Your First Android App with Fire
The first time you start Fire, before opening or starting a new project, it will present you with the Welcome Screen, pictured below. You can also always open up the Welcome screen via the "Window|Welcome" menu command or by pressing ⇧⌘1.
In addition to logging in to your remobjects.com account, the Welcome Screen allows you to perform three tasks, two of which you will use now.
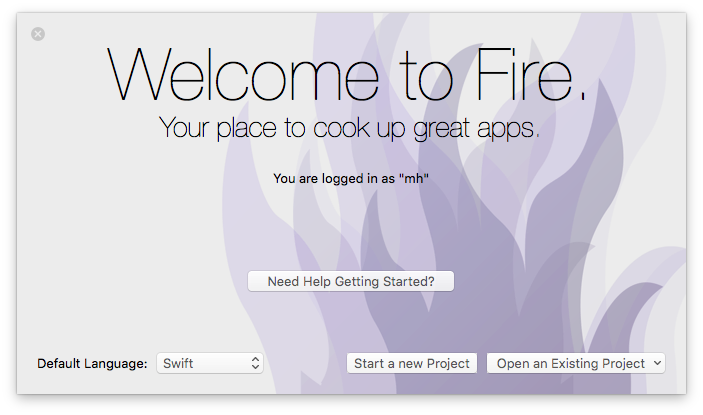
On the bottom left, you can choose your preferred Elements language. Fire supports writing code in Oxygene, C# and Swift. Picking an option here will select what language will show by default when you start new projects, or add new files to a multi-language project (Elements allows you to mix all fivwe languages in a project, if you like).
This tutorial will cover all languages. For code snippets, and for any screenshots that are language-specific, you can choose which language to see in the top right corner. Your choice will persist throughout the article and the website, though you can of course switch back and forth at any time.
After picking your default language (which you can always change later in Preferences), click the "Start a new Project" button to bring up the New Project Wizard sheet:
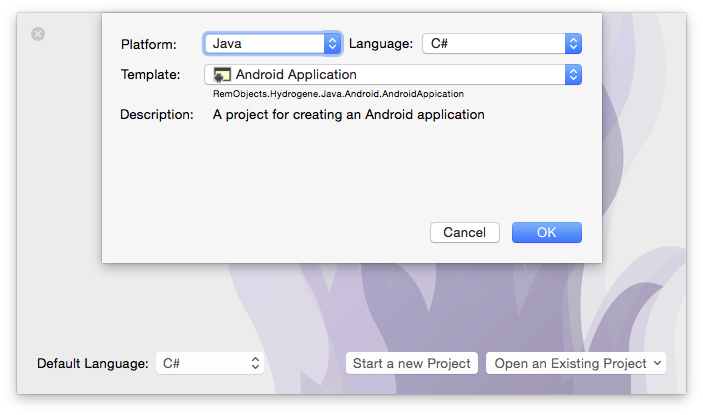
You will see that your preferred language is already pre-selected at the top right – although you can of course always choose a different language just for this one project.
On the top left you will select the platform for your new application. Since you're going to build an Android app, select Java. This filters the third list down to show all Java-based templates only. Drop down the big popup button in the middle and choose the "Android Application" project template, then click "OK".
Next, you will select where to save the new project you are creating:
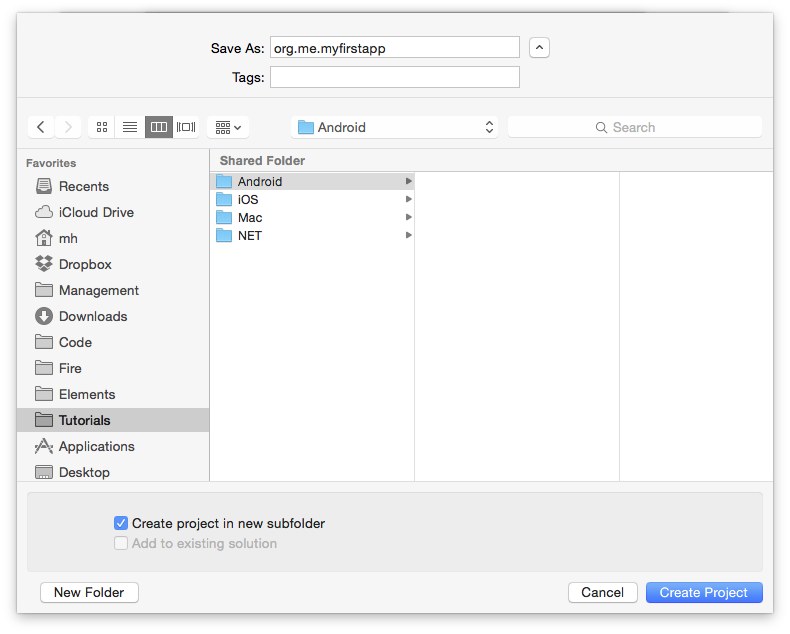
This is pretty much a standard Mac OS X Save Dialog; you can ignore the two extra options at the bottom for now and just pick a location for your project, give it a name, and click "Create Project".
You might be interested to know that you can set the default location for new projects in Preferences. Setting that to the base folder where you keep all your work, for example, saves you from having to find the right folder each time you start a new project.
Note: Android projects are required to be named lowercase, and have a dotted name, usually using a reverse domain notification. By default, Fire will use org.me. as prefix for project names, but you can configure a different default,such as your company's domain, in Preferences.
When you create apps for publishing in the Google Play Store, make sure to use a unique prefix that you "own".
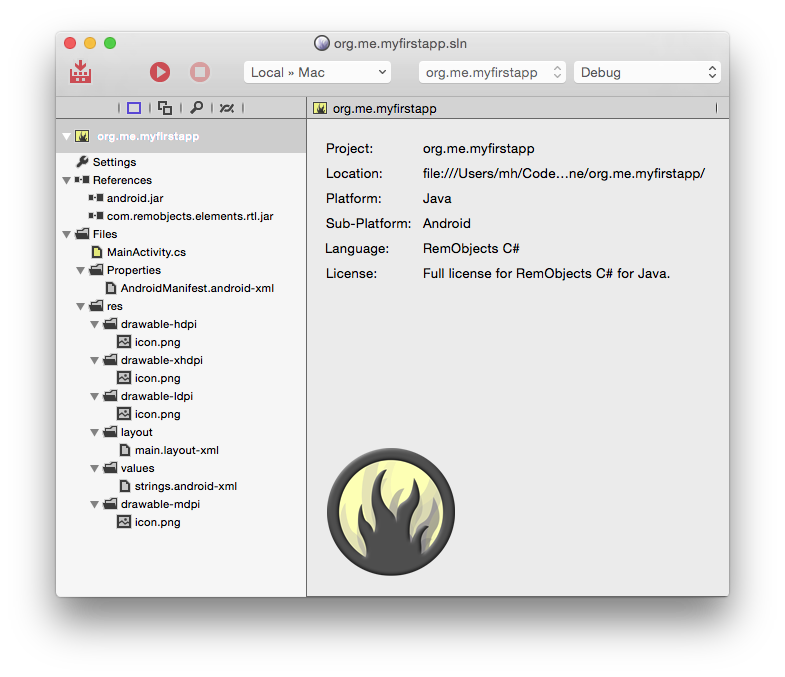
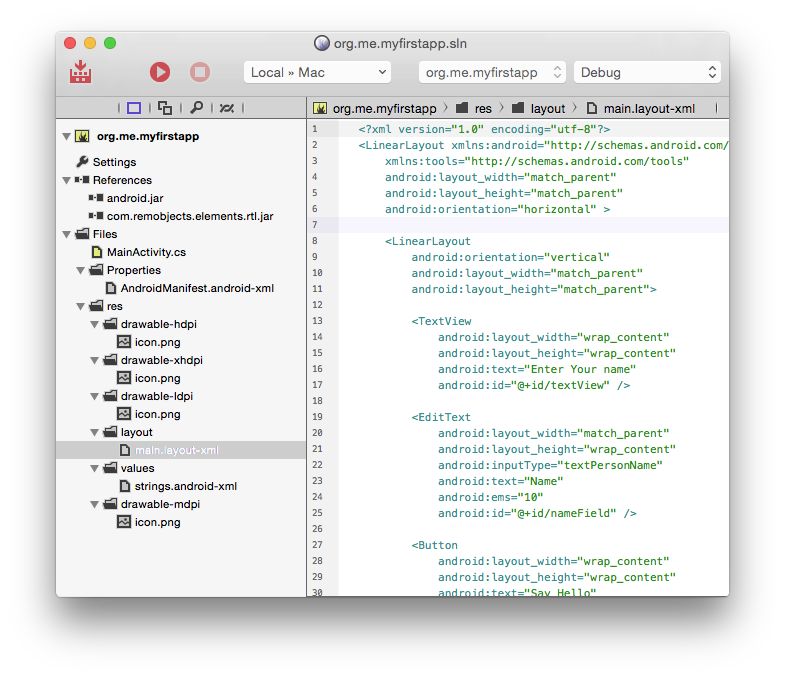
Once the project is created, Fire opens its main window, showing you a view of your project:

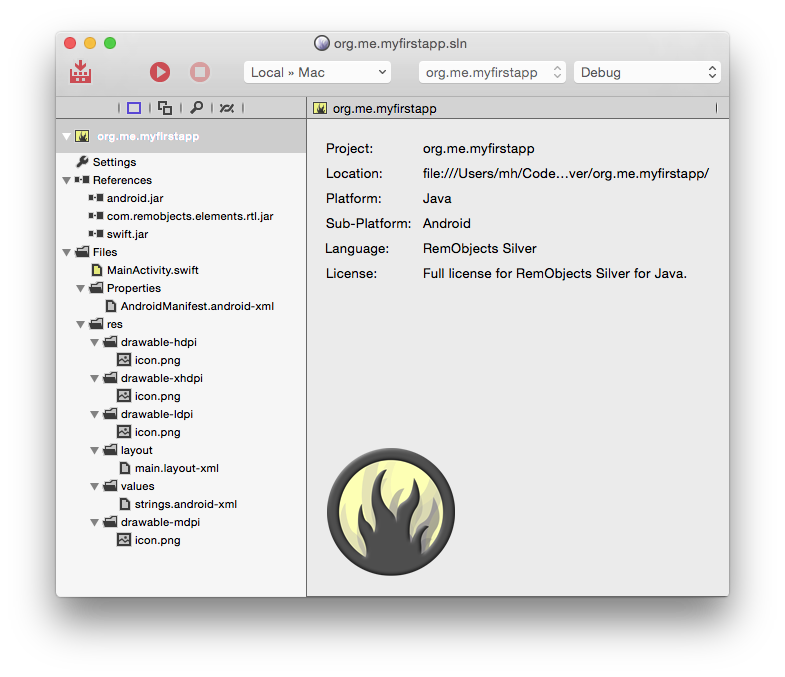
Let's have a look around this window, as there are a lot of things to see, and this windows is the main view of Fire where you will do most of your work.
The Fire Main Window
At the top, you will see the toolbar, and at the very top of that you see the name MyFirstApp.sln. Now, MyFirstApp is the name you gave your project, but what does .sln mean? Elements works with projects inside of a Solution. You can think of a Solution as a container for one or more related projects. Fire will always open a solution, not a project – even if that solution might only contain a single project, like in this case.
In the toolbar itself are buttons to build and run the project, as well as a few popup buttons that let you select various things. We'll get to those later.
The left side of the Fire window is made up by what we call the Navigation Pane. This pane has various tabs at the top that allow you to quickly find your way around your project in various views. For now, we'll focus on the first view, which is active in the screenshot above, and is called the Project Tree.
You can hide and show the Navigation Pane by pressing ⌘0 at any time to let the main view (which we'll look at next) fill the whole window. You can also bring up the Project Tree at any time by pressing ⌘1 (whether the Navigation Pane is hidden or showing a different tab).
The Project Tree
The Project Tree shows you a full view of everything in your project (or projects). Each project starts with the project node itself, which is larger, and selected in the screenshot above, as indicated by its blue background. Because it is selected, the main view on the right shows the project summary. As you select different nodes in the Project Tree the main view adjusts accordingly.
Each project has three top level nodes.
-
Settings gives you access to all the project settings and options for the project. Here you can control how the project is built and run, what exact compiler options are used, etc. The project settings are covered in great detail here.
-
References lists all the external frameworks and libraries your project uses. As you can see in the screenshot, the project already references all the most crucial libraries by default (we'll have a look at these later), and you can always add more by right-clicking the References node and choosing "Add Reference" from the context menu. You can also drag references in directly from the Finder, as well as, of course, remove unnecessary references. Please refer to the References topic for more in-depth coverage.
-
Files, finally, has the meat of your application. This is where all the files that make up your app are listed, including source files, images and other resources.
The Main View
Lastly, the main view fills the rest of the window (and if you hide the Navigation Pane, all of the window), and this is where you get your work done. With the project node selected, this view is a bit uninspiring, but when you select a source file, it will show you the code editor in that file, and it will show specific views for each file type.
When you hide the Navigation Pane, you can still navigate between the different files in your project via the Jump Bar at the top of the main view. Click on the "MyFirstApp" project name, and you can jump through the full folder and file hierarchy of your project, and more.
Your First Android Project
Let's have a look at what's in the project that was generated for you from the template. This is already a fully working app that you could build and launch now – it wouldn't do much, but all the basic code and infrastructure is there.
There's a single source files, the MainActivity. Android apps can consist of one or more activities, and you can think of each activity as a unique "view" or a unique "task" that your app offers to the user. One activity is designated the main activity, and that's the one that will show when the user launches your app from the home screen.
The project also contains a handful of resources, including four versions of the application icon in different sizes (icon.png), and two XML files with string constants (strings.android-xml) and a layout for your main view (main.layout-xml). More on those later.
Finally, there's the AndroidManifest file. Another XML file, this file provides the Android OS and the GooglePay store with basic information about your app, such as what name and icon to show, what permissions the app requires and which activities the app offers. For the purpose of this tutorial, the pre-created manifest will do fine, but you can read more about this file format and how to change it here.
The Main Activity
As mentioned before, the Main Activity is the first (and currently only) view on your app, and will show when the user launches your app. While it is possible to create an activity entirely in code, most activities consist of a pair of files – a class descending from Activity, and a .layout-xml file that describes what the view looks like, and which can be edited by hand or in the visual designer.
To start out, your MainActivity implementation is pretty basic: it overrides a single method, onCreate(), and loads the view from the layout file when that method is called:
method MainActivity.onCreate(savedInstanceState: Bundle);
begin
  inherited;
  // Set our view from the "main" layout resource
  ContentView := R.layout.main;
end;
public override void onCreate(Bundle savedInstanceState)
{
    base.onCreate(savedInstanceState);
    // Set our view from the "main" layout resource
    ContentView = R.layout.main;
}
public override func onCreate(_ savedInstanceState: Bundle!) {

    super.onCreate(savedInstanceState)
    // Set our view from the "main" layout resource
    ContentView = R.layout.main
}
The R Class
The code snippet above makes use of a special class in your project, the R class. R is not a class you define yourself; it is created behind the scenes by Elements and the Android tool chain to give you access to all the resources in your projects.
In this case, layout.main refers to the main.layout-xml file in your project, which contains the layout for this activity. As you add more resources to the project, R will automatically gain more members.
You can see what's in the R class by switching the Navigation Pane to the second tab to show the Types Tree by pressing ⌘2 and locating the class in your (currently pretty short) list of types. If the class doesn't show yet, hit ⌘B to build your project; the class will update every time the project is built.
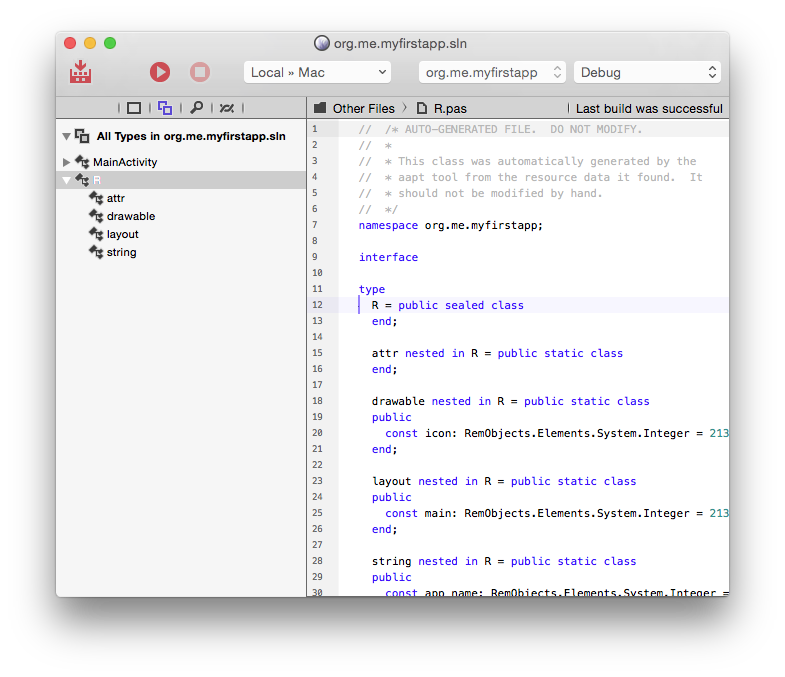
You will see that the R class contains several nested classes for each type of resource (such as images, strings and layouts), which in turn contain constants that uniquely identify that resource with an ID. You never need to worry about or handle the numerical values of these yourself.
When you look at the source for the R class, you'll also notice that it is presented in the Oxygene language, no matter what language your project is in. This too is an implementation detail of the tool chain, and should not be of any concern, as you will never edit or work with this file directly.
Layouts
Next, let's look at the main.layout-xml file.
Elements uses the standard Android layout format, the same you would be using if you were working with the Java language as most less fortunate Android developers. This means that any examples for Android layouts you find online will work exactly the same way in Elements, and it also means that you can use any of the design tools available.
Fire offers two ways to create your layouts. The first option, and preferred by many Android developers, is to simply edit the XML directly in Fire's code editor. Just select the file in the project tree, and edit away. The Android layout language is very simple and intuitive, and you should make yourself familiar with it, even if you choose to use a visual designer most of the time.
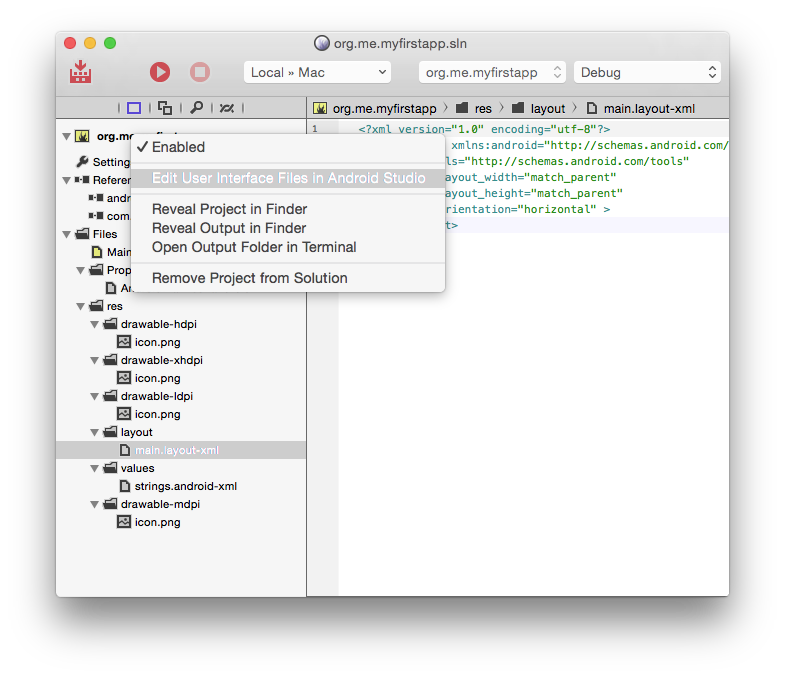
The second option is to use the visual designer provided by Google in Android Studio (ADS). If you have Android Studio installed and set up, you can simply right-click the project node and choose "Edit User Interface Files in Android Studio".
Fire will automatically create or update an Android Studio project file for you, and launch Android Studio for you to edit your layouts. As you make changes in ADS, they will automatically get synced back into Fire, and vice versa.
After ADS starts up, you should see a view similar to the one pictured below, but with an empty canvas. Drop a few controls to make the view look like depicted in the screenshot:
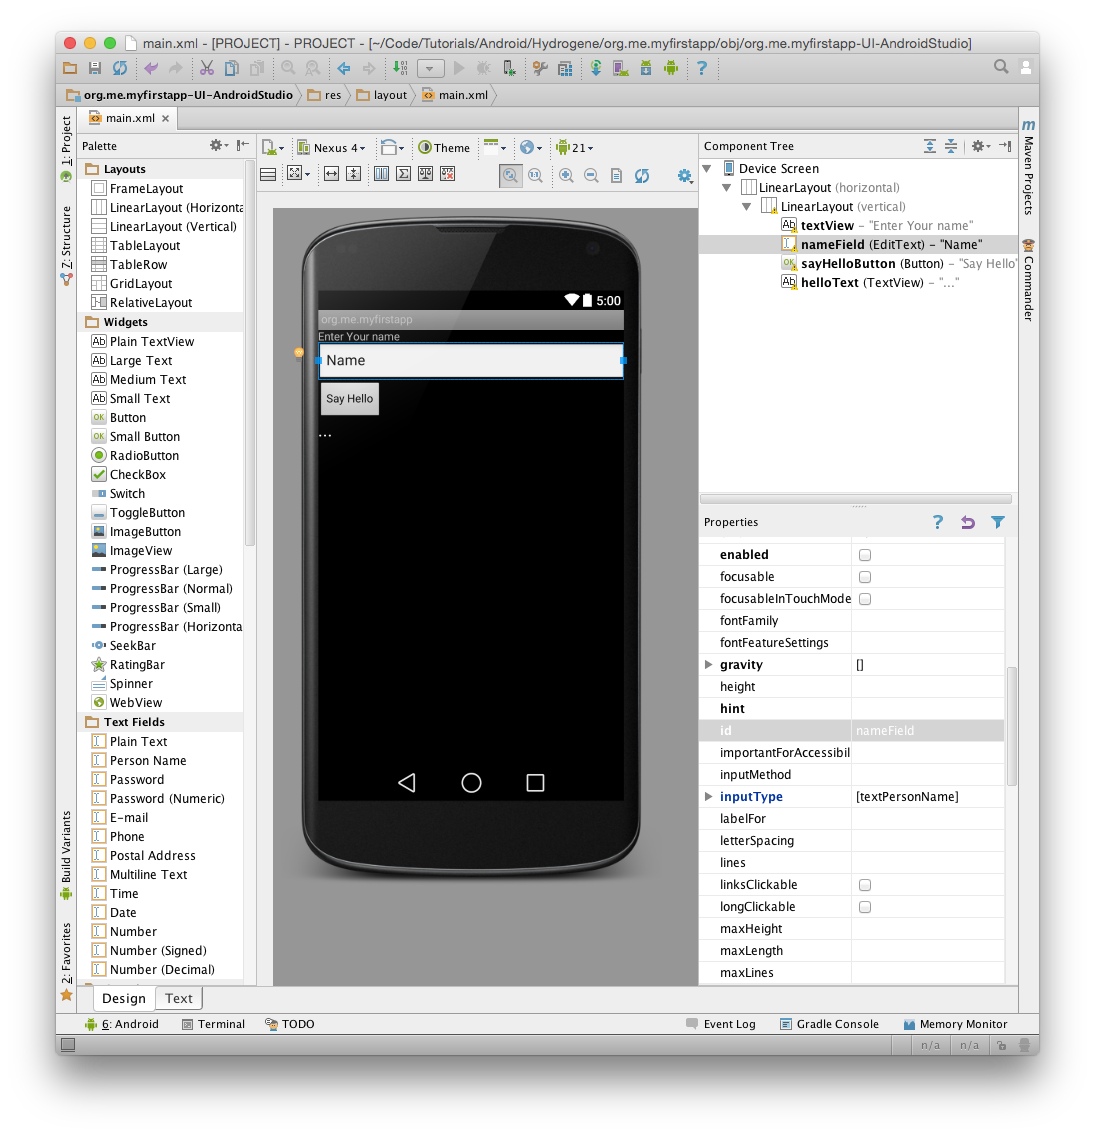
First drop a Linear Layout (Vertical) control to hold the four controls, and size it to full width. Android uses a flexible layout system that lets you design UIs that reflow to match the screen; the Linear Layout will stack controls vertically, putting each control in its own row. (We'll not worry too much about making things pretty for this tutorial, but will cover more advanced layout options later.) .NET developers will find Android's layout system very familiar and similar to WPF.
Next, drop two labels, a text field and a button, and arrange them as shown. Set the id property of the text field to nameField and that of the button to sayHelloButton. Set the id for the second label to helloField.
When you're done, press ⌘S to save, and switch back over to Fire. You will notice that main.layout-xml has changed to contain elements for all the new controls you dropped. If you wanted, you could further tweak the layout here, in plain text XML:
One thing worth pointing out is that each control you dropped and gave a unique ID has received an android:id attribute in the XML, with a value starting with "@+id/". This tells Android to define a new ID that can then be used to identify that control. Just as with resources, IDs are exposed via the R class, so you can, for example, use r.id.nameField to refer to the name field control. Let's see how that works.
Working with Views from Code
Going back to the MainActivity source , let's hook up some code to the UI you just created.
Android UI/Code interaction is a bit different than most other platforms. Above, you've already seen the one line of code that loads your layout into the activity and shows it. But by default, there are no fields or properties generated for you that reference the controls in your layout, nor do events get hooked up automatically.
Instead, you look up controls by their ID as needed – and that is done by the findViewById method exposed on the Activity class. So for example to find the Button, you simply write:
var button := findViewById(R.id.sayHelloButton) as Button;
var button = findViewById(R.id.sayHelloButton) as Button;
let button = findViewById(R.id.sayHelloButton) as! Button
Note how a typecast to Button is needed to get the correct type – since findViewById() can be used to locate any type of control, it is defined to return a View, the base class of all visual controls.
Once the control is obtained, you can work with the class as you would expect. For example, you could set its Text property to a new value to change the button's caption. In the above example, the control is stored in a local variable – but if you find that you need to reference a given control a lot, you can of course also define a field or property in your class and assign that inside onCreate() for future reference.
Events
For this example, the only thing needed as the activity starts is to assign an event handler for the button, so that your code can react when the user taps it. Android has its unique way of dealing with events that is very different from .NET or the VCL, but might seem familiar if you worked with delegate objects on Cocoa. On Android, you will assign so-called listener objects that get called back when things happen in the UI. While this listener can be any object that implements a certain interface (for example, the listener could be the MainActivity class itself), it is common practise to assign an anonymous class.
In this case, the View.OnClickListener actually just expects a single method, the easiest way to assign a handler is to just use regular anonymous method syntax:
button.OnClickListener := method (v: View) begin
  // on-Click code goes here
end;
button.OnClickListener = (View v) => {
    // on-Click code goes here
};
button.OnClickListener = { (v: View!) in
        // on-Click code goes here
    }
}
Note: Oxygene and Silver provide a special syntax to define an anonymous class with more than one method, as well. C# does not have such a syntax, so other mechanisms like a nested class can be used, if needed.
button.OnClickListener := new class View.OnClickListener(onClick := method (v: View) begin
  // on-Click code goes here
end);
button.OnClickListener = class View.OnClickListener {
    func onClick(_ v: View!) {
        // on-Click code goes here
    }
}
Inside this anonymous method, you can now add code that reacts to the tap, which should be simple given what we have already learned. Simply look up the remaining two controls with findViewById just as you did with the button, and then read the Text property of the former and update the Text of the latter:
var nameField := findViewById(R.id.nameField) as EditText;
var nameField := findViewById(R.id.nameField) as EditText;
var helloText := findViewById(R.id.helloText) as TextView;
helloText.Text := 'Hello from Oxygene, '+nameField.Text;
var nameField = findViewById(R.id.nameField) as EditText;
var helloText = findViewById(R.id.helloText) as TextView;
helloText.Text = "Hello from C#, "+nameField.Text;
let nameField = self.findViewById(R.id.nameField) as! EditText
let helloText = self.findViewById(R.id.helloText) as! TextView
helloText.Text = "Hello from Silver, "+nameField.Text
And that's it!
The complete onCreate method should now look something like this:
method MainActivity.onCreate(savedInstanceState: Bundle);
begin
  inherited;

  // Set our view from the "main" layout resource
  ContentView := R.layout.main;

  var button := findViewById(R.id.sayHelloButton) as EditText;
  button.OnClickListener := method (v: View) begin
    var nameField := findViewById(R.id.nameField) as EditText;
    var helloText := findViewById(R.id.helloText) as TextView;
    helloText.Text := 'Hello from Silver, '+nameField.Text;
  end;
end;
public override void onCreate(Bundle savedInstanceState)
{
    base.onCreate(savedInstanceState);

    // Set our view from the "main" layout resource
    ContentView = R.layout.main;

    var button = findViewById(R.id.sayHelloButton) as Button;
    button.OnClickListener = (View v) => {
        var nameField = findViewById(R.id.nameField) as EditText;
        var helloText = findViewById(R.id.helloText) as TextView;
        helloText.Text = "Hello from Silver, "+nameField.Text;
    };
}
public override func onCreate(_ savedInstanceState: Bundle!) {
    super.onCreate(savedInstanceState)

    // Set our view from the "main" layout resource
    ContentView = R.layout.main

    let button = findViewById(R.id.sayHelloButton) as! Button
    button.OnClickListener = { (v: View!) in
        let nameField = self.findViewById(R.id.nameField) as! EditText
        let helloText = self.findViewById(R.id.helloText) as! TextView
        helloText.Text = "Hello from Silver, "+nameField.Text
    }
}
Running Your App
You're now ready to run your app on your Android device on in the Emulator.
Earlier on we looked at the top toolbar in Fire. In the middle of the toolbar, you will find a popup button that is the device selector, which should by default be set to "Android Device". That is a placeholder that is available whether you have an actual device connected (and/or an emulator set up) or not. However, because "Android Device" does not represent a real device, you cannot run your app on it.
If you open up the popup, you will see a menu with more options. You will see an entry for any real Android device connected to your Mac, as well as for any emulator or any remote/wireless device you have connected to (such as "Nexus 7" in the screenshot below), along with details about the device type and OS version.
If you do not see any devices, refer to Working with Devices to learn how to get set up with the various options.

Select the device you want to run on. When done, you can hit the "Play" button in the toolbar, or press ⌘R.
Fire will now build your project, deploy it, and launch the app. You will notice that while the project is compiling, the Jump Bar turns blue and shows the progress of what is happening in the top right of the window. The application icon will also turn blue for the duration; this allows you to switch away from Fire while building a more complex/slow project, and still keep an eye on the progress via the Dock.
If there were any errors building the project, Jump Bar and application icon would turn Red, and you could press ⌥⌘M or use the Jump Bar to go to the first error message. But hopefully your first iOS project will build ok, and a few seconds later (or minutes, if you are using the Emulator) your app will come up.
Type in your name, press the "Say Hello" button and behold the application performing its task: