Project Settings in Fire & Water
In Fire and Water, each project has a node called "Settings" listed as the very first item in the Project Tree. Selecting this node will show the project's settings in a grid-like fashion in the main view. You can also bring this view to the front by pressing ⌘I (Fire) or Alt-SHift-I (Water), or selecting "Project|Settings|Show Project Settings" from the menu.
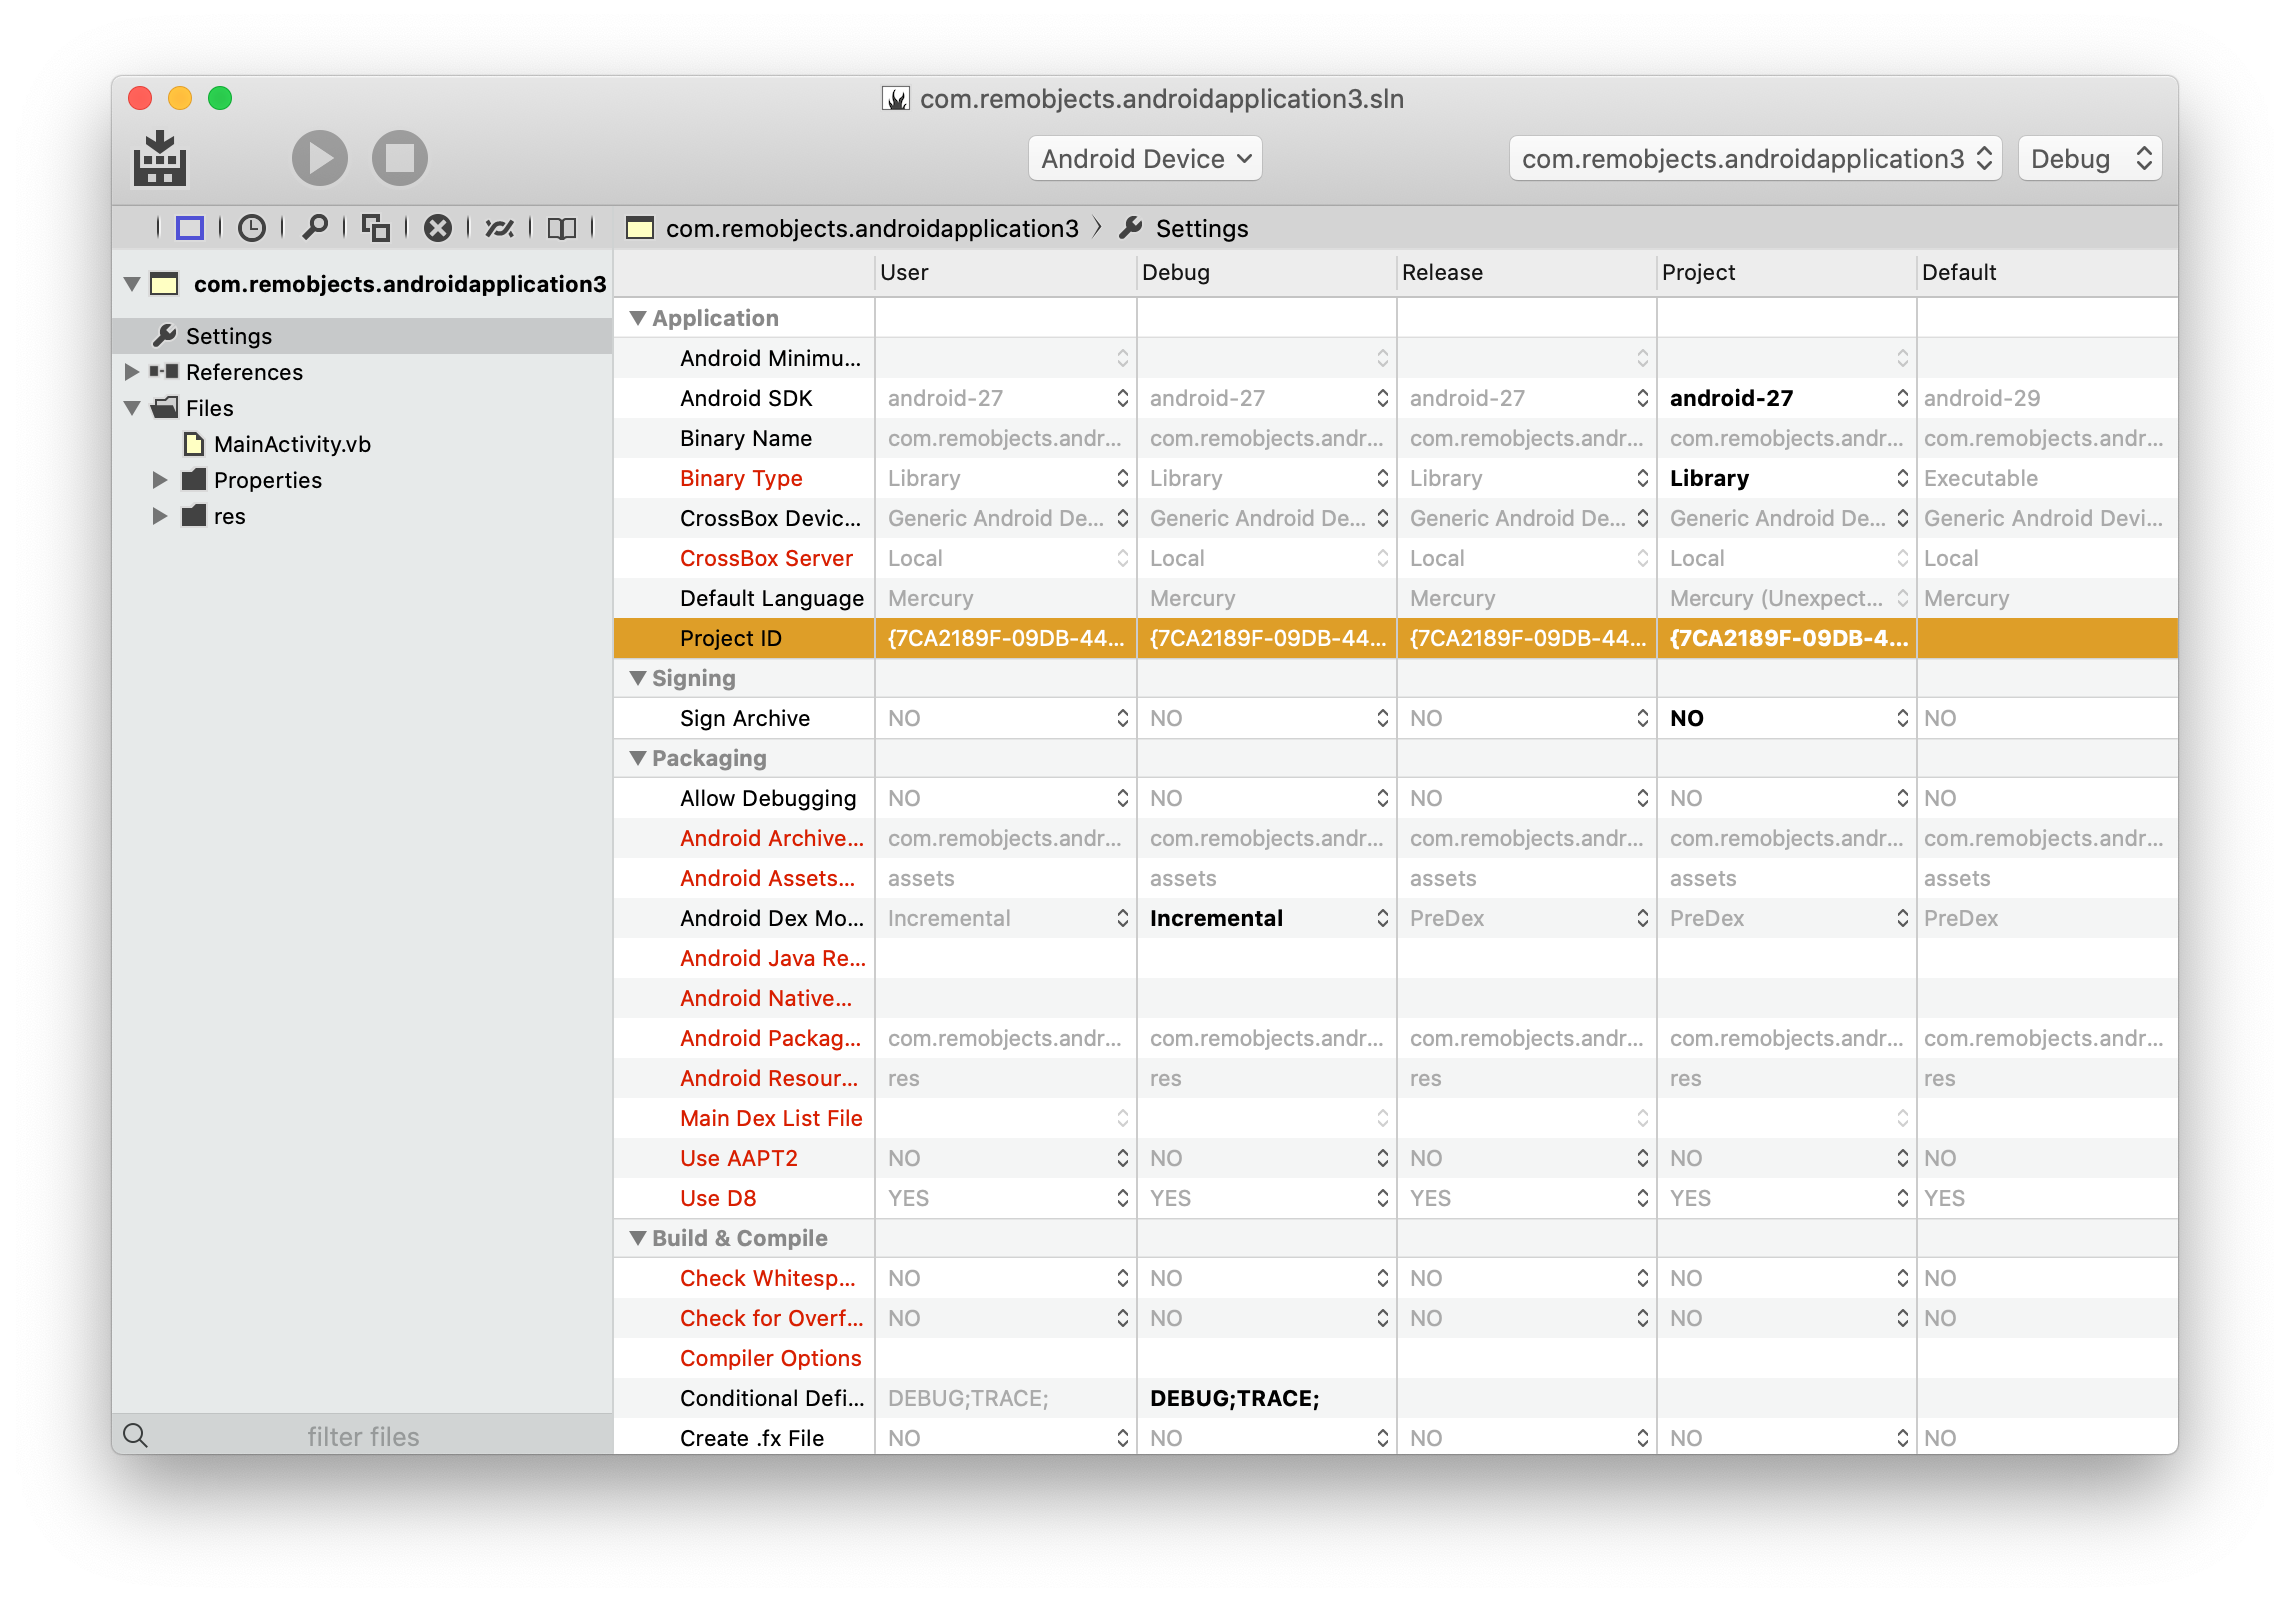
This view shows all the settings available for the project, grouped in logical sections.
Advanced and infrequently used settings are hidden by default, and shown via the "Project|Settings|Display Advanced Project Settings" menu item. They will show with a red caption, if visible.
Also in the "Project|Settings" menu you can toggle whether to show friendly (descriptive) names or the actual names of the underlying EBuild settings, and whether to goup settings by category (the default) or show them as one flat sorted list.
The left-hand column on the grid shows the title for each setting, while the remaining columns (typically five) show the value(s) configured for the settings in different scopes, increasing from right to left.
Settings Levels
The very right-most column, titled Default, will, where applicable, show the default value for the setting that would or will apply if the project does not override it. Not all settings have a default value, and for those that do, that value might be hardcoded, depending on the project type or platform, or be derived from other settings (the Default Namespace setting, for example, defaults to getting its value from the Executable Name).
The second-to-right column, captioned Project, lists values as they are set globally for the full project. If a value is shown in gray, that value is not set, but being inherited from the default; if a value shows in black, it is set at this level.
The next number of columns show the setting values for each of the Configurations set up in the project. Most projects start out with two configurations, called Debug and Release, but this number and their names are arbitrary and can be changed. Just as in the Project column, each configuration column will show the setting value in gray if it is inherited from the project (or the default), or in black when set explicitly for this configuration.
Finally, the left-most column is entitled User, and it allows you to set values that won't be stored in the project's .elements file, but instead in a separate .elements.user file stored next to it. Essentially, this allows you to override settings for local use and without affecting other developers working on your project (by excluding *.user from the files you commit to version control). Like the other columns, this one also shows values inherited from the right in gray, and values set explicitly in black.
Because the User column shows an aggregate of (a) a per-user setting, (b) the active configuration, (c) project level settings and (d) the default, this column also gives you a handy overview of what the current effective values for each of the settings are.
Types of Settings
Fire and Water know three types of settings:
- Free-form settings may contain any manually typed-in string. To change them, simply click into the field and start typing/editing the value you want to set.
- Multiple-choice settings show little black arrows, and clicking them will provide a popup menu with available options to choose from. If a value is set, the menu will also include an option to clear the value. If a setting contains an invalid or unexpected value, it will indicate that.
- Finally, boolean settings allow you to toggle between two values, YES and NO.
Available Settings
You can find an overview of all project settings that are available and understood by the Elements compiler and tool chain in the Project Settings Reference topic.
Applying Settings
Like everywhere in Fire, there is no need to "save" or "apply" settings. As soon as you change them, your project (or (.user) file) will update, and the new setting will be in effect.
CrossBox
For Cocoa, Android and remote projects (such as Linux, or Windows in Fire), the "CrossBox" and/or "CrossBox Device ID" setting will be synced with what you select in the CrossBox popup in the middle of the solution window's toolbar.
If you select a device in the settings view, this change will apply to the single project whose settings you are currently editing.
If you select a device from the CrossBox popup in the toolbar, this will update the "CrossBox" and/or "CrossBox Device ID" setting for all projects in the current solution that the selected device is applicable to.
For example, if you have two iOS projects and an Android project open, selecting an iOS device from the toolbar will update both iOS projects to use this device, but will (obviously) not affect the Android project.
See also Working with Devices.