Your First watchOS App with Fire
With watchOS SDK, it is now possible to build native applications for the Apple Watch running watchOS 2.0 or later.
An Apple Watch solution consists of three distinct Elements projects:
- A regular iPhone (or universal) iOS Application project
- A Watch App project
- A WatchKit Extension project
Apple Watch apps ship as companions to an iPhone app, so they are hosted inside a regular iOS app. This can be an application you are already shipping, or a new app you create specifically to host your watch app. For the purpose of this tutorial, we assume you are already familiar with creating an iOS app, as shown in the Your First iOS App tutorial. If you are not, you should read that tutorial first.
For the remainder of this text, we'll assume you already have an iPhone (or universal) app created that you want to add watch support to.
Creating the Extension and WatchKit App Projects
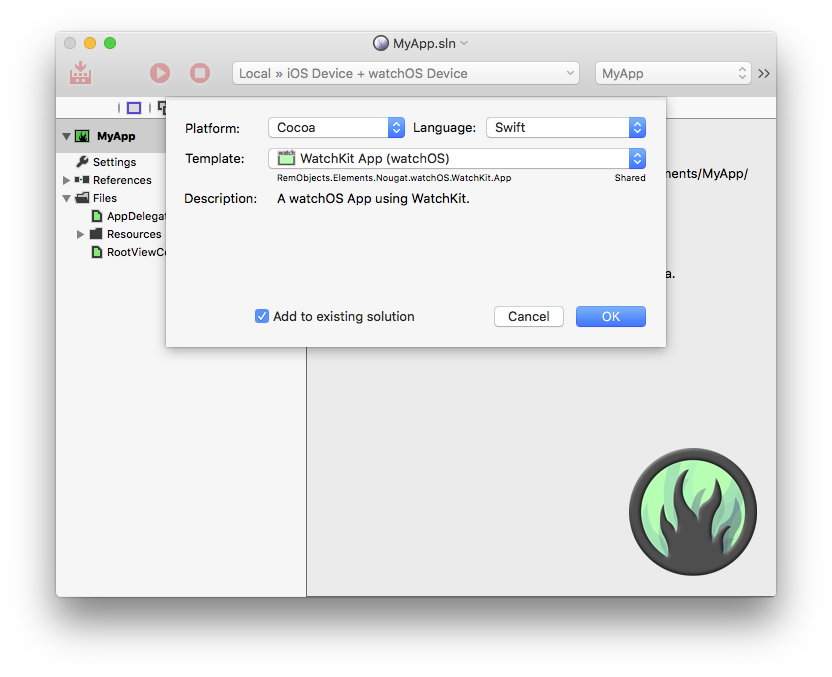
The first step will be to add a Watch App project to your solution via the "File|New Project" menu item. Make sure to select "Cocoa" as platform, and your language of choice. Then pick the "WatchKit App (watchOS)" project template. Make sure you check the "Add to existing solution" option:


Next, pick a place to save your new project. It makes sense to save it underneath or parallel to your existing iOS app. For the purpose of this tutorial, save the project as "WatchKitApp".
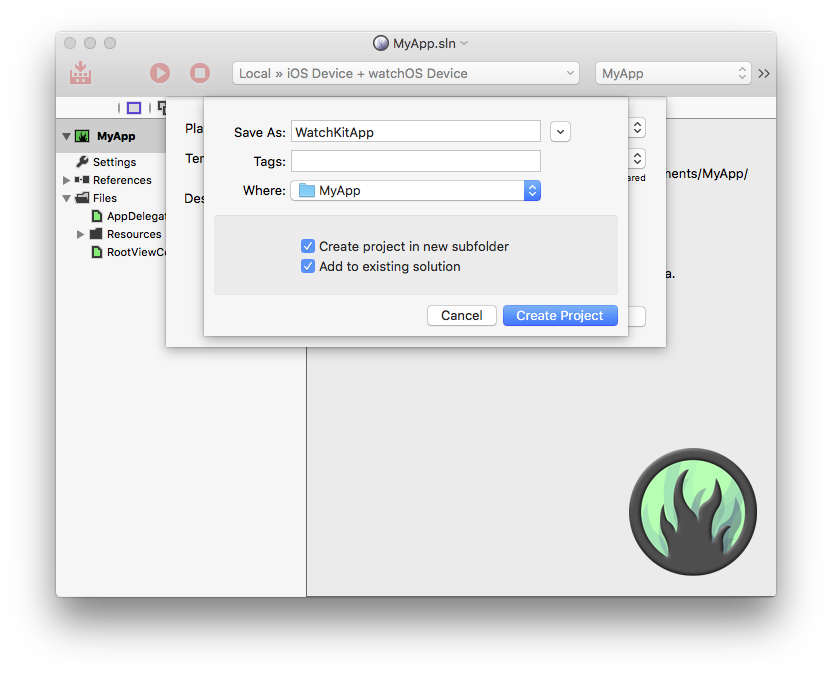
Click "Create Project" and the WatchKit App project will be saved and added to your solution.
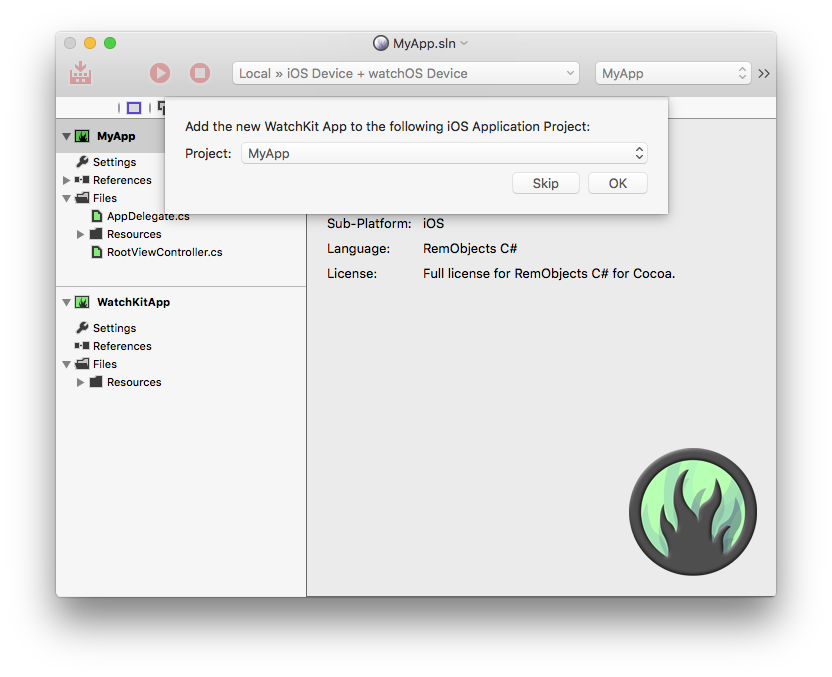
Next, a sheet will pop up asking you to embed your app into one of the iOS applications in your solution. Since you only have one project open, you can just click "OK". If you had more than one application in the solution, you could choose the one you want your watch extension to be hosted in.
After the sheet closes, you're back in your solution, which now has thee projects:
- your original app
- the new "WatchKitApp" project
- a third "WatchKitApp Extension" project
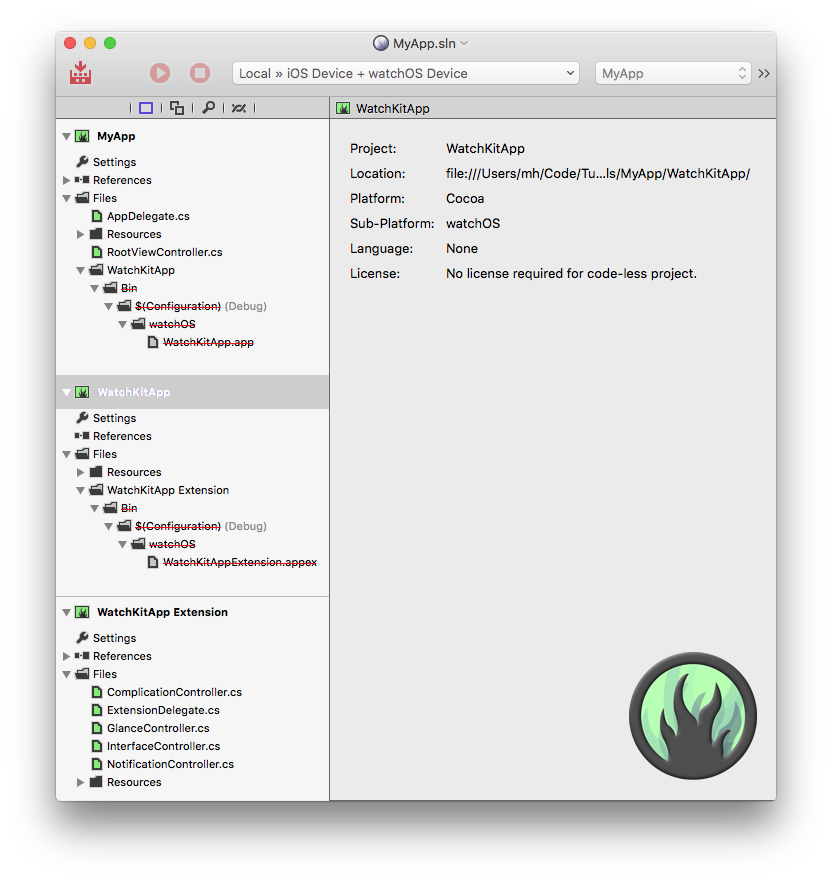
In addition to marking your watch app for embedding in the iOS app, the post-template wizard performed a few more steps for you automatically:
- It added the third "WatchKit Extension" project to your solution, as seen above.
- It adjusted the Bundle Identifiers of both new projects to match that of your iOS host application. watchOS requires these identifiers to be nested, so that the Watch App has your iOS app's ID as a prefix, and the extension in turn has the watch app's ID as prefix.
- It updated certain keys in the new projects'
Info.plistfiles to match these Bundle Identifiers. - It added a reference to your watch app to the iOS app. You can see the
WatchKitApp.appfile, which is shown crossed-out in red because it doesn't exist yet (once you build the project by pressing ⌘B, the cross-out will go away), listed in the project tree. - It added a reference to your extension to the watch app – you can see the
.appexfile in the project tree. - It added build dependencies between the three projects, so they will always be built in the right order.
Note: If you later change the Bundle Identifier of your app, you will need to adjust the IDE identifier for the two watch projects to match, both in Project Settings and also in the Info.plist.
The Projects
Your Apple Watch app is ready to run now, even if it does not do much (or anything, really) yet: connect your iPhone, hit ⌘R (or ⌘⇧D to "Deploy" to your phone without actually launching the iOS app) and everything will build and install. Your app should show up in the Apple Watch Companion App, where you can choose to have it installed onto your Watch (once you do, the watch will automatically update when you deploy a new version to your phone).
But let's have a look a what is actually inside the projects now.
Your iOS Application, MyApp in this example, has not been touched at all, except for the above-mentioned reference to the WatchKitApp bundle. It will still work just as before, except now it contains your Watch App. Of course, you might later want to expand it to support explicit interaction with the watch app, depending on your specific case.
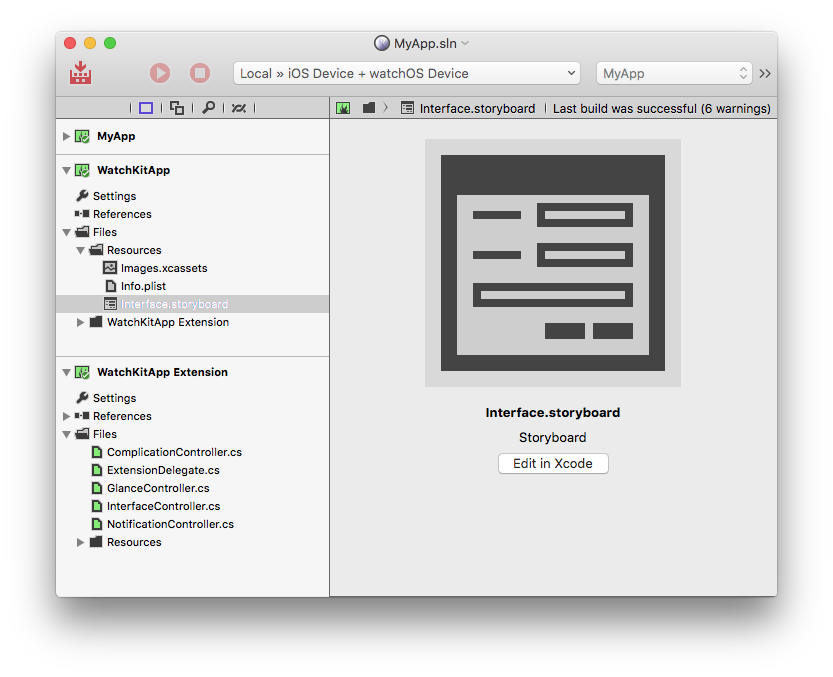
Next, the Watch App itself, WatchKitApp, contains just a couple of files that are of interest: An Asset Catalog that contains your app icon, and a Storyboard file where you will design your UI. We will look at those shortly.
Finally, all the code for your watch app lives in the Extension, called WatchKitApp Extension in this case. Here you will find five source files waiting for you to fill with code: one ExtensionDelegate class that acts as the central entry point for your app, and one controller class for each of the four potential interaction models your app might want to provide: The App interface itself (Interface), a Glance, a Notification view, and a custom watch face Complication.
Read more:
- Implementing your Watch App
- Implementing a Glance for your Watch App
- Implementing a Custom Notification View for your Watch App
- Implementing a Custom Watch Face Complication for your Watch App
Of course, depending on your goals, you might not want or need to implement all four of these parts; only the main app is mandatory. If you don't need a glance, notification view or complication, you can simply delete the file (and later delete the corresponding element(s) from the storyboard, as well).
Filling the App with Life
So your app runs and deploys, but it doesn't do much yet. Let's see how to change that.
In many ways, creating the user interface for a Watch App is similar to what you are probably already familiar with from UIKit (or even the Mac). You have a .storyboard file (contained in the WatchKitApp project), and classes that define view controllers (called InterfaceControllers in WatchKit parlance) in the Extension project.
To edit the Storyboard in Xcode, you can select the file and click the "Edit in Xcode" button. You can also right-click the file and choose "Edit in Xcode" from the menu, or right-click the project node and choose "Edit User Interface Files in Xcode" (on either the Extension or the WatchKit App):
By default, the WatchKit template creates three views: the main interface of your Watch app (InterfaceController), a Glance view (GlanceController) and a Notification view (NotificationController). All three are represented by both a code file and a view inside the storyboard (the fourth view type, the Complication, is not designed in Interface Builder).
As mentioned above, if you do not want to offer glance view and/or a custom notification view, you can simply delete the corresponding code files and views.
You should read up more in Apple's excellent WatchKit Programming Guide to get familiar with the UI paradigms in depth, to understand the difference between the main application and Glances, and how custom notifications work. For the purpose of this tutorial, we will focus on the main application UI, but the same paradigms apply to all views.
When you open the Storyboard in Xcode, it will look a bit like this:
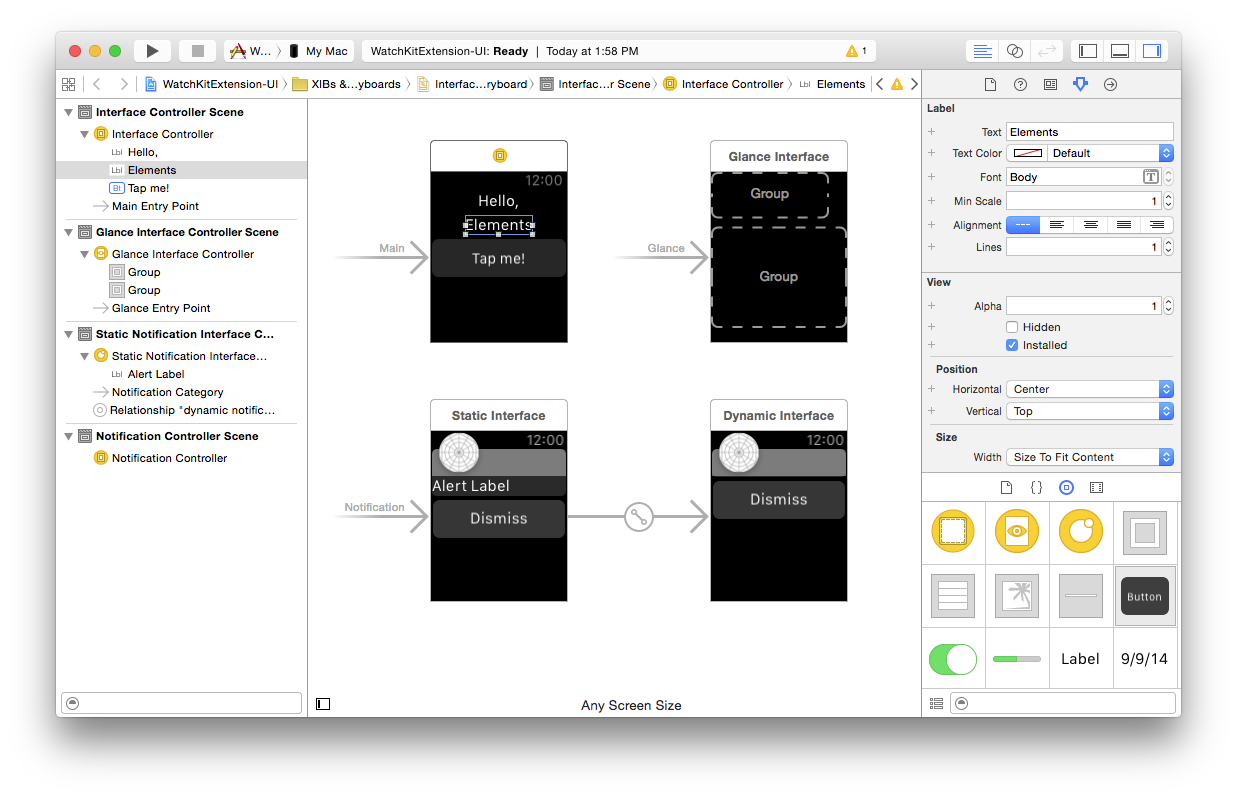
Note the three separate sets of views (with two views for notifications – static and dynamic). Let's focus on the top-left one, the Interfacecontroller for your main app, as it is what will launch when the user taps its icon on the Watch home screen.
WatchKit uses a different layout paradigm than UIKit. Rather than positioning controls at arbitrary coordinates, all UI elements float into shape on a stack. By default, you will see a first label sticking to the top. As you add more controls, you will see them stack up below each other automatically. Apple's WatchKit Programming Guide covers this in more detail.
For now, drop a second label and a button, and then set the horizontal alignment for the two labels to "Center" to make the UI look somewhat like in the screenshot above.
Next, let's hook these up to some code, so switch back to Fire, select the InterfaceController source file and add the following two pieces of code:
[IBOutlet] property label: weak WKInterfaceLabel;
[IBAction] method buttonTapped;

// ...

method InterfaceController.buttonTapped;
begin
  label.text := 'Oxygene';
end;
[IBOutlet] public __weak WKInterfaceLabel label { get; set; }

[IBAction]
public void buttonTapped()
{
    label.text = "RemObjects C#";
}
@IBOutlet weak var label: WKInterfaceLabel

@IBAction func buttonTapped() {
    label.text = "Silver"
}
Choose "Edit in Xcode" again, and now you can hook this property and method up to the UI elements you dropped before, just as you would in a regular iOS app. Control-drag from the InterfaceController onto the second label and connect it to the label property, and control-drag from the button back to InterfaceController to hook up its tap event to the buttonTapped method.
When you now save and re-run your app, tapping the button will update the label with the new string.
Version Notes
Working with watchOS requires Xcode 7.0 or later to be your active Xcode version, as well as Elements 8.2 or later. It is currently supported only in Fire.
Please also note that deploying on the Apple Watch Simulator is currently not supported.
But Deploying and testing your apps on real hardware is fully functional.