Submitting to the iOS App Store
The final goal of all your work with an iOS app is probably to submit it to the iOS App Store for distribution – whether it's for sale or as a free app.
Doing so is relatively straight-forward, but does involve a few steps worth outlining here. In principle, these are the same steps when you use Elements as those performed by developers using Apple's own Xcode IDE, so any tutorials or information you find about App Store submissions online will more or less apply to you as an Elements developer, as well.
Refer to Apple's App Distribution Guide as the official documentation for this process.
App IDs, Profiles and Certificates
Since you have been working and testing your iOS app, you will already be familiar with the concepts of App IDs, Provisioning Profiles, as well as Code Signing Certificates. For your local development, you have been using a Development Profile and a Development Certificate to build the app for your devices. Maybe you set these up yourself, or maybe you have let Xcode create them for you when you first connected your device.
For App Store distribution, your first step is to create a dedicated Distribution Profile and a Distribution Certificate. If you have been using the default App ID, you might also want to consider setting up a dedicated App ID for your application, with a unique reverse-name ID string.
All of these tasks are performed on the Certificates, Identifiers & Profiles page of Apple's developer portal, which has become a bit tricky to find a link to recently, but is available via the link above, and also from Fire's "Tools|Cocoa" menu.
Creating an App ID
As mentioned before, this step is optional, but recommended. If you decide to create a dedicated App ID for your app, you will most likely do this early in the development process, and not just shortly before submission.
To do so, click in the "Identifiers" link underneath the "iOS Apps" headline on the page mentioned above. You will see a new view with "App IDs" active on the left, and a list of already configured IDs on the right. Click the "+" button at the top right to create a new ID.
You will be asked to provide a description (this is for your internal use, to recognize the ID later), as well a Bundle ID, which should be in reverse domain notation (e.g. "com.yourcompany.yourproduct").You can choose for the Bundle ID to be "explicit" or "wildcard". An explicit ID contains a full bundle ID that will match exactly one app, while a wildcard ID ends with .* and can be shared by multiple apps.
Near the bottom, you can also enable certain platform services from your App, such as iCloud support, HealthKit access, and the like. Some features (such as Push Notifications) are only available for apps with explicit IDs.
Once you're happy with your setup, click "Continue" to save your App ID.
Creating a Distribution Certificate
Next, click on the "Production link under "Certificates", and once again click the small "+" button in the top right, this time to add a new certificate. Select the "App Store and Ad Hoc" option and press Continue, and then follow the instructions displayed to create your Certificate. These include running the Key Chain Access tool on our Mac, creating a Request, uploading that request and then downloading the generated certificate. Once done, double-click the downloaded certificate file to install it in your local Key Chain, where Elements (and Xcode) will automatically find it.
Creating a Distribution Profile
Finally, click on "Distribution" under "Provisioning Profiles" in the sidebar and – once again – click the "+" button. Choose the "App Store" option and press "Continue". On the next couple of pages, you will be asked to choose an App ID (pick either one you created above, or a wildcard) and the certificate to use. Finally, you'll be asked for a descriptive profile name (make sure to pick one that is unique), and then you can download the profile.
As with the certificate, simply double-click the downloaded file on your mac, and it will be installed. Fire, Visual Studio and Xcode will find it automatically.
App Store Connect
With the steps created above you'd be ready to build your app for distribution, but to actually submit it to the App Store, you will need to visit a second website to set up the actual shop details. Let's get this out of the way first, before going back to Fire or Visual Studio.
Point your browser to Store Connect Connect at https://appstoreconnect.apple.com, log in with your Apple Account and click on the "Apps" icon. A view comes up that shows all the apps you have already configured for the App Store – if you are reading this, it is probably empty.
Click the "+" Button in the top left and choose "iOS App" from the dropdown.
A dialog comes up asking you for some details, the most important being the name (this will be the actual name that shows in the App Store for your app), and the Bundle ID (you can choose from all the App IDs configured in the developer portal, as seen earlier). When you click "Create", iTunes Connect will verify everything is in order, and you're done: the App Store is now ready for your submission.
Building your App for App Store Submission
It's time to leave the web browser and get back to your favorite IDE and build the binary for distribution. Assuming your App development has been going great and your app's code is all ready to go, these will just be a few simple steps.
Open your project in Visual Studio or Fire and go to Project Settings. There's a couple of options you will want to adjust in order to get your app to build form distribution.
As you know, Elements allows you to define project settings for different Configurations, and by default each new project comes with a Debug and a Release configuration. You have probably been using the former as you worked on and tested your app, and that is great. We recommend to keep that one set to your development settings, and update the Release configuration for distribution. Here's how.
First, set the "Provisioning Profile" and "Certificate Name" settings to the newly created profile and certificate. If they don't show up right away, you might need to refresh the list (Visual Studio has a Refresh button, while Fire has a "Refresh Options" item in the drop-down). Again, make sure to set these options for the Release configuration.
Next, locate the "Create .ipa File" option and enable that, as well (check the box in Visual Studio, or set the option to "YES" in Fire).
You should check the "Bundle Identifier" setting to make sure it matches the Bundle ID you want to use, and that you specified for your App ID. If your Bundle ID does not match, App Store submission will fail. What's more though, once you submit your first binary, you cannot change the Bundle ID later on – so make sure you start out using the proper ID you want, as you will be stuck with it for the rest of your App's life on the store.
Finally, you should review the Info.plist file in your project top make sure you're happy with all the information in there. In particular, make sure the CFBundleVersion is the right number (probably 1.0 for your first submission, or 0.1 if you're submitting a beta), and that CFBundleDisplayName, if set, has the proper name you want your app icon to show on the home screen. (If CFBundleDisplayName is not set, Elements will set it to match your project's executable name.)
And with that, you're ready to build. Make sure to activate the Release configuration in the drop-down box in Fire or Visual Studio's toolbar, and hit Build. When all is done, you will see the release version of your .app bundle in the bin/Release folder, alongside an .ipa file (which is essentially a zipped-up version of your .app, with some extra meta-data). This IPA is ready to be submitted to the App Store.
Upload to the App store
To upload the IPA to the store, you will use Apple's "Application Loader" App. If you are using Fire, you can conveniently launch this App from Fire's "Tools|Cocoa" menu. If not, the easiest way to get to it is to launch Xcode on your Mac and go via the "Xcode|Open Developer Tool" menu.
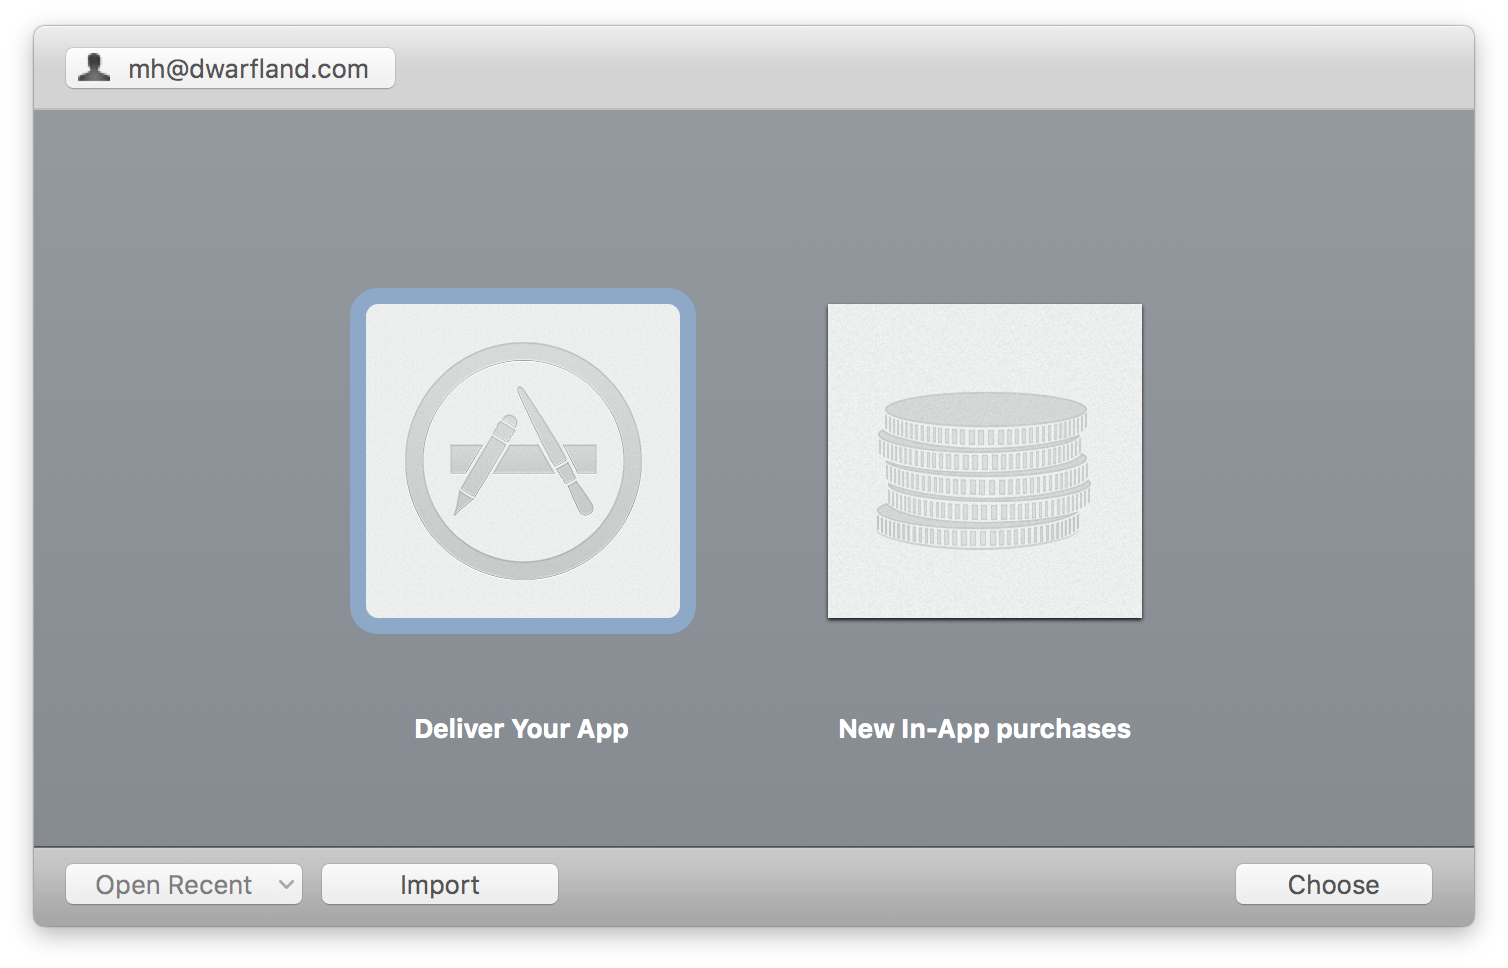
Application Loader presents two big options in the center. Select the left one, "Deliver Your App" and press "Choose". Up comes a standard File|Open dialog, where you can browse for your IPA and upload it. Follow the instructions on screen to answer a few questions, such as which App Store app the binary is for, and then Application Loader will verify and upload your IPA.
Verification will be done both before the upload (locally) and after (by the App Store server), and either step may generate warnings (e.g. point out minor inconsistencies you may want to address for the next upload) or failures (e.g. something that is wrong with your binary that will prevent the app from being submitted as is).
Common pitfalls include:
- invalid architectures (build for
armv7andarm64, unless you know what you're doing) - mismatched Bundle ID and Profile/Certificate
- invalid information in
Info.plistor the Entitlements file - accidentally building against a Beta SDK
Hopefully, your upload will go well and you will be notified by a nice and friendly "ding". Which means it is time to head back to iTunes Connect to finish your submission.
iTunes Connect, Revisited
Go back to the "MyApps" view on iTunes Connect again, and this time click the big icon of your app, which showed up in the main view after you configured it above.
You will see a tabbed view with details for your app, with the left-most "Versions tab being active and showing your version "1.0". You will need to fill in most of the fields in this view with details about your app – including a description, keywords and screenshots for the different device types you support.
If you scroll all the way down, you will see a section called "Build". If you have successfully uploaded an IPA with Application Loader before, you will see a "+" button that will let you select which binary (in theory, you might have uploaded more than one) to use for this version. Click that, and select the version you just uploaded.
Once you're happy with all the details about your app, click the "Submit for Review" button at he top right of the page. The App Store server will do some more verifications (including checking that all the data you entered is valid and more checks on your binary). If all goes well, your app will be submitted for review.
Your next step now is to sit back, relax, and wait the average of 7 days it takes for Apple to review and (hopefully) approve your app. That, or get started on those features for version 1.1.