Connecting to CrossBox from Visual Studio
Connecting to your CrossBox server is easy, and only needs to be done once, after which the server will automatically be available for all your projects.
If an open solution contains one or more qualifying projects (currently, that means Island projects), the "CrossBox" popup button in tool bar will give you the option to select or register a new remote server, by clicking "CrossBox: Please select server" and then "Register server..." from the menu that opens.
Selecting this option will present you with the following dialog:
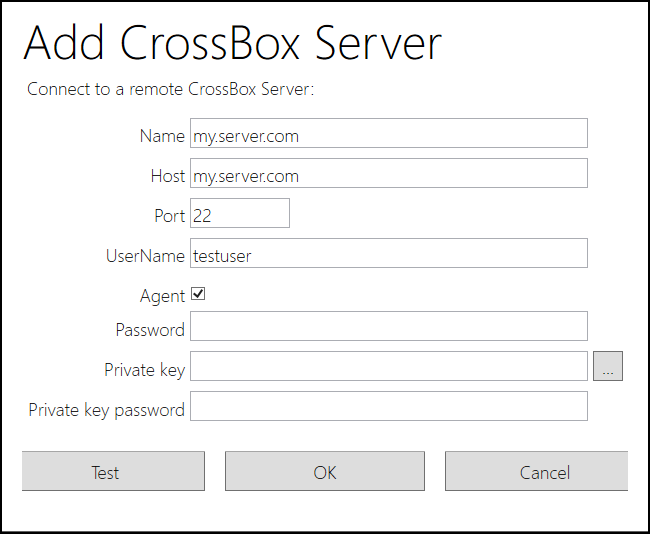
At the very least, you will need to specify the host name/address and the username for the CrossBox Server you want to connect to.
Depending on how your SSH is set up locally, Visual Studio might automatically pick up your default public key file; if it does not, you can browse for the key file manually, or simply provide a password, if your server allows password-based authentication.
The default port for SSH is 22, but you can override this with a different value if your server is listening on a different port, or you have NAT redirects in place that change the port. The machine you are trying to connect to must be reachable on this port.
(We recommend to familiarize yourself with how SSH works in general, via the link(s) provided below).
Once you provided all the information needed, you can click "Test" to check the connection. If all is well, after a few seconds you should see a confirmation message. If you see an error instead, verify your settings and make sure that your server is reachable.
Once the test succeeds, you can click "OK", and your server will be registered. It can now be selected for this and any future projects from the "CrossBox" toolbar dropdown button.