Setting up Xcode for Cocoa Development with VisualStudio
Elements compiler requires a Mac with the latest Xcode to be installed for Cocoa development.
- Download Xcode: Mac App Store
- Connect Visual Studio to your Mac via CrossBox
Once Xcode is installed, and you have connected to your Mac, Elements will handle the rest.
Working with Multiple Xcode Versions
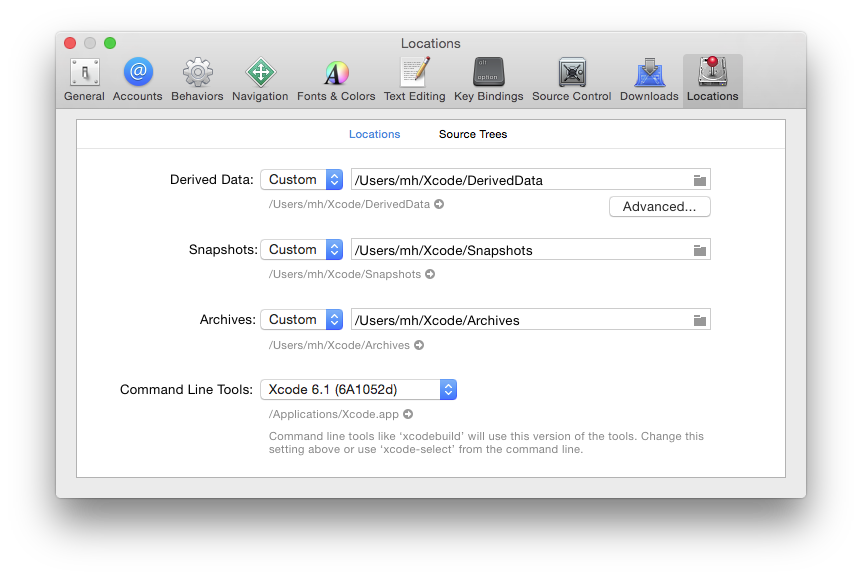
If you have multiple versions of Xcode installed on your Mac and want Elements to use a specific version (of if the one version of Xcode you have installed is for some reason not detected by default), you can explicitly select a version of Xcode from the "Command Line Tools" dropdown in the Xcode Preferences window:

Alternatively, you can run
sudo xcode-select --switch /path/to/Xcode.app
in Terminal to switch the selected version of Xcode (where you'd replace /path/to/Xcode.app with the actual path to the version of Xcode you want to use).
You can also use
xcode-select --print-path
in Terminal to find out what version of Xcode is currently selected. CrossBox uses this command line internally, so you can be assured that whatever the output is, it is what CrossBox will see, as well.
SDK Versions
Please note that in order for things to work out of the box, the version of Xcode you install needs to contain SDK versions supported/known by Elements in form of a folder with .fx files.
In most cases, Elements and CrossBox will automatically determine the highest version of the SDK supported by both Elements and the version of Xcode you have installed.
Any version of Elements will come with pre-built .fx files for the latest SDKs that were released at the time that version of Elements shipped, as well as support for some older SDKs. Please refer to the .fx Files topic for more details.
Elements will automatically download newer (or older) SDK versions form our website as needed, on first build. You can also downlaod SDK support manually from elementscompiler.com/elements/sdks and, if needed, you can also manually import SDKs from an Xcode version; please refer to the Importing new SDKs topic for more details on this.