Connecting to CrossBox 1 from Visual Studio
Connecting to your Mac via CrossBox server is easy, and only needs to be done once, after which the server will automatically be available for all your projects.
When you first create or open an existing Cocoa (macOS, iOS, tvOS or watchOS) project, Visual Studio will automatically prompt you to select a server, or to register a new one.
If an open solution contains one or more Cocoa projects, the "CrossBox" popup button in the tool bar will also give you the option to select or register a new remote server, by clicking "CrossBox: Please select server" and then "Register server..." from the menu that opens.
Selecting this option will present you with the following dialog:
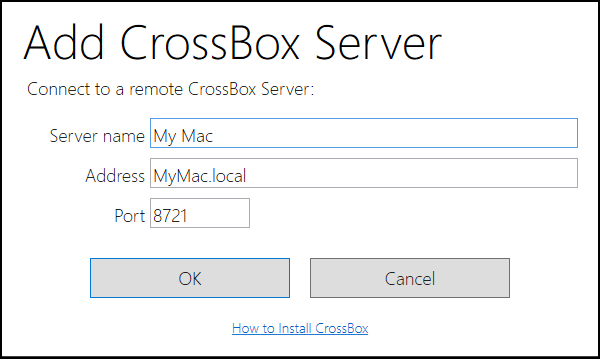
Provide the host name or IP address of your Mac (and, optionally, a name), and click "OK".
On your Mac, CrossBox will show a four digit authentication code in the menu bar next to its icon. Type this code in when prompted by Visual Studio to authenticate, and your server is registered. It can now be selected for this and any future projects from the "CrossBox" toolbar dropdown button.