Elements Docs
One toolchain, six languages, all major platforms: Elements is a modern development tool stack for creating applications for all of today's platforms, using either our very own Oxygene Language or the C#, Java, Mercury, Go or Swift languages.
All the languages let you leverage the same language skill set, no matter what platform(s) you are developing for, without losing the benefit of working natively and directly with the underlying platforms — be it the .NET Framework, the Java and Android Runtime Libraries, the Cocoa and Cocoa Touch Frameworks for the Apple platforms, or our new Island platform for CPU-native Windows, Linux and Android NDK projects.
RemObjects Oxygene is our own state-of-the art programming language for the 21st century. Combining ideas from many origins along with original concepts unique to Oxygene, the language provides an unprecedented level of productivity.
Oxygene is the most advanced and most versatile general purpose programming language available today.
RemObjects C# is 100% C# — now available natively on the Java/Android and Cocoa platforms as well. Primarily designed for developers already familiar with C# on .NET, it allows you to expand your existing skills to iOS, Android and Mac development in a snap.
RemObjects Iodine is our take on the Java programming language — again brought over to now be usable on all platfroms, including .NET, Cocoa and Island.
RemObjects Mercury is an implementation of the BASIC programming language that is fully code-compatible with Microsoft Visual Basic.NET™, but takes it to the next level, and to all elements platforms.
RemObjects Go adds support for the Go language (and access to the vast Go Base Library for all languages).
RemObjects Swift is our implementation of Apple's new Swift programming language — brought over to Java/Android and .NET/Mono development (as well as of course Cocoa).
Depending on how you roll, you can pick your language of choice, or you can mix any of the six languages in the same project (on a file-by-file basis) to use each language for its strengths, where applicable.
Documentation Overview
-
The first six sections, Oxygene, C#, Iodine, Mercury, Go & Swift and explore each of the languages individually. Go here to get a first introduction to your language and to learn about specific language features, syntaxes and capabilities.
-
Concepts explores specific ideas and technologies available in the languages in more depth. Many of these apply to all languages, while some are specific to more advanced features only available in our own Oxygene language.
-
Platforms dives into topics specific to the individual platforms – .NET, Cocoa, Android, Java, WebAssembly and native Windows and Linux.
-
Projects talks about advanced topics for working with projects, from Project Settings over References to Shared Projects.
-
Then there are sections about working in the two IDEs for Elements, Visual Studio on Windows, our own Fire for Mac and Water for Windows. We also cover more general Tools and Technologies relevant to both.
-
The Compiler, EBuild and Tools sections dive deeper into the underlying compiler and build chain technolofies, and related tools.
-
There are a range of Tutorials on various topics, from getting to learn the language(s) to diving into creating your first app for a given platform. We'll be adding more of these over time.
-
Finally, there's the API Reference, where we document the handful of optional libraries that ship with Elements, such as Sugar, as well as the System Functions, and Standard Types.
More Resources
Outside of this documentation site, we think you will find these links useful:
Support & Discussion Forums
Other Useful Links
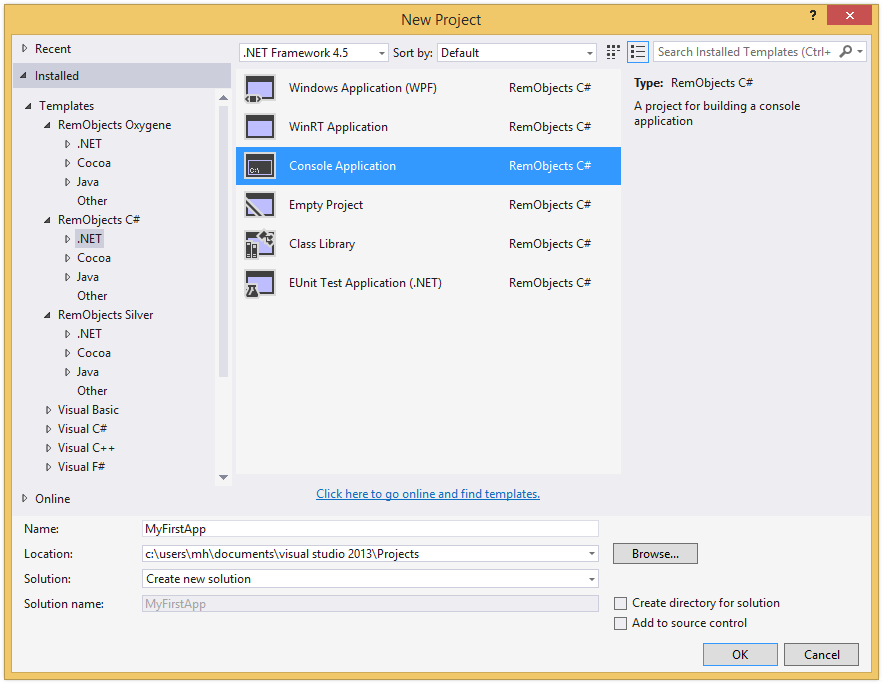
RemObjects Oxygene

One of six languages in the Elements family, Oxygene is based on the foundation of Object Pascal but – in contrast to our C# and Swift implementations – we have been aggressively driving Object Pascal forward over the past ten years, significantly improving the language year after year after year.
As a result, Oxygene is a language that is decidedly Object Pascal, and will make you feel immediately at home if you come from a Delphi or Object Pascal background, but at the same time is a modern language for the 21st century, with many, many advanced language features that take your productivity to the next level.
The Oxygene compiler will continue to evolve rapidly, with new features coming to the language with almost every release.
Learn More
Getting Started
Support
The Language
Oxygene is a powerful general purpose programming language, designed to let developers create all imaginable kinds of projects on a wide variety of platforms.
To achieve this, it provides a combination of language features that ease the development processes — from basic Object Oriented language concepts found in most modern languages (such as the concept of classes with methods, properties and events) to sophisticated specialized language features that enable and ease specific development tasks (such as creating safe, multi-threaded applications) — many of them unique to Oxygene.
All of the provided features are based on the foundation of Object Pascal and stay true to the language design paradigms that make Pascal great, readable and discoverable.
Like all the Elements languages, Oxygene comes with support for four distinct Platforms: .NET, Cocoa (the platform behind macOS and iOS), Android, Java, Windows, Linux and WebAssembly.
Object-Oriented Background
At heart, Oxygene is a purely object oriented language, meaning that all code is contained in Classes and other Types, which can expose Members such as Methods, Properties and Events.
On the Cocoa and Island platforms, additional allowances are made for accessing non-object-oriented platform APIs, like the C runtime functions.
Keywords
Object Pascal, just like Pascal before it, is easily readable by both humans and computers. This is by design, and is accomplished through the use of English words instead of symbols to define most of the language. For example, blocks of code are delimited with the begin and end keywords in sharp contrast to the C family of languages (which includes Elements' three other languages, C#, Swift and Java), which use the curly braces { & } to accomplish the same task.
This extends through all aspects of the language, aiming for a "read as plain english" approach for features, where feasible. For example, where C#, Swift and Java use a cryptic ? to mark nullability, Oxygene uses the nullable keyword, and where C-style languages use & and |, Oxygene relies on readable operator names such as and and or.
Case & Naming Conventions
The language itself, is not case sensitive, but it is case preserving, and Oxygene – unlike older Pascal dialects – is case-preserving, and will emit warnings (and suggest automatic fixes) if identifier case is used inconsistently. However two identifiers that only differ in case are not permissable.
By convention, reserved words (Keywords) in Pascal are written in lowercase, but the compiler will permit and recognize uppercase and mixed case keywords, as well.
In older Pascal dialects, like Turbo Pascal and Delphi, it was convention to prefix class names with a T; this is no longer the case with Oxygene (although Oxygene does preserve the convention of prefixing interface types with I to distinguish them from regular classes).
Aside from that, there are no formal naming or case conventions in Oxygene. Typically, the naming and case follows the conventions of the underlying framework – which is a mixture of "PascalCase" and "camelCase", depending on the platform. For cross-platform or non-platform-specific code, "PascalCase" is recommended.
Structured Programming
One of the things that differentiated Pascal when it was introduced is that it was designed to be a structured programming language. This translates into two things: The first is that it was designed to support complex data structures like lists and records. The second is that it supports various control structures like for, case, while, repeat, etc., as well as procedures & functions, without the need to rely on goto or jump like unstructured languages (in fact, Oxygene drops the goto keyword that is available in legacy Pascal altogether).
Classes
Classes defined in Oxygene belong to a class hierarchy rooted in a base
object called Object (which maps to System.Object in .NET, java.Object in Java and Foundation.NSObject in Cocoa). Each class declaration either explicitly specifies an ancestor class, or will implicitly descend from Object.
Classes inherit all members from their ancestor classes and are thus said to extend that class – commonly by adding additional members or providing overridden implementations of select members defined in the ancestors.
Classes can be marked as abstract to indicate that they need to be extended in order to be instantiated and used. They can also be marked as sealed to indicate that they cannot be extended further.
Methods and Other Class Members
Methods define the execution flow of applications written in Oxygene. Each method consists of a list of Statements that get executed in turn when a method is called. Statement types include loops, conditional statements, logical and mathematical expressions or calculations, or calls to other members in the same or different classes.
Pascal originally differentiated between procedures and functions (the latter being a procedure that returned a result) by using different identifiers, and early Object Pascal implementations carried this legacy over when introducing object-orientation, although this terminology no longer seemed accurate. The Oxygene language no longer differentiates the two by keyword and consistently uses the method keyword for, well, methods (although the procedure and function keywords remain available as compatibility option).
Properties provide controlled access to data contained within a class instance, and can be read/write, read-only or (in rare cases) write-only. Events allow objects to retain references to call-back methods on other objects that they can call, when necessary.
While methods and properties (next to private fields or instance variables) are the two core kinds of members that make up classes, other more advanced member kinds are supported as well, such as Events, Invariants or Nested Types.
Class members can be declared at different visibility levels to control how they can be accessed from outside the class they are in. The three most important levels include private visibility, which restricts access to the class itself; protected visibility, which allows access only from descendants of the class; and public, which allows any code in the project to access the member (but several more fine-grained visibility levels are available as well).
With Oxygene being a truly object oriented language, all code you write will generally be contained in classes (or encoded in other types), with no "global" functions or other elements.
Other Types
Classes are the core of any object oriented program, but they are complemented by a range of other kinds of types that enrich the language:
- Interfaces are abstract types that define a set of shared methods, events or properties that can be implemented by one or more (otherwise unrelated) classes. Classes that implement the same interface can be accessed in identical ways by code that might otherwise be unaware of the concrete class types. This makes it easy to write code that can act on "similar" classes, without those classes having to share a common ancestor. Many developers consider Interfaces to be a cleaner replacement for multiple inheritance, which Oxygene intentionally does not support.
- Records behave similar to classes, but are stack-based rather than heap-based. They can also contain fields, methods and properties, like classes do.
- Enums are simple types that provide a collection of named values.
- Standard types include Simple Types such as integers, floats and strings, as well as more complex types such as arrays, sets and Modified Types.
Advanced Concepts
The Oxygene language contains numerous advanced language concepts, many of which are common to most modern languages, some of which are inspired by other less mainstream languages and yet others which are entirely unique to Oxygene.
-
Class Contracts allow optional code to
be included with class definitions and method implementations to
enforce class consistency. These contracts can be enforced at
runtime, leading to more precise and timely error reporting when
constraints are not met as expected.
-
Sequences and Query
Expressions are deeply integrated
into the language to work with various types of lists of objects, iterate them, and
perform advanced queries (such as filtering, sorting or combining)
on them.
-
Several language constructs for
Parallelism are integrated into the
language to make it easy to write multi-threaded code that scales
well from single-CPU to multi-core computers. These include
Parallel Loops, Future
Types, Asynchronous Expressions and more.
-
Duck Typing and the
Dynamic type provide more weakly typed
language constructs akin to more dynamic languages such as
Objective-C or JavaScript, where needed.
-
Generics provide for classes to be
customizable to work with different types without having to write
separate implementations. For example, a generic list class can be
implemented (or indeed provided by the underlying frameworks) and
then be instantiated to be a list of a very specific concrete type.
File Structure
The Code File Structure topic explains how an Oxygene .pas file is structured and how the types and code are laid out, within.
The language aims at being ~99% identical and compatible between the platforms, but there are a few subtle differences owed to the underlying platforms, covered in the Platform Differences Overview.
With very few minor exceptions dictated by the underlying runtimes, the Oxygene language is designed to be virtually the same across all three supported development environments: .NET, Cocoa and Java.
This means that the language syntax is 99% identical on all three platforms, and that a lot of the code you write can be shared between the platforms (as long as it does not use platform-specific APIs, of course), and that all the language knowledge and experience you build up using Oxygene can be applied to all platforms. Using the same language also makes it easier and more intuitive to work on apps for the different platforms, without having to "switch gears" between – say – C#, Java and Objective-C all the time.
And the open source Elements RTL base library makes sharing
code between projects across all three runtimes even easier.
Code File Structure
All the code in an Oxygene project is divided into code files. A code file can contain a single class (often recommended) or more than one class or auxiliary type. By default, all types defined in a code file are members of the same Namespace; that namespace is specified at the top of the file via the namespace keyword.
Multiple files, or even multiple projects, can of course contribute to the same namespace – in fact, for small to medium projects, it will be common for all types to be situated in the project's one and only namespace. You can read more about this in the Namespace and Uses topic.
Classic Interface/Implementation Split
After the namespace declaration, traditionally each code file is divided into two parts, the interface and the implementation section.
The interface section is similar to the separate header file found in many languages from the C family. It defines the public interface of the code found in that code file, including Types and their Members' signatures.
The implementation section contains the actual, well, implementation. This includes code that implements the classes defined in the interface section. The implementation section provides a level of encapsulation of the complexity of the implemented code.
The advantage of this separation is that it provides a convenient human- and computer-readable summary of the APIs in the code file. This speeds up human navigation and comprehension of the types when consuming the classes elsewhere.
Types can be defined in the implementation section as well, but that makes them private to the file and inaccessible from rest of the project (similar to unit level Visibility).
Both the interface and the implementation sections may include a uses clause that can bring additional namespaces "into scope". uses clauses are covered in more detail in the Namespace and Uses topic
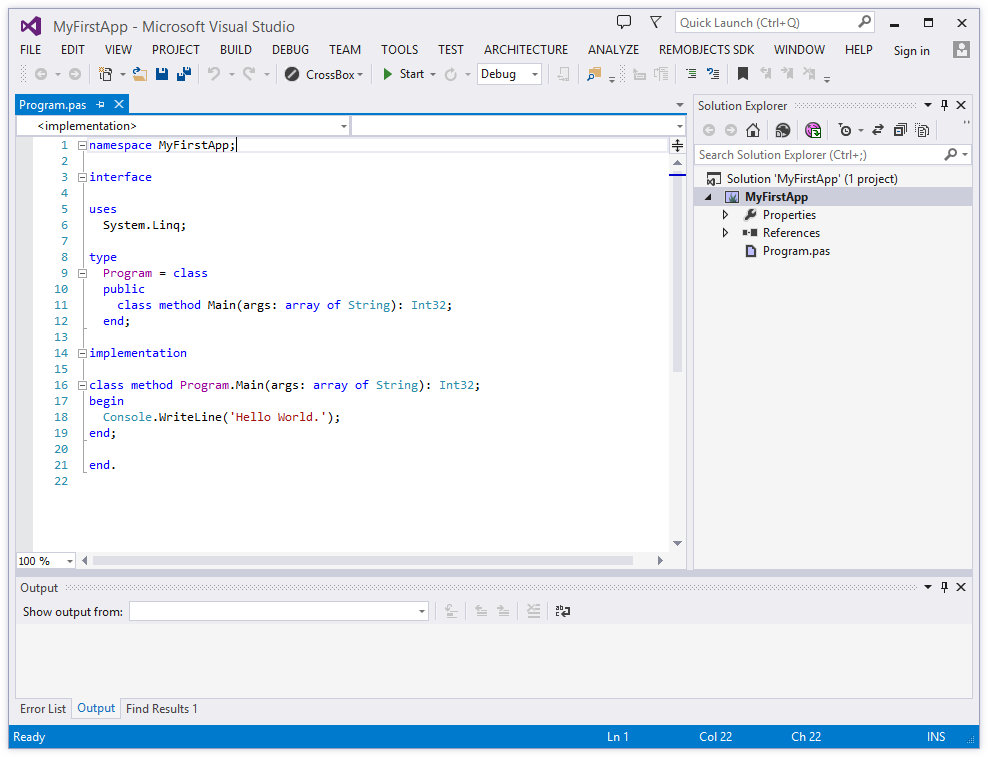
namespace LutherCorp.WorldDomination;

interface

uses
 LutherCorp.DominationTools;

type
 WorldDominator = class
 public
   method AchieveWorldDomination;
 end;

implementation

method WorldDominator.AchieveWorldDomination;
begin
 // Do something
end;

end.
The end of every code file is indicated with the end keyword followed by a period. Everything beyond that point will be ignored.
Unified Class Syntax
Oxygene also supports declaring and implementing types in a more unified syntax, where the body of a Method can be directly attached to its declaration. This provides a code layout that is more similar to modern C derivatives such C# or Swift.
There are advantages and drawbacks to both code-styles, and Oxygene does not enforce a struct choice; the two styles can me mixed, with some methods having their implementation at the top, and others being deferred in classic style to the implementation section.
If the implementation section of a file contains no code, both the interface and the implementation keywords can be omitted:
namespace LutherCorp.WorldDomination;

uses
 LutherCorp.DominationTools;

type
 WorldDominator = class
 public
   method AchieveWorldDomination;
   begin
     // Do something end;
   end;
 end;

end.
Again the end of the code file is indicated with the end keyword followed by a period, and everything beyond that point will be ignored.
See Also
Code Style Guide
This document aims at providing a style guide for how to structure and format code written in the Oxygene language.
The guidelines laid out here are by no means mandatory, and an Oxygene developer may choose to adopt all, some, or none of the guidelines provided. However, our IDEs are designed to work best when code follows the guidelines, and we try to adhere to these guidelines for all code in Elements and its surrounding libraries, ourselves. Code submissions and pull requests for the open-source Elements libraries must meet these guidelines, as well.
Keywords
- All keywords shall be used in their lowercase form.
- Use the
method keyword instead of procedure or function.
- Use the
block keyword instead of delegate, method, procedure or function, for Block declarations.
- Use the
namespace keyword instead of unit, at the beginning of a file.
Casing & Naming Conventions
While Oxygene is case insensitive, it by default preserves case and warns when identifiers differ in case between their declaration and use. These warnings should be avoided, and care should be taken to use the proper case. We recommend enabling Auto-Fix for case issues.
- Again, all keywords shoul;d be lower case
- Type names should use a PascalCase form, without the
T prefix common in other Pascal dialects. Upper-case abbreviation prefixes should also be avoided where posisble. Use Namespaces instead.
- Interface types should use an
I prefix, followed by a PascalCased name.
- Public type Members (that should exclude fields) should use PascalCase names unless the platform conventions for a single-platform project suggest otherwise.
-
Variables usually use a single-letter lower-case prefix, followed by a PascalCase name:
- Fields should use an
f prefix: fName
- Local Variables should use an
l prefix: lName
- Parameters should use an
a prefix: aName
- Only loop Variables or very short-lived helpers variables may use short, lowercase names:
i, x.
Code Block Structure
If an if uses a begin/end block, any connected else clause must also use begin/end, and vice versa. In other words, an if clause with a block should not be mixed with a single-statement else clause, or vice versa.
Bad:
if Something then
  DoThis
else begin
  DoThat;
  AndThisOtherThing;
end;
Better:
if Something then begin
  DoThis
end
else begin
  DoThat;
  AndThisOtherThing;
end;
The else should always start on a new line, never follow the end or the first statement.
If an if, else, for, while or similar statement does not uses a begin/end block, the then or do keyword should always be followed by a linebreak and the following statement should be indented in a new line.
Better:
if Something then
  exit;
Statements with a begin/end block, should never be nested inside statements where the begin/end block, was omitted.
Bad:
if Something then
  if SomethingElse then
    for a in list do begin
      ...
    end;
Better:
if Something then begin
  if SomethingElse then begin
    for a in list do begin
      ...
    end;
  end;
end;
Spacing
Consistent spacing should be used throughout all code in a file.
Types spanning more than a single line should be preceded and succeeded by a single empty line, to separate them from their siblings. However, there should be no empty line between the type keyword and the first type that follows it.
Single-line types (e.g., aliases, short enums, etc) should be in a single block without spacing, and the types may be grouped logically together (e.g., several related enums) with an empty line in between them.
Inside a Class (or Record) declaration, members should be spaced consistently. Single-line members (such as Properties, Fields, Events, or Methods w/o inline implementation) may be grouped logically, with individual groups separated by a single line.
Methods, constructors, or Properties that span multiple lines (and/or include an inline implementation) should be separated from each other by a single empty line; even if they are the first, last, or only member in the current type or visibility block.
Groups of members (e.g., several methods relating to a single feature) may be visually separated with a single comment line "//" or three comment lines.
Namespace and Uses
In Oxygene, all Types (and Globals) are contained in a namespace. You can think of a namespace as a longer version of a name, that helps group related types together, and to avoid name ambiguity between types with the same name (but in different namespaces).
A type"s full name is its namespace, followed by a dot, followed by the type's short name. The namespace itself may contain additional dots, to indicated a nested hierarchy of namespaces:
MyCompany.AHelperClass
MyCompany.MyProject.SomeClass
Here, both "MyCompany" and "MyCompany.MyProject" are (separate and distinguished) namespaces. And "AHelperClass" and "SomeClass" are the short names of two classes defined therein.
It is common to use a company or individual's name as the root portion of namespaces for custom code, to (virtually) eliminate the chance of overlap with code written by other people. For example, all RemObjects code uses namespaces starting with "RemObjects."; that is followed by the name of the product, e.g. "RemObjects.Elements.", "RemObjects.DataAbstract.", and so forth.
Declaring A Namespace
In Oxygene every source file starts with the namespace keyword, followed by the name of the namespace that everything else contained in the file be put into (optionally, this name can be omitted, and type will be generated namespace-less. But this is very rarely done, and discouraged).
namespace MyCompany.MyProject;

...

end.
This declaration affects two things:
- By default, all types declared in the file will become part of this namespace.
- All types from this namespace — no matter where they are defined — will be "in scope" for the file.
What does this mean, exactly? Let's have a closer look.
1. By default, all types declared in the file will become part of this namespace. This means that if we define a type as follows:
namespace MyCompany.MyProject

type
  MyClass = class
    ...
  end;
then the MyClass class will automatically be considered part of the MyCompany.MyProject namespace. Its so-called *full name will this be "MyCompany.MyProject.MyClass". And this full name is how the class can be referred to everywhere.
2. All types from this namespace will be "in scope" for the file. This means that if we add a second (or more) files to our project and also begin it with namespace MyCompany.MyProject, these files will be part of the same namespace, and all types from that namespace will be in scope in all the files (no matter which file they were declared in). As such, we can refer to the above class simply as MyClass — because it is in the same namespace.
One can add as many files to a project as needed and they can all share the same namespace. In most (smallish) projects that only have a single namespace, there is no need to worry about adding namespaces to the uses clause (more on that below), just to access classes from within the project's code base. All types are automatically in scope in all source files (of the same namespace).
Of course, while it is common for small to medium projects to just use a single namespace, it is also common to declare different namespaces across a project in order to better partition parts of the project — for example one could have a MyCompany.MyProject namespace for the bulk of a project, but a MyCompany.MyProject.MySubSystem namespace for a certain sub-system of the project.
Regardless of namespace, all types declared in a project will be available all throughout the project (unless they are marked for unit level visibility only) by their full name, and all types marked as public will also be available outside of the project (i.e. when you are creating a library that will be referenced from other projects).
Code in the MyCompany.MyProject namespace could refer to a type from the sub-system simply by using it's full name:"
var x := new SomeClassFromTheMainNamespace(); // no need to specify the full name
var y := new MyCompany.MyProject.MySubSystem.SubSytemClass();
Uses Clauses
Of course, it would become cumbersome to always refer to types from other namespaces using their full name – especially if the same type, or many types from the sanem namespace(s) are used frequently through-out a source file.
By providing a uses clause with a list of namespaces at the top of the file, these additional namespaces can be brought "into scope" as well, so that anything declared in them can now also be accessed using the short name.
namespace MyCompany.MyProject;

uses
  MyCompany.MyProject.MySubSystem;

...

var y := new SubSytemClass(); // MyCompany.MyProject.MySubSystem is now in scope!
A uses clause can list one or more namespaces (separated by comma). Alternatively where convenient, multiple uses clauses can be provided, each terminated by a semicolon. This is especially helpful when using {$IFDEF}s:
namespace MyCompany.MyProject;

uses
  CoreFoundation,
  Foundation;

{$IF MACOS}
uses
  AppKit;
{$ENDIF}
...
Resolving Ambiguities
If more than one namespace in scope declare a type of the same (short) name, using that name will refer the one in the namespace that is most towards the end of the uses clause. Of course you can still use the full type name, to be sure, or to refer to one of the other types of the same name:
namespace MyCompany.MyProject;

uses
  MyCompany.MyProject.MySubSystemA,
  MyCompany.MyProject.MySubSystemB,

...

var y := new SubSytemClass(); // comes from MyCompany.MyProject.MySubSystemB
var z := new MyCompany.MyProject.MySubSystemA.SubSytemClass(); // explicitly use the type from MySubSystemB
Wildcards
In addition to listing individual namespaces, the uses clause also allows the asterisk character as a wildcard, to include a namespace and all its sub-namespaces. For example, uses MyCompany.MyProject.* would also add e.g. MyCompany.MyProject.SubSystem and all the rest to the scope, including recursive sub-namespaces.
namespace MyCompany.MyProject;

uses
  MyCompany.MyProject.*;
Standard Namespaces
Certain System namespaces will be in scope by default and do not manually need to be listed in the uses clause for their types to be accessible by their short name.
- The
RemObjects.Elements.System namespace contains compiler-intrinsic types, such as Integer, System Functions and other elements, and is always first in scope.
- On .NET, the
System namespace contains many core classes, such as String and Object, and is always second in scope.
- On Java, the
java.lang namespaces contain many core classes, such as String and Object, and are always second in scope.
- On Cocoa, the
rtl.* namespace contains the C runtime library, core types and many core C-based APIs and is always second in scope.
- On Island, all standard types are in the above-mentioned
RemObjects.Elements.System, which is also mirrored to just System, for ease of use.
Project-Wide Default Uses Clauses
In addition, you can specify a list of namespaces be in scope for all files via the "Default Uses Clause" Project Setting. Any namespaces in that list will be in scope before those listed in an individual source file's uses clause (in alphabetical order, with RemObjects.Elements.RTL, of present, last).
The unit Keyword
For backwards compatibility with Delphi, Oxygene allows the unit keyword to be used instead of namespace. Note that even when using that keyword, the following identifier still specifies the namespace for that file, and all the above discussion still applies.
Just as with namespace, the identifier does not have to match or correspond to the file name, and multiple (or even all) files in the project can (and typically will) use the same namespace.
See Also
Types
Types are the fundamental building blocks of the Oxygene language.
There are three broad categories of types:
-
Predefined Simple Types are small and atomic types that are built into the language to represent the simplest of data: numbers, booleans, strings, and the like.
-
Custom Types are types not defined by the language, but by yourself or provided by base libraries or frameworks. Where standard types are universal in application, custom types usually serve a specific purpose.
-
Modified Types are defined by the language itself, and extend or modify the behavior of a regular type, or form complex combinations, such as arrays, sequences, tuples or pointers of a given other type.
-
Anonymous Types are custom types (Classes or Records) that are instantiated on the fly without being explicitly declared or given a name.
Oxygene also has support for declaring types in special ways:
-
Generic Types are classes (or records and interfaces) where one or more of the other types that the class interacts with (for example to receive or return as a parameter from methods) is not well-defined, but kept generic. This allows for the class to be implemented in a fashion that it can work with or contain different type parameters. Only when a generic type is used, a concrete type is specified.
-
Partial Types are regular types that are declared and implemented across multiple source files – commonly to keep a large class easier to maintain, or because one part of the class is generated by a tool.
-
Mapped Types allow you to provide the definition of a type that will not exist at runtime, but merely map to a different, already existing type.
-
Type Extensions can expand an existing type with new methods or properties (but not new data), even if that type was originally declared in an external library.
-
Type Aliases can give a new name to an existing type.
Type Declarations
Custom Types and Aliases to existing types can be declared in the interface or implementation section of any source file, after a type keyword.
Each type declaration starts with the type's name, followed by an equal sign (=) and followed by optional Type Modifiers, which can also include a Visibility Lebel, followed by the details of the type declaration as specified in the individual custom type topics referenced above.
type
  MyClass = sealed class
  end;

  MyInteger = public type Integer;
In the above example, MyClass ands MyInteger are the type names. They are followed by the equal sign, and the sealed and public type modifiers, respectively. Finally class ... end and Integer are the type declaration itself (a Class declaration and an Alias, in this case).
Type References
While Type Declarations, covered above, introduce a new type name, the most common interaction with types is to reference existing ones.
Most types, including Simple Types and Custom Types, are referenced using simply their name – either their short name, or their fully qualified name including the Namespace.
var x: SomeClass; // Variable x is declared referencing the SomeClass type by name.
By contrast, Modified Types are referenced using a particular syntax specific to the type, such as the array of, sequence of or nullable keywords, often combined with a type name.
var x: array of SomeRecord; // Variable x is as an *array* of the type referred to by name.
var y: nullable Integer;    // Variable x is as a *nullable* version of the name's simple type.
On the Cocoa platform, type references can be prefixed with Storage Modifiers to determine how they interact with ARC.
On the Island-based platform, type references can be prefixed with a Life-Time Strategy Modifier to determine how their lifetime is managed (although doing so explicitly is rarely needed). Storage Modifiers, as discussed above, are also supported when working with Cocoa or Swift objects Cocoa project.
More on Type Names
Every named type (Simple Types and Custom Types) in Oxygene can be referred to either by its short name (e.g. MyClass), or what is called a fully qualified name that includes a full namespace (e.g. MyCompany.MyProject.MyClass).
When declaring types with a simple name, the type will automatically be placed within the namespace that is declared at the top of the file alongside the namespace keyword. Alternatively, a fully qualified name can be provided in the declaration to override the namespace.
namespace MyCompany.MyProject

interface

type
  MyClass = class // full name will be MyCompany.MyProject.MyClass
  end;

  MyCompany.OtherProject.OtherClass = class // full name will be MyCompany.OtherProject.OtherClass
  end;
You can read more about this in the Namespaces topic.
See Also
Predefined Simple Types
Like most programming languages, Oxygene defines a set of basic types that make up the core language, cover simple and atomic data types (such as numbers and characters) and form the base for more advanced types you define yourself or link in from libraries.
Integers
Oxygene provides integer types in 4 sizes, from 8-bit to 64-bit, both signed and unsigned. Refer to the Integers topic in the API Reference for more details.
Floating Points
Two floating point types provide storage of fractional values, with single and double precision. The Floats section in the API Reference covers these in more depth.
Boolean
A boolean is a simple value type that can hold one of two values – true or false. See Boolean for details.
Strings and Characters
Individual characters can be stored in the Char type, while the String class provides support for strings of characters. Both hold 16-bit UTF-16 entities.
Object
Object is the implied root class of all Class Types defined in Oxygene and the other Elements languages. On .NET and Java (and in a limited degree on Cocoa and Island), it is also the root of all other types, through a mechanism called Boxing). Visit the Object topic for more details.
Dynamic
The dynamic type can be used to work with objects whose API is not known at compile time. It can be used as a placeholder type for a field, variable or parameter that can hold any type, at runtime. Different than an Object reference, which needs to be cast to a more concrete type for useful work, a dynamic reference allows any imaginable calls to be made on it, without enforcing any compile times checks to see whether it is valid. The compiler will generate code that tries to dispatch the call dynamically, failing at runtime if a call is invalid.
Custom Types
Custom Types are types not defined by the language, but by yourself or provided by base libraries or frameworks. Where standard types are universal in application, custom types usually serve a specific purpose.
Classes
A class is a data structure that may contain data members (Constants, Fields and Properties, as well as actions that work with that data (Methods).
Classes take part in a hierarchy of types and can descend from each other to form that hierarchy (more on that below). An instance of a class is commonly referred to as an "object".
A class type is declared using the class keyword, followed by zero or more member declarations, and closed off with the end keyword. Optionally, a base class and/or a list of one or more interfaces implemented by the class can be provided in parenthesis behind the class keyword:
type
  MyClass = public class(Object, IMyInterface)
  private
    fName: String;
    fValue: Integer;
  public
    property Name: String read fName;
    property Value: Integer read fValue;
  end;
Like all custom types, classes can be nested in other types with the nested in syntax.
Members
Classes can contain Type Members, including Fields, Properties and even Methods. Also like in classes, the members can be grouped in Visibility Sections.
Invariants
Classes can define Invariants to help ensure a consistent state. Invariants are boolean expressions that will automatically be enforced by the compiler every time a method or property accessor finishes.
Nested Types
Classes can also define Nested Types. Nested types are like regular custom types, except they are considered part of the class and their visibility can be scoped as granular as all class Members.
Nested types are declared using the nested in syntax, and (outside of the containing class) are referred to in the same way as static class members would – prefixed with the name of the class, and dot.
Refer to the Nested Types topic for more details.
Polymorphism
As hinted above, classes are part of a class hierarchy, where each class (except the root) has an ancestor class that it descends from and extends. You can think of this hierarchy as a tree, with a common root (Object).
Classes can be treated polymorphically. That means an object (a concrete instance of a class) can be treated the same as any any of its base classes. This allows code to be written that can work with a base class (or even Object itself), and it can be applied to any descendant of the same class, as well.
Individual members of a class can be virtual, which means that descendant classes can override their implementation to provide more specific behavior. When code working with a common base class accesses virtual members, at runtime execution is automatically passed to the implementation for the concrete instance.
For example, code could be written for a list of Person classes, which, at runtime, includes various concrete subclasses or persons, such as Employee, Manager, FamilyMember or the like. The code has access to all (visible) members declared on Person, but might end up transparently calling more specific implementations of these members provided by Employee, Manager or FamilyMember.
Please refer to the Polymorphism topic in the Concepts section, for details.
Abstract Classes
A class can be marked with the abstract Modifier, to indicate that it is an abstract base class. Abstract classes cannot be instantiated, and they may (but don't have to) contain abstract Members – that is, members that have been defined on the class, but not implemented.
Descendants from an abstract classes class can become non-abstract, if they provide overriden implementations for all abstract members.
Consider a class hierarchy of vehicles, where the base class Vehicle can represent any kind of vehicle, but not a concrete type. It might provide an abstract Drive method, but no implementation (since there is no one way to drive "any vehicle"). It makes no sense to create an instance of a Vehicle. Concrete subclasses such as Car, Train and Bike could provide implementations for the Drive method.
Yet, even though Vehicle is abstract, code can be written that knows how to call Drive on any vehicle.
Again, please refer to the Polymorphism topic in the Concepts section, for details.
Sealed Classes
A class can be marked with the sealed Modifier, to prevent further subclassing.
Extension Classes
Extension Classes can add properties, methods, operators and events to an existing type (but not add anything that requires storage, like fields, events or stored properties). These become available to callers if this type is in scope for the caller. The first type in the ancestor defines which type gets extended; optional interfaces can be used to add/implement as interfaces allowing the type to be compatible with that interface.
Read more about Extension Classes here.
Type Visibility
The visibility of a class type can be controlled by applying a Visibility Modifier on the declaration. The default visibility is assembly.
Other Modifiers
A number of other Type Modifiers can be applied to classes:
abstract Forces the class to be abstract; see above.extension Makes this an extension class; see above and Extensions.mapped Makes this a mapped class; see Mapped Types.partial Partial can be used to spread a type over several files in the same project. All parts must have this modifier then.readonly Makes this class readonly. All fields in it will be readonly and can only be set by a constructor and not modified afterwards.static Static classes are classes with only static members. The class modifier is implied on all members.
See Also
Records
Records (also called "Structures" or "Structs", in many other programming languages) are a lot like Classes except for two crucial differences:
- Records are value types, and stored on the stack, while classes are reference types, and stored in global memory.
- While they can have an ancestry hierarchy (i.e. a record type can decent from and extend another record), they do not support polymorphism, e.g., overriding virtual methods.
When using a record type, the value is stored on the stack (or when defined inside a different type, it is stored inline within the memory space of that type). Assigning a record from one variable to another creates a copy of the record, and making changes to on copy does not affect the other. For this reason, records are usually used to hold a small number of related values.
See Value Types vs. Reference Types) for more on stack- vs heap-baswed types.
A record type is declared using the record keyword, followed by zero or more member declaratins, and closed off with the end keyword. An optional ancestor and/or a list of one of more interfaces to implement can be provided in parenthesis behind the record keyword:
type
  Color = public record(IColor)
  public
    R, G, B, A: Byte;
  end;
Like all custom types, records can be nested in other types with nested in syntax.
Note: Oxygene records are not to be confused with the record types introduced in C# 9 and Mercury, which add special logic to class (or struct). Oxygene records are the equivalent of a simple struct in C# or Swift, or a Structure in Mercury.
Members
Like Classes, records can contain Type Members, including Fields, Properties and even Methods. Also like in classes, the members can be grouped in Visibility Sections
Packed Records
By default in-memory layout of a record's individual fields is optimized for fast access first, and memory efficiency second. This means that additional padding might be added to make sure Integers and pointers align at 4 or 8-byte boundaries, and the in-memory order of fields might be rearranged, as well.
When a record is marked as packed with the packed directive (or the cross-language Packed Aspect), this will not happen, and the records memory layout will be exactly as specified.
Use packed records when the memory layout matters – for example when reading binary data from disk or the network and accessing it as a record, or when sharing records in-memory with code compiled from non-Elements languages, such as C ort Delphi.
Invariants
Records can define Invariants to help ensure a consistent state. Invariants are boolean expressions that will automatically be enforced by the compiler.
Note that invariants can only be effective for non-public fields, as access to public fields would bypass them. This makes invariants less useful for most typical records rthan they are for Classes.
Nested Types
Records can also define Nested Types. Nested types are like regular custom types, except they are considered part of the record and their visibility can be scoped as granular as all class Members.
Refer to the Nested Types topic for more details.
Extension Records
Like Extension Classes, Extension Records can add properties, methods, operators and events to an existing type (but not add anything that requires storage, like fields, events or stored properties). These become available to callers if this type is in scope for the caller. The first type in the ancestor defines which type gets extended; optional interfaces can be used to add/implement as interfaces allowing the type to be compatible with that interface.
Read more about Extension Records here.
Type Visibility
The visibility of a record type can be controlled by applying a Visibility Modifier on the declaration. The default visibility is assembly.
Other Modifiers
A number of other Type Modifiers can be applied to records:
extension Makes this an extension record; see Extensions.mapped Makes this a mapped record; see Mapped Types.partial Partial can be used to spread a type over several files in the same project. All parts must have this modifier then.readonly Makes this record readonly. All fields in it will be readonly and can only be set by a constructor and not modified afterwards.static Static records are records with only static members. packed Packed records do not align their members by round offsets. Ignored on .NET and Java
See Also
Interfaces
Interfaces provide an abstract definition of one or more type members (Methods, Properties or Events) that other types may opt to implement. You can think of them as type contract that a type promises to provide functionality for.
Many types can implement the same interface, regardless of whether they share a common ancestry in their inheritance hierarchy, and all types implementing the interface can then be interacted with by the same code, without the code having to be aware of the actual concrete types.
Any type opting to implement an interface must provide an implementation for all members of the interface (except for those declared optional, a feature available only on Cocoa objects). All interface members are implied to be public, and no visibility sections are allowed (with the exception of Private Interface Members, discussed below).
By convention, and to provide distinction from concrete types, interface names start with an uppercase I followed by a PascalCased name. But this is not a rule that is compiler-enforced. On Java, system-provided interfaces do not follow this convention.
An interface type is declared using the interface keyword, followed by zero or more member declarations, and closed off with the end keyword. Optionally, one or more base interfaces can be provided in parenthesis behind the interface keyword:
type
  IMyInterface = public interface
    method DoSomething;
  end;

  MyClass = public class(IMyInterface)
  public
    method DoSomething; ///
  end;

  var x: IMyInterface;
  x.DoSomething(; // we don't know the actual type of x, only that it implements IMyInterface
Interfaces Members are limited to
Like all custom types, interfaces can be nested in other types with nested in syntax.
Default Implementations
Interfaces can optionally choose to provide a default implementation for some of the methods they define. If a default implementation is provided, types implementing the interface may choose not to provide an implementation themselves, and will in that case "inherit" the default implementation.
This is often helpful for interface methods that would be similar for most implementations. Consider the ILogger interface example below. Most concrete implementations would only need to implement the first method to emit the log string to various mediums. The second method is handy to have for callers of the interface, but it would be cumbersome having to re-implement it for each logger.
type
  ILogger = public soft interface
    method Log(aInfo: String);
    method Log(aFormat: String; params aParameters: array of Object);
    begin
      Log(String.Format(aFormat, aParameters));
    end;
  end;
Private Interface Members
As part of default implementations, interfaces can also define private helper members. These members must provide an implementation; they do not become part of the official interface contract, and are only available from other methods implemented in the same interface. Consider:
type
  ILogger = public soft interface
  public

    method Log(aInfo: String);

    method Log(aFormat: String; params aParameters: array of Object);
    begin
      Log(CustomFormat(aFormat, aParameters));
    end;

  private

    method CustomFormat(aFormat: String; params aParameters: array of Object): String;
    begin
      ...
    end;

  end;
Optional Members (Cocoa)
On the Cocoa platform, interface members can be marked as optional with the optional keyword directive. Optional members do not have to (but may) be implemented by classes conforming to the interface. Of course, code calling into such optional members must take care to ensure they are implemented by the concrete instance, at runtime – usually by calling the respondsToSelector() method on Cocoa's base Object.
type
  IFoo = public interface
    method One;
    method Two; optional;
  end;
Soft Interfaces
Interfaces can be marked as soft and suitable for automatic Duck Typing, using the soft modifier keyword. You can read more about Soft Interfaces, in all Elements languages, here.
type
  ISoftDuck = public soft interface
    method Quack;
  end;
Combined Interfaces
A Type Alias can combine two or more interfaces into a new interface type that combines both:
type
  ICodable = IEncodable and IDecodable;
See the Combined Interfaces topic for more details
Type Visibility
The visibility of an interface type can be controlled by applying a Visibility Modifier on the declaration. The default visibility is assembly.
Other Modifiers
Only one Type Modifier can be applied to interfaces:
soft marks the interface as soft (see above)
See Also
Enums
An enum type, short for enumeration, is a type that represents a number of distinct named values, each of which can optionally be represented by a specific numerical value. An instance of an enum represents a single of the enum's values.
Flags are a special sub-type of enums where each value is represented by a separate bit in the underlying storage, allowing for a flag instance to represent a single value or a combination of two or more values, using bitwise or.
An enum type is declared with the enum or flag keyword, followed by one or more value names in parentheses:
type
  Color = public enum(
    Red,   // implied 0
    Green, // implied 1
    Blue   // implied 2
  );

  Number = public enum
  (
    One = 1,
    Two = 2,
    Three = 3
  ) of Word;


  State = public flags
  (
    IsVisible,  // implied 1
    IsSelected, // implied 2
    IsHovered   // implied 4
  );
Each enum value can be assigned to a specific numerical representation. If no numerical representation is provided, the compiler will automatically assign consecutive numbers, starting at 0 and counting up in increments of 1 for enum types, and starting at 1 and shifting the bit to the left for flags types.
If a numerical representation is provided for some values but not all, the compiler will use the fixed values where provided, and increment (enums) or look for the next free higher bit (flags from there for subsequent values without explicit number).
By default, enums are stored at 32-bit numbers compatible with a UInt32 type. Optionally, a different integer storage type can be provided at the end of the declaration, using the of keyword. This can be used to size the enum smaller (Byte or Word) or larger (Int64).
Type Visibility
The visibility of an enum type can be controlled by applying a Visibility Modifier on the declaration. The default visibility is assembly.
Other Modifiers
Other modifiers do not apply to enums.
Blocks
A block type, also referred to as a delegate type on .NET, defines a method pointer that can be used to hold a reference to a Method or an Anonymous Method. Blocks are a safe way to dynamically invoke methods with a specific signature on unrelated classes.
Different from regular Function Pointers on native platforms (more on those below), block instance captures not only the implementation of the method in question, but also the Self pointer of the object instance that contains the method. This allows calls to blocks to execute in the context of a specific object instance, and access that object's members.
A block type is declared using the block keyword, followed by a regular Method signature. This signature can include parameters and a result type.
type
  MyBlock1 = public block(aParameter: Integer);
  MyBlock2 = public block: String;
  MyBlock3 = public block;
In addition to block, the delegate keyword can also be used to declare a block.
The two keywords are interchangeable, and delegate is mainly supported for backwards compatibility. We discourage the use of delegate, because, while commonly used on .NET, the term can be confusing with what the terminology "delegate" refers to many other platforms, especially Cocoa. We recommend to use the block keyword, exclusively.
Creating Block References
A block reference can be created by simply assigning a Method, Anonymous Method or Lambda Expression to a block variable.
To avoid ambiguity (e.g. as to whether to call the method and use its result, or assign the method itself), the method reference can be prefixed with the Address Of (@) Operator. But note that this is seldomly required, except in cases of ambiguity (e.g. if the method itself returns a compatible block), ot to levarage type inference.
var x: MyBlock1 := @MyClass.MyMethod; // use a method as block
var y: MyBlock2 := () -> "Hello";     // use a lambda as block
var z := method begin                 // use an anonymous method
           DoSomething;
         end;
Invoking a Block
Invoking a block reference is as easy as calling into the block as if it were a regular local method:
x(15);
var s: String := y();
z();
Note that different than in regular Method Calls, parenthesis are required to call the block. This is to avoid ambiguity between calling or referencing the block, e.g.:
var a := y;   // assigns the same block as `y` to `a`
var b := y(); // calls `y` and assigns the result to `a`.
Function Pointers
Function Pointers are a type similar to blocks, but more limited. They can be declared using the same syntax, but with the method keyword instead of block.
Different than blocks, function pointers do not capture a Self. As such, they can only refer to simple (global) functions, not to class methods. Anonymous methods or lambdas can be used as function pointers, as long as they do not access the surrounding scope or self.
Inline Block Types
Inline block types are blocks defined in a type reference, they use the same syntax as regular blocks, but without a name. On .NET and Java, these blocks must map to system-predefined generic delegates (System.Action*, and System.Func* on .NET and types in the Cooper Base Library for Java). Cocoa and Island support arbitrary inline blocks natively.
method DoSomething(aCallback: block(aStatus: String));
begin
  //...
  aCallBack("Done.");
end;
Type Visibility
The visibility of a block type can be controlled by applying a Visibility Modifier on the declaration. The default visibility is assembly.
Other Modifiers
Other modifiers do not apply to blocks.
Modified Types
Modified Types extend or modify the behavior of a regular type, to form more complex combinations, such as arrays, sequences, tuples or pointers of a given other type.
For example, value types can normally not be nil, but the nullable version of that same type can. And an array can broaden what usually is a single copy of a given type into a group of several items of the same type that can be worked on in bulk.
Modified Types are defined by the Oxygene language itself, and are usually not referred to by name (although one can of course define an Alias to a specific modified type), but with a special language syntax.
Array Types
An array is a constant sized list of elements. An array type is expressed with the ``array of` keyword followed by the name of any valid Type; an optional size can be provided in square brackets. The lower bound of an array does not have to be 0.
var x: array of Integer;         // an array of undetermined (as of yet) size
var y: array [0..9] of Integer;  // an array fixed to 10 elements
var z: array [5..10] of Integer; // an array fixed to 6 elements, with a lower bound of 5.
Arrays can be made multidimensional, by providing more than one set of bounds.
var x: array[0..9, 0..9] of Integer; // 10x10 = 100 integers
var y: array[0.., 0..] of Integer;   // an undetermined (but rectangular) number of integers
var z: array of array of Integer;    // an undetermined (loose) number of integers
Static Arrays
It is worth noting that arrays with fixed specified bounds are automatically allocated by the compiler, on the stack as value types, and can be immediately used. These are referred to as Static Arrays.
var x: array[0..9] of Integer; // these 10 integers now exist as space on the stack
x[3] := 42;                     // so we can just set the one at index 3 to "42"
The same holds true for multi-dimensional arrays with fixed bounds. These are allocated as a monolithic block of memory, so essentially array [0..99] of Integer and array [0..9, 0..9] of Integer have the same memory representation. Merely the semantics of how the 100 individual items get accessed differs.
var y: array[0..9, 0..9] of Integer; // these 100 integers too exist as space on the stack
x[3,8] := 42;                         // so we can just set the one at index 3 to "42"
Dynamic Arrays
Arrays without bounds (or with open bounds) are un-initialized reference types, and set to nil by default (because, after all, their actual size is not known from the declaration). These are referred to as Dynamic Arrays.
To use, fill these arrays with values, a copy needs to be instantiated using the new operator:
var x: array of Integers; // unknown number of Integers, for now
x := new Integer[20];     // so we need to allocate 20 of them in memory (indexed 0..19)
x[3] := 42;               // *now* we can set the one at index 3 to "42"
var x: array [0.., 0..] of Integers; // unknown number of Integers, for now
x := new Integer[20,20];  // so we need to allocate 400 of them in memory (indexed 0..19/0..19)
x[3,8] := 42;               // *now* we can set the one at index 3 to "42"
For loose multi-dimensional dynamic arrays, each level would need to be instantiated manually (since each level can, in theory, contain a different-sized sub-array):
var x: array [0.., 0..] of Integers; // unknown number of Integers, for now

x := new array of Integer[50];       // we allocate 50 arrays for dimension one (indexed 0..49)
for i: Integer := 0 to 49 do
  x[i] = new Integer[20];            // and for each, we allocate 20 integers — for a total of 50*20 = 1000

x[3,8] := 15;                        // now we can set values
Dynamic arrays are always reference types.
Inline Arrays
Inline arrays are concept specific to arrays on the .NET platform. The inline Type Modifier ensures that memory for the arrays is allocated with the stack space or the memory space of the containing Class or Record.
type
  MyRecord = public record
  public
    Chars: inline array[0..255] of Byte;
  end;
The above record's size would be 256 bytes, unlike a record with a regular array, which would be stored outside of the record. Inline arrays are specially useful when working with P/Invoke to call native code.
Inline arrays are considered "unsafe". In order to use them, the "Allow Unsafe Code" Compiler Option must be enabled, and any Methods that deal with them must be marked with the unsafe Member Modifier.
See Also
Sequence Types
Sequences are a special type in the language and can be thought of as a collection of elements, similar to an array.
In contrast to arrays, sequences do not imply a specific form of data storage, but can represent any collection of elements that is accessible in a specific order. This could be an array (and as a matter of fact, all arrays can be treated as a sequence) or a different data store, such as a linked list, a binary tree or a custom collection implementation.
Sequences can also represent non-static data that is retrieved or generated on the fly when the sequence is enumerated. For example, you could implement a sequence that calculates all digits of Pi, or retrieves RSS headlines downloaded from a server.
As a result, sequences are not a concrete type that can be instantiated – one cannot "new up a new sequence", because it would be undefined where its data would come from. Instead, sequences are used as base types to consume data where the exact storage is unknown.
For example, a method could be written that prints out a sequence of Integer to the console. That method could then be invoked with any number of different types that adhere to the sequence protocol, no matter where those Integers come from. By contrast, if the method were declared to take an Array or a generic List<Integer>, it would be much more restrictive.
Using Sequences
Sequence types are expressed with the sequence of keyword followed by a type name.
var SomeIntegers: sequence of Integer;
The most common operation on a sequence is to iterate it using a for each Loop loop, a variant of for loop that executes a statement (or block of statements) once for each item in the sequence:
for each i in SomeIntegers do
  writeLn(i);
It is also common to apply LINQ operations in form of a from Expression to perform operations on a sequence, such as filtering or sorting.
var FewerSortedIntegers := from i in SomeIntegers where i ≥ 20 order by i;
for each i in FewerSortedIntegers do
  writeLn(i);
In the above example, the sequence of Integers will be filtered to include only those values larger or equal to 20, and then sorted numerically.
Compatible Types
In addition to Array, most collection types on the various platforms, including the List<Integer> type in Elements RTL are compatible with sequences. Sequences can easily be implemented using Iterators or for Loop Expressions.
Parallel Sequences
Available only on .NET, parallel sequences are a special type of sequence that can be iterated in parallel in a multi-threaded environment with .NET's parallelism APIs. It maps to the ParallelQuery<T> system type.
var data: parallel sequence of Integer;
data.ForEach(a -> DoSomethingParallelWith(a));
Queryable Sequences
Available only on .NET only, queryable sequences are a special type of sequence where LINQ expressions applied to the sequence will be compiled to executable code, but converted into meta data that can be used to perform operations on the sequence at runtime.
For example, using LINQ to SQL or DA LINQ, a from expression on a sequence of database objects can be translated into SQL code that could perform the operations on the back-end database. Rather than fetching an entire data table and then filtering it locally, the filtering can be done by the database engine.
var AllUsers := rda.GetDataTable<Users>;
var NewUsers := from u in AllUsers where u.DateSignedUp > DateTime.Now.Add(-1);
for each u in NewUsers do
  writeLn(u.Name);
In this case, the "where" clause would get translated to SQL to only fetch the most recent users from the database instead of all of them – potentially saving a lot of network bandwidth and memory.
A queryable sequence maps to the IQueryable<T> system type.
Asynchronous Sequences
Also available only on .NET only, asynchronous sequences (called asynchronous streams in C# parlance) are sequences that can be iterated asynchronously using the a await for each Loop Statement.
var lItems: async sequence of String := ...;
await for each i in lItems do
  writeLn(el);
writeLn("Done");
Asynchronous Sequences are expressed by the async sequence keyword, and map to the IAsyncSequence<T> platform type. They can easily be created by implementing an Iterator with an async sequence of X result type.
See Also
Set Types
A set is a collection of ordinal values of the same Integer or Enum type. The set type defines the range of potential values; for each instance of the set, any number of individual items (from none to all of them) can be contained in the set. Each value can only be contained once.
A set type is expressed using the set of keywords, followed by a range of values.
type
  DayOfTheWeek = public enum (Mon, Tue, Wed, Thu, Fri, Sat, Sun);

var Weekend: set of DayOfTheWeek := [DayOfTheWeek.Sat, DayOfTheWeek.Subn];

if TodaysDay in Weekend then
  PartyTime();
Sets can be comprised of Enum values (as shown above), or Integer values:
type
  DaysOfTheMonth: set of 1..31;

var FirstFewPrimeNumbers: set of Integer := [2, 3, 5, 7, 11, 13, 17, 19, 23, 29, 31];
Sets are limited to 64 individual possible values, ensuring they can be stored in an UInt64 value. Sets containing 32 or less items are stored in an UInt32.
Operators
The following Operators are supported on sets:
| Operator |
Meaning |
+ |
Union of two sets: [a,b,e] + [c,e,f] = [a,b,c,e,f] |
- |
Difference of two sets: [a,b,c,d] - [a,c] = [b,d] |
* |
Intersection: [a,b,e] * [c,e,f] = [e] |
= |
Exact equal; only true if all elements are the same in both |
≠ |
Not equal |
< |
Subset, true if the right side has all elements the left set has, and more |
> |
Superset, true if the left side has all elements the right set has, and more |
≤ |
Subset, true if equal or if the right side has all elements the left set has |
≥ |
Superset, true if equal or if the left side has all elements the right set has |
in |
Check if an enum or integer is in a set: a in [a, b, c] |
not in |
returns not (a in b). |
Note that Oxygene's language level sets are not to be confused with Swift's higher-level Set<T> struct.
See Also
Tuple Types
A tuple is a well-defined group of values of specific types that can be handled together as a single grouped value, and also be taken apart into their individual values easily. Tuples provide a more lightweight way to group related values without the need of declaring, for example, an explicit Record type.
A tuple type is expressed with the tuple of keywords, followed by a list of two or more types (since a tuple of just one value makes very little sense).
method ExtractValues(s: String): tuple of (String, Integer);
The method declared above would return a tuple consisting of a String and an Integer.
A tuple value can be constructed simply by providing a matching set of values surrounded by parentheses. The following result assignment would work for the above method.
result := ("A String", 5);
Tuple values can be assigned in whole or as their individual parts, both when assigning from a tuple or to one:
var t: tuple of (String, Int);
var s: String := "Hello"
var i: Integer := 5;

t := (s, i); // assigning individual values to a tuple
var u := t; // assigning one tuple to another
(s, i) := ExtractValues("Test"); // assigning a tuple back to individual elements
Extracting a tuple back to individual items can even be combined with a var Statement, to declare new variables for the items:
var t := ExtractValues("Test");
var (a, b) := ExtractValues("Test"); // assigning a tuple back to individual elements
Here, three new variables are declared. For the first call, t is declared as new tuple variable, so far so unusual. For the second call though, two new variables a and b are declared, and the tuple is automatically taken apart, so that a would hold the String value and b the Integer.
Tuples and Discardable
Tuple extraction can also be combined with a [Discardable] Expression(../Expressions/Discardable). If only some of the values of a tuple are of interest, the nil keyword can be provided in place of the items that are not of interest, and the will be discarded.
var (FirstName, nil, Age) := GetFirstNameLastNameAndAge();
Here, assuming that GetFirstNameLastNameAndAge returns a tuple of three values of information about a person, but only two variables are declared, for the FirstName and Age, the middle value of the tuple is simply discarded.
Accessing Individual Tuple Items
Instead of extracting the whole tuple, individual values inside a tuple can also be accessed directly, with the Indexer Expression:
var Info := GetFirstNameLastNameAndAge();
writeLn($"{Info[0]} is {Info[2]" years old".)
While in syntax this access looks like an array access, the access to to each item of the tuple is strongly typed, so Info[0] is treated as a String, and Info[2] as an Integer, for this example. For this reason, a tuple can only be indexed with a constant index.
Named Tuples
Tuples can optionally be defined to provide names for their values. Either all or none of the values need to have a name, a tuple cannot be "partially named". A named tuple can be initialized with a tuple literal with or without names.
var Person: tuple of (Name: String, Age: Integer);
Person := (Name := "Peter", Age := 25);
Person := ("Paul", 37);
In a named tuple, individual items can be accessed both via index as outlined above, and via name:
writeLn($"{Person.Name} is {Person[1]" years old".)
Named and unnamed tuples (and tuples with mismatched names) are assignment compatible, as long as the types of the tuple items matches.
var Person: tuple of (Name: String, Age: Integer);
var Person2: tuple of (String, Integer);
Person := Person2;
Person2 := Person;
See Also
Future Types
A future is a strongly typed variable that represents a value that might or might not have been calculated yet, but is promised to be (made) available when needed.
A future is expressed by the future keyword, followed by a type:
var count: future Integer;
Future values can be used interchangeably with their underlying type, including as parameters to Method Calls or even in arithmetic or logical Expressions. The first time the value of a future is accessed, execution will wait for the future's value to become available.
The futureAssigned() System Function can be used to check if a future itself is assigned or not (i.e. is nil). Note that a future can be assigned, but still have a determined value of nil, of course.
Synchronous and Asynchronous Futures
Future types can be synchronous or asynchronous. By default, futures are synchronous, and will be evaluated the first time they are used.
When futures are used in combination with an Async Expression, they become asynchronous, and will execute to determine their value on a background thread. When an asynchronous future is first accessed, its value might or might not have been determined yet. If it has not, one of two things can happen:
- If execution of the future has already started, access will block the current thread and wait for that execution to finish and the value to become available.
- If execution of the future has not started yet, it will be executed inline within the current thread.
Both of these scenarios happen transparently to the calling code.
Futures and Exceptions
Any exception that occurs while calculating the future will be caught, cached, and re-thrown whenever the future's value is accessed.
Example
Consider the following snippet of pseudo code that calculates the Sum of values in a binary tree:
method ThreeNode.Sum: Integer;
begin
  var l := Left.Sum;
  var r := Right.Sum;
  result := l+r;
end;
This code first calculates the Sum of the left part of the subtree, then that of the right one. Finally, the two values are combined using the + operator. Calculating the value of both l and r might take a relatively long time, yet the value of l is not actually needed until the very last line of the method. This is an ideal candidate for a future:
method ThreeNode.Sum: Integer;
begin
  var l: future Integer := async Left.Sum;
  var r: Integer := Right.Sum;
  result := l+r;
end;
Instead of calculating the value of l in place as before, l is now defined as a future Integer, declaring that the variable does not actually hold the value of Left.Sum, but just the promise that, at some point in the future, it will. This first line of code will execute in virtually no time, and the method can move on to calculating r, which is unchanged and will happen inline, as before.
Note how the value assigned to l has been changed to include the async keyword, making it an async expression that will be spawned in the background. In fact, it's this use of the async keyword that makes the future useful in this case.
The result of an async expression is always a future, so the code would behave the same without explicit type declarations:
method ThreeNode.Sum: Integer;
begin
  var l := async Left.Sum; // l will become a future Integer
  var r := Right.Sum;      // r is still a regular Integer
  result := l+r;
end;
The actual value of the future, l in this example, will not be accessed until it is used in code. In the code above, this happens on the last line of the method, when l is used with the + operator to combine with with r.
When the value is accessed, one of three things can happen:
- If the future is already done executing in the background, its value will be available immediately, just as if it were a plain non-future type that is being accessed.
- If the future is not finished executing at that point, execution will hold and block the current thread until the future is done.
- If any exception occurred while executing the future in the background, that exception will be re-thrown as the future value is accessed.
Note how in the example above, the code does not need to worry about whether the value of the future l has already been determined or not when execution reaches the last line and the value is required. The code can simply treat l as if it were a regular Integer.
Type-Less Futures
Futures can also be type-less, which is also referred to as Void Futures. Such a type-less future does not represent a value, but merely a certain action that will be run in the background.
A type-less future can be called, like a statement, in order to wait for its action to be finished. But because a type-less future has no value, it cannot be used as an expression, only as a statement.
var f := async begin // goes off and does a couple of things in the background
  DoSomething();
  DoSomethingElse();
end;

DoSomeMore(); // meanwhile, do more work on the current thread

f(); // wait for the type-less future to finish, if it hasn't already.

var x := f; // Compiler error: f has no value.
As with typed futures, if any exception occurred in the background while executing the future, that exception will be re-thrown if and when the future is being called into.
Non-Asynchronous Futures
While asynchronous futures are the most common use case, a future type in itself does not imply background execution – it merely implies a value that may or may not exist, and will be made available when needed.
If a future is declared and initialized with an expression that is not an async expression, the value will be calculated the first time it is accessed.
method ThreeNode.Sum: Integer;
begin
  var valueA := SomeCostlyOperation();
  var valueB := SomeOtherCostlyOperation();

  // ...

  if x > 10 then
    result := SomeCostlyOperation + SomeOtherCostlyOperation; // SomeCostlyOperation will only
  else                                                    // be calculated if we hit this line
    result := SomeOtherCostlyOperation;

  result := result*SomeOtherCostlyOperation; // in any case, SomeOtherCostlyOperation is only
end;                                         // calculated once
A Future Executes only Once
Both typed and type-less futures will only execute a single time.
The value of a typed future may be accessed multiple times during the flow of execution; subsequent access will simply yield the value directly.
Similarly, the first time you call into a type-less future, execution will wait if needed; subsequent calls will be guaranteed to just return immediately.
method ThreeNode.WeirdSum: Integer;
begin
  var l := async Left.Sum;
  var r := Right.Sum;
  result := l+r+l; // l will only be calculated once, even though it's being accessed twice
end;
See Also
Range Types
A range is an Integer type that is limited to a range of specific values. It is expressed simply as a numerical start and end value, connected with two dots in between:
var x: 0..100;
Internally, Range types are stored ase on of the regular Integer types supported by Oxygene. The compiler will automatically pick the best matching type to fit the whole range (e.g. an Int64 if the range exceeds the scope of 32-bit, etc).
If the "Range Checks" Compiler Option is on, the compiler will also enforce range checks when assigning values from and to a range type variable. Constant assignments will always be range-checked at compile time;
x := 35; // ok
x := 210; // compiler error
See Also
Pointer Types
A pointer is a low-level reference to the in-memory address to data. Pointers can be un-typed (so-called Void pointers) to generically refer to a location in memory, or they can be typed and (ostensibly) refer to the location of a specific data type at that memory location.
In the latter case, a pointer can be dereferenced and used as if it were the underlying type.
A pointer is expressed by using the ^ character, followed by a type name. For un-typed pointers, the Void type name is used, as in ^Void.
var a: Integer;  // a regular Integer
var b: ^Integer; // pointer *to* an Integer
Creating Pointers
The Address Of (@) Operator can be used to get the address of an item as a pointer:
a := 15;  // set a to 15
b := @a;  // make `b` a pointer to the address of `a`
Dereferencing Pointers
A pointer can be dereferenced in order to get back to the value it points to, by appending the Pointer Dereference (^) Post-Fix Operator to it. The result is an expression that can be used interchangeably with the underlying type of the pointer – for example, a deference ^Integer could be used in expressions like any other Integer.
var x := a + b^
b^ := 12; // also changes `a`!
See Also
Nullable & Non-Nullable Types
Oxygene allows to explicitly specify the nullability of values such as variables, fields, properties or method parameters. For brevity, we'll use the term "variables" throughout this topic to refer to all four kinds of references.
Nullable variables may either contain a valid value or they may not — in the latter case they are considered to be nil. Non-nullable variables must always contain a value and cannot be nil.
In Oxygene (as in C# and Java), the default nullability of a variable is determined by its type. For value types (records, enums and simple numeric types), variables are assumed to be non-nullable by default, and always have a value (which might be 0, which is of course distinct from nil). By contrast, reference types (i.e. classes or interfaces) are considered nullable by default, and may be nil.
Nullability of a type can be expressed by explicitly prefixing the type name with a modifier. A variable can be made explicitly nullable with the nullable keyword, or explicitly non-nullable with the not nullable keyword combination.
For example:
var i1: Int32;                               // non-nullable by default
var b1: Button;                              // nullable by default

var i2: nullable Int32;                      // nullable
var b2: not nullable Button := new Button(); // not nullable, thus needs initialization
It is perfectly acceptable (and in many cases recommended) to apply what might appear to be redundant explicit nullability information, as it can help both the compiler and the user of APIs to understand the intention of the code.
For example, even though Strings are reference types, and nullable by default, marking a Method Parameter or a Method Result as nullable String can express the intention that the method will accept or potentially return a nil value.
Especially when working on platforms where much of the core libraries do currently not express this kind of information, and APIs refer to plain reference types without indication whether nil values are acceptable or to be expected, this extra information can help make your own APIs more robust and self-describing.
You can read more about this topic in more depth in the Nullability topic in the Language Concepts section.
See Also
Class References
A class reference is a special meta type that can be used to refer to classes (not instances of them) within a certain subtree of the class hierarchy. This allows to write code that can work polymorphically with classes – for example dynamically instantiate different subclasses or call virtual static methods.
A class reference can be expressed by using the class of keywords, followed by the name of a Class.
var lControlClass: class of Control;
lControlClass := Button;
A class reference variable can hold a reference to the base type it was defined for (in this example, Control, as well as any subclass of it (e.g. Button)). Assignment can be made by simply specifying the type name, or by using the result of the classOf() System Function.
A valid class reference (i.e. one that is not nil, but references an actual type) can be used in many of the same scenarios that the type name itself can be used. Most interestingly, it can be used in new Expressions, to instantiate instances of the referenced type dynamically.
This is very powerful, as it allows for code that can instantiate new types, without knowing the exact subclass that is being instantiated, at compile time.
A class reference can also be used to call any Static Members of the type.
Of course, since a class reference is strongly-typed to reference a specific base type, it can only provide access to constructors and static members defined on the base type. For example, the above reference would allow calls to constructors and static members declared on Control, but not any new members introduced by Button.
Virtual Constructors and Status Members
When working with class references, Oxygene provides the ability to have Constructors, as well as any static Methods, Properties or Events be Polymorphic by being marked virtual (or abstract) in a base class, and overridden in descendant classes.
Polymorphism will work just as it does normally for class instances: at runtime, calls will be directed to the implementation most appropriate for the current class reference. For example:
type
  Control = public abstract class
  public
    property DescriptionForToolBox: String; static; abstract;
    constructor(aWindow: Window); virtual;
  end;

  Button = public class(Control)
    property DescriptionForToolBox: String read 'A Button Control'; static; abstract;
    constructor(aWindow: Window); override;
  end;

var ControlType: class of Control := Button;

writeLn(ControlType.DescriptionForToolBox);  // prints `A Button Control`
var c := new ControlType(SomeWindow);        // creates a new button
Implementation Details
Class references in Oxygene are implemented via a meta class type.
Since emitting a meta class for every type would be a big overhead, the compiler automatically decides whether a meta class is required for a given class.
A meta class will be generated if
- the class (or one of its base classes) is used in a class reference type anywhere in the project
- the class (or one of its base classes) declares a virtual constructor or a virtual static member.
For this reason, class references can not be used for classes from external references (unless the external reference already provided the meta class). In other words, class of cannot be used with, say, classes provided by the platform.
For custom solutions spread across multiple projects, if project A references project B, then project B can only use class of with types from project A if a class reference for them was declared or used in project A (or if the type has a virtual constructor or a virtual static member).
An easy way to do this is to simply declare a Type Alias in the base project, for the root of the type hierarchy that should be enabled for class references, eg:
type
  Control = public abstract class
  end;

  ControlClass = public class of Control;
The type alias ensures that Control, and all its subclasses, will be ready for use with class references (even if the rest of the project that declares Control does not use class references.
Classes references implement a couple of helper methods
Instance: class of ClassName — Holds the instance of this meta class.ActualType: &Type — returns the platform type for the class this meta class refers to (Type on .NET, Java and Island, and Class on Cocoa).
Additionally, any class that a meta class was generated for will expose a GetMetaClass instance method that returns the meta class for a live instance.
See Also
Anonymous Types
Anonymous Types are custom types (Classes Records or Interfaces) that are instantiated on the fly, without being explicitly declared or given a name (hence, anonymous). This is done by combining the new keyword with class, record or interface instead of a concrete type name:
Anonymous Classes or Records
An anonymous classes or records declaration is followed by parentheses containing one1 or more Property Initializers, which for an anonymous class function both to declare and initialize the property.
var x := new class(Name := "Peter", Age := 35);
The above code declares a new variable x which holds an instance of an unnamed class with two properties, Name, of type String and Age of type Integer.
The class can then be used in normal fashion, accessing (or changing) the value of its properties, or doing further processing on it.
Variables initialized to an anonymous type instance are assignment compatible, if their parameter names and types match.
var x := new class(Name := "Peter", Age := 35);
var y := new class(Name := "Paul", Age := 28);
x := y;
Anonymous types are most frequently used in combination with the select clause of a from Expression, to limit the sequence to a subset of fields or combine data within each item of a sequence in new ways.
var lNamesAndAges := from p in lPersons
                       select new class(Name := p.Name, Age := DateTime.Today-p.DateOfBirth);
Anonymous Interface Classes
Anonymous interfaces classes provide the implementation for one or more methods of an Interface. This usage pattern is very common on the Android platform, where rather than .NET-style Events, controls usually are assigned a delegate object that implements a given interface in order to receive callbacks when events happen – such as to react to the click of a button.
Anonymous interfaces classes allow to define such a class inline and implement one or more handler methods without having to implement the interface on the containing class or providing a class who's connection to the surrounding code would need to be managed manually.
You can think of anonymous interface classes as an extension or a more sophisticated version of Anonymous Methods. In fact, an anonymous method is considered the same as an anonymous interface class with just one method.
And just like anonymous methods, code inside an anonymous interface class has full access to the surrounding scope, including full access to the containing class.
Anonymous interfaces are defined using the new interface keyword combo, and mjust include the name of the interface being implemented:
fButton.delegate := new interface IClickEvent(OnClick := method begin
                                               // handle the click here
                                             end);
See Also
Generic Types
A Class, Record, or Interface can be generic, if it operates on one or more types that are not specified concretely when the type is defined.
Why Generics?
Generic types are best understood by comparing them to regular, non-generic types and their limitations. For example, one could implement a "StringList" as a regular class that can contain a list of Strings. One could make that list as fancy as one likes, but it would always be limited to Strings and only Strings. To have a list of, say, Integers, the entire list logic would need to be implemented a second time.
Alternatively, one could implement an "ObjectList" that could hold any Object. Since Strings and Integers can both be objects, both could be stored in this list. But now we're sacrificing type safety. Any given ObjectList instance might contain Strings, Integers, or indeed any other kind of object. At each access, one would need to cast, and type check.
By contrast, a generic "List<T>" class can be written that holds an as-of-yet undefined type of object. The entire class can (and, indeed, must) be implemented without ever knowing what type of objects will be in the list, only referring to them as T. But: When using the generic class for a concrete purpose, it can be instantiated with a concrete type replacing T: as a List<String> or a List<Integer> for example.
Type Parameters
Any Class, Record or Interface type declaration can be made generic by applying one or more type parameters to its name, enclosed in angle brackets:
type
  List<T> = public Class
  end;

  List<Key,Value> = public class
  end;
The type parameters can be arbitrary identifiers. It is common to use short single-letter uppercase names such as T, U, V, to make the type parameters stand out in the remainder of the code, but that is mere convention. Any valid identifier is allowed.
Once declared as part of the generic type's name, these type parameters become valid types that can be used throughout the declaration and implementation, as if they were regular, well-known type names. For example they can be used as type for Method Parameters or Results, or as variables inside a method body.
type
  List<T> = public class
  public
    method Add(aNewItem: T);
    property Items[aIndex: Integer]: T;
  end;
Of course, since little is know about what T is, there are limitations to what the generic class can do with instances of T in code. While some lists will contain Strings, others might contain Integers – so it would not be safe to, for example, call a string-specific method on T.
This is where constraints come in.
Constraints
If a generic type needs more specific control over what subset of types are allowed for its generic parameters, it can declare one or more constraints, using the where keyword.
Essentially, a constraint limits the generic class from being instantiated with a concrete type that does not fulfill the conditions.
There are five types of supported constraints:
is TypeName — requires the concrete type to implement the specified Interface or descend from the specified Class.is class — requires the concrete type to be a Class (i.e. disallows records or value types).is record — requires the concrete type to be a Record or Value Type (i.e. disallows classes).is unmanaged — (.NET only) requires the concrete type to be a simple unmananaged1 type.has constructor — requires the concrete type to have a parameter-less constructor.
Of course individual constraints can be combined. For example constraining the above list in two ways could give it additional capabilities:
type
  List<T> = public class
    where T is IComparable, T has constructor;
  public

    method New: T;
    begin
      result := new T; // made possible because of `where T has constructor`
      Add(result);
    end;

    method Sort();
    begin
      ... complex sorting code
      if self[a].CompareTo(self[b]) then // made possible by `where T is IComparable`
        Switch(a,b);
      ... more complex sorting code
    end;

  end;
The where T has constructor constraint allows the new list code to create new instances of whatever type T is, at runtime. And the where T is IComparable constraint allows it to call members of that interface on T (without cast, because T is now assured to implement IComparable).
Of course on the downside, the List<T> class is now more restricted and can no longer be used with types that do not adhere to these constraints.
Adding constraints is a fine balance between giving a generic class more flexibility, on the one hand, and limiting its scope on the other. One possible solution for this is to declare additional constraints on an Extension, instead, as shown in the next section.
A single where clause may list multiple constrains, separated by comma. Alternatively. multiple where clauses, each terminated with a semicolon, are also permissible.
type
  List<T> = public class
    where T is IComparable;
    where T has constructor;
  ...
Constraints on Extensions
When declaring an Extension for a generic class, it is allowed to provide additional constraints that will applicable only on the extension members.
This keeps the original class free from being constrained, but limits the extension members to be available to those instances of the class that meet the constraints. For example, one could make the List<T> from above more useful for strings:
  List<T> = public class
    where T is String;

  public

    method JoinedString(aSeparator: String): String;
    begin
      var sb := new StringBuilder();
      for each s in self index i do begin
        if i > 0 then
          sb.Append(aSeparator);
        sb.Append(s);                  // we know s is a String, now
      end;
    end;

  end;
var x := List<String>;
var xy:= List<Button>;

x.JoinedString();
y.JoinedString(); // compiler error, no such member.
In this example, the new JoinedString method would only be available on List<String>, as a list with any other type would not satisfy the constraint.
Co- and Contra-Variance
A generic Interface can be marked as either co- or contra-variant on a type parameter, by prefixing it with the out or in keyword, respectively:
  IReadOnlyList<out T> = public interface
    GetItemAt(aIndex: Integer): T;
  end;

  IWriteOnlyList<in T> = public interface
    SetItemAt(aIndex: Integer; aItem: T);
  end;
A co-variant generic parameter (marked with out) makes a concrete type compatible with base types of the type parameter. For example, a IReadOnlyList<Button> can be assigned to a IReadOnlyList<Object>.
This makes sense, because any Button is also an Object. Since the IReadOnlyList only uses the type T outgoing, as method results (or out Parameters), any call to a list of Buttons can be assure to return an Object.
The reverse would not be case, if the original List class were co-variant, on could add arbitrary Objects to a list of Buttons – and that would be bad.
By contrast, a contra-variant generic parameter (marked with in) makes a concrete type compatible with descendant types of the type parameter. For example, a IWriteOnlyList<Object> can be assigned to a IWriteOnlyList<Button>.
Once again, this makes sense, because IWriteOnlyList only uses the type T incoming, as method parameter. Because a IWriteOnlyList<Object> can hold any object, it is perfectly safe to be treated as a IWriteOnlyList<Button> – the only thing that can ever happen through this interface is that buttons get added to the list – and buttons are objects.
And again, the reverse would not be case. If the original List class were contra-variant, one could retrieve arbitrary Objects from a List if Objects, from code that expects to get buttons.
Co- and Contra-Variance is allowed only on Interface types. Generic Classes or Records cannot be marked as variant.
Unconstrained Generics
By default, Generics defined on Oxygene are always constrained to be compatible with the default Object type (or any type that can be boxed into an Object).
On platforms that support more than one Object Model, the unconstrained keyword can be used to explicitly mark a generic as supporting all types of object models. Note that this severely restricts what can be done with the elements without requiring explicit casts or use of the modelOf() system function.
type
  List<T> = public class
    where T is unconstrained;

    ...
  end;
See Also
Partial Types
Partial types allow the declaration of Classes and Records to be split into multiple parts and, potentially, multiple files within the same project.
A class or recored can be declared as partial simply by applying the partial Type Modifider to it's declaration. Once done, multiple declarations for the same type may exist (as long as they are all marked as partial), and will be combined into a single type when compiled.
For Classes, only a single base class can of course be specified (Records, of course, have no ancestor). It is allowed either for all partial declarations to declare the same base class, or for only one part to declare it. If different parts declare a different ancestor, compilation will fail.
All parts also must declare the same Visibility and, of course, be within the same Namespace (otherwise, they'd be unique, separate types).
It is entirely permissable for the partial modifier to be present on a class that is declared with only one partial – for example in preparation for additional parts ot be added later, or because the other parts are not used in the current project or configuration.
type
  MyClass = public partial class(MyBaseClass)
  public
    method Test;
  end;
type
  MyClass = public partial class
  public
    method Test2;
  end;
Partial Methods
Partial types can also declare partial Methods, which can be used to advertise the availability of a method in one part, and optionally provide an implementation on the other part.
For this, one part must declare the partial method with both the partial and the empty Member Modifiers and not provide an implementation. Optionally, another part may re-declare the method with just the partial Member Modifier, and provide an implementation.
A method declared as such can be called from other pieces of code, like any other method. If only the empty part is provided, calls to the method become a no-op, and have no effect. If an implementation is provided in another part, calls to the method will, of course, call that implementation.
type
  MyClass = public partial class(MyBaseClass)
  public
    method Test;
    begin
      Test2;
    end;
    method TestHelper; partial; empty;
  end;
type
  MyClass = public partial class
  public
    method TestHelper; partial;
    begin
      DoSomething;
    end;
  end;
Partial methods are useful when one part of the class needs to refer to a method that might or might not be implemented in another part. For example, the implementation for a partial method might be in a part that is conditionally compiled, say for Debug vs. Release, or for a particular platform.
Or one part might be machine-generated (such as the code-behind file for a WinForms or WPF form, and have calls that the developer might or might not choose to provide in the user-edited part of the class.
Modifiers
A partial type is a Class or Record that is marked with the p[artial Type Modifier.
The Visibility modifier needs to match between all parts of the type, or has to be omitted from the other parts. In other words, of one part declared a class as public.
See Also
Mapped Types
Mapped Types are a unique feature of the Elements compiler that let you create compatibility wrappers for types without ending up with classes that contain the real type. The wrappers will be eliminated by the compiler and rewritten to use the type the mapping maps to.
Note: When working with Oxygene, you will most commonly use mapped types (for example as provided by the Elements RTL cross-platform library). Using mapped types is seamless, and they behave just like regular non-mapped types.
You will not often need to implement mapped types yourself, but for when you do, Oxygene – like RemObjects C#, Swift and Java – provides a syntax for implementing mapped types when needed, with the mapped keyword.
Please refer to the Mapped Types topic in the Language Concepts section for more details.
A mapped type can be a Class or a Record, and is declared like any other class or record, but with the mapped to keywords following the declaration, alongside of the type that is being mapped – also referred to as the "original type".
type
  MyString = public class mapped to String
  end;
Mapped Classes can optionally provide an ancestor, as long as that ancestor is either also an ancestor of the original class, or is in itself a mapped class, mapped to an ancestor of or directly to the original class. Both mapped classes and mapped records can provide an optional list of Interfaces that they adhere to.
Members
Mapped types can define members such as Constants and Properties, as well as actions that work with that data (Methods), just like regular classes and records. However, because at runtime mapped classes are, well, mapped to a different, existing class, mapped types cannot add Fields, or properties with implicit storage (which would require an implicit field to be added).
Inside the code of the members of a mapped class (method bodies, property getters and setters), a special mapped Expression can be used to refer to members of the original type, or the "self" of the original type.
type
  MyString = public class mapped to String
    property TwiceTheLength: Integer read mapped.Length*2;
  end;
Without dereferencing via mapped, code inside a mapped class sees only the members defined on the mapped class. Members of the original class are available only through mapped. mapped can also be used standalone, to refer to the current instance as its original type.
You can think of mapped as equivalent to self – both refer to the same physical instance of the type, but they differ in as what type the class or record is seen.
var x := self;    // `x` is a `MyString`
var y := mapped;  // `y` is a String
if x = y then ... // but they are the same
Shortcut Mappings
For methods, oxygene supports a special syntax for direct one-to-one mappings of members, using the mapped to Member Modifier:
type
  MyString = public class mapped to String
    method MakeUpper: Integer; mapped to ToUpper;
  end;
Here, the MakeUpper method is mapped directly to the ToUpper method of the underlying original class.
Note that while in this example the name of mapped and original member differ, it is also acceptable (and common) to map members with the same name, in order to expose the original member on the mapped type, "as as".
type
  MyString = public class mapped to String
    method ToUpper: Integer; mapped to ToUpper;
  end;
Constructors
Mapped types can provide Constructors that can be used to instantiate copies of the mapped type. Because instantiating a mapped type, ultimately, must end up with instantiating a copy of the original type, constructors in mapped types have some additional capabilities.
In addition to deferring execution to other constructors using regular constructor Expressions, constructors in mapped types are also allowed to instantiate a copy via any other means (say by calling class factory methods), and returning an instance by assigning to result or calling exit.
constructor MyString(aChar: Char);
begin
  result := aChar as String;
end;
It is also possible to use the mapped Expression to defer to constructors of the original type. This works in symmetry with how the inherited constructor Syntax works in "real" classes:
constructor MyObject;
begin
  mapped constructor("Hello");
end;
Type Visibility
Just as with regular Classes and Records, the visibility of a mapped type can be controlled by applying a Visibility Modifier on the declaration. A mapped type cannot be more visible than the underlying original type. The default visibility is assembly.
Other Modifiers
A mapped type is a Class or Record that is marked with the mapped to Type Modifier.
See Also
Type Extensions
Type extensions can be used to expand an existing type with new methods or properties. They are similar to Partial Types in concept, with the distinction that they can be applied to all available types, even those originally declared in external libraries or core platform frameworks.
Extensions are most commonly used to add custom helper methods, often specific to a given project or problem set, to a more general type provided by the framework, or to correct perceived omissions from a basic type's API.
For example, a project might choose to extend the String type with convenience methods for common string operations that the project needs, but that are not provided by the actual implementation in the platform.
Extension declarations look like regular Class or Record declarations, except that the class or record keyword is prefixed with the extension Type Modifier. Extensions need to be given a unique name, and state the type they extend in parenthesis, in place of the ancestor. It is common (but not mandatory) to use the original type's name, appended with the unique suffix.
type
  String_Helpers = public extension class(String)
    method NumberOfOcurrencesOfCharacter(aCharacter: Chat): Integer;
  end;
Inside the implementation, the extended type instance can be referred to via self, and all its members can be accessed without prefix, as if the extension method was part of the original type. Note that extensions do not have access to private, protected or assembly and/or protected members. Essentially they underlie the same access controls as any code that is not part of the original type itself.
method NSString_TrimHelpers.stringByTrimmingTrailingCharactersInSet(characterSet NSCharacterSet): NSString;
begin
  var charBuffer: unichar[length];
  self.getCharacters(charBuffer);
  var i := length;
  for i: Int32 := length downto 1 do begin
    if not characterSet.characterIsMember(charBuffer[i-1]) then
      break;
  end;
  result := self.substringWithRange(NSMakeRange(0, i));
end;
Extension types can declare both instances and static members. They can add methods and properties with getter/setter statements, but they cannot add new data storage (such as fields, events, or properties with an implied field), because the underlying structure of the type being extended is fixed and cannot be changed.
Extensible Types
Extensions can be defined for any named type, be it a Class, Record, Interface, Enum, Block or even an Alias to an otherwise unnamed type.
No matter which kind of type is being extended, the extension will always use the class or record keyword.
See Also
Aliases
A type alias can give a new name to an existing type, whether that type is declared in the same project, or elsewhere.
Type aliases can serve many purposes. They can provide a short-hand for an otherwise more complex to write type (such as Array or a Tuple with a specific configuration) or they can distinguish between different use cases of the same base type (such as declaring different, incompatible aliases to Double refer to different units of measure.
Type aliases can be declared by simply following the equal sign with the name of another type, optionally preceded by a Visibility Level.
type
  Number = public Integer; // "Number" now has the same meaning as "Integer"
Incompatible Type Aliases
A type alias can be marked to be deliberately incompatible with the original type (and other aliases to the same type) by applying the type Type Modifier:
type
  Celsius = type Double;
  Farenheit = type Double;

var BoilingTemp: Celsius = 100.0;

var OvenTemperature: Fahrenheit := BoilingTemp; // this assignment will fail with an error.
You could even provide Custom Operators for the new incompatible types (as a global, or via an Extension that could handle conversions (where applicable), so that you could then write
operator Explicit(C: Celsius): Fahrenheit;
begin
  result := (C * 9.0/5.0) + 32.0
end;

...

var OvenTemperature: Fahrenheit := Fahrenheit(BoilingTemp);
Combined Interfaces
A type alias can combine two or more Interfaces into a new Interface type, using the and keyword:
type
  ICodable = IEncodable and IDecodable;
To be compatible with the new combined interface type, a type must implement all the interfaces, and declaring a type to implement the combined interface automatically marks it as implement (and requires it to implement) all the interfaces.
See Also
Globals
Although discouraged in a pure Object-Oriented environment, Oxygene lets you define global members within a namespace that will be accessible from any place where the namespace is in score, without a class prefix.
This is mostly useful to define and interact with global functions on the Cocoa and Island platform where code must often interact with non-object-oriented system APIs, but also available on .NET and Java.
Internally, Oxygene will create an implied static class called __Globals that contains these members.
Forward Declarations
Though not necessary in Oxygene, the compiler also allows forward declaration using the forward keyword. A forward declaration provides the signature of a global method without providing the implementation; the implementation of the method can then be provided further down in the same file.
Forward declarations were necessary in legacy pascal compilers due to their single-pass nature, in order to allow two methods to call each other without depending on method order within the file. With Oxygene, this is not necessary.
A forward declaration looks like a regular method declaration, with the forward Member Modifier.
Type Modifiers
Type Declarations can sport a range of modifiers that affect how the member works or is accessed.
Type Modifiers are provided after the = that separates the type's name from the declaration itself, and before the remainder of the declaration.
type
  MyClass = public sealed Class
  end;

  Distance = public type Double;
The order of modifiers has no relevance, but note that combinations of modifiers that would be contradictory or non-sensible are not permitted.
Visibility Modifiers
Each type can be marked with an individual Visibility Level that controls where the type can be accessed. If no visibility level is specified, the default is assembly, marking the type as available everywhere within the project, but not externally.
unit — only accessible from within the same fileassembly — only accessible from within this projectpublic — accessible from everywhere
Please refer to the Member Visibility Level topic for a detailed description of visibility levels.
Example:
type
  MyClass = public Class
  end;
Other Modifiers
The following additional modifiers are supported for various types:
abstract — (Classes only) marks the class as being abstract. Abstract classes are considered "incomplete", and cannot be instantiated at runtime. Any class that contains abstract Members must be marked as such. Descendant classes must implement all abstract members in order to become able to be instantiated.extension — (Classes and Records only) marks the type to be an Extension Type.inline — (Arrays only) marks the array to be inlined within the stack space of a Record. See Inline Arrays for details.parallel — (Sequences only) marks the sequence as parallel. See Parallel Sequences for details.partial — (Classes and Records only) marks the type to be a Partial Type.queryable — (Sequences only) marks the sequence as queryable. See Queryable Sequences.readonly — (Classes and Records only) makes all fields in the class or record readonly.sealed — (Classes only) marks the class as sealed, meaning that it will not be allowed to declare further descendants.soft — (Interfaces only) marks an interface to be a Soft Interfaces for use with Duck Typing.static — (Classes and Records only) marks the type as static. A static type cannot be instantiated at runtime. All Members declared within the type will automatically become static as well (whether explicitly marked as such with a Member Modifier or not).type — (Type Aliases only) marks the new type alias as a distinct type and "incompatible" with the original type. Values of the original type cannot be assigned to variables of the new type, or vice versa, without explicit cast.
Type Suffixes
Not strictly type modifiers:
- Mapped Classes or Records use the
mapped to type suffix to indicate mapping to a different, existing type.
- Nested Types use the
nested in type suffix to indicate that the type is considered a member of another type.
See Also
Type Visibility Levels
Any Type defined in Oxygene can have one of three visibility levels that controls where the type is accessible from.
Unless marked differently with one of the keywords below, all types have assembly visibility – that is, they are accessible from within the same project but not exported from library projects for external access.
unit — only accessible from within the same fileassembly — only accessible from within this projectpublic — accessible from everywhere
Among others, the assembly and public visibility levels are also available for type members themselves.
Storage Modifiers (Cocoa)
On the Cocoa platform, which uses ARC rather than Garbage Collection for memory management, the three storage modifier keywords strong, weak and unretained are available to control how object references are stored in local variables, fields or properties.
By default, all variables and fields are strong – that means when an object is
stored in the variable, its retain count is increased, and when a variable's value gets overwritten, the retain count of the previously stored object gets reduced by one.
Read more about this topic in the Storage Modifiers topic in the Cocoa platform section.
var x: weak Button;
See Also
Life-Time Strategies (Island)
On the Island platform, type references can be prefixed with a Life-Time Strategy Modifier to determine how their lifetime is managed.
By default, each sub-platform defines its preferred life-time strategy, and having to override is rarely needed.
Read more about this topic in the Life-Time Strategies topic in the Island platform section.
var x: lifetimestrategy(Manual) String;
See Also
Type Members
In Oxygene, Class or Record (and, to a more limited fashion, Interfaces) can contain various types of members that define the type, its data and its behavior.
Within the type declaration, which starts with the class, record or interface keyword and ends with end, individual members can be declared, separated by semicolons. Optionally, different Visibility Sections can be used to define which parts of the project have access to each member.
Bodies of members that contain code (such as Methods or Properties) can be provided in-line, directly following their declaration, or they can – in more traditional Pascal style – be provided below the type declaration in a separate implementation section. Please refer to the Code File Structure topic for more details on this.
type
  MyClass = public class
  private
    var fName: String;
  public
    property Name: String read fName;

    method DoSomething;
    begin
      DoSomeWork;
    end;
  end;
A type can define the following kinds of members:
You might also want to read up on:
Instance Members
By default, members of a class are specific to the instance. This means if they provide storage (such as Fields, Properties or Events), that storage is separate for each instance of the class, and if they access storage (such as a Method that reads or writes the value of a field or property) they access the storage of that instance.
Code for instance members has access to the self Expression which gives access to the current object instance that code is running on. All access to the class's storage goes through this self reference (be it explicit, or implied).
type
  MyClass = public class
  private
    var fName: String; // each instance of the class has its own copy of fName.

  public
    method DoSomething;
    begin
      fName := "Hello";
    end;
  end;
Static Members
Members can optionally be marked as static, using either the static Member Modifier or by being prefixed with the class keyword.
For members that provide storage (Fields, Properties or Events), only one copy isn provided for the class itself. Any code that accesses or changes the data, be it in a static or an instance method, will see and change the same value.
Code for static members runs without the context of a specific instance. As such it has access to statically stored data, but cannot access any instance members. Static members can still use the self Expression, but it will refer to the class, not to an instance.
type
  MyClass = public class
  private
    var fName: String;          // each instance of the class has its own copy of fName.
    var fName2: String; static; // there's only one copy of fName2

  public

    method DoSomething2; static;
    begin
      fName2 := "Hello";
      // we can't access fName here!
    end;
  end;
See Also
Fields
A field is a simple variable in a Class or Record that stores (part of) the type's state.
Fields can be defined at any place within the declaration of a class or record. To avoid ambiguity with other modifiers, the field or, for backwards compatibility, var keywords can be used to start an explicit field section, but it is not required.
type
  MyClass = public class
  private
    fValue: String;
    fNumber1, fNumber2, fNumber3: Integer;
    field fNumber4: Integer;
    var fNumber5: Integer;
    method Foo;
  end;
Each field can be declared as a name/type pair separated by a colon; multiple fields of the same type can also be declared as a comma-separated list, without having to repeat the type name every time.
Initializers
Fields can be assigned an initial value right in their declaration by having the field declaration closed off with the := operator followed by an expression.
field fName: String := 'Paul';
Initialization is only supported for individually declared fields, not when multiple fields are declared with a comma-separated list. If the type of the variable can be inferred from the initialization expression, the explicit type can be omitted:
field fName := 'Paul'; // String is inferred
Please also refer to the Constructors: Initializers topic for more detail on when and how fields get initialized.
Read-Only Fields
Fields can be marked with the readonly Member Modifier to become read-only.
Read-only fields can still be written to from an Initializer or from the class's Constructors – but they cannot be modified once construction of an instance has completed.
Storage Modifiers (Cocoa)
On the Cocoa platform, the type of a field declaration can be amended with one of the weak, unretained or strong Storage Modifier keywords, with strong being the implied default.
field fValue: weak String;
To specify a Storage Modifier, the type cannot be inferred, but must be explicitly specified. Inferred types will always be considered strong.
Visibility
The visibility of fields is governed by the Visibility Section of the containing type the fields is declared in, or the Visibility Modifiers applied to the method.
It is strongly encouraged to keep all fields private, and use properties to expose the class state externally.
Static Fields
Like most type members, fields are by default defined on the instance – that means fields can be called on and will execute in the context of an instance of the class. All fields can be marked as static by prefixing the field's declaration with the class keyword, or by applying the static Member Modifier:
class field fName: String;    // static field on the class itself
field fName2: String; static; // also a static field on the class itself
Other Modifiers
A number of other Member Modifiers can be applied to fields.
deprecated Triggers a deprecation warning when used.external For Island/Toffee class fields; this field is defined in an external module.implements ISomeInterface (See Explicit Interface Implementations).readonly Readonly fields can only be set from the constructors, after that they are readonly.unsafe Allows the use of unsafe types in the field signature.volatile Volatile ensures access to this field is never optimized.
See Also
Methods
Methods are the building block of any program, as they contain what we commonly think of as "code": the actual logic that makes up the functionality of a class.
Simply put, a method is a block of code that can be called from elsewhere within the project to perform its function.
Methods are Object Oriented Programming's logical replacement for the plain "procedures" and "functions" defined by basic Pascal. Because methods are such an important part of OOP languages, and because what we call something defines how we think of it, Oxygene introduced the new method keyword back in 2004 to define methods.
Method Declaration Syntax
In its simplest form, a method declaration consists of the method keyword, followed by a method name and an optional list of parameters that can be passed to the method, in parenthesis. Methods can also have an optional result type, separated from the rest of the method with a colon.
The method declaration can optionally be followed by a number of Modifiers, separated by semicolons. The most important modifiers will be covered in more detail, below.
method MyMethodName(aParameter: String; aNotherParameter: Integer): Boolean; virtual;
Method Implementation Syntax
Unless it is empty, abstract or external (more on those below), each method declaration needs to provide an implementation. The implantation can be provided right behind the declaration, using what Oxygene refers to as Unified Class Syntax, or it can be provided below the type declaration in the implementation section of the file.
If the implementation is provided separarely, the method declaration (minus any modifiers) is repeated, but expanded to include the type name in front of the method name:
method MyClass.MyMethodName(aParameter: String; aNotherParameter: Integer): Boolean;
begin
  // code goes here
end;
The method body must consist of at least a begin/end block that can contain the zero or more Statements that make up the method body. There can also optionally be a require block at the beginning and an ensure block at the end, both containing pre- and post-conditions to be checked before the method starts and after it ends. Pre- and post-conditions are covered in more detail, below.
For compatibility with legacy Pascal compilers such as Delphi, methods can also have an optional var section at the start, where variables for use throughout the method can be declared. Use of a var section is discouraged in favor of using var Statements in the main body of the method body, as needed.
method MyClass.DoSomeWork(aData: String): String;
var
  lCount: Integer;          // not recommended
begin
  lCount := aData.Length;
  //...
end;
Parameters
A method can take zero or more parameters, listed after the method name, and enclosed in parenthesis. Individual parameters are separated by semicolons, and each parameter must at the very least consist of a name and a type, separated by a colon.
Unlike other languages, including C# and Swift, an empty set of parenthesis is optional (and discouraged) for declaring methods that take no parameters.
method DoSomething(aParameter: String);
method DoSomethingElse;
Optionally, a default value can be provided via the := operator. If a default is provided, callers can omit the parameter in question, and the default will be used instead:
method DoSomething(aParameter: String := 'Use this by default.');
'out' and 'var' Parameters
Parameters can also have a modifier of either var or out. By default, parameters are passed into the method, but not back out. Inside the method, the parameter becomes a local variable, and any changes made to it inside the method are not propagated to the caller.
Parameters declared with var will be passed into the method, and any changes made by the method will be passed back out when the method exits. Parameters declared with out will start off as having their default() value when the method starts, and any changes made to them will then be passed out when the method is finished.
method GetValues(var a: Integer; out b: Integer);
begin
  a := a + 15;
  b := 10;
end;
Note that when passing heap-based Reference Types such as Classes, the var and out modifiers apply to the reference, and not the data stored within the type. Changes made to a class passed in as regular "in-wards" parameter will still affect the caller, as it is holding as reference to the same class. Changing the parameter to a different instance will not propagate outwards. When a reference type is passed via var, changes to the reference itself will propagate back, and the caller will have a reference to the new object.
method GetValues(a: SomeClass; var b: SomeClass);
begin
  a.SomeValue := a.SomeValue+15; // affects the instance that the caller passed in
  a := new SomeClass();          // this change will not affewct ehe caller
  b := new SomeClass();          // this change will affect ehe caller
end;

GetValues(x, y);
// x is changed, but still the same class. y is now a new class
'const var' Parameters
Parameters can optionally be marked as const var. If marked as such, they will be passed in the same fashion as var parameters, discussed above, but cannot be modified within the method.
This option is mainly used for performance reasons, allowing for example a large struct to be passed without causing a second copy to be created on the stack, while still preventing changes to the original value from the caller's side.
'params' Method Parameters
The optional params keyword can be used on the last parameter to capture all extra parameters in a single array. To use params, this parameter has to be a simple Dynamic Array.
method Write(a: String; params args: array of String);
begin
end;

...
Write('hello', 'this', 'world'); // a is 'hello', args is ['this', 'world']
Write('hello', 'world'); // a is 'hello', args is ['world']
Write('hello'); // a is 'hello', args is [] (empty array)
Method Result
If the method is defined to return a value, an implicit result Variable is available in scope, within the method body. This variable is of the same type as the method's return type, and initialized to the default() value of the type (typically 0 or nil).
The result variable can be both written and read, allowing you to use it to store an incremental status and be updated during the course of the method's execution. This is a significant improvement over other languages, including C, C# or Swift, where a return value can only be set in the same step as the method is exited.
Of course the exit Statement can still exit the method and return a value in one go at any time. If exit is called with a value, that value is used as result. If it is called without value, any previously set value in result will be used, just as if the method terminated by reaching its end.
Multi-Part Method Names
In order to fit in well with the API conventions on the Cocoa platform, Oxygene has support for multi-part method names.
Multi-part method names are essentially the ability for a method's name to be split into separate parts, each followed by a distinct parameter. This is "required" on the Cocoa platform because all the platform's APIs follow this convention, and we wanted Oxygene to be able to both consume and implement methods alongside those conventions without resorting to awkward attributes or other adornments, and to feel at home on the Cocoa platform.
A multi-part method has parameter parts for each part, both when being declared:
method RunCommand(aString: String) Arguments(params aArguments: array of String): Boolean;
...and when being called:
myClass.RunCommand('ebuild') Arguments('MyProject.sln', '--configuration:Debug');
While the feature was created for Cocoa, multi-part method names are supported on all platforms, and considered a regular feature of the Oxygene language (and also compatible with C#, Swift and Java). We encourage to use and embrace them, as they are a great tool to make code more readable and understandable.
Method Body
The method body is what makes up the bulk of a method, and provides its implementation. It starts with the begin keyword and ends with a matching end or – id a post-condition is provided – ensure keyword.
The method body is made up of xero or more Statements, separated by semicolons (and, traditionally but optionally, a line break). Most (mut not all) Expressions can also be used as standalone statements. When doing so, the value of the expression is simply ignored.
Statements can be simple one-line constructs (such as a Method Call or a var Declaration, or they can be more complex structures that might even contain their own sub-list of statements (such as a repeat/until Block.
Pre- and Post-Conditions
Methods can provide optional pre-conditions that will be checked before the main mody of the method starts executing, or post-conditions that will be checked after the method exits.
Both pre-conditions and post-conditions consist of a list of Boolean expressions, separated by semicolons. Each condition will be evaluated in row, and if any of them evaluates to false, execution will be aborted with a fatal Assertion.
Pre-conditions are provided before the method body, in an optional require section. Post-conditions are provided after the method body, in an optional ensure section:
method MyClass.IncrementCount(aBy: Int32);
require
  aBy > 0;
begin
  fCount := fCount + aBy
ensure
  fCount - aBy = old fCount;
end;
In the ensure section, the old Operator can be used to refer to the original value a parameter or field had before the method started. This can be useful for checking the validity od the result compared to previous state. Note that for heap-based Reference Types (except Strings such as Classes, which receive special handling), the old operator only captures the old reference, but not the old state of the object it contains.
In both the require and ensure section, an optional more detailed error message can be provided, to be included in the assertion when a check fails. This must be in the form of a constant String Literal, separated from the expression with a colon. (If the expression itself contains a colon, the whole expression needs to be wrapped in parenthesis).
method MyClass.IncrementCount();
require
  (SomeValue:SomeField = 0) : "SomeField may not be zero!";
begin
  ...
Note that pre- and post-conditions will only be compiled and executed if the "Enable Asserts" Compiler Option is on. By default, this option is off for Release builds, to optimize performance. It is important to not rely on pre- and-postconditions to execute for the regular operation of the project, and to avoid conditions with side effects.
Pre- and post-conditions should be used only for testing, not for general code flow.
Generic Methods
Similar to Generic Types, individual methods can be declared to have one or more generic parameters. The type parameters are provided enclosed in angle brackets after the method name. These types are then used as placeholders for a more concrete type, allowing you to define methods that are, well, generic, and not tied down to working with a specific type as parameter or result.
method ArrayHelpers.FindIndexInArray<T>(list: array of T; item: T): Integer;
begin
  for i: Integer := 0 to list.Length - 1 do begin
    if list[i] = item then
      exit i;
  exit -1;
end;
For example, the FindIndexInArray<T> method above can work with any type of array to find an item's index.
ArrayHelpers.FindIndexInArray<Int>([1,2,3], 2);
ArrayHelpers.FindIndexInArray<String>(["One","Two","Three"], "Four");
Optional Generic Gonstraints can be provided, using the where Member Modifier. Co- and contra-variance does not apply to generic methods.
method ArrayHelpers.SomeMethod<in T>(aSomeParaneter T); where T has constructor;
begin
  ...
Please refer to the Generic Types topic for a more detailed discussion on generics, including many details that apply to generics in members, as well.
Static Methods
Like most type members, methods are by default defined on the instance – that means the method can be called on and will execute in the context of an instance of the class. A method can be marked as static by prefixing the method declaration with the class keyword, or by applying the static Member Modifier:
class method MyClassMethod: String;        // static method on the class itself
method MyOtherClassMethod: String; static; // static method on the class itself
Visibility
The visibility of methods is governed by the Visibility Section of the containing type the method is declared in, or the Visibility Modifiers applied to the method.
Virtuality
The Virtuality of methods can be controlled by applying one of the Virtuality Member Modifiers.
method OverrideMe; virtual;
Other Modifiers
A number of other Member Modifiers can be applied to methods:
The Legacy procedure and function keywords
For compatibility with legacy Pascal languages, the procedure and function keywords can be used instead of method, when Delphi Compatibility is turned on. Methods declared with function must have a result type, while those declared with procedure may not.
We discourage the use of procedure and function and strongly encourage you to embrace the method keyword.
See Also
Properties
Properties provide abstraction of a type's data by combining the concepts of Fields (to store data in a Class or Record) and Methods (to perform actions on that data) into a single entity.
When accessed, a property behaves much like a field – it has a value that can be read and (optionally) updated. But unlike fields, accessing a property does not directly give unfettered access to the stored data in the class or record. Instead, access to a property goes through custom method-like getter and setter code.
This provides three main benefits:
- Properties can be read/write or read-only (and in rare cases even write-only)
- Setter code can validate new values
- Setter code can perform additional actions (such as updating related values)
Combined, these aspects allow classes (and records) to take control of the data by not allowing outside access to their fields, which any external code could modify in an uncontrolled manner.
In fact, it is considered good practise to have all fields of a class marked private, so only the class's code itself can access them, and funnel all external modifications through properties (or regular Methods, of course).
A further benefit of properties is that their getters can generate or modify the returned value dynamically – so not every property necessarily maps directly to a value stored in a field.
Property Declaration Syntax
A simple property declaration consists of the property keyword, followed by a property name and a (result) type, separated with a colon and optional getter (read) and setter (write) statements:
property Name: String read fName write SetNameAndUpdateView;
If only a getter or or only a setter is provided, the property will be read-only or write-only, respectively. If neither getter or setter is provided, the compiler will automatically provide a field for storage, and a simple getter and setter that uses that field. Such a property works much like a regular Field then, from a usage level.
The getter can be any Expression that returns the correct type. This could be a simple field access (as in the example above), a method, or a more complex expression:
property Name: String read fName;
property Name: String read GetName;
property Name: String read FirstName+" "+LastName;

method GetName: String;
The setter can be any Writable Expression (such as a field, another property or even a Discardable), or the name of a method that takes a single parameter of the right type:
property Name: String read fName write fName;
property Name: String read fName write SetName;
property Name: String read fname write nil;

method SetName(aNewName: String);
Alternatively, a full begin/end block of statements can also be provided for either the getter or the setter. In this case, the value Expression can be used to access the incoming value, within the setter code:
property Value: Double
  read begin
    result := GetInternalValue;
    result := (result + 5) * 8;
  end
  write begin
    SetInternalValue(value / 8 - 5);
  end;
Stored Properties
As mentioned above, if neither a getter nor a setter is provided, the property will be read/write, and the compiler will automatically generate getters and setters that store and obtain the value from a (hidden) backing variable. In this case, the property behaves very much like a plain field:
property Name: String; // internally stored in a hidden String var
Different to an actual field, stored properties still are exposed via getter and setters, so they can be "upgraded" to use custom getters or setters later, without breaking binary compatibility of a type. Also, they will still support the notify Modifier, and other property-specific features.
Stored properties can be marked with the readonly Member Modifier to become read-only. Read-only properties can still be written to from an Initializer or from the class's Constructors – but they cannot be modified once construction of an instance has completed.
Separte visibility for a stored property cna be declared by providing an emoty read and write statement with an option visibility prefix, e.g.:
property Name: String read private write; // everyone coan read, but writing is restricted
Field-Backed Properties
Field-backed properties are a variation of stored properties that provide a "best of both worlds" approach by automatically providing storage for the property, but still allowing the declaration of an explicit read and/or write expression or statements.
Inside the read or write expression or statements, the field keyword can be used to access the implicit field that provides the storage.
property Name: String write begin
  field := value;
  wirteLn(#"Name was changed to {field}.");
end;
If a property uses field in its write expression or statements, a read field is implied automatically. Conversely, if field is used in the read handler, a write field is implied. This is because a read-only or write-only field-backed property would serve no purpose.
Initializers
Like Fields, Stored Properties can be assigned an initial value right in their declaration by having the property declaration closed off with the := operator followed by an expression. Optionally, they can be marked with the lazy Member Modifier to defer execution of the initializer until the first time the property is accessed.
property Name: String := 'Paul';
Please also refer to the Constructors: Initializers topic for more details on when and how fields get initialized.
Indexer Properties
While regular properties represent a single value (of an arbitrary type, of course), indexer properties can provide access to a range of values of the same type. This is similar in concept to an Array, but each access – read or write – goes through the proper getter or setter code.
An indexer property is declared by providing one or more parameters after the property name, enclosed in square brackets. Indexer properties cannot be stored properties, so either a read or a write statement is required.
property Items[aIndex: Integer]: String read ... write ...;
The rules for read and write statements are similar to regular properties: The name of the indexer parameter(s) may be used in the statements, and if the name of a getter of setter method is provided, the signature of this method must include parameters that match the property's parameters:
property Items[aIndex: Integer]: String read fMyArray[aIndex];
property Items[aIndex: Integer]: String read GetItems wrire SetItems;

method GetItems(aIndex: Integer): String;
method SetItems(aIndex: Integer; aValue: String);
Of course, an indexer property does not necessarily have to be backed to an array-like structure, it can also generate (or store) values more dynamically. In the example below, the IntsAsStrings could be accessed with any arbitrary index, and would return the approriate string.
property IntsAsStrings[aIndex: Integer]: String read aIndex.ToString;
...
var s := myObject.IntsAsString[42];
Indexer properties can have more than one parameter (i.e. be multi-dimensional), and – different that Arrays – they can be indexed on any arbitrate type, not just Integers.
Note that, also unlike arrays, indexer properties themselves have no concept of a count, or a valid range of parameters. It is up to the type implementing the property to provide clear semantics as to how an indexer can be accessed. For example, a List class indexed with integer indices might expose a separate Count property, while a dictionary would allow arbitrary indexes – and might decide to raise an exception, or return nil for values not in the dictionary.
Default Indexers
One indexer property per class (optionally overloaded on type) can be marked with the default Member Modifier. The default property can then be accessed by omitting the property name accessing the indexer off an instance (or type) itself;
type
  MyClass = public class
  public
    property Items[aIndex: Integer]: String read ...; default;
...

var s := myObject[0];  // same as myObject.Items[0];
Required Properties
Properties be marked with the required directive require explicit initialization whenever an instance of the containing class, or a descendant, is created. When using a constructor that does not initialize the property implicitly, an explicit vaklue must be passed as Property Initializer to the new call.
type
  Person = class
  public
    property Name: String; required;
    ...
  end;

new Person(Name := 'Wednesday');
Property Notifications
Non-indexed properties can optionally be marked with the notify Member Modifier. Properties marked with notify will emit special platform-specific events whenever they are changed – allowing other parts of code to be notified about and react to these changes.
How these notifications work and how they can be retrieved depends on the underlying platform. Notifications are used heavily in WPF on .NET or with Key-Value-Observation (KVO) on Cocoa.
Please refer to the Property Notifications topic, the [Notify] Aspect and the Observer class for more details on this.
Storage Modifiers (Cocoa)
On the Cocoa platform, the type of a stored property declaration can be amended with one of the weak, unretained or strong Storage Modifier keywords, with strong being the implied default.
property Value: weak String;
To specify a Storage Modifier, the type cannot be inferred, but must be explicitly specified. Inferred types will always be considered strong.
Static Properties
Like most type members, properties are by default defined on the instance – that means the property can be called on and will execute in the context of an instance of the class. A property can be marked as static by prefixing the property declaration with the class keyword, or by applying the static Member Modifier:
class property Name: String;    // static property on the class itself
property Name2: String; static; // also a static property on the class itself
Visibility
The visibility of properties is governed by the Visibility Section of the containing type the property is declared in, or the Visibility Modifiers applied to the property.
By default, both getter and setter of the property are accessible on that visibility level, but visibility can be overridden by prefixing either the getter or the setter with a separate visibility keyword:
property Name: String read private write; // readonly for external access
Virtuality
The Virtuality of properties can be controlled by applying one of the Virtuality Member Modifiers.
property Name: String read; abstract;
Properties can be marked as abstract, if a descendant class must provide the implementation. Abstract properties (and properties in Interfaces may not define a getter or setter, but they can optionally specify the read and/or write keywords to indicate whether a property can be read, written or both:
property A: String; abstract;            // read/write
property B: String read; abstract;       // read-only
property C: String write; abstract;      // write-only
property D: String read write; abstract; // also read/write
Other Modifiers
A number of other Member Modifiers can be applied to properties.
See Also
Events
Events are a special kind of Member in a Class or Record that allow other parts of the code to subscribe to notifications about certain, well, events in the class.
An event is very similar to a Block type Field, but rather than just storing a single block reference, events are "multi-cast". This means they maintain a list of subscribers, and when calling the event, all subscribers will get a callback.
Event Declaration Syntax
A simple event declaration consists of the event keyword, followed by a name for the event and the type of Block that can be used to subscribe to the event. The block type can be a named Alias, or an explicit block declaration:
event ButtonClick: EventHandler;       // EventHandler is a named block defined elsewhere
event Status: block(aMessage: String);
Just as with Stored Properties, with this short syntax the compiler will take care of creating all the infrastructure for the event, including a private variable to store subscribers, and add and remove methods.
Optionally, an add and remove clause can be provided to explicitly name the methods responsible for adding and removing handlers. These methods must then be declared and implemented separately, and they must take a single parameter of the same type as the event (This, too, is comparable to the read and write statements for a Property). It is then up to the implementation of these methods to handle the subscription/unsubscription logic.
  private
    method AddCallback(v: EventHandler);
    method RemoveCallback(v: EventHandler);
  public
    event Callback: EventHandler add AddCallback remove RemoveCallback;
Alternatively, on .NET only, a block field to be used for storage can be provided via the block (or legacy delegate) keyword:
  private
    fCallback: EventHandler;
  public
    event Callback: EventHandler block fCallback;
Subscribing to or Unsubscribing from Events
Externally, code can subscribe or unsubscribe from an event by adding or removing handlers. This is done with the special += and -= operators, to emphasize that events are, by default, not a 1:1 mapping, but that each event can have an unlimited number of subscribers.
method ReactToSomething(aEventArgs: EventArgs);

//...

myObject.Callback += @ReactToSomething

//...

myObject.Callback -= @ReactToSomething
Of course, any compatible Block can be used to subscribe to an event – be it a method of the local type, as in the example above or e.g. an Anonymous Method.
Please refer to the Event Access Expression topic for more details.
Raising Events
An event can be raised by simply calling it like a Block or Method. Before doing so, one should ensure that at least one subscriber has been added, because firing a unassigned event, just as calling a nil block, will cause a NullReferenceException.
The assigned() System Function or comparison to nil can be used to check if an event is assigned.
if assigned(Callback) then
  Callback();
By default, only the type that defines the event can raise it, regardless of the visibility of the event itself. See more on this in the following section.
Visibility
The visibility of events is governed by the Visibility Section of the containing type the event is declared in, or the Visibility Modifiers applied to the event.
This visibility extends to the ability to add and remove subscribers, but not to the ability to raise (or fire off) the event, which can be controlled by the raise statement, described below.
Optionally, separate visibility levels can be provided for the add, remove and raise statements. These will override the general visibility of the event itself:
event Callback: EventHandler public add AddCallback private remove RemoveCallback;
Raise Statements
Optionally, a raise statement combined with an (also optional) visibility level can be specified, in order to extend the reach of who can raise (or fire off) the event. By default, the ability to raise an event is private, and limited to the class that declares it.
event Callback: EventHandler protected raise;
In the example above, raising the event (normally private) is propagated to a protected action, meaning it is now available to descendant classes.
Static/Class Events
Like most type members, events are by default defined on the instance – that means the event can be called on and will execute in the context of an instance of the class. A event can be marked as static by prefixing the event declaration with the class keyword, or by applying the static Member Modifier:
class event SomethingChanged: EventHandler;       // static event on the class itself
event SomethingElseChanged: EventHandler; static; // also static event on the class itself
Virtuality
The Virtuality of events can be controlled by applying one of the Virtuality Member Modifiers.
event SomethingChanged; virtual;
Events can be marked as abstract, if a descendant class must provide the implementation. Abstract events (and events in Interfaces may not define an add, remove or raise statement.
event OnClick: EventHandler; abstract;
Other Modifiers
A number of other Member Modifiers can be applied to events.
deprecated Makes an event deprecated.implements ISomeInterface.SomeMember (See Explicit Interface Implementations). locked Like locked on, with self as an expression.locked on Expression executes a lock on the expression around the accessors of this event.mapped to (See Mapped Members).optional (Interface members only).unsafe Allows the use of unsafe types in event signatures.
See Also
Constants
Constants represent pre-defined and unchangeable values associated with a type.
They are similar in concept to Fields, but their value is determined at compile time and, as the name implies, will remain unchanged during the the course of the execution of the program.
Constants are automatically considered static, and are available both on instances of a type as well as on the type itself (according to their visibility level, of course).
Constants are not to be confused with [Read-only Fields](Fields#read-only fields), which are initialized at runtime and can be different for each instance of a class and – most notably – can contain more complex values.
When a constant is used from code, its value is inlined. This is an important distinction when using constants defined from referenced libraries: if the value for a constant changes in a newer version of the library, but the code using the constant is not recompiled, it will continue to use the value of the constant that it was compiled with.
Declaration
Similar to Fields and the var keyword, constants are defined with the const keyword. After the const keyword, every subsequent item will be considered a constant.
To emphasize the constant and unchanging nature, constants use the = equals operator to specify their value, not the := assignment operator as used for Field or Property Initializers.
type
  MyClass = public class
  private
    const PI = 3.14;
    const E = 2.7;
    const Five: Double := 5
    const Hello = 'Hello';
    ...
    var AnyNumber := 5;
  end;
An optional type name can optionally be specified, to override the default type inferral. In the above example "5" would normally infer to be an Integer type, but here Five will explicitly become a Double, instead.
Visibility
The visibility of constants is governed by the Visibility Section of the containing type the method is declared in, or the Visibility Modifiers applied to the constants.
Static Constants
As already mentioned above, constants are always static, and do not need to (in fact, cannot) be prefixed with the class keyword nor can they have the static Modifier applied.
Virtuality and Other Modifiers
Polymorphism and other modifiers do not apply to constants.
See Also
Constructors
Constructors are a special method-like type member that defines how a Class or Record gets instantiated and initialized (i.e. "constructed").
Constructors are not invoked directly, as regular methods would be. Instead, the new Expression is used to create a class instance and call one (or more) of its constructors implicitly, and the same new Expression can also be used to initialize a record.
Constructors can also call each other, deferring part of object construction to a different level, by using the constructor Expression. More on that, below.
Constructor Declaration Syntax
A constructor declaration consists of the constructor keyword, optionally followed by a list of parameters that can be passed to the constructor, in parenthesis. Constructors cannot have a result.
The constructor declaration can optionally be followed by a number of Modifiers, separated by semicolons. The most important modifiers will be covered in more detail, below.
constructor (aParameter: String; aNotherParameter: Integer); public;
Constructor Implementation Syntax
Unless it is empty or abstract, each constructor declaration needs to provide an implementation. The implantation can be provided right behind the declaration, using what Oxygene refers to as Unified Class Syntax, or it can be provided below the type declaration in the implementation section of the file.
If the implementation is provided separately, the constructor declaration (minus any modifiers) is repeated, but expanded to include the type name in front of the method name:
constructor MyClass(aParameter: String; aNotherParameter: Integer);
begin
  // code goes here
end;
The constructor body follows the same rules as described for Methods. This includes optional legacy var sections, and Pre- and Post-Conditions.
Deferred Construction
For classes which are always part of the global class hierarchy, each constructor must, eventually, defer back to a constructor of the ancestor class, to allow it to perform its part of the initialization, as well. This can happen implicitly, or explicitly with a constructor Expression.
If no constructor Expression is present, the compiler will automatically generate a call to a matching constructor in the base class, as first step of the constructor. A matching constructor is either one with the exact same parameters as the current constructor, or one without any parameters.
In cases where no matching constructor exists, an explicit constructor call is required to let the compiler know which constructor to defer to.
A constructor can choose to defer construction to a different constructor in the same class (a so called "convenience constructor"), or to one in the base class. Even if construction is deferred within the same class, eventually one constructor in the chain must call a base constructor.
A constructor call is done by using the constructor keyword, optionally followed by whatever parameters are required for the constructor in question. By default, a constructor call defers to a constructor in the same class. The call can be prefixed with the inherited keyword in order to call the base class.
type
  Ancestor = public class
  public
    constructor(aString: String); empty;
  end;

  Descendant = public class(Ancestor)
  public
    constructor(aString: String); // will automatically call the base .ctor
    begin
      writeLn("I think this line is mostly filler");
    end;

    constructor(aValue: Double);
    begin
      inherited constructor("Number "+aValue.ToString); // calls the base .ctor
    end;

    constructor(aValue: Integer);
    begin
      constructor(aValue.ToString); // defers to another local .ctor
    end;

  end;
Constructor calls must happen on the top begin/end level of the constructor body; they may not be nested in other constructs, such as if/then Statements, loops or the like. They may also not be preceded by any try Block or exit Statements. Each constructor may also perform no more than one call to a different constructor.
Also note that access to self is not allowed in a constructor until after the deferred constructor call. This includes:
- Use of
self directly.
- Access to fields of the base class.
- Calls to methods, properties or events of the current class or the ancestor.
Constructors in Mapped Types
Some special considerations apply to constructors in Mapped Types. Please refer to the Constructors sub-topic there for details.
Initializers
Types can contain Fields and Stored Properties defined with an initializer that sets a start value for them. Initialization of these fields happens as part of the constructors, with code automatically generated by the compiler. There are certain rules that are relevant for understanding how fields will be initialized.
- Initializers that do not require access to
self will be run at the beginning of any constructor that calls a base constructor.
- Initializers that require access to
self will be run after the call to the base constructor.
This introduces two important caveats:
- Convenience constructors cannot rely on initializers to have run until after they have deferred to a different constructor (which in turn, will have deferred to the base class).
- No constructors can rely on initializers that require
self to have run until after the deferred call.
Note that this only applies to explicit initializers. All fields or properties will of course be pre-set to their default value (e.g. 0 or nil) from the very beginning.
Also note that this does not apply to Properties marked with the lazy Member Modifier, which defers execution of the initializer until the first time the property is accessed.
Inheriting Constructors
If a class declares no constructors of its own, it automatically inherits all public constructors of the base class.
If the base class was abstract, any protected constructors are also inherited, and made public by default. This is to enable the common practice of declaring all constructors on an abstract class protected, to indicate that the class cannot be created.
Once a class declares one or more constructors of its own, only these constructors will be available to create instances of the class; any base constructors that are not matched become unavailable. (If this were not the case, instances of the descendant class could be created through the base constructors, possibly leaving the class in an incomplete state.)
Multi-part Constructor Names
Similar to Multi-Part Method Names, constructors can provide optional names, and have those names split into multiple parts for all parameters.
If provided, it is convention for constructor names to start with the lower-case word with, followed by descriptive nouns for each parameter:
constructor withFirstName(aFirstName: String) LastName(aLastName: String);
...and when being called:
var x := new Person withFirstName("Paul") LastName("Miller");
Language Interoperability
Named multi-part constructors interoperate with all Elements languages (and Objective-C, on Cocoa). For Swift they map to the equivalent init member, dropping the with prefix, and inits defined in Swift will be available in Oxygene, RemObjects C# and Java with the with prefix. e.g.
init(fistName: String, LastName: String)
Both RemObjects C# and Java provide language extensions for defining and calling named multi-part constructors, as well.
Static Constructors
By default, constructors are applicable to individual instances of a class – that means they work on the instance being constructed.
A single parameterless static constructor can be provided by prefixing the constructor declaration with the class keyword, or by applying the static Member Modifier. This static constructor will automatically be called once (and exactly once) before the first instance of the class is created or the first static member of the class is accessed.
constructor; static; // static constructor
Regardless of what section it is declared in, the static constructor will always have private visibility.
Static fields will be initialized from an implicit class constructor.
Visibility
The visibility of (non-static) constructors is governed by the Visibility Section of the containing type the method is declared in, or the Visibility Modifiers applied to the constructors.
Virtuality
By default, constructors in Oxygene do not participate in Polymorphism, unless Class References are used – which is rare. As such, you will not generally declare constructors as virtual or override, even when overriding constructors from a base class.
The usual modifiers can be used when designing classes to be used with Class References, please refer to that topic for more details.
Other Modifiers
A number of other Member Modifiers can be applied to constructors.
See Also
Finalizers
A finalizer is a special method-like type member that executes once, just before a Class or Record gets destroyed as part of Garbage Collection or Automatic Reference Counting.
Finalizers are meant as a last resort to clean up resources (such as unmanaged resources on .NET and Java), in case the type was not properly closed or disposed of as it should have been.
Similar to Constructors, Oxygene uses a special finalizer keyword to declare finalizers. Finalizers are always considered private, and they cannot be called explicitly from code, they will only be called implicitly, by the runtime. Finalizers cannot have parameters or a return type.
type
  MyClass = public class
    finalizer;
    begin
      ...
    end;
  end;
On .NET and Java, finalizers will be executed on a special thread run by the Garbage Collector instead of the main thread.
On .NET, Java and Island, you should make sure to understand using Statements and the IDisposable/AutoCloable pattern before deciding whether your classes require a finalizer. Read More:
Visibility
Finalizers always have private visibility, regardless of what Visibility Section they are declared in. Explicit Visibility Modifiers other than private are not allowed on finalizers.
Virtuality
Finalizers do not directly participate in Polymorphism, and cannot have Virtuality Modifiers. If a base class implements a finalizer, the compiler will automatically make sure finalizers in descendant classes will safely call the base finalizer as last step of their execution.
Other Modifiers
No modifiers are allowed on finalizers.
See Also
Iterators
Iterators provide an easy and comfortable way to provide data for a Sequences.
Iterators are special types of Methods that return a Sequence. Rather then executing all at once and returning a finished list, tough, bits of the iterator are run as needed, whenever a new ite for the sequence is requested.
Note: Since iterators are very similar to regular methods, many topics covered in the Methods topic will apply to them, as well.
This includes the sections on Parameters and Method Body.
Iterator Syntax
Iterators are declared like normal methods, but with three important distinctions:
- Iterator methods must return a Sequence type.
- They must me marked with the
iterator Member Modifier.
- Instead of returning a value, they pass back individual items of the sequence using
yield.
Of course, any method can return a sequence, simply by declaring a sequence type as their result type. A normal method would need to handle the work of constructing the sequence itself – which can be easy when returning data from, say an Array or a list, but becomes more complicated when the data should be generated dynamically as the sequence is enumerated.
What the iterator syntax adds to the table is that it makes it easy to write linear code that returns one item of a sequence after the other, but allow that code to be executed non-linearly, piece by piece, if and when the sequence is accessed.
This is done via the yield statement), which is available only in iterators, and replaces result or the ability to exit with a value.
While the iterator is declared to return sequence of a specific type, inside it, each use of the yield statement will yield a single value of that type. For example
method NaturalNumbers: sequence of Integer; iterator;
begin
  for i := 1 to Int32.Max do
    yield i;
end;

...

for each n in NaturalNumbers do
  writeLn(n);
Under the Hood
When an iterator is called, the body of the iterator method is not actually executed to calculate the whole sequence. Instead, a new object is instantiated, representing the sequence. Once code starts to enumerate over the sequence, for example in a for each loop, the iterator's method body will be executed piece by piece in order to provide the sequence elements.
It will run until the first occurrence of yield, and that value will be returned as the first value of the sequence – and then stop. As the loop continues to iterate the sequence and asks for the next item, execution resumes at that position, until the next yield statement is encountered, and so on — until the method body reaches it's end, marking the end of the sequence.
Of course the above example is very simple (and could be easily reproduced without iterators, for example using a For Loop Expression. But iterators allow for arbitrary complexity in code, and as many yield statements as needed.
For example, one could easily imagine a complex parser that processes data, with many nested if/then Clauses or case Statements that dive deep into a data structure and yield new items for a sequence from many places.
Oxygene;'s iterator syntax allows such complex logic to be expressed as linear flow – leaving it to the compiler to unpack the code so that for each tem of the sequence, execution runs form one yield statement to the next, and no further.
method WeirdSequenceOfNumbers(aExtraWeird: Boolean): sequence of String; iterator;
begin
  yield 'One';
  yield 'Two';
  yield 'Three';
  for i := 4 to 20 do
    yield i.ToString;
  yield 'Twenty-1';
  if aExtraWeird then begin
    for i := 20 to 90 do
      yield (i*3).ToString;
    yield "Twohundred and seventyone";
  end
  else begin
    for i := 20 to 90 do
      yield i;
  end;
end;
Delegating Iteration to a Sequence
The yield keyword also supports delegation of the iterator to a second sequence, as shown below:
var MoreValues := [3,4,5,6]; // array of Int32, can act as sequence

method SomeIntegers: sequence of Int32; iterator;
begin
  yield 1; // adds "1" to the sequence
  yield 2; // adds "2" to the sequence
  yield MoreValues; // adds "3" thru "6" to the sequence, from the array
  yield 7; // adds "7" to the sequence
end;
When the iterator reaches the relevant yield statement, subsequent items are retrieved from that sequence, until it ends. After that, it continues to the next local yield statement. One can think of it as shorthand for:
  yield 1; // adds "1" to the sequence
  yield 2; // adds "2" to the sequence
  for each i in MoreValues do
    yield i
  yield 7; // adds "7" to the sequence
Limitations for Code in Iterators
In general, almost all code constructs can be used in iterators, including complex loops and conditional statements.
Since yielding in an iterator returns back to the caller on every iteration, it's not allowed to yield from within a protected block such as a locking statement or a try/ finally block, as that would leave an unbalanced Exception Handling Stack.
In addition, while an iterator can use the exit Statement to prematurely finish it's execution in any place, it may not return a value as part of the exit. Similarly, the result Expression is not available.
Implementing Asynchronous Sequences
Iterators can implement an Asynchronous Sequences, simply by specifying the appropriate async sequence of X result type:
method SomeIntegers: async sequence of Int32; iterator;
begin
  for i: Integer := 0 to 25 do
    yield il;
end;
Asynchronous sequences can then be iterated via an * await for each Loop.
Static Methods, Visibility and Virtuality and Other Modifiers
Since iterators are methods, they can be made static, and visibility and virtuality apply just as for regular methods.
See Also
Custom Operators
Types provide custom operator implementations to override the behavior of many of the standard Unary and Binary Operator Expressions for specific type combinations.
For example, if a class or record contains data that, logically, a + operation would make sense for, a custom Add operator can be provided to allow the expression a + b to be evaluated using the correct rules.
Operators can be defined for Classes and Records, as well as for other types (including external ones) via Extensions or as Globals).
The following standard operators can be overridden: +, -, *, /, div, mod, and, or, xor, <, ≤, =, >, ≥ and ≠. In addition, two cast operators, Implicit and Explicit, can be provided to allow implicit and explicit casting from and to other types.
A custom operator declaration consists of the operator keyword and the operator name, always followed by a list of parameters in parenthesis, and a result type. The names and list of parameters are well-defined and must match the table below.
Operators are always considered static; the static Member Modifier or a class keyword prefix are optional for consistency, and have no effect.
type
  ComplexNumber = public record
  public
    Real: Double;
    Imagnary: Double;

    operator Add(lhs: ComplexNumber, rhs: ComplexNumber): ComplexNumber;

    operator Implict(aOther: Double): ComplexNumber;
    operator Explicit(aOther: Double): ComplexNumber;
    operator Explicit(aOther: ComplexNumber): Double;
  end;
At least one parameter (or, for casts, the result) must be of the type that the operator is defined on. The other parameter can be of a different type:
operator Add(lhs: ComplexNumber, rhs: Double): ComplexNumber;
operator Add(lhs: Double, rhs: ComplexNumber): ComplexNumber;
Using Operators
Expressions using the above operators will automatically use custom operators, the right and left hand side of the expression (or just the single operand, for Unary Operators such as not) are strongly typed to match the parameters of an operator (or one of the base classes).
For example, an Add operator defined such as
type
  Foo = class
    operator Add(aFoo: Foo; aOther: Object);
would be called for any expression such as a + b where a is of type Foo, and b is any type (that descends from Object).
Note that the operands need to be strongly typed, as operator overloading is resolved at compile time. For example, in the following scenario, the custom operator would not be called, even though a holds a Foo class at runtime, because to the compiler, a is just an object, and operarors are not Polymorphic:
var a: Object := new Foo();
var b: Object := "Hello"
var x := a+b;
Operators can be kept "flexible" by keeping one parameter weakly-typed (such as in the example above), and checking for the best operation at runtime, in the operator's implementation. For example, the above operator allows to add a Foo instance to just about anything else – be it a String, an Integer, or even anotherFoo. It is then up to the implementation to take the appropriate action depending on the type of aOther.
Operator Names
The following special names need to be used when implementing operators:
| Name |
Oxygene Operator |
Comments/Example |
Plus |
+ |
Unary, +5 |
Minus |
- |
Unary, -5 |
BitwiseNot |
not |
Bitwise not: not $00ff |
LogicalNot |
not |
Logical not: if not true |
|
|
|
Increment |
inc() |
maps to the single parameter inc() system function, and ++ in C# & Co) |
Decrement |
dec() |
maps to the single parameter dec() system function, and -- in C# & Co) |
Implicit |
— |
Automatic (implicit) type casts |
Explicit |
Explicit |
Manual (explicit) type casts with as or () |
True |
— |
Returns whether a value represent "true" |
False |
— |
Returns whether a value represent "false" |
Add |
+ |
"5+3" |
Subtract |
- |
"5-3" |
Multiply |
* |
"5*3" |
Divide |
/, div |
"5/3", "5 div 3" |
IntDivide |
div |
"5 div 3" (only with Delphi-style Divisions enabled) |
Modulus |
mod |
"5 mod 3" |
Pow |
** |
x to the power of y, e.g.: "10**5" |
BitwiseAnd |
and |
Bitwise "and", $08ad and $00ff = $00ad |
BitwiseOr |
or |
Bitwise "or", $08ad or $00ff = $08ad |
BitwiseXor |
xor |
Bitwise "xor", $08ad or $00ff = $0852 |
ShiftLeft |
shl |
|
ShiftRight |
shr |
|
Equal |
= |
|
NotEqual |
≠, <> |
|
Less |
< |
|
LessOrEqual |
≤, <= |
|
Greater |
>, |
|
GreaterOrEqual |
≥, >= |
|
In |
in |
Checks if the left value is contained in the right |
| — |
and |
Logical "and" (cannot be overloaded) |
| — |
or |
Logical "or" (cannot be overloaded) |
| — |
xor |
Logical "xor" (cannot be overloaded) |
| |
|
|
Box |
— |
Used when boxing value types |
Unbox |
— |
Used when un-boxing value types |
Assign |
:= |
Used when assigning records (Island only) |
IsNil |
— |
Returns whether a value represents "unassigned"/nil |
The following alias names are supported for Delphi Compatibility:
| Name |
Equivalent to |
Comment |
Inc |
Increment |
|
Dec |
Decrement |
|
Positive |
Plus |
|
Negative |
Minus |
|
LessThan |
Less |
|
LessThanOrEqual |
LessOrEqual |
|
GreaterThan |
Greater |
|
GreaterThanOrEqual |
GreaterOrEqual |
|
LeftShift |
ShiftLeft |
|
RightShift |
ShiftRight |
|
Visibility
The visibility of operators is governed by the Visibility Section of the containing type the operator is declared in, or the Visibility Modifiers applied to the operator.
Static/Class Annotations
Operators are always static and do not have access to instance data (except of course the instances passed in as parameters). They do not need to (but are allowed to) be prefixed with the class keyword or have a static Member Modifier.
Virtuality
Since operators are always static, they do not participate in Polymorphism, and cannot have Virtuality Modifiers.
Other Modifiers
A number of other Member Modifiers can be applied to operators.
deprecated Triggers a deprecation warning when used.empty Empty body; when calling this does nothing.inline Makes the body of this method inlined when calling this.locked Like locked on, with Self as an expression.locked on Does a lock on Expression around the body of this method.mapped to (See Mapped Members).raises Defines the Java raises condition for this operator; this is the list of exceptions it might throw.unsafe (See Unsafe Code on .NET).
See Also
Nested Types
Classes can also define Nested Types. Nested types are like regular custom types, except they are considered part of the class they are nested in, and their visibility can be scoped as granular as all class Members.
Nested types are declared using the nested in syntax, and (outside of the containing class) are referred to in the same way as static class members would – prefixed with the name of the class, and dot.
Refer to the Nested Types topic for more details.
```oxygene
type
OuterClass = public class
end;
InnerClass nested in OuterClass = public class
end;```
These can be accessed as OuterClass.InnerClass, e.g.:
var i := new OuterClass.InnerClass(...);
Visibility
A visibility level modifier can be applied to a class type, the default level is assembly. Note that because nested types are considered class members, they can be applied the full range of more granular member visibility levels, instead od just public or assembly.
Other Modifiers
A nested type can be any Custom Type or Type Alias that is marked with the nested in Type Modifier.
See Also
Invariants
Classes and Records can define optionally define invariants – boolean conditions that will automatically be enforced to be true by the compiler.
Invariants together with Pre- and Post-Conditions in Methods are part of part of Oxygene's Class Contracts feature that enables Design by
Contract-like syntax to create self-testing types.
Invariants are used to define a fixed state an instance of the type must fulfill at any given time.
Invariants are declared in a special section of the class or record type initiated with the invariants keyword. Inside the invariants section, zero or more boolean expressions can be listed, separated by semicolon. At certain times during the execution of the program (more on that below), these expressions will be evaluated, and execution will abort with a fatal Assertion, if one of them fails (i.e., evaluates to false).
type
  MyClass = class;
  public
    ... some methods or properties
  public invariants
    fField1 > 35;
    SomeProperty = 0;
    SomeBoolMethod() and not (fField2 = 5);
  private invariants
    fField > 0;
  end;
Invariants can provide an optional more detailed error message, to be included in the assertion when a check fails. This must be in the form of a constant String Literal, separated from the expression with a colon. If the expression itself contains a colon, the whole expression needs to be wrapped in parenthesis:
public invariants
  (SomeValue:SomeField = 0) : "SomeField may not be zero!";
Public vs. Private Invariants
Invariants can be marked either public or private.
Public invariants will be checked at the end of every non-private method call or property access, and if an invariant fails, an assertion is raised.
Private invariants will be checked at the end of every method call, including private methods.
The idea behind this separation is that that public invariants must be met whenever a call is made into the type from the outside. In other words, no outside access to the type should ever leave the object in an invalid state.
However, there might be certain scenarios where a public method defers work to two or more private methods; the first of those calls might leave the object in a partial state, which the second call then rectifies. If all invariants were checked at every step, this would be a problem.
You can think of private invariants as being most strict. Any time a method finishes, they must be satisfied to the T. Public invariants are more lax – anything goes while the type does its work internally, eve across multiple methods. But when it is done and execution passes back to an outside caller, these invariants too must be sorted out again.
Note that both types of invariant sections have full access to all private fields of the class, the only difference is the method (and property) calls they apply to.
If a class specifies invariants, all fields must be marked as private.
About Assertions
Note that like pre- and post-conditions, invariants will only be compiled and executed if the "Enable Asserts" Compiler Option is on. By default, this option is off for Release builds, to optimize performance. It is important to not rely on invariants to execute for the regular operation of the project, and to avoid conditions with side effects.
Pre- and post-conditions should be used only for testing, not for general code flow.
See Also
Mapped Members
Inside Mapped Types, the mapped to Member Modifier can be used to map Methods, Properties, Events, Constructors or Custom Operators to matching members of the "real" underlying class.
This is essentially a shortcut to providing a method body or full read/write statements for the property that would just contain a single statement.
Mapped members may not provide an implementation body:
type
  MyMappedClass = public class mapped to SomeCollection
  public

    method Add(o: Object); mapped to addObject(o);
    property Count: Integer; mapped to length;

  end;
The two mapped members shown above would be equivalent to the following two regular implementations:
type
  MyMappedClass = public class mapped to SomeCollection
  public

    method Add(o: Object);
    begin
      mapped.addObject(o);
    end;

    property Count: Integer read mapped.length write mapped.length;

end;
See Also
Explicit Interface Implementations
When a Class or Record declares that it implements an Interface, the compiler will by default map members declared in the type to those required by the interface, using name and signature:
type
  IFoo = public Interface
    method Bar;
  end;

  Foo = public class(IFoo)
    method Bar;             // automatically maps to IFoo.Bar
  end;
Sometimes, this behavior is not desirable, and the implements Member Modifier can be used to override it by explicitly providing a mapping from members to their interface equivalent.
Explicitly Implementing Individual Members
Individual members can be mapped to an interface member that they don't match by name, by using the implements modifier, combined with the name of the interface and the name of the interface member it should be mapped to:
type
  IFoo = public Interface
    method Bar;
  end;

  Foo = public class(IFoo)
    method Bar;
    method Baz; implements IFoo.Bar; // explicitly maps to IFoo.Bar
  end;
This can be be helpful in a variety of situations, for example if
- the type already contains a different member of the same name that is not related to the interface
- the type implements two or more interfaces that expect a member of the same name (but require different implementations)
- the name required by the interface does not make sense on the context of other members of the class, or could cause confusion
When an explicit mapping is provided, the member is accessible by its real name, when calling it on a reference of the type itself, and on via the interface's name when calling it on an interface reference:
var f := new Foo();
f.Bar;                // calls Foo.Bar
f.Baz;                // calls Foo.Baz
var g: IFoo := f;
g.Bar;                // calls Foo.Baz
Delegating the Implementation of an Entire Interface
The implements modifier can also be used to delegate the implementation of an entire interface to a different type stored in a Field or Property of the type. This can be helpful to reuse an existing implementation of an interface in multiple places, or to be able to "switch out" concrete implementations of the interface at runtime (by assigning a different value to the field or property):
type
  IFoo = public Interface
    method Foo;
    method Bar;
    method Baz;
  end;

  Foo = public class(IFoo)
    method Foo;
    method Bar;
    method Baz;
  end;

  MyClass = public class(IFoo)
  public
    var fFoo: Object; implements IFoo;
  end;
In the above example, the Foo class provides a complete implementation of IFoo. MyClass declares the interface as well, bu does not provide its own implementation for the three methods. Instead, it delegates that implementation to the fFoo field.
var m := new MyClass();
m.Foo;                   // compiler error, Foo is not accessible here
(m as IFoo).Foo;         // calls fFoo.Foo
By default, members from a deferred interface implementation are not available on the type itself, but only through the interface. Optionally, a Visibilty Modifier can be provided to make the interface members available on the class, as well:
  MyClass = public class(IFoo)
  public
    var fFoo: Object; implements public IFoo;  // members of IFoo are publicly available on MyClass
    var fBar: Object; implements private IBar; // members of IBar are only privately available
  end;

var m := new MyClass();
m.Foo;                   // now allows call to fFoo.Foo
See Also
Member Modifiers
Each member of a Class, Record or Interface can sport a range of modifiers that affect how the member works or is accessed.
Member Modifiers are provided after the ; that closes the member declaration. Multiple modifiers can be provided, each followed by/separated by a semicolon.
method Foo; virtual; private; empty; locked on fBar;
begin
  ...
end;
The order of modifiers has no relevance, but note that combinations of modifiers that would be contradictory or non-sensible (such as abstract;override; or async;iterator;") are not permitted.
If an implementation for a method is provided in-line as part of the Unified Class Syntax, modifiers must be listed before the begin or require keyword that starts the method body.
Virtuality Modifiers
The concepts of polymorphism and virtuality of members are shared between all type members, and across all Elements languages that support classes. Please read more about this in the Polymorphism topic.
Methods, Properties, Events and (in a limited fashion) Constructors can take part in polymorphism, so the following modifiers are allowed on these kinds of members.
virtual — marks a member as virtual, so that descendent classes can override it.abstract — marks a member as abstract. Abstract members cannot have an implementation (or read/write or add/remove statements, for properties and events), and descendent non-abstract classes must to override the member.override — marks a member as overriding a virtual or abstract event from the base class.final — marks an overridden member as final, so that descendants cannot override it further.reintroduce — indicates that the member replaces a member of the same name in the base class without overriding it or participating in polymorphism.
method OverrideMe; virtual;
Visibility Modifiers
Each member can be marked with an individual Visibility Level that overrides the level set by the visibility section it is defined in (if any).
Please refer to the Member Visibility Level topic for a detailed description of visibility levels.
method VerySecret; private;
Static Members
By default, members are considered to be defined on the instance of a type. That means that an instance is needed to access them, and any changes they make will affect that instance.
Methods, Properties, Events, Fields and Constructors can optionally be marked as static, which means they can be accessed without reference to an instance and (in the case of properties, events and fields) their state is shared globally, as a single copy for the entire type.
A member can be marked as static by applying the static modifier (or, for backward compatibility, by prefixing it with the class keyword):
method MyClassMethod: String; static;    // static method on the class itself
class method MyOtherClassMethod: String; // also a static method on the class itself
Other Modifiers
The following additional modifiers are supported for various member types. Note that (with the exception of async), all modifiers marked as available "for methods only" apply to all method-like members, including Constructors and Operators.
async — (Methods only) marks a method as running asynchronously from the caller. When called, an asynchronous method returns control to the caller immediately, while the actual processing happens in the background. Asynchronous methods cannot have var or out parameters, and if they return a value, that value will be returned to the caller in form of a Future. On .NET, asynchronous methods are also compatible with the await keyword. See also Async Expressions.copy — (Properties only) marks the property with the "Copy" meta-flag, for Cocoa.default — (Properties only) marks the property to be (a) default Indexer Property for the containing type.deprecated — marks the member as "deprecated", and causes a warning to be emitted if it is accessed from code. An optional constant String message can be provided.empty — (Methods only) marks the method as containing no code. A method marked as empty cannot have an implementation body. In contrast to abstract methods, empty methods can be called safely at runtime, they just perform no action.external — (Methods and Fields only) marks a method as being a declaration for a method or function that is linked in from an external library. Usually used in combination with the [DllImport] aspect to define a method that calls, for example, a native .dll on .NET. No implementation body may be provided.implements ISomeInterface.SomeMember — indicates that the member implements the given member of an interface, even though it may not match that method in name. See Explicit Interface Implementations.implements ISomeInterface — (Properties and Fields only) indicates that the member points to a type that provides an implementation for the whole interface. See Explicit Interface Implementations.inline — (Methods only) marks the method to be compiled as inline. This means that no actual distinct method will be emitted into the executable, instead the code of the method will be inserted inline wherever the method is called. This can provide small speed improvements when used on simple but often-called methods. Inlined methods cannot participate in Polymorphism or in dynamic method dispatching at runtime.iterator — (Methods only) marks the method as an Iterator method that returns a dynamically generated sequence of items.lazy — (Properties only) in combination with an initialization value for the property, this will make sure that the initial value is only calculated if and when when the property is first accessed (opposed to as part of the class's instantiation). Lazy properties can be readonly or read/write, but must have an initialization expression. When a lazy property is written to before it's first read, the initial value is not evaluated at all. The accessors for Lazy properties are thread safe.locked — makes sure that all access to the method is thread safe and synchronized, so that only one single thread can execute the method at a time. See also Locking Statements.locked on Expression — optionally provides an expression that will be used to synchronize the access.mapped to — (Mapped Types member only) marks the member to be mapped to a member in the original class.notify — (Properties only) will cause the property to emit platform-specific Notifications when the property is changed. See also Property Notifications.optional — (Interface members only) marks the member as optional, on the Cocoa platform.partial — (Methods only) marks the method for special behavior inside a Partial Type as discussed in that topic. Often combined with empty.readonly — (Properties and Fields only) marks the member as read-only, so that it can only be assigned from the constructors or via an initializer, and is immutable from that point on (both internally within the defining type and externally).raises — adds a Java Throws Definition to declare that the member can raise exceptions. It can optionally be followed by a comma-separated list of Exception type names. (Available on the Java platform only.)unsafe — marks a member as using "unsafe" code, such as direct pointer manipulation, on a managed platform. (Available on .NET only.)where — provides Constraints on Generic Methods or Properties.volatile — (Fields only) marks the field as volatile, meaning it is safe to be changed from multiple threads at once. A field marked as volatile won't be optimized by the compiler or runtime in optimizer phases that assume single-threaded access. Each access of the field will always read/write directly from/to memory, bypassing any caching. It also guarantees that only one CPU core at a time reads or writes this field at a given time.
Legacy Modifiers
The following additional modifiers are supported for various member types. Note that (with the exception of async), all modifiers marked as available "for methods only" apply to all method-like members, including Constructors and Operators.
See Also
Member Visibility Levels
Each member of a Class or Record (and, to a limited degree, Interface) has a visibility level that controls which portions of your (or external) code have access to the member.
The following keywords and keyword combinations can be used to introduce a new visibility section that all subsequent members will fall into.
private — only accessible from other members of this same type.unit — only accessible from within the same file.unit or protected — only accessible from this type, a subclass or within the same file.unit and protected — only accessible from this type, a subclass that is within the same file.assembly — only accessible from within this project.assembly or protected — only accessible from this type, subclasses or any code within the same project.assembly and protected — only accessible from this type and subclass that are within the same project.protected — only accessible from this type or subclasses.public — accessible from everywhere.published — accessible from everywhere, and excluded from linker optimizations.
All of these visibility levels are available members of Classes or Records. Members of Interfaces are public by default, but under certain conditions, private interface members are permitted, as well.
The unit, assembly and public visibility levels are also available for types themselves.
The published visibility level behaves identical to public, on a conceptual level. On platforms that use the Island compiler back-end, published will exclude the members from linker optimization, making sure they are included in the final executable as part of the type, even when not directly used. Similar behavior can be achieved with the [Published] and [Used] Aspects.
Oxygene has provides two ways to specify this visibility:
Visibility Sections
Traditionally, visibility is defined by the visibility section that the member is declared in. Every occurrence of a visibility specifier from the table below will initiate a new section, and all members that follow with share that visibility. The default visibility is assembly, so any members declared before the first visibility specifier are accessible from the entire project.
type
  MyClass = public class
    method A; // method A and B are "assembly" visible, as that is the default
    method B;
  protected
    method C; // method A and B are "protected"
    method D;
  public
    method E; // method A and B are "public", visible outside of the project
    method F;
  end;
Visibility Modifiers
Alternatively, visibility levels can be specified on individual members, using the visibility specifier as Modifier on the member. A visibility modifier overrides whatever section the member is defined in, and affects the visibility of the individual member only.
This syntax is useful to keep related members close together, regardless of visibility – especially when using the newer Unified Class Syntax.
type
  MyClass = public class
  public
    method A; // method A, B , D, E and F are all "public"
    method B;
    method C; private; // method C is private.
    method D;
    method E;
    method F;
  end;
See Also
Statements
Statements are the meat and bone of your application – they are the actual code that executes and determines application flow and logic. Without statements, an Oxygene application would not be able to do anything.
Statements are usually written in Methods and other method-like members (such as Constructors or Finalizers), which provide a body that contain zero, one or more statements.
Statements can be standalone individual lines of code (such as a variable declaration with the var keyword), include a sub-statement (such as for loops, exit statements or async expressions), or they can be so-called block statements and contain a whole nested block (such as the begin/end block statement or the repeat/until block loop statement.
Aside from statements provided via Oxygene language constructs, Method Calls are probably the most commonly used type of statement (technically, expression) in an object oriented language such as Oxygene.
Please refer to the nested topics listed in the sidebar on the left for a complete reference of available statement types.
Expressions
Expressions, covered separately in their own section here, are a special sub-type of statement that represent a value.
As a result, expressions can usually be used in the same way a regular statement is (and causing the expression's value to be ignored), but they can also be used in many other places where a value is expected — for example as parameters to method calls, or as parts of more complex expressions.
var x := CalculateValueA() + CalculateValueB(); // each method call is an expression,
                                                // as is the + operation of the two results

CalculateValueB();                              // result of the method call will be ignored
                                                // here expression is treated as a plain statement
Separating Individual Statements
In Pascal, individual statements within a method or nested in a block statement are separated by semicolons (;). This means that (different from C#, Java or Objective-C, where statements are terminated with a semicolon), no semicolon is needed after the last statement or after a single statement. However, for convenience and consistency, it is common practice and recommended in Oxygene to provide a closing semicolon, even if not strictly required.
begin
  DoSomething();
  DoSomethingElse(); // this last semicolon is not strictly needed
end;
begin/end Block Statements
In any place where an individual statement is expected, the begin/end block statement can be used to wrap a whole bunch of separate statements together and treat them as a single statement.
For example, the if/then statement expects a single sub-statement after the then keyword, which will be executed if the condition preceding it evaluates to true. But it can easily be extended to conditionally execute a whole list of statements, when combined with begin/end. Technically speaking, the begin/end is not part of the if/then statement's syntax.
if x ≥ 0 then DoSomething; // if expects only a single sub-statement...

if x ≥ 0 then begin        // ...but a begin/end statement can be used for that single
  DoSomething;             // statement, allowing to conditionally execute a whole list
  DoSomethingElse;
end;
This same principle applies anywhere a statement is allowed, for example as sub-statement to for and while loops.
You can read more about begin/end block statements here.
All Statements
Declaration Statements
Expressions that can be Used as Statements
Begin/End Block Statements
The begin/end statement is a block statement that does not perform any logic or functionality in itself, but is used to group two or more statements together so that they can be treated as a single statement – usually in a context where a single statement is expected.
For example, the if/then statement expects a single sub-statement after the then keyword, which will be executed if the condition preceding it evaluates to true. Using a begin/end pair, a whole block of statements can be tied to the condition instead. Technically speaking, the begin/end is not part of the if/then statement's syntax:
if x ≥ 0 then
  DoSomething;             // if expects only a single sub-statement...

if x ≥ 0 then begin        // ...but a begin/end statement can be used for that single
  DoSomething;             // statement, allowing to conditionally execute a whole list
  DoSomethingElse;
end;
The following lists all statement and expression types that can be used in combination with an (optional) begin/end block:
By contrast, the following block statements already enclose a list of statements they act upon and do not require an explicit begin/end pair to act upon multiple statements at once:
Statements vs. Expressions
Like all statements, begin/end blocks can only be used in a context where a plain statement is expected. They can not act as expressions, because they only represent a bunch of statements to be executed, but not a resulting value. Conversely, begin/end blocks can not be used in the following constructs:
Async Expressions and begin/end
async expressions are special in that they are expressions, but can take either an expression or a plain statement to be run asynchronously. When applied to a statement (as would be the case when using begin/end), the async keyword results in an expression of a type-less Future, also referred to as a Void Future.
You can read more about async expressions here.
Standalone begin/end Block Statements
Since begin/end blocks introduce no behavior or logic of their own, they can of course be also used to group one or more (technically, zero or more) statements at any place in code where a statement is allowed, even when not used in the context where the grouping is necessary to pull the statements together.
The following code snippet shows three statements, the second of which is a begin/end block that itself contains two statements. This is valid, even though the begin/end pair has no effect, and the code would perform the exact same action without it.
Console.Write('hello');
begin
  Console.Write(' to');
  Console.Write(' the');
end;
Console.WriteLine(' world')
If/Then/Else Statements
The if/then statement is a conditional statement that executes its sub-statement, which follows the then keyword, only if the provided condition evaluates to true:
if x < 10 then
  x := x+1;
In the above example, the condition is x < 10, and the statement to execute is x := x+1. As such, the code will increment x by one only if its current value is still less than 10.
else clause
Optionally, an else clause with a second sub-statement can be provided. This second statement will be executed instead of the first one if the condition was false. It is always guaranteed that one of the two statements will execute:
if x < 10 then
  x := x+1
else
  x := x+10;
In the above example, the code will increment x by one if its current value is still less than 10, as before. However, if x is already 10 or larger, it will be incremented by 10 instead.
A Note on Semicolons
Note how the second example above has no semicolon (;) after the first statement, the one that will execute if the condition is true. that is because in, in Oxygene semicolons are used to separate statements, not terminate them.
Technically speaking, the semicolon on the first code snippet does not belong to the inner x := x+1 statement. Instead, it separates the entire if/then statement from whatever may come after it. In the second example, the entire if/then/else statement does not end until after the fourth line, so that is the first place a semicolon is valid.
One could argue that it should not be present in the code example at all – however, Oxygene convention is to write the trailing semicolon after each statement, even single ones, and that's why the snippet included it.
if/then Statements and begin/end blocks.
On its own, the if/then statement, as well as its optional else clause, only takes a single statement to be executed for each of the two cases. To execute more than one statement, multiple statements can be grouped using a begin/end Block Statement:
if x < 10 then begin
  x := x+1;
  writeLn('increased by 1.');
end
else begin
  x := x+10;
  writeLn('increased by 10.');
end;
Optionally, a begin/end statement block can be used, even if only a single statement is provided. This is common practice to keep code clean and readable, and to avoid the common mistake of forgetting to add begin/end when later expanding a single-statement if/then statement.
It is also common practice and highly recommended to either consistently use or not use a begin/end pair for both the then and the else statement, even if not necessary. It helps to keep code balanced.
if x < 10 then begin
  x := x+1;
  y := y+1;
end
else
  x := x+10; // feels unsymmetrical with the 'then' block above

if x < 10 then begin
  x := x+1;
  y := y+1;
end
else begin
  x := x+10; // balances nicely, even if the 'begin/end' is unnecessary here.
end;
Nullable Conditions
The condition expression for the if/then statements must be of Boolean or Nullable Boolean type.
If the condition is a simple boolean, the if/then statement will execute the then clause if the condition is true, and the (optional) else clause if the condition is false.
If the condition is a Nullable Boolean type, then the additional case of the condition evaluating to nil needs to be considered. While a nil nullable boolean strictly speaking is not equivalent to false, the if/then statement treats them the same, and will execute the else clause, if provided, in this case.
This behavior symmetrically extends to while/do loops, which also treat a nil condition as false and will exit the loop, while repeat/until loops will treat a nil condition as false and keep running the loop.
See Also
Loop Statements
Loop statements are used to perform the same action, or variations of the same action, multiple times in a row. As such, they form an important part of every programming language.
Oxygene provides four core types of loops:
for loops iterate over a given set of data, be it a sequence of objects or a range of numbers with a well-defined start and end point.while/do loops keep iterating while a certain condition is true, re-evaluating the condition each time the loop begins. They might run zero or more times.repeat/until loops keep iterating until a certain condition is false, re-evaluating the condition each time the loop ends. They always run one or more times.loop loops, also referred to as Infinite Loops, run indefinitely, until they are broken out of using either a break, exit or raise statement.
Labeled Loops
Loop statements can be prefixed with an optional name, separated form the loop keyword by a colon. When such a name is provided, it can be used in continue and break flow control statements to more precisely control which loop to cpntinue or break out of.
var i := 0;
lOuterLoop: while i < 30 do begin
  i := i + 1;
  for j := 0 to 20 do begin
    if i*j = 150 then continue lOuterLoop; // contine the OUTER loop
    writeLn(i*j);
  end;
  writeLn(i);
end;
For Loops
A for Loop is a loop that iterates over a predefined set of numbers, or a pre-defined set of values in a Sequence, and executes a statement or a block of statements once for each value. An iterator variable is defined and maintained by the loop, allowing each iteration access to the value that it is asked to operate on.
There are two basic types of For Loops: for/to loops that iterate over a range of numbers, and for/in loops (also referred to as for each loops) that iterate over items in a Sequence.
for/to Loops
A simple for/to loop uses the following syntax:
for i := 0 to 10 do
  DoSomething;
The For loop always introduces its own variable for the loop, even when a variable of the same name is already defined in the outside scope. This is different from legacy Pascal dialects, which uncleanly allow the reuse of a variable (often with undefined results) before and after the for loop itself.
The type for the loop variable will be inferred from then start and end value, but can also optionally be specificed explcitly:
for i: Integer := 0 to 10 do
  DoSomething;
Steps
By default, a for/to loop iterates over each value from the start to the end in increments of 1 (one). Optionally, the steps keyword can be used alongside a different increment. If specified, the loop will iterate in larger steps, in the example below only running the loop for every other number.
for i := 0 to 10 step 2 do
  DoSomething();
If the step size does not cause the loop counter to exactly reach the end value of the loop, the loop will end with the last iteration that is smaller than the end value. For example, the code below will iterate across 0, 3, 9, and then stop. It will hit neither 10 nor 12.
for i := 0 to 10 step 3 do
  DoSomething();
The range can be specified as a constant or as a dynamic expression, but (unlike in C# and many other languages) the end value will only be evaluated once, at the beginning of the loop. Changes to the step count or the loop range from inside the loop will have no effect on the duration of the loop.
Backwards Loops
A for loop can also be made to count downwards instead of upwards, by replacing the to keyword with downto, as shown here:
for i := 10 downto 0 do
  DoSomething();
Note that it is up to the developer to ensure that the start and end value have the proper relationship to each other (i.e. start being smaller than end for a to loop, and higher than end for a downto loop), otherwise the loop may run through the full range of the Integer type and will "wrap around" when it reaches the type's minimum or maximum range.
for/in Loops
for/in (or for each) loops are a second variation of for loops. Rather than iterating over a range of numbers, they iterate over all elements of a Sequence or sequence-compatible type (such as an Array).
A simple for/in loop uses the following syntax:
for each i in list do
  DoSomething();
where list can be any sequence of values.
By default, the type for the iterator variable i is usually inferred from the type of sequence, but just as with for/to loops, it can also be specified manually, using the expected syntax:
for each i: String in list do {...}
When specified, the compiler will enforce that the declared type matches the type of the sequence and emit an error if it does not match (for example if, in the example above, list was a Integer, not assignment compatible with String).
For legacy reasons, the each keyword is optional and can be omitted, although we encourage to use it.
Matching
As a variation on this, the optional matching keyword can be used, along with an explicitly specified type name, to limit the for loop to only run for those items of a sequence that match in type. This is helpful if you have a sequence of a certain base type, but only want to iterate over the items of a specific descendant type. For example:
var list: sequence of Control;
for each matching b: Button in list do
  DoSomething();
Here, list is a sequence that could contain any sort of Control (a made-up class) type. But the loop will only execute for those controls that actually are of type Button.
Indexes
Sometimes it is useful to keep count of the iterations of the loop in a numerical way, even in for/in loops. For example, when rendering a list of items, one might want to use different colors for even vs. odd items.
While it is of course possible to manually define and increment a counter variable, Oxygene provides an enhancement to the for loop syntax to take care of this:
for each s in list index i do
  DoSomething(s);
In this example, s remains the loop iterator, and will contain the values obtained from the sequence as the loop progresses. At the same time, i is introduced as a second loop value of type Integer and will be incremented with each iteration.
Omitting the Loop Variable
Sometimes it is useful to just lopp over a collection without need to access the actual elements. In this case, a nil Dicardable can be used for the loop variable, or it can be omitted altogether:
for each nil in list do
  DoSomething();
or simply:
for each in list do
  DoSomething();
This can avoid "variable is ot used" warnings.
for each from Shortcut Syntax
Oxygene provides shortcut syntax for combining a for/in loop and a from query expression.
The normal syntax for using an expression inside a for loop would look like this:
for each i in (from i2 in myList where i2 > 5) do
  DoSomething();
Note how an extra variable needs to be defined inside the clause that, in essence, represents the same element as the outer loop variable.
You can write the same in a more natural way, by combining the iterator variable and the query expression variable into one:
for each from i in myList where i > 5 do
  DoSomething();
Prematurely Exiting the Loop or a Loop Iteration
Like all loops, for Loops can be exited prematurely using the break and exit statements and raise, and a single loop iteration can be cut short by using the continue statement, which jumps to the next loop iteration.
Parallel Loops
It's possible to process the body of the loop in parallel, usually leveraging multiple threads and CPU cores.
A for loop can be turned parallel simply by adding the keyword to it, as shown below:
for parallel i := 0 to 10 do
  DoSomething();
Using this syntax, the individual iterations of the loop are automatically spread over multiple threads and CPU cores. But this is done smartly, and in a way that leverages core OS resources to distribute the load onto a number of threads that makes sense for the current hardware. A loop of 1000 items will not just create a thousand threads, which would be terrible for performance. Instead, the number of threads and how to create them will be handled at runtime by the OS, and take into account factors such as the number of available CPU cores and overall load on the system at the time.
This is true for all Parallelism features in Oxygene (and Elements in general).
Although the loop will execute individual iterations asynchronously (and, nota bene, not necessarily in a predetermined order), the loop itself does not finish and pass execution to the code that follows it until all iterations are complete.
If an exception occurs in any one of the iterations, the loop is canceled, finishing the currently running iterations. The exception(s) will be wrapped in a new exception that will be re-thrown in the context of the original code and thread.
The use of exit is not allowed in parallel for loops. The break keyword can be used, and will stop the loop from starting up further iterations, but (similar to the exception behavior described above), any iterations already running will continue until they completed. The continue keyword will work as expected, as it only affects the current iteration.
Limitations of Parallel Loops
Parallel For Loops support both for/to and for each loop types. However, the downto and step syntaxes are currently not supported.
for Loops and begin/end blocks.
On its own, the for loop only takes a single statement to be executed for each iteration. To execute more than one statement, multiple statements can be grouped using a begin/end Block Statement:
for i: Integer := 0 to 10 do begin
  DoSomething();
  DoSomethingElse();
end;
See Also
While/Do Loops
The while/do loop is a loop that executes a statement or a block of statements repeatedly, as long as a given condition evaluates to true. The condition will be re-evaluated at the beginning of each iteration of the loop, allowing code inside the loop to affect the condition in order to terminate it.
Since the condition is evaluated before the loop is entered, it is possible for a while/do loop to never be executed even once, if the condition is already false when execution arrives at the loop.
As an alternative to the while/do loop, the repeat/until block loop will evaluate a condition at the end of each iteration, thus providing a loop that is guaranteed to be entered at least once.
Syntax
The basic syntax for a while/do loop looks like this:
while x < 10 do
  DoSomething();
where a conditional expression is specified between the while and do keywords, and the do keyword is followed by the statement that is to be executed repeatedly.
Nullable Conditions
The condition expression for the while/do loop must be of Boolean or Nullable Boolean type.
If the condition is a simple boolean, the while/do loop will execute as long as the condition evaluates to true.
If the condition is a Nullable Boolean type, then the additional case of the condition evaluating to nil needs to be considered. While a nil nullable boolean strictly speaking is not equivalent to false, the while/do loop treats them the same, and will stop executing the loop if the condition evaluates to either nil or false.
This behavior symmetrically extends to if/then statements and repeat/until loops, which also treat a nil condition as equivalent to false.
while/do Loops and begin/end blocks.
On its own, the while/do loop only takes a single statement to be executed for each iteration. To execute more than one statement, multiple statements can be grouped using a begin/end Block Statement:
while x > 10 do begin
  DoSomething();
  DoSomethingElse();
end;
Prematurely Exiting the Loop or a Loop Iteration
Like all loops, while/do loops can be exited prematurely using the break and exit statements, and a single loop iteration can be cut short by using the continue statement, which jumps to the next loop iteration.
Matching
As a variation on the while loops is the optional while matching variant. a while matching loop introduces a new variable and initialization condition, and keeps running while that variable remains non-nil. See als the for each matching loop type, for reference.
For example:
whlle matchign lItem := NextItem do
  DoSomething(lItem);
The while matching loop will execute until NextItem returns nil. Essentially, it's a more convenient way of writing:
var lItem := NextItem;
while matching lItem := NextItem do begin
  DoSomething(lItem);
  lItem := NextItem
endl
See Also
Repeat/Until Block Loops
The repeat/until loop is a loop that executes a block of statements repeatedly, until a given condition evaluates to true. The condition will be re-evaluated at the end of each iteration of the loop, allowing code inside the loop to affect the condition in order to terminate it.
Since the condition is evaluated at the end of each iteration, a repeat/until loop will always be executed at least once, even if the condition is already true when execution arrives at the loop.
As an alternative to the repeat/until block loop, the while/do loop will evaluate a condition at the start of each iteration, thus providing a loop that can skip even the first iteration.
Syntax
The basic syntax for a repeat/until loop looks like this:
repeat
  DoSomething();
  DoSomethingElse();
until x ≥ 10;
where a conditional expression is specified after the closing until keyword, and a list of statements can be provided between the repeat and until keywords.
Nullable Conditions
The condition expression for the repeat/until loop must be of Boolean or Nullable Boolean type.
If the condition is a simple boolean, the repeat/until loop will execute as long as the condition evaluates to false (in other words until it is true).
If the condition is a Nullable Boolean type, then the additional case of the condition evaluating to nil needs to be considered. While a nil nullable boolean strictly speaking is not equivalent to false, the repeat/until loop treats them the same, and will continue executing the loop if the condition evaluates to either nil or false. Only a value of true will terminate the loop.
This behavior symmetrically extends to if/then statements and while/do loops, which also treat a nil condition as equivalent to false.
repeat/until Loops and begin/end blocks.
Unlike most other statements, and all the other loop types, the repeat/until loop is a block statement, and encloses a list of statements, rather than looping an individual statement. As such, a separate or explicit begin/end block statement is not necessary in order to execute a loop with two or more statements.
Prematurely Exiting the Loop or a Loop Iteration
Like all loops, repeat/until loops can be exited prematurely using the break and exit statements, and a single loop iteration can be cut short by using the continue statement, which jumps to the next loop iteration.
See Also
Infinite Loops
An infinite loop is a loop that executes a statement or a block of statements repeatedly, without a guarding condition to determine its end (such as the while/do and repeat/until loops or a pre-defined set of items to loop over, like the for loop).
An infinite loop will run indefinitely, until it is explicitly broken out of using either a break, exit or raise statement.
The syntax for an infinite loop is simply the loop keyword, followed by the statement to be repeated:
loop DoSomething();
Infinite Loops and begin/end blocks.
On its own, the infinite loop only takes a single statement to be executed for each iteration.
Given the need to eventually break out of the loop with a break or exit statement, the infinite loop is almost always used in combination with a begin/end block statement to allow the execution of multiple statements for each iteration:
loop begin
  DoSomething();
  DoSomethingElse();
  if DoneSomethingThird then
    break;
end;
Prematurely Exiting the Loop or a Loop Iteration
Like all loops, infinite loops can be exited prematurely using the break and exit statements, and a single loop iteration can be cut short by using the continue statement, which jumps to the next loop iteration.
See Also
Flow Control Statements
Flow control statements can be used to take charge of the execution flow on a method or block of code and direct it to jump to a different place in the application, rather than continuing through to the text statement linearly.
- The
continue and break flow control statements are used solely inside loops, and will terminate the current iteration or the whole loop, respectively.
- The
exit flow control statement can be used almost anywhere, and will completely exit out of the current method – optionally providing a return value for the method, as well.
- The
raise flow control statement will raise an Exception that will terminate the current flow of execution and will bubble up the call stack until it is "caught" by a [try/except] block.
- The
yield statement is strictly speaking not a flow control statement; it will provide a value to return while generating a sequence, but execution will continue linearly after it.
Also:
- The
goto statement, while not recommended for common use, can redirect execution to continue at an arbitrary Labeled Statement within the same scope.
Break Statements
The break flow control statement breaks out of the current loop and lets execution resume on the first statement after the loop, forgoing any further iterations.
var i := 0;
loop begin
  i := i + 1;
  if i = 15 then break; // exit the loop when we hit 15
end;
Labeled Loops
If the loop is labeled with a name, that name can be used alongside break to be more explicit about which loop to beak out of. This is especially helpful when using nested loops:
var i := 0;
lOuterLoop: loop begin
  i := i + 1;
  for j := 0 to 20 do begin
    if i*j = 150 then break lOuterLoop; // exit the OUTER loop
  end
end;
See Also
Continue Statements
The continue flow control statement breaks out of the current iteration of a loop and lets execution resume with the next iteration of the loop, presuming there are further iterations left to complete.
var i := 0;
while i < 30 do begin
  i := i + 1;
  if i = 15 then continue; // skip the following code for "15" only
  writeLn(i);
end;
Labeled Loops
If the loop is labeled with a name, that name can be used alongside break to be more explicit about which loop to beak out of. This is especially helpful when using nested loops:
var i := 0;
lOuterLoop: while i < 30 do begin
  i := i + 1;
  for j := 0 to 20 do begin
    if i*j = 150 then continue lOuterLoop; // continue the OUTER loop
    writeLn(i*j);
  end
  writeLn(i);
end;
See Also
Exit Statements
The exit flow control statement will terminate the execution of the current method and directly exit back to the code that called it.
If the current method has a result type, then exit can optionally provide a return value that will be passed back to the caller. If such a value is provided, it will replace whatever value may already be stored in the result variable. If exit is invoked without a return value, any value already stored in result will be returned.
Invoking exit will break out of any loops and skip executing any further code that is written as part of the current method. exit will honor any code provided in finally sections.
Examples
method Test: String;
begin
  writeLn('Hello');
  result := 'Hello';
  exit;
  writeLn('This line won''t run');
end;

method Test2: String;
begin
  writeLn('Hello');
  exit 'Hello';
  writeLn('This line won''t run');
end;

method Test3;
begin
  writeLn('Hello');
  exit;
  writeLn('This line won''t run');
end;
See Also
Raise Statements
The raise flow control statement will terminate the current scope by raising (or re-raising) an exception. The exception will bubble up the call stack, terminating all execution flow, until it is caught by a try/except block.
The raise keyword can be used in two ways.
Typically, raise is followed by an expression that provides an exception instance. That instance (typically of type Exception or a sub-type, but any Object can be raised, in theory) will travel up the stack, and will be available to all exception handlers, providing details about the exception that occurred.
Inside a try/except block, the raise keyword can be used on its own; it will the re-raise the exception currently being handled.
raise new ArgumentException('Invalid parameter!');
See Also
Goto Statements
The goto flow control statement can redirect execution to continue at an arbitrary Labeled Statement within the same scope.
goto is supported for legacy reasons, but should generally not be used in regular code, as most logic flow is better expressed using proper Loop Statements.
Examples
writeLn('Hello');

if x > 5 then
  goto Here;

writeLn('x is five or less');

Here: begin
  writeLn('World');
end;
See Also
Assign Statements
The assign statements – expressed as :=, a colon followed by an equal sign – assigns the value of the expression on right to the writable expression on the left.
x := 5;
After the above statement, x has a value of 5.
Different from most other languages, Pascal and Oxygene purposely do not use the equal sign for assignment, to highlight the active nature of the statement – it is not expressing equality, but transferring a value (even if the end result – usually, but not always – is equality of the left and the right).
The left side of the assign statement must be a writable expression, while the right side can be any kind of Expression.
Writable expressions include:
Note that in particular for Properties with custom setter code, and for Discardables, the end result of an assignment is not necessarily equality. For example, a property setter (or getter) code might modify the actual value.
Other uses of the := Operator
The assignment operator can also appear in other statements that are not stand-alone assign statements such as:
Notably, Consts use the = operator to specify their value, and not :=, since for constants, equality between the constant and the literal it is being initialized with is guaranteed, and a fundamental part of what makes them constants.
See Also
Try Block Statements
A try statement surrounds a protected block that receives special treatment when an Exception occurs during its execution, whether in the try block itself, or any other code that is called from within the block.
Two types of handler sections can be provided at the end of the try block, to determine what happens when an exception occurs: finally and except. Any individual try block can specify either or both of these sections, and in either order.
Finally Sections
A finally section can provide code that will always execute, whether an exception occurs or not. Recall that normally an exception terminates all execution flow on the current thread, terminating the current method, and its callers, until the the point where the exception is handled. Code inside the finally section is an exception (pardon the pun) to that.
Finally sections are useful for cleanup code that must be ensured to run even in case of exceptions – for example to close unmanaged resources such as an open file:
try
  DoSoemthing;
  MaybeThrowsAnException;
  DoSomethingMore;
finally
  Cleanup;
end;
AndDoYetMore;
In this example, Cleanup would always be called, even if MaybeThrowsAnException indeed does throw an exception. DoSomethingMore and AndDoYetMore of course are not.
Except Sections
By contrast, an except section will only run if an exception occurs and it will handle (or "catch") the exception, so that execution flow will continue normally as if nothing happened:
try
  DoSoemthing;
  MaybeThrowsAnException;
  DoSomethingMore;
except
  writeLn("An error occurred");
end;
AndDoYetMore;
In this example, the writeLn would only be called if MaybeThrowsAnException (or any other code in the try block) does throw an exception. Since the exception is then considered handled, AndDoYetMore would be called as well.
Inside the except block, one or more on/do clauses can be provided to filter for specific exceptions. Note that the except block can either contain regular code statements or on/do clauses, but not mix both:
try
  DoSoemthing;
  MaybeThrowsAnException;
  DoSomethingMore;
except
  on E: FileNotFoundException do
    writeLn("Can't load that file. moving on without");
end;
AndDoYetMore;
In this case, the except block only handles the exception if it is of the right type. Any other exception will continue to bubble up the call stack.
Multiple on/do clauses are allowed, and an optional where condition can be used to filter exceptions on criteria other than their type. Note that only the first clause that matches a given exception is executed, and the exception is only considered handled if it did match one of the clauses:
try
  DoSoemthing;
  MaybeThrowsAnException;
  DoSomethingMore;
except
  on E: FileNotFoundException do
    writeLn("Can't load that file. moving on without");
  on E: HttpException where E.Code = 404 do
    writeLn("Can't load that webpage. moving on without");
  on E: HttpException do
    writeLn("Different web error");
end;
AndDoYetMore;
Here, both FileNotFoundException and HttpException types are caught, with a different handler being run depending on the error code in the HttpException. Any other exception will continue uncaught.
Re-raising Exceptions
Inside an except section, code may decide to not handle the exception after all, and to re-raise it. This can be done by using the raise Statement or a raise Expression on its own, without specifying a new exception expression:
except
  on E: FileNotFoundException do
    if FileName = "ReallyImortant.txt" then
      raise;
    writeLn("Can't load that file, but it seems unimportant...");
end;
Note that using raise without an expression will let the current exception continue untouched, preserving all its information, including the original call stack. Using raise E or even raise new Exception(...) would instead raise the (or a new) exception fresh, losing the history.
Combining finally and except
Both finally and except sections can be combined within a single trt block. In case of an exception, they will be run in the order they have been specified:
try
  DoSoemthing;
  MaybeThrowsAnException;
  DoSomethingMore;
finally
  Cleanup;
except
  writeLn("An error occurred, but we cleaned up fine.");
end;
AndDoYetMore;
See Also
Case Statements
The case statement splits code flow, and executes one (or none) of several optional code paths, based on the value of the provided expression:
case value of
  1: writeLn('One');
  2: writeLn('Two');
  6..9: writeLn('Between six and nine')
  else writeLn($'Unexpected value: {value}');
end;
The expression provided between case and of can be of any type that can be compared to constant or literal values, including numbers or strings. The expression will be evaluated once, and the case that matches its value will be executed. If no case matches, and an optional else clause is provided, it will execute.
Each case statement must be unique, and having duplicate or overlapping statement ranges will cause a compiler error. Each case can either specify a single value, or a range of values that the expression must fall within, for the case to match.
begin/end blocks can be used in order to provide more than one statement for an individual case, or for the else clause.
Unlike other languages, execution will not "fall though" from the first matching case to others, but only a single case will ever be executed.
Case of string
As well as ordinal types, the case statement can switch on string values, such as in this small console method parsing command-line parameters:
class method Main(args: array of String): Int32;
begin
  case args[0] of
    '--help': RemObjects.Elements.RTL.writeLn('Help');
    '--doc': RemObjects.Elements.RTL.writeLn('Doc');
    '--amazonandnile': RemObjects.Elements.RTL.writeLn('Curiously interested in rivers');
    else RemObjects.Elements.RTL.writeLn($'Commandline argument 0 was: {args[0]}');
  end;
end;
(The else contains an example of string literal interpolation where the expression args[0] is inserted into the string.)
String comparison is case-sensitive and equivalent to using the = equality check. If you have complex string data, you can use the Elements RTL method ToLowerInvariant to get a lowercase string, such as case args[0].ToLowerInvariant of....
Case type of
A variation is the case type/of statement, which allows you to execute different cases depending on the type of the expression at runtime:
case myControl type of
Button: writeln("Looks like a button!");
CheckBox: writeln("This one's a checkbox");
else writeLn("No idea what this is!?");
end;
This can also work directly on a type itself:
case Self type of
Program: RemObjects.Elements.RTL.writeLn('self is program');
String: RemObjects.Elements.RTL.writeLn('self is string');
end;
case Program type of
Program: RemObjects.Elements.RTL.writeLn('Program class is program');
String: RemObjects.Elements.RTL.writeLn('Program class is string');
end;
Essentially, a is cast is performed on each case, and the first matching case will be executed. Note that unlike for regular case/of, this construct allows for potential overlap (e.g. for descendent types), so attention must be paid that the case for a base type does not prevent a later case for a more concrete subtype to ever be hit.
Case Expressions
The case statement can also be used as an expression, forming a value. Read more on the case Expression page.
See Also
Locking Statements
A locking statement protects a block of code to be only run from a single thread at a time.
Example:
var mylock := new Object;
...
locking mylock do begin
// thread sensitive operations.
end;
See Also
Using Statements
The using statement executes code that works on a resource that needs to be manually disposed of afterwards. You can thing of it as a convenient combination of a local variabele declaration alongside a try/finally block that makes sure the contents of the variable is disposed proeprly at the end, even if an exception happens:
using fs := new FileStream("textfile.txt", FileMode.Open) do begin
var b := new byte[123];
fs.Read(b, 0, b.Length);
end; // the filestream is closed here.
The statement begins with the keyword using, followed by the name of a new variable and an initializer; typically the initializer will create a new object, or call a method that returns a new object, but in theory, any expression is permitted. The do keyword can be followed by a single statement or a begin/end block grouping multiple statements.
At the end of the using statement, the Dispose method wil be called on the object (if it supports disposing). This call is ensured even when an exception occurs, as if it were encapsulated in a try/finally.
Essentially, the above code is equivalent to:
with fs := new FileStream("textfile.txt", FileMode.Open) do try
var b := new byte[123];
fs.Read(b, 0, b.Length);
finally
IDisposable(fs):Dispose();
end;
The Disposable Pattern
You can read more about the Disposable Pattern here. Essetially, it centers around an interface (called IDisposable on .NET and the Island-based native platforms, and AutoCloseable in Java, which provides a single method (Dispose or close), which the compiler will automatically call, if the interface is implemented.
Using using on an object that does implement the interface is permitted, but has no effect at runtime. However, this allows you to apply proper precautions when using vlasses that might later change to become disposable.
Auto-Release Pools (Cocoa)
When targetting the Cocoa platform, the using statement has been extended with a special syntax using the autoreleasepool keyword, in order to create new Auto-Release Pool for this thread, and clean it up at the end of the using statement.
Please refer to the Auto-Release Pool topic for more details.
using autoreleasepool do begin
NSApplicationMain(argc, argv);
end;
See Also
With Statements
The with can be used to temporarily introduce new members in the scope. It supports multiple with items seperated by a comma. The main benefit of with over using a regular local var declaration is that with more explicitly limits the scope of the new variables to the statement or block of statements it applies to. The do keyword can be followed by a single statement or a begin/end block grouping multiple statements.
with fb := CalculateFooBar do begin
writeLn(fb);
end;
// fb is not available here anymore.
Optionally, the matching keyword can be applied to ensure that the object matches a certain type or subtype – symmetrical to how matching works in for loops. The with statement will only be executed if the type matches, otherwise it will be silently skipped. For obvious reasons, an explicit type needs to be specified when using matching.
with matching b: Butotn := GetNextControl do begin
writeLn($"Ayup, {b} is a button!");
end;
With Statements and Records
When the expression for the with statement is a Record or other value type, the new variable acts as an alias to the original record, and any changes done on the identifier will directly affect the original record.
By contrast, assigning the record to a new local var declaration would create a copy of the record on the stack:
var x: Person;
x.Name := "Peter";
with y := x do
y.Name := "Paul";
// x.Name is now Paul
Compared to:
var y := x;
y.Name := "Paul";
// x.Name is unchanged, as y is a separate copy
See Also
Yield Statements
The yield statement is used when generating a sequence to add a new value into the generated sequence. It can be used in two places: in iterator methods and for loop expressions.
Please refer to these two topics for more details:
Examples:
Using yield in an iterator, the following method will return a sequence with 12 items: start, Value 0, Value 1, Value 2, Value 3, Value 4, Value 5, Value 6, Value 7, Value 8, Value 9, end:
type
MyClass = public class
public
method Test: sequence of String; iterator;
end;
Implementation:
method MyClass.Test: sequence of String;
begin
yield 'start';
for i : Integer := 0 to 9 do
yield 'Value: '+i;
yield 'end';
end;
...
for each val in myClassInstance.Test do begin
Console.WriteLine(val);
end;
Using yield in a for loop expression, this creates a new sequence in x containing 10 strings with Value 0 through Value 9:
var x: sequence of string := for i := 0 to 0 yield 'Value: '+i;
Local Variables
The var statement is used to declare and optionally initialize a new local variable in the current scope. The variable will be available for all code below its declaration, up until the end of the current scope – that is either to the end of the current method, if the variable is declared on that level, or to the end of the block Statement that includes the declaration.
In its simplest form, a variable declaration starts with the keyword var, followed by a new unique name for the variable, a colon (:), and the type.
var i: Integer;
Optionally, the declaration can be followed by an initial value for the variable, assigned via the := operator. Variable declarations without initializer will be initialized to the default value of their type.
var i: Integer := 5;
Type Inference
When an initializer is provided and a concrete type can be inferred from it, the type name can optionally be omitted. This is referred to as type inference.
var i := 5;
It is important to note that – unlike in scripting languages such as JavaScript – the variable will still be strongly typed, in the above case to be an Integer. Omitting the type name is merely a convenience (and sometimes a necessity, when using Anonymous Types which have no name), but that does not mean that the variable is untyped.
Oxygene will use the type of the expression to the right of the := operator to infer the type, if possible. For numeric literals, the inferred type will be the smallest integer that can fit the literal, but no smaller than a 32-bit signed integer.
Declaring Multiple Variables in one Statement
Multiple variables of the same type can be declared in one statement by separating them with a comma. When using this option, no initializer may be provided, as it would be ambiguous whether the initialization would apply to all variables or only to the last one.
var a, b: Integer;
Modifiers
Similar to type members, the following modifiers are allowed on local variables:
pinned — can be applied to pointer and class reference variables on the .NET platform to indicate that the target object will be pinned to a fixed location and may not be moved by the Garbage Collector while the variable is alive (applicable on platforms that use GC, namely .NET and Java).readonly — indicates that the variable may not be altered after its declaration. For obvious reasons, this only makes sense for variables that have an initializer.
var i := 5; readonly;
var a := new Customer; pinned;
See Also
Local Constants
Similar to Variables, the const statement is used to declare and optionally initialize a new constant in the current scope. The constant will be available for all code below its declaration, up until the end of the current scope – that is either to the end of the current method, if the variable is declared on that level, or to the end of the block Statement that includes the declaration.
Constant values need to be initialized with a value that can be determined at compile time, and – as the name implies – their value cannot change.
The initializer can be a simple literal, or simple expression combining one or more constant values (for example, the concatenation of two strings, or the product of two integer constants.
const PI = 3.14;
const NAME = FIRST + ' ' + LAST;
const AREA = 5.3 * 8.9;
Type Inference
The type of a constant is usually inferred from the (required) initializer, but an explicit type can be provided in order to make it explicit, or to overide the default inference:
const I = 5; // Int32
const U: UInt64 = 5;
const D: Double = 5;
Modifiers
No modifiers are allowed on const declarations.
See Also
Local Methods
The method statement can be used to declare and implement a new local method in the current scope. The method will be available for all code below its declaration, up until the end of the current scope – that is either to the end of the current method, if the variable is declared on that level, or to the end of the block Statement that includes the declaration.
The method's code has access to everything that is in scope at the point of its declaration, including type members, as well as any local Variables, Properties, Contants or other local methods declared before it.
The method declaration follows the same structure as regular Methods declared as Type Members, with a method header that can include optional parameters and result type, and a begin/end section encompassing the method body with optional require and/or ensure sections to evaluate pre- post-conditions.
method MyClass.XMarksTheSpot; // regular type member method
begin
var x := 5;
DoSomething(x);
method UpdateX: Boolean; // nested Local Method
begin
inc(x, 5);
result := x < 30;
end;
for i := 0 to 10 do
if not UpdateX then
break;
DoSomethingElse(x);
end;
Please refer to the Methods topic in the Type Members section for a complete overview of method syntax.
Modifiers
No modifiers are allowed on local method declarations.
See Also
Local Properties
The property statement can be used to declare a property in the current scope. The property will be available for all code below its declaration, up until the end of the current scope – that is either to the end of the current method, if the variable is declared on that level, or to the end of the block Statement that includes the declaration.
Local properties are similar to local variables, but – just like Properties in a Type – can have getter and setter code associated with them that gets run when the value is read or written.
In its simplest form, a property declaration starts with the keyword property, followed by a new unique name for the property, a colon (:), and the type. Declared as such, the property will behave the same as a Variable:
property i: Integer;
Distinct from variables, a property declaration can also provide a read and/or write expression that will be executed when the property is accessed:
property i: Integer read SomeExpression write SomeOtherExpression;
Properties with just a read expression are read-only, while properties with just a write statement are write-only. A property that provides both can be read and written.
The property's getter and setter code has access to everything that is in scope at the point of its declaration, including type members, as well as any local Variables, Contants, Methods or other local properties declared before it.
Please refer to the Properties topic in the Type Members section for a full discussion of properties and their capabilities.
Features of Local Properties
Local Property declarations can use all the features of Property type members in Classes and Records, including:
Modifiers
Similar to type members, the following modifiers are allowed on local variables:
readonly — indicates that the property may not be altered after its declaration. For obvious reasons, this only makes sense for properties that have an initializer.
property i := 5; readonly;
See Also
Local Fields
The field statement is used to declare and optionally initialize a new field in the class that is private to the current scope (e.g. a method).
It works very much like a local variable declaration with var, except that it defines a field, and the value stored in it will persist between calls to the current scope. The Field will be available for all code below its declaration, up until the end of the current scope – that is either to the end of the current method, if the field is declared on that level, or to the end of the block Statement that includes the declaration.
Local fields in Oxygene are what some other languages, such as C, might somewhat confusingly refer to as "static variables".
In its simplest form, a local field declaration starts with the keyword field, followed by a new unique name for the variable, a colon (:), and the type.
field i: Integer;
Optionally, the declaration can be followed by an initial value for the variable, assigned via the := operator. Variable declarations without initializer will be initialized to the default value of their type.
field i: Integer := 5;
If an initial value is provided, the field will be initialized the very first time it's declaration is hit. The right-hand side of the expression will not be re-evaluated on subsequent runs, and the value of the field will not reset.
Type Inference
When an initializer is provided and a concrete type can be inferred from it, the type name can optionally be omitted. This is referred to as type inference.
field i := 5;
It is important to note that – unlike in scripting languages such as JavaScript – the field will still be strongly typed, in the above case to be an Integer. Omitting the type name is merely a convenience (and sometimes a necessity, when using Anonymous Types which have no name), but that does not mean that the field is untyped.
Oxygene will use the type of the expression to the right of the := operator to infer the type, if possible. For numeric literals, the inferred type will be the smallest integer that can fit the literal, but no smaller than a 32-bit signed integer.
Static Fields
By default, local fields declared in a regular method are tracked per instance — just like a Field declaration on class level would. This means, each instance of the class gets its own copy of the field – but each call to a method on the same instance will use the same field.
Optionally, local fields can also be declared as static using the class prefix or the static directive. Static fields will be tracked as a single field per class, meaning one value is shared across all instances of the class.
class field i := 5; // same i for every instance
Of course, fields declared inside a static method, or a method of a static class will always be static, by default.
Declaring Multiple Fields in one Statement
Multiple fields of the same type can be declared in one statement by separating them with a comma. When using this option, no initializer may be provided, as it would be ambiguous whether the initialization would apply to all variables or only to the last one.
field a, b: Integer;
Modifiers
Similar to type members, the following modifiers are allowed on local variables:
pinned — can be applied to pointer and class reference variables on the .NET platform to indicate that the target object will be pinned to a fixed location and may not be moved by the Garbage Collector while the field is alive (applicable on platforms that use GC, namely .NET and Java).readonly — indicates that the field may not be altered after its declaration. For obvious reasons, this only makes sense for fields that have an initializer.static — indicates that the field is static (see above).
field i := 5; readonly;
field a := new Customer; pinned;
See Also
Labeled Statements
Statements can be prefixed with a named label, so that they can be referenced and jumped to from other parts of the same method body. This is particular helpful for terminating nested loops via the break or continue statements.
The label can be any unique identifier, and must be separated from the statement with a colon:
method LoopTheSquare;
begin
XLoop: for x := 0 to Width-1 do begin
YLoop: for x := 0 to Width-1 do begin
if value[x,y] > 200 then break XLoop; // breaks out of the outer loop
if value[x,y] > 100 then break; // breaks the inner YLoop
end;
end;
end;
While not officially supported or encouraged, labeled statements can also be jumped to via the goto keyword.
Due to possible ambiguity with the colon operator, labels cannot prefix a statement that starts with an identifier (such as for example a method call). They can be followed by any keyword-based statement, including a begin/end, or by a semicolon.
See Also
Expressions
Expressions are a constructs of code that represent a value. They are similar to Statements, but with a crucial difference: while regular statements must always stand on their own, expressions represent a value that can (sometimes must) be used in the larger context of a surrounding expression or statement.
For example "5 + 3" is an expression, with a resulting value of 8. It makes little sense to write "5 + 3" as a statement on it's own, but the expression can be embedded in a more complex formula such as "(5 + 3) * 2", or in a statement such as "var x := 5 + 3;".
Some expressions can be used as statements, having their final value ignored. For example, a Method Call Expression might produce a result that can be part of a larger expression, but the same method can also be called as a statement.
Examples of Expressions
Expressions can be as simple as a literal value, such as the number 5 or the string 'Hello', they can be simple identifiers, referring to a Variable or calling a Method that returns a value, or they can be complex – well – expressions combining several expressions together to represent a new expression.
For example, the condition within an if/then is an expression (of Boolean type). If you declare a variable with the var Statement and assign it an initial value, that value is an expression.
var five := 5; // a simple literal expression, '5', is used to initialize a variable
var ten := 2 * five; // a literal `2` and a variable reference expression (`five`) are used as
// operands to a larger expression that multiplies them
if ten > 5 then DoThis(); // a variable reference expression is compared to a literal
// expression and the resulting boolean expression is used to
// conditionally execute the `DoThis()` method call expression
In the above examples, you have seen three kinds of expressions:
These are certainly the most common types of expressions, but Oxygene provides a range of additional expression types that allow you to express more complex values and calculations.
For example:
- Member Access expressions allow you to directly access members of a class, record or enum using the
.or : operator.
- The
self keyword lets you refer to the current class or record to use it in a nested expression, while inherited expressions allow you to explicitly call into the ancestor type.
- The
result keyword lets you work with and set the return value of a method.
new expressions are used to construct new instances of a type by executing its constructor.
Please refer to the nested topics listed in the sidebar on the left for a complete reference of available expression types.
Sophisticated and Advanced Expression Types
Unique to the Oxygene language, the traditional if, case and for statement types can be used as expressions. When used as such, if and case Expressions conditionally return different values, while for Loop Expressions return a whole Sequence of values.
async expressions can take any given Statement (not just expressions), and turn it into a Future that will be executed asynchronously in the background.
from expressions allow you to use LINQ to write strongly typed code that can query, filter and otherwise work with collections and Sequences of objects.
Parenthesis
Parenthesis allow you to visually enclose sub-expressions in order to indicate the order of precedence in which they will be executed within a larger expression. This is especially helpful when using Binary Operators, but can also help clarify other more complex expressions.
var x := 3 + 2 * 5 // evaluates to 3 + 10 = 13, as * has precedence over + by default.
var x := (3 + 2) * 5 // evaluates to 5 * 5 = 25, as the parenthesis cause the addition to be performed first.
All Expressions
Expressions that can be Used as Statements
Expressions that can be Assigned to
Literals
Literal Expressions, or simply Literals, are constant values expressed directly in code by providing a concrete, hardcoded number or string value.
Integer Literals
The default type of an Integer Literal is determined by the first type from the following list that can hold the number: Int32, UInt32, Int64, UInt64 and BigInteger (the latter currently limited to the .NET platform).
Integer Literals are supported as decimal (default) or as hexadecimal and binary (with $ and % prefixes, respectively). Spaces are allowed within the number to logically group digits, commonly in blocks of 3 for decimal, 4 for hexadecimal and 8 for binary.
var MyInteger := 153; // Decimal (Base 10) integer literal
var MyHexInteger := $100; // Hexadecimal (Base 16) integer literal with a value 256
var MyBinaryInteger := %101; // Binary (Base 2) integer literal with a value of 5
var MyBigInteger := 698574357436578436543275894375984326598342759435634977653476574392865784356;
var MySpacedInteger := 500 000;
var MySpacedHexInteger := $c000 0000;
Floating Point Literals
Floating Point Literals can be defined by including a decimal point in the literal, or by using exponential notation with the letter E (upper or lower case). Note that floating point literals only accept decimal numbers, not hexadecimal or binary.
var MyFloat := 153.0;
var MySecondInteger := 123E3; // 123000.0
Boolean Literals
The true and false keywords can be used to express Boolean literal values.
var oxygeneRocks = true;
var oxygeneIsCaseSensitive = false;
Nil Pointer Literals
The nil keyword can be used to express a nil pointer, reference type or a nullable type without value.
var b := nullable Boolean := nil;
String and Character Literals
String Literals start with a double quote (") or single quote (') and end with the same type of quote that started it. Within the string,
occurrences of the quote character can be escaped by duplicating it.
var hello := "Hello, ";
var world := 'World';
writeLn(hello+world);
Literals enclosed with single quotes (') and consisting only of one individual character are considered to be Character Literals by default, but the compiler will smartly 'upgrade' them to string literals, if it detects that a string is expected in the current context. Literals enclosed with double quotes (") will always be strings.
var o := 'o'; // a Char
var p := "p"; // a String
var qr := 'qr'; // also a String
Character Literals can also be expressed as Character Code Literals – which are made up by a hash symbol (#) followed by a 16-bit value indicating the characters' unicode, without quotation marks. A hexadecimal code can be used if prefixed with $.
var linefeed := #10;
var carriageReturn := #$0d;
String literals enclosed with a double quote (") may contains line breaks, in order to to define multi-line strings. Such literals will include all characters encountered between the opening and closing quote, including all line breaks and all whitespace.
String and character literals can be concatenated with +, or linked/interspersed by
Character Code Literals without the need for an explicit +.
var MyString := 'Hey there!';
var MyString2 := "Don't Stop Believing"; // The apostrophe is fine because the string is surrounded by double quotes
var MyString3 := 'Don''t Stop Believing'; // The apostrophe escaped
var MyString3 := 'Don'#0039't Stop Believing'; // The apostrophe as character code literals
var MySingleChar := 'x'; // A Char, because length is 1
var MySingleCharString: String := 'x'; // Treated as string based on context
Interpolated Strings
String Literals can be interpolated with values at runtime, if they are prefixed by a dollar ($) character. Inside an interpolated string literal, any range of code surrounded by curly braces ({...}) will be interpreted as a code expression, which will be compiled, evaluated at runtime and inserted in the string at this position.
var TimeString := $'It is {DateTime.UtcNow} o'' clock!';
To use a literal curly brace inside an interpolated string, the brace can be duplicated from escape interpolating:
var lValue := 5;
var MyString := $'The {{curly} gets replaced by a {lValue}'; // "The {curly} gets replaced by 5"
Interpolated string literals can be used for Constants, if all interpolated values are constant, themselves.
Note: Interpolated strings are considered obsolete, superseded by Raw Strings as described below.
Raw Strings
Raw Strings, new in Oxygene .2345 combine the best of multi-line and interpolated strings, with the ability to control leading whitespace and more flexible escaping of both quotes and curly braces.
Raw strings always start with one or more hash (#) symbol, followed by one or more double quote (") symbols.
The same number of quotes that starts the raw string literal is required to terminate it. Quote symbols can be freely used inside the string without the need to be escaped, as long as not more than one less are used consecutively. For example, if the string literal has the need of a set of three consecutive quotes (""") it its text, it should be started with four (or more) quotes:
var s := #""""This is a string that contains three """ quotes."""";
Raw strings are always interpolated. The number of hash symbols at the start defines how many curly braces are used to start an interpolation. Sets of fewer curly braces can be used freely and without escaping. For example, to represent Json code with single curly braces, and still use interpolation, one would use two (or more) hash symbols:
var lJson := ##""{ "Value" : {{5+3}} }""; // #"{ "Value" : 8 }";
Raw strings can either be single-line, as in the examples above, or contain line breaks. For a raw string to allow line-breaks, the actual content of the string must start on a new line after the opening sequence, and end on the line above closing quotes:
var lMoreJson := ##""
{
"Value" : 8,
"Value2" : "Boo",
"Value3" : {{5-2}},
}
"";
For multi-line raw strings, a base indent is calculated by the number of whitespace in front of the closing quote(s). The same amount of leading whitespace will be removed from the start of each line of the final string. If any non-empty line is not indented far enough to remove said whitespace, a compiler error is raised.
No trailing whitespace is preserved for raw strings (just as the Fire code editor does not preserve trailing whitespace, either). Tab characters in the source file will be treated as two spaces.
In the above example, the lines with the curly braces ({ and }) would have no leading whitespace, and the lines defining the three values would have two spaces.
This allows raw strings to be indented to match the rest of the surrounding code, without the indentation affecting the string value.
Notes:
To start or end a raw string with a quote char, use multi-line syntax:
var lQuote := #""
"War is Peace."
"";
Single-line raw strings must contain at least one character, as an empty multiraw string would be ambiguous on whether it is terminated or not:
var a := #""; var b := ""; // is `; var b := ` part of the string literal, NOT second variable.
If more curly braces are encountered than needed to start an interpolation, the excess curly braces are kept as part of the string content. This allows you to directly surround an interpolated value with curlies, e.g.:
##""The Value is {{{5+8}}}""; // renders as `The Value is {5+8}`, keeping one extra set of curlies.
Note that this behavior is different from both legacy interpolated strings, as well as from C#'s raw strings.
See Also
Array and Set Literals
Array and Set literals are surrounded by square brackets ([]) and contain zero or more expressions, separated by comma (,) that provide the individual elements of an Array or Set.
The type of all expressions must match, and the type of the underlying array or set will be inferred, if necessary to the closest common base type. Whether the literal becomes an array or a set will also be inferred based on context, where an Array is inferred by default, if there is ambiguity.
method TakeArray(x: array of Integer);
...
TakeArray([1, 2, 3, 4, 5]);
var y := [0, 1, 2, 3, 4.5]; // array of double
var z: set of Integer := [1, 2, 3];
See Also
Tuple Literals
A tuple literal is an expression that defines a Tuple by providing a list of expressions, seperated by a comma (,) and surrounded by parenthesis (()). If assigned to a pre-defined tuple, the expressions need to match in type; when used in combination with type inference in a var Statement, the individual types will be inferred.
var x := (15, 15, 12); // tuple of (Integer, Integer, Integer)
var y: tuple of (Double, Double, Double) := (1, 1, 5); // tuple of 3 double types.
See Also
Selector Literals (Cocoa)
The selector keyword can be used to get a selector reference on the Cocoa platform. Selectors are feature unique to the Cocoa platform and Object Model, and they represent the name of an Objective-C runtime method.
Selectors are held in a type called SEL, and can be used to dynamically invoke methods, for KVO, Notification center, or to pass them to other Cocoa APIs that expect a aSEL type.
A selector is declared with the selector keyword, followed by parenthesis enclosing the Objective-C name of the method, which is made up of the name, plus a colon if the method takes parameters, plus additional name and colon pairs for all parts of a multi-part method:
method compare(aOther: id)_ options(aOptions: NSCompareOptions);
...
var s := selector(compare:options:);
Using the selector literal syntax will cause the compiler to perform checks if the specified selector is valid and known, and a warning will be emitted if a selector name is provided that does not match any method known to the compiler. This provides extra safety over using the NSSelectorFromString function.
Note that by default, the Elements compiler might mangle type names and method names, for example to ensure uniqueness of overloaded methods. You can specify the [objc] Aspect on a method to prevent mangling and make its internal name on the Objective-C runtime match the selector name.
See Also
Arithmetic & Logical Expressions
Oxygene allows the use of operators to create comparisons, arithmetic expressions and logic expressions. The language has well-defined set of operators for these scenarios, but Types can provide custom implementations for operators, using a technique called Custom Operators, a.k.a. Operator Overloading.
Comparisons
Supported Operators: =, ≠, <, ≤, >, ≥ (and <=, >=, <>)
The above operators can be used to compare two operands for equality, non-equality and sort order.
For types that to not provide a custom equality and/or non-equality operator implementation, = and ≠ will compare the object reference (i.e. identity) of heap based types (such as Classes), and do a memory/value compare for stack-based types (such as Integers, Booleans, Floats, and Records).
If a matching custom = or ≠ operator is defined on the type of either the left or the right-hand expression, it will be called instead.
The <, ≤, >, ≥ operators are only supported if the appropriate custom operator is implemented on one of the types.
var x := 5;
var y := 10;
if x ≤ 5 then ...
Note : Oxygene supports rich unicode ≤, ≥ and ≠ operators, but also, for backwards compatibility, the double-character <=, >= and <> spelling. Fire and Water will auto-correct <=, >= and != to ≤, ≥ and ≠, respectively, and on macOS you can use ⌥<, ⌥> and ⌥= to type these operators directly, as well.
Double Boolean Comparisons
Oxygene provides a convenient short-hand for comparing a value against two boundaries at once, via Double Boolean Comparisons. a double boolean comparisons is true only of both the first and the second hald of the expression is true. It is convenient for testing if a value falls within a range between two values:
var y := 10;
if 10 ≤ x ≤ 15 then
writeLn("x is between 10 and 15").
The above check essentially expands to
if (10 ≤ x) and (x ≤ 15) then.
...
Arithmetic Operators
Supported Operators: +, -, *, /, **, div, mod
The above operators are used to carry out mathematical operations on two operands
var a := 2+2; // 4
var b := 12+3; // 9
var c := 3*9; // 27
var d := 8/2; // 4
var d := 2**10; // 1024
var d := 10.0/4.0; // 2.5
var d := 10.0 div 4.0; // 2.5
var d := 10.0 mod 4.0; // 2
Note that all operators use the type of the input values as result type. For example Dividing two integers will always perform an integer division, producing an integer, potentially losing the remainder. If one of the two operands is a floating point type, the result will be a float, as well.
Also note that Oxygene will apply operator precedence (more on that below for combined expressions, according to mathematical rules (* an / tage precedence before + and -, etc).
var a := 5 + 10 * 2; // 25
var b := 5 + (10 * 2); // 25
var b := (5 + 10) * 2); // 30
Note on Delphi Compatibility Mode: The / and div operators will behave differently in Delphi Compatibility Mode. As in Delphi, the operators will not infer the result from the operands. Instead , / will always result in a floating point, while div will always perform an rounded integer division.
Logical Operators
Supported Operators: and, or, xor, not and implies
The above operators can be used to combine boolean expressions. and, or and xor are binary operators, which means the take two parameters; not is a unary prefix operator and takes one parameter to it's right.
and returns true, if both the expression on the left and the one on the right are true.or returns true, if either one of the expression on the left or the right is true.xor returns true, if only one of the expression on the left or the right is true, but not both.not returns true, if the value it precedes is false, otherwise it returns true. In other words, it reverses or negates the boolean value.implies returns false, only if the expression on the left is true, but the the expression on the right is not.
var a := x and y;
var b := x or y;
var c := x xor y;
var d := not x;
var e := x implies y;
By default, Oxygene will apply Boolean Short-Circuit, where starting from the left, the compiler will stop evaluating expressions once the outcome of the expression is determined.
For example, if the left-hand side of an and operation is false, the result will always be false. Likewise, if the left-hand side of an or operation is true, the result will always be true. In both cases, evaluation of the right will not be evaluated at all.
Note that different than in many other, especially C-based languages, the logical and, or and xor operators take precedence over comparisons. For this reason, combining multiple comparisons with logical operators will often require parenthesis:
if x > 5 and y < 10 then ... // 🛑 compiler error, because "(5 and y)" would be evaluated first
if (x > 5) and (y < 10) then ... // ✅ works!
Bitwise Operators
Supported Operators: and, or, xor and not
The save four operators can also be used for bitwise operations on numeric (integer) values. When doing so, they apply above boolean logic on each bit of the numeric value's in-memory representation, with 0 and 1 represening false or true, respectively.
and returns 1 for very bit that is 1 in both the expression on the left and the one on the right.or returns 1, for every bit that is 1 either one of the expression on the left or the right.xor returns 1 for every bit that is 1 in only one of the expression on the left or the right, but not both.not returns 1, for every bit that is 0, and 0 for every bit that is one. In other words, it inverts the bit mask of the value.
var a := %0000 1100 and $0000 1010; // %0000 1000
var b := %0000 1100 or $0000 1010; // %0000 1110
var c := %0000 1100 and $0000 1010; // %1111 0110
var d := not %0000 1100 // %1111 0011
Operator Precendence
...
Nesting Expressions with Parenthesis
Parenthesis allow you to visually enclose sub-expressions in order to indicate the order of precedence in which they will be executed within a larger expression. This is especially helpful when using the arithmetic and logical expressions discussed in this topic, but can also help clarify other more complex expressions.
var x := 3 + 2 * 5 // evaluates to 3 + 10 = 13, as * has precedence over + by default.
var x := (3 + 2) * 5 // evaluates to 5 * 5 = 25, as the parenthesis cause the addition to be performed first.
Nullable Types in Expressions
Please refer to the Nullable Types In Expressions topic for some caveats when using expressions that contain potential nil values. In particular, a nil value anywhere in an operator expression propagates outwards, potentially turning the entire expression nil. This can have some unintuitive results when working wit booleans, in particular in combination with the not operator, where not nil remains nil. Also consider Boolean Short-Circuit.
Implies
The implies boolean operator can feel a bit awkward to start with, as it is crafted for a very specific scenario: to be used in Invariants to a condition that is only relevant if another condition matched.
implies combines two boolean arguments. If the first argument is false, the result is true, otherwise, the result is the second argument. The idea is that the trueness of the second condition only matters if the first is true.
The following (contrived) example of a class representing a traffic light illustrates it:
type
PedestrianCrossing = class;
public
property CarLight: Color;
property PedLight: Color;
public invariants
CarLight = Color.Green implies = PedLight = Color.Red;
PedLight = Color.Green implies = CarLight = Color.Red;
end;
The invariant test here ensures that, if one direction's traffic light is green, then the other must be red, to avoid accidents. If it is not green, then the other light does not matter (it could be green, red, yellow or even purple, for as far as the test is concerned).
Essentially, x implies y translates to (not x) or y, but expresses the intent of the check much clearer.
See Also
In
The in operator check if the left-hand value side is in the Array and Collections, Set or Flags Enum on the right, and returns true or false
var x: set of Color;
...
if Color.Red in x then
...
For Set and Flags Enum types, the operartor directly checks whether the value is included. For Flags, that is the equivalent of applying the and bitwise operator and checking for equality.
For Arrays, Collections and Sequences, the in operator invokes the LINQ Contains method, if available.
Not In
For ease of readability, the in operatore can be combined with not, to negate the result.
if Color.Red not in x then
...
Which is more naturally readable than the equivalent:
if not (Color.Red in x) then
...
See Also
Identifier Expressions
An identifier is the simplest form of expression, and simply refers to a code element, typically a type reference, by name.
An identifier could refer to a local variable or parameter, a member of the current type, such as a Field, Property or the like, a named Type itself, or anything that can be referenced by name.
See Also
Self
The self keyword refers to the current instance of the class that a block of code belongs to. It provides access to the members of the class (although by default they are in scope without the need for a self, and also makes the current instance available, for exa ple to be passed or assigned to other places.
type
Foo = public class
private
property Value: String;
public
method Test;
begin
var x := Value; // members can be access directly...
var u := self.Value; // ... but also via `self`;
var f: Foo := self; // `self` represents the instance as a whole.
end;
end;
As discussed in Member Access Expressions, self can be helpful to avoid ambiguity, or access class members that are "hidden" from by another identifier of the same name. It can also provide clarity and code improve readability, in places where it might not be obvious which identifiers refer to type members, and which don't:
method UpdateValue(Value: String);
begin
self.Value := Value; // the paramer hides the property
end;
Self in Static Members
In static members (defined with the static modifier or the class method/class property, class var or class event prefix), self refers to the (platform-specific) meta-class that describes the current type. This can be assumed to be unique for each type, and distinct for separate types, and allows for polymorphism (i.e. in descendant class, self will refer to the descendant meta-class:
self inside a static member is identical to typeOf(self) in an instance method.
See Also
Mapped
Only available in Mapped Types, the mapped keyword refers to the current instance of the type, but typed to be the original underlying type that is being mapped to.
You can think of mapped as equivalent to self – both refer to the same physical instance of the type, but they differ in as what type the class or record is seen.
type
MyString = public class mapped to String
...
var x := self; // `x` is a `MyString`
var y := mapped; // `y` is a String
if x = y then ... // but they are the same
'mapped' in Constructors
In mapped types, constructors can defer defer to constructors of the original type using the mapped expression with the constructor Call Expression. This works in symmetry with how the inherited constructor Syntax works in "real" classes:
constructor MyObject;
begin
mapped constructor("Hello");
end;
See Also
Inherited
The inherited operator can be used for the following expressions to explicitly operate on the implementation provided by the base class of the current Class, instead of a potential override in the current type.
When overriding a class Member, inherited is the only way to access the override functionality from the descendant type, as all direct calls to the member will be directed to the override version, as part Polymorphism.
When used standalone, the keyword will call the inherited version of the Method, Property or Constructor that exactly matches the current one in name and signature.
type
Foo = class
public
constructor;
begin
end;
end;
Bar = class(Foo)
public
constructor;
begin
inherited; // calls the exact same (in this case name- and parameterless) constructor in the base
end;
end;
inherited can also be used with an explicit member name and (optional) parameters, to call the same or any member in the base class.
type
Foo = class
public
method Test1; virtual;
begin
end;
method Test2(aValue: String); virtual;
begin
end;
end;
Bar = class(Foo)
public
method Test1; virtual;
begin
inherited Test2('Hello, Unnamed'); // explictly calls Test2 of the base, not Bar.Test2
end;
method Test2(aValue: String); virtual;
begin
inherited Test2($'Hello, {aValue} 🖖'); // calls same method in base, but w/ different value;
end;
end;
Inherited in Constructors
While calling into the base is optional for regular methods or properties, Constructors must always call a a different constructor of the same class that (eventually) calls into a constructor in the base class.
Constructors without an explicit Constructor Call will automatically either call a constructor matching the same parameters (if available) or the parameterless constructor (again, if available) of the base class.
The Constructor Call and Constructors: Deferred Construction topics cover this in more detail.
See Also
Result
Inside Methods with a return value, the result expression can be used to refer to the result that the method will return upon completion.
result acts like a variable of the same type as the method's return type, and will be initialized to that type's default value (nil for reference types, and 0 or the equivalent for value types) as the method starts. result can be both assigned to and read from.
method Test: Integer;
begin
result := 15;
...
if result > 30 then
...
...
end;
See Also
Old
Inside an ensure Post-Condition block, the old operator can be used to refer to the original value a parameter, Field or Property had at the beginning of the method. This can be useful for checking the validity of the result compared to the previous state. Note that for heap-based Reference Types (except Strings such as Classes, which receive special handling), the old operator only captures the old reference, but not the old state of the object it contains.
method MyClass.IncrementCount(aBy: Int32);
require
aBy > 0;
begin
fCount := fCount + aBy
ensure
fCount - aBy = old fCount;
end;
See Also
Value
Inside a Property's write block, the value expression can be used to refer to and access the unnamed parameter that contains the new value being assigned to the property:
property Foo: String
read fFoo
write begin
if Foo ≠ value then
fFoo := value;
end;
See Also
Member Access
A dot (.) is used to access a Member of a Type, such as accessing the value of a Field or Property, or call a Method:
var x := lMyObject.SomeProperty;
or
lMyObject.DoSomething(5);
Member access requires an Expression on the left side of the dot that is not nil. If the expression evaluates to nil, a NullReferenceException will occur.
The right side of the dot needs to have one of the following expressions:
which is expressed by the name of a Member of that type that is visible from the current scope.
The resulting expression is of the same type as the member that is being accessed, and it can be used in a more complex expression, or – if the member is a non-read-only Field, Propertiy or Event – be assigned to, to update their value.
var x := lMyList.Count + 5;
(↑ Using the result of a property access as part of a + Binary Expression.)
lMyObject.FooBar := 'Baz';
(↑ Assigning a value to a property access expression.)
Nil-safe Member Access
By default, member access throws a NullReferenceException (NRE) if the left side is a nil reference (e.g an uninitialized variable). Using the "colon" (:) operator, also called the "not-nil" operator, instead of the dot (.) can avoid that.
Nil-safe member access works like regular member access with ., except that if the left hand side is nil, nothing on the right side is evaluated and instead the entire expression resolves to nil. The : operator is right-associative, meaning that if the left side is nil, all of the right side of the expression is skipped, and not evaluated at all.
var x := MyClass:SomeProperty;
This extends to any further member access chained to the expression. In the example below, the last two method calls do not need the : operator, to protect against a nil value in SomeProperty. (However, if SomeProperty is assigned but CalculateSomething returns nil, the call to ToString would still NRE.)
var x := MyClass:SomeProperty.CalculateSomething.ToString;
Note that if the type of the right-hand expression is a value type (such as an Integer or a Boolean) that normally cannot be nil, the combined expression will be treated as a nullable version of that value type, according to Nullabilty rules.
var b := MyClass:SomeBooleanProperty; // b is a "nullable Boolean"
Note that this can have side effects depending on how the result is used, especially if a nullable Boolean result is used as part of a more complex expression.
var lFile := "/Some/File.exe";
//...
if not lFile:Exists then // this might not do what you think it does, if lFile is nil.
The above code will not do what you might expect from it, if lFile is nil, since according to nullable boolean logic, 'lFile.Exists' would be nil, and since any operation involving nil remains nil, not nil is still nil...
See Also
Field Access
Fields of a Class or Record can be accessed simply by specifying their name.
For fields of the current type (i.e. the class or record that the current code is also a part of), simply the name of the field on its own suffices to access it. To access fields of a different type (or a different instance of the same type), a Member Access Expression is used, appending a . or : to the expression that represents the instance, followed by the field name:
type
Foo = public class
private
var fValue: String;
public
method CopyFrom(aBar: Foo);
begin
fValue := aBar.fValue;
end;
end;
In the above example, fValue can be accessed directly, to get its value in the current instance of the class. A Member Access Expression is used to access the same field on aBar – a different object.
Note that non-private fields are discouraged, so accessing fields (opposed to, say, Properties) on other instances is a rare (but not entirely uncommon) situation. In the example above, you notice that a class can access private fields of other instances of the same class
Using self to Avoid Ambiguity
The self expression can be used to explicitly access a field on the current instance, in cases where the name of the field is hidden by a different identifier in scope:
var Value: String;
method UpdateValue(Value: String);
begin
self.Value := Value;
end;
Although in general it is advised to avoid such issues by having a consistent naming schema — such as f prefix for fields, and a prefix for parameter names:
var fValue: String;
method UpdateValue(aValue: String);
begin
fValue := aValue;
end;
Writing to Fields
Unless a field is marked as readonly, field access expressions are assignable, allowing code to to update the value of the field (as already seen in the code snippet above).
fValue := 'Hello';
See Also
Property Access
Properties of a Class, Record or Interface can be accessed simply by specifying their name.
For properties of the current type (i.e. the class or record that the current code is also a part of), simply the name of the property on its own suffices to access it. To access properties of a different type (or a different instance of the same type), a Member Access Expression is used, appending a . or : to the expression that represents the instance, followed by the property name:
type
Foo = public class
private
property Value: String;
public
method CopyFrom(aBar: Foo);
begin
Value := aBar.Value;
end;
end;
In the above example, Value can be accessed directly, to get its value in the current instance of the class. A Member Access Expression is used to access the same property on aBar – a different object.
Using self to Avoid Ambiguity
The self expression can be used to explicitly access a property on the current instance, in cases where the name of the field is hidden by a different identifier in scope:
method UpdateValue(Value: String);
begin
self.Value := Value;
end;
Although in general it is advised to avoid such issues by having a consistent naming schema, such as an a prefix for parameter names:
method UpdateValue(aValue: String);
begin
fValue := aValue;
end;
Writing to Properties
Unless a property is readonly (either by omitting a setter, or having the [readonly](../Members/Properties#other-modifiers modifier), property access expressions can also be assigned to, to update the value of the property (as already seen in the code snippet above).
Value := 'Hello';
Accessing Indexer Properties
Indexer Properties are a special kind of property that do not represent a single value, but have a range of values controlled by one or more parameters (or "indexes").
Indexer properties must be accessed by appending an Indexer Expression, consisting of square brackets and one or more parameters, to the name. This applies both to reading and (where permitted) writing the property.
If an indexer property is marked as default, it can also be accessed by using the indexer expression directly on the type instance (or on self).
var i := lList.Items[5];
lList.Items[5] := "New Value";
Note that a property access expression to an indexer property is not valid without the appended indexer access expression. e.g.:
var items := lList.Items; // 🛑 compiler error!
See Also
Method Access & Calls
Methods of a Class, Record or Interface can be accessed simply by specifying their name.
For methods of the current type (i.e. the class or record that the current code is also a part of), simply the name of the method on its own suffices to access it. To access methods on a different type (or a different instance of the same type), a Member Access Expression is used, appending an . or : to the expression that represents the instance, followed by the method name.
By default, accessing a method means to call it, unless the expression is preceeded by an @ Address-Of operator, or the surrounding context suggests that the address of the method is expected. More on that below.
Parameter-less methods can be called with just their name, or an optional empty set of parenthesis (()). For methods that require parameters, these must be provided in parenthesis after the method name:
type
Foo = public class
private
method Print;
method Update(aValue: String);
public
method Test(aBar: Bar);
begin
Print;
Update(aBar.Name);
aBar.NortifyOfUpdate(self);
end;
end;
In the above example, Print and Update can be called directly, as methods on the current instance of the class. A Member Access Expression is used to call the NortifyOfUpdate method on aBar – a different object.
Using self to Avoid Ambiguity
The self expression can be used to explicitly access a method on the current instance, in cases where the name of the field is hidden by a different identifier in scope:
method Test(aBar: Bar);
begin
var Print := new StarryNight(5, 10);
...
self.Print;
end;
In the above example, the local Print variable (which really should have been named lPrint) hides the Print method. Via the self keyword it can still be called. In this case simply adding parenthesis, Print(), would also have resolved the ambiguity.
Generic Parameters
Methods might be defines with generic parameters. In most cases, these can be inferred from parameters of the method call, but sometimes it might be necessary to explicitly specify them, using angle brackets between the method name and the (optional) parameter list:
var x := lStringList.Select<Integer>(s -> length(s));
The above example would compile without the explicit <Integer> because the type can be inferred from the code in the Lambda Expression, but it is good to have the option to be explicit.
Multi-Part Method Names
Methods can have Multi-part Method Names that give a more expressive description for individual parameters. The individual parts of the method name will be used for the call in the same way as they are in the declaration, with each part being followed by a set of parenthesis containing a subset of parameters:
lObject.RunCommand('ebuild') Arguments('MyProject.sln', '--configuration:Debug');
Trailing Closures
If the last parameter of a Method (or Constructor) is a Block type used as a callback, rather than passing a method name or Anonymous Method, the block can follow the method call as a "trailing closure". This allows for a more natural integration of the callback into the flow of code and essentially makes the method call feel more like a native language construct being followed by an begin/end block:
The following snippet shows a call to dispatch_async with a trailing closure:
dispatch_async(dispatch_get_main_queue) begin
// do work on the main thread
end;
If the closure receives any parameters, their names will be inferred from the declaration of the method or the Block type used in the declaration, and become available as if they were local identifiers:
remoteAdapter.beginGetDataTablewWithSQL('SELECT * FROM FOO') begin
writeLn(table)
end;
To avoid ambiguity, trailing closures are not supported inside require/ensure clauses of Class Contracts.
Getting the Address of a Method
Sometimes, instead of calling a method, one needs to obtain its address – typically to assign to an Event or pass it as a Block. There are two ways to achieve this.
Preceding the method access expression with the @ Address-Of operator will always return its address:
var m := @lMyObject.Foo; // get the address
...
m(); // call it, later
Alternatively the compiler will also infer that the address of the method is requested, based on the context the method access expression is used in – for example when assigning to a Block type variable/parameter or to an event via +=/-=:
Button.Click += OnClick;
var callback: block := OnSuccess;
Note that parenthesis after the method name are not permitted when obtaining a method's address. In fact, specifying either @ or an empty set of () can resolve (rare) ambiguities where both the methods address or its result would be valid (for example, if the method's return value is a block of the same type as the method itself).
See Also
Event Access
Events of a Class, Record or Interface can be accessed simply by specifying their name.
For events of the current type (i.e. the class or record that the current code is also a part of), simply the name of the event on its own suffices to access it. To access events of a different type (or a different instance of the same type), a Member Access Expression is used, appending an . or : to the expression that represents the instance, followed by the event name:
lButton.Click += OnClick;
Using self to Avoid Ambiguity
The self expression can be used to explicitly access an event on the current instance, in cases where the name of the field is hidden by a different identifier in scope:
Working with Events
Events are multi-cast and hold a chain list of Blocks that is maintained internally. As such, Events are not "read" or "written" in the commom sense, but rather new handlers can be added or removed to an event, using the spcialized += and -= operators:
lButton.Click += OnClick; // add a handler
...
lButton.Click -= OnClick; //remobve it agaun.
Additionally, events can be raised (or triggered, fired), which essentially will call all blocks subscribed to the event, in an undetermined order.
By default, only the class that declares an event can call it; external code can only add or remove handlers. An event is called using the regular Method Call expression, but requires parenthesis to be provided, even if the event is parameterless.
if assigned(OnClick) then
OnClick(args); // foire the Events
See Also
Indexers
An indexer expression is used to access sub-items of an expression at a specific index. Expressions that can be index include Arrays, Indexed Properties or objects with a Default Indexers and Tuples.
An indexer expression consists of a pair of square brackets ([]) containing one or more expressions, separated by comma. The number and type of the expressions depends on the definition of the indexed expression.
var x := lMyArray[5, 8];
var y := lDictionary['Foo'];
var z := lMyTuple[1];
Arrays
Arrays can have one or more dimension, and when indexing the array as many indexer expressions can be provided as there are dimensions. If the number of indexes matches the number of dimension, an array element is the result; if fewer expressions are provided, the result is a sub-array with the remaining dimension(s).
Imagine an var a := array [0..9, 0..9] of String. This can be thought of as a square of 100 string values, or ten rows with ten columns each.
Indexing the array with two indexer expressions accesses one specific string. a[0,0] is the very first string, and a[9,9] the very last. a[0,9] is the last string oin the first column, while a[9,0] is the first string of the last column.
(which index represents the "column" and which one the "row" is completely arbitrary, of course, and depends on the semantics behind the actual data in the array).
Indexing the array with a single expression will return a subarray, one individual row of the array. a[0] ios the first row (an array [0..9] of String, itself), while a[9] is the last row.
Of course, sub-arrays can be indexed themsleves, so a[0][9] will index the first row, and then index the last element in it, essentially being equivalent to a[0,9].
var a := array [0..9, 0..9] of String;
var first := a[0, 0];
var last := a[9, 9];
var x := a[0, 9];
var y := a[9, 0];
var sub := a[0]; // sub is an array[0..9] iof String
last z := sub[9]; // same as a[0,9]
Arrays are always indexed with an Integer, Enum or Boolean type, depending on how the array was defined. Each dimension of an array can start at 0 (the default), or at an arbitrary start value specified when declaring the array, and must fit within the bounds of the array.
Indexer Properties
Indexed Properties are a special kind of properties, that look similar to an array, when being used, but under the hood provide their own code to access and store individual items.
Like Arrays, indexer properties can define one or more parameter, or dimensions, but unlike arrays, these parameters can be of any type, including non-numeric ones. Also unlike arrays, accessing an indexed property always requires all parameters, one cannot obtain a "slice" of a multi-dimensional indexed property.
property Languages[aName: String]: String; ...
...
var x := Languages['Swift'];
Default Indexers
Default Indexers are essentially the same as Indexed Properties, with the special provision that the name of the property can be omitted and the Type containing the property itself can be indexed.
Essentially this is just a convenient shortcut to omit the name of the property but it allows for cleaner and richer APIs, especially for objects where the indexed data is their main purpose (such as a List or a Dictionary class, for example:
var lNames := new List<String>;
...
var y := lNames.Count;
var x := lNames[5];
var z := lNames.Items[5]; // more verbose and less intuitive
Tuples
Individual members of a Tuple can also be accessed via an indexer expression. Tuples are always indexed with an constant integer expression, starting at zero and ending one value below the number of items in the tuple. The result is strognly typed to the particular member of the tuple.
var t := (1, 'Hello', true);
var a := t[0]; // a is an Integer
var b := t[1]; // b is a String
var c := t[2]; // c is a Boolean
var d := t[a]; // 🛑 Compiler error - tuple index must be constant
Writing to Indexer Expressions
Assuming the underlying expression is not read-only, indexers can be assigned to, to change an individual value of the expression.
a[5,5] := 'Center(ish)';
p['Oxygene'] := 'My favorite propgramming language';
t[1] := 5;
See Also
Global Access
The global access expression, :, allows access to global Namespaces in cases where they would otherwise be hidden by a different identifier in the current scope.
For example, a local variable named "System" might make it impossible to access the System.* namespaces on .NET by name. The : works around that:
type
MyClass = public class
property System: String;
method LoadFromFile;
begin
:System.IO.File.ReadAllBytes(...);
end;
end;
The operator works similar to the global:: prefix in C#, and can only be prefix to a fully qualified name, i.e. a name that includes the namespace, or the name of a Type or Global that has no namespace.
See Also
Lambda
A lambda expression is a short version of an Anonymous Method.
It is used to define an inline callbacks that is assignable to a Blocks, an interface reference with a single method that can act as a delegate, or an Expression tree.
Lambdas start with an identifier or a comma seperated list of identifiers surrounded by parenthesis, followed by the lambda operator >. After the operator, either a single expression or a begin/end block that includes one or more Statements.
The identifiers before the -> operator define the parameter names of the lambda. These have to match the number of parameters expected by the block or interface that the lambda is being assigned to, and their type will be inferred.
Lambdas, like Anonymous Method, have full access to everything available in the scope they are defined in, including type members, as well as any local Variables, Properties, Contants or other local methods declared before it.
Any change done to variables or properties in the local scope will affect the lambda, and vice versa.
method Loop(aAction: block(aValue: Integer));
begin
for i: Integer := 0 to 10 do
aAction(i);
end;
method Test;
begin
Loop(a -> writeLn(a)); // This prints "0" thru "10"
end;
When there is no parameter for the lambda, an optional set of empty parenthesis or just a -> operator is allowed to start the lambda. When there is more than one parameter, parenthesis are required:
Test1( -> writeLn('test!')); // parenthesis are optional, without parameters
Test1( () -> writeLn('test!'));
Test2( a -> writeLn($'Got {a}')); // parenthesis are optional, for a single parameter
Test2( (a) -> writeLn($'Got {a}'));
Test3( (a,b) -> writeLn($'Got {a} and {b}')); // parenthesis are required
See Also
Anonymous Methods
An anonymous method is used to is used to define an inline callbacks that is assignable to a Blocks, an interface reference with a single method that can act as a delegate, or an Expression tree.
Anonymous methods start with the block, delegate or method keyword, followed by a Method signature and a begin/end block that includes one or more Statements.
Anonymous methods can use any member defined in the scope they are defined in. Any change done to variables in the local scope will affect the lambda and vice versa.
method Loop(aAction: block(aValue: Integer));
begin
for i: Integer := 0 to 10 do
aAction(i);
end;
method Test;
begin
var b := 10;
Loop(method(a: Integer); begin
writeLn(a+)
end);
end;
An alternative syntax for defining anonymous methods is a Lambda expression, which is shorter but cannot provide parameter types and relies on type inference.
Static Anonymous Methods
Anonymous methods may optionally be declared as static, by prefixing them with the class keyword. This is works analogous to static anonymous methods in C# 9.0.
method Test;
begin
var b := 10;
const c := 20;
Loop(class method(a: Integer); begin
writeLn(a+c); // cannot access "b" here.
end);
end;
Making anonymous methods static can avoid unintentionally or unnecessarily capturing state from the enclosing context, which could result in extra overhead.
See Also
If/Then/Else Expressions
The if/then expression works similarly to the common if/then Statement , except that is an expression that presents a value – namely that of either the then sub-expression or the (optional) else sub-expression, depending on whether the condition is true or false.
var lDescriptiveText := if x < 10 then
'less than ten'
else
'ten or more'
In the above example, the variable lDescriptiveText is assigned one of two values, depending on whether the condition x < 10 is true or false.
Optional else clause and Nullability
Like with the if/then Statement, the else clause is optional. If it is omitted, the value of the if/then expression for a false condition will be nil. This implies that if the type of the then expression is a non-nullable type, such as a value type, the type of the whole expression will be upgraded to be nullable.
var lCount := if assigned(s) then s.Length; // lCount will be a nullable Integer
Nullable Conditions
The condition expression for the if/then expression must be of Boolean or Nullable Boolean type.
If the condition is a simple boolean, the if/then statement will execute the then clause if the condition is true, and the (optional) else clause if the condition is false.
If the condition is a Nullable Boolean type, then the additional case of the condition evaluating to nil needs to be considered. While a nil nullable boolean strictly speaking is not equivalent to false, the if/then statement treats them the same, and will execute the else clause, if provided, in this case.
See Also
For Loop Expressions
For Loop Expressions are a way to use a regular for Loop as part of an expression, symmetrical to the new Case Expressions and If Expressions. The result of the for loop expression is a Sequence of values (implemented internally the same way as an Iterator would be).
Just as the regular for Loop Statement, the for loop expression supports for/to loops that iterate over a range of numbers, and for each loops that can iterate over an existing sequence.
Because for loop expressions generate a sequence, rather than performing a repeated action, they use the yield keyword, instead of do, to provide the expression for each iteration:
var lSquares := for i: Integer := 0 to 9 yield i**2;
The result of the above expression is a sequence that, when iterated, will contain the numbers 0, 1, 4, 9, 16, 25, 36, 49, 64, 81...
Note that, just like Iterators, the for expression does not actually run the full sequence and generate all values ahead of time. It merely defines how each ite of the sequence will be generated. It is not until the sequence is iterated, for example with a for each loop statement, or a LINQ function sich as .ToList().
Also just as the regular for Loop Statements, downto can be used to count downwards instead of up, step can be used to change the increment for each loop iteration, index and provide a separate index counter and matching can filter a for each loop down to a specific set of subtypes.
breaking out of a for loop statement or continueing an iteration without value is not supported, but it is allowed for an iteration to raise an Exception via a raise Expression.
See Also
Case Expressions
Like its counter-part the case Statement, the case expression can return one (or none, i.e. nil) of a set of possible expressions, depending on the provided input:
Case expressions make it possible to use case in an expression instead of a standalone statement. Instead of statements, case requires a (single) expression for each element and its else clause:
var i: Integer;
var s := case i of
0: 'none';
1: 'one';
2: 'two';
3..5 : 'a few';
else 'many';
end;
The result type of a case expression is the closest common type that can be inferred from all individual statements. For numerical values, it will be the closest type that can hold any of the returned (e.g. Double, if some cases return an Integer and others a Double).
If the else clause is omitted and no other case matches, the case expression returns the default value for its type (nil for a reference or nullable type, or 0-equivalent for a value type).
See Also
Async Expression
async expressions are a special kind of expression that can take any expression or single statement and cause it to be evaluated or performed asynchronously, without blocking the execution flow in the place the async statement is being called. Only when the value of an async expression is being explicitly accessed at a later time will the execution flow block and wait for the value to become available, if necessary.
To represent that their value will not be available immediately, async expressions will always be of a Future type matching the type of the inner expression.
For example, if the inner expression would be of type Integer, the corresponding async expression will be of type future Integer, instead.
var len1 := async SlowlyCountCharactersInString("2nd String"); // len2 will be a future Integer
var len2 := SlowlyCountCharactersInString("Some String"); // len will be a regular Integer
var l := len1+len2; // waits for the len1 Future to finish evaluating, if necessary
Plain Statements in async expressions
Despite being expressions themselves, async expressions can also work on a plain statement, which has no resulting value of its own. In such a case, the async expression will be a type-less Future, also sometimes referred to as a Void Future.
Unlike typed futures, a typeless future has no value that it represents, but it can be used to wait for the asynchronous task that it represents to be finished.
var fut := async begin // goes off and does a couple of things in the background
DoSomething();
DoSomethingElse();
end;
DoSomeMore(); // meanwhile, do more work on the current thread
fut(); // wait for the type-less future to finish, if it hasn't already.
var x := fut(); // ERROR. fut has no value.
You can and should read more about Futures, both typed and type-less, here
See Also
Await Expressions
An await expression can be used to write asynchronous code in a linear fashion. It can be applied to methods that return a Task or Future, as well as to methods that expect a callback closure as final parameter.
Code can be written as if the methods in question return a value right away, and the compiler will handle the task of unwrapping the provided code and handle the callbacks properly. Under the hood, await will break the method into different parts, scheduling them to be executed asynchronously once the awaited actions have been completed.
Await with Tasks
Await with Tasks works similar to the "async/await" pattern in other non-Elements languages, such as JavaScript or Visual C#. A method is declared as returning a special Task type either explicitly, or using language sugar such as the C# async keyword. The returned Task instance can be used to keep track of the status, and be notified when the result is available – which the await keyword abstracts:
method Test: Task<String>;
begin
var task := new Task<String>(-> begin
Thread.Sleep(10000);
exit 'Result!'
end);
task.Start();
exit task;
end;
...
method OtherMethod();
begin
var lMessage := await Test();
writeLn(lMessage);
end;
At the point of the await in OtherMethod, the actual method containing the await call will finish. All subsequent code (such as the call to writeLn in the example above) will be wrapped in a helper type, and execute once the task as completed.
Await with Closures
Await can also be used with methods that take a "callback" closure as last parameter. The parameters of the closure will turn into return values of the call. For example consider the following call using Elements RTL's Http class:
method DownloadData;
begin
Http.ExecuteRequestAsJson(new HttpRequest(URL), (aResponse) -> begin
if assigned(aResponse.Content) then begin
dispatch_async(dispatch_get_main_queue(), () -> begimn
// show data
end);
end;
end);
end;
This code uses two nested closures, first to wait for the response of tne network request, and then to process its results on the main UI thread. With await this can be unwrapped nicely:
method DownloadData;
begin
var lResponse := await Http.ExecuteRequestAsJson(new HttpRequest(URL));
if assigned(lResponse.Content) then begin
await dispatch_async(dispatch_get_main_queue());
// show data
end;
end;
Note how the parameter of the first closure, aResponse becomes a local variable, lResponse, and how await is used without return value on the dispatch_async call.
For callbacks that return more than one parameter, await will return a Tuple, e.g.:
var (aValue, aError) := await TryToGetValueOrReturnError();
...
Await with Asynchronous Sequences
On the .NET platform, await can also be used to loop an Asynchronous Sequence. Here the await keyword is followed by the for each keywords defining a regular for Loop. Each individual entry in the sequence will be await'ed and the loop will be run for it. Execution after the loop will continue after all items have been processed and the end of the asynchronous sequence has been reached.
var lItems: async sequence of String := ...;
await for each i in lItems do
writeLn(el);
writeLn("Done");
See Also
Await for Closure Callbacks is unique to Elements, and is available in RemObjects C# and Swift, as well.
From Expressions (LINQ)
from expressions provide an elegant SQL-like way to perform query operations on a Sequence, Array or other collection.
This includes ways to filter, sort, group and join sets of data.
A from expression (also referred to as a LINQ expression, short for "Language INtegrated Query") always starts with the keyword from, and its result is a new Sequence of the same or a derived (and possibly anonymous) type.
var lNames := from p in People
where p.Age ≥ 18
select p.Name;
The beginning of the expression is formed by the two keywords from and in. Much like a for i in, the in keyword is followed by the sequence to be iterated, and preceded by a new variable that is introduced for the iteration. This variable is available throughout the rest of the expression to refer to an individual item in the sequence.
Following the preamble can be one or more query sub-expressions, such as the where and select expressions in the example above. When the LINQ expression is later executed, each sub expression is applies to the result of its predecessor.
In the above example from p in People is the origfinal sequence of all items in the People collection. where p.Age > 18 executes over each of these items, returning a new sequence that contains only those matching the condition (p.Age ≥ 18). select p.Name then runs over that sequence, i.e. only the persons age 18 or above, and it will return a new sequence that has each adult's name, instead of the full data.
As a result, lNames will be a sequence of String, containing the name value from all people whose age value was 18 or above.
LINQ Query Operators
The following query operators, or sub-expressions, are supported:
where
where can be used to filter a sequence. The expression should return a boolean where true indicates this value will be included in the result.
var lTallPeople := from p in People where p.Height > 200;
from
from can also be used as a sub-expression, to introduce a sub-sequence into scope. Both the original identifier and the new variable are available in scope, afterwards:
var lChapters :=
from book in Books
from chapter in book.Chapters
where book.Author = "Stephen King" and chapter.length > 50
select Book.Title+", Chapter "+Chapter.Title;
// all chapters by Stephe King that are longer than 50 pages
with
with can be used to evaluate a sub-expression, store it, and give it a name, so it can be reused in additional queries.
var s := "A sentence";
var vowels := from letter in s
with lower := Char.ToLower(letter)
where lower in ['e', 'u', 'i', 'o', 'a']
join
join expressions can join two seperate collections together. An optional into clause can change the name of the resulting identifier.
var lBooksWithAuthor := from b in Books
join a in Authors on b.Author equals author.ID
select new class (Book := b, Author = a);
order by (descending)
order by is used to sort a sequence in a specific order. It expects an expression that is comparable. To sort by multiple criteria, more than one exprerssion can be provided, separated with a comma. An optional ascecnding (default) or descecnding modifier can be appended after each expression to reverse the order.
var lSorted := from p in People
order by p.Name ascending, p.Age descending
select p.Name+", age "+p.Age;
select
select can be used to convert each item of the sequence to a derived value, which can be of the same or a different type. When select is not the final query operator in the expression, the into keyword has to be used to provide a new identifier for the rest of the expression.
var lShortPasswords := from u in Users
where not u.Disabled
select u.Password into p
where p.Length < 8;
group by
group by is used to partition a sequence into sub-groups by an expression.
The result returns a grouped sequence with one entry for each group, which contains both the shared value, as well as all items of the subgroup as nested sequence.
When this is not the final query operator in the expression, the into keyword has to be used to provide a new identifier for the rest of the expression. The identifier after group is implied to be the current LINQ query identifier, if it's omitted.
var lPeopleByAge = from p in People
group s by s.Age;
reverse
As the name implies, reverse reverses the order in which things are returned.
var x := [1,2,3,4,5];
var y := from a in x reverse;
// 5,4,3,2,1
distinct
distinct filters out duplicates items in a sequence, so that each unique value is only contained once in the result.
var x := [1,2,3,2,4,4,5];
var y := from a in x distinct;
// 1,2,3,4,5
take
take takes a limited number of elements from the collection and stops returning after that.
var x := [1,2,3,4,5,6,7];
var y := from a in x take 5;
// 1,2,3,4,5
take while returns items as long as the provided expression returns true.
var x := [1,2,3,4,5,4,3,2,1,0];
var y := from a in x take while a < 4;
// 1,2,3
skip
skip skips a number of elements before returning from the collection. If the end of the collection is reached before the appropriate number of items where skipped, the resulting sequence will be empty.
var x := [1,2,3,4,5,6,7];
var y := from a in x skip 3;
// 4,5,6,7
skip while skips items as long as the expression returns true.
var x := [1,2,3,4,5,4,3,2,1];
var y := from a in x skip while a < 4 select a;
// 4,5,4,3,2,1
See Also
Locking Expressions
A locking expression works much like a regular locking statement, in that it protects a bit of code to be only run from a single thread at a time. In contrast to a locking statement, which can wrap a single code statement or a full block, a locking expression wraps access to a single expression, and its value can be used in a wider expression outside of the scope of the lock.
Example:
var lCount := locking self do CountItemsInList();
// go on to use lOunt, unlocked
Without support for locking as an expression, the above code would have to clumsily declare a manually typed variable first, and then obtained the count, e.g. as such:
var lCount: Integer;
locking self do begin
lCount := CountItemsInList();
end;
// go on to use lCount, unlocked
See Also
Raise Expressions
Much like the regular raise statement, the raise expression will terminate the current scope by raising (or re-raising) an exception. The exception will bubble up the call stack, terminating all execution flow, until it is caught by a try/except block.
Different than the raise Statement, the raise expression can be used in place of an expression of arbitrary type — for example in an if/then Expression or as parameter to coalesce():
var x := coalesce(a, b, c, raise new Exception('neiter a, b or c were assigned');
See Also
New
The new expression is used to instantiate a new Class, Record or dynamic Array type. When instantiating a class use parenthesis, when instantiating an array type use blocks.
// creates a new instance of List<String> and calls the constructor.
var x := new List<String>;
// creates an array of integers with size 15
var y := new int[15];
// creates an array of integers with size 15
var y := MyRecord(5);
For classes and dynamic arrays, calling new will allocate the necessary space on the heap to store the data on the heap. Since records are stack based, no allocation is necessary, and in fact the use of new on record types is infrequent.
For both classes and record, the new expression will also execute one of the type's Constructors.
Parameters
The new expression can optionally provide zero or more parameters, to the constructor, surrounded by parenthesis. Similar to regular method overloading, a type can provide multiple constructors, and the new expression will pick the constructor that best matches the provided parameters. The parenthesis are optional (but encouraged) when no parameters are passed.
var x := new MyClass(15); // Calls the constructor with 15
Types may also provide named constructors, typically starting with the prefix with, that can be used to further disambiguate, which constructor will be called:
var x := new List<String> withCapacity(20);
Property Initializers
Very often, the first task after creating a class instance is to initialize some of its properties that are not set by a constructor. For example:
var b := new Button();
b.Title := 'Click me!';
Oxygene allows to add property initializers as part of the parameter list, to do this in one step. this is especially helpful when the created object is immediately passed on to, say, a method call:
fContriols.Add(new Button(Title := "Click me!");
This extended syntax is only supported for constructors, and the property initializers must be placed after any of the regular constructor parameters.
See Also
Constructor Call
Inside a Constructor, the constructor keyword can be used to defer construction of a Class or Record instance to another constructor on the same type, or the ancestor class.
Used on its own, the constructor keyword calls a different constructor on the same type:
type
MyClass = public class
public
constructor;
constructor(aName: String);
property Name: String;
end;
constructor MyClass;
begin
constructor('My Name'); // calls the second constructor.
end;
constructor(aName: String);
begin
Name := aName;
end;
Please refer to the Constructors: Deferred Construction topic for more details.
Constructor calls accept parameters, and they can also work with named and multi-part constructors. Just as in new Expressions, the keyword can be followed (optionally) by a name, and/or a set of parameters. Unlike new Expressions, constructor calls can not take additional properties to initialize, but that can be done as separate statements after the constructor call.
'inherited` Constructor Calls
In constructors for Classes, the inherited Expression can be used with constructor calls in order to defer execution to a constructor of the base class:
constructor;
begin
DoSomeWork();
inherited constructor("Hello");
DoSomeMoreWork();
end;
'mapped` Constructor Calls
In Mapped Types, constructors can defer defer to constructors of the original type using the mapped Expression with the constructor call:
constructor;
begin
mapped constructor("Hello");
DoSomeAdditionalSetup();
end;
Please refer to the Mapped Types: Constructors sub-topic for more details.
See Also
Type Cast Expressions
Type Check Expressions
The is and is not type check expressions can be used to check if a concrete class instance is compatible with a given type – i.e. is of that type or descendant, or implement the given interface. This is most useful with polymorphism, when a valuen is declares as a base type, and the concrete type it might hold is not known at compile-time.
var p: Person := FindPersonByName("Peter Parker");
if p is Employee then begin
...
end;
The above example assumes a class hierarchy, where Exployee is a subclass of the Person class. the FindPersonByName method might be declared to return any ind of person, and the is check is used to determine if the returned instance is of type Employee, or not.
The expression p is Employee will evaluate as true if the instance het by p is of type Employee, or any further subclass of Employee. It will be false, otherwise *e.e.g id p holds Client persion instance.
is can also be used to determine of a class implements a given interface:
if p is IDisposable then begin
...
end;
Note that the compiler will emit a hint if it can determine a given is check to always be false (or always be true), at compile time, for example, because the two types are from incompatible subtrees of the class hierarchy, or from differen TObject models:
var p: Person := FindPersonByName("Peter Parker");
if p is Button then begin // Hint: will always be false, compiler knows a Person can't be a Button
...
end;
If the source value is nil, an is type check will always evaluate to false.
Negative is not Checks
While, like any boolean expression, an is type check can be negated by not, a special is not expression is supported to allow a more convenient and readable negative check:
var p: Person := FindPersonByName("Peter Parker");
if p is not Manager then begin
...
end;
is equivalent to the more verbose and less intuitive:
if not (p is Manager) then begin
...
end;
If the source value is nil, an is not type check will always evaluate to true, correctly negating the behavior of is.
Inline Variable Declarations
An is type check can optionally declare a new inline variable matching the new type, which will be assigned by Type Casting the source value to the target type if it matches. Otherwise the new variable will be nil. The new variable will valid for the remainder of the current scope.
if p is var e: Employee then begin
e.GiveRaise; // e is always assigned, here
end;
writeLn($'was employee? {assigned(e)}"); // e is still valid here, but may be nil
would be equivalent to:
if p is Employee then begin
var e:= o as Employee;
e.GiveRaise;
end;
See Also
Discardable (nil)
A discardable is a special kind of expression that can be used as the target of an Assign Statement in order to ignore (part of) the result of the right-hand side of the assignment.
In general, most Oxygene Expressions can be used as Statements, meaning they can be used stand-alone, ignoring a possible result. For example, a method can be called, and its result can simply be ignored, by putting the method call as a plain standalone statement. However there are some cases where this is not allowed, and the result of an expression must be reused or acted upon. For example, it is not allowed to access a property without doing something with its value.
The discardable expression provides a workaround for those scenarios, by allowing to explicitly assign the result of an express "to nowhere". This is done by using the nil keyword as the left-hand side of an Assign Statement.
There are three commonly useful scenarios for this:
- Calling into a property to trigger side-effects of its getter (for example, lazy initialization) w/o using its value
- Calling a method that is explicitly marked with the
WarnUnusedResult Aspect
- Discarding parts of a Tuple Types result, while extracting others
For example:
nil := MyManagerClass.Instance; // make sure the Instance is created, but don't use it.
(a, nil, c) := SomeTupleWithThreeValues; // discard the middle value of a tuple
On the case of tuple expansion, the nil keyword can also be used in combination with a Var Statement, to declare new variables to hold some tuple values, while discarding others:
var (a, nil, c) := SomeTupleWithThreeValues; // discard the middle value of a tuple, declare `a` & `c` fresh
See Also
Address-Of (@)
The address-of expression obtains the address of a Field or local variable as a Pointer, or the address of a Method as a Block. It is a prefix operator, and applied to the left of the expression whose address should be obtained:
var i := 5;
var a := @i; // a is now an ^Integer
...
a^ := 7;
Use of @ is often unnecessary when obtaining block references, as the compiler can infer the intention based on surrounding code. But an explicit use of @ can help with type inference, or resolve ambiguities (e.g. obtaining a block reference to a method that itself returns a block.
method foo(a: Integer);
var x: block(a: Integer) := foo; // compiler knows a block reference is needed
var y := @foo; // implicit @ helps infer the type because else...
var z := foo; // ... it would just call `foo` and use its result
or
type BlockGenerator = block: block; // a block that returns a block
method foo: block;
var x: BlockGenerator := @foo; // x is a block reference to `foo`
var y: BlockGenerator := foo; // y is whatever block `foo` *returned*
See Also
Pointer Dereference (^)
The pointer dereference expression "unwraps" a Pointer and gives access to the Field or local variable that the pointer referred to. The result has the same type as the original value, and can be used in any expression where such a value would be usable. For example, a dereferenced Integer pointer is an integer:
var i := 5;
var a := @i;
...
a^ := 7; // a is the same integer as `i`.
var x := a^ + 5; // gives 13
De-referencing a nil pointer will result in a Null Reference Exception, and de-referencing an invalid (garbage) pointer can result in memory corruption or crashes.
One can think of a pointer dereference as the opposite of the Address-Off (@) Operator.
Automatic Dereferencing
When accessing members of a record through a pointer using the Member Access(.) Operator, the ^ is optional:
type
MyRecord = record
a: Integer;
end;
var x := ^MyRecord;
x^.a := 5;
x.a := 5; // same thing
Note that this does not extend to calling methods or accessing properties; this is to avoid the ambiguity of invoking a method (such as ToString, on .NET) on the pointer itself.
See Also
Operator Expressions
An operator expression combines a well-defined operator (such as + or and) with either one or two expressions to its left and/or right. The result is a new expression.
Oxygene supports expressions with a fixed set of Unary and Binary Operators.
See Also
Unary Operators
Unary expressions are expressions where an Operator is combined with a single other expression. Unary operators can be pre-fix, meaning they come before the expression they operate on, or post-fix, meaning they come after the expression.
Except for the ^ Pointer Dereference Operator, all unary operators in Oxygene are pre-fix.
Examples:
var a := true;
var b := not a; // result: false
var x := 5;
var y := -x; // result: -5
var f: block := @MyMethod;
var i: ^Integer;
i^ := 5; // de-references the pointer
Operators
The table below lists all available unary operators.
| Operator |
Description |
not |
Reverses the value of a Boolean from true to false or vise versa
Reverses each bit of an Integer value from 0 to 1 or vice versa. |
- |
Turns a positive Integer value negative, or a negative one positive. |
+ |
Opposite of negation (-), generally does nothing for most types. |
@ |
The Address Of operator. |
^ |
The Pointer Dereference operator. |
old |
The old Operator, can be used to refer to the original value of a parameter or Field in a Post-Condition. |
inherited |
Allows access to the inherited version of the expression it precedes. Available for Member Access and constructor Calls |
For the +, - and not operators, Custom Types can implement Custom Operators that provide type-specific behavior.
See Also
Binary Operators
Binary expressions are expressions where an Operator is used to operate ion two expressions, one provided on its left, and one on its right (commonly refered to as the left-hand and right-hand expression).
Examples:
if a < b then ...
if SomeVariable is not String then writeLn(not a String)
Operator Precedence
When used in more complex expressions, binary operators will be evaluated according to their order of precedence, starrting with the highest order. For example in the expression 5 + 10 * 2, the multiplication will happen before the addition, resulting in 25. Operators of the same precedence will be executed from lef to right, so for the expression 10 - 3 + 8, the subtraction will happen first, then the addition, resulting in 15.
The ≤, <, ≥ and > operators can also be used in Double Boolean Comparisons. Here, the middle operand will be compared both to the first and to the last operand, in order. Boolean Short-Circuit will apply for the second comparison:
var y := 10;
if 10 ≤ x ≤ 15 then
writeLn("x is between 10 and 15").
When mixed with Unary Operators, the unary operatores take full precedence. So for the expression 5 + -3 + 8, the value 3 will be negated first, and the additions are then performed, resulting in 10.
Operators
The table below lists all available binary operators.
| Operator |
Precedence |
Description |
≤ |
0 |
(Also >=) Greater than or equal |
≤ |
0 |
(Also <=) Less than or equal |
> |
0 |
Greater than |
< |
0 |
Less than |
= |
0 |
Equal |
≠ |
0 |
(Also <>) Not equal |
in |
0 |
Check if the left-hand value side is in the Array, Set or Flags Enum on the right.. |
not in |
0 |
Returns the oposite of in |
is |
0 |
The Type Check Operator. Checks if the left-hand-side object is of the right-hand-side type. |
is not |
0 |
Returns the oposite of is |
implies |
0 |
a implies b, translates to not a or b |
+ |
1 |
Add two values |
- |
1 |
Substract two values |
or |
1 |
Logical or binary or |
xor |
1 |
Exclusive or |
** |
2 |
Power of |
* |
2 |
Multiply |
/ |
2 |
Divide; When the Delphi Compatible Division option is set this always results in a float |
div |
2 |
Divide |
mod |
2 |
Modulus |
and |
2 |
Logical or binary AND |
shl |
2 |
Shift left |
shr |
2 |
Shift right |
as |
2 |
The Type Cast Operator. Casts left side to the type on the right, or fails with an Exception. nil results in a nil. |
+= |
3 |
Add an event handler to an Event |
-= |
3 |
Remove an event handler from an Event |
For the +, -, * /, div, mod, and, or, xor, shl, shr, =, ≠, <, ≤, >, ≥, in and not operators, Custom Types can implement Custom Operators that provide type-specific behavior.
See Also
Parenthesis Expressions
Any expression can be enclosed inside a pair of parenthesis ((...)), as needed. Parenthesis do not change the value or behavior of the expression they enclose, but the can provide readability and – in certain cases – help with code ambiguity and/or override Operator precedence. The latter is especially helpful when using Binary Operators.
At best, surrounding parenthesis have no effect at all:
var x := (3 + 2);
However, they can add to the readability of more complex expressions. In the following example, both statements evaluate the same (because * has precedence over +) – but while the added parenthesis add nothing to code flow, they make the expression more readable to the developer by emphasizing that the second part executes first. In less trivial examples, that can be very helpful.
var x := 3 + 2 * 5;
var y := 3 + (2 * 5);
Parenthesis can also override operator precedence, by clearly grouping a subset of a complex set of expressions. In the following example, the parenthesis group 3 + 2 together to make sure they are seen as one expression to be evaluated first, before multiplying with 5.
var x := 3 + 2 * 5;
var y := (3 + 2) * 5;
Parenthesis can also be necessary (or at least helpful) to resolve otherwise ambiguous code – whether it is ambiguous to the compiler or (like in the above examples) merely to the reader:
var x := (y as String).Length;
var c := (new MyClass).SomeMethod();
See Also
Aspects
Oxygene provides full support for Attributes and Aspects.
Attributes and Aspects are annotations that can be placed on pieces of code, from Types to Members, in order to affect compiler or runtime behavior.
Custom Attributes can be queried for at runtime using a technology called Reflection, while Aspects (some of which are provided by the system, but which can also be user-created) can affect and adjust code at compile-time.
The remainder of this text, and much of this documentation site, uses the term Aspects to refer to both Aspects and Attributes, for conciseness.
Aspects can be applied, where allowed, by enclosing one or more attribute names in square brackets:
type
[Obfuscate]
MyClass = public class
...
end;
Multiple aspects can be applied using individual sets of brackets, or by separating the individual aspects with commas. Aspects can take optional parameters closed in parenthesis, including unnamed and named parameters.
type
[Obfuscate(PublicMembers := true)]
MyClass = public class
...
end;
Scope Prefixes
By default, aspects apply to the code construct they immediately precede. In some cases, this is not possible, because the exact place where an aspect should be applied to has no direct code representation, or cannot easily accommodate an aspect. In these cases, the aspect can be prefixed with a scope modifier, followed by a colon:
[assembly:Obfuscate]
The following scope prefixes are supported:
assembly: — applies the aspect to the entire assembly (i.e. the entire project)module: — applies the aspect to the current Module, on .NETglobal: — applies the aspect to the Global classresult: — applies the aspect to the result type of a Method or Propertyparam: — applies the aspect to a specific parameter of a Method or Indexer Propertyvar: — applies the aspect to the backing field of a Property or Event.read: — apply the aspect to the backing read statement of a Property.write: — apply the aspect to the backing write statement of a Property.
As well as:
aspect: — (optional/legacy) designates that the attribute is implemented via a Cirrus Aspect. Can be combined/prefixed with any of the previous prefixes.
See Also
Keywords
Oxygene, being Pascal-based, is a rich and expressive language that heavily relies on keywords over obscure syntaxes to express itself. In Oxygene, the following words are treated as keywords and have special meaning:
abstract — Virtuality Member Modifier and Abstract Classesadd — Events Add Statementsand — Boolean and Bitwise Operator, Member Visibility Levels, Combined Interfacesarray — Array Typesas – Type Cast Expressionsasc — LINQ Expressionsaspect — Aspect Scope Prefixassembly— Type Visibility Levels and Member Visibility Levels, Aspect Scope Prefixasync — Member Modifier and Async Expressionsautoreleasepool — Auto-release Pools for Cocoaawait — Await Expressionsbegin — Begin/End Blocks, Methodsblock – Blocksbreak — All Loop Statementsby — LINQ Expressionscase — Case Statements and Case Expressionsclass — Class Types, declaring static Members and Class Referencesconcat — LINQ Expressionsconst — Constants and Local Constant Declarationsconstructor — Constructors and calls to themcontinue — All Loop Statementscopy — Member Modifier for Properties on Cocoadefault — Member Modifier for Propertiesdelegate – Blocks and Eventsdeprecated — Member Modifierdesc — LINQ Expressionsdistinct — LINQ Expressionsdiv — Numberic Operatordo — For Loop Statements and Expressions, While Loops, With Statements, Locking Statements and Expressions, Using Statements, Try Block Statementsdownto — For Loop Statements and For Loop Expressionsdynamic — Dynamic Typeeach — For Loop Statements and For Loop Expressionselse — If/Then/Else Statements and Expressions, Case Statements and Expressionsempty — Member Modifier for Methodsend — Begin/End Blocks and terminator for various language constructsensure — Method Post-Conditionsenum — Enum Typesequals — LINQ Expressions with joinevent — Eventsexcept — Try Block Statementsexit — Exit Statements and Method Resultsextension — Extension Types and Extension Methodsexternal — Member Modifier for Methods and Fieldsfalse — Boolean Literalsfield — Fields, Method-Local Fields, and Field-Backed Propertiesfinal — Virtuality Member Modifierfinalizer — Finalizersfinally — Try Block Statementsflags — Enum Typesfor — For Loop Statements and For Loop Expressionsfrom — LINQ Expressions, For Loop Statements and For Loop Expressionsfuture — Future Typesglobal — Aspect Scope Prefixgroup — LINQ Expressionshas — Generic Constraintsif — If/Then/Else Statements and If/Then/Else Expressionsimplementation — Code File "Implementation" Sectionimplements — Explicit Interface Implementationsimplies — Implies Operatorin — For Loop Statements and Expressions, In Expressions, Generic Contra-Varianceindex — For Loop Statements and For Loop Expressionsinherited — Inherited Expressionsinline — Member Modifier, Arraysinterface — Interface Types, Code File "Interface" Sectioninto — LINQ Expressionsinvariants— Invariantsis – Type Check Expressions, Generic Constraintsiterator — Member Modifier for Iteratorsjoin — LINQ Expressionslazy — Member Modifier for Propertieslifetimestrategy — Life-Time Strategies for Islandlocked — Member Modifierlocking — Locking Statements and Locking Expressionsloop — Infinite Loopsmapped — Mapped Types and Mapped Expressionsmatching — For and While Loop Statements, For Expressions, and With Statementsmethod — Methods, Anonymous Methods (Closures) and Local Method Declarationsmod — Numberic Operatormodule — Aspect Scope Prefixnamespace — Namespaces, Code File Structurenested — Nested Typesnew — Constructor Call Expressionsnil – Nullability, nil Literalsnot – Boolean and Bitwise Operator, Type Check Expressions, In Expressions, Nullabilitynotify — Member Modifier for Propertiesnullable – Nullability,of — Case Statements and Case Expressions, Arrays, Enums, Sets, Sequences and Tuples, Blocks and Class Referencesold — Method Post-Conditionson — Try Block Statements, Locking Statements and Expressions, locked Member Modifieroperator — Operatorsoptional — Member Modifier for Interface membersor — Boolean and Bitwise Operator, Member Visibility Levelsorder — LINQ Expressionsout — Method Parameter Modifier, Method Calls and Generic Co-Varianceoverride — Virtuality Member Modifierparallel — For Loop Statements and Sequence Typesparam — Aspect Scope Prefixparams Method Parameter Modifierpartial — Partial Types and Member Modifier for Methodspinned — Pinned Local Variablesprivate Member Visibility Levels, Invariantsproperty — Properties and Property Statementsprotected — Member Visibility Levelspublic — Type Visibility Levels and Member Visibility Levels, Invariantspublished — Member Visibility Levelsqueryable — Sequence Typesraise — Events Raise Statementsraises— Member Modifier for Methodsread — Property Gettersreadonly — Member Modifier for Fields, Properties, Local Variables and Local Propertiesrecord — Record Typesreintroduce — Virtuality Member Modifierremove — Events Remove Statementsrepeat — Repeat/Until Loopsrequire — Method Pre-Conditionsrequired — Required Propertiesresult — Method Results, Aspect Scope Prefixreverse — LINQ Expressionssealed — Sealed Classesselect — LINQ Expressionsselector — Selector Expressions for Cocoaself — Self Expressionssequence — Sequence Typesset — Set Typesshl — Bitwise Operatorshr — Bitwise Operatorskip — LINQ Expressionssoft — Soft Interfacesstatic — Member Modifierstep — For Loop Statements and For Loop Expressionsstrong — Storage Modifiers for ARCtake — LINQ Expressionsthen — If/Then/Else Statements and If/Then/Else Expressionsto — For Loop Statements and For Loop Expressions, Mapped Types, true — Boolean Literalstry — Try Block Statementstuple — Type Typestype — Type Declarations, Code File Structureunconstrained — Unconstrained Genericsunit— Type Visibility Levels and Member Visibility Levelsunmanaged — Generics Constraintsunretained — Storage Modifiers for ARCunsafe — Member Modifieruntil — Repeat/Until Loopsuses — Namespacesusing — Using Statementsvar — Fields, Local Variable Declarations and Method Parameter Modifier and Method Callsvirtual — Virtuality Member Modifiervolatile — Member Modifier for Fieldsweak — Storage Modifiers for ARCwhere — LINQ Expressions, Generic Constraints and Try Block Statementswhile — While Loop Statementswith — With Statements and LINQ Expressionswrite — Property Settersxor — Boolean and Bitwise Operatoryield — Iterators
Legacy Keywords
asm — started a block of assembly code (not supported by Oxygene, but respected by the compiler for compatibility)forward — Forward Declarations for Global Methodsfunction — alias for method (but must have a return type)goto — Go To Statementsprocedure — alias for method (but must not have a return type)
Delphi Compatibility
The following keywords are only active when Delphi Language Compatibility is enabled:
cdecl — method calling convention modifier (honored for external methods only)create — allows calling Constructors using ".Create"destructor — allows defining a Delphi-style "destructor Destroy"finalize — allows calling Finalizers using ".Finalize"helper — allows declaring Extensions using class helper for or record helper forlibrary — warning directive for platform-specific code (ignored)noreturn — indicates that the method never returns execution flow to the caller, simliar to the [NoReturn]. This is not enforced, its merely informational.otherwise — alias for else in FPC-compatible case Statementsoverload — member modifier, ignored (Oxygene allows overloading implicitly)packed — modifier for Records, ignoredpascal — method calling convention modifier (ignored/the default)platform — warning directive for platform-specific code (ignored)reference to — marks a function pointer as Block (ignored)register — method calling convention modifier (ignored, but not supported)safecall — method calling convention modifier (ignored, but not supported)stdcall — method calling convention modifier (honored for external methods only)strict — declares a static methods w/o access to the class metadata (ignored)
In general, our goal is to keep the Oxygene language as consistent between platforms as possible. Most language and Compiler features discussed in the Oxygene section and elsewhere in these docs will work the same or similar, across all Elements platforms.
That said, due to differences in the underlying platfroms, there will be a few differences. This topic will highlight the most important differences on the Oxygene language side, and you should also check out the Differences topic in the Cross-Platform section of this site, for a more thorough discussion of all differences as they apply to all Elements languages.
- On .NET and Java, the
block, delegate, method (and legacy) function and procedure) keywords work identically to declare a Block. On the other more-native platfroms, only block and delegate declare a true block, while method, function and procedure deflare more traditional function pointers w/o a "self" reference. See here for more details.
- ARC and the
stronf, weak and unretained Storage Modifiers are supported on platforms that use ARC, Cocoa.
- The
lifetimestrategy keyword for Life-Time Strategies is only supported on Island-backed platforms.
- The
optional keyword for Interfaces methods is supported only on Cocoa.
unsafe code is not supported on Java, and all code is assumed to be unsafe on Cocoa and Island, making the keyword ignored/unnecessary on that platform.- Generic co/contra-variance is supported on .NET only.
- Differences in [Pointer References in Oxygene for Cocoa](Pointer References in Oxygene for Cocoa).
parallel for loops, parallel sequences and queryable sequences are currently only supported for .NET.- Special Java( Platform)-style exception handling extensions and the
raises keyword will be a new platform difference, once implemented.
See Also
Oxygene for Delphi Developers
If you're a Delphi user looking to get into Oxygene, either to expand your tool belt or to move to the more modern cross-platform Pascal dialect altogether, then you have come to the right place!
This page collects all the information you need to get started, will let you explore the differences (and similarities) between Delphi and Oxygene, and provides you with a unique look at what makes Oxygene great, from a Delphi user's perspective.
The Language
It is probably safe to assume that one of the reasons you are here is that you love the Object Pascal language.
The good news is that Oxygene is pretty much the same language that you already know and have used for years with Delphi — it is just vastly extended with additional features (such as Future Types or Class Contracts) and small things that make life easier, like the Colon Operator or Double Boolean Comparisons).
It also cleans up a few minor idiosyncrasies and inconsistencies in Delphi's Pascal dialect to make the language (in our opinion) a bit cleaner and more consistent. Some of these idiosyncrasies can be restored by enabling the Delphi Compatibility Settings.
Read more:
- Minor Language Differences compared to Delphi – explores the minor "cleanup" changes to the language. Things you want to be aware of as you start coding, or as you port existing Delphi code over into the future.
- New Language Features compared to Delphi – gives you an overview of the major features Oxygene offers over Delphi's Pascal dialect. This covers all the big new things Oxygene introduced over the years – features you dont need to worry about for now if you are just getting started, but that will come in handy once you become more familiar with them.
Get to know some key concepts that differ in Oxygene:
- Namespaces and References – sometimes they match, sometimes they don't. Learn more about these two related concepts.
- Namespaces Vs. Unit Names – The =
uses clause in Oxygene pulls in whole namespaces, not single units. Find out what that means.
- Object Lifecycle Management with GC and ARC – say goodbye to
try/finally/Free.
Finally, the following are a few articles to help get Delphi developers acquainted with the GUI frameworks used by Oxygene:
How To Upgrade/Migarte Your Code
Two ways! First, just try importing your project and recompiling. Seriously, that's it! File|Import in Water (or Fire on the Mac) lets you import your project or project group; if you haven't done so already, it will also prompt to import the Delphi packages know as the 'Delphi SDK'.
Second, Oxygene also includes a great tool called Oxidizer that lets you import legacy Delphi code into your Oxygene project, and have it adjusted to the above-mentioned idiosyncrasies automatically. Oxidizer can convert code as you paste it from the clipboard, or import entire units into your project.
- Using Oxidizer to Import Legacy Delphi Code
We strongly encourage you to try and not enable Delphi Language Compatibility for your Oxygene projects, but instead get used to the (few, small, and very sensible) differences. Over time, you will come to appreciate them for making the language cleaner.
The Delphi Language Compatibility option is provided mainly for developers who want to share code between Delphi and Oxygene, but it can also be useful to get started with a large codebase that has many "Delphi-isms".
The IDEs
Oxygene is fully integrated into Visual Studio. However, but we also have two IDEs dedicated to Oxygene and the whole Elements framework:
- Fire, for coding on Mac
- Water, for coding on Windows
These are built from the same codebase and use native UI on both platforms. You can read more about them here.
The Frameworks
When Delphi was first released in 1994 — over twenty (30!) years ago now — it introduced the VCL, a much-needed feature that made Delphi what it was. Back then, programming to the Windows API was painful, as the API was procedural and based on C functions, and using a powerful abstraction layer such as the VCL was much preferable to manually dealing with object handles and writing long case statements to handle window messages.
But in the past 20+ years, the computing landscape has changed, and all of today's platforms come with vast, powerful, and mostly easy to use, consume, and extend frameworks that don't need further abstraction and are in fact hindered by unnecessary abstraction attempts.
-
On Windows, despite what some naysayers like to make you believe, the .NET Framework has become the de facto standard for creating applications, services, and any other kind of application imaginable. With over 10,000 classes and types, the .NET Framework Class Library provides well-designed APIs for just about any need you may have, and third-party libraries, commercial and open source, are there to fill any remaining gaps.
-
Java, too, comes with a vast set of libraries for all imaginable purposes, and on Android, the Java-based APIs provided by the OS in the Android SDK are the default "native" way to develop for the platform (Google in fact discourages the use of the C++-based "NDK" for all but corner cases like the device driver – but the NDK is of course supported by Oxygene, as well).
-
And then there are of course Mac, iOS and their siblings where the extensive, object-oriented Cocoa libraries actually are part of the operating system and its default API. Like the other two platforms above, the Cocoa frameworks provide an unprecedented wealth of well-designed classes and APIs that let you accomplish anything you want on iOS and the Mac.
-
For sharing non-UI business logic code between platforms, our own open source Elements RTL library provides access to commonly used classes and APIs in a cross-platform way with toll-free casting.
The biggest step in adjusting to Oxygene when coming from a Delphi background is the realization that there is no need for a wrapper framework like the VCL to make the OS APIs accessible, because the platforms already come with amazing libraries that, once you get used to them, you will love.
That said, when targeting the native Windows, macOS, and Linux platforms with our Island Compiler Back-End, you have the ability to reference all your existing Delphi packages, giving you optional access to the Delphi RTL, VCL, and all the other APIs that come with Delphi, as well as your own and third party packages. You can read more about that option here.
The Platforms section of this site is dedicated to these libraries, and while most of the actual documentation for them can be found on the platform vendors' sites (the great thing about not having a wrapper framework is that you can use the platform straight from the horses mouth), it will give you an introduction and tips on how and where to get started.
Minor Differences
Aside from the vast amount of New Language Features compared to
Delphi that Oxygene brings to Object Pascal, it also
provides some minor cleanup of idiosyncrasies to make the language more
consistent and a better citizen on the (semi-)managed platforms. This
topic describes these "cleanups" in more detail.
True Namespace Support
Oxygene has full support for Namespaces. As
such, it does away with the unit keyword used in Delphi, and each
source file starts with the keyword instead, optionally followed by a
namespace name. All types declared in a unit are part of the same
namespace (unless the type declaration provides a full alternative
namespace), and multiple source files can and usually will contribute to
the same namespace — in fact, it is even common for small to medium
projects to place all their types into a single namespace.
The clause syntax persists as in Delphi, but instead of listing units
to be used, it will list the namespaces that you want to be in scope for
the current source file. Any types declared in either the current
namespace or a namespace that is "used" will be visible within the
source file without specifying the full namespace.
It is important to distinguish between Namespaces and
References. Using a namespace only brings types
into scope that are already known to the compiler, so that they can be
identified by their short name. References added to the project (.dlls
on .NET, .jar files on Java and on Cocoa) in turn give the compiler a
list of places to find types in. Often, there's a direct mapping between
a reference and a namespace (UIkit.fx, for example, contains the
classes in the UIKit namespace), but sometimes that is not the case.
Read more on Namespaces and References.
0-Based Object-Oriented Unicode String
In Oxygene, the standard String type maps to the platform's default string class, which contains immutable, zero-based unicode strings. On
.NET that is System.String, on
Cocoa Foundation.NSString and on
Java java.lang.String.
Because Strings are true objects, they provide member methods and
properties you can call to perform string manipulations, mostly
obsoleting helper libraries such as Delphi's StrUtils unit. Another
important consideration is that, because strings are regular objects,
the language differentiates between a nil string reference vs. an empty
('') string.
Oxygene allows the use of either single ('Hello') or double
("World") quotes for string literal declarations.
Proper Private/Protected Visibility
In Oxygene, the private and protected Visibility Levels truly have the visibility implied by their names: private members are truly private to
the individual class; protected members are only accessible to
descendant classes. In Delphi, both of these keywords allow unchecked
access to private and protected members of all classes in the same unit
— which is unclean.
Recent versions of Delphi have introduced new strict private and
strict protected visibility sections that mimic what Oxygene's private
and protected visibility types do out of the box.
The unit and unit or protected visibility can be used to obtain an
effect similar to Delphi's interpretation of private/protected.
Delphi also supports a published visibility type that behaves mostly
identical to public. This visibility is not supported or needed in
Oxygene.
Nameless Constructors and the new Keyword
Oxygene uses nameless constructors (and
optionally constructors with Cocoa's with* naming convention)
instead of Delphi's convention of using regular method names, commonly
starting with Create. This goes along with the operator, which is
used for instantiating objects.
The use of Create is not supported in Oxygene by default, neither for
declaring constructors, nor for calling them.
No Destructors, but Finalizers
Oxygene does not support the concept of destructors, since all of its
supported platforms use Garbage Collection or
Automatic Reference Counting. As such, the
destructor keyword is not supported.
As a slightly related concept, but not 100% comparable to destructors,
Oxygene supports Finalizers to allow objects to
perform cleanup when they are released. Unlike Delphi's destructors,
finalizers will be automatically called by the runtime as needed, and
will/should never be called explicitly.
Methods
While still supported, Oxygene deprecates the procedure and function
keywords and favors the method keyword to be used for all method declarations.
The reasoning for this is two-fold. For one, Pascal traditionally calls
things by their name — and Methods are something
fundamentally different than the actual functions and procedural of
pre-OOP procedural programming. For another, in modern Pascal it seems
unnecessary and arbitrary to distinguish between methods that return a
result and those that do not.
:= vs = Operator
Oxygene employs the standard Pascal := assignment operator in two
places where Delphi uses the plain = operator:
Oxygene continues to use = for actual constant declarations, such as
const MY_CONST = 5;, as here a constant is declared to be
equal to a given value.
The syntax for so-called "typed consts" is supported, but members
defined with this syntax are pure constants and cannot be modified; in
essence, const works the same whether a type is specified or not (symmetrical
to how it works to define a variable, whether a type is specified or omitted - a feature we call Type Inference).
Unsupported Member Modifiers
Delphi supports a plethora of method flags that are unnecessary or have
no relevance on the platforms supported by Oxygene, and are thus not
supported. These include:
-
The
stdcall, cdecl, pascal, register,
safecall flags, used in Delphi to indicate the lower-level
binary calling convention to use for the method, are not supported
or necessary in Oxygene.
-
The
overload flag is not supported or necessary in Oxygene,
method overloading is supported by default.
-
The
library, platform and deprecated "cross-platform"
warning flags are not supported in Oxygene.
-
The
dynamic keyword, used by Delphi to indicate an alternative
technique for method virtualization, is not supported in Oxygene.
- The
reference to keywords are not supported.
All of these keywords can be used (in most cases to be ignored) via the
Delphi Compatibility Settings.
Implicit var/out in method calls
In Oxygene, when passing values by reference to a method declared with
the var or out keyword, it is necessary to prefix the passed parameter with the
matching var or out keyword. This makes sure that it is obvious from the call
site that the parameter is passed by reference, and can be modified by
the called method.
In Oxygene for Cocoa, the var or out keywords can also be
used to call framework APIs that are defined to take object pointers – which essentially are C's and Objective-C's way of passing by reference.
Generics
Recent versions of Delphi have begun implementing support for
Generics, and the basic syntax for declaring and
using them – via type parameters in angle brackets – is the same in
Oxygene and Delphi. Unfortunately, while Delphi borrowed the basic
syntax from Oxygene, which brought it to the Pascal landscape first,
Embarcadero chose to use a different syntax for declaring Generic
Constraints.
Oxygene uses the keyword and a rich syntax for declaring the various
different types of constraints, such as is IFoo, or
has constructor. It does not support Delphi's constraint syntax.
Different behavior of the div and / Operators
In Oxygene, the div and / division operators always derive their result from the type of the input parameters. Dividing two integers will result in an integer; dividing floats will result in a float. This is consistent with how all other operators behave as well.
The "Use Delphi-compatible division operators" project option can be used to change this behavior. See Delphi Compatibility Settings for details.
Improved with Construct
Oxygene drops Delphi's inherently unsafe with construct and replaces
it with a new construct that forces the declaration of a new variable
name to access the scope of the with clause. This preserves many of
the benefits of the with feature as found in Delphi, without the
dangerous scope conflicts.
Of course, the Inline Variable Declarations support in Oxygene makes the new with rarely used these days.
No initialization and finalization Sections
Oxygene does not provide support for initialization and
finalization sections, nor any similar functionality because no
concept exists on the underlying platforms that would allow to reliably
reproduce the functionality provided by these features in Delphi -
namely to execute particular code at startup or shutdown of the
application.
Depending on your design goal, there are several avenues to consider for
providing the necessary functionality. If the purpose of the
initialization section is to initialize a type or types defined in
the module, [Class Constructors](Class Constructors) might be
an appropriate solution, and are available on all platforms. If
you are trying to register types or information for later consumption,
consider using Custom Attributes (on .NET and
Java) or other infrastructure provided by the runtimes on all three
platforms for querying available classes.
Delphi-style GUIDs in Interface Declarations
Oxygene does not support Delphi-style GUIDs in Interface declaration, unless the Delphi Language Compatibility
Options are turned on. You can use the [Guid] Aspect, instead.
No Resource Strings
The resourcestring keyword is not supported in Oxygene. Each of the platforms targeted by Oxygene has unique (and usually intuitive and simple to use) ways to deal with localized strings, but they are not tool-chain compatible with having resources strings defined in code.
See Localizing Applications for platform-specific topics on how to deal with localization.
Pointers and "Unsafe" Code
As a managed environment, .NET and Java provide limited support for
pointers and directly manipulating memory. In general, this is not a
problem and most code that relies on pointers can, with a little effort,
be rewritten to run fully managed and verifiable - this is the
recommended approach.
On .NET, Oxygene supports writing so-called Unsafe
Code by setting the appropriate project option
and marking methods with the unsafe keyword. The term "unsafe" here does not reflect that such code is
inherently bad or broken, just that it (potentially) performs memory
actions that cannot be verified as "safe" by the runtime. As such, the
runtime may impose restrictions on unsafe code, for example when running
applications from the network, in specific host environments, or in
other low-trust scenarios, such as on phones or on WinRT.
Where possible, unsafe code should be avoided, but the option is there
if needed. Please refer to the Unsafe Code topic for more details on this.
On Cocoa, which we sometimes like to refer to as semi-managed, pointers
and other code constructs common for "unmanaged" code are available.
On Java, "unsafe" code is not supported at all.
Interface Method Renaming
Delphi for Win32 uses the "=" operator to implement interface methods
under a different name should conflicts arise, such as:
procedure MyFooBar;
procedure IFoo.bar = MyFooBar; // maps the MyFooBar method to the IFoo interface
Oxygene does not provide this syntax, but uses the implements keyword to achieve this
(and provide a lot more flexibility in the process). Refer to the Interface topic for more details.
Record Initializers
Oxygene uses named parameters to initialize a record and class fields
and properties.
var x := new MyRecord(Field1 := 'test', Field2 := 15.2)
This syntax works in both definition and in code blocks.
Delphi does not have a syntax for this that works inside blocks, but it
does have one for constants:
const p: TPoint = (x: 15; y : 16);
This syntax is not supported in Oxygene.
Minor Items
-
Oxygene does not allow access to the outer result variable from
inside a nested local method.
-
Oxygene does not allow you to re-declare a local variable in a
nested method, if a variable of the same name is also declared in
the outer method.
-
You are not allowed to compare Booleans with the
> and <
operators.
-
Oxygene requires the exact number of array parameters, as the array
defines when accessing array members. For an
array of array of integer it requires MyArray[dim1][dim2],
for an array[0.., 0..] of Integer it requires the
MyArray[dim1, dim2] syntax.
-
Variant records are not directly supported in Oxygene, except on
Cocoa.
Inline Assembler Code
Since Oxygene compiles against many different target platforms,
including IL, JVM, x86, x64 and ARM, it does not provide support for the
asm keyword and inline assembler code.
New Features
Oxygene has come so far from where Delphi left the Pascal language when it stopped innovating in the late '90s that it's hard to provide a simple and concise overview of what's "new" in Oxygene for Delphi developers – there's just so much.
This topic will try to provide brief sections on most of the major improvements and new language features that Oxygene provides, covering them with a brief introduction and then linking off to the main language documentation where you can find more details.
Pretty much all of these features, with the one exception of Generics, will be new to you, whether you are coming from Delphi 7 or a more recent Delphi version such as XE7, because the Delphi language really hasn't changed much over the past 15 years.
Types
While pretty much all code in Oxygene lives inside types, this first section looks at new kinds of types that Oxygene introduces (such as tuples and sequences), and fundamentally new things you can do with types (such as nullability). Let's get started.
Sequences
Sequences are a special type that exist on a similar level to Arrays, and can also be thought of as a collection of elements.
Different from arrays, sequences do not imply a specific form of data storage, but can represent any collection of elements that is accessible in a specific order. This could be an array (and as a matter of fact, all arrays can be treated as a sequence) or a different data store.
One major advantage of working with data via sequences is that your code can start to work on the first items of a sequence before the entire sequence has been generated. Your code might even stop working the sequence at some point, and the remainder of it never will be generated. This allows for some pretty powerful use. For example, you can query a large database table, and have rows fetched as you need them. You could even have an infinite sequence that generates all the digits of Pi, and choose to process only the first 10,000.
Sequences are defined with the sequence of keyword combo, parallel to arrays:
var lCustomers: sequence of Customer;
Sequences can be looped over with the regular for each loops that recent versions of Delphi have also introduced, and they also work great with LINQ and Oxygene's from expression syntax for LINQ.
Aside from many APIs in the frameworks that already expose sequences, the Iterators and For Loop Expressions features discussed below help you define your own sequences in Oxygene.
Tuples
Tuples are the second new kind of "container" type introduced by Oxygene. You can think of a tuples as a group of two or more strongly typed variables that can be used and passed around in combination – for example passed into or returned from a method.
Each member of a tuple can have a different, well-defined type (for example, you can have a tuple of a number and a string), but different than a record, members of a tuple have no individual names. Commonly, tuples are used in a more light-weight fashion, in places where declaring an explicit record type somewhere else would seem overkill.
Types are defined with the tuple of keyword combo:
var lError: tuple of (Integer, String) := (404, "Page not found")
You can access individual members of a tuple using their numeric index, such as lError.0. You can also assign tuples back into individual variables by using a tuple literal on the left side of an assignment:
(lCode, lMessage) := WebRequest.GetError();
Future Types
A Future Type is variant of a type that promises to have a value at a later time, but that value might not be calculated or obtained yet, and may be derived either asynchronously in the background, or the first time the future's value is accessed.
Any ordinary type known in Oxygene can be used as future by prefixing its type name with the future keyword:
var lCount: future Integer := lSomeSequence.Count; // the count of a sequence might be costly to determine
An ordinary future as in the example above will be evaluated the first time the value is accessed. All future access to the variable will use that same value. In essence, the future enables lCount to be referred to multiple times, but ensures it won't actually be calculated until (and unless) it is actually accessed. Within any subsequent code, lCount can be used just as if it were an ordinary Integer, so it could for example be used in arithmetic expressions such as lCount/4+lCount.
Futures really shine when used in combination with async expressions, as covered below. A future initialized with an asynchronous expression will start calculating its value in the background automatically, so it might already be available when first accessed. As such, futures really help writing parallelized code that can take advantage of multi-core CPUs, with very little work.
Anonymous Classes and Records
Anonymous Types provide a syntax to quickly define and instantiate a simple class – commonly containing only data, but no code – from inside the code that will use it. Anonymous classes are not often used on their own, but they really shine when used in combination with Sequences and LINQ, as they enable you to filter down or combine data from sequences into new objects on the fly.
For example, as you are processing a lot of Customers and their Orders, you might want to generate a new list that contains each Customer and their total order volume, and then loop over that list. Anonymous classes make that easy without having to clumsily define a class for this. In particular, the select clause of LINQ from expressions will commonly define new anonymous classes.
Anonymous classes are defined using the new class keyword combo:
var lCustomerData := new class(CustomerID: lCustomerID, OrderVolume: lOrders.Sum);
Anonymous Interface Classes
Anonymous Interface Classes are very similar to anonymous classes, and are used to define a new class inline that satisfies (i.e. implements) a given interface. This is commonly used on the Java and Android platform, where rather than Delphi- or .NET-style Events, controls usually are assigned a delegate object that implements a given interface in order to receive callbacks when events happen – such as to react to the click of a button.
Anonymous interface classes allow you define such a class inline and implement one or more handler methods without having to implement the interface on the containing class (which can be awkward if you need to provide different handlers to different controls – for example two different click events on two different buttons).
You can think of anonymous interface classess as an extension or a more sophisticated version of Anonymous Methods. In fact, an anonymous method is considered the same as an anonymous interface class with just one method.
Anonymous innterface classes are defined using the new interface keyword combo:
fButton.delegate := new interface(OnClick := method begin
// handle the click here
end);
Partial Types
The Partial Types feature allows the definition of a Class or Record to be split across two or more source files. This is mainly used for three different types of scenarios:
- Complex or very large classes can be split up to keep the individual code files more manageable.
- Classes that are shared across platforms (for example via Shared Projects can have one part that's shared, and another that provides platform-specific logic, without needing excessive
$IFDEFing.
- Some UI frameworks, such as WinForms and WPF will use one part for user code, while a second part is maintained by the visual designer or build tool chain.
Nullability
In Oxygene, like Delphi, simple value types that are stored on the stack will always have a value (a default of 0, if not otherwise initialized), while reference types (mostly Class) that are stored on the heap will be nil unless initialized.
Oxygene, however, provides a way to override this. A variable, field or parameter of value type can be marked as nullable type to indicate that it will default to (and can be assigned) nil. Similarly, a variable of reference type can be marked as not nullable, causing the compiler to enforce it to always be assigned a valid value and never be nil.
Most interestingly, and unique to Oxygene and the other Elements languages, nullable value types can be used in code, including arithmetic expressions, just as their regular counterparts. The Nullability will filter through, so that any expression using a nullable type will in turn also be nullable – and in true tertiary boolean logic, an actual nil value in an arithmetic expression will turn the whole expression nil.
var x := nullable Int; // nil
var y := 5;
var z := 10*x+y; //z will be nullable, and nil
You can read more about nullability here.
Mapped Types
Mapped Types are a unique feature of the Elements compiler that lets you create compatibility wrappers for other types.
Type Members
That covers actual types, and as you see, Oxygene has quite a lot to offer. Next, let's have a look at what you can do within those types (and in particular, Class or Record. It's also worth mentioning that in Oxygene, Records are elevated to be pretty much as powerful as classes: In addition to fields, they can contain properties and methods, just like their siblings.
Pretty much the only difference between the two kinds of types is that classes are heap based – they get created in memory as needed, and variables refer to their memory location. More than one variable can point to the same class instance, and you can pass class instances all around your program. Records are stack based and value types. Two variables of record type will always point to unique copies of the record, and passing a record as parameter or assigning it to a second field or variable will create a copy of its data.
Advanced Fields
Fields in classes and records work and behave pretty much as you know them from Delphi. The only new feature for fields is that they can be marked with the readonly directive, which indicates that they can only be written from the Constructor or via an initializer, but are then immutable.
Fields can also be initialized in line, and when they are, their type can be omitted if it can be inferred from the initial value.
fCount := 5; readonly; // fCount will be an Integer
Advanced Properties
Just like fields, Properties in principle work as in Delphi, but as mentioned above are also supported in Records, not just Classes.
That said, Oxygene vastly expands the syntax for declaring properties, making them a lot more convenient to define and work with. All of these features are covered in detail in the Properties section.
- Like fields, properties can me marked
readonly.
- Like fields, properties can be initialized inline.
- Properties can be declared without
read and write clause, and will automatically be backed by an implicitly created field.
- Properties themselves can be marked
virtual and be overridden, which is cleaner than relying on virtual getters/setters as Delphi does.
- Properties can be defined in Interfaces.
- Properties can define different visibility for the getter and setter, for example letting you declare a property that is
public readable but only private or protected writable, which can be very powerful.
- Properties can be marked as
locked to synchronize their access to be thread-safe.
- Properties can be marked to generate Notifications when they change, via the
notify directive.
- Properties can be marked as
lazy and have their initialization deferred until they are first accessed.
- Properties can use more complex expressions than just a field or method name for their
read and write statement.
Advanced Methods
Methods also work just as in Delphi, and are supported in Records as well, not just Classes. As mentioned in the Minor Differences topic, Oxygene introduces a new method keyword that we recommend to use for methods, instead of the old procedure and function keywords. It emphasizes the Object-Oriented nature of Oxygene, and deemphasizes the largely irrelevant difference of whether a method returns a value or not. But procedure and function still work as well, in Delphi Language Compatibility Mode.
But once again, Oxygene expands the syntax for declaring methods, all of which is covered in detail in the Methods section.
- Like properties, methods can be marked as
locked to synchronize their access to be thread-safe.
- Methods can me marked as
async to indicate that they will automatically execute in the background. async methods with a return value will return a Future.
- Methods can me marked as
empty if they are placeholders that perform no function. This saves creating an empty method body.
- Methods can be marked as
inline, and their logic will then be embedded into the calling code for performance optimization.
In Oxygene, methods can use a new "multi-part method name" syntax that embraces Cocoa naming conventions (but is available on all platforms, and for all languages) and makes for more readable and expressive method calls. You can read more in the respective section in the Methods topic.
Methods can also define pre- and post-conditions to validate their arguments and their results, which is covered further down on this page and under Class Contracts.
Iterators
Iterators are a special kind of method that makes it easy to implement dynamically generated Sequences. Marked with the iterator directive, an iterator method can write regular linear code that can use the yield statement to add values to the sequence. yield works similar to exit in that it returns a value, except that the execution flow of the iterator method keeps going, because the returned value is just one of many that make up the final sequence.
Multi-Cast Events and Blocks
Oxygene introduces a new kind of member for classes and records: Events. While in Delphi events are essentially properties of a special type, and thus get no special syntax, events in Oxygene are fundamentally different and separate from regular properties, and are defined with the event keyword.
Events are multi-cast, meaning that more than one handler can be assigned to an event using the += operator that Oxygene introduces exclusively for events. When the event is triggered, all assigned handlers will be called.
Multi-cast Events are almost exclusively used on the .NET platform, since the Cocoa, Java and Android platforms have different default mechanisms to deal with this concept – such as the Anonymous Interface Classes discussed earlier on Java, or more traditional delegate classes on Cocoa. But the Event syntax and infrastructure is nonetheless available on all platforms, should you wish to use it.
Custom Operators
Finally, Oxygene allows you to define Custom Operators for your classes and records, allowing them to participate naturally in arithmetic expressions. For example, you can define the + operator for a record representing a Complex number or a Matrix, allowing code that consumes the new record (or class) to seamlessly add two values together.
You can read more in the Custom Operators section.
Statements
We've now covered both types and their members, so next, let's take a look at what Oxygene lets you do inside those members, most particularly Methods-like members, in terms of the kinds of Statements you can write.
Inline vars and Type Inference
Most prominently, Oxygene does away with the need for an explicit var section at the top of each method where all the method's local variables need to be declared.
Instead, Oxygene lets you declare variables throughout the flow of your method where they are needed, with the new var statement. This makes code easier to understand, as variables can be declared closer to where they are used, and even inside nested scopes, such as if blocks or Loops.
More importantly, the var statement supports type inference, so you can, for example, assign the result of a method call to a new local variable without restating (or even knowing) the exact type. Variables defined with inferred type will of course still be strongly typed.
Type Inference is of course especially important when working with Anonymous Types discussed above, since these classes don't even have a known type name that could be explicitly stated. Type inference is the only way to declare a variable holding such a type (or a Sequences of such types).
Infinite Loops
Mostly a curiosity but handy at times, Oxygene introduces a new loop type that runs indefinitely, with the loop keyword. A loop loop, also called an infinite loop, has no pre-determined exit condition and keeps running until it is broken out of with break or exit.
While not used often, loop does make for cleaner code and lets you avoid awkward and unintuitive while true or repeat until false loops.
Improved For Loops
for loops have also bee greatly expanded in Oxygene.
For one, Oxygene adds a new for each/in variation in addition to the trusted for/to loop. for each loops run over all members of a collection, Array or Sequences, without your code having to maintain an indexer manually. (More recent versions of Delphi have adopted this loop style as well, so you might already be familiar with it.)
for each loops also have two advanced syntaxes.
- Via the
index keyword, you can introduce a second loop variable that keeps track of the count of loop iterations, without you having to increment the variable yourself. Essentially, index gives you the best of both for each and for/to loops, in one.
- Via the
matching keyword, you can limit the loop to only execute for those members of a collection that are of a specific sub-type.
Currently on .NET only, both loop types can also be made to run multiple loop iterations in parallel on different threads, via the parallel keyword.
Exception Handling
Exception Handling has been expanded over Delphi's in two ways:
- A single
try block can be followed by both a finally block and one or more except blocks. There no longer is any need to nest two try blocks just to leverage both types of handler.
except blocks can be expanded using where clauses to further filter which exception a given block will catch, using criteria other than just the mere exception type.
Advanced Case Statements
Oxygene expands the case statement to be more flexible. case statements can work on strings (smartly using a hash table in the background for efficiently finding the proper case to execute). This not only saves code over needing to write multiple if/else if/else if statements, but is also faster.
The case statement can also execute different branches based on the type of its parameter, via the new case/type of syntax.
Refer to the case Statements topic for more details.
Locking
Similarly to the locked directive on Methods and Properties already mentioned above, the locking statement can protect a section of code against parallel execution on multiple threads, making it very easy to write code that is ready for parallelization. Via its parameter, the locking statement gives you flexibility for how granularly to synchronize execution – for example per instance, or globally.
Using
While Oxygene uses GC or ARC on all platforms and you do not usually need to worry about memory and object lifetime management, sometimes your code will interact with external resources (such as file or network handles) that do need to be released in a clean and timely fashion.
The using statement allows you to write a block of code that will run and make use of a specific object and automatically dispose of the object at the end. Essentially, using is a convenient way to encode a try/finally block that makes sure your object and external ("unmanaged") resources get cleaned up.
Expressions
With statements out of the way, let's look at some of the improved Expression types Oxygene provides.
Colon Operator
Small but immensely powerful, the Colon (:) Operator is a team favorite of all the features in Oxygene.
Delphi and Oxygene normally use the Dot (.) operator to access members such as Properties or Methods of a class reference. This is something so natural and so frequently done, we mostly don't even think about this as a special expression.
When trying to access a member of a class reference that happens to be nil, an exception is raised. In Delphi, that is the dreaded Access Violation straight from the CPU, in Oxygene it's a Null Reference Exception, often chummily called "NRE".
NREs are great when they happen on truly broken code, as they report the failure in a clean and obvious manner. But oftentimes it would be nice to be able to write code that doesn't need to care if an object is nil or not. That's where the Colon (:) Operator comes in.
If you use : instead of . to call a member, Oxygene will automatically check whether the object you are trying to call into is valid or not. If the object is valid, the call will proceed as normal, same as with .. But if the object is nil, then rather than raising an NRE, Oxygene will just skip the call altogether and return nil as the result.
Consider this example:
var lKnownSiblings := lSomeObject.Parent:GetChildren();
This code will call the GetChildren method of the object from the Parent property of lSomeObject. But what if Parent is not assigned (for example because data is incomplete, or because lSomeObject is the root of the hierarchy)? Because the code uses :, the call to GetChildren will simply be omitted, and lKnownSiblings will be set to nil.
The Colon (:) Operator allows you to write code that's simpler (often avoiding many nested if assigned(...) checks) and less error prone.
Double Boolean Comparisons
Double Boolean Comparisons allow you to compare three values in one step with a ternary operator – for example to check if a given value falls between two boundaries.
if 5 <= Count <= 10 then writeLn('between five and ten');
Lambda Expressions
[Lambda Expressions] provide a convenient shortcut syntax for writing short Anonymous Methods without the overhead of a full method/begin/end declaration. Lambda expressions are commonly used for single-statement methods, where they consist of an (optional) parameter list, the special -> operator, and the single statement. For example:
var lFives := lMyCollection.Where(x -> x.Value = 5); // filter list to items with value 5
Lambda expressions can be used anywhere anonymous methods can be used – for example as event handler assignments or as Block parameters to methods. One very common scenario, as shown in the example, is to use them with the LINQ query operators.
If Expressions
if expressions take the regular if statement and allow it to be used for expressions. As such, the if expression evaluates a condition, and then returns one value or the other.
var lLabel := if lList.Count = 1 then 'Item' else 'Items';
Case Expressions
Similar to if expressions, case allow the regular case statement syntax to be used as an expression to return a conditional value:
var lCountString := case lList.Count of
0: 'none';
1: 'one';
2: 'two';
else 'more than i can count';
end;
For Loop Expressions
You are probably seeing a pattern here. For Loop Expressions are the expression version of the regular for loop statement. Since a for loop, by its nature, can run for many iterations, the result of a for loop expression is a Sequences of values:
var lSomeEvenNumbers := for i := 1 to 100 yield i*2;
Similar to Iterators, for loop expressions use the yield keyword to add a value to the generated sequence. Also like iterators, the value of a for loop expression merely represents the functional logic for generating the sequence. The loop code does not actually run until the sequence is enumerated.
Async Expressions
async expressions allow a statement or an expression to be executed and evaluated asynchronously on a background thread, returning a Future Type.
Calling an async expression will return immediately, and execution will begin in the background (immediately, or once a free thread is available based on system resources).
Await Expressions (.NET)
Available on .NET only, the await expression construct can be used to "unwrap" otherwise asynchronous code so that future results can be dealt with in a linear fashion. Under the hood, await will break the method into different parts, scheduling them to be executed asynchronously once the awaited actions have been completed.
Please refer to the await Expressions topic for more details.
From (LINQ) Expressions
A huge topic on their own, from expressions provide a rather sophisticated sub-language that allows you to use an SQL-like syntax to work with Sequences of objects in a strongly-typed fashion. They form the basis of LINQ support.
var lFilteredData := from c in lCustomers
where c.Name.StartsWith('O') // filter by name
order by c.DateOfBirth // order by date
select c.Name, c.Address; // and return only two fields
// via a new anonymous class
Note: Although LINQ technology originated on .NET, Oxygene makes it and from expressions available on all platforms.
"is not" / "not in"
Oxygene expands the standard is type check operator and the in operator that checks for membership in a set to allow for more natural use with the not keyword.
if not (x is Button) then ... // traditional Delphi
if not (5 in MySet) then ... // traditional Delphi
if x is not Button then ... // Oxygene
if 5 not in MySet then ... // Oxygene
Class Contracts
Last but not least, Oxygene introduces a major language feature called Class Contracts that allows you to write self-testing code in a "Design-by-Contract" fashion.
Class Contracts consist of two syntax features:
-
Inside method implementations, you can add code to check for pre-conditions and post-conditions using the require and ensure keywords, as shown in the "Method Implementation Syntax" section of the Methods topic.
-
On a class (or record) level, you can define Invariants that are used to define a fixed state the type must fulfill at any given time. This makes it easy to detect bugs where any method or property setter leaves the type in an inconsistent state.
You can read more about these features in the Class Contracts topic.
Migrating Delphi Code to Oxygene
Delphi is more than a language, it is an entire development eco-system with libraries, third party components, and more. Oxygene shares its basic language – Object Pascal – with Delphi, but it does not share the rest of the eco-system.
While simple pure-pascal Delphi code should easily migrate to Oxygene without many changes, most complex Delphi projects will need adjustment – minor or major – to get the code base over to Oxygene. Whether it is gto adjust for (minor) language differences, or different platform APIs.
Oxygene provides tools and libraries on many levels to help you get your Delphi code into Oxygene.
Note that it might not make sense for every project to migrate fully to 100% Oxygene, depending on how deeply your project depends on things such as VCL, TDataSet, or Delphi-specific third-party components.
New Oxygene code can also interact well with code compiled in Delphi, for example using Hydra, direct P/Invoke, COM, or external method imports.
Preparing Your Delphi Code for the Oxygene Language
Leaving aside differences in available APIs (Delphi RTL, VCL, etc. vs. what is available on the Platforms targeted by Oxygene), most Delphi Object Pascal code should compile easily in Oxygene, with no or very few changes.
But there are a few arreas you might want to look at:
Minor Language Differences
Oxygene branched off from Delphi around the Delphi 7 time-frame, so its language design is very close to that of Delphi, and mainly focuses on extending the language, rather than diverging from it. That said, there are a few areas where we made explicit design choices to differ in syntax, and a couple others where Delphi gained features later than Oxygene, and chose different syntaxes where Oxygene's preceded (for example, Generic Constraints).
These differences are documented in the Minor Differences topic, and virtually all of them can be solved by one of two options:
The first option leaves your code unchanged, and lets the compiler accept more Delphi-isms in code than it does in normal Oxygene mode. This is especially great if you want to share code between Oxygene and Delphi, rather than migrating it fully to Oxygene-only.
The second option adjusts your code, to automatically change (where possible) legacy Delphi syntax into the correct Oxygene variant.
It is perfectly valid to use both options in combination, as well.
New Keywords
Oxygene has added (and keeps adding) a lot of new language features to 2004-style Object Pascal, and with that comes the introduction of a range of new keywords to support those features.
Many of these keywords are (just as in Delphi) limited to specific contexts, and this will not interfere with your regular code much (for example, order is used only within LINQ Expressions, so you will have no problem using it as a regular identifier in your code. Others (such as for example event or new are global keywords, and if your Delphi code uses them as identifiers (for example as name of a class or field), this will cause compile time errors.
Oxygene has a few ways to mitigate this:
-
In Oxygene, any identifier after a "." will not be treated as a keyword, as no keyword is valid in that context. This means that in many cases, when accessing methods, properties or fields with Oxygene keywords as names, this will compile just fine.
-
For all other cases, Oxygene allows the use of an ampersand ("&") before a keyword to "escape" it, and use it as a regular identifier.
var &Event: SomeClass; // & escapes the "event" keyword
...
x := MyClass.Event; // no escape needed after "."
Of course, for a large Delphi code-base, manually escaping any such cases could be a lot of work, that's why Oxygene comes with a tool that allows you to bulk-escape all known Oxygene keywords (that are not also keywords in Delphi) found in your code.
Note that Keyword Escaper is a one-time process that you should run on your Delphi code before starting to use Oxygene-specific features in it. If your code already uses Oxygene-only keywords, running Keyword Escaper will most likely break it!
Smarter {$IFDEF...} Processing
Oxygene uses a smarter (but in some cases more restrictive) pre-processor for {$IFDEF...} and other related directives for Conditional Compilation.
While not recommended, if your code depends on "unstructured" $IFDEFs and cannot be easily reworked, you might want to – at least temporarily – enable the (undocumented) UseLegacyPreprocessor project setting my manually setting it in your .elements project file.
API Differences
Finally, a big difference when moving Delphi code to Oxygene is the availability of APIs, which is virtually completely different between the Delphi RTL/VCL ecosystem and Oxygene, which uses each platform's native APIs and class libraries (e.g. the .NET Base library on .NET, Java/Android classes on Java and Apple's Cocoa classes on macOS and iOS.
By default, pretty much none of the classes and standard System methods you are familiar with from Delphi will be available in Oxygene.
In particular, Oxygene uses each platform's native Object class as the root of the class tree, which notably does not have a .Free method (as all Oxygene platforms use automatic life-cycle management.
Oxygene also uses the native String type, which on all platfroms is reference based, read-only, and 0-indexed – compared to Delphi's special String type that's writable, 1-based and a copy-on-write value type.
The open-source Delphi RTL library can mitigate some of this, it can be used by adding the "Delphi" library reference to your project and adding the RemObjects.Elements.RTL.Delphi namespace to your uses clause of individual files, or to the global DefaultUses project setting.
Delphi RTL provides:
-
An TObject alias type and extensions that provides Delphi-Compatibility for that class, including the ability to call .Free (even though the calls will be ignored as Oxygene relies on GC or ARC to actually free objects.
-
A replacement String type that behaves like Delphi's string, with seamless bridging semantics to the platform's native Strings.
-
Clean implementations of many (but far from all) common methods and classes from Delphi's RTL, such as SysUtils and the like.
You can read more about Delphi RTL, here.
Oxidizer
// todo.
For now, read more about Oxidizer in the Tools section.
Keyword Escaper
Oxygene has added (and keeps adding) new language features not available in Delphi, and with that comes the introduction of a range of new keywords to support those features.
While many of these keywords are (just as in Delphi) limited to specific contexts and this will not interfere with your regular code much, some keywords are global, and must be escaped using "&" to be used as regular identifiers (or the identifier can of course be renamed to something else), unless used after a period (".").
Oxygene provides a "Keyword Escaper" tool that can automate this process for you. Keyword Escaper, available as part of the Oxidizer Command-Line Tool, can process a single file or a full folder hierarchy, find all usage of Oxygene-only keywords in your code, and escape them, where needed.
Note that Keyword Escaper is a one-time process that you should run on your Delphi code before starting to use Oxygene-specific features in it. If your code already uses Oxygene-only keywords, running Keyword Escaper will most likely break it!
Usage
To use Keyword Escaper, you run the Oxidizer.exe tool that ships with Elements, passing the --escape-keywords command line switch.
Keyword Escaper requires two additional parameters, the input file or folder, and the output file or folder.
-
When specifying an individual file, both input and output must have a .pas file extension. Keyword Escaper will read the input, process it, and save it under the output name, potentially replacing the existing file.
-
When specifying a folder, Keyword Escaper will process all .pas files in the folder and all its sub-folders, and recreate the same folder structure in the output destination. (It will not process or copy any other files)
C:> Oxidizer --escape-keywords-only <SourceFile>.pas <TargetFile>.pas
C:> Oxidizer --escape-keywords-only <SourceFolder> <TargetFolder>
# mono Oxidizer.exe --escape-keywords-only <SourceFile>.pas <TargetFile>.pas
# mono Oxidizer.exe --escape-keywords-only <SourceFolder> <TargetFolder>
# mono Oxidizer.exe --escape-keywords-only <SourceFile>.pas <TargetFile>.pas
# mono Oxidizer.exe --escape-keywords-only <SourceFolder> <TargetFolder>
You can specify the same path as input and output, in which case Keyword Escaper will update your files in place. Do note that this will be irreversible, so be sure to have your files backed up or under version control before doing so.
Again do note that running Keyword Escaper on files that already use Oxygene syntax (which it cannot detect, because – how?) will be a very bad idea!
Delphi Compatibility Settings
Aside from the vast amount of new features that Oxygene brings to Object Pascal, it
also provides some to make the language more consistent and a better citizen on the (semi-)managed platforms.
We believe that these changes, as small and as trivial as some of them
seem to be, are an important factor of what makes the Oxygene language
clean and consistent, and we encourage developers to embrace them,
rather than resists change and disable them — but we also realize that
there is a need for developers to share some code between Oxygene and
Delphi and maintain it for both compilers.
And so we have provided a compiler option to enable enhanced Delphi
compatibility — at the expense of making the language a bit more
cluttered and inconsistent when this option is enabled.
There are two ways to enable this mode:
- Delphi language compatibility can be enabled on a file-by-file basis (or even for a sub-portion of a file) using the
$DELPHICOMPATIBILITY Compiler Directive. Possible values are ON, OFF and DEFAULT, with the latter reverting to the project-wide setting.
- It can also be enabled for the entire project in the Compatibility section of Project Settings.
Effects of the Delphi Language Compatibility Option
Turning on Delphi language compatibility effects the following changes
in the Oxygene compiler:
- Allow the following Delphi modifier keywords:
stdcall, cdecl, pascal.
-
Ignore the following Delphi modifier keywords:
reference toregistersafecalllibraryoverloadplatform
-
Ignore compiler Delphi directives that have no meaning/use in Oxygene:
*
$A1/2/4/8/16
$DEFINITIONINFOEXCESSPRECISION$H+/-$I+/-$INLINE$J+/-,$LEGACYIFEND$M+/-$NODEFINE$O+/-$OBJTYPENAME$RTTI$T+/-$W+/-$WARN$X+/-$ZEROBASEDSTRINGS OFF$ZEROBASEDSTRINGS ON will emit an error if encountered, as that option is not supported and could lead to invalid code.- Allow additional keywords
initialization and finalization sections (on some platforms).class helper for and record helper for syntax to declare Extensions.otherwise instead of else in case Statements.resourcestring to declare (regular) string constants.dynamic is treated as identical to virtual.deprecated (with optional message) is mapped to the appropriate [Obsolete] attribute.experimental (with optional message) emits the message (if any) when referenced.
- Allow the use of the
= operator instead of := in parameter defaults, variable initialization and attributes.
- Allow Delphi-style GUIDs in interface declaration on .NET and Island to add the
[Guid] attribute..
- Allow Delphi's syntax for generic constraints.
- Allow indexed properties.
- Allow using a function's name to assign the function's
result.
- Allow Nested Types to be declared inside the parent type via
type, instead of Oxygenes nested in syntax.
- Allow
DEFINED() and DECLARED() in $IF sections, and allow them to be closed by $IFEND.
-
Use Delphi-style visibility levels for type members:
private really means unit (i.e., visible in the entire file).protected really means unit or protected (i.e., visible to ancestors and in the entire file).strict private means truly private.strict protected means truly protected.
and
- Enable the four options discussed in the next section.
Other Relevant Project Options
In addition to the "big" Delphi Language Compatibility switch, there are four more compatibility options (available on the same Project properties tab) that might be relevant to Delphi developers:
- Allow legacy
with — Restores Delphi's unsafe with syntax that does not require an explicit variable declaration, like Oxygene's keyword does. We highly discourage enabling this option, and recommend revising the Delphi code in question instead, if you must share code between Delphi and Oxygene.
- Allow implicit
var/out in method calls — Allows the passing of by-reference parameters without prefixing them with the var or out keyword.
- Allow legacy 'Create' constructors — Allows the use of the
Create name both for declaring and calling Constructors and instantiating new objects. By default, Oxygene uses nameless constructors (and, on Cocoa, optionally constructors with Cocoa's with* naming convention).
- Allow legacy unscoped enums — Allows enums declared in the current project to be accessed globally, without needing to be prefixed with the enum's type name. Note that this option affects declared enums, not their use. Enums from referenced libraries will still need to be scoped, unless the library was build with this option on, and enums declared in a library with the option on will show as globals in all projects that reference the library, regardless of whether the option is turned on in the referencign project.
- Use Delphi-compatible division operators — Changes the
div and / operators to behave as they do on Delphi, with div always producing an integer result, and / always producing a floating point result, regardless of input.
See Project Settings Reference: Delphi Compatibility Build Settings.
Turning on the Delphi Language Compatibility option discussed above will implicitly enable these four options as well.
See Also
Using Delphi Packages
Using the Island/Delphi pseudo-platform, new in Elements 12, your Elements projects can use the Delphi type system take advantage of all the existing Delphi class libraries, including the RTL (SysUtils & Co), VCL, FireMonkey, dbGo and more.
Delphi SDK support is available for Island-based projects on native Windows, Linux and macOS.
You can read more about this feature, here.
See Also
Namespaces and References
One of the conceptual differences between Delphi and Oxygene is the handling of References and Namespaces in Oxygene.
In Delphi, every source module (except the main program) starts with the keyword and a unique name (Delphi's recent addition of half-baked namespaces confuses this matter a bit, but let's leave that aside for now). That unique name must match the filename on disk, and it becomes the name that this unit will later be "used" as.
Elsewhere in the project (or in other projects making use of the unit), the name of the unit must be specified in the clause for types and other items defined in the unit to be accessible. In order to be able to "use" a unit, its source file (or a precompiled compiler-version-specific .dcu file of the same name) must either be listed as part of the project, or be found in one of several Search Path settings.
For example, you might create a file called Helpers.pas, and start it with the line unit Helpers. In other files of your project, you will include uses ..., Helpers, ...;, in order to make the items declared in that unit available to the following code.
As a Delphi developer, all of the above is obvious and second nature to you, but reiterating it will help to put in perspective how similar things are achieved in Oxygene.
References
Unlike Delphi, an Oxygene project does not commonly directly include or import external source files, such as code from shared libraries, third party libraries or even the core platform/OS classes. Instead, external types and other entities are obtained via References to other libraries. These can either be pre-compiled binary libraries (.dll files on .NET, .jar files on Java and .fx and .a Files on Cocoa, or references to other projects that are opened as part of the same Solution (a Solution is comparable to a Project Group in Delphi parlance) that compiles to such a library.
Simply by virtue of being referenced, any (public) types and global entities exposed by the library are automatically available to all code in the project that references the library.
For example, let's assume we have a library called Helpers which contains several types, named Foo, Bar and so on. If we create a new project and add a Reference to Helpers.dll (or Helpers.jar or Helpers.fx, depending on the platform), our code can make immediate use of these types, simply by referring to them via their (full) name. For instance, it could new up a copy of the Foo class, simply by writing Foo().
Once the reference is made, the code in the project doesn't need to worry what library (let alone what source file) the types it needs have been declared in. There is no need for a clause simply to access the types, or to cause the library to be linked against.
However, uses clauses still have their – pardon the pun – use, as we will see in the next section.
Namespaces
In Oxygene, types can be contained in namespaces, and while it is possible to declare a type to be namespace-less, that is very rarely (if ever) done, so for all intents and purposes, one could say that just about all types are part of a namespace.
In Delphi, every source file starts with the unit keyword, in Oxygene every source file starts with namespace, instead (the unit keyword is also supported in Delphi Compatibility Mode, but it will behave identical to namespace.
Just like unit, namespace is also (optionally) followed by a name. That name is what will be considered the default namespace for the file. The default namespace influences two aspects of the code inside the file:
- By default, all types declared in the file will become part of this namespace.
- All types from this namespace — no matter where they are defined — will be "in scope" for the file.
What does this mean, exactly? Let's have a closer look.
By default, all types declared in the file will become part of this namespace. This means that if we define a type as follows:
namespace MyCompany.MyProject
...
type
MyClass = class
...
end;
then the MyClass class will automatically be considered part of the MyCompany.MyProject namespace. Its so-called fully qualified name will be MyCompany.MyProject.MyClass. And this full name is how the class can be referred to everywhere.
All types from this namespace will be "in scope" for the file. This means that if we add a second (or more) file to our project and also begin it with namespace MyCompany.MyProject, this file will be part of the same namespace, and all types from that namespace will be in scope. As such, we can refer to the above class simply as MyClass — because it is in the same namespace.
The nice thing is that you can add as many files to your project as you need and they can all share the same namespace. This way, you never have to worry about adding items to the uses clause just to access classes from within your own project. All your types are automatically in scope in all source files (of the same namespace).
Of course, while it is common for small to medium projects to just use a single namespace, you are also free to declare different namespaces across your project in order to better partition parts of your project — for example you could have a MyCompany.MyProject namespace for the bulk of your project, but a MyCompany.MyProject.MySubSystem namespace for a certain sub-system of the project.
Regardless of namespace, all types declared in a project will be available all throughout the project (unless they are marked for unit level visibility only) by their full name, and all types marked as public will also be available outside of the project (i.e. when you are creating a library that will be referenced from other projects).
Namespaces and References
The key point to remember is that namespaces work totally independent of references, as discussed above. Namespaces are logical groupings of types into a common, well, name space, and they work across references. You could have several libraries that all contain classes belonging to the same namespace. Conversely, you could have a single library reference that contains classes spread across several namespaces.
It is also perfectly fine for your own main project to declare types that are part of a namespace that is also used by referenced libraries (although you should take care to only define types in namespaces you control, not in System namespaces such as System.* on .NET or system.*, java.* and android.* on Java).
uses Clauses
We learned above that any type available to a project (whether from inside the project or via references) will be accessible anywhere via its fully qualified name. So, for example, simply by referencing System.Xml.Linq.dll (on .NET), you can access the XDocument via its full name:
namespace MyCompany.MyProject
...
begin
var x := new System.Xml.Linq.XDocument(...);
(Note that in this example, the name of the .dll and the namespace of the XDocument class are identical. This is common practice, but does not really indicate a direct link between the two. A library can have any name, and contain any namespaces.)
However, it can become tedious to always have to refer to classes by their fully qualified name, and that is where clauses come into play.
Syntactically similar to Delphi, in Oxygene the uses clause can (optionally) be present in both the interface and implementation section of a source file, and it can provide a comma-separated list of namespaces that will be considered in scope for the remainder of the file.
For example, if a lot of places in the code above were to refer to types from System.Xml.Linq, the code could be simplified like this:
namespace MyCompany.MyProject
...
uses
System.Xml.Linq;
...
begin
var x := new XDocument(...);
and now XDocument can be accessed directly and without its full name.
Some Special Considerations for uses Clauses
- In addition to listing individual namespaces, the
uses clause also allows the asterisk character as a wildcard to include a namespace and all its sub-namespaces. For example, uses System.Xml.* would add System.Xml.Linq to the scope, but also System.Xml and any other sub-namespace.
-
Certain System namespaces will be in scope by default and do not manually need to be listed in the uses clause for their types to be accessible by their short name.
- The
RemObjects.Elements.System namespace contains compiler-intrinsic types, such as Integer, System Functions and other elements, and is always in scope.
- On .NET, the
System namespace contains many core classes, such as String and Object, and is always in scope.
- On Java, the
system and java.lang namespaces contain many core classes, such as String and Object, and are always in scope.
- On Cocoa, the
rtl.* namespace contains the C runtime library, core types and many core C-based APIs and is always in scope.
Namespaces vs. Unit Names
Th the very top, Oxygene and Delphi source files start very similarly, but even though they may look almost the same, there are some key semantical differences, and there is enhanced flexibility in how Namespaces in Oxygene let you structure your code.
Units in Delphi
In Delphi, every unit starts with the keyword unit (or program/package) followed by an identifier that gives that unit a name. That name can be used elsewhere in code to make the types fork this unit available, by using the name in the uses clause elsewhere.
Right after that (and after the interface keyword, usually comes the aforementioned uses clause, which lists all the other units that you want to refer from the code that follows:
unit MyThirdUnit;
interface
uses
MyFirstUnit, MySecondUnit;
A separate uses clause can be provided in the implementation section, of course.
The unit system has some strict limitations:
- Each unit – that is, every single source file in your Delphi project, must have a unique name
- The unit's name must match that of the file on disk (minus the file extension).
- Two units cannot use themselves circularly, in the interface section.
The last is the most critical limitation. It means you cannot for example have two types, in two separate units, that both reference each other in their public interface. The only way to achive such a thing is to out both classes into the same file.
Namespaces in Oxygene
Oxygene does not really have a concept of units, but this standard Delphi structure still compiles and works in Oxygene. Why? Because Oxygene partitions code into Namespaces, and if each source file in your project sets its own name, that simply means that each source file creates its own namespace.
And while Oxygene prefers.suggests the namespace keyword to start a new fine, it also allows the unit keyword for backward compatibility.
As a result, the standard unit structure you know from Delphi works ok.
But, Oxygene code can escape from the strict shackles outlined below and gain much flexibility, by embracing the concept of namespaces:
- in Oxygene, the name given at the top of each file does not have to be be unique, and it must not match the file on disk. Several files in your project can specify the same name, and they will all contribute to the same namespace. In fact, it is very common to only have a single namespace for an entire small project (or a section of a larger project), or only a handfull of themselves.
- All types in the same namespace can see each other directly, without a
uses clause – even if they live in separate files.
- Types from other namespaces can be accessed by adding their namespace to the
uses clause.
- There is no restriction on "circular references" – files for one namespace can
use another and vice versa, without limits.
This opens up many flexibilities for structuring your code across files and namespaces. In fact, it is very common in Oxygene to give each class (especially non-trivial ones) their own source file, for clarity. (You can even split a very large class across several files, with Partial Types, but that is another topic).
namespace MyOnlyNamespace;
interface
uses
Some.External.Comonent.Library;
Namespaces can contain dotted separators to indicate a hierarchy of namespaces and sub-namespaces (e.g. MyProject.SubSystem1, MyProject.SubSystem2), but that is purely cosmetic and informational.
See Also
If you are familiar with UI development in Delphi using the VCL or FireMonkey, then making the switch to WinForms or WPF will feel natural to you, as both UI systems behave – with minor differences we will look at in this topic – very similar to the Delphi VCL.
In fact, one could argue that WinForms, created by Delphi inventor Anders Hejlsberg, is a logical evolution of the VCL. And FireMonkey is basically Embarcadero's attempt to replicate the more modern WPF system back to Delphi.
WinForms and WPF are two different ways for creating Windows UI applications using the .NET platform. They are interchangeable, and it will be largely a matter of taste and preference which option you pick.
WinForms is a bit older, having been introduced with the original .NET 1.0 in the early 2000s. It is still well supported and widely used, although many people consider it deprecated and replaced by WPF.
WPF is a more modern take at UI design that provides many benefits over WinForms, including performance (WinForms uses GDI+, which does not use graphic acceleration, while WPF is built on top of DirectX), more flexibility in UI design, and cleaner separation between code and UI.
WPF uses XAML, a technology shared with Xamarin/MAUI and the deprecated WinRT and Silverlight platyforms – so if you are planning to also develop "modern" WinRT apps or web apps with Silverlight, WPF is a more natural choice than WinForms.
Oxygene fully supports both WinForms and WPF.
Before we dive into how WinForms and WPF work in detail, let's look at Delphi's VCL for comparison.
In Delphi, you develop user interfaces by opening a window (usually referred to as a Form in VCL parlance) in a visual designer. The window will be a descendant class that you create off of the VCL TForm class, and it will be represented by two files: a source file that contains your code and the class definition, and a .dfm file that contains a binary or text representation of the window's design, with information on the different control's positions and attributes.
When you drop components onto the form, an entry gets added for them in the .dfm file, and a field gets added to your form class in a special published visibility section. At runtime, these properties get hooked up magically, as the form data gets loaded from the .dfm. Any property values you configure on controls (or on the form itself) get stored in the .dfm as well, and loaded from it on startup. Finally, you can create event handlers by double-clicking controls, or by picking more explicit event types from Delphi's Object Inspector, and when you do, stub methods get generated in your form class, ready for you to fill, along with an entry in the .dfm that connects the method to the control's event.
You are probably familiar with all of this in depth already, but it's worth spelling out the details for comparison.
Both WinForms and WPF behave pretty similarly concerning the design experience. You get a visual design surface where you can drop components and configure them. And you can double-click to connect events, and will get stub methods created for you.
Under the hood, however, things work a bit differently in both UI frameworks, and it's important to understand and be aware of those differences.
Just like the VCL, WinForms and WPF represent your form by creating a subclass of a base form class – System.Windows.Forms.Form for WinForms, and System.Windows.Window for WPF. In this class, you add your own code to implement the form's logic and to react to events.
Similar to the .dfm file in Delphi, WinForms and WPF also use a secondary file to store the core form contents and design.
In WinForms, all design information is stored in code that gets parsed when the form is loaded into the designer, and updated/adjusted as you make changes. If your main form class is in MyForm.pas, you will see a second MyForm.Designer.pas file in your project, which Visual Studio will nest underneath it.
These two files form a single class, using an Oxygene language feature called Partial Classes, and the idea is that you write your own code in the main file, while the designer updates the .Designer.pas file as needed. Of course you can also update the designer file if you want, but you need to be careful which changes you make, as to not break the designer.
Inside the .Designer.pas file you will find a declaration for your class (marked with the partial keyword to indicate that it is merely half of a partial class). The class will have fields for any components you have dropped, and a method called InitializeComponent that the designer fills with actual code that instantiates the controls and populates all the properties you have set. When you make change to the designer, you can actually see the code in InitializeComponent change to reflect the new values.
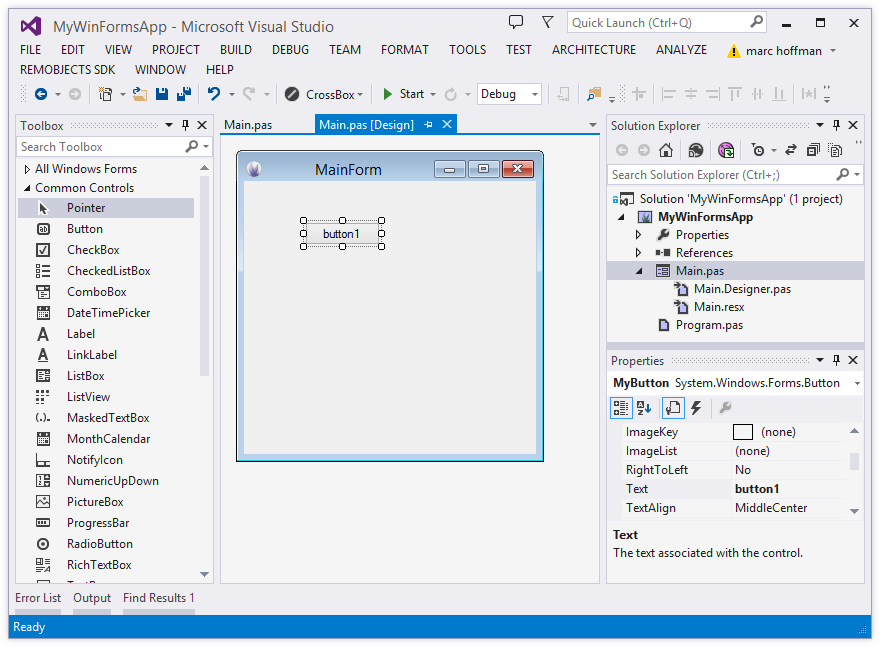
When you create event handlers (by double-clicking a control or using the Event tab in the Properties Pane, which works analogous to the event view in Delphi's Object Inspector, the designer will add the stub method to your main code file, and also add a line to InitializeComponent to hookup the event handler to the right control.
All in all this is pretty similar to how things work with the VCL – and in most cases you can just ignore that the .Designer.pas file contains actual Oxygene code, and just think of it as being comparable to the .dfm file in your Delphi app.
WPF
WPF takes a slightly different approach. Like in WinForms, you have a code file where your descendant of the base Window class is defined. But instead of a second source file, the design of your form is stored in a so-called XAML file – essentially an XML file with the .xaml extension.
XAML files are such an important part of the WPF development experience that Visual Studio actually reverses the nesting: you will see MyForm.xaml as top-level file in your project, with MyForm.pas being nested underneath it – a reversal from how WinForms files are shown.
As you make changes to your form in the designer, you are essentially directly manipulating the XML in the .xaml file. Dropping new controls adds additional XML elements to the file; changing properties adds or updates attributes in those tags.
In addition to using the visual designer, the XAML was designed to also make it convenient and easy to directly edit the XML in the code editor. This practice is so common that the XAML designer will by default show as a split view, with the UI on top and the XAML source at the bottom. You can edit either, and the other will adjust.
Different than WinForms (or the VCL), editing your WPF form will not make any changes to your code, aside from inserting event handler stubs when you create them, of course. All other changes are constrained to the .xaml file only. This makes for a nice and clean separation between UI and code, and in fact it is common in larger teams to pass .xaml files on to the UI designers who won't touch or even use the code.

You will notice that not even fields are generated in your code for the components you drop. How then can you interact with the items on your form from code?
Simple: In practice, you can think of the .xaml file as being part of your code base, and any items that show up in the .xaml file, if they have been assigned a Name, are automatically available as properties in your form class, just as if they had been declared in code. If you have a button like this in the .xaml:
<Button x:Name="MyButton" ... />
you can simply access it directly from code as
MyButton.Text := 'Click me!';
How does this work under the hood? As you compile your project (and also inside the IDE, for purposes of code completion and IntelliSense), each .xaml file gets processed into source code, creating half of a partial class that extends your own code (very similar to WinForms). This part defines properties for all the named controls in your form.
During normal development, this is not something you often have to think about or concern yourself with, but you may sometimes see this auto-generated file referred to, for example in error messages. It will have the same name as your class, but a .g.pas extension (with g standing for "generated") and it will be located in the /obj/ folder of your project. You should never touch or modify these files, as any changes you make to them will be lost when the file is regenerated.
In Practice
So you see, in practice, working with WinForms and WPF is much like what you are already familiar with from Delphi's VCL. You implement your window in a custom class derived from a root form class provided by the system. You get a visual designer where you can drop components, adjust their properties and create the look of your form in a WYSIWYG fashion. And you can create event stubs to react to user events from the controls, the same way you would in Delphi.
Your form's data and layout is stored in a second file (.Designer.pas or .xaml) that you can treat pretty much as a black box, but can also interact with and tweak manually, if so desired.
Read More
You can find out more about WinForms and WPF at these external resources:
On using WinRT to create "modern" Windows apps instead:
Other platforms:
- Delphi to Oxygene: iOS UI Development with Cocoa Touch
- Delphi to Oxygene: Mac UI Development with Cocoa
- Delphi to Oxygene: Android UI Development
RemObjects C#

As you would expect from the name, the RemObjects C# language is basically pretty much exactly the C# language you may already know and love from your work with Microsoft's Visual C# on .NET or with Xamarin and Mono.
Different from our own Oxygene language, where we add new and exciting language features frequently, our aim with the RemObjects C# compiler front-end is to stay as close and true to the C# language as possible, and to adhere to the official C# standard as described in the EMCA specification and as implemented in the de-facto standard C# compilers.
The RemObjects C# compiler will evolve as the official C# language evolves, but our goal is not to drive the C# language forward (and diverge from the standard) ourselves, but rather to provide a compiler and language for .NET, Cocoa and Java that will feel like "true C#" to everyone familiar with the language.
That said, RemObjects C# does adds a few features to the standard C# language to make it fit better on all the platforms it supports. These are covered under Language Extensions.
Learn More
Getting Started
Support
Learning C#
Just about any decent book, tutorial or course out there will provide you with the information you need to learn C#, and all you learn about the language will apply directly to using RemObjects C#.
See Also
Language Extensions
RemObjects C# adds a few features to the standard C# language to make it fit better on all the platforms it supports. We try to keep these extensions to a minimum, and tasteful within the design aesthetics of the C# language.
Where additional keywords are needed, we follow the C/C++/C# convention of prefixing these with two underscores ("__") to avoid conflict with future changes to the C# spec.
Multi-Part Method and Constructor Names
In order to fit in well with the API conventions on the Cocoa platform, RemObjects C# adds support for multi-part method names — essentially the ability for a method's name to be split into separate parts, each followed by a distinct parameter. This feature is available on all platforms, and described in more detail in the Multi-part method names topic.
Not-nullable Types
Similar to the "nullable types" feature in standard C#, reference type variables can be adorned byf the ! operator to mark them as "not nullable". See the Nullability topic in the Language Concepts section for more details, and Non-Nullable Types for a more explicit discussion of the C# syntax (which mirrors nullable types in our Java dialect, Iodine).
Inline Methods
Functions can be marked with the __inline keyword to cause them to be inlined at the call site instead of being generated as separate functions in the executable. See the Inline Functions topic for more details.
Labeled Loop Statements
Labeled Loop Statements allow you more control when writing nested loops, including the ability to break or continue an outer loop from inside a nested one.
Trailing Closures
Similar to Swift, RemObjects C# supports using a Trailing Closures syntax when calling methods who's last parameter is a closure. This can make for code that looks cleaner and more easy to read than embedding the closure as last parameter within the parentheses.
Await for Closure Callbacks
The await keyword works not only with "async/await"-style APIs but also with methods that expect a trailing callback parameter.
Cocoa-Specific Features
RemObjects C# adds the __strong, __weak and __unretained type modifiers to control how the lifetime of Automatic Reference Counted objects is handled on Cocoa. The modifiers are described in the Storage Modifiers topic. The using __autoreleasepool can be used to manually control ARC auto-release pools.
__selector() can be used to create a selector instance on Cocoa, for use in functions that take such a selector for callback purposes, and for dynamic dispatch of method calls in the Objective-C runtime environment. This is described here.
Mapped Types
RemObjects C# also has full support for a feature called Mapped Types, which are inlined types useful to create cross-platform wrappers with zero overhead. While you won't often implement your own mapped types, you will likely use existing ones, for example from the Elements RTL library.
Extension Types
Extensions Types can be used to expand an existing type with new methods or properties.
Inheritance for Structs
In RemObjects C#, structs can specify an ancestor, allowing a newly declared struct to inherit the fields and methods of its base struct. Unlike classes, structs are not polymorphic, and members cannot be virtual or overriden.
Aspects
Aspects are special attributes that influence how the compiler emits the final executable. In RemObjects C#, they use attributes syntax and the optional __aspect: attribute prefix. Aspects are covered in more detail in their own section, including how to use them and how to create your own.
Class Contracts
Class Contracts allow code to become self-testing, with Pre- and Post-Conditions for methods and type-wide Invariants.
Smaller Changes
Global Members
Mostly to fit in better with Cocoal and Island, but available on all platforms, RemObjects C# allows you to both call and define global methods (functions) and variables that are not contained within a class.
Public/Non-Local Type Aliases
Standard C# allows the declaration of local type aliases with the syntax using keyword, but these aliases are confined to be visible in the current file only. RemObjects C# allows the annotation of this syntax with the public keyword to define global/public aliases that will be visible anyehwere the containing namespace is in scope.
public using Menu = Foundation.NSMenu;
Multi-Part Method Names
In order to fit in well with the API conventions on the Cocoa platform, C# method syntax has been expanded with support for what we call multi-part method names.
Multi-part method names are essentially the ability for a method's name to be split into separate parts, each followed by a distinct parameter. This is "required" on the Cocoa platform, because all the platform's APIs follow this convention, and we wanted RemObjects C# to be able to both consume and implement methods alongside those conventions without resorting to awkward attributes or other adornments, and to feel at home on the Cocoa platform.
For cross-platform completeness, multi-part method names are now supported on all platforms, and are also compatible with Oxygene and Swift.
A multi-part method has parameter parts for each part, both when being declared:
bool application(UIApplication application) didFinishLaunchingWithOptions(NSDictionary launchOptions) { ... }
and when being called:
myClass.application(myapp) didFinishLaunchingWithOptions(options);
Implementing Multi-Part Constructors
RemObjects C# has always had the ability to call named and multi-part-named constructors defined externally, both from Cocoa APIs and on classes defined in Oxygene or Silver. With version 8.2, named constructors can now be declared and implemented in C# as well. To avoid ambiguity, the syntax for this deviates sightly from C#'s regular syntax for nameless constructors (which use the class's name), and uses the this keyword instead.
For example:
public class Foo
{
public Foo(string name) // regular nameless C# constructor
{
}
public this(string name) // same as above
{
}
public this withName(string name) // regular named C# constructor
{
}
public this withName(string name) andValue(object value) // multi-part C# constructor
{
}
}
These can be of course called as follows:
new Foo("Hello");
new Foo withName("Hello");
new Foo withName("Hello") andValue(42);
Version Notes
- The ability to define custom multi-part constructors is new in Version 8.2.
See Also
Non-Nullable Types
Similar to how value types can be made nullable in standard C# by suffixing the typename with a question mark (?), RemObjects C# allows reference types – which are nullable by default – to be marked as not nullable by suffixing the type name with an exclamation point (!).
This can make for more robust code, as variables, fields, properties or parameters declared as such can be relied on to not be null. In many cases, the compiler can even emit compile-time warnings or errors, for example when passing a literal null to a non-nullable parameter.
For consistency, the ! operator is alos allowed on value types, where it will be ignored, simliar to how the ? is allowed on referene types (are nullable by default) and is ignored there.
Int32 i1; // non-nullable by default, 0
Button b1; // nullable by default, null
Int32! i1; // non-nullable by default, 0, same as above
Button? b1; // nullable by default, null, same as above
Int32? i2; // nullable, null
Button! b2 = new Button(); // not nullable, thus needs initialization
Please also refer to the Nullability topic in the Language Concepts section for more detailed coverage.
See Also
Inline Methods
Functions can be marked with the __inline keyword to cause them to be inlined at the call site instead of being generated as separate functions in the executable.
__inline int add(a: Int, b: Int)
{
return a+b
}
Labeled Loop Statements
If a loop statement such as a for, foreach or while loop is labeled (a syntax normally only used in combination with the dreaded goto statement), RemObjects C# allows that name to be used to continue or break out of the loop without regard for nestings.
For example:
List<List<string>> myLists; // a list of lists
OuterLoop: foreach (List<string> l in myLists)
{
foreach (string s in myLists)
{
if (s == "stop")
break OuterLoop;
}
}
See Also
Trailing Closures
Similar to Swift, RemObjects C# supports using a Trailing Closures syntax when calling methods whose last parameter is a closure. This can make for code that looks cleaner and more easy to read than embedding the closure as last parameter within the parentheses.
The following snippet shows a call to dispatch_async with a trailing closure:
dispatch_async(dispatch_get_main_queue) {
// do work
}
Compared to the classic call with the closure embedded:
dispatch_async(dispatch_get_main_queue, () => {
// do work
});
If the closure receives any parameters, their names will be inferred from the declaration of the method or the delegate type used in the declaration, and become available as if they were local identifiers:
Limitations
Trailing closures are not supported inside the base/this call to a deferred constructor, or inside __require/__ensure clauses.
See Also
Await Expressions
In RemObjects C#, await can also be used with methods that take a "callback" closure as last parameter. The parameters of the closure will turn into return values of the call. For example, consider the following call using Elements RTL's Http class:
void downloadData()
{
Http.ExecuteRequestAsJson(HttpRequest(URL), (response) => {
if (response.Content != null)
{
dispatch_async(dispatch_get_main_queue( () => {
data = response.Content;
tableView.reloadData();
});
}
});
}
This code uses two nested closures, first to wait for the response of the network request, and then to process its results on the main UI thread. With await this can be unwrapped nicely:
func downloadData() {
var response = await Http.ExecuteRequestAsJson(HttpRequest(URL)) {
if let content = response.Content
{
await dispatch_async(dispatch_get_main_queue());
data = response.Content;
tableView.reloadData();
}
}
Note how the parameter of the first closure, response becomes a local variable, and how await is used without return value on the dispatch_async call.
For callbacks that return more than one parameter, await will return a tuple, e.g.:
var (value, error) = await TryToGetValueOrReturnError();
...
See Also
Storage Modifiers (Cocoa)
On the Cocoa platform, which uses ARC rather than Garbage Collection for memory management, the three storage modifier keywords __strong, __weak and __unretained are available as extensions to the C# language in order to control how object references are stored in local variables, fields or properties.
By default, all variables and fields are __strong – that means when an object is stored in the variable, its retain count is increased, and when a variable's value gets overwritten, the retain count of the previously stored object gets reduced by one.
Read more about this topic in the Storage Modifiers topic in the Cocoa platform section.
See Also
Auto-Release Pools w/ using (Cocoa)
The standard C# using statement has been extended for the Cocoa platform to allow the __autoreleasepool keyword to be used in lieu of another expression. This creates a new Auto-Release Pool for this thread and cleans it up at the end of the using statement.
using (__autoreleasepool)
{
NSApplicationMain(argc, argv);
}
Refer to the Auto-Release Pool topic in the Cocoa platform section for more details.
See Also
Selector Expressions (Cocoa)
The __selector keyword can be used to get a selector reference on Cocoa, for example to dynamically invoke methods, or pass them to Cocoa APIs that expect a SEL type.
SEL s = __selector(compare:options:);
Using the selector literal syntax will cause the compiler to check whether the specified selector is valid and known, and a warning will be emitted if a selector name is provided that does not match any method known to the compiler. This provides extra safety over using the NSSelectorFromString function.
See Also
Mapped Types
Mapped type are a unique feature of the Elements compiler. They let you create compatibility wrappers for types without ending up with classes that contain the real type. The wrappers will be eliminated by the compiler and rewritten to use the type the mapping maps to.
When working with C#, you will most commonly use mapped types (for example as provided by the Sugar cross-platform library). Using mapped types is seamless, and they behave just like regular non-mapped types.
You will not often need to implement mapped types yourself, but for when you do, RemObjects C# – like Oxygene and Swift – provides a syntax for implementing mapped types with the __mapped keyword and the => operator.
Please refer to the Mapped Types topic in the Language Concepts section for more details.
Extension Types
Type extensions can be used to expand an existing type with new methods or properties.
Extensions are most commonly used to add custom helper methods, often specific to a given project or problem set, to a more general type provided by the framework, or to correct perceived omissions from a basic type's API.
For example, a project might choose to extend the String type with convenience methods for common string operations that the project needs, but that are not provided by the actual implementation in the platform.
Extension declarations look like regular Class declarations, except that the class keyword is prefixed with the __extension keyword. Extensions need to be given a unique name, and state the type they extend in place of the ancestor. It is common (but not mandatory) to use the original type's name, appended with the unique suffix.
public __extension class String_Helpers : String
{
int NumberOfOcurrencesOfCharacter(Char character)
{
...
}
}
Inside the implementation, the extended type instance can be referred to via the this keyword, and all its members can be accessed without prefix, as if the extension method was part of the original type. Note that extensions do not have access to private or otherwise invisible members. Essentially they underlie the same access controls as any code that is not part of the original type itself.
Extension types can declare both instance and static members. They can add methods and properties with getter/setter statements, but they cannot add new data storage (such as fields, or properties with an implied field), because the underlying structure of the type being extended is fixed and cannot be changed.
Extensible Types
Extensions can be defined for any named type, be it a Class, Struct, Interface, Enum, or Block.
No matter which kind of type is being extended, the extension will always use the class keyword.
See Also
Struct Inheritance
In RemObjects C#, structs can specify an ancestor, allowing a newly declared struct to inherit the fields and methods of its base struct. Unlike classes, structs are not polymorphic, and members cannot be virtual or overriden.
MyStruct1 = public struct
{
public int a;
public void DoSomething()
{
..
}
}
MyStruct2 = public struct : MyStruct1
{
public string b;
public void DoSomethingElse()
{
..
}
}
In the example above, MyStruct2 contains all the fields and methods of MyStruct1, as well as those defined for MyStruct2 itself.
See Also
Aspects
Aspects are special attributes that influence how the compiler emits the final executable. In RemObjects C#, they use regular attributes syntax. Aspects are covered in more detail in their own section, including how to use them and how to create your own.
See Also
Class Contracts
RemObjects C# has support for Class Contracts, allowing you to provide Pre- and Post-Conditions for methods and type-wide Invariants to create classes and structs that can test themselves.
Please refer to the Class Contracts topic for more details.
Keywords
__ensure__invariants__old__require
See Also
Keywords
C# Evolution
Without promising exact timelines for individual features, our goal is to try and support all new C# language changes introduced by Microsoft for the closest upcoming release after they have been finalized, often before and sometimes shortly after they have shipped in Visual C#. Of course, details depend on the timelines for both Microsoft's releases and ours.
New features listed without a bug ID are pending review of feasibility for RemObjects C# and/or awaiting more official status from Microsoft, while the C# language version they are slated for is still in development...
Where applicable, we support new language features for all platforms and for all .NET target frameworks (while in Visual C#, many new features are only supported on .NET Core), and we also review if a similar feature applies to Oxygene, as well.
C# 14 (as per .NET 10)
Feature status for Microsoft's Visual C# 14 is tracked here
C# 13
Based on this page
C# 12
Based on this page
C# 11
Based on this page
These features seem to have dissappeared from the official plans, but have been covered for RemObjects C#
C# 10
C# 9
C# 8
Status for these seems unclear on Microsoft'a side:
C# 7.3
C# 7.2
C# 7.1
Elements .2295 and later is fully up to date with C# 7.1.
C# 7.0
RemObjects Iodine (Java Language)

RemObjects Iodine extends the Elements family of languages by adding support for the Java Language.
In a mixture of our goals with our own Oxygene language, and more similar to our C# and Swift implementations, our aim with the Iodine compiler front-end is to stay close and true to the Java language, but taking it to the next level by making it more modern.
With Iodine, the Java language can now be used for all Elements platforms, including .NET, Cocoa and Island – as well as of course on the Java JVM and Android.
Learn More
Getting Started
Support
Learning Java
If you are not familiar with Java yet, we recommend checking out some of the many sites, tutorials and books available about the Java language in general, in addition to our own resources specific to our implementation of Java on this site.
Just about everything you learn about the Java language in general, and just about any decent book, tutorial or course out there will provide you with the information you need to learn Java, and all you learn about the language will apply directly to using RemObjects Iodine.
Language Extensions
RemObjects Iodine adds a few features to the Java language to make it fit better on all the platforms it supports. We try to keep these extensions to a minimum, and tastefully within the design aesthetics of the Java language.
Where additional keywords are needed, we follow the C-style language convention of prefixing these with two underscores ("__") to avoid conflict with future changes to the official Java language.
Type Inference
Paralleling its use in the C# language, the var keyword can be used to replace a concrete type in field and variable declarations, to leverage type inference:
Foo x = new Foo(); // classic Java
var x = new Foo(); // use Type Inference
Multi-Part Method and Constructor Names
In order to fit in well with the API conventions on the Cocoa platform, Iodine (like C# and Oxygene) adds support for multi-part method names — essentially the ability for a method's name to be split into separate parts, each followed by a distinct parameter. This feature is available on all platforms, and described in more detail in the Multi-part method names topic.
Not-Nullable Types
In Iodine, both value and reference type variables can be adorned by the ? operator to mark them as "nullable" and with the ! operator to mark them as "not nullable". See the Nullability topic in the Language Concepts section for more details, and Non-Nullable Types for a more explicit discussion of the Java syntax (which mirrors nullable types in our C# dialect).
The ! operator can also be used to force a nullable expression to be non-nullable.
int? foo = null;
String! bar = "Hello";
Events & Blocks
Support for .NET-style multi-cast Events is provided to allow Swift code to fully participate in the .NET event system, including support for Block Types via the __event and __block keywords.
Properties
Iodine extends the Java language to allow the definition of true properties that can be accessed like fields using the . syntax, invoking optional getter or setter code. In addition, Methods named get* and set* imported from external libraries will automatically be made accessible using property syntax as well. Defining custom properties uses a syntax similar to C#, but with the __get and __set keywords.
Structs
Using the __struct keyword, Iodine allows the declaration of structs, which are stack-based value types that otherwise behave similar to classes and can contain fields, properties and methods.
public __struct Point
{
public double x;
public double y;
public double distanceTo(Point other) { ... }
}
Cocoa-Specific Features
Iodine adds the __strong, __weak and __unretained type modifiers to control how the lifetime of Automatic Reference Counted objects is handled on Cocoa. The modifiers are described in the Storage Modifiers topic. The try ( __autoreleasepool) can be used to manually control ARC auto-release pools.
__selector() can be used to create a selector instance on Cocoa, for use in functions that take such a selector for callback purposes, and for dynamic dispatch of method calls in the Objective-C runtime environment.
Mapped Types
Mapped Types let you create compatibility wrappers for types without ending up with classes that contain the real type. The wrappers will be eliminated by the compiler and rewritten to use the type the mapping maps to.
Extension Types
Extensions Types can be used to expand an existing type with new methods or properties.
Partial Classes
Partial Classes allow a single class (or struct) to be declared spanning multiple source files.
Aspects & Attributes
Aspects are special attributes that influence how the compiler emits the final executable. Aspects are covered in more detail in their own section, including how to use them and how to create your own.
Class Contracts
Class Contracts allow code to become self-testing, with Pre- and Post-Conditions for methods and type-wide Invariants.
Conditional Compilation
Iodine allows the use of compiler directives such as #if to compile code conditionally – be it for different platforms, or just different project configurations.
Smaller Changes
Global Members
Mostly to fit in better with Cocoa and Island, but available on all platforms, Iodine allows you to both call and define global methods (functions) and variables that are not contained within a class.
Array Literals
Iodine allows the declaration of Array Literals using curly braces. On Cocoa, they are assignment compatible with NSArray, as well.
int[] myIntArray1 = new int[3];
int[] myIntArray2 = {1,2,3};
int[] myIntArray3 = new int[]{1,2,3};
myIntArray1 = new int[3];
myIntArray3 = new int[]{1,2,3};
myIntArray2 = {1,2,3};
NSArray array1 = {1,2,3};
Pointers
Iodine supports pointers on Cocoa, Island and on .NET with Unsafe Code enabled, using the same syntax as familiar from C and C#. The * operator can be used to dereference pointers, and to annotate pointer types; & can be used to obtain the address of objects.
int a = 8;
int *anIntPointer;
anIntPointer = &a;
*anIntPointer = 5;
Out and By-Reference Parameters
Iodine extends Java with support for both in-out and out-only by-reference parameters, using the __ref and __out keywords. These work symmetrical to ref/out in C# or var/out in Oxygene, and need to be specified both in the declaration and at the call site:
public void getValues(__out String foo, __ref String bar) { ... }
...
String f;
String b = "Hello";
getValues(__out f, __ref b);
Swift-style keyword Escaping
Keywords can be used as identifiers if surrounded by back-ticks – same as in Swift:
var `if` = 5;
Multi-Part Method Names
In order to fit in well with the API conventions on the Cocoa platform, Iodine method syntax has been expanded with support for what we call multi-part method names.
Multi-part method names are essentially the ability for a method's name to be split into separate parts, each followed by a distinct parameter. This is "required" on the Cocoa platform, because all the platform's APIs follow this convention, and we wanted Java to be able to both consume and implement methods alongside those conventions without resorting to awkward attributes or other adornments, and to feel at home on the Cocoa platform.
For cross-platform completeness, multi-part method names are now supported on all platforms, and are also compatible with Oxygene, C# and Swift.
A multi-part method has parameter parts for each part, both when being declared:
boolean application(UIApplication application) didFinishLaunchingWithOptions(NSDictionary launchOptions) { ... }
and when being called:
myClass.application(myapp) didFinishLaunchingWithOptions(options);
Implementing Multi-Part Constructors
Iodine also allows you to call named and multi-part-named constructors defined externally, both from Cocoa APIs and on classes defined in Oxygene or Silver, and to declare your own. To avoid ambiguity, the syntax for this deviates sightly from Java's regular syntax for nameless constructors (which use the class's name), and uses the this keyword instead.
For example:
public class Foo
{
public Foo(string name) // regular nameless Javaconstructor
{
}
public this(string name) // same as above
{
}
public this withName(string name) // regular named Java constructor
{
}
public this withName(string name) andValue(object value) // multi-part Java constructor
{
}
}
These can be of course called as follows:
new Foo("Hello");
new Foo withName("Hello");
new Foo withName("Hello") andValue(42);
See Also
Non-Nullable Types
Iodine extends the language with nullability annotations, matching the syntax we also use for C# and Mercury. Reference types – which are nullable by default – can be marked as not nullable by suffixing the type name with an exclamation point (!), and value types can be marked as nullable with a question mark (?).
This can make for more robust code, as variables, fields, properties or parameters declared as such can be relied on to not be null. In many cases, the compiler can even emit compile-time warnings or errors, for example when passing a literal Null or Nothing to a non-nullable parameter.
For consistency, the ! operator is alos allowed on value types, where it will be ignored, simliar to how the ? is allowed on referene types (are nullable by default) and is ignored there.
Int32 i1; // non-nullable by default, 0
Button b1; // nullable by default, null
Int32! i1; // non-nullable by default, 0, same as above
Button? b1; // nullable by default, null, same as above
Int32? i2; // nullable, null
Button! b2 = new Button(); // not nullable, thus needs initialization
Please also refer to the Nullability topic in the Language Concepts section for more detailed coverage.
See Also
Events & Blocks
RemObjects Iodine extends Java language with support for .NET-style Events via the __events keyword.
Events are provided mainly to let Java fit in well on .NET, where the use of them is unavoidable. But although events most commonly used in .NET and both Cocoa and Java have different paradigms to deal with similar concepts such as Blocks and Delegates, Delegate Protocols (Cocoa) and Anonymous Interfaces (Java), events are supported in Java on all platforms.
Declaration Syntax
Events are pretty similar to properties in concept, and that reflects in the declaration syntax. An event member is declared similarly with the __event keyword, followed by a name for the event and the event type, which must be a Block type:
__event EventHandler Click;
Like properties with short syntax, the compiler will take care of creating all the infrastructure for the event, including private variables to store assigned handlers, and add and remove methods.
Assigning Events
Externally, code can subscribe or unsubscribe from receiving notifications for an event by adding or removing handlers. This is done with the special += and -= operators, to emphasize that events, by default, are not a 1:1 mapping, but that each event can have an unlimited number of subscribers.
func ReactToClick(aEventArgs: EventArgs) {
}
//...
myObject.Click += ReactToClick
//...
myObject.Click -= ReactToClick
The += operator adds the passed method (also called event handler) to the list of subscribers. The -= operator removes the method from the list again, assuming it was added before. Neither operator looks for duplicates, so if += is used multiple times with the same event handler, that handler will trigger multiple times when the event fires. Similarly, -= removes the first occurrence of the event handler from the list.
When the event later fires, all the subscribers that have been added will be notified. They will be called one by one, but the order will be undetermined.
Who can add and remove subscribers to an event is controlled by the visibility of the event (see below).
Calling Events
An event can be called, or fired, by simply calling it like a method. Before doing so, one should ensure that at least one subscriber has been added, because otherwise firing the event will cause a Null Reference Exception. You can check if an event has one or more subscribers by comparing it to nil or using the assigned() system function:
if (Click != null) {
Click()
}
Only the type that defines the event can fire it, regardless of the visibility of the event itself.
Visibility
Like all members of a type, events can be marked with a visibility modifier, such as public, internal, or private. This visibility extends to the ability to add and remove subscribers, but not to raise (or fire) the event, which is always private.
Virtuality
Events are virtual, and can be overriden in base classes.
Block (Delegate) Types
Block types (for use in Events and elsewhere) can be defined using the __block keyword:
__block int BlockTypename(int i);
Properties
Iodine extends the Java language to allow the definition of true properties that can be accessed like fields using the . syntax, invoking optional getter or setter code. In addition, Methods named get* and set* imported from external libraries will automatically be made accessible using property syntax as well.
Defining custom properties uses a syntax similar to C#, but with the __get and __set keywords.
String Name {
__get {
return fName;
}
__set {
fName = value;
updateUI();
}
}
int Count { __get { return fCount; } }
Bool Test { __get; __set; }
Properties can be accessed using regular . syntax:
myObject.Name = "Hello";
if (myObject.Test) {
...
}
Structs
Iodine extends the Java language with the ability to declare Structs. Like in C#, Swift, Go and Mercury, and Records in Oxygene, Structs are comparable to Classes in that they represent a data structure that combines Fields and Methods. Unlike Classes, Structs are stack-based value types, and while they do support inheritance, they do not offer polymorphism.
A struct is declared very similar to a class, except by replacing the class keyword with __struct:
MyStruct = public _struct {
public int count;
public void DoSomething() {
..
}
}
Structs may provide an ancestor via extends, but they may not declare virtual or overriden members.
Except when using the Toffee compiler back-end for Cocoa, they may also implement interfaces using the same implements syntax as used for classes.
MyStruct2 = public _struct extends MyStruct implements IFoo {
public string name;
public void DoSomethingElse() {
..
}
..
}
In the example above, MyStruct2 contains all the fields and methods of MyStruct, as well as those defined for MyStruct2 itself.
See Also
Storage Modifiers (Cocoa)
On the Cocoa platform, which uses ARC rather than Garbage Collection for memory management, the three storage modifier keywords __strong, __weak and __unretained are available as extensions to the Java language in order to control how object references are stored in local variables, fields or properties.
By default, all variables and fields are __strong – that means when an object is stored in the variable, its retain count is increased, and when a variable's value gets overwritten, the retain count of the previously stored object gets reduced by one.
Read more about this topic in the Storage Modifiers topic in the Cocoa platform section.
See Also
Auto-Release Pools w/ try (Cocoa)
The standard Java try statement has been extended for the Cocoa platform to allow the __autoreleasepool keyword to be used in lieu of another expression. This creates a new Auto-Release Pool for this thread and cleans it up at the end of the try statement.
try (__autoreleasepool) {
NSApplicationMain(argc, argv);
}
Refer to the Auto-Release Pool topic in the Cocoa platform section for more details.
See Also
Selector Expressions (Cocoa)
The __selector keyword can be used to get a selector reference on Cocoa, for example to dynamically invoke methods, or pass them to Cocoa APIs that expect a SEL type.
SEL s = __selector(compare:options:);
Using the selector literal syntax will cause the compiler to check whether the specified selector is valid and known, and a warning will be emitted if a selector name is provided that does not match any method known to the compiler. This provides extra safety over using the NSSelectorFromString function.
See Also
Mapped Types
Mapped types are a unique feature of the Elements compiler. They let you create compatibility wrappers for types without ending up with classes that contain the real type. The wrappers will be eliminated by the compiler and rewritten to use the type the mapping maps to.
When working with Java, you will most commonly use mapped types (for example as provided by the Sugar cross-platform library). Using mapped types is seamless, and they behave just like regular non-mapped types.
You will not often need to implement mapped types yourself, but for when you do, RemObjects Iodine – like Oxygene, C# and Swift – provides a syntax for implementing mapped types when needed, with the __mapped keyword and the => operator.
Please refer to the Mapped Types topic in the Language Concepts section for more details.
Extension Types
Type extensions can be used to expand an existing type with new methods or properties.
Extensions are most commonly used to add custom helper methods, often specific to a given project or problem set, to a more general type provided by the framework, or to correct perceived omissions from a basic type's API.
For example, a project might choose to extend the String type with convenience methods for common string operations that the project needs, but that are not provided by the actual implementation in the platform.
Extension declarations look like regular Class declarations, except that the class keyword is prefixed with the __extension keyword. Extensions need to be given a unique name, and state the type they extend in place of the ancestor. It is common (but not mandatory) to use the original type's name, appended with the unique suffix.
public __extension class String_Helpers extends String {
Int NumberOfOcurrencesOfCharacter(Char character) {
...
}
}
Inside the implementation, the extended type instance can be referred to via this keyword, and all its members can be accessed without prefix, as if the extension method was part of the original type. Note that extensions do not have access to private or otherwise invisible members. Essentially they underlie then same access controls as any code that is not part of the original type itself.
Extension types can declare both instances and static members. They can add methods and properties with getter/setter statements, but they cannot add new data storage (such as fields, or properties with an implied field), because the underlying structure of the type being extended is fixed and cannot be changed.
Extensible Types
Extensions can be defined for any named type, be it a Class, Struct, Interface, Enum, or Block.
No matter which kind of type is being extended, the extension will always use the class keyword.
See Also
Partial Classes
Partial Classes allow a single class (or struct) to be declared spanning multiple source files by having each part amended with the __partial keyword. All parts must be declared with the same visibility level. All parts must either declare the exact same set of ancestors, or only one part may declare any ancestors at all.
public __partial class Window1 extends System.Windows.Window
{
public String reverse() { ... }
}
Aspects
Aspects are special attributes that influence how the compiler emits the final executable. In RemObjects Iodine, they use regular attributes syntax. Aspects are covered in more detail in their own section, including how to use them and how to create your own.
See Also
Class Contracts
RemObjects Iodine has support for Class Contracts, allowing you to provide Pre- and Post-Conditions for methods and type-wide Invariants to create classes and structs that can test themselves.
Please refer to the Class Contracts topic for more details.
Keywords
__ensure__invariants__old__require
See Also
Conditional Compilation
Iodine supports the same directives as C# for Conditional Compilation.
Code blocks, whole members or entire types can be enclosed using #if and #endif directives in order to compile them only when the specified condition applies.
void main() {
soSomething()
#if DEBUG
doSomethingOnlyInDebugMode();
#endif
doSomethingElse();
}
See Also
Keywords
The following words are treated as keywords in Java, and have special meaning:
Iodine Keywords
Iodine adds the following handful of keywords to support some Language Extensions to Oracle's standard Java implementation.
Standard Java Keywords
These standard keywords are defined by the Java language spec and are also all used by Iodine:
abstractassertbooleanbreakbytecasecatchcharclassconstcontinuedefaultdodoubleelseenumextendsfalsefinalfinallyfloatforgotoifimplementsimportinstanceofintinterfacelongnativenewnullpackageprivateprotectedpublicreturnshortstaticstrictfpsuperswitchsynchronizedthisthrowthrowstransienttruetryvoidvolatilewhile
Java Evolution
Without promising exact timelines for individual features, our goal is to try and support any new Java language changes introduced by Oracle in a timely fashion after they have been finalized, often before and sometimes shortly after they have shipped in Oracle's Java compiler.
Java 10
(via this)
Java 9
(via this and this)
Java 8
(via this link and this one)
Java 7
(also via this one)
RemObjects Mercury (VB)

RemObjects Mercury brings the VB.NET language to the Elements platforms.
With Mercury, you can build your existing VB.NET projects, and leverage your Visual Basic™ language experience to write code for all Platforms supported by Elements.
Our goal for is for Mercury to be the future of the Visual Basic.NET language, as M Microsoft shifts focus to a C#-only future for their tools. With Mercury, VB developers will be able to continue using the language they know and love, both for existing and new projects.
Unlike Visual Basic.NET, Mercury will continue to evolve, both to keep up with new versions of and technologies on .NET and language/platfrom capabilities of C#, but also as a language onto itself, with new and innovative features being added all the time, both based on user requests and feedback, and our internal product roadmap.
What's more, Mercury takes the VB language beyond just .NET, letting developers create native projects for all modern operating systems and platforms, from Android and iOS to Java and CPU-native Windows, Mac and Linux apps.
With Mercury, the future of ther Visual Basic language is bright and strong.
Learn More
Getting Started
Support
Visual Basic™, Visual Basic.NET™ and others are registered trademarks of Microsoft Corporation.
Basics
Mercury will feel familiar and comfortable right away for developers familiar with Microsoft Visual Basic.NET, as well for existing Elements users who want to add the Mercury language to their portfolio.
For Veteran Visual Basic.NET Developers
For veteran Visual basic.NET developers, Mercury is the language you already know and love, and everything will work in exactly the same ways you expect – especially within the .NET platform. While Mercury has some Language Extensions, these are mostly all additive, and you can choose to learn and adopt them over time.
A slight learning curve will – not unexpectedly – be involved when taking Mercury to the other Platforms. Here, the language is still the same VB you know, but you will be dealing with new sets of Operating System APis and potentially different paradigms for UI development and other aspects of your projects, then what you are used to on .NET.
The optional Elements RTL library provides platform-independent abstractions for many common types and tasks that you might need in your day-to-day development (and might take for granted on .NET). What's more, it is largely models after simliar types from the .NET Base Library, so it will be instantly familiar to you.
Adopting it, over platform specific types (such as what the .NET Base Library provides), is a good idea if yu plan to take your code cross-platform, or even just want to work on a single platform but craving that extra bit of ".NET-like"-ness.
Elements RTL is available in all Mercury projects simply my Importing the RemObjects.Elements.RTL namespace.
For Users Familiar with Other Elements Languages
Users familiar with one or more Elements language also find that Mercury will work pretty much as they would expect. The same concepts such as References, Namespaces and Classes apply.
Simply adding a new .vb code file tom your project is all youn need to start using Mercury.
Namespaces
One thing worth noting is that Mercury code files do not need an explicit namespace declaration. Unlike C#, where types defined without a namespace are, indeed, namespaceless, Mercury works similar to Swift and uses the RootNamespace setting for these types. Unlike Swift, Mercury code files can optionally declare a namespace for the types they define and – unlike C# – when they do, this namespace is prefixed by the RootNamespace. You can prefix the namespace with Global. to avoid that.
As in all Elements languages, you can use a dotted name for types as you declare them, to override this and provide the full namespace for the class.
Modules
Mercury also has the concept of Modules. Modules are like static classes, but all their members are available as globals (i.e. accessible without the class name), if the Module is in scope. Modules defined in .vb code files will become available to all Elements languages, and you can use the newly introduced Module Aspect to implement Modules using the other languages, if you so desire.
Learning Visual Basic and Mercury
If you are not familiar with the Visual Basic.NET™ language yet, we recommend checking out some of the many sites, tutorials and books available about the language in general, in addition to our own resources specific to our implementation of the Mercury VB dialect on this site.
Just about everything you learn about the original Visual Basic.NET language in general, and just about any decent book, tutorial or course out there will provide you with the information you need to learn VB, and all you learn about the language will apply directly to using Mercury and Elements.
Converting from VB.NET to Mercury
Mercury provides the option to easily convert an existing .vbproj (and also .csproj) for use with Elements.
There are three main ways to trigger a conversion:
-
When opening a sln file that contains one or more .vbproj projects in Fire or Water, these projects will show in the project tree, but grayed out as "unsupported". You can right-click an individual project and choose "Convert to Elements" from the context menu. This will convert the project in place, create a new .elmemets file, and replace it in the solution. If the solution contains more than one .vbproj or .csproj, the context menu will also provide the option to convert all projects to Elements in one go. This path has the benefit that it can adjust all project references between the projects to point to the converted .elements projects, as well.
-
You can use the "File|Import|Visual C# or Visual Basic.NET Project" menu item in Fire or Water to open and convert a .vbproj directly. This will automatically create a new .elements file based on the original project file. If a .sln with a matching name already exists in the same folder, it will be preserved, and a second Silution will be created for the new project.
-
You can use the EBuild command line tool with the --convert to convert convert projects from the Terminal/Command Line or from a batch script. On Mac, you will need to install the External Compiler to use the command line tool.
All three paths lead to the same conversion logic. The .vbproj will be read and analyzed, and a new .elements project will be created based on its contents. The .vbproj will not be changed.
When converting projects within an open solution, as an added benefit, the IDE will also try to adjust any project references from existing Elements projects to the project being converted.
The conversion performs a number of steps to try and bring most settings and features over. This includes but might extend beyond:
- Removing legacy and unsupported settings.
- Adjusting settings that use different names in Elements, such as
AllowUnsafeCode, GeneratePDB, VBOptionStrict, etc.
- Converting
Imports to the DefaultUses setting.
- Setting
XmlLiteralMode to "Linq to SQL" (see here).
- Migrating
DEBUG, TRACE, CONFIG= and _MYTYPE= Conditional defines.
- Dropping unnecessary
.Designer.vb files
and more.
Please let us know if you encounter any problems converting projects, of have suggestions for more derails that should be carried over.
Project References
When converting projects that are part of a larger solution, Fire and Water will automatically try to adjust Project References as well, with some limitations:
-
If you choose to "Convert all projects to Elements" in one go, the IDe will be avle to adjust all (well-formed) project references to the converted projects to the new filenames.
-
If you convert a single project to Elements, the IDE will adjust project references to it in existing Elements projects, but it will not touch any not-yet-converted .vbproj (or .csproj) projects.
Therefore, the best option for converting a solution with several inter-dependent projects would be to convert all projects in one go.
See Also
Language Extensions
RemObjects Mercury adds meny extra features to the Visual Basic™ language, in order to allow better interaction with all supported platforms and APIs, interact with the other Elements languages, and just in general make Mercury a better language.
In addition to ' and the REM keyword, Mercury also supports // to mark the rest of the current line as comment, and /* ... */ to mark a free-form block of code, potentially spanning multiple lines, as comment.
This change is additive to the Visual Basic™ language and should not cause incompatibility with existing code, where both // and /* are not valid constructs.
The // and /*...*/ comment styles are supported across all six Elements languages.
Simple Entry Point / Top-Level Statements
Similar to Top-Level Statements introduced in C# 9.0 and similar to Swift, Mercury supports a simple syntax for defining the Entry Point for an executable without explicitly declaring a static class and a static Main method, by simply having a (single) .vb file that contains code statements at the top level.
Mapped Types
Mercury also has full support for a feature called Mapped Types, which are inlined types useful to create cross-platform wrappers with zero overhead. While you won't often implement your own mapped types, you will likely use existing ones, for example from the Elements RTL library.
Extension Types
Extensions Types can be used to expand an existing type with new methods or properties.
Class Contracts
Class Contracts allow code to become self-testing, with Pre- and Post-Conditions for methods and type-wide Invariants.
Inheritance for Structs
In Mercury, Structs can specify an ancestor, allowing a newly declared struct to inherit the fields and methods of its base struct. Unlike classes, structs are not polymorphic, and members cannot be virtual or overriden.
Multi-Part Method Names
In order to fit in well with the API conventions on the Cocoa platform, Mercury adds support for multi-part method names — essentially the ability for a method's name to be split into separate parts, each followed by a distinct parameter. This feature is available on all platforms, and described in more detail in the Multi-part method names topic.
Lazy Properties
Lazy Properties are a special kind of property that will be initialized delayed, on first access.
Interface Delegation
Interface Delegation can be used to, well, delegate the implementation of an interface and all it's members to a local property of the class (or structure).
Shared Classes
Entire classes, not just individual methods, can be marked as "Shared". Similar to a Module, a Shared class cannot be instantiated or descended from, and all its members implicitly become Shared and callable without an instance. However, unlike for modules, they do not become part of the global scope.
For Loop Improvements
For loops have been extended with two new powerful options:
-
For Each Matching will loop a collection, but only execute the code block for items that match a specific type.
-
For Each With index will loop a collection and optionally provide a zero-based index of how many iterations of the loop have executed. This can be helpful, e.g. for pagination or otherwise handling items differently based on their index.
Dynamic
The Dynamic keyword is provided to represent an object of dynamic type. Any known member may be called on a Dynamic without compiler checks, and the call will be dynamically dispatched at runtime, using Reflection or IDynamicObject). In Option Strict Off mode, Object references are treated as Dynamic to achieve the same behavior as in Microsoft Visual Basic.NET.
Null
In addition to Nothing, which represents the default value or zero-representation of a given type ("unassigned" for reference types, "zero" for value types), Mercury also introduces the Null keyword, which represents a true null value, even for value types (much like null in C# or nil in Oxygene).
See Null vs. Nothing for more details.
Null-coalescing Assignment Operator
Matching C# 8.0, the ??= null-coalescing assignment operator assigns the value of its right-hand operand to its left-hand operand, if and only if the left-hand operand evaluates to Null. The right-hand expression is only evaluated if needed.
Non-Nullable Types
Similar to the "nullable types" feature in standard Visual Basic, reference type variables can be adorned with the ! operator to mark them as "not nullable". See the Nullability topic in the Language Concepts section for more details, and Non-Nullable Types for a more explicit discussion of the Mercury syntax (which, given that VB's nullable syntax is that same as C#, was modeled after non-nullable types in RemObjcts C#).
CTryType() Function
The CTryType() keyword/function performs the same functionality as standard CType(), but instead of raising an exception on failure will return a null value. The result value of CTryType() will always be a Nullable Type.
Pointers
Mercury has full support for Pointers and direct memory access, in Unsafe Code on .NET and on the native Cocoa and Island=backed platforms, via the Ptr(Of x) syntax.
Records
Mercury includes support for the new Records types introduced by C# 9.0. Records can be declared using the new Record keyword, are available on all platforms and compatible with Visual C# and all other Elements languages,.
ByRef Return Values
Matching C# 7.0, reference return values are supported. From the C# documentation: "A reference return value allows a method to return a reference to a variable, rather than a value, back to a caller. The caller can then choose to treat the returned variable as if it were returned by value or by reference. The caller can create a new variable that is itself a reference to the returned value, called a ref local."
LINQ Extensions
Mercury has improved LINQ support:
From x In list1 Zip y In list2 Select x + y
Inline Delegate Declarations
When declaring a Sub or Function that accepts a one-off callback type as parameter, Mercury allows the delegate type to be described inline as part of the method declaration, without the need for a separate named type. The syntax follows the same form as an explcit delegate declaration, e.g.:
Public Sub DoSomeSWork(Callback As Sub(Success As Boolean))
...
Callback(True)
End Sub
Throw Expressions
Like in C# or Oxygene, Mercury allows expressions to throw an exception:
Dim x := Iif(aSOmeCheck, "All good!", Throw New Exception("Oopsie!"))
Async Main
Also like newer C# or Oxygene, Mercury allows the Main method of a propgram to me marked as Async.
The new #CrossPatform Compiler Directive can be used to toggle Cross=Platform Compatibility Mode on or off within a single file. Cross-Platform Compatibility Mode can also be toggled per project, in Project Settings. It is off by default.
Cocoa-Specific Features
The Using AutoReleasePool combination can be used to manually control ARC auto-release pools.
Top-Level Statements
Similar to Top-Level Statements introduced in C# 9.0 and similar to Swift, Mercury supports a simple syntax for defining the Entry Point for an executable without explicitly declaring a static class and a static Main method, by simply having a (single) .vb file that contains code statements at the top level.
Essentially this simplified code:
Imports System
writeLn("The magic happens here.")
is equivalent to:
Imports System
Module Program
Sub Main(args as String())
writeLn("The magic happens here.")
End Sub
End Module
Access to command line arguments is still available via the implicitly named args variable, and the code can choose to Return either with an integer result, or without.
Requires Mercury build .2695 or later.
See Also
Mapped Types
Mapped type are a unique feature of the Elements compiler. They let you create compatibility wrappers for types without ending up with classes that contain the real type. The wrappers will be eliminated by the compiler and rewritten to use the type the mapping maps to.
When working with Mercury, you will most commonly use mapped types (for example as provided by the Sugar cross-platform library). Using mapped types is seamless, and they behave just like regular non-mapped types.
You will not often need to implement mapped types yourself, but for when you do, Mercury – like Oxygene, C#, and Swift – provides a syntax for implementing mapped types with the MappedTo keyword.
Please refer to the Mapped Types topic in the Language Concepts section for more details.
Extension Types
Type extensions can be used to expand an existing type with new methods or properties.
Extensions are most commonly used to add custom helper methods, often specific to a given project or problem set, to a more general type provided by the framework, or to correct perceived omissions from a basic type's API.
For example, a project might choose to extend the String type with convenience methods for common string operations that the project needs, but that are not provided by the actual implementation in the platform.
Extension declarations look like regular Class declarations, except that the Extends keyword is used (required) in lieu of Inherits, to indicate the type that is being extended. Extensions need to be given a unique name and state the type they extend in place of the ancestor. It is common (but not mandatory) to use the original type's name, appended with the unique suffix.
Public Class String_Helpers
Extends String
Public Sub NumberOfOcurrencesOfCharacter(character as Char) As Integer
...
Sub End
End Class
Inside the implementation, the extended type instance can be referred to via the Me keyword, and all its members can be accessed without prefix, as if the extension method was part of the original type. Note that extensions do not have access to Private or otherwise invisible members. Essentially they underlie the same access controls as any code that is not part of the original type itself.
Extension types can add any kind of member that does not imply storage, including:
- Subs/Functions
- Properties with Getter/Setter
- Operators
Subs/Functions and Properties added by an extension class can be instance (the default) or static (Shared). Extension types cannot add members that require/definde storage on the class itself, sjuch as fields, events or properties with an implied field.
Extensible Types
Extensions can be defined for any named type, be it a Class, Struct, Interface, Enum, or Block. The type does not have to originate from the same project as the extension.
No matter which kind of type is being extended, the extension will always use the Class keyword.
See Also
Class Contracts
Mercury has support for Class Contracts, allowing you to provide Pre- and Post-Conditions for methods and type-wide Invariants to create classes and structs that can test themselves.
Please refer to the Class Contracts topic for more details.
Keywords
EnsureCheckInvariantsOldRequire
See Also
Struct Inheritance
In Mercury, Structures can specify an ancestor, allowing a newly declared struct to inherit the fields and methods of its base struct. Unlike classes, structs are not polymorphic, and members cannot be virtual or overriden.
Public Structure MyStruct1
Public Dim a As Integer
Public Sub DoSomething()
..
End Sub
End Structure
Public Structure MyStruct2
Inherits MyStruct1
Public Dim B As String
Public Sub DoSomethingElse()
..
End Sub
End Structure
In the example above, MyStruct2 contains all the fields and methods of MyStruct1, as well as those defined for MyStruct2 itself.
See Also
Multi-Part Method Names
In order to fit in well with the API conventions on the Cocoa platform, Mercury method syntax has been expanded with support for what we call multi-part method names.
Multi-part method names are essentially the ability for a method's name to be split into separate parts, each followed by a distinct parameter. This is "required" on the Cocoa platform, because all the platform's APIs follow this convention, and we wanted Mercury to be able to both consume and implement methods alongside those conventions without resorting to awkward attributes or other adornments, and to feel at home on the Cocoa platform.
For cross-platform completeness, multi-part method names are supported on all platforms, and are also compatible with Oxygene, C#, Swift and Java.
A multi-part method has parameter parts for each part, both when being declared:
Sub application(application As UIApplication, didFinishLaunchingWithOptions launchOptions As NSDictionary) ...
and when being called:
myClass.application(myapp, didFinishLaunchingWithOptions: options);
Named & Multi-Part Constructors
Mercury also allows declaring and calling named constructors with (optionally) multiple name parts.
For example:
Public Class Foo
Public Sub New(name As String) ' regular nameless constructor
...
End Sub
Public Sub New withName(name As String) ' regular named constructor
...
End Sub
Public Sub New withName(name As String, andValue value As Object) ' multi-part constructor
...
End Sub
End Class
These can be of course called as follows:
New Foo("Hello")
New Foo withName("Hello")
New Foo withName("Hello", andValue: 42)
See Also
Non-Nullable Types
Similar to how value types can be made nullable in standard Visual Basic by suffixing the typename with a question mark (?), Mercury allows reference types – which are nullable by default – to be marked as not nullable by suffixing the type name with an exclamation point (!).
This can make for more robust code, as variables, fields, properties or parameters declared as such can be relied on to not be Nothing or Null. In many cases, the compiler can even emit compile-time warnings or errors, for example when passing a literal Null or Nothing to a non-nullable parameter.
For consistency, the ! operator is alos allowed on value types, where it will be ignored, simliar to how the ? is allowed on referene types (are nullable by default) and is ignored there.
Dim i1 As Int32 ' non-nullable by default, 0
Dim b1 As Button ' nullable by default, null
Dim i2 As Int32! ' non-nullable by default, 0, same as above
Dim b1 As Button? ' nullable by default, null, same as above
Dim i2 As Int32? ' nullable, null
Dim b2 As Button! = new Button(); ' not nullable, thus needs initialization
Please also refer to the Nullability topic in the Language Concepts section for more detailed coverage.
See Also
Lazy Properties
Lazy Properties are a special kind of property that will be initialized delayed, on first access.
A property can be marked as lazy by prefixing the Property keyword with Lazy. Lazy properties must provide an initializer, and cannot provide custom getter or setter code.
Under the hood, the compiler will generate a property getter that will ensure the initializer is run, in a thread-safe fashion, the first and only the first time the property is read.
Public Lazy Property ExpensiveToCreate = New ExpensiveObject()
If a lazy property is not accessed as part of the execution flow of a program, the initializer will never run. A writable lazy property can still be explicitly set to a value, from code, to override the default value. If this happens before the property is read the first time, the initializer will never be executed.
See Also
Interface Delegation
Interface Delegation can be used to, well, delegate implementation of an interface and all it's members to a local field or property of the class (or structure).
Essentially, the class can declare itself to implement an interface, without actually providing an implementation for the members of this interface, itself. Instead, it can mark one of its properties or fields as providing the implementation for it. The member must, at runtime, contain a type that does implement the interface in question.
Public Interface Foo
Sub DoFoo()
End Interface
...
Public Class Bar
Implements IFoo
' Implementation of IFoo is delegated to an instance of FooHelper
Private Property Helper As FooHelper Implements IFoo = New FooHelper()
End Class
...
Class FooHelper
Implements IFoo
Sub DoFoo()
..
End Sub
End Class
Of course, Implements is also supported on "full" properties with custom Get/Set implementations:
Public Class Bar
Implements IFoo
' Implementation of IFoo is delegated to an instance of FooHelper
Public Property Helper As FooHelper
Implements IFoo
Get
...
End Get
Set
...
End Set
End Property
End Class
Implements can be used on plain fields, as well:
Public Dim Helper As FooHelper Implements IFoo = New FooHelper()
By default, members from a delegated interface are not available on the type itself, but only by casting to the interface. Optionally, a Public or Private (the default) visibility modifier can be provided to make the interface members available on the class, as well:
Private Property FHelper As FooHelper Implements Public IFoo = New FooHelper()
Private Property BHelper As BarHelper Implements Private IBar = New BarHelper()
See Also
Pointers
Mercury provides full support for pointers, compatible with Unsafe Code features on the .NET and full direct memory access on the unmanaged platforms.
A pointer variable is declared via the new Ptr type. A pointer can be untyped and reference an arbitrary memory location (a "void pointer"), or represent a specific type. The generic (Of T) syntax is used to declare typed pointers:
Dim v As Ptr = ...
Dim m as Ptr(Of MyStruct) = ...
Dim s as Ptr(Of String) = ...
In the above example, v is an untyped pointer to arbitrary memory, while m is a typed pointer to memory containing a MyStruct, and s is similarly typed and points to a String. (Note that with String being a reference type itself, s does not point to the string itself, but rather to the four or eight bytes holding the reference to the actual string instance, of course.)
Obtaining Pointers
A pointer is, in essence, the address of something, and as such, a pointer can be obtained by using the standard AddressOf keyword.
Dim a As MyStruct
m = AddressOf a
s = AddressOf "Hello Mercury!"
In this case, m now holds the memory address of the struct instance called a, stored on the local heap. And s holds the address of the reference to the String object instance representing the literal "Hello Mercury!".
Using Pointers
Of course, a pointer is only useful if we can work with the data it points to. This is called dereferencing. Every typed pointer exposes an implicit member called Dereference that can be used to access the memory it points to. Dereference can be thought of as a property (or field) of the same type as the pointer:
m.SomeField = 5
writeLn(s.Length)
The above code sents the SomeField field of the struct to 5, and then prints the length of the string that s refers to (14). Note that because m points to the very same memory that is the local struct stored in a, changing the field via m actually changes the original struct.
Pointer Math
Pointers, by definition, represent a single space in memory (and the data stored within), but it is common to use points to work with a continuous layout of multiple items of the same type in memory – an array. The most common scenario is a Byte array – when operating with data in memory at ist rawest level – but it can be an array of any type.
The + and - operators (and related arithmetic) can be used to increase or decrease a pointer to move it between different elements in memory. An increase or decrease of "1" will move the pointer not by one byte, but by the size of the pointer's type (which can be determined, if necessary, using the sizeof() System Function.
Dim b As Ptr(Of Byte) = AddressOf MyMemoryBlob
b.Dereference = 1
(b+1).Dereference = 2
(b+2).Dereference = 3
b += 3
b.Dereference = 4
The code above writes the values 1, 2, 3, 4 to the first four bytes starting at the address of MyMemoryBlob. Since a Byte is (of course) one byte in size, the each pointer increment changes the pointer by one. Note that you can both change the value of b itself (b += 3), or add (or subtract) from it inline to create a new temporary pointer (b+1).
Dim m As Ptr(Of MyStruct) = AddressOf MyArrayOfStructs
m.Dereference.SomeField = 1
(m+1).Dereference.SomeField = 2
(m+2).Dereference.SomeField = 3
m += 3
m.Dereference.SomeField = 4
Here, m references a struct which (assuming it contains more that a single field of type Byte) has a size of larger than one. As the pointer m gets adjusted, it moves to the next struct in memory, based on the type's size.
Allocating Memory
On the native platforms (Windows, Linux and Cocoa), memory can be allocated as needed, using the malloc() system API.
For example, the line below allocates enough memory on the heat to hold one instance of the MyStruct structure, and returns a pointer to it. Of course, this memory is not managed by the garbage collector or ARC, so care must be taken to release it properly by calling free(), when it is no longer needed.
Dim m As Ptr(Of MyStruct) = rtl.malloc(sizeOf(MyStruct))
...
free(m)
See Also
Records
Records are special type of class or structure, originally introduced by C# 9.0 and (for structs) C# 10.0.
From Microsoft's documentation:
Records are distinct from classes in that record types use value-based equality. Two variables of a record type are equal if the record type definitions are identical, and if for every field, the values in both records are equal. ... Value-based equality implies other capabilities you'll probably want in record types. The compiler generates many of those members when you declare a record instead of a class.
Symmetrical to C#, Mercury lets you use the Record keyword as prefix for Class or Structure in the type declaration, to mark a class or structure as record. (In all languages, you can use the Record aspect to achieve the same).
Records can only descend from classes that are also records (or the base Object, of course), and any descendents from a record must also be records.
Public Record Class Foo
Inherits Bar ' must also be a Record!
Public Property Name As String
End Class
Public Record Structure Baz
Public Property Name As String
End Structure
Equivalent using the aspect:
<[Record]>
Public Class Foo
Inherits Bar ' must also be a Record!
Public Property Name As String
End Class
<[Record]>
Public Structure Baz
Public Property Name As String
End Structure
Note: C#- and Mercury-style "Records" are not to be confused with the record keyword in Oxygene, as in Pascal the term "record" is used to refer to (regular) Structures.
See Also
Auto-Release Pools w/ Using (Cocoa)
The standard Visual Basic Using statement has been extended for the Cocoa platform to allow the AutoReleasePool keyword to be used in lieu of another expression. This creates a new Auto-Release Pool for this thread and cleans it up at the end of the using statement.
Using AutoReleasePool
NSApplicationMain(argc, argv)
End Using
Refer to the Auto-Release Pool topic in the Cocoa platform section for more details.
See Also
VBLang
This page covers official user requests for Visual Basic.NET on VBLang and our plans to implement them in Mercury.
The following requests are already covered by Mercury, either explicitly, or by existing Elements compiler or tool chain technologies:
- 19 - Optional parameter implicit type conversion
- 20 - NameOf(obj) function that gives back a string with the full qualified variable name as it is in the source
- 29 - Implicit Default Optional Parameter
- 41 - Allow Single Line Comments in more places
- 43 - Variable scoped late binding (via the
Dynamic type)
- 46 - Add Support For Pointers
- 65 - Allow comments after explicit line continuations
- 73 - Extension Properties
- 92 - Implicit interface implementations
- 135 - Late-binding without requiring Option Strict Off for entire file or project (via the
Dynamic type)
- 174 - Make the
Optional keyword optional
- 152 -
Out arguments (and In)
- 164 - Can't call extension methods on Object
- 183 - Implicit Line-Continuation Comments
- 211 - Use of any installed programming language (Elements allows mixing of all six languages on the same project)
- 271 - Inline comments (
/* .. *./)
- 300 -
unmanaged type parameter
- 354 - Make Optional optional (dupe of 174)
- 355 - Nullable References
- 406 - WebAssembly support
Additional candidates are:
- 24 - Case ... When ... Clauses
- 63 - Allow overridable and overriding events
- 87 - TryCast should support nullable value types as its target type
- 96 - Generic Property
- 169 - Using readonly property as target of ByRef
- 186 - Exit For j Statement to Break Out of Nested For and For Each Loops
- 204 - Add shadow classes as a way to extend sealed classes
- 210 - Member functions in Enums
Differences and Limitations
Mercury strives for 99% backward compatibility with Microsoft Visual Basic.NET so that ideally every existing VB project can be opened and built (for the .NET platform only, of course) with no or very minor adjustments.
This section covers some of the smaller differences that you might encounter and that might require you to make manual adjustments in order to port your project over to Mercury.
Conditional Compilation
Mercury, like all of Elements uses a stricter but more powerful processor for conditional compilation with #If Then. In some rare cases, you might need to re-arrange your #If Then, #Else and #End If directives so that they do not intersect with language code structures.
Read the Conditional Compilation (Mercury) topic for more details.
You might also want to check out the shared Conditional Compilation topic for all languages, the list of Standard Conditional Defines provided by the Compiler and the defined(), exists() and and static() System Functions.
The My Class
Visual Basic.NET creates an implicit My class (and related classes) with helper APIs for common application programming tasks. Mercury provides the same classes, but they ar injected into the build in slightly different ways and it uses slightly diferent mechanics to determine what type of classes to create.
Read the The My* Classes topic for more details.
XML Literals
XML Literals are supported and fully compatible with XElement/Linq to XML, on the .NET platform. On all platforms, XML Literals can be used with XmlElement classes from [Elements RTL](/API/Elements RTL).
On the .NET Platform, a Project Setting is provided to determine the standard type of XML Literals to be used, when it cannot be inferred from context. The default is Elements RTL, but projects Converted from a .vbproj will have the setting set to use Linq to XML.
Read the XML Literals topic for more details.
Conditional Compilation
Like all Elements languages, Mercury supports Conditional Compilation in order to conditionally include or exclude code from being built into the executable based on the current configuration, target platform, or other conditions.
The standard Visual Basic #If, #Else and #ElseIf directives can bed used to surround code with conditions for inclusion/exclusion. In addition, the defined() and static() system functions can also be used to tie blocks of code to conditions.
Defines
Conditional compilation is applied based on the presence or lack of presence of named conditional defines. Defines are identifers that live in a namespace sepaarte from the rest of the code, and can be set fopr the project in four ways:
- Pre-defined by the compiler (e.g.
ELEMENTS, DOTNET or COCOA).
- Set in the project via the
<ConditionalDefines> (or, legacy, <DefineConstents>) setting, editable via the "Manage Conditional Defines" Sheet Manager in Fire and Water and the Project Properties in Visual Studio.
- Passed to the compiler via the EBuild command line.
- Set in code using the
#Const directive.
A define is either a simple name (e.g. "DEBUG") or can optionally have a value assigned ("VERSION=5").
Defines (whether they have a value or not) can be treated as boolean values — if the define is present (defined), they evaluate to True, and if they are not present (undefined) they evaluate to False:
#If DEBUG
' debug code goes here
#End If
Multiple defines can also be combined in a logical expression, using AndAlso, OrElse, Xor and Not:
#If DEBUG AndAlso COCOA
' debug code for the Cocoa platform goes here
#End If
Finally, arithmetic expressions can be used to evaluate defines that have a value:
#If DEBUG AndAlso COCOA AndAlso VERSION > 3
' Version 3+ debug code for the Cocoa platform goes here
#End If
Validity of Undefined Code
Unlike most other compilers, the conditional compilation system in Elements is not a dumb text-pre-processor that simply strips all undefined code from the file before compilation. Instead, Conditional compilation directives are part of the syntax tree of a Mercury code file.
This brings with it two limitations:
- Code in sections of the file that will not be compiled int the binary due to the current set of conditional defines still must be syntactically valid Mercury code. It can refer to types or identifiers that are unknown, but it must not be grammatically wrong.
#If/#End IF sections cannot intersect language constructs. For example, an #If block may not start before of a Subs declaration and then close inside it.
These restrictions allow several benefits. They allow the compiler (and IDE smarts) to build a single syntax tree that covers all versions of an #If'ed code file, letting you get Code Completion in active and inactive portions of the code.
They also enable more advanced conditional compilation using the methods desxcribed in the next section.
Conditional Compilation w/ defined()
In addition to the traditional #If directive, Mercury has two System Functions that allow you to integrate conditional compilation more naturally with the normal flow of the language.
The defined() system function takes a string literal parameter with the name of a single define, and will – at compile-time – evaluate to True if the define is set, and to False, if not. If False, the compiler will (where possible) eliminate code that should not need to compile.
If defined("DEBUG") Then
' debug code goes here
End If
This code works the same as the example above, but it flows more natural with the regular execution flow of the Mercury language.
The real power of defined() comes into play when it can be combined with other conditions that evaluate at run time. Consinder the following example
If defined("COCOA") OrElse (defined("DOTNET") AndAlso Environment.OS = OperatingSystem.macOS) Then
' code that only works on Mac
End If
In this example, the first part of the condition, defined("COCOA"), will be evaluated statically at compile time:
- When building a native Mac (Cocoa) app, the If statement is determined to be true, and (through boolean shot circuit) the following code can be included unconditionally.
- When building, say, a native Windows, both
defined() conditions will evaluate to false, and the entire block of code will be excluded.
- However, if we're building for .NET, our executable could in theory run on any platform, including the Mac. Since
defined("COCOA") is False but defined("DOTNET") is true, the compiler will emit the If clause with the at-runtime check of Environment.OS, so the code block will run depending on the actual platform.
Similar to defined(), the static() system function takes a simple boolean expression that must be possible to resolve at compile time. Its result is True if the expression is true, and False, if the expression is false.
Just as with defined(), the compiler will be able to smartly omit code where possible.
Note: just as with classic #If directives, code omitted due to defined() or static() must of course be syntactically valid, but is free to make reference of types and identifiers that would be invalid. For example, this code will compile clean, even if ThisMethodDoesNotExist is unknown, since the static() call evaluates to False:
If static(2+2=5) Then
ThisMethodDoesNotExist()
End If
Visual Basic Standard Defines
Microsoft's Visual Basic.NET has a few standard defines that are set by the compiler. In Mercury, these are handled differently.
-
The VBC_VER define is not supported, as it refers tom specific versions of Microsoft's compiler implementation. Elements as its own Standard Conditional Defines you can use to check compiler version, platform and more. You can use #If ELEMENTS to check for Mercury vs. Microsoft Visual Basic.NET.
-
The DBEUG and TRACE defines are simple defines declared in the project. As far as the compiler is concerned, there is nothing special or magical about them compared to defines you would make up yourself. By default, All new projects created from template haver these defines set for the Debug configuration.
-
The CONFIG define also a simple constant defined in the Elements project. For all Mercury projects created from template, this constant will be predefined for the two standard configurations, Debug and Release, that the templates create. If you add Mercury code to existing Elements projects and need this define, you might need to add it yourself. If you add additional configurations to your project, yuo might also need to set it.
-
the TARGET define will not be set by the Mercury templates, as it is used infrequently, and its terminology conflicts with how the term "Target" is used in Elements. If needed, you can set this define yourself, of course.
-
The _MYTYPE define will also not be set by the Mercury templates, as Mercury's My Type System does not rely on it.
When importing/converting .vbproj projects to Mercury, the importer will set the CONFIG for all configurations, if not already present in the original project, and it will also add the DEBUG and TRACE defines for the Debug configuration, and set the _MYTYPE define, based on the MyType setting in the .vbproj.
See Also
The My Classes
Visual Basic.NET creates an implicit My class (and related classes) with helper APIs for common application programming tasks. Mercury provides the same classes, but they ar injected into the build in slightly different ways and it uses slightly diferent mechanics to determine what type of classes to create.
The My types are very specific to .NET, and not available on the other platforms.
How the My Classes are Generated
in Mercury, the My classes are not injected by the compiler, but are defined in a regular sorce code file that is generated by the build phase prior to core compilation, and passed to the compiler along with your own source files. If you look at the more detailed version of the build log, you will see this file in the list, it kis called My.pas (and for legacy reasons, its content is defined using the Oxygene language, not Mercury).
The file will be generated if the following four conditions are met:
- The
VBGenerateMy setting is set to True (the default)
- The project has a
RootNamespace set
- The project platform is .NET
- The project has a reference to "
Microsoft.VisualBasic.dll" and/or "Mercury.dll"
The VBGenerateMy setting default to True, but you can explicitly set it to False if you want to forego the creation of a My classes.
The My Classes and Code Completion
Because the My.pas is created on build, it's contents will not be available to code completion and other IDE intelligence, until the first time you compile your project successfully.
Once your project has built, the classes become available to Code Completion and the Editor Code Model. Because they are diven by a plain source file, you can even use "Go to Definition" to open the generated file and review it.
In Fire and Water, the file (among potentially others) is also available via the "Other Files" item in the Jump Bar at the top of the editor.
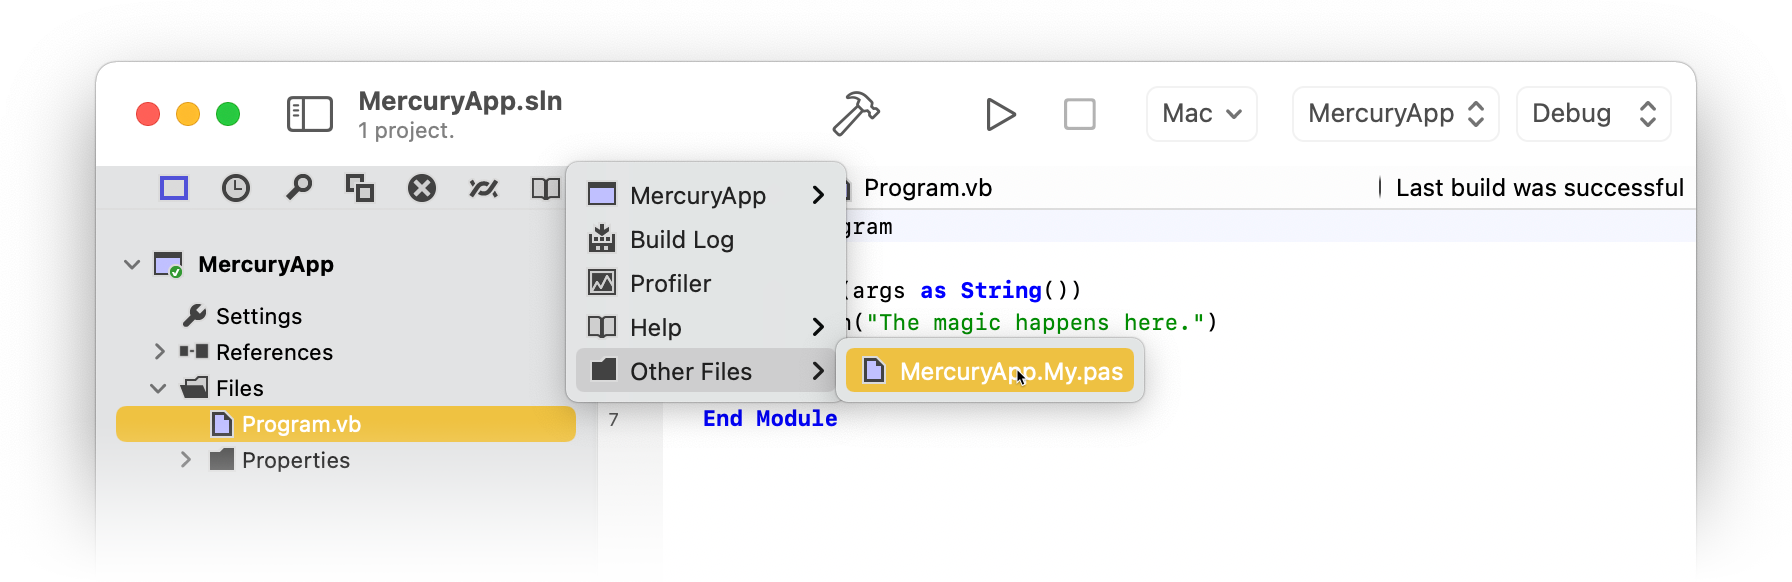
Generated Classes
Visual Basic.NET uses the MyType project setting, also available to code via the _MYTYPE Conditional Define to determine what content to generate for the My classes. Mercury does not use thus setting (although project conversion does migrate it to a plain conditional define). Instead it relies on Elements more advanced conditional compilation to generate all possibly items in the My.pas file, but compile only those that are applicable for the current project.
We think this system should be mostly compatible with the use of My in most Visual Basic.NET projects, but please let us know if you encounter any problems or have suggestions for enhancements.
XML Literals
Mercury has full support for Visual Basic.NET's XML Literals, with a few additions.
In Microsoft Visual Basic.NET, XML Literals map to types from the Linq to XML class library, such as XElement, XCData and the like. These classes ar eof course speciifc to the .NET platform.
In Mercury, XML Literals instead map to types from the native XML Document implementation in our cross-platform Elements RTL library, such as XmlElement. This allows XML Literals to be used on all platforms, and with a consistent (albeit different) API on the resulting objects.
Mercury supports falling back to using XElement & Co for backward compatibility with existing code, when compiling for .NET and .NET Core. This can be achived in two ways:
- Assigning an XML Literal to a strongly typed variable, of a Linq to XML type will force the XML literal to use that mode, e.g. "
Dim x As XElement = <xml />."
- Setting the "XML Literals (Mercury)" Project Setting from "Elements RTL" (the default) to "Linq to XML" will force all XML Literals to default to using
XElement (unless assigned to a strongly typed XmlElement of course).
Keywords
Mercury Evolution
Since Visual Basic.NET™ is not being developed further by Microsoft, there is no language evolution process to keep track of. Our goal is to provide full backwards compatibility with Microsoft's existing Visual Basic.NET™ implementation as of .NET 4.8, and evolve the Mercury language with our own extensions from there.
RemObjects Go

RemObjects Go brings the Go language to the Elements platforms.
RemObjects Go is a 100% compatible implementation of the Go language supported for all Elements platforms — .NET, Cocoa, Android, Java, Windows, Linux and WebAssembly.
For .NET and the Island-backed platforms (except WebAssembly), a complete port of the Go runtime and Go Base Library is provided as well, so that any standard Go code should compile and be usable out of the box. Functionality privided by this Go Base Library is also be optionally available to the other four Elements languages on these platforms.
The goal for RemObjects Go is not to provide a full app development solution for all the platforms, as the Go language has many (purposeful) limitations that we would have to accommodate for with Language Extensions, which we do not want to do at this stage.
For example, Go does not even have support for classes, which are crucial for most GUI frameworks.
The intended use for Go is mainly to allow to bring in existing libraries to use in applications (in particular on the Island-backed native platforms, where the OS-native APIs are often limited and low-level), and/or to allow simple Go-language code to be compiled as part of a larger project in one of the other languages.
That said, within the capabilities of the Go language, Go code build with Elements has full access to all the capabilities of the respective platforms – e.g. full access to the .NET or .NET Core framework library when building for .NET, or the Cocoa APIs when building for iOS or macOS.
In addition to simply adding .go source files directly to your project, Go Import can be used to import whole existing Go packages (and their dependencies) so they can be added to your project as Project References or Remote Project References.
Learn More
Getting Started
Support
Basics
Users familiar with one or more Elements languages will find a few areas that might work in surprising ways, when adding Go code to their project.
This topic should cover some of these caveats.
Namespaces
Like all Elements languages, Go has full support for Namespaces, including specifying namespaces for your own code and accessing existing code within the namespaces it lives in, for all the platforms. However, the way Go specifies namespaces behaves slightly different than the other languages.
Oxygene, C# and Java specify the full namespace for all types declared in a file at the top, while Swift files do not specify a namespace at all and have all types be part of the RootNamespace set in Project Settings.
Similar to Swift, Go derives the namespace for a file from the RootNamespace, but combines it with the physical folder structure within the project (i.e. relative to the .elements project file) to form the full namespace. The package keyword at the top of the file must match the last part of the namespace.
For example, if a project has a RootNamespace of "mycompany.myproject" and one or more files in a subfolder called "tools", then the package name specified in those files must also be "tools", and the full namespace of types declared in these files will be "mycompany.myproject.tools".
The "Go" root namespace
For .NET and Island-based platforms, Go comes with an extensive Go Base Library (GBL) of commonly used types and functions, ranging anywhere from mathematic algorithms to encryption, network communication and more.
Within .go source files, these types are available via the same namespaces as in Google's Go implementation, e.g. builtin, fmt, crypto, and so on.
Since Elements projects can mix languages, a common scenario is to have some Go code in a project that is predominantly using one of the other languages, and referencing the GBL because the Go code depends on it. In order to not pollute the base name scope with all the Go namespaces, types from the GBL are nested under a virtual "Go" namespace, when accessed from Oxygene, C#, Swift and Java.
In other words, where from Go you might see crypto.md5, the same types will be accessible as Go.crypto.md5 from the other languages
File Name Suffixes
Different than in other languages, file names have relevance for whether a .go file gets compiled as part of a project or not. Go files can have one or more suffixes appended to the base file name with an underscore.
If that suffix matches a platform (such as "_windows"), the file will only be compiled if it matches the platform of the project (or target). If it matches an architecture (such as, "_arm64"), it will only be compiled when building for that particular architecture. Note that this includes platforms and architectures not covered by Elements itself (e.g. a file with suffix "_sparc64" will never be compiled by Elements).
Projects with a suffix of "_test" will only be compiled for Go test projects (which are currently not supported by Elements yet).
Files with unknown suffixes ("_foo") will be compiled as normal.
If in doubt, avoid underscores in names.
Scope of Go Base Library
Our goal is to support the full Go Base Library (GBL) for the following platforms and sub-platforms:
A very limited go.jar with a few base types is provided for Java, but the vast majority of GBL code is not compatible with the limitations of the Java runtime, unfortunately.
The Go Base Library will not be available for Toffee V1 Cocoa projects, since we're planning to have Island/Darwin overtake this target as the default back-end soon (see here for more details).
See Also
Learning Go
If you are not familiar with Go yet, we recommend checking out some of the many sites, tutorials and books available about the Go language in general, in addition to our own resources specific to our implementation of Go on this site.
Just about everything you learn about the Go language in general, and just about any decent book, tutorial or course out there will provide you with the information you need to learn Go, and all you learn about the language will apply directly to using RemObjects Go and Elements.
Language Extensions
RemObjects Go adds no features to the Go language, in order to keep it as close to the original standard Go implementation as possible.
Instantiating Classes
While Go does not support defining class types, it can interfact with classes provided by the platform base libraries, or defined in code written in a different Elements languages.
When working with class instances obtained externally, methods and properties of the instance can be accessed using the same paradigms as used for Go structs. In addition, RemObjects Go also allows creating new instances of classes, again in a syntax that mirrors that of initializing a regular struct:
var b = Button { Caption: "Test", Color: Color.Red }
Inheritance for Structs
In RemObjects Go structs can specify an ancestor, allowing a newly declared struct to inherit the fields and methods of its base struct. Unlike classes, structs are not polymorphic, and members cannot be virtual or overriden.
Other Language Extensions
There are no language extensions for RemObjects Go, for now.
Struct Inheritance
In RemObjects Gold, structs can specify an ancestor, allowing a newly declared struct to inherit the fields and methods of its base struct. Unlike classes in other languages, structs are not polymorphic, and members cannot be virtual or overriden.
type MyStruct1 struct {
a int
func DoSomething() {
..
}
}
type MyStruct2 struct : MyStruct1 {
b string
func DoSomethingElse() {
..
}
}
In the example above, MyStruct2 contains all the fields and methods of MyStruct1, as well as those defined for MyStruct2 itself.
See Also
Keywords
The following words are treated as keywords in Go, and have special meaning:
RemObjects Go Keywords
As of yet, Gold adds no custom keywords to the Go language
Standard Go Keywords
These standard keywords are defined by the Go language spec and are also all used by RemObjects Go:
breakcasechanconstcontinuedefaultdeferelsefallthroughfalseforfuncgogotoifimportinterfacemakemapnewnilpackagerangereturnselectstructswitchtruetypevar
Go Evolution
Without promising exact timelines for individual features, our goal is to try and support any new Go language changes introduced by Google in a timely fashion after they have been finalized, often before and sometimes shortly after they have shipped in Goole's Go compiler.
Current language and base library support matches Go 1.13.5.
RemObjects Swift

RemObjects Swift (code-named "Silver") implements Apple's Swift language, which you might already be familiar with from working with it in Xcode for your iOS or Mac projects. RemObjects Swift takes it a step further by also targeting the .NET, Android, Java, Windows, Linux and WebAssembly platforms (in addition to iOS, Mac, tvOS, visionOS and watchOS, of course).
Different from our own Oxygene language, where we add new and exciting language features frequently, our aim with the Elements compiler front-end is to stay as close and true to the Swift language as possible, and to follow where Apple takes the Swift language with their own compiler.
The Elements compiler will evolve as the official Swift language evolves, but our goal is not to drive the Swift language forward (and diverge from Apple's standard) ourselves, but rather to provide a compiler and language – for .NET, Cocoa and Java – that will feel like "true Swift" to everyone familiar with the language.
That said, RemObjects Swift does adds a few features to the standard Swift language to make it fit better on all the platforms it supports. These are covered under Language Extensions. It also has a few notable differences and limitations, as covered under Differences and Limitations.
Learn More
Getting Started
Support
Differences and Limitations
This page describes differences and caveats in RemObjects Swift vs. Apple's standard Swift implementation. These differences fall into three categories:
Additional Features
Please check out the Language Extensions topic for detailed coverage of the features RemObjects Swift adds on top of regular Apple Swift. These are few, and only added with extreme caution where necessary to properly embrace all platforms.
RemObjects Swift also extends error handling to cover both Swift style errors and platform exceptions. You can read more about that here:
Temporary Limitations
These are temporary limitations or differences in our implementation of Swift. They are due to the beta status or that we simply haven't found proper solutions for them yet on all platforms, and our goal is to resolve these over time.
none currently known
Permanent Differences
The differences listed here are permanent and intrinsic to Silver's implementation of Swift, usually driven by demands of the platforms. We expect these differences to remain indefinitely.
-
Silver uses the platform String types (with some extensions) which are UTF-16 based, implemented as reference types, and immutable.
-
Type Extension are limited when the extended class is declared in a different project/assembly, and they do not support (a) adding new fields or stored properties or (b) implementing additional protocols.
-
On the Cocoa and Island platforms, not every (non-class) type descends from the root Object class. As a result, in Silver types that do not descend from Object are not compatible with the Swift-defined Any type.
-
On the Cocoa platform, protocols cannot be applied to structs when using the Toffee back-end. This limitation is lifted in the upcoming multi-platform Island back-end.
Language Extensions
RemObjects Silver adds a few features to the Swift language to make it fit better on all the platforms it supports. We try to keep these extensions to a minimum, and tastefully within the design aesthetics of the Swift language.
Where additional keywords are needed, we follow the C-style language convention of prefixing these with two underscores ("__") to avoid conflict with future changes to the official Swift language.
Iterators
Iterators are a special type of method that provide an easy and comfortable way to implement custom Sequences.
Partial Classes
Partial Classes allow a single class (or struct) to be declared spanning multiple source files.
Static Classes
Static Classes are classes where all members are static. Silver provides a convenient shortcut to mark a class as static instead of having to mark each individual member.
Custom Cast Operators
Cast Operators allow you to implement custom type casting behavior for your own types, bot. for implicit and explicit (as) casts.
Events
Support for .NET-style multi-cast Events is provided to allow Swift code to fully participate in the .NET event system.
Pure Fields
New in Elements 9.3, the __field keyword works symmetrical to var to declare a field inside a class or struct. Unlike var, the field will be implemented as plain low-level field, and not as property. This distinction can be important when, for example, dealing with Reflection on .NET.
Await Statements
The __await keyword is supported on .NET to unwrap asynchronous calls, similar to how await works in Oxygene and C#. See the Await Expressions topic for more details.
Lock Statements
Similar to C# or Oxygene, __lock Statement can be used to ensure thread-safe access to a block of code.
Using Statenents
Also similar to C# or Oxygene, a __using Statement can be used to make sure an object is properly disposed through the IDisposable/Closable interfaces after the code that uses it is finished.
External Functions
Silver introduces the __external keyword to allow the import of external APIs via P/Invokeand JNI.
Mapped Types
RemObjects Silver has full support for Mapped Types, which are inlined types useful to create cross-platform wrappers with zero overhead. While you won't often implement your own mapped types, you will likely use existing ones, for example from the Sugar library.
Inheritance for Structs
In RemObjects Swift, structs can specify an ancestor, allowing a newly declared struct to inherit the fields and methods of its base struct. Unlike classes, structs are not polymorphic, and members cannot be virtual or overriden.
Aspects & Attributes
Aspects are special attributes that influence how the compiler emits the final executable. Aspects are covered in more detail in their own section, including how to use them and how to create your own.
Class Contracts
Class Contracts allow code to become self-testing, with Pre- and Post-Conditions for methods and type-wide Invariants.
Smaller Extensions
- Not meant for user code, the
¡ (inverted exclamation point) suffix operator can be used to mark a type as being nullable only if it is a reference type – essentially giving it the same Nullability behavior of the type name being used on its own in Oxygene or C#.
- Silver allows named parameters in attributes, as well as attribute scope prefixes using
:.
__out can be used similarly to inout, but parameters will be one-directional.- Silver supports the same attribute prefixes as Oxygene and C#, as well as a Swift-specific
@main: attribute prefix for applying attributes to the entry point.
- For symmetry with #available, a special
#defined() syntax is provided around the defined() function for conditional compilation.
Exception Handling
Exception handling is a crucial feature on the .NET and Java/Android platforms (and frankly, also comes in very handy on the Cocoa platform as well). Silver extends the Swift 2.0 error handling syntax to also support for exception handling on all platforms, as covered in more detail in the Exceptions and Error Handling topic.
RemObjects Swift originally provided an interim syntax for exception handling in Swift 1.0 that has been being deprecated moving forward, in favor of the new do/catch syntax.
Note that this Exception Handling Language Extension we provided for Swift 1.0 has been deprecated as of Elements version 8.2, and will be removed in a future update. Please refer to the Exceptions and Error Handling topic for the new way to deal with exceptions and errors consistently.
Iterators
Iterators provide an easy and comfortable way to implement custom sequences in your Silver project.
Iterators are special types of methods (funcs) that return a sequence. When called, the body of the iterator method is not actually executed, but a new object is instantiated, representing the sequence. Once code starts to enumerate over the sequence, for example in a for in loop, the iterator's method body will be executed piece by piece in order to provide the sequence elements.
A sample, as the saying goes, says more than a thousand words, so let's
start by looking at a real live iterator implementation:
func getEvenNumbers() -> ISequence<Int> {
for var i: Int = 0; i < 100; i++ {
__yield i
}
That's a fairly simple iterator method that will provide a sequence of
all even numbers between 0 and 100. There are two things that make this method special:
First, the method return type is an ISequence<T> protocol type.
Second, you will notice the use of the __yield keyword inside the
for loop. This keyword is specific to iterator implementations, and used to pass back the individual elements of the sequence. You can think of this as the equivalent of return i, but instead of exiting the method, the value of i will be returned as part of the sequence, and the iterator will continue its work.
This is a lot to take in on first sight, so let's walk through what happens when this iterator is used in code such as this:
let numbers := getEvenNumbers()
for n in numbers {
println(n)
}
The first line calls our iterator method, but instead of executing any
of the code we wrote in getEvenNumbers, this will simply create a new
sequence object and pass it back, storing it in the numbers variable.
At this point, none of the "hard work" needed to calculate the sequence
will be performed yet.
Next, the for in loop runs over the sequence, which in turn
starts executing the iterator body. The for loop starts at 0, and
reaches the yield keyword. At this point, the iterator will halt, and
the first value, 0 will be passed back as the first element of the
sequence. The body of the for in loop in the second snippet now executes with n = 0 and
writes that value out to the console.
As the for each loop resumes, it will try to get the next value of the
sequence – which in turn resumes our iterator body. The for loop
continues to i = 2, and the game continues.
Eventually, the iterator will reach 100, and exit – the end of the
sequence has been reached, and the for each loop too will terminate as well.
As you can see in this simple example, iterators can make it very easy
to implement complex sequences by allowing the entire buildup of the
sequence to be written as normal sequential code. Beyond what is shown
in this sample, iterators can contain __yield statements in various
places, contain nested loops, conditions and almost all of Swift's language constructs that you can use in ordinary methods. This allows them to perform operations that would be very complex to achieve if every iteration of the sequence would need to be encapsulated
independently.
Delegating Iteration to a Sequence
The yield keyword also supports delegation of the iterator to a second sequence, as shown below:
var moreValues = [3,4,5,6] // array of Int, can act as sequence
func myIterator() -> ISequence<Int> {
__yield 1 // adds "1" to the sequence
__yield 2 // adds "2" to the sequence
__yield moreValues // adds "3" thru "6" to the sequence
__yield 7 // adds "7" to the sequence
}
Limitations inside Iterator Methods
Since yielding in an iterator returns back to the caller, it's not
possible to __yield from within a protected block such as a __try/ __finally block, as there is no guarantee that the caller will actually finish looping over the sequence.
See Also
Partial Classes
Partial Classes allow a single class (or struct) to be declared spanning multiple source files by having each part amended with the __partial keyword. All parts must be declared with the same visibility level. All parts must either declare the exact same set of ancestors, or only one part may declare any ancestors at all.
There is not much use for partial class syntax in regular user code, as Swift extensions can perform all the same functionality (and are, in fact, treated identical to partial classes when defined within same project), but the __partial syntax is provided for use in code generators such as .NET CodeDom, which sometimes use code patterns that do not match well with the extension syntax.
Static Classes
RemObjects Silver allows classes to be marked with the static keyword to indicate they are purely static. All members defined in the class will automatically become static, whether they themselves are marked as static or class, or not. Static classes cannot be instantiated.
Example
public static class Helpers {
public func Helper() { // will be static
}
}
Custom Cast Operators
RemObjects Silver allows the implementation of implicit and explicit cast operators on types by declaring a static func named __implicit or __explicit.
Cast operators funcs must have one parameter and a result, and one of the two must be the type they are declared on.
public class Foo {
public static func __implicit(_ other: Foo) -> Bar {
return createBarFromFoo()
}
public static func __explicit(_ other: Foo) -> Bar {
return createBarFromFoo()
}
public static func __implicit(_ other: Bar) -> Foo {
return createFooFromBar()
}
public static func __explicit(_ other: Bar) -> Foo {
return createFooFromBar()
}
}
With an explicit cast operator declared on a class, explicit casts from one type to the other are allowed:
let bar = Bar()
let foo: Foo = f as? Foo
With an implicit cast operator declared on a class, automatic casts from one type to the other are allowed:
let bar = Bar()
let foo: Foo = f // no explicit cast necessary
Events
RemObjects Silver extends the Swift language with support for .NET-style Events via the __events keyword.
Events are provided mainly to let Swift fit in well on .NET, where the use of them is unavoidable. But although events most commonly used in .NET and both Cocoa and Java have different paradigms to deal with similar concepts such as Blocks and Delegates, Delegate Protocols (Cocoa) and Anonymous Interfaces (Java), events are supported in Swift on all platforms.
Declaration Syntax
Events are pretty similar to properties in concept, and that reflects in the declaration syntax. An event member is declared similarly with the __event keyword, followed by a name for the event and the event type, which must be a Block type:
__event Callback: (Int) -> () // using an inline block definition
__event Click: EventHandler // using a predefined block/delegate type
Like properties with short syntax, the compiler will take care of creating all the infrastructure for the event, including private variables to store assigned handlers, and add and remove methods.
Assigning Events
Externally, code can subscribe or unsubscribe from receiving notifications for an event by adding or removing handlers. This is done with the special += and -= operators, to emphasize that events, by default, are not a 1:1 mapping, but that each event can have an unlimited number of subscribers.
func ReactToSomething(aEventArgs: EventArgs) {
}
//...
myObject.Callback += ReactToSomething
//...
myObject.Callback -= ReactToSomething
The += operator adds the passed method (also called event handler) to the list of subscribers. The -= operator removes the method from the list again, assuming it was added before. Neither operator looks for duplicates, so if += is used multiple times with the same event handler, that handler will trigger multiple times when the event fires. Similarly, -= removes the first occurrence of the event handler from the list.
When the event later fires, all the subscribers that have been added will be notified. They will be called one by one, but the order will be undetermined.
Who can add and remove subscribers to an event is controlled by the visibility of the event (see below).
Calling Events
An event can be called, or fired, by simply calling it like a method. Before doing so, one should ensure that at least one subscriber has been added, because otherwise firing the event will cause a Null Reference Exception. You can check if an event has one or more subscribers by comparing it to nil or using the assigned() system function:
if Callback != nil {
Callback()
}
Only the type that defines the event can fire it, regardless of the visibility of the event itself.
Visibility
Like all members of a type, events can be marked with a visibility modifier, such as public, internal, or private. This visibility extends to the ability to add and remove subscribers, but not to raise (or fire) the event, which is always private.
Virtuality
Events are virtual, and can be overriden in base classes.
Await Expressions
An await expression can be used to write asynchronous code in a linear fashion. It can be applied to methods that return a Task, as well as to methods that expect a callback closure as final parameter.
Code can be written as if the methods in question return a value right away, and the compiler will handle the task of unwrapping the provided code and handle the callbacks properly. Under the hood, __await will break the method into different parts, scheduling them to be executed asynchronously once the awaited actions have been completed.
Await with Tasks
Await with Tasks works similar to the "async/await" pattern in other languages, such as C#, Oxygene or even modern JavaScript. A method is declared as returning a special Task type either explicitly, or using language sugar such as the C# async keyword. The returned Task instance can be used to keep track of the status, and be notified when the result is available – which the __await keyword abstracts:
func test() -> Task<String> {
let task = Task<String>() {
Thread.Sleep(10000)
return "Result!"
}
task.Start()
return task
}
...
func OtherMethod() {
let message = __await test();
print(message)
}
At the point of the __await in OtherMethod, the actual method containing the await call will finish. All subsequent code (such as the call to print in the example above) will be wrapped in a helper type, and execute once the task as completed.
Await with Closures
Await can also be used with methods that take a "callback" closure as last parameter. The parameters of the closure will turn into return values of the call. For example, consider the following call using Elements RTL's Http class:
func downloadData() {
Http.ExecuteRequestAsJson(HttpRequest(URL)) { response in
if let content = response.Content {
dispatch_async(dispatch_get_main_queue()) {
data = content
tableView.reloadData()
}
}
}
}
This code uses two nested closures, first to wait for the response of the network request, and then to process its results on the main UI thread. With await this can be unwrapped nicely:
func downloadData() {
let response = __await Http.ExecuteRequestAsJson(HttpRequest(URL)) {
if let content = response.Content {
__await dispatch_async(dispatch_get_main_queue())
data := content
tableView.reloadData()
}
}
Note how the parameter of the first closure, response becomes a local variable, and how __await is used without return value on the dispatch_async call.
For callbacks that return more than one parameter, __await will return a tuple, e.g.:
let (aValue, aError) = __await tryToGetValueOrReturnError()
...
See Also
Lock
The __lock statement can be used to place a thread safe lock on an object. Only one thread at a time can have a lock on an object, at the end of the lock statement the lock is released.
let mylock = Object()
...
__lock mylock {
// thread sensitive operations.
}
See Also
Using
A __using statement can be used to make sure an object is properly disposed through the IDisposable/Closable interfaces after the code that uses it is finished.
__using let fs = FileStream("textfile.txt", FileMode.Open) {
let b = byte[](123)
fs.Read(b, 0, b.Length)
} // the filestream is closed here.
See Also
External Functions
RemObjects Silver adds the __external keyword as language extension, to allow the declaration of APIs to external functions in a linked binary. This can be used with P/Invoke (.NET)
and JNI (Java), as well as to import C-based APIs on Cocoa.
The keyword works symmetrically with the matching external and extern keywords in Oxygene and C#.
See Also
Mapped Types
Mapped type are a unique feature of the Elements compiler. They let you create compatibility wrappers for types without ending up with classes that contain the real type. The wrappers will be eliminated by the compiler and rewritten to use the type the mapping maps to.
When working with Swift, you will most commonly use mapped types (for example as provided by the Sugar cross-platform library). Using mapped types is seamless, and they behave just like regular non-mapped types.
You will not often need to implement mapped types yourself, but for when you do, RemObjects Silver – like Oxygene and C# – provides a syntax for implementing mapped types when needed, with the __mapped keyword and the => operator.
Please refer to the Mapped Types topic in the Language Concepts section for more details.
Struct Inheritance
In RemObjects Swift, structs can specify an ancestor, allowing a newly declared struct to inherit the fields and methods of its base struct. Unlike classes, structs are not polymorphic, and members cannot be virtual or overriden.
MyStruct1 = public struct {
public var a: Int
public func DoSomething() {
..
}
}
MyStruct2 = public struct : MyStruct1 {
public var b: String
public func DoSomethingElse() {
..
}
}
In the example above, MyStruct2 contains all the fields and methods of MyStruct1, as well as those defined for MyStruct2 itself.
See Also
Aspects
Aspects are special attributes that influence how the compiler emits the final executable. In Swift, they use regular attributes syntax. Aspects are covered in more detail in their own section, including how to use them and how to create your own.
See Also
Class Contracts
RemObjects Silver has support for Class Contracts, allowing you provide Pre- and Post-Conditions for methods and type-wide Invariants to create classes and structs that can test themselves.
Please refer to the Class Contracts topic for more details.
Keywords
__ensure__invariants__old__require
See Also
Exception Handling (Legacy)
Note that this Exception Handling Language Extension we provided for Swift 1.0 has been deprecated as of Elements version 8.2, and will be removed in a future update. Please refer to the Exceptions and Error Handling topic for the new way to deal with exceptions and errors consistently.
Silver extends the Swift language with support for exception handling on all platforms, simply because exception handling is a feature that cannot be avoided when working with the .NET or Java frameworks.
It introduces a few new keywords for this, namely __throw to raise an exception, and __try, __finally and __catch to handle them.
Throwing Exceptions
An exception can be thrown by using the __throw keyword followed by an exception instance, for example:
__throw ArgumentException("Parameter foo needs to be larger than 5")
When inside an exception handling block (more on that below), the __throw keyword can also be used on its own as a statement to re-throw the current exception.
Handling Exceptions
To protect code against exceptions, it can now be enclosed in a __try code block followed by a set of curly braces:
__try {
println("This code is protected against exceptions.")
}
If an exception is encountered inside a __try block (including any code that the __try block calls out to), execution of that block is immediately terminated at that point.
How code execution will proceed will depend on the blocks following the __try. There are two ways react to exceptions:
Finally Blocks
__finally blocks can provide code that is guaranteed to be executed, regardless of wether an exception occurred or not. They are helpful for cleanup tasks – for example for closing file handles or disposing of other resources.
After the execution of the __finally block, any exception that had occurred will be re-thrown. In other words, the __finally block does not catch the exception.
__try {
__throw Exception("Throwing a random exception here.")
println("This code will never run.")
}
__finally {
println("This code will always run.")
}
println("This code will also never run.")
Catch Blocks
__catch blocks can contain code that will only run if an exception is thrown. They are helpful for handling error conditions. By default, as the name implies, a __catch block catches the exception, handles it, and execution will continue after the block as if the exception never happened. The __throw keyword can be used to re-throw the exception, i.e. treat it as not caught and let it bubble up the call stack.
__try {
__throw Exception("Throwing a random exception here.")
println("This code will never run.")
}
__catch {
println("This code will run only if an exception occurred above.")
}
println("This code will also run, because the exception was handled.")
Optionally, an exception type can be provided in order to only handle certain exceptions:
__try {
__throw Exception("Throwing a random exception here.")
println("This code will never run.")
}
__catch E: FileNotFoundExeption {
println("Error \(E.Message) occurred")
}
println("This code may or may not run.")
Each __try block must be followed by at least one of the above two block types to react to the exception. Zero or one __finally can be present, depending one whether there is cleanup code that needs to run on now.
Any variable number of __catch blocks can be present, provided each of them catches a different exception type. If more than one __catch block is present, the first block that matches the concrete exception type will execute.
Only a single __catch block will ever be executed, even if multiple successive blocks would match the exception. This means that if you are looking to catch related exception classes using different __catch blocks, the blocks should be ordered with the most concrete class type first, and the most base class type (or possibly a type-less __catch block) last.
Note that this Exception Handling Language Extension we provided for Swift 1.0 has been deprecated as of Elements version 8.2, and will be removed in a future update. Please refer to the Exceptions and Error Handling topic for the new way to deal with exceptions and errors consistently.
See Also
Exceptions and Error Handling
RemObjects Swift combines the error handling syntax, available since Swift 2.0, with the handling of real platform Exceptions.
Both error and exception handling is done with the do/catch keyword combination, and cleanup code (the traditional finally block of exception handling) are performed with an independent defer statement.
-
do/catch work pretty much as exception handling works in the other languages – the code inside the do scope is protected against failures, and one or more catch clauses can be provided where execution will continue if an exception or error occurs. Separate catch clauses can be defined to catch different kinds of errors, by class, or by more complex Pattern.
-
defer blocks can be used to specify code that will run at the end of the current scope, regardless of whether an error or exception occurred, or whether the method exited prematurely via a simple return. This makes defer statements incredibly useful even when error handling is not involved.
Exceptions vs. Errors
The do/catch syntax combines handling of both errors (a concept which does not translate to the other platforms/languages) and exceptions in the following ways.
Exceptions
RemObjects Swift uses the regular do/catch syntax to protect code against exceptions, and executes the closest matching catch block when an exception occurs. Keywords aside, this is no different than regular try/catch or try/except blocks in C# or Oxygene.
If no variable is provided for the catch block, a default error variable will be in scope, containing the current exception. It can be re-thrown with the throw keyword.
Note that the try (or try!) keyword is not used or necessary for exception handling. It can be specified and will be ignored. This is because any statement can, potentially, throw an exception, and making every statement require a try would be cluttery.
do {
let x = Int32.Parse("Five");
} catch {
println("could not parse string, failed with \(error)")
}
Errors
In addition, the try or try! keywords can be used inside the do scope to call methods that follow Cocoa's and Swift's pattern of returning an Error or NSError value, explicitly or by being declared with throws in Swift.
When called with the try keyword, these methods drop the last Error parameter, and their result is converted to be non-nullable (for functions that return a nullable value) or to be void (for functions that return a Boolean). When the function call returns nil or false, the remainder of the do scope will be skipped, and execution will continue with the closest matching catch clause for the received NSError. No actual platform exception will be raised.
These methods can also be called the "old fashioned" way, without the try keyword, and handling the return value and any returned error value will be up to the calling code (just as it would be from other languages). The calls will then not participate in any error handling logic provided by a potential do/catch.
do {
try NSFileManager.defaultManager.contentsOfDirectoryAtPath(path)
} catch {
println("could not read directory, failed with \(error)")
}
vs.
var error: NSError?
if !NSFileManager.defaultManager.contentsOfDirectoryAtPath(path, error: &error) {
println("could not read directory, failed with \(error)")
}
The NSError Pattern
Exceptions can happen on all platforms (including Cocoa). Errors are limited to three specific scenarios:
- Methods that return a nullable result value and a nullable
__out NSError value as last parameter, on Cocoa.
- Methods that return a
Bool result value and a nullable __out NSError value as last parameter, on Cocoa.
- Methods declared in Swift, using the
throw keyword.
try?
The try? syntax is also fully supported, for both exceptions and errors, and will convert any exception or error into a nil value:
let x = try? Int32.Parse("Five");
//x will be nil
Converting Errors to Exceptions
RemObjects Swift also allows you to use the try or try! keywords to make calls to methods that follow the NSError pattern, without a do/catch clause. If the method containing the try! statement itself follows the NSError pattern, any error received will be passed on to the caller of the current method. If the method does not follow the pattern, any error will be wrapped in a platform exception and thrown up the call stack.
Once again, try? will catch errors and convert them into a nil result.
func countFilesInDirectory() -> Int throws {
let files = try! NSFileManager.defaultManager.contentsOfDirectoryAtPath(path)
return files.count
}
Throwing Errors and Exceptions
The throw keyword can be used to throw an Exception (all methods) or an Error (inside methods that follow the NSError Pattern).
Legacy Exception Handling Language Extension
Note that the temporary Exception Handling Language Extension we provided for Swift 1.0, using __try, __finally and __catch, has been deprecated as of Elements version 8.2, and will be removed in a future update.
See Also
Keywords
The following words are treated as keywords in Swift and have special meaning:
RemObjects Swift Keywords
RemObjects Swift adds the following handful of keywords to support some Language Extensions in Apple's standard Swift implementation:
Deprecated Exception Handling Keywords
These keywords were defined in RemObjects Swift 8.1 for Exception Handling. With[Swift 2.0 and later now supporting error handling officially, these are being deprecated in RemObjects Swift 8.2 and beyond, and will generate errors. They will be completely removed in subsequent versions of RemObjects Swift.
Please refer to the Exception and Error Handling topic for more details on the new error handling support in Swift 2.0 and RemObjects Swift 8.2 and later.
__throw__try__catch__finally
Standard Swift Keywords
These standard keywords are defined by Apple's spec for the Swift language, and are also all used by RemObjects Swift's implementation of the language:
- __consuming
- __owned
- __shared
- COLUMN
- FILE
- FUNCTION
- LINE
- _modify
- _read
- as
- assignment
- associatedtype
- associativity
- autoreleasepool
- break
- case
- catch
- class
- ConstUnsafePointer
- continue
- convenience
- default
- defer
- deinit
- didSet
- do
- dynamic
- dynamicType
- else
- enum
- extension
- fallthrough
- false
- fileprivate
- final
- for
- func
- get
- guard
- if
- higherThan
- lowerThan
- import
- in
- indirect
- infix
- init
- inout
- internal
- is
- lazy
- left
- let
- mutating
- nil
- none
- nonmutating
- open
- operator
- optional
- override
- postfix
- precedence
- precedencegroup
- prefix
- private
- protocol
- public
- repeat
- required
- rethrows
- return
- right
- safe
- self
- Self
- set
- some
- static
- strong
- struct
- subscript
- super
- switch
- throw
- throws
- true
- try
- typealias
- unowned
- unsafe
- unsafeAddress
- unsafeAddressOf
- unsafeMutableAddress
- UnsafeMutablePointer
- UnsafePointer
- var
- weak
- where
- while
- willSet
Swift Base Library
The Swift Base Library is a small library that can be optionally used in Swift projects compiled with the Elements compiler. It provides some of the core types, classes and functions that, while not part of the Swift language spec per se, are commonly used in Swift apps (and provided in a similar Swift Base Library in Apple's implementation).
This includes types such as the Swift-native array and dictionary types, and base functions like println().
The Swift Base Library ships precompiled with the Elements compiler. New projects created with one of the RemObjects Swift project templates will automatically have a reference to the library, but if you are adding Swift files to a project that started out with a different language, you can add a reference to your projects via the Add References dialog in Fire or Visual Studio, where the Swift library should show automatically.
The library is called Swift.dll on .NET, libSwift.fx on Cocoa and swift.jar on Java/Android.
The code for the Swift Base Library is open source and available on GitHub. We appreciate feedback, contributions and pull requests.
See Also
Swift Evolution
With Elements 12, we are ceasing further efforts to keep Silver in sync with new language features added to the Apple swift language.
When Swift was first announced back in 2014, it seemed that Apple had a winner on their hand – they revealed an exciting new language that was still basic, but showed a lot of potential and introduced a number of intriguing design ideas. So of course we swiftly jumped on board supporting the language in our compiler.
Unfortunately, over the past five or so years, Apple's direction of Swift has change drastically, and is no longer in line with our vision (or, in come cases, platform-driven capabilities) for Swift in Elements.
Ever since open-sourcing the language and switching to a community-driven development process, the language "design" has gotten increasingly insane and unmaintainable. Swift's over-wrought and over-designed generic system has completely lost its plot, and is next to impossible to replicate within the exiting platforms that Elements compiles for. And in general, each new language feature proposal that gets approved and implemented by the Swift team seems more crazy and convoluted than the last, and designed to just make the language (and code written in it) unreadable and the language itself incomprehensible.
We're tempted to list examples, but really just pick any random feature numbered higher than 200, linked below, to see what we mean.
As such, we will cease development efforts of Silver aimed at keeping it up to date with new syntaxes and language features in Apple Swift. We will of course keep Silver updated and supported, in its current form, as part of the Elements language family, and keep it available to build and maintain existing projects.
We do recommend the migration to different Elements languages, for new code. Keep in mind that you can mix languages in Elements, so it is easy to add new source files in, say, Oxygene or C# to your projects. And you can use Oxidizer to convert your Swift code to other languages, as well.
Regardless, the list below will be kept in sync with this overview on swift.org using this little tool. (sorted by ID).
Review
- SE-0406 Backpressure support for AsyncStream
- SE-0405 String Initializers with Encoding Validation
- SE-0403 Package Manager Mixed Language Target Support
- SE-0395 Observation
- SE-0288 Adding
isPower(of:) to BinaryInteger — (SBL)
- SE-0270 Add Collection Operations on Noncontiguous Elements — (SBL)
SE-0220 count(where:) — (done, .2633)
Accepted
- SE-0404 Allow Protocols to be Nested in Non-Generic Contexts
SE-0391 Package Registry Publish — (Not applicable)- SE-0386 New access modifier:
package
- SE-0383 Deprecate @UIApplicationMain and @NSApplicationMain
SE-0378 Package Registry Authentication — (Not applicable)- SE-0364 Warning for Retroactive Conformances of External Types
SE-0342 Statically link Swift runtime libraries by default on supported platforms — (Not applicable)- SE-0327 On Actors and Initialization — (E25037)
SE-0321 Package Registry Service - Publish Endpoint — (Not applicable)SE-0301 Package Editor Commands — (Not applicable)- SE-0283 Tuples Conform to
Equatable, Comparable, and Hashable — (SBL)
- SE-0246 Generic Math(s) Functions — (SBL)
Implemented for Swift 5.9
- SE-0402 Generalize
conformance macros as extension macros
- SE-0401 Remove Actor Isolation Inference caused by Property Wrappers
- SE-0400 Init Accessors
- SE-0399 Tuple of value pack expansion
- SE-0398 Allow Generic Types to Abstract Over Packs
- SE-0397 Freestanding Declaration Macros
- SE-0396 Conform
Never to Codable
- SE-0394 Package Manager Support for Custom Macros
- SE-0393 Value and Type Parameter Packs
- SE-0390 Noncopyable structs and enums
- SE-0389 Attached Macros
- SE-0388 Convenience Async[Throwing]Stream.makeStream methods — (SBL)
- SE-0384 Importing Forward Declared Objective-C Interfaces and Protocols
- SE-0382 Expression Macros
SE-0381 DiscardingTaskGroups — (Not applicable)- SE-0380
if and switch expressions
- SE-0377
borrowing and consuming parameter ownership modifiers
- SE-0374 Add sleep(for:) to Clock — (SBL)
- SE-0366
consume operator to end the lifetime of a variable binding
Implemented for Swift 5.8
- SE-0376 Function Back Deployment
- SE-0375 Opening existential arguments to optional parameters
- SE-0373 Lift all limitations on variables in result builders
SE-0372 Document Sorting as Stable — (Not applicable)- SE-0370 Pointer Family Initialization Improvements and Better Buffer Slices — (SBL)
- SE-0369 Add CustomDebugStringConvertible conformance to AnyKeyPath — (SBL)
- SE-0368 StaticBigInt — (SBL)
- SE-0367 Conditional compilation for attributes
- SE-0365 Allow implicit
self for weak self captures, after self is unwrapped
SE-0362 Piecemeal adoption of upcoming language improvements — (Not applicable)SE-0274 Concise magic file names — (done)
Implemented for Swift 5.7
- SE-0363 Unicode for String Processing — (SBL)
SE-0361 Extensions on bound generic types — (done)- SE-0360 Opaque result types with limited availability
- SE-0358 Primary Associated Types in the Standard Library
- SE-0357 Regex-powered string processing algorithms
SE-0356 Swift Snippets — (Not applicable)- SE-0355 Regex Syntax and Run-time Construction
- SE-0354 Regex Literals
- SE-0353 Constrained Existential Types
- SE-0352 Implicitly Opened Existentials
SE-0351 Regex builder DSL — (Not applicable)- SE-0350 Regex Type and Overview
SE-0349 Unaligned Loads and Stores from Raw Memory — (Not applicable)SE-0348 buildPartialBlock for result builders — (Not applicable)- SE-0347 Type inference from default expressions
- SE-0346 Lightweight same-type requirements for primary associated types
SE-0345 if let shorthand for shadowing an existing optional variable — (done, .2739)- SE-0344 Distributed Actor Runtime
- SE-0343 Concurrency in Top-level Code
- SE-0341 Opaque Parameter Declarations
- SE-0340 Unavailable From Async Attribute
SE-0339 Module Aliasing For Disambiguation — (won't implement)- SE-0338 Clarify the Execution of Non-Actor-Isolated Async Functions — (E25616)
- SE-0336 Distributed Actor Isolation — (E25616)
SE-0334 Pointer API Usability Improvements — (Not applicable)SE-0333 Expand usability of withMemoryRebound — (Not applicable)- SE-0329 Clock, Instant, and Duration — (SBL)
- SE-0328 Structural opaque result types — (E25620)
SE-0326 Enable multi-statement closure parameter/result type inference — (won't implement)- SE-0309 Unlock existentials for all protocols
- SE-0302
Sendable and @Sendable closures
SE-0292 Package Registry Service — (Not applicable)
Implemented for Swift 5.6
SE-0337 Incremental migration to concurrency checking — (Not applicable)SE-0335 Introduce existential any — (done, .2713)SE-0332 Package Manager Command Plugins — (Not applicable)SE-0331 Remove Sendable conformance from unsafe pointer types — (Not applicable)SE-0325 Additional Package Plugin APIs — (Not applicable)- SE-0324 Relax diagnostics for pointer arguments to C functions
- SE-0322 Temporary uninitialized buffers
- SE-0320 Allow coding of non
String / Int keyed Dictionary into a `KeyedContai…
- SE-0315 Type placeholders (formerly, "Placeholder types")
SE-0305 Package Manager Binary Target Improvements — (Not applicable)- SE-0290 Unavailability Condition
Implemented for Swift 5.5.2
- SE-0323 Asynchronous Main Semantics
Implemented for Swift 5.5
- SE-0319 Conform Never to Identifiable — (SBL)
- SE-0317
async let bindings
- SE-0316 Global actors
- SE-0314
AsyncStream and AsyncThrowingStream — (SBL)
- SE-0313 Improved control over actor isolation — (#85904)
- SE-0311 Task Local Values
- SE-0310 Effectful Read-only Properties — (#85999)
SE-0308 #if for postfix member expressions — (done, .2631)SE-0307 Allow interchangeable use of CGFloat and Double types — (Not applicable)- SE-0306 Actors — (#85904)
- SE-0304 Structured concurrency — (#85916)
- SE-0300 Continuations for interfacing async tasks with synchronous code
- SE-0299 Extending Static Member Lookup in Generic Contexts
- SE-0298 Async/Await: Sequences — (#85914)
- SE-0297 Concurrency Interoperability with Objective-C
SE-0296 Async/await — (done, .2629)- SE-0295 Codable synthesis for enums with associated values
- SE-0293 Extend Property Wrappers to Function and Closure Parameters — (#85915)
SE-0291 Package Collections — (Not applicable)
Implemented for Swift 5.4
SE-0294 Declaring executable targets in Package Manifests — (Not applicable)- SE-0289 Result builders — (#85014)
SE-0287 Extend implicit member syntax to cover chains of member references — (done)SE-0284 Allow Multiple Variadic Parameters in Functions, Subscripts, and Initialize… — (done)
Implemented for Swift 5.3
SE-0286 Forward-scan matching for trailing closures — (done)SE-0285 Ease the transition to concise magic file strings — (done)- SE-0282 Clarify the Swift memory consistency model ⚛︎ — (#84618)
- SE-0281
@main: Type-Based Program Entry Points — (#84619)
SE-0280 Enum cases as protocol witnesses — (Not applicable)SE-0279 Multiple Trailing Closures — (done, .2531)SE-0278 Package Manager Localized Resources — (Not applicable)- SE-0277 Float16 — (SBL)
- SE-0276 Multi-Pattern Catch Clauses — (#83855)
SE-0272 Package Manager Binary Dependencies — (Not applicable)SE-0271 Package Manager Resources — (Not applicable)SE-0269 Increase availability of implicit self in @escaping closures when refer… — (done, .2473)SE-0268 Refine didSet Semantics — (Not applicable)- SE-0267
where clauses on contextually generic declarations — (#83755)
- SE-0266 Synthesized
Comparable conformance for enum types — (#79250)
- SE-0263 Add a String Initializer with Access to Uninitialized Storage — (SBL)
Implemented for Swift 5.2
- SE-0253 Callable values of user-defined nominal types — (#82278)
- SE-0249 Key Path Expressions as Functions — (#82280)
Implemented for Swift 5.1
SE-0261 Identifiable Protocol — (done, .2433)SE-0260 Library Evolution for Stable ABIs — (done)SE-0258 Property Wrappers — (done, .2629)SE-0255 Implicit returns from single-expression functions — (done)SE-0254 Static and class subscripts — (done)- SE-0252 Key Path Member Lookup — (#82279)
- SE-0251 SIMD additions
- SE-0248 String Gaps and Missing APIs — (SBL)
- SE-0247 Contiguous Strings — (SBL)
- SE-0245 Add an Array Initializer with Access to Uninitialized Storage — (SBL)
SE-0244 Opaque Result Types — (done)SE-0242 Synthesize default values for the memberwise initializer — (done)- SE-0240 Ordered Collection Diffing — (SBL)
SE-0068 Expanding Swift Self to class members and value types — (done)
Implemented for Swift 5
- SE-0241 Deprecate String Index Encoded Offsets — (SBL)
- SE-0239 Add Codable conformance to Range types — (SBL)
SE-0238 Package Manager Target Specific Build Settings — (Not applicable)- SE-0237 Introduce
withContiguous{Mutable}StorageIfAvailable methods — (SBL)
SE-0236 Package Manager Platform Deployment Settings — (Not applicable)SE-0235 Add Result to the Standard Library — (done, .2353)SE-0234 Remove Sequence.SubSequence — (Not applicable)- SE-0233 Make
Numeric Refine a new AdditiveArithmetic Protocol — (SBL)
SE-0232 Remove Some Customization Points from the Standard Library's Collection H… — (Not applicable)SE-0230 Flatten nested optionals resulting from 'try?' — (done, .2371)- SE-0229 SIMD Vectors — (#81921)
SE-0228 Fix ExpressibleByStringInterpolation — (Not applicable)- SE-0227 Identity key path — (#81920)
- SE-0225 Adding
isMultiple to BinaryInteger — (SBL)
SE-0224 Support 'less than' operator in compilation conditions — (done, .2371)- SE-0221 Character Properties — (SBL)
SE-0219 Package Manager Dependency Mirroring — (Not applicable)- SE-0218 Introduce
compactMapValues to Dictionary — (SBL)
- SE-0216 Introduce user-defined dynamically "callable" types — (#81924)
SE-0215 Conform Never to Equatable and Hashable — (won't implement)SE-0214 Renaming the DictionaryLiteral type to KeyValuePairs — (Not applicable)SE-0213 Literal initialization via coercion — (won't implement)- SE-0211 Add Unicode Properties to
Unicode.Scalar — (SBL)
SE-0200 Enhancing String Literals Delimiters to Support Raw Text — (done, .2393)SE-0192 Handling Future Enum Cases — (done, .2393)
Implemented for Swift 4.2
SE-0212 Compiler Version Directive — (Not applicable)- SE-0210 Add an
offset(of:) method to MemoryLayout — (SBL)
SE-0209 Package Manager Swift Language Version API Update — (Not applicable)SE-0208 Package Manager System Library Targets — (Not applicable)- SE-0207 Add an
allSatisfy algorithm to Sequence — (SBL)
- SE-0206 Hashable Enhancements — (SBL)
- SE-0205
withUnsafePointer(to:_:) and withUnsafeBytes(of:_:) for immutable value… — (SBL)
- SE-0204 Add
last(where:) and lastIndex(where:) Methods — (SBL)
- SE-0202 Random Unification — (SBL)
SE-0201 Package Manager Local Dependencies — (Not applicable)SE-0199 Adding toggle to Bool — (done, .2283)- SE-0197 Adding in-place
removeAll(where:) to the Standard Library — (SBL)
SE-0196 Compiler Diagnostic Directives — (done, .2283)- SE-0195 Introduce User-defined "Dynamic Member Lookup" Types — (#79673)
SE-0194 Derived Collection of Enum Cases — (done, .2333)SE-0193 Cross-module inlining and specialization — (done)- SE-0174 Change
RangeReplaceableCollection.filter to return Self — (SBL)
SE-0143 Conditional conformances — (done)- SE-0079 Allow using optional binding to upgrade
self from a weak to strong refere…
SE-0054 Abolish ImplicitlyUnwrappedOptional type — (Not applicable)
Implemented for Swift 4.1
SE-0198 Playground QuickLook API Revamp # — (Not applicable)- SE-0191 Eliminate
IndexDistance from Collection — (SBL)
SE-0190 Target environment platform condition — (done, .2233)SE-0189 Restrict Cross-module Struct Initializers — (done)- SE-0188 Make Standard Library Index Types Hashable — (SBL)
- SE-0187 Introduce Sequence.compactMap(_:) — (SBL)
SE-0186 Remove ownership keyword support in protocols — (done, .2305)- SE-0185 Synthesizing
Equatable and Hashable conformance — (#79250)
- SE-0184 Unsafe[Mutable][Raw][Buffer]Pointer: add missing methods, adjust existing l… — (SBL)
- SE-0157 Support recursive constraints on associated types — (#80045)
SE-0075 Adding a Build Configuration Import Test — (done, .2307)
Implemented for Swift 4
- SE-0183 Substring performance affordances — (SBL)
SE-0182 String Newline Escaping — (done, 9.2)SE-0181 Package Manager C/C++ Language Standard Support — (Not applicable)- SE-0180 String Index Overhaul — (SBL)
SE-0179 Swift run Command — (Not applicable)- SE-0178 Add
unicodeScalars property to Character — (SBL)
- SE-0176 Enforce Exclusive Access to Memory — (#79251)
SE-0175 Package Manager Revised Dependency Resolution — (Not applicable)- SE-0173 Add
MutableCollection.swapAt(_:_:) — (SBL)
SE-0172 One-sided Ranges — (done)- SE-0171 Reduce with
inout — (SBL)
- SE-0170 NSNumber bridging and Numeric types
SE-0169 Improve Interaction Between private Declarations and Extensions — (done, .2305)SE-0168 Multi-Line String Literals — (done, 9.2)- SE-0167 Swift Encoders — (#78130)
- SE-0166 Swift Archival & Serialization — (#78130)
SE-0164 Remove final support in protocol extensions — (done)- SE-0163 String Revision: Collection Conformance, C Interop, Transcoding — (SBL)
SE-0162 Package Manager Custom Target Layouts — (Not applicable)- SE-0161 Smart KeyPaths: Better Key-Value Coding for Swift — (#79252)
SE-0160 Limiting @objc inference — (Not applicable)SE-0158 Package Manager Manifest API Redesign — (Not applicable)- SE-0156 Class and Subtype existentials
- SE-0154 Provide Custom Collections for Dictionary Keys and Values
SE-0150 Package Manager Support for branches — (Not applicable)SE-0149 Package Manager Support for Top of Tree development — (Not applicable)SE-0148 Generic Subscripts — (won't implement)SE-0146 Package Manager Product Definitions — (Not applicable)- SE-0142 Permit where clauses to constrain associated types — (#80051)
- SE-0104 Protocol-oriented integers — (SBL)
Implemented for Swift 3.1
SE-0152 Package Manager Tools Version — (Not applicable)SE-0151 Package Manager Swift Language Compatibility Version — (Not applicable)- SE-0147 Move UnsafeMutablePointer.initialize(from:) to UnsafeMutableBufferPointer
SE-0145 Package Manager Version Pinning — (Not applicable)- SE-0141 Availability by Swift version
SE-0082 Package Manager Editable Packages — (Not applicable)- SE-0080 Failable Numeric Conversion Initializers — (SBL)
- SE-0045 Add prefix(while:) and drop(while:) to the stdlib — (SBL)
Implemented for Swift 3.0.1
- SE-0140 Warn when
Optional converts to Any, and bridge Optional As Its Payloa…
- SE-0139 Bridge Numeric Types to
NSNumber and Cocoa Structs to NSValue
- SE-0138 UnsafeRawBufferPointer
Implemented for Swift 3
- SE-0155 Normalize Enum Case Representation — (#81923)
- SE-0137 Avoiding Lock-In to Legacy Protocol Designs
- SE-0136 Memory layout of values
SE-0135 Package Manager Support for Differentiating Packages by Swift version — (Not applicable)- SE-0134 Rename two UTF8-related properties on String — (SBL)
- SE-0133 Rename
flatten() to joined() — (SBL)
- SE-0131 Add
AnyHashable to the standard library — (SBL)
- SE-0130 Replace repeating
Character and UnicodeScalar forms of String.init — (SBL)
SE-0129 Package Manager Test Naming Conventions — (Not applicable)- SE-0128 Change failable UnicodeScalar initializers to failable — (SBL)
SE-0127 Cleaning up stdlib Pointer and Buffer Routines — (Not applicable)SE-0125 Remove NonObjectiveCBase and isUniquelyReferenced — (Not applicable)- SE-0124
Int.init(ObjectIdentifier) and UInt.init(ObjectIdentifier) should have … — (SBL)
- SE-0121 Remove
Optional Comparison Operators — (SBL)
- SE-0120 Revise
partition Method Signature — (SBL)
- SE-0118 Closure Parameter Names and Labels — (#75885)
SE-0117 Allow distinguishing between public access and public overridability — (done, 9.0)SE-0116 Import Objective-C id as Swift Any type — (Not applicable)- SE-0115 Rename Literal Syntax Protocols
- SE-0114 Updating Buffer "Value" Names to "Header" Names — (SBL)
- SE-0113 Add integral rounding functions to FloatingPoint — (SBL)
SE-0112 Improved NSError Bridging — (won't implement)SE-0111 Remove type system significance of function argument labels — (done, 9.0)- SE-0109 Remove the
Boolean protocol
- SE-0107 UnsafeRawPointer API — (SBL)
SE-0106 Add a macOS Alias for the OSX Platform Configuration Test — (done, 9.0)SE-0103 Make non-escaping closures the default — (done, 9.0)SE-0102 Remove @noreturn attribute and introduce an empty Never type — (done, 9.0)- SE-0101 Reconfiguring
sizeof and related functions into a unified MemoryLayout … — (SBL)
SE-0099 Restructuring Condition Clauses — (done, 9.0)SE-0096 Converting dynamicType from a property to an operator — (done)- SE-0095 Replace
protocol<P1,P2> syntax with P1 & P2 syntax
SE-0094 Add sequence(first:next:) and sequence(state:next:) to the stdlib — (done, 8.3.95)- SE-0093 Adding a public
base property to slices — (SBL)
- SE-0092 Typealiases in protocols and protocol extensions
SE-0091 Improving operator requirements in protocols — (done, .2307)- SE-0089 Renaming
String.init<T>(_: T) — (SBL)
- SE-0088 Modernize libdispatch for Swift 3 naming conventions
SE-0086 Drop NS Prefix in Swift Foundation — (done, 9.0)SE-0085 Package Manager Command Names — (Not applicable)SE-0081 Move where clause to end of declaration — (done, 9.0)- SE-0077 Improved operator declarations — (#75872)
- SE-0076 Add overrides taking an UnsafePointer source to non-destructive copying met… — (SBL)
SE-0072 Fully eliminate implicit bridging conversions from Swift — (Not applicable)SE-0071 Allow (most) keywords in member references — (done, 8.3.95)SE-0070 Make Optional Requirements Objective-C-only — (Not applicable)- SE-0069 Mutability and Foundation Value Types — (SBL)
- SE-0067 Enhanced Floating Point Protocols — (SBL)
SE-0066 Standardize function type argument syntax to require parentheses — (done, 9.0)SE-0065 A New Model for Collections and Indices — (Not applicable)SE-0064 Referencing the Objective-C selector of property getters and setters — (done, v10)SE-0063 SwiftPM System Module Search Paths — (Not applicable)- SE-0062 Referencing Objective-C key-paths — (#75182)
SE-0061 Add Generic Result and Error Handling to autoreleasepool() — (done, v10)- SE-0060 Enforcing order of defaulted parameters
SE-0059 Update API Naming Guidelines and Rewrite Set APIs Accordingly — (Not applicable)SE-0057 Importing Objective-C Lightweight Generics — (done)SE-0055 Make unsafe pointer nullability explicit using Optional — (Not applicable)SE-0053 Remove explicit use of let from Function Parameters — (Not applicable)- SE-0052 Change IteratorType post-nil guarantee — (SBL)
SE-0049 Move @noescape and @autoclosure to be type attributes — (done, 9.0)SE-0048 Generic Type Aliases — (done, 9.0)SE-0047 Defaulting non-Void functions so they warn on unused results — (done, 9.0)SE-0046 Establish consistent label behavior across all parameters including first l… — (done, 9.0)- SE-0044 Import as member — (#74959)
SE-0043 Declare variables in 'case' labels with multiple patterns — (done)SE-0040 Replacing Equal Signs with Colons For Attribute Arguments — (done, 8.3.95)SE-0039 Modernizing Playground Literals — (Not applicable)SE-0038 Package Manager C Language Target Support — (Not applicable)SE-0037 Clarify interaction between comments & operators — (done, 9.0)SE-0036 Requiring Leading Dot Prefixes for Enum Instance Member Implementations — (done, 9.0)SE-0035 Limiting inout capture to @noescape contexts — (won't implement)SE-0034 Disambiguating Line Control Statements from Debugging Identifiers — (done, 9.0)- SE-0033 Import Objective-C Constants as Swift Types — (#74782)
- SE-0032 Add
first(where:) method to Sequence — (SBL)
SE-0031 Adjusting inout Declarations for Type Decoration — (done, 9.0)SE-0029 Remove implicit tuple splat behavior from function applications — (Not applicable)SE-0025 Scoped Access Level — (done, 9.0)SE-0023 API Design Guidelines — (Not applicable)SE-0019 Swift Testing — (Not applicable)SE-0017 Change Unmanaged to use UnsafePointer — (Not applicable)- SE-0016 Add initializers to Int and UInt to convert from UnsafePointer and UnsafeMu… — (SBL)
- SE-0008 Add a Lazy flatMap for Sequences of Optionals # — (SBL)
SE-0007 Remove C-style for-loops with conditions and incrementers — (done, 8.3.95)SE-0006 Apply API Guidelines to the Standard Library — (Not applicable)SE-0005 Better Translation of Objective-C APIs Into Swift — (done, 9.0)SE-0004 Remove the ++ and -- operators — (done, 8.3.95)SE-0003 Removing var from Function Parameters — (done, 9.0)- SE-0002 Removing currying
func declaration syntax
Implemented for Swift 2.2
SE-0028 Modernizing Swift's Debugging Identifiers — (done, 8.3.95)- SE-0022 Referencing the Objective-C selector of a method
SE-0021 Naming Functions with Argument Labels — (done, v10)SE-0020 Swift Language Version Build Configuration — (done, 8.3)SE-0015 Tuple comparison operators — (done, .2305)- SE-0014 Constraining
AnySequence.init — (SBL)
SE-0011 Replace typealias keyword with associatedtype for associated type decla… — (done, 8.3)SE-0001 Allow (most) keywords as argument labels — (done, 8.3)
Implemented for 5.6
SE-0303 Package Manager Extensible Build Tools — (Not applicable)
Deferred
Rejected
SE-0275 Allow more characters (like whitespaces and punctuations) for escaped ident… — (done, .2531)- SE-0256 Introduce
{Mutable}ContiguousCollection protocol — (SBL)
- SE-0231 Optional Iteration
- SE-0222 Lazy CompactMap Sequence — (SBL)
SE-0217 Introducing the !! "Unwrap or Die" operator to the Swift Standard Library — (done, .2353)- SE-0203 Rename Sequence.elementsEqual — (SBL)
- SE-0159 Fix Private Access Levels
SE-0153 Compensate for the inconsistency of @NSCopying's behaviour — (Not applicable)- SE-0144 Allow Single Dollar Sign as a Valid Identifier
- SE-0132 Rationalizing Sequence end-operation names
- SE-0123 Disallow coercion to optionals in operator arguments
- SE-0122 Use colons for subscript declarations
- SE-0119 Remove access modifiers from extensions
- SE-0108 Remove associated type inference
- SE-0105 Removing Where Clauses from For-In Loops
- SE-0098 Lowercase
didSet and willSet for more consistent keyword casing
- SE-0097 Normalizing naming for "negative" attributes
- SE-0087 Rename
lazy to @lazy
- SE-0084 Allow trailing commas in parameter lists and tuples
- SE-0083 Remove bridging conversion behavior from dynamic casts
- SE-0074 Implementation of Binary Search functions
- SE-0073 Marking closures as executing exactly once
- SE-0058 Allow Swift types to provide custom Objective-C representations
- SE-0056 Allow trailing closures in
guard conditions
SE-0042 Flattening the function type of unapplied method references — (Not applicable)- SE-0041 Updating Protocol Naming Conventions for Conversions
- SE-0027 Expose code unit initializers on String — (SBL)
- SE-0026 Abstract classes and methods
SE-0024 Optional Value Setter ??= — (done, 8.3)- SE-0013 Remove Partial Application of Non-Final Super Methods (Swift 2.2)
- SE-0012 Add
@noescape to public library API
- SE-0010 Add StaticString.UnicodeScalarView — (SBL)
- SE-0009 Require self for accessing instance members
Returned
SE-0385 Custom Reflection Metadata — (Not applicable)- SE-0371 Isolated synchronous deinit
- SE-0359 Build-Time Constant Values
SE-0330 Conditionals in Collections — (done, .2713)SE-0318 Package Creation — (Not applicable)- SE-0312 Add
indexed() and Collection conformances for enumerated() and `zip(_…
- SE-0265 Offset-Based Access to Indices, Elements, and Slices — (SBL)
- SE-0262 Demangle Function — (SBL)
- SE-0259 Approximate Equality for Floating Point
- SE-0257 Eliding commas from multiline expression lists — (#82859)
- SE-0250 Swift Code Style Guidelines and Formatter
- SE-0177 Add clamp(to:) to the stdlib — (SBL)
- SE-0090 Remove
.self and freely allow type references in expressions
- SE-0078 Implement a rotate algorithm, equivalent to std::rotate() in C++
- SE-0018 Flexible Memberwise Initialization
Withdrawn
- SE-0223 Accessing an Array's Uninitialized Buffer — (SBL)
- SE-0126 Refactor Metatypes, repurpose
T.self and Mirror
- SE-0100 Add sequence-based initializers and merge methods to Dictionary — (SBL)
- SE-0051 Conventionalizing
stride semantics
- SE-0050 Decoupling Floating Point Strides from Generic Implementations
- SE-0030 Property Behaviors
Grand Rename
For Swift 3.0, Apple applied a great many changes to how Cocoa APIs appear to Swift.
Although we see RemObjects Swift as a "Swift for Cocoa" and have Swift (like the other Elements languages) be much more native to the Objective-C runtime than Apple's Swift, we still wanted to make these renamed APIs available to RemObjects Swift users, as well.
We have done so as of Elements 9.0, in a way that we hope will be nice and intuitive.
The "Grand Rename", as Apple refers to it, consists of several separate aspects that contribute to new names and different APIs to appear to the Swift language when working with Cocoa. The rename has no effect on RemObjects Swift on the other platforms (.NET, Java/Android and Island), as it only affects the types imported from Objective-C.
Drop NS Prefix from Foundation types.
For all types in Foundation, the NS prefix is being removed. NSString becomes just String (which of course always has been an alias in Elements), NSMutableArray becomes MutableArray, NSIndexPath becomes just IndexPath, and so on.
While for Apple's compiler, this is a breaking change, in Elements we decided to just make these types available under both names. So the NS* versions will continue to work in your existing code, but you can start using the names w/o prefix when writing new code.
This change applies to all languages, so Oxygene and C# will see the new type names without NS prefix, too. For Swift, Code Completion will default to only show (i.e. recommend) the new names, while for Oxygene, C# and our new Java Language front-end, CC will continue to recommend the "real" Cocoa names, with NS prefix.
Note that this renaming only affects Foundation, and only the NS prefix. Other framework prefixes will remain; in particular AppKit classes on macOS will continue to have NS prefixes, and – for example – UIKit classes on iOS will continue to have UI* prefixes, as in UIView and so on.
Rename Methods and Omit Needless Words
In addition to renaming the core types in Foundation, Swift 3.0 also prescribes a thorough renaming of many Cocoa method (and property) names, to make them less verbose and fit in better with Swift naming guidelines (see SE-0023).
This encompasses dropping redundant nouns and prepositions from method names, shortening them, and also converting parts of some method names into first parameter prefixes.
For example
public static func bezierPathWithRect(_ rect: CGRect!) -> instancetype!
becomes:
public static func bezierPath(with rect: CGRect!) -> instancetype!
Note how the Rect noun has been dropped, because it is redundant with the CGRect type name, and how with has been moved into the parenthesis, and is now naming the first parameter.
This renaming follows rather complex rules outlined in SE-0005, and is applied to all Objective-C classes imported with FXGen, including the platform .fx files we ship with Elements 9.0 and later, as well as any custom Objective-C libraries of frameworks you import yourself using the new version of the tools.
This change applies only to the Swift language, while Oxygene, C# and Java continue to see members with their original Cocoa notations. For backward compatibility, the original Cocoa names can also still be called from Swift, but they will no longer be offered by Code Completion, and new Swift code should adopt the new names.
Grand Central Dispatch (GCD, libDispatch)
The Grand Central Dispatch APIs, previously available via C-level dispatch_ functions, have been wrapped in a new class structure that is more intuitive to use from Swift. This is provided as wrapper classes in Swift Base Library, and the original C APIs continue to be available as well.
This new wrapper is available to all languages when referencing libSwift, but it is (currently) only available on the Cocoa platform (as is the underlying GCD API).
Not Implemented (yet)
The following renaming proposals are not implemented yet for Elements 9.0 and under review for a future update:
Concepts
ARC vs. GC
One of the most significant
differences in the Elements languages between .NET and Java on the one side and Cocoa on the other is the use of Garbage Collection (GC) vs. Automatic Reference Counting (ARC) for the life cycle management of objects.
What is Life Cycle Management?
What is Life Cycle Management? Simply put, life cycle management is the
feature of the language that keeps track of how long an object will
stick around ("be alive") in memory before it gets destroyed and its
memory released to be used by other objects. Keeping track of this and
efficiently disposing of objects that are no longer needed is a crucial
task, as memory is a precious resource (on some systems, such as mobile
devices, more than others), and if too many objects stick around longer
than necessary, the application (and eventually the entire computing
system) will run out of memory to perform further operations.
The Olden Days
Before the introduction of modern object life cycle management,
developers had to keep track of all objects they created, themselves,
and make sure to explicitly release them when done. This can lead to
unnecessary plumbing code at best, and to hard-to-maintain class
structures at worst.
In Delphi, for example, all created objects need to
be freed by explicitly calling their Free method. In many cases, this
requires unnecessary try/finally blocks just to free local objects, and to think
hard (and document well) about ownership of objects returned from
methods or contained in the fields of a class. In Objective-C, before the
introduction of ARC, manual calls to retain and release were
necessary to keep track of object ownership.
Both GC and ARC aim to take this burden from the developer, so that you
no longer need to worry about tracking reference count, think about
ownership or, indeed, manually free objects as they become unused. Both
techniques do it in a rather transparent way that works similar enough
on a language level that you just do not need to think about object life
cycle management at all when writing day-to-day code.
What Keeps an Object Alive
Object life cycle management is really about keeping track of whether an
object is still needed by the application. Both GC and ARC simply do
this by defining that an object is considered needed as long as there
are references to it. Simply put: as long as some piece of code, any
piece, is holding on to the object (and thus potentially is able to
perform tasks with the object), the object is still needed. Once this
ceases to be the case, the object can be released.
There are a few scenarios to consider:
- an object stored inside another object's field or property,
-
local objects created within the current method (including those
defined outside, but used inside an anonymous method),
- objects passed into or out of method and function calls,
as well as, of course, combinations of the three.
In any of these three scenarios, the compiler alongside GC or ARC will
take care that the object in question is kept around as long as it is
needed. For example, if you store an object inside a field (or a
property), that object will stick around, and the field will contain a
valid reference to it until the field is being overwritten with a
different reference, or the object containing the field is freed itself.
Similarly, if you declare a local variable inside a method and assign an
object to it, you can be sure that the referenced object will be around
for as long as the variable is in scope.
Of course all of these rules combine, so if the same object is stored in
both a field and a local variable, it cannot be considered for release
until both the field and the local variable have let go of the
reference.
What this boils down to is that you can pretty much just take for
granted that your objects stick around as long as you can access them,
and that they will automatically be freed once no part of your code is
using them anymore. The implementation details for how this is achieved
with GC vs. ARC vary greatly though.
Garbage Collection
Garbage Collection (or GC for short) is the technique used for life
cycle management on the .NET and
Java platforms. The way GC works is that
the runtime (either the Common Language Runtime for .NET or the Java
Runtime) has infrastructure in place that detects unused
objects and object graphs in the background.
This happens at indeterminate intervals (either after a certain amount
of time has passed, or when the runtime sees available memory getting
low), so objects are not necessarily released at the exact moment they
are no longer used.
Advantages of Garbage Collection
- GC can clean up entire object graphs, including retain cycles.
-
GC happens in the background, so less memory management work is done
as part of the regular application flow.
Disadvantages of Garbage Collection
-
Because GC happens in the background, the exact time frame for
object releases is undetermined.
-
When a GC happens, other threads in the application may be temporarily
put on hold.
Automatic Reference Counting
Automatic Reference Counting (ARC for short) as used on Cocoa takes a different approach. Rather than having the runtime look for and dispose of unused
objects in the background, the compiler will inject code into the
executable that keeps track of object reference counts and will release
objects as necessary, automatically. In essence, if you were to
disassemble an executable compiled with ARC, it would look
(conceptually) as if the developer spent a lot of time meticulously
keeping track of object life cycles when writing the code — except that
all that hard work was done by the compiler.
Advantages of Automatic Reference Counting
-
Real-time, deterministic destruction of objects as they become
unused.
-
No background processing, which makes it more efficient on lower-power systems,
such as mobile devices.
Disadvantages of Automatic Reference Counting
- Cannot cope with retain cycles.
Retain Cycles
A so-called retain cycle happens when two (or more) objects reference
each other, essentially keeping each other alive even after all external
references to the objects have gone out of scope. The Garbage Collection
works by looking at "reachable" objects, it can handle retain cycles
fine, and will discard entire object graphs that reference each other,
if it detects no outside references exist.
Because Automatic Reference Counting works on a lower level and manages
life cycles based on reference counts, it cannot handle retain
cycles automatically, and a retain cycle will cause objects to stay in
memory, essentially causing the application to "leak" memory.
ARC provides a method to avoid retain cycles, but it does require some
explicit thought and design by the developer. To achieve this, ARC
introduces Storage Modifiers that can be
applied to object references (such as fields or properties) to specify
how the reference will behave. By default, references are strong, which means
that they will behave as described above, and storing an object
reference will force the object to stay alive until the reference is
removed. Alternatively, a reference can be marked as weak. In this case, the
reference will not keep the object alive, instead, if all other
references to the stored object go away, the object will indeed be freed
and the reference will automatically be set to nil.
A common scenario is to determine a well-defined parent/child or
owner/owned relationship between two objects that would otherwise
introduce a retain cycle. The parent/owner will maintain a regular
reference to the child, while the child or owned object will merely get a weak reference to the parent. This way, the parent can control the (minimum)
lifetime of the child, but when the parent object can be freed, the
references from the children won't keep it alive.
Of course the children or owned objects need to be implemented in a way
that enables them to cope with the parent reference going nil (which would, for
example, happen if an external direct reference to the child kept it
alive, while the parent is destroyed). It would be up to the developer
to determine how to handle such a scenario, depending on whether the
child object is able to function without the parent or not.
The Storage Modifiers are only supported
on Cocoa.
IDisposable & Finalizers
The .NET and Java frameworks provide the "Disposable" pattern that lets
specific classes work around the non-deterministic deallocation of
objects.
While for most classes deterministic deallocation is not crucial, there
are some cases where it is, such as with classes that represent
so-called "unmanaged resources", i.e. resources outside of the scope
of the garbage collector. For example, a class might contain an open
exclusive file handle, or a network connection. If such a class is no
longer used, it is commonly desirable to have the unmanaged resource
released immediately, e.g. have the file closed and its handle released,
or the network connection shut down.
Because we cannot rely on the exact time for when an object will be
deallocated under GC, the Disposable pattern provides a well-defined
interface and method that can be called on an object to "dispose" it
deterministically. Calling this method will not actually release the
object (the GC will do that, as it does for all objects), but it will
give the object a chance to "clean up" after itself, release any
unmanaged resources and (typically) set an internal flag to indicate
that it has been disposed.
-
On .NET, the interface for this is called
IDisposable, and the
single method is called Dispose.
-
On Java, the pattern uses the
Closeable interface, with a close
method to be called.
For both platforms, Elements provides a statement to work
with an object and then have it closed/disposed as the block ends. (On
Cocoa, the statement works as a no-op, simply creating a local variable,
and letting ARC collect the object at the end of the statement. This
way, the syntax can be used in a cross-platform fashion in all three
editions.)
On both .NET and Cocoa, Finalizer methods defined with the finalizer keyword (in
replacement of method) can be provided to perform additional cleanup.
-
On .NET, finalizers are a last resort, and should serve only as a
backup in case the user of a class "forgot" to use the Disposable
pattern and call
Dispose properly. They are costly to the garbage
collector, and should not be declared on objects without sufficient
reason.
-
On Cocoa, finalizers are a regular part of an object's cleanup, and
they will be called deterministically when the object is released.
Automatic Reference Counting
Automatic Reference Counting (ARC) is one of two memory and object lifetime management models used by the Elements compiler, next to Garbage Collection (GC). It is used on the Cocoa platform.
Automatic Reference Counting manages object life cycles by keeping track
of all valid references to an object with an internal retain count.
Once all references to an object go out of scope or are cleared, and the
retain count thus reaches zero, the object and its underlying memory is
automatically freed.
In essence, ARC (as well as GC) alleviates the developer of the burden
of manually keeping track of object ownership, eliminating explicit
calls to "free" or "destroy" methods or so-called destructors.
Retain Cycles
While ARC provides a more deterministic destruction of objects than GC,
one downside of ARC is that it cannot automatically handle Retain
Cycles, that is cyclic references between two
or more objects that "keep each other alive". The concepts of Storage
Modifiers and object references has been
introduced to compensate for that.
Auto-Release Pools
Under the hood, ARC uses the concept of so-called Auto-Release
Pools to help manage the life cycle of
unowned objects returned from functions. In most cases, auto-release
pools are created for you by the Cocoa runtime, as it calls into your
application. However, Elements does provide a syntax for explicitly
creating auto-release pools, should you need them, via the do keyword
combination.
Method Naming Rules
Cocoa uses special naming rules to determine if the result of a called
method is returned "owned" (i.e. needs to be released by ARC when it
goes out of scope) or unowned (i.e. needs to be retained by ARC if it
is held onto beyond the current scope in a reference). Since ARC takes
care of all of this, in general the developer no longer needs to be
aware of these naming conventions much — however, care must be taken
when naming new methods.
The following method name prefixes are known by ARC to return retained
objects. In general, you should avoid implementing methods with these
names, except when overriding methods from NSObject
or implementing Constructors and "init*" Methods. If you must declare methods that break these conventions, the [ReturnsNotRetained] special attribute can be applied to the method to indicate that despite the name, it returns an unretained object.
init*, alloc*, copy*, mutableCopy* and new* return owned objects by default, i.e. have [ReturnsRetained] implied.
Conversely, the [ReturnsRetained] special attribute can be used to
indicate a method that returns an owned object, in spite of not using
the above naming.
The compiler will automatically adjust the ARC code generated inside
methods adorned with these attributes, so that the reference count of
the returned object is as expected. E.g. in a method marked with
[ReturnsRetained], ARC will ensure that the result value is not
released or placed in the autorelease pool.
Comparing GC and ARC
You can find a more detailed comparison of GC and ARC, and how the differences affect the Elements code you write, in the Automatic Reference Counting vs. Garbage Collection topic.
Elements' ARC Compared to Objective-C
In essence, Elements's ARC implementation works identical to that
provided by the Objective-C language in the Clang-LLVM compiler; as a
matter of fact, it uses the same underlying runtime mechanisms.
One item worth noting is that in contrast to Objective-C's default,
Elements considers local variables to go out of scope at the end of the
block that defined them (i.e. usually at the end of the method, or at
the end of a nested/pair). By contrast, Objective-C will release the
references stored in local directly after the last time that variable is
accessed, which can lead to some unexpected crashes when working with
child objects or bridged objects.
In Objective-C, the __attribute__((objc_precice_lifetime)) attribute
can be used to change this behavior; Elements behaves as if this
attribute was defined, by default. You could say that Elements errs on
the side of caution and more well-defined object lifetimes.
Garbage Collection
Garbage Collection (GC) is one of two memory and object lifetime management models used by the Elements compiler, next to Automatic Reference Counting (ARC). It is used on the .NET and Java platforms.
Garbage Collection manages object life cycles by having the managed infrastructure provided by the Common Language Runtime (on .NET and Mono) and Java Runtime Environment (on Java) keep track of when objects are no longer referenced by any part of your code, so that the underlying memory and resources can automatically be freed when they are no longer needed.
In essence, GC (as well as ARC) alleviates the developer of the burden of manually keeping track of object ownership, eliminating explicit calls to "free" or "destroy" methods or so-called destructors.
Only objects that represent so-called "unmanaged resources", such as file handles, network sockets or the like, might need special consideration to be deterministically disposed of — which can be accomplished using the Dispose Pattern.
Comparing GC and ARC
You can find a more detailed comparison of GC and ARC and how the differences affect the Oxygene code you write in the Automatic Reference Counting vs. Garbage
Collection topic.
Attributes and Aspects
Elements provides full support for Aspects and Attributes on all platforms, and support for a select number of compiler-defined Aspects. In addition, Elements allows the compiler itself to be extended by Creating Custom Aspects, which essentially are more sophisticated attributes that can control the compiler's behavior.
An aspect, or attribute, is a tag that can be applied to certain code elements (for example classes or methods) or the entire executable, to provide additional information that is not part of the core code. The function of aspects can vary widely, from actually affecting the compiler's behavior to merely attaching a piece of information to a code element that can be queried for at runtime using Reflection.
On .NET, Island and Java, attributes are types that descend from System.Attribute (.NET and Island) or implement the java.lang.annotation.Annotation interface (Java), respectively. On Cocoa, all attributes are compiler-defined, and custom attributes are not supported.
Cirrus is an extension of the standard attribute syntax and concept that allows for the creation of even more flexible Aspects that can influence how the compiler handles the annotated code. Cirrus aspects are supported for all platforms, but are always implemented in .NET.
Example
For example, the Conditional attribute (defined by the .NET runtime, and provided by the Elements compiler for Cocoa and Java) causes the compiler to omit any calls to the methods it is attached to, unless the passed conditional define
(in this case "DEBUG") is defined.
type
DebugHelper = public class
public
[Conditional('DEBUG')]
class method DebugOutput(aData: String);
end;
public class DebugHelper
{
[Conditional("DEBUG")]
public static void DebugOutput(string data) {
...
}
}
public class DebugHelper {
@Conditional("DEBUG")
public static func DebugOutput(string data) {
...
}
}
public class DebugHelper {
@Conditional("DEBUG")
public static void DebugOutput(string data) {
...
}
}
Public Class DebugHelper
<Conditional("DEBUG")> _
Public Static Sub DebugOutput(data As string)
...
End Sub
End Class
In this example, other parts of code might contain calls to DebugHelper.DebugOutput(). These calls will turn into no-ops and not be compiled into the final executable, unless the DEBUG define is set.
See Also
Creating Aspects (Cirrus)
Cirrus is an infrastructure for Aspect-Oriented Programming (AOP) using the Elements compiler, available in all languages except Go.
Cirrus extends the attributes system with full support for Aspect-Oriented Programming,
Like regular attributes, aspects annotate a class or one of it's members. But wile plain attributes can only affect build-in compiler changes (for a few well-defined ones) or leave static meta-data that can be inspected at runtime by Reflecrtion, Aspects can take an active role in then compile process, allowing your own code to run and adjust the emitted binary as you need.
Separation of Concerns
This is great for allowing you to separate concerns such as logging, security or other functionality orthogonal to the regular class hierarchy into Aspects that can be attached to classes or their members, as needed.
Functionality that otherwise would need to be reimplemented in various places across an application or framework can be encapsulated in reusable form and maintained in a single place. Elements allows developers both to reuse existing aspects written by third parties or included with the compiler’s standard aspect library, as well as to create their own aspects.
Aspects can only be implemented using the .NET platform (using any of the OOP languages in Elements). They can then be applied to code for any of the four platforms, .NET, Cocoa, Java and Island.
Aspects can be applied in all languages except Go, using the same syntax as for regular attributes. On Oxygene and C# this is done by enclosing the aspect name in square brackets ([SomeAspect]), in Swift and Java by prefixing it with an "at" symbol (@SomeAspect), and in Mercury using angle brackets (<SomeAspect>).
See Also
Getting started with Cirrus
Elements' AOP systen, Cirrus, makes it possible to change the behavior of code, add or remove fields, properties, events or methods and even extra classes, by applying special kinds of attributes - Aspects - to classes or members.
Aspects are written in Elements itself, compiled into a separate library, and are reusable by different projects. They are fairly simple to write. Aspects can be created using any of the Object Oriented Elements languages, using .NET, and can used from Oxygene, C#, Swift, Java and Mercury, on all target platforms.
Writing an Aspect
To write an aspect, simply create a new .NET (Classic) Class Library and set its Target Framework to 4.8, or a new .NET Standard Class Library and set its Target Framework to 2.0. Then add a reference the RemObjects.Elements.Cirrus library shipping with Elements, via the regular Add Reference dialog. Finally add a new class descending from System.Attribute, and optionally the regular AttributeUsage() attribute to denote where it can be applied. The only difference from a regular attribute is that aspects implement one of the special interfaces defined by Cirrus, such as IMethodImplementationDecorator, as in the sample below.
Aspect attributes are loaded and instantiated by the compiler at compile time, and are given the chance to take very powerful influence on the code the compiler is generating.
In the example below, we are creating an aspect to decorate methods of the class it is applied to. This is done through the IMethodImplementationDecorator interface, which requires one single method, HandleImplementation to be implemented by the aspect. The compiler will call this method after a method body (implementation) was generated and allows the aspect to take influence on the generated code and to change or augment it:
namespace MyAspectLibrary;
interface
uses
RemObjects.Elements.Cirrus;
type
[AttributeUsage(AttributeTargets.Class or AttributeTargets.Struct)]
LogToMethodAttribute = public class(System.Attribute, IMethodImplementationDecorator)
public
[AutoInjectIntoTarget]
class method LogMessage(aEnter: Boolean; aName: String; Args: Array of object);
method HandleImplementation(Services: IServices; aMethod: IMethodDefinition);
end;
implementation
class method LogToMethodAttribute.LogMessage(aEnter: Boolean; aName: String;
Args: Array of object);
begin
if aEnter then
Console.WriteLine('Entering ' + aName)
else
Console.WriteLine('Exiting ' + aName);
end;
method LogToMethodAttribute.HandleImplementation(Services: IServices;
aMethod: IMethodDefinition);
begin
if String.Equals(aMethod.Name, 'LogMessage', StringComparison.OrdinalIgnoreCase) then exit;
if String.Equals(aMethod.Name, '.ctor', StringComparison.OrdinalIgnoreCase) then exit;
aMethod.SetBody(Services,
method begin
LogMessage(true, Aspects.MethodName, Aspects.GetParameters);
try
Aspects.OriginalBody;
finally
LogMessage(false, Aspects.MethodName, Aspects.GetParameters);
end;
end);
end;
end.
using RemObjects.Elements.Cirrus;
namespace MyAspectLibrary
{
[AttributeUsage(AttributeTargets.Class | AttributeTargets.Struct)]
public class LogToMethodAttribute: System.Attribute, IMethodImplementationDecorator
{
[AutoInjectIntoTarget]
public static void LogMessage(bool aEnter, String aName, object[] Args)
{
if (aEnter)
Console.WriteLine("Entering " + aName);
else
Console.WriteLine("Exiting " + aName);
}
public void HandleImplementation(IServices Services, IMethodDefinition aMethod)
{
if (String.Equals(aMethod.Name, "LogMessage", StringComparison.OrdinalIgnoreCase)) return;
if (String.Equals(aMethod.Name, ".ctor", StringComparison.OrdinalIgnoreCase)) return;
aMethod.SetBody(Services, (services, meth) => {
LogMessage(true, Aspects.MethodName(), Aspects.GetParameters());
try
{
Aspects.OriginalBody();
}
finally
{
LogMessage(false, Aspects.MethodName(), Aspects.GetParameters());
}
});
}
}
}
import RemObjects.Elements.Cirrus
@AttributeUsage(AttributeTargets.Class | AttributeTargets.Struct)
public class LogToMethodAttribute : System.Attribute, IMethodImplementationDecorator
{
@AutoInjectIntoTarget
public static func LogMessage(_ aEnter: Bool, _ aName: String, _ aArgs: object[])
{
if (aEnter) {
Console.WriteLine("Entering " + aName)
} else {
Console.WriteLine("Exiting " + aName)
}
}
public func HandleImplementation(_ Services: IServices, _ aMethod: IMethodDefinition)
{
if String.Equals(aMethod.Name, "LogMessage", StringComparison.OrdinalIgnoreCase) {
return
}
if String.Equals(aMethod.Name, ".ctor", StringComparison.OrdinalIgnoreCase) {
return
}
aMethod.SetBody(Services) { (services, meth) in
LogMessage(true, Aspects.MethodName(), Aspects.GetParameters())
defer {
LogMessage(false, Aspects.MethodName(), Aspects.GetParameters())
}
do {
Aspects.OriginalBody()
}
}
}
}
package MyAspectLibrary;
import RemObjects.Elements.Cirrus.*;
@AttributeUsage(AttributeTargets.Class | AttributeTargets.Struct)
public class LogToMethodAttribute extends System.Attribute implements IMethodImplementationDecorator
{
@AutoInjectIntoTarget
public static void LogMessage(bool aEnter, String aName, object[] Args)
{
if (aEnter)
Console.WriteLine("Entering " + aName);
else
Console.WriteLine("Exiting " + aName);
}
public void HandleImplementation(IServices Services, IMethodDefinition aMethod)
{
if (String.Equals(aMethod.Name, "LogMessage", StringComparison.OrdinalIgnoreCase)) return;
if (String.Equals(aMethod.Name, ".ctor", StringComparison.OrdinalIgnoreCase)) return;
aMethod.SetBody(Services, (services, meth) => {
LogMessage(true, Aspects.MethodName(), Aspects.GetParameters());
try
{
Aspects.OriginalBody();
}
finally
{
LogMessage(false, Aspects.MethodName(), Aspects.GetParameters());
}
});
}
}
Imports RemObjects.Elements.Cirrus
<AttributeUsage(AttributeTargets.Class Or AttributeTargets.Struct)>
Public Class LogToMethodAttribute
Inherits System.Attribute
Implements IMethodImplementationDecorator
<AutoInjectIntoTarget>
Public Shared Sub LogMessage(aEnter As Boolean, aName As [String], Args As Object())
If aEnter Then
Console.WriteLine("Entering " + aName)
Else
Console.WriteLine("Exiting " + aName)
End If
End Sub
Public Sub HandleImplementation(Services As IServices, aMethod As IMethodDefinition)
If String.Equals(aMethod.Name, "LogMessage", StringComparison.OrdinalIgnoreCase) Then
Return
End If
If String.Equals(aMethod.Name, ".ctor", StringComparison.OrdinalIgnoreCase) Then
Return
End If
aMethod.SetBody(Services, Sub(aServices2, meth)
LogMessage(true, Aspects.MethodName(), Aspects.GetParameters())
Try
Aspects.OriginalBody()
Finally
LogMessage(false, Aspects.MethodName(), Aspects.GetParameters())
End Try
End Sub)
End Sub
End Class
In the code fragment above, our aspect compares the method name to ".ctor" and "LogMessage" (we do not want to augment those), and if they do not match, it adds LogMessage calls around the original method, protected by a try/finally.
The Aspects class is a special Compiler Magic Class provided by Cirrus that allows the aspect to take control of the code it is being applied to. Among other things, you see that it can query for the method name and the parameters, but also the body of the method in question, as written in the original source for the class.
By calling SetBody() on the method, the aspect can replace the body of the generated code (in this case, by taking the original body and surrounding our calls to LogMessage). Note how the new method body is being provided as plain, readable Oxygene code, in form of an extension to the anonymous method syntax.
It is also worth noting that the LogMessage method of our aspect has an aspect of its own applied. The AutoInjectIntoTarget Aspect is defined by Cirrus itself, and it's intended for use within aspects only. It causes the member (in this case the LogMessage method) to be added to the class the aspect is applied to.
This is necessary since our aspect makes use of LogMessage() in the new and augmented method body - but no such method is likely to exist in the target object. Without AutoInjectIntoClass, all the logic for LogMessage would need to be crammed into the SetBody call - making it potentially harder to read, but also potentially duplicating a lot of code and logic.
The following application makes use of our Log aspect. Note how this can be done in both Oxygene and RemObjects C#.
namespace CirrusTest;
interface
uses
MyAspectLibrary,
System.Linq;
type
[aspect:LogToMethod]
ConsoleApp = class
public
class method Main;
class method Test(S: string);
end;
implementation
class method ConsoleApp.Main;
begin
Console.WriteLine('Hello World.');
Test('Input for Test');
end;
class method ConsoleApp.Test(S: string);
begin
Console.WriteLine('TEST: '+s);
end;
end.
using MyAspectLibrary;
using System.Linq;
namespace CirrusTest
{
[__aspect:LogToMethod]
public class ConsoleApp
{
public static void Main()
{
Console.WriteLine('Hello World.');
Test('Input for Test');
}
public static void Test(string S)
{
Console.WriteLine('TEST: '+s);
}
}
}
Imports MyAspectLibrary
<LogToMethod>
Public Class ConsoleApp
Public Shared Sub Main()
Console.WriteLine(Null)
Test(Null)
End Sub
Public Shared Sub Test(S As String)
Console.WriteLine(Null)
End Sub
End Class
We simply created a new console app that references the aspect library we created above, as well as the Cirrus library.
*Note': Because aspects are applied at compile time, the final executable will not depend on the aspect library or on Cirrus anymore.
This is also what enabled Aspects – although written in .NET – to be used in projects for any platform.
Running and debugging this program will output a log message at the beginning and end of each method, just as specified in our designed aspect.
Entering Main
Hello World.
Entering Test
TEST: Input for Test
Exiting Test
Exiting Main
When this code is run, the LogMessage method has been injected into our class, and the binary will nit reference or require RemObjects.Elements.Cirrus.dll or our aspect .dll to run.
API Overview
Cirrus is a small .NET library with interfaces and classes that can be used to build and adjust the code model in the compiler. There are two ways to use Cirrus, through an aspect attribute or a method override.
Aspect attributes
Aspect attributes are plain .NET attributes that implement 1 or more of the cirrus interfaces. These attributes are placed in a regular .NET class library.
All the *InterfaceDecorator interface will be called early on, before any method bodies are resolved or generated. The *ImplementationDecorator interfaces are called after the body of that member was generated and processed. An aspect can implement multiple interfaces and if an aspect applied to a type implements one of the member interfaces will apply to all relevant membes of the call too.
The aspects all have a method with a services parameter that can be used to emit messages, find or create types and even add references to the project. The other parameter is a reference to the member this aspect is applied to.
Using aspect attributes
First in the project that will use the aspect add a "Cirrus Reference" to the aspect library. To use these aspects an aspect: (Oxygene) or __aspect: (RemObjects C#) prefix is used in the attribute. These aspects will not be compiled into the target executable.
Method aspects
Method aspects are aspects that get triggered when a call to a specific method is done, this aspect lets you replace the call with something else. Method aspects can be defined by applying MethodAspectAttribute to a class that implements IMethodCallDecorator. The constructor has several overloads that can be used to narrow down the method(s) to apply the aspect to, the method in this interface then gets called for each such method. Just referencing an aspect library with method aspects activates them. Method aspects get a context parameter that contains the services, the current type and method, a parameter with the method that was called and a parameter with the parameters to this call.
Special Attributes
In addition to regular Custom Attributes, the Elements compiler provides support for the special platfrom-specific attributes that cana affect its behavior:
See Also
.NET
In addition to normal Custom Attributes and Predefined Aspects and Attributes provided by the compiler, the Elements compiler provides support for the special, attribute classes defined by the .NET Framework itself. In many cases, these attributes result in specific code or data to be generated in the executable, or in changed the compiler behavior.
AssemblyKeyFile, AssemblyKeyName, AssemblyDelaySign
These attributes control strong-naming and signing of the assembly,
as required for installation in the Global Assembly Cache (GAC).
AssemblyVersionAttribute, AssemblyFileVersionAttribute
These two attributes specify the
version numbering of the output assembly.
If AssemblyFileVersionAttribute is not specified, the
AssemblyVersionAttribute value is used for both the string name and the
Win32 file version. If it is specified, the AssemblyFileVersion will be
for the Win32 version resource and the AssemblyVersion will go into the
strong name.
AssemblyCompany, AssemblyProduct, AssemblyCopyright, AssemblyTrademarkAttribute, AssemblyCulture, AssemblyDescription
These attributes contribute additional fields to the assembly strong name and or version information.
Out
Used to mark out params. The .NET runtime passes out parameters by passing them as "by
reference" (similar to the var or ref keyword) and setting the Out attribute on the parameter.
ComImport, In, Optional, MarshalAs, NonSerializable, Serializable, PreserveSig
These are not real custom attributes, but represent flags in the IL. Oxygene knows about these and correctly maps them to the underlying flags.
DllImport
DllImport is used to import functions from unmanaged dlls (such as Win32 dlls or
shared objects and dylibs on Linux or Mac, with Mono. A static method
header can be defined in a class, and the DllImport attribute can be
added to specify what dll and what function to import (and possibly more
details on how to marshal parameters back and forth) and calls to this
method will be directed to the external Win32 dll.
Conditional
This attribute is used to mark types or members for conditional compilation.
The compiler will link calls to members with this attribute only if the matching define is set. For example, most methods in RemObjects.DebugServer.dll have the [Conditional("DEBUG")] attribute. This means that if you write code referencing this assembly and use those methods, the actual calls will only be generated if the "DEBUG" define is set for the project or via \$IFDEF.
The nice thing about ConditionalAttribute is that it not only works within the same assembly as traditional IFDEFs, but also across assembly boundaries. The DebugServer assembly, for example, is written in C# and completely outside of the control of the Oxygene compiler - yet the Oxygene-written code will behave differently depending on what defines it is compiled with.
Obsolete
This attribute marks types or members (or entire assemblies) as obsolete. When the compiler notices that you are using an item marked with this attribute, it will generate the appropriate warning or error (depending on the parameters supplied to the attribute).
StructLayout/FieldOffset
- See
Records for modifying record storage layouts.
Guid
The compiler will enforce proper GUID format for
string constants used with the GuidAttribute.
Debuggable
The compiler will emit this assembly level
attribute automatically when compiling, however, when it's present, the
compiler will use the one defined in code.
MethodImpl
An attribute that changes the flags of a MethodDef in the metadata. Used for ComImport and internal calls. Generally these shouldn't be used as they might create invalid code, depending on the combination of flags.
Security Attributes
Oxygene provides full support for understanding security attributes and generating the appropriate XML structures inside the output assembly.
CoClass
This attribute is used in COM imports to define what class is a co-class for the interface this is applied to. When it is defined, the new operator will work on interfaces and it will instantiate the proper co-class.
CLSCompliant
This attribute is used to define whether a type or member is compliant with the Common Language Specification (CLS).
UnmanagedExport & NativeExport
This is a special attribute that can be used to export a class method as an unmanaged dll export entry.
See Unmanaged Exports
CallerFilePath, CallerMemberName, CallerLineNumber
When applied to a parameter (with a default set) the compiler will insert the filename, member name or line number of the caller. Useful for logging purposes:
public static void Test([CallerMemberName] string mn = "",
[CallerFilePath] string fp = "",
[CallerLineNumber] int ln = 0)
{
Console.WriteLine("member name: " + mn);
Console.WriteLine("file path: " + fp);
Console.WriteLine("line number: " + ln);
}
...
Test(); // will emit the name, filename and line number of the current location.
See Also
Cocoa
In addition to normal Custom Attributes, some of the Predefined Aspects and Attributes provided by the compiler are of specific relevance for the Cocoa platform in particular:
See Also
Java
In addition to normal Custom Attributes and Predefined Aspects and Attributes provided by the compiler, the Elements compiler provides support for the special, attribute classes defined by the Java libraries themselves. In many cases, these attributes result in specific code or data to be generated in the executable, or in changed the compiler behavior.
Retention
Defines if something should be written to the .class/jar and exposed to the runtime (see Retention) for more information
See Also
Island
In addition to normal Custom Attributes and Predefined Aspects and Attributes provided by the compiler, the Elements compiler provides support for the special, attribute classes defined by the low-level Island RTL. In many cases, these attributes result in specific code or data to be generated in the executable, or in changed the compiler behavior.
VersionResource
Windows only: Defines the parameters for the PE version resource. Assembly level attribute, has these properties which are the direct equivalent to their version property.
property Copyright: String
property Description: String
property FileVersion: String
property CompanyName: String
property ProductName: String
property LegalTrademarks: String
property Title: String
property Version: String
StaticAddress
For low level targets, this places a static field to be equivalent to a memory address, when reading from it or writing to it, it will directly write to that memory address. Takes 1 IntPtr parameter containing the memory address.
InlineAsm
When defined on an external method, its body becomes a pure inline asm function. This attribute takes 4 parameters: asm containing the AT&T style asm. Constraints containing a clang compatible constraints string. SideEffects boolean to define if the asm block has side effects and align if it needs to be aligned.
CallingConvention
For i386 only, ignored on all other CPU types. Overrides the calling convention, takes 1 parameter of type CallingConvention and can be Default, FastCall, Stdcall or Cdecl.
SymbolName
Overrides the name of a method or static field, takes a string parameter. By default Island uses name mangling to ensure methods don't have the same name, with this attribute a custom name can be provided. Useful for interop with other languages. Note that the compiler still applies some rules like adding an underscore before it, or adding @number after it for stdcall on Windows, these rules can be overriden by prefixing the symbol name with ascii character 1 (SymbolName(#1'MySymbol')).
DisableOptimizations
When applied to a method all optimizations in that function are disabled, even if the project is optimized.
DisableInlining
When applied to a method, this won't be inlined by the optimizer.
InReg
i386 only, ignored elsewhere. Can be set on a method, in which case its first parameter will pass via EAX instead of on the stack.
ThreadLocal
Can be set on a static field, when set this field will have its own copy for every thread instead of being a static.
SectionName
Overrides the PE/ELF section a method or field will be defined in. Takes a string parameter containing the new section name.
NoReturn
Marks a method as not returning for optimization purposes.
Weak
Marks a method or field as weak. When the linker encounters weak symbols it will merge them instead of fail, and a non weak version will take prescendence over a weak one.
LinkOnce
Like Weak, but linkonce symbols can be discarded if they are not referenced.
Used
Can be applied to a type, method or static field and forces the compiler to link this symbol in, even if it's not referenced.
- See
Used for more information.
Naked
When set on a method no prologue/epilogue, like a stackframe will be emitted for this method. Generally only combined with asm.
DllImport
For all platforms, imports a symbol from the given dynamic library. Takes a dllname as a parameter. Optionally an EntryPoint named argument can be set to define which symbol to look for.
DllExport
For all platforms, exports a method, static field or type from the given dynamic library. This can also be set globally by setting the ExportAllTypes option. When used on methods or fields, the SymbolName attribute can be used to override the name which it gets exported with.
Union
Changes a struct to work like a union, all fields are located at offset 0 and overlap eachother. The size of the struct is the size of the largest field.
- See
Union for more information.
Packed
Changes the packing of the struct from the platform default to byte aligned.
- See
Packed for more information.
See Also
Blocks
A block (or delegate in .NET parlance) is a method pointer type
with optional scope. Blocks are a safe way to dynamically invoke methods
with a specific signature on unrelated classes and [Anonymous
Methods](Anonymous Methods).
On .NET, block types are often used in combination
with events, where the event provides a simple way
to add and remove event handlers (in the form of blocks) that can then
be called back. Blocks can also be used in combination with Anonymous
Methods in methods that accept callbacks.
On Cocoa, blocks are often used as callbacks and
completion handlers, for example in APIs such as Grand Central
Dispatch.
On Java, blocks are supported, but not commonly used in platform APIs.
A block instance can be thought of as a method implementation (which could be derived from an actual method or an anonymous method declared inline) tied to a specific object instance, which has (in the case of Anonymous Methods optional) access to variables "captured" from the scope surrounding the anonymous method. (See the topic on Anonymous Method for more details on this.) As such, a block is much more than a mere function pointer.
Defining Custom Block Types
Defining a block can be done with the block keyword in Oxygene and the delegate keyword in C#. In Swift the -> operator is used.
In Oxygene, the function, procedure or method keyword can also be used, although that is frowned upon, and they will provide different behavior on the Cocoa
platform to define C function pointers instead of true Cocoa blocks.
On .NET, it is common for events to use block
types with a similar signature, where the first parameter is the
"sender"of type Object, and the second one is an EventArgs or a descendant of that class. This is not a technical requirement, but mainly a common code pattern seen throughout the .NET Framework Class Library and Third Party Libraries. See the Events topic for more discussion on this matter.
type
ClickEventDelegate = block (sender: Object; args: ClickEventArgs);
delegate void ClickEventDelegate(Object sender, ClickEventArgs args);
ClickEventDelegate = (Object sender, ClickEventArgs args) -> ()
Inline Block Declarations
Oxygene and Swift support inline block declarations in the signatures for methods, fields or properties, without having to declare an explicit, named type.
Rather than requiring the declaration of an explicit and named block
type as in the sample above, the block keyword can be used inline to
describe a block parameter:
MyClass = public partial class
public
method DoSomethingAndCallMeBack(aCallback: block(aSuccess: Boolean));
property ErrorCallback: block(aErrorMesage: String);
end;
public class MyClass {
public func doSomethingAndCallMeBack(aCallback: (aSuccess: Boolean) -> ()) {}
public var errorCallback: (aErrorMesage: String) -> () { get {} set {} }
}
Here, the DoSomethingAndCallMeBack method expects a block parameter,
but the parameter does not refer to a named block type declared
elsewhere, but provides the required signature right as part of the
method declaration. Similarly, the ErrorCallback property uses an
inline block type, as well.
Invoking blocks
To invoke a block, it can simply be called upon in a statement, as if it
were a regular method. In Oxygene, parenthesis are optional when no parameters are expected, but depending on context, they can be useful to avoid ambiguity between calling a block or merely referring to the block.
type
MyBlock = block;
//...
begin
var meth: MyBlock;
meth := ...; // assigning the block a value
meth; // invoking the block
meth(); // invoking the block
end;
delegate void MyBlock();
//...
{
MyBlock meth;
meth := ...; // assigning the block a value
meth(); // invoking the block
}
MyBlock = () -> ()
//...
{
var meth: MyBlock?
meth = ... // assigning the block a value
meth() // invoking the block
}
Depending on the platform, the underlying type used to implement blocks
might also expose members that can be called on the block explicitly.
For example, on .NET, blocks are based on the
System.Delegate
type that exposes members such as BeginInvoke, Invoke or EndInvoke,
which can be called for asynchronous execution. On Cocoa, blocks expose no callable members but are compatible with the Object and id types, participate in (ARC) and can, for example, be stored in NSArrays.
For cross-platform code, it is encouraged to not make assumptions about
members being available on block instances.
More Use Cases and Examples
You can assign a method to a block:
type
MyBlock = block;
MyClass = public partial class
public
method ClassMethod;
BlockVar: MyBlock;
end;
//...
BlockVar := @ClassMethod;
delegate void MyBlock();
public class MyClass
{
MyBlock blockVar;
static void ClassMethod() {}
}
//...
blockVar = &ClassMethod;
public class MyClass
{
var blockVar: () -> ()
static func ClassMethod() {}
}
//...
blockVar = &ClassMethod
You can assign an anonymous method to a block:
type
MyBlock = block;
MyClass = public partial class
public
BlockVar: MyBlock;
end;
//...
BlockVar := method begin
// do something;
end;
delegate void MyBlock();
public class MyClass
{
MyBlock blockVar;
}
//...
blockVar = => {
// do something
}
public class MyClass
{
var blockVar: () -> ()
}
//...
blockVar = { in
// do something
}
Or you can assign an Oxygene or C# Lambda Expression:
type
MyBlock = block(aMessage: String);
MyClass = public partial class
public
BlockVar: MyBlock;
end;
..
begin
BlockVar := aMessage -> writeLn(aMessage);
end;
delegate void MyBlock();
public class MyClass
{
MyBlock blockVar;
}
//...
blockVar = => {
// do something
}
On .NET, one important use of a block variable is to
register a callback function into unmanaged code. If you need to pass a
function pointer to unmanaged code via P/Invoke, you can obtain a function
pointer via the block variable rather than the method itself. This will
ensure that the function pointer remains in scope for the lifetime of
your object:
var i: IntPtr;
i := Marshal.GetFunctionPointerForDelegate(BlockVar);
IntPtr i;
i = Marshal.GetFunctionPointerForDelegate(BlockVar);
var i: IntPtr?
i = Marshal.GetFunctionPointerForDelegate(BlockVar)
When passing delegates to unmanaged code, it's important to remember to
keep a reference to the delegate instance on the .NET side for the whole
time the unmanaged side needs it.
Block Polymorphism
On Cocoa, blocks with descendant types are
assignment compatible, providing support for so-called "Polymorphic
Blocks".
Consider the following two block definitions:
type
Foo = block (sender: object; data: FooData);
FooEx = block (sender: object; data: FooDataEx);
delegate Foo(object sender: object; FooData data);
delegate FooEx(object sender, FooDataEx data);
Foo = (sender: object; data: FooData) -> ()
FooEx = (sender: object; data: FooDataEx)- ()
You can assign a FooEx block to something that expects a Foo;
basically FooEx behaves as if it were a descendant of Foo.
On .NET, the blocks types themselves are not assignment compatible, but a block accepts ancestor classes of the originally declared type for the parameter (so a method(a: object) can satisfy a block(a: string)). Similarly, descendant types are accepted for the result and for parameters (a method: string can satisfy a block: object). This feature is especially relevant for writing WPF applications, as WPF's event routing system uses shared methods to register event handlers, which expect a specific block.
Compatibility Rules
A parameter of a block is compatible with the corresponding parameter of
a method, if the type of the block parameter(s) is more restrictive than
the type of the method parameters. This guarantees that an argument
passed to the block can be passed safely to the method.
Similarly, the return type of a block is compatible with the return type
of a method, if the return type of the method is more restrictive than
the return type of the block, because this guarantees that the return
value of the method can be cast safely to the return type of the block.
Class Contracts
Class Contracts cover two constructs that enable Design by
Contract-like syntax to create classes that can test themselves.
- Pre-conditions and Post-conditions
- Invariants
If a contract is not upheld, an assertion is generated in the same fashion as calling the assert() system function would.
While originally devised for the Oxygene language, class contracts are available for all Elements languages (except Go, which does not support classes), as language extensions.
Pre-Conditions and Post-Conditions
Pre- and post-conditions are used to describe conditions that are required to be true when a method is called or after a method exits, respectively. They can be used to check for the validity of input parameters, results, or for the state of the object required by the method.
The require and ensure (Oxygene) or __require and __ensure (C#, Swift and Java) keywords will expand the method body to list the preconditions; both sections can contain a list of Boolean statements, separated by semicolons.
In Oxygene, the require and ensure sections live before and after the main begin/end pair of the method body; in C#, Swift, and Java, __require and __ensure can provided as sub-sections within the body.
Examples:
method MyObject.DivideBy(aValue: Integer);
require
aValue ≠ 0 : "Cannot divide by zero";
begin
MyValue := MyValue/aValue;
end;
method MyObject.Add(aItem: ListItem);
require
assigned(aItem);
begin
InternalList.Add(aItem);
ensure
Count = (old Count) + 1;
end;
method MyObject.DoWork(aValue: Integer);
require
assigned(fMyWorker);
fMyValue > 0;
aValue > 0;
begin
//... do the work here
ensure
assigned(fMyResult);
fMyResult.Value >= 5;
end;
void DivideBy(int value)
{
__require
{
value != 0 : "Cannot divide by zero";
}
MyValue = MyValue/value;
}
void Add(ListItem item)
{
__require
{
item != null;
}
InternalList.Add(item);
__ensure
{
Count == (__old.Count) + 1;
}
}
void DoWork(int value)
{
__require
{
fMyWorker != null;
fMyValue > 0;
value > 0;
}
//... do the work here
__ensure
{
fMyResult != null;
fMyResult.Value >= 5;
}
}
func Divide(by value: Integer) {
__require {
value != 0 : "Cannot divide by zero";
}
MyValue = MyValue/value;
}
func Add(item: ListItem) {
InternalList.Add(item);
__ensure {
Count == (__old.Count) + 1;
}
}
func DoWork(_ value: Int) {
__require {
fMyWorker != null;
fMyValue > 0;
value > 0;
}
//... do the work here
__ensure {
fMyResult != nil;
fMyResult.Value >= 5;
}
}
void DivideBy(int value) {
__require {
value != 0 : "Cannot divide by zero";
}
MyValue = MyValue/value;
}
void Add(ListItem item) {
__require {
item != null;
}
InternalList.Add(item);
__ensure {
Count == (__old.Count) + 1;
}
}
void DoWork(int value) {
__require {
fMyWorker != null;
fMyValue > 0;
value > 0;
}
//... do the work here
__ensure {
fMyResult != null;
fMyResult.Value >= 5;
}
}
Sub DivideBy(aValue As Integer)
Require
Check aValue ≠ 0, "Cannot divide by zero"
End Require
MyValue := MyValue/aValue;
End Sub
Sub Add(aItem As ListItem)
Require
Check assigned(aItem)
End Require
InternalList.Add(aItem);
Ensure
Check Count = (Old.Count) + 1
End Ensure
End Sub
Sub DoWork(aValue As Integer)
Require
Check assigned(fMyWorker)
Check fMyValue > 0
Check aValue > 0
End Require
' ... do the work here
Ensure
Check assigned(fMyResult)
Check fMyResult.Value >= 5
End Ensure
End Sub
The old (Oxygene and Mercury) or __old (C#, Swift and Java) prefix operator can be used in the ensure section for local variables,
parameters and properties to refer to the original values before the execution.
The compiler will add code to save these to local variables before executing the method body. old/__old is supported for strings and value types. When used with Reference Types such as Classes, it will capture the old pointer, not the old state of the object being pointed to.
Invariants
In contrast to pre- and post-conditions, invariants are used to define a fixed state the object must fulfill at any given time. Invariants can be marked public or private.
Public invariants will be checked at the end of every public method (after the method's "ensure" block, if present, has been checked) and if an invariant fails, an assertion is raised.
Private invariants will be checked at the end of every method call, public or private.
The idea behind this separation is that public invariants must not be met by private methods, so theoretically a public method can defer work to several private worker methods, and public invariants would only be checked after the public method finishes.
Examples:
type
MyClass = class;
public
... some methods or properties
public invariants
fField1 > 35;
SomeProperty = 0;
SomeBoolMethod() and not (fField2 = 5);
private invariants
fField > 0;
end;
public class MyClass
{
public __invariants
{
field1 > 35;
SomeProperty = 0;
SomeBoolMethod() && !(fField2 == 5);
}
private __invariants
{
field > 0;
}
}
public class MyClass {
public __invariants {
field1 > 35
SomeProperty = 0
SomeBoolMethod() && !(fField2 == 5)
}
private __invariants {
field > 0
}
}
public class MyClass {
public __invariants {
field1 > 35;
SomeProperty = 0;
SomeBoolMethod() && !(fField2 == 5);
}
private __invariants {
field > 0;
}
}
Public Class MyClass
' ... some methods or properties
Public Invariants
Check fField1 > 35
Check SomeProperty = 0
Check SomeBoolMethod() And Not (fField2 = 5)
End Invariants
Private Invariants
Check fField > 0
End Invariants
End Class
Note that both types of invariant sections have full access to all private fields of the class, the only difference is the method (and property) calls they apply to.
If a class specifies invariants, all fields must be marked as private.
Custom Messages
By default, a generic Assertion call is generated, using the textual representation of the condition as message. For example, suppose that Method1 failed the following requirement:
Require
Check A > 10
End Require
This would generate the following message: "Method1 assertion failed A > 10".
Both Invariants and Pre-/Post-Conditions can provide an optional more detailed error message to be included in the assertion when a check fails. This must be in the form of a constant String Literal, separated from the expression with a colon (all languages except Mercury) or a comma (Mercury). If the expression itself contains a colon/comma, the whole expression needs to be wrapped in parenthesis:
method MyObject.Add(aItem: ListItem);
require
assigned(aItem) : 'List Item for MyObject cannot be nil';
begin
InternalList.Add(aItem);
ensure
Count = old Count +1 : 'MyObject: Count logic error';
end;
void Add(ListItem item)
{
__require
{
(item != null) : "List Item for MyObject cannot be null";
}
InternalList.Add(aItem);
__ensure
{
Count == (__old.Count) + 1 : "MyObject: Count logic error";
}
}
func Add(aItem: ListItem) {
InternalList.Add(aItem);
__ensure {
Count == (__old.Count) + 1 : "MyObject: Count logic error"
}
}
void Add(ListItem item) {
__require {
(item != null) : "List Item for MyObject cannot be null";
}
InternalList.Add(aItem);
__ensure {
Count == (__old.Count) + 1 : "MyObject: Count logic error";
}
}
Sub Add(aItem As ListItem)
Require
Check assigned(aItem), "List Item for MyObject cannot be nil";
End Require
InternalList.Add(aItem);
Ensure
Count = Old.Count + 1, "MyObject: Count logic error";
End Ensure`
End Sub
Notes
Note that not all members of a class can be used inside invariants, because some elements of a class (or the entire class system of your application) can be accessed and written to directly, without the knowledge of the class.
If, for example, your invariant were to depend on a public field, other parts of your system would be able to modify this field directly, bypassing the invariant checking. Of course non-private fields are discouraged in general and you should always use private fields and – where applicable – a property with a higher visibility to make the field's value accessible.
Members that can be used in invariants are:
- private fields
- properties
- methods
See Also
Conditional Compilation
Conditional compilation provides a way to have one set of source code that can be compiled slightly differently depending on certain
conditions, such as compiling for different platforms, compiling different versions/editions of your project, or, if you must, compiling the same code in Elements and other compilers, for example:
- Oxygene vs. legacy Pascal compilers, such as Delphi or Free Pascal
- RemObjects C# vs. Microsoft Visual C# or Mono's C# Compiler
- RemObjects Silver vs. Apple's Swift compiler
- .NET vs. Cocoa vs. Java
For example:
- The
ECHOES, TOFFEE, COOPER and ISLAND symbols can be used to distinguish between platforms, .NET, Cocoa, Java and Island, respectively.
- The
ELEMENTS symbol can be used to conditionally check for Elements vs. other compilers (e.g. when sharing code with Delphi, Visual C# or Apple's Swift Compiler).
Providing Conditional Defines
Conditional defines can originate from four sources:
-
The compiler will provide a set of predefined symbols based on compiler version and platform, as outlined in the Conditional Defines topics. Examples include ELEMENTS (always defined) or COCOA (defined for Apple's platforms).
-
Referenced libraries or frameworks can provide additional symbols that are active if the respective namespace is used. For example, the iOS SDK provides TARGET_OS_IPHONE to distinguish between Mac and iOS, in the implicitly used rtl namespace.
-
A list of Project-wide defines can be specified in the Project Settings and will be available to check for throughout the project. These defines can be configured separately for each configuration.
-
Finally, defines can be set (and removed) right inside the source code using {$DEFINE} (Oxygene) or #define (C#, Swift and Java) Compiler Directives. Defines set (or removed) with these directives will apply only to the code in the same file and below the directive.
Conditional Compilation w/ defined()
New in Elements 10, the defined() system function can be used to specify conditional compilation using regular if statements that integrate naturally with the flow of the code.
Conditional Compilation w/ Directives
Wherever possible, i.e. inside method bodies, using defined() is the preferred way for conditional compilation. That said, support for conditional directives such as $IF (Oxygene) and #if (C#, Swift and Java) is still provided, for use outside of method bodies (e.g. to conditionally omit whole methods or classes).
Conditional compilation is controlled by surrounding blocks of code with $IF/#if $ENDIF/#endif directives that check for specific conditions. These blocks can be nested within each other.
The $IF/if directive checks for the availability of one or more symbols, and begins a block that will conditionally be compiled if (and only if) the expression passed to the directive is found to be true (i.e. defined). Any block started with an "if" directive must be terminated with a matching $ENDIF/#endif directive to close it off (and can optionally also include additional $ELSE/#else sections to provide alternate blocks of code that will be considered if the original condition was not met).
New since Elements 5.2 release, the if (and elseif) directives accept not only a single symbol name to check for, but can also handle two or more symbols combined with the boolean logical operators (AND, OR, XOR and NOT in Oxygene, and &&, ||, ^ and ! in C#, Swift and Java). This allows for more complex checks against several symbols, without the need to awkwardly nest symbols.
In Oxygene, the $IF directive replaces the older $IFDEF and $IFNDEF directives, which are still supported, but considered legacy.
Examples:
{$IF COOPER} // Compile the following for Java only.
{$IF TOFFEE AND TARGET_OS_IPHONE} // Compile the following for Cocoa / iOS only.
{$IF ECHOES OR COOPER} // Compile the following for .NET and Java (but not Cocoa).
{$IF NOT TOFFEE} // Don't compile the following for Cocoa (but do for .NET and Java).
#if COOPER // Compile the following for Java only.
#if TOFFEE && TARGET_OS_IPHONE // Compile the following for Cocoa / iOS only.
#if ECHOES !! COOPER // Compile the following for .NET and Java (but not Cocoa).
#if !TOFFEE // Don't compile the following for Cocoa (but do for .NET and Java).
#if COOPER // Compile the following for Java only.
#if TOFFEE && TARGET_OS_IPHONE // Compile the following for Cocoa / iOS only.
#if ECHOES || COOPER // Compile the following for .NET and Java (but not Cocoa).
#if !TOFFEE // Don't compile the following for Cocoa (but do for .NET and Java).
#if COOPER // Compile the following for Java only.
#if TOFFEE && TARGET_OS_IPHONE // Compile the following for Cocoa / iOS only.
#if ECHOES || COOPER // Compile the following for .NET and Java (but not Cocoa).
#if !TOFFEE // Don't compile the following for Cocoa (but do for .NET and Java).
The "elseif" (or "elif" in C#) directive follows a previous "if" directive (and optional "elseif" directives). It closes the previous blocks and starts a new block of code that will be compiled if none of the previous conditions have been met and the condition provided in the directive itself is met.
"elseif"/"elif" allow the cascading of multiple cases, comparable to a case statement in regular code, without requiring a convoluted nesting of multiple "if"/"endif" directives.
Examples:
{$IF COOPER} // Compile the following for Java only.
{$ELSEIF ECHOES} // Compile the following for .NET only.
{$ELSEIF TOFFEE} // Compile the following for Cocoa only.
{$ELSE} // Compile if neither of the previous three were defined.
{$ENDIF} // Done.
#if COOPER // Compile the following for Java only.
#elif ECHOES // Compile the following for .NET only.
#elif TOFFEE // Compile the following for Cocoa only.
#else // Compile if neither of the previous three were defined.
#endif // Done.
#if COOPER // Compile the following for Java only.
#elseif ECHOES // Compile the following for .NET only.
#elseif TOFFEE // Compile the following for Cocoa only.
#else // Compile if neither of the previous three were defined.
#endif // Done.
#if COOPER // Compile the following for Java only.
#elif ECHOES // Compile the following for .NET only.
#elif TOFFEE // Compile the following for Cocoa only.
#else // Compile if neither of the previous three were defined.
#endif // Done.
The "else" directive follows a previous "if" directive (and optional "elseif"/"elif" directives). It closes the previous blocks and starts a new block of code that will be compiled if none of the previous conditions have been met. The block needs to be closed with a final "endif" directive.
Finally, the "endif" directive, as discussed in the previous sections, is used to close off a conditional section started with if. Afterwards, compilation will continue unconditionally (or based on any conditions set forth by a nested "if" directive) once again.
Within an ignored block (i.e. an if, elseif or else block that is not being compiled) all code and all compiler directives except if, else* and endif are ignored.
Oxygene Legacy Directives
{$IFDEF} — Legacy, use {$IF} instead.{$IFNDEF} — Legacy, use {$IF NOT} instead.{$IFOPT} — For Delphi compatibility, will always resolve as false.
Examples
begin
{$IFDEF TRIAL}
writeLn('This a trial version!');
{$ELSE}
writeLn('This is the full version');
{$ENDIF}
{
#if TRIAL
Console.WriteLine("This a trial version!");
#else
Console.WriteLine("This is the full version");
#endif
{
#if TRIAL
println("This a trial version!");
#else
println("This is the full version");
#endif
{
#if TRIAL
Console.WriteLine("This a trial version!");
#else
Console.WriteLine("This is the full version");
#endif
begin
{$IFDEF ECHOES}
writeLn('.NET');
{$ELSEIF COOPER}
writeLn('Java');
{$ELSEIF TOFFEE AND TARGET_OS_IPHONE}
writeLn('Cocoa on iOS');
{$ELSEIF TOFFEE}
writeLn('Cocoa and not iOS (i.e. OS X, tvOS or watchOS)');
{$ELSE}
writeLn("Some platform that hasn't been invented yet");
{$ENDIF}
{
#if ECHOES
writeLn(".NET");
#elif COOPER
writeLn("Java");
#elif TOFFEE && TARGET_OS_IPHONE}
writeLn("Cocoa on iOS");
#elif TOFFEE
writeLn("Cocoa and not iOS (i.e. OS X, tvOS or watchOS)");
#else
writeLn("Some platform that hasn't been invented yet");
#endif
{
#if ECHOES
writeLn(".NET");
#elif COOPER
writeLn("Java");
#elif TOFFEE && TARGET_OS_IPHONE}
writeLn("Cocoa on iOS");
#elif TOFFEE
writeLn("Cocoa and not iOS (i.e. OS X, tvOS or watchOS)");
#else
writeLn("Some platform that hasn't been invented yet");
#endif
{
#if ECHOES
writeLn(".NET");
#elif COOPER
writeLn("Java");
#elif TOFFEE && TARGET_OS_IPHONE}
writeLn("Cocoa on iOS");
#elif TOFFEE
writeLn("Cocoa and not iOS (i.e. OS X, tvOS or watchOS)");
#else
writeLn("Some platform that hasn't been invented yet");
#endif
Defining or Undefining Conditionals
The $DEFINE/#define directive defines a new symbol for the pre-processor; the defines are position dependent, so the symbol will only be defined for everything after the directive, in the same source file.
The $UNDEF/#undef directive removes a symbol for the pre-processor, if previously
defined. Like "define", the directive is position dependent, so it will only affect code after the directive. Undefining can remove any pre-processor symbol, even ones defined by the compiler itself or the project options. When a symbol doesn't exist, the undefine will be ignored.
See Also
Duck Typing
The Elements compiler includes explicit support for Duck Typing, for all languages.
The name "duck typing" comes from the old saying that if something walks like a duck and quacks like a duck, it is a duck – and applies the same concept to objects. In essence, it means that if an object has all the methods or properties required by a specific interface, with Duck Typing you can treat it as if it implemented that interface (even if it does not).
Imagine we have the following (a bit contrived) types declared, and let's further assume that some of them are outside of our direct control – maybe they are declared in the core framework, or in a piece of the project we don't want to touch:
type
IFooBar = interface
method DoFoo;
method DoBar;
end;
Foo = class
method DoFoo;
end;
Bar = class
method DoBar;
end;
FooBar = class
method DoFoo;
method DoBar;
end;
public interface IFooBar
{
void DoFoo();
void DoBar();
}
public class Foo
{
void DoFoo() {}
}
public class Bar
{
void DoBar() {}
}
public class FooBar
{
void DoFoo() {}
void DoBar() {}
}
public interface IFooBar {
func DoFoo()
func DoBar()
}
public class Foo {
func DoFoo() {}
}
public class Bar {
func DoBar() {}
}
public class FooBar {
func DoFoo() {}
func DoBar() {}
}
public interface IFooBar
{
void DoFoo();
void DoBar();
}
public class Foo
{
void DoFoo() {}
}
public class Bar
{
void DoBar() {}
}
public class FooBar
{
void DoFoo() {}
void DoBar() {}
}
Public Interface IFooBar
Sub DoFoo()
Sub method DoBar()
End Interface
Public Class Foo
Sub DoFoo()
End Class
Public Class Bar
Sub DoBar()
End Class
Public Class FooBar
Sub DoFoo()
Sub DoBar()
End Class
As you see, we have an interface IFooBar that declares a couple of methods. We also have three classes that look pretty similar but with one caveat: while they do implement some of the same methods defined by IFooBar, they don't actually implement the IFooBar interface itself. This means that if we now have a method like this:
we cannot actually pass a FooBar instance to it, even though FooBar obviously implements all the necessary methods. There's nothing that our Test method could throw at the FooBar instance that it could not handle, yet we can't just pass it in.
Enter Duck Typing
Starting with Elements 5.0, the generic duck<t>() system function allows you to apply duck typing to let the compiler "convert" a FooBar into an IFooBar, where necessary. For example, you could write:
var fb := new FooBar;
Test(duck<IFooBar>(fb));
var fb = new FooBar();
Test(duck<IFooBar>(fb));
let fb = FooBar()
Test(duck<IFooBar>(fb))
var fb = new FooBar();
Test(duck<IFooBar>(fb));
Dim fb = New FooBar()
Test(duck(Of IFooBar)(fb))
and pass the object in. The result of duck() is, essentially, an IFooBar, and you can use it in any context that accepts an IFooBar – method calls, variable assignments, you name it. This works because FooBar implements all the necessary methods to satisfy an IFooBar implementation – and the compiler takes care of the rest.
So what if that is not the case? What would happen if instead we write the following?
var fb := new Foo;
Test(duck<IFooBar>(fb));
var fb = new Foo();
Test(duck<IFooBar>(fb));
let fb = Foo()
Test(duck<IFooBar>(fb))
var fb = new Foo();
Test(duck<IFooBar>(fb));
Dim fb = New Foo()
Test(duck(Of IFooBar)(fb))
where, as you note above, Foo does implement DoFoo, but does not implement DoBar, which is required for the interface. So clearly, Foo doesn't qualify to be duck typed as an IFooBar? That's correct, and in fact the line above would fail, with an error such as:
- (E265) Static duck typing failed because of missing methods
- (N2) Matching method "MyApplication.IFooBar.DoBar" is missing
But what if you're fully aware your object only satisfies a subset of the interface, and you want to pass it anyway? Maybe you know that Test only makes use of DoFoo and does not need DoBar?
Elements' duck typing has a solution for this as well, by passing an optional DuckTypingMode enum value to the duck() function. DuckTypingMode has three values; the default is Static*, and we've seen it in action above. Static duck typing will enforce that the passed object fully qualifies for the interface, and will fail with a compiler error if any member (method, property or event) of the interface is not provided by the type.
The second DuckTypingMode is Weak. In weak mode, the compiler will match any interface members it can find, just like in static mode. But for any member it does not find on the original type, it will generate a stub that throws a "Not Implemented" exception. This enables us to write:
var fb := new Foo;
Test(duck<IFooBar>(fb, DuckTypingMode.Weak));
var fb = new Foo();
Test(duck<IFooBar>(fb, DuckTypingMode.Weak));
let fb = Foo()
Test(duck<IFooBar>(fb, DuckTypingMode.Weak))
var fb = new Foo();
Test(duck<IFooBar>(fb, DuckTypingMode.Weak));
Dim fb = New Foo()
Test(duck(Of IFooBar)(fb, DuckTypingMode.Weak))
and successfully pass a Foo object to Test(). As long as Test only calls DoFoo, everything will be fine and work as expected; if Test were to call DoBar as well, an exception would be thrown at runtime.
The third and final DuckTypingMode is Dynamic. Dynamic duck typing will not directly map methods of the source object to the interface; instead, it will create a wrapper class that will dynamically call the interface members, based on what is available at runtime.
You can think of these three modes of duck-typing as being on a scale, with Static (the default) being 100% type safe. If static duck typing compiles, you can rest assured that everything will work as you expect, at runtime. Weak mode trades some type safety for a model that is weaker typed, comparable to, for example, Objective-C's id type (which essentially does weak duck typing everywhere by default – if an object has a method of a given name, you can call it). Dynamic is at the opposite end of the scale, completely resolving all calls at runtime, more like true dynamic languages such as JavaScript.
Soft Interfaces
So this is all good and well, but imagine you have a large (and untouchable) library with classes that implement the DoFoo/DoBar pattern, and you plan to use those all over your code base. Sure, you can declare IFooBar, and use the duck method to duck-type those objects all over the place, but that will get annoying quickly. The compiler knows that DoFoo and DoBar methods are enough to satisfy the interface, so wouldn't it be great if you could let the compiler worry about the duck typing where necessary?
That's where soft interfaces come in. Instead of declaring IFooBar as above, you could declare it as a Soft Interface, as follows:
type
IFooBar = soft interface
method DoFoo;
method DoBar;
end;
[SoftInterface]
public interface IFooBar
{
void DoFoo();
void DoBar();
}
@SoftInterface
public interface IFooBar {
func DoFoo()
func DoBar()
}
@SoftInterface
public interface IFooBar
{
void DoFoo();
void DoBar();
}
<SoftInterface>
Public Interface IFooBar
Sub DoFoo()
Sub method DoBar()
End Interface
Simply adding the soft keyword (in Oxygene) or the SoftInterface aspect (all languages) lets the complier know that this interface represents a pattern it will find in classes that do not actually implement the interface themselves. As a result, you can now simply declare the Test method as before:
And just pass your FooBar instances to it – no call to duck() necessary.
var fb := new Foo;
Test(fb);
var fb = new Foo();
Test(fb);
var fb = new Foo();
Test(fb);
Dim fb = New Foo()
Test(fb)
In essence, the compiler will treat any class that implements the matching methods – DoFoo and DoBar in this case – as actually implementing the interface. This works even for classes imported from external frameworks.
To give a more concrete sample based on real life objects, imagine the following scenario:
type
INumberToStringFormatter = soft interface
method ToString(aFormat: String): String;
end;
var d: Double := 15.2;
var x: INumberToStringFormatter := d; // no cast necessary
writeLn(x.ToString('m'));
[SoftInterface]
public interface INumberToStringFormatter
{
void string ToString(string format);
}
double d = 15.2;
INumberToStringFormatter x = d; // no cast necessary
writeLn(x.ToString("m"));
@SoftInterface
public interface INumberToStringFormatter {
func ToString(_ format: String) -> String
}
let d: Double = 15.2;
let x: INumberToStringFormatter = d; // no cast necessary
writeLn(x.ToString("m"));
@SoftInterface
public interface INumberToStringFormatter
{
void string ToString(string format);
}
double d = 15.2;
INumberToStringFormatter x = d; // no cast necessary
writeLn(x.ToString("m"));
<Soft>
Public Interface INumberToStringFormatter
Sub ToString(format As String) As String
End Interface
Dim d As Double = 15.2
Dim x As INumberToStringFormatter = d // no cast necessary
writeLn(x.ToString("m"))
Different to the regular ToString() method, not every object in .NET implements ToString(String). Yet with the soft interface declared here, you now have a common type that you could assign a Double, an Int32 or even a Guid to – and call ToString(String) on. All with complete type safety.
See Also
Entry Point
The entry point is the bit of code where execution of a program starts. Every Elements project that has an OutputType type of Executable, Exe or (on Windows) WinExe must define declare an entry point, in order to successfully compile and launch.
Library projects and other non-executable projects do not require an entry point.
There are several ways of declaring the entry point for your project, some explicit and some more implicit. Let's have a look.
A Static Main() Method
The most common way to create an entry point for your project is to have a single static method called Main that contains the code that should run when your executable launches.
It does nit matter what class this method is defined in (a common convention in Elements' templates is Program), but it must adhere to a few conventions:
- It must be named
Main (case does not matter, even in the case-sensitive languages)
- It must match of of a set of allowed signatures (see below)
- It must be marked as static, be in a static class, or be global.
The signature of the Main method must adhere to the following rules
- It may have an return type of
Integer/int/Int32, or optionally no return type (Void)
- It can be parameterless, accepts as single parameter a Native Dynamic (unsized) Array of String or (on the native platforms) two C-style parameters, the count of arguments and an array of pointer to an
AnsiChar containing the parameters.
class method Main;
class method Main: Integer;
class method Main(aArguments: array of String);
class method Main(aArguments: array of String): Integer;
class method Main(aCount: Integer; aArguments: array of ^AnsiChar);
class method Main(aCount: Integer; aArguments: array of ^AnsiChar): Integer;
public static void Main()
public static void Main(string[] arguments)
public static void Main(int count, AnsiChar *arguments[])
public static int Main()
public static int Main(string[] arguments)
public static int Main(int count, AnsiChar *arguments[])
public static func Main()
public static func Main() -> Int
public static func Main(_ arguments: String[]) // note, not [String]
public static func Main(_ arguments: String[]) -> Int
public static func Main(_ count: Int, _ arguments: UnsafePointer<AnsiChar>[])
public static func Main(_ count: Int, _ arguments: UnsafePointer<AnsiChar>[]) -> Int
public static void Main()
public static void Main(string[] arguments)
public static int Main()
public static int Main(string[] arguments)
Public Shared Sub Main()
Public Shared Sub Main(aArguments As String())
Public Shared Sub Main(aCount As Integer, aArguments As Ptr(Of AnsiChar)())
Public Shared Function Main: Integer
Public Shared Function Main(aArguments As String()): Integer
Public Shared Function Main(aCount As Integer, aArguments As Ptr(Of AnsiChar)()): Integer
The variants with two parameters are supported on Cocoa and the Island-backed platforms only, and only in languages that support Pointers.
Note that either the methods must be declared as static (optionally class method in Oxygene, and Shared in Mercury, or they can be contained in a class that is marked as static (again, Shared in Mercury). Also note that in the Java language, the static keyword on a class does not mark it static but has a different meaning, so in Java, the method itself must be marked static.
Resolving Ambiguity
If for some reason a project contains multiple candidates for an entry point, the compiler will by default emit an error and fail the compilation. You can set the StartupClassProject Setting to the name of the class containing the proper Main function; the Main method in that class must be non-ambiguous.
Simplified Entry Point in Oxygene
In Oxygene, rather than explicitly declaring a Main method, the project can have a single source unit where the final end. is preceded by the begin keyword and zero or more statements that make up the entry point:
namespace MyProject;
uses
Foo;
// more types and methods could be here
begin
writeLn('The magic happens here');
end.
Simplified Entry Point in C#, Swift and Mercury
In C#, Swift and Mercury rather than explicitly declaring a static Main method, the project can have a single source unit that contains one or more statements in the global scope (i.e. not contained in a type or func):
using Foo;
// more types and code could be here
writeLn("The magic happens here");
// more types and methods could be here
import Foo
// more types and code could be here
writeLn("The magic happens here");
// more types and funcs could be here
Imports Foo
' more types and code could be here
writeLn('The magic happens here');
' more types and Subs could be here
If variables, functions/methods or type declarations are found after the first statement, they will be treated not as globals, but as declared nested within the implied Main function, will behave as local variables/types/closures and have access to the values of previously declared locals, as if the entire body from the first statement to the end of the file were enclosed in a Main() method block.
Swift Base Library declares the following two global properties that give you access to the arguments that were passed to the executable at runtime, even when using the simplified entry point:
public let C_ARGC: Int
public let C_ARGV: [String]
Technically, these would also be available form anywhere in code, and they are also available to other languages, if the project references the SBL.
In C# and Mercury, am implicit local variable/parameter named args is available, providing optional access to the array of command line parameters.
The ApplicationMain Aspect (Cocoa)
On the Cocoa platform, the NSApplicationMain/UIApplicationMain aspect can be applied to a single class in the project. That class will then be regarded as the App Delegate, and the Aspect will automatically emit a proper Main() method during compilation that calls the corresponding NSApplicationMain or UIApoplicationMain Cocoa runtime function, passing the app delegate type and the command line arguments as needed.
The App.xaml File (WPF)
In WPF projects on .NET, a .xamnl file marked with the ApplicationDefinition will contribute to a sub-class of type System.Windows.Application and automatically generate a Main() method that will instantiate and call the appropriate members of that class on startup.
Future Extensions
Swift recently proposed a new @main attribute to replace the NSApplicationMain or UIApoplicationMain aspects covered above. Support for this new Aspect is planned, but not implemented yet. (SE-0281 @main: Type-Based Program Entry Points, bugs://84619).
Projects without Entry Point
Some project types do not require an entry point, because thay are not, technically, executables that can be launched directly by the OS:
- Library, StaticLibrary and DynamicLibrary projects cannot launch ad thus, as mentioned above, do not require entry points.
- WebAssembly Modules are not launched directly but technically are dynamic libraries loaded by the browser or Node.js runtime, which communicates with the code via other means than a
Main() method
- Android Applications, similarly, are launched by the Android runtime, which will call one of possibly several
Activity classes
- ASP.NET and ASP.NET Core and related projects are launched and called into by the ASP.NET runtime or the web server.
See Also
Exception Handling
Exceptions are the fundamental way how Elements deals with errors, in a consistent way that works the same across all platforms, and works similarly for all languages.
Exceptions happen asynchronously from the regular application flow. When an error occurs, an exception is "raised" (in Oxygene parlance) or "thrown" (in C#, Swift and Java parlance), and it interups the current execution flow at that point. The exception travels back up the call stack of methods, until it is handled (or "caught") by an exception handler, or until it reaches the top of stack.
Exceptions can be caught explicitly, by code in your project, or implicitly, by the surrounding platform or application framework (such as Cocoa, WinForms, or WPF) that provides the execution context for your app.
If an exception reaches the top of its stack, uncaught, it will usually result in termination (or "crash") of your application.
As an exception travels up the stack, each stack frame gets the chance to interact with it, to perform cleanup, save release of resources, error logging, or to catch the exception.
How Exceptions Happen
There are three typical sources for an exception:
- Your code explicitly raises an exception, because it detected an error condition, using the
raise (Oxygene) ot throw (C#, Swift of Java) keyword.
- Your code performed an action that lead the compiler or runtime to generate an exception (such as a null reference access, or a bad cast).
- Your code called a framework, platform, or third party library API that in turn caused an exception.
The subsequent behavior is identical, in all three cases. In the last case, the Call Stack of the exception might contain further details about the original source of the error.
Raising/Throwing Exceptions Manually
If your code deems it necessary, it can manually raise an exception, using the raise (Oxygene) ot throw (C#, Swift of Java) keyword:
if i > 5 then
raise new Exception("Did not expect a value larger than five!");
if (i > 5)
throw new Exception("Did not expect a value larger than five!");
if i > 5 {
throw Exception("Did not expect a value larger than five!")
}
if (i > 5)
throw new Exception("Did not expect a value larger than five!");
While not the most common case for exceptions, this is useful for when your code detects error conditions that it is not prepared to handle. Raising an exception is a convenient way of putting the onus for the bad input on the caller, rather than dealing with bad data at the current level of your algorithm, for example.
The higher levels of your app might be better equipped to handle the error, depending on its cause – for example, if it was caused by bad user input, you might just want to display an error message to the user, but if the exception was caused by faulty logic on the higher level, the exception will let you know that a bug fix is needed there.
Catching Exceptions
If you expect certain sections of code to throw exceptions, sometimes it makes sense to explicitly catch and deal with the error at the right level. For example, when writing data to a disk, an "expected" cause for an exception could be that the disk is full, or the file is locked.
Each language provides mechanism for catching exceptions, either those of a certain type (e.g. only errors related to network access) or more widely all exceptions:
- Oxygene:
try/except Blocks
- C#:
try/catch Blocks
- Swift:
do/catch Blocks
- Java:
try/catch Blocks
Except on the very highest level of your application, it usually makes sense to catch only those types of exceptions you expect, and know how to deal with at that level, and let all other exceptions bubble further up. For example, in a library that downloads a file from the network, you might reasonably expect network errors, or a "disk full" error, and have the means to react to those (maybe retry the download, or fail with a new, more high-level error), but you will probably have very little means to deal with, say, a null reference exception, or an out of memory condition – so it will be best to let those pass through.
Depending on the type of your application, you might want to catch all exceptions and the top level (to prevent the user from seing an ugly crash or have your app just disappear), but you should also keep im mind that some truly unexpected exceptions might leave your app in an inconsistent state. Sometimes it is better to show the user a nice error and then quit, rather than keep running with bad data, and destroy the user's document in the process.
try
// this might raise an Exception
except
on E: IOException do
// handle error
end;
try
{
// this might raise an Exception
}
catch (IOException e)
{
// handle error
}
do {
// this might raise an Exception
} catch IOException {
// handle error
}
try
{
// this might raise an Exception
}
catch (IOException e)
{
// handle error
}
Protecting Code from Exceptions, and Cleaning Up
Some methods will need to perform cleanup or housekeeping when an exception, any exception, occurs, even if the code does not deal with the exception itself.
For example, your code might open a file, read and process its data, and then close the file. Any number of (unexpected) errors could occur during the reading or processing – but you would still need to make sure the file gets closed properly, else it might stay locked, or lose data.
Again, each language has a construct for this:
- Oxygene:
try/finally Blocks
- C#:
try/finally Blocks
- Swift:
defer or __finally Blocks
- Java:
try/finally Blocks
Code in a finally (or defer, for Swift) block will run regardless of whether an exception occurred or not, making it perfect for cleanup code that you want to run both on success and on failure.
var file := OpenFile(...);
try
// this might raise an Exception
finally
file.Close();
end;
var file = OpenFile(...);
try
{
// this might raise an Exception
}
finally
{
file.Close();
}
let file := OpenFile(...)
defer {
file.Close()
}
// this might raise an Exception
var file = OpenFile(...);
try
{
// this might raise an Exception
}
finally
{
file.Close();
}
using statements are a convenient way to clean up resources that implement the Disposable pattern, as they essentially combine a finally/defer with a call to a standardized clean-up method:
- Oxygene:
using Blocks
- C#:
using Blocks
- Swift:
__using Blocks
- Java: "
try with Resource" Blocks
Common Exception types
Each platform and library has its own set of standard exceptions for errors that occur when working with the platform. We recommend to familiarize yourself with the platform and/or the third party libraries you use to see which exceptions you might need to handle ("catch" and deal with) in your code.
By convention, all exception types descend from the root Exception base class, available unde the same name on all platforms. You can use this type (or a type-less except or catch clause) if you want to catch all exceptions – which is recommended only on the very highest level of your app.
There are a couple of standard exception types you will come across all platforms that are generated by the compiler itself, for invalid code patterns.
-
A Null Reference Exception will occur if you try to access members of an object on a variable that has not been initialized yet, and contains nil or null, or when you try to pass a nil or null value top a parameter that does not accept nullable values.
-
An Invalid Cast Exception will occur if you try to cast or forcibly assign an object reference to the type it is not compatible with (e.g. if you try to cast a String to a Button).
Stack Traces
Exceptions typically contain a stack trace that gives you information of the different levels of method calls your application was in at the time the exception occurred. The stack trace (along with other parameters of the exception, like its Message) can be very useful to narrow down where an exception occurred, even when it was called (and maybe logged for diagnosis) at a higher level of your app.
If your project uses Elements RTL, a property called CallStack is available consistently across all platforms to give you access to the call stack for the exception.
See Also
Extensions
Extensions are a powerful mechanism that lets you add additional capabilities to an existing type – whether the original type is part of your code base, or imported externally.
For example, you can add commonly needed helper methods to any core framework type such as String or even the base Object type. But they can also be helpful for extending your own types in flexible ways, similar to Partial Classes.
Elements provides two ways to add extensions: Type Extensions and individual Extension Methods (the latter in Oxygene only).
Type Extension
Type Extensions add one or more members to an existing type, which might be declared locally in the same project or externally. The new members added by the extension will appear alongside the regular members of the type, and be available (subject to visibility) everywhere the extension is in scope (i.e. when the namespace the extension is defined in is used/imported).
An extension declaration looks much like a type declaration of its own, but does not in fact declare a new type, merely extends the existing type. Extensions can reside in any namespace, and do not need to be declared within the same namespace as the original type.
The extension (Oxygene and Swift) or __extension (C#) keyword is used to declare a type extension, and a basic declaration looks something like this:
type
Foo = public extension class(String)
//...
end;
public __extension class Foo : String
{
//...
}
public extension String
{
//...
}
In Oxygene and C#, the extension syntax specified a name for the extension. This name should be unique, and can be descriptive of the goal of the extension (such as String_PathHelpers for an extension to String that adds methods to work with file paths), but it is not otherwise exposed to the consumer of the extension. In Swift, no such name is provided.
Inside the extension declaration, methods and (calculated) properties can be declared using the normal expected syntax.
Note that generally, extensions can only add behavior to the class (e.g. methods and calculated properties), but no additional data (e.g. fields, stored properties or events). That is because the actual class (and with it its memory layout) is most likely defined by an external reference, and cannot be extended.
One exception to this are extensions in Swift that are declared in the same project as the original type. Swift allows such extensions to add fields and stored properties as needed, because all extensions declared in the same project will become part of the actual type (much like Partial Classes in Oxygene and C#).
Extensions can be provided for pretty much every kind of user type – including classes, records/structs, enums and even interfaces/protocols.
Version Notes
Extension support for C# is new in Elements 9.0.
Constraints
Extension Methods
Extension Methods are an older syntax in Oxygene that predate the availability of full-fledged extension classes. They are declared similar to global functions, prefixed with the extension keyword, and the name of the type they are extending:
interface
extension method String.ReversedString: String; public;
implementation
extension method String.ReversedString: String;
begin
//...
end;
end.
See Also
LINQ
LINQ Expressions, short for "Language INtegrated Query", provide an elegant SQL-like way to perform query operations on Sequences and collections of data.
This includes ways to filter, sort, group and join sets of data. A LINQ expression always starts with the keyword from, and its result is always a new Sequence of the same or a derived (and possibly anonymous) type.
In Oxygene, the from expression can be combined with for loops using the for each from shortcut syntax, to combine a query expression with the loop that iterates it.
Please refer to the documentation for from Expressions in Oxygene and the Standard Query Operators Overview provided by Microsoft for C#, for more details on how to use LINQ
Oxygene, C# and Mercury Languages Only
This topic applies to the Oxygene, C# and Mercury languages only. LINQ is not available in Swift, Java and Go as a language feature (although the Query Expressions methods can be used as regular methods, of course).
LINQ Expressions in Oxygene vs. C# vs. Mercury
In general, Oxygene use the same syntax for LINQ queries as C#, with a few differences.
Oxygene uses with instead of let to introduce a new variable:
from o in list with name := o.Name where ...
from o in list let name := o.Name where ...
Oxygene uses a more readable "order by" for sorting, while C# uses the concatenation "orderby":
from o in list order by o.name descending
from o in list orderby o.name descending
Oxygene also supports distinct, reverse, skip and take as LINQ operators, which are not available in C#.
LINQ from Swift, Java and Go
While the Swift, Java and Go languages do not have a language integrated query syntax, the LINQ operators themselevs can still be used using regular lambda/closure syntax:
let sortedAdults = people.Where({ $0.Age > 18 }).OrderBy({ $0.Name })
var sortedAdults = people.Where(p -> p.Age > 18).OrderBy(p -> p.Name);
Queryable Sequences
Depending on the sequence type, LINQ expressions can be processed by the compiler in two ways. For normal sequences, each sub-expression is mapped to simply call to an (extension) method on the sequence, as detailed below. However, for Queryable Sequences, the LINQ expression is converted to meta data that can be interpreted at runtime – for example for translating a LINQ expression directly to an SQL query run against a database.
Mapping
Each LINQ expression maps to an (extension) method on the Sequence type, under the hood. Implementations for these methods are provided by the framework, on .NET, and by the Elements libraries (libToffee, Cooper.jar and Island RTL) on the other platforms.
distinct – maps to .Distinct()group X by Y/group by Y select x – maps to .GroupBy()from X in Y (inner from) – maps to .SelectMany() with optional Cast<T> if the type is specified; the result is turned into a special anonymous class where both original and new are available.join on X equals Y – maps to .Join()order by X – maps to .OrderBy, secondary order to .ThenBy()order by X descending – maps to .OrderByDescending, secondary order to .ThenByDescending()reverse – maps to .Reverse()where X – maps to .Where()select X – maps to .Select()skip X – maps to .Skip()skip while X – maps to .SkipWhile()take X – maps to .Take()take while X – maps to .TakeWhile()with (Oxygene) and let (C#) – maps to .Select() with a special anonymous that makes both the original and the new variable available.
See Also
Mapped Types
Mapped type are a unique feature of the Elements compiler. They let you create compatibility wrappers for types without ending up with classes that contain the real type. The wrappers will be eliminated by the compiler and rewritten to use the type the mapping maps to.
When working with Elements, you will most commonly use mapped types (for example as provided by the Elements RTL cross-platform library), but not very often implement mapped types yourself. All languages except Go provide a syntax for easily and conveniently defining mapped types though, if needed, via the mapped (Oxygene), __mapped (RemObjects C#, Swift and Java) and MappedTo (Mercury) keywords.
What Are Mapped Types?
You can think of mapped types (usually classes) as "type aliases" or "inline types". They are not types that will actually exist at runtime. Instead, they are projections of an existing different type (the "real" type) under a new name and with a new set of visible members.
For example, a real class Foo might readily exist, with methods B and C. A mapped class called Bar might be defined, exposing methods called Y and Z that actually map to the methods B and C of the original class.
What is the Purpose of this Charade?
The most common goal for mapped classes is to allow different-but-similar classes that may exist on different platforms or in different frameworks to be used by one set of code, without a lot of Conditional Compilation.
For example, all platforms (such as .NET, Java, Cocoa) include basic classes such as strings, lists, dictionaries, XML documents, etc. But while these classes perform the same tasks on all platforms, their APIs generally look differently (both the classes and their members have different names), and they might have subtly different behavior (for example, subString on Java treats the indices differently than SubString on .NET).
A mapped class allows you to define a new class that is not "real" and that exposes one set of methods; this class can be used on all platforms. Under the hood, that mapped class will actually map to the original platform-specific classes, depending on which platform your code is compiled.
The Elements RTL library provides a wide range of such classes, ready to be used across platforms – and you can of course define your own.
Read More
Using
Using mapped types is as seamless as it can get: you just use them.
Mapped types looks and behave just like a regular types, and your code can use them seamlessly, without even being aware they are mapped. You can declare variables or fields of the type, new up instances of them, and make calls to their members.
Under the hood, the compiler will do all the hard work and map everything to calls to the original classes, depending on the platform you are compiling for – but your code does not need to concern itself with that. For example, when using the [Elements RTL](/API/Elements RTL) mapped class library, you can simply write platform-independent code that will "just work" everywhere.
Casting between Mapped and Real Types
Because instances of mapped types really are instances of the original type at runtime, there are a couple of extra things you can do with mapped types:
- You can seamlessly cast from a mapped type to the real type, for example if you need access to a more advanced function not exposed on the mapped type. Of course at this stage, the cast and the remaining code becomes platform-specific.
- You can seamlessly cast from a real type to a mapped type. For example, you may be working with platform APIs that return concrete platform types (say a Cocoa API that returns an
NSDictionary). To continue working with the type in a platform-independent way, you can just cast it to, say, a Sugar.Dictionary.
These casts are completely toll-free – meaning they are mere instructions to the compiler to now treat the type differently. They incur no runtime overhead and no conversion cost.
- You can also seamlessly pass mapped types to functions expecting a concrete type or vise versa. This makes it extremely easy to mix platform-specific and platform-independent code. Your shared business code might define a method that expects a
Sugar.XmlDocument, but it's being called from platform-specific code that just read an NSXMLDocument on Cocoa. You can call the method, and simply pass the NSXMLDocument, without ugly casts making the code more complicated.
Defining
Although it done rarely as part of most software projects, the Elements compiler provides a syntax for declaring your own mapped types in all languages except Go. In Oxygene, the mapped keyword is used, while both C# and Swift use __mapped and Mercury uses MappedTo
Declaring Mapped Types in Oxygene
In Oxygene, the mapped keyword is used in both the type declaration and the individual mapped members. In the type declaration, the phrase mapped to will indicate the underlying "real" class that is being mapped:
type
List<T> = public class mapped to ArrayList<T> ...;
Individual members can either be mapped via a shorthand syntax, right inside the type declaration, or they can provide a regular method or property body and within there use the mapped keyword to refer to members of the underlying original type.
The inline shortcut syntax looks like the following snippet, which simply instructs the compiler to map any call to RemoveAt to the remove method on the real class:
method RemoveAt(index: Integer); mapped to remove(index);
An example for a regular method body that uses the mapped keyword to call into the real class might look like this:
method List<T>.Remove(item: T);
begin
var n := mapped.IndexOf(item);
if n >= 0 then mapped.Remove(n);
end;
Declaring Mapped Types in C#, Swift, Java and Mercury
In C#, Swift and Java the __mapped class modifier can be used in the type header to indicate that a class definition is mapped, alongside the => operator to indicate the concrete class that is being mapped to. Mercury uses the MappedTo keyword, instead.
Similar to Oxygene above, the __mapped keyword can also be used inside the member bodies to refer to members of the real type, for C#, Swift and Java. in Mercury, the MyMapped keyword serves that role.
public __mapped class MyList<T> => List<T>
{
public void Remove(T o)
{
var n = __mapped.IndexOf(o);
if (n >= 0)
__mapped.Remove(n);
}
}
public __mapped class MyList<T> => List<T> {
func Remove(o: T) {
let n = __mapped.IndexOf(o)
if n >= 0 {
__mapped.Remove(n)
}
}
}
public __mapped class MyList<T> => List<T>
{
public void Remove(T o)
{
var n = __mapped.IndexOf(o);
if (n >= 0)
__mapped.Remove(n);
}
}
Public Class MyList<T>
MappedTo List<T>
Function Remove(o As T)
Dim n = MyMapped.IndexOf(o)
if n >= 0 Then
MyMapped.Remove(n)
End If
End Function
End Class
Note that unlike Oxygene, no shorthand syntax for mapping is provided, both because the inline nature of the C#, Swift and Mercury class structure makes that less necessary, and to keep changes/extensions to the C# standard and Swift syntax at a minimum.
Full Example
The code below shows a full example for the definition of a mapped class. More examples can be found by perusing the available Elements RTL source code.
namespace System.Collections;
interface
uses
java.util;
type
List<T> = public class mapped to ArrayList<T>
public
method Add(o: T); mapped to add(o);
method RemoveAt(i: Integer); mapped to remove(i);
method Remove(o: T);
begin
var n := mapped.IndexOf(o);
if n >= 0 then mapped.Remove(n);
end;
property Length: Integer read mapped.size;
property Item[i: Integer]: T read mapped[i] write mapped[i]; default;
end;
method List<T>.Remove(o: T);
namespace System.Collections
{
using java.util;
public __mapped class List<T> => ArrayList<T>
{
public void Add(T o) { __mapped.add(o); }
public void RemoveAt(int i) { __mapped.remove(i); }
public void Remove(T o)
{
var n = __mapped.IndexOf(o);
if (n >= 0)
__mapped.Remove(n);
}
public int Length
{
get
{
return __mapped.size;
}
}
public T this(int i)
{
get
{
return __mapped[i];
}
set
{
__mapped[i] = value;
}
}
}
}
import java.util
public __mapped class List<T> => ArrayList<T> {
public func Add(o: T) {
__mapped.add(o)
}
public func RemoveAt(i: Int) {
__mapped.remove(i)
}
public void Remove(T o) {
et n = __mapped.IndexOf(o)
if (n >= 0) {
__mapped.Remove(n)
}
}
public var Length: Int {
eturn __mapped.size
}
public subscript(i: Int) -> T {
get {
return __mapped[i]
}
set {
__mapped[i] = newValue
}
}
}
package System.Collections;
import java.util.*;
public __mapped class List<T> => ArrayList<T>
{
public void Add(T o) { __mapped.add(o); }
public void RemoveAt(int i) { __mapped.remove(i); }
public void Remove(T o)
{
var n = __mapped.IndexOf(o);
if (n >= 0)
__mapped.Remove(n);
}
public int Length { get { return __mapped.size } }
public T this(int i) { get { return __mapped[i]; } set { __mapped[i] = value; } }
}
Imports java.util
Public Cass List<T>
MappedTo ArrayList<T>
Public Funcion Add(o As T)
MyMapped.add(o)
End Function
Public Funcion RemoveAt(i: Int) {
MyMapped.remove(i)
End Function
Public Sub Remove(T o) {
Dim n = MyMapped.IndexOf(o)
If n >= 0 Then
MyMapped.Remove(n)
End If
End Sub
Public Property Length: Int {
return MyMapped.size
End Property
Public Property(i: Int) -> T {
Get
Return MyMapped[i]
End Get
Set
MyMapped[i] = Value
End Set
End Property
End Class
Multi-Part Method Names
Driven by the goal to fit in well with the API conventions on the Cocoa platform, Elements has added support for multi-part method names to all languages, and for all platforms.
Multi-part method names are essentially the ability for a method's name to be split into separate parts, each followed by a distinct parameter. This is "required" on the Cocoa platform because all the platform's APIs follow this convention, and we wanted all Elements languages to be able to both consume and implement methods alongside those conventions without resorting to awkward attributes or other adornments, and to feel at home on the Cocoa platform.
But since multi-part method names are not intrinsically tied to the Cocoa platform, we have made them available as an option for all platfroms, and encourage their use.
A multi-part method has separate name parts for each parameter (or, rarely, group of parameters).
In Oxygene, C# and Java, each parameter is a combination of a (partial) name, and its own set of parenthesis declaring that parameters internal name and type.
In Swift and Mercury, the first part of the method name is followed by a single set of parenthesis enclosing all parameters; each parameter can (optionally) declare an external name that becomes part of the method signature.
Unique to Swift and Mercury, the first parameter can declare an outer name in addition to the first part of the method name (e.g. "Run(command)" in the Swift samle below. To Oxygene, C# and Java, a method declared as such will appear as if the two parts have been concatenated and camel-cased (e.g. "RunCommand").
Note: methods can be overloaded on parts of their name, even if all versions acept the same kind of types.
Declarations
A multi-part method declaration looks like this:
method RunCommand(aCommand: String) Arguments(params aArguments: array of String): Boolean;
bool RunCommand(string Command) Arguments(string[] arguments)
func Run(Command: String, Arguments: [String]) -> Bool
Boolean RunCommand(String Command) Arguments(String[] arguments)
Function RunCommand(Command As String, Arguments arguments as String[])
Note that in Swift, all parameters are assumed to have an outer name, by default; if none is provided explicitly then the internal name of the parameter is used externally as well. To declare a parameter without an external name, prefix it with an underscore:
func RunCommandWithArguments(_ Command: String, _ Arguments: [String]) -> Bool
By contrast, Mercury will only associate an external name with a parameter if one is explicitly provided, so – in line with traditional Visual Basic declaration syntax – a regular parameter with just name and type will have no external name.
Calling Multi-Part Methods
When calling a multi-part method, a similar syntax is used, providing separate sets of names and parenthesis for Oxygene C# and Java, and a single set for Swift and Mercury:
x.RunCommand("ebuild") Arguments('MyProject.sln', '--configuration:Debug');
x.RunCommand("ebuild") Arguments(new string[] {"MyProject.sln", "--configuration:Debug"});
x.Run(Command: "ebuild", Arguments: ["MyProject.sln", "--configuration:Debug"])
x.RunCommand("ebuild") Arguments(new String[] {"MyProject.sln", "--configuration:Debug"});
x.RunCommand("ebuild", Arguments: {"MyProject.sln", "--configuration:Debug"})
Multi-Part and Named Constructors
Constructors can also optional be named and have multi-part names. For simplicity, lets look at a constructor for a Process class with a signature similar to the above method:
constructor withCommand(aCommand: String) Arguments(params aArguments: array of String)
this withCommand(string Command) Arguments(string[] arguments)
init(Command: String, Arguments: [String]) -> Bool
this withCommand(String Command) Arguments(String[] arguments)
Sub New(Command command As String, Arguments arguments as String[])
Note that by convention, constructor names start with the word with and (usually) a noun describing the forst parameter. For Swift and Mercury, this is omitted, but is implicitly added by the compiler (e.g. when creating a class declared in Swift or Mercury from the other languages.
Also note that in C# and Java, the this keyword is used instead of the class name, to avoid ambiguity with a regular method syntax. We recommend using this for all constructors, named or not.
On Cocoa, a named constructor maps to the corresponding initWith* method on Objective-C level. That name is derived by uppercasing the "W" (or the first letter of the name, regardless of what it is, and prefixing it with init.
Creating an instance looks similar:
x := new Process withCommand('ebuild') Arguments('MyProject.sln', '--configuration:Debug');
var x = new Proces withCommand("ebuild") Arguments(new string[] {"MyProject.sln", "--configuration:Debug"});
let x = Process(Command: "ebuild", Arguments: ["MyProject.sln", "--configuration:Debug"])
var x = new Process withCommand("ebuild") Arguments(new String[] {"MyProject.sln", "--configuration:Debug"});
Dim x = New Process(Command "ebuild", Arguments: {"MyProject.sln", "--configuration:Debug"})
While the feature was created for Cocoa, multi-part method names are supported on all platforms, and considered a regular feature of the languages. We encourage to use and embrace them, as they are a great tool to make code more readable and understandable.
See Also
Namespaces
Namespaces are used to group types into logical subsets – for example for related sections of a larger project, or for types from different libraries. Within each namespace, type names must be unique, but two types of the same name may exist in different namespaces. With that, namespaces are also a great way to help avoid naming conflicts between libraries.
A namespace is either a single identifier (e.g. System), or a list of identifiers, separated by a dot (e.g. System.Windows.Forms).
Types can be referred to from uniquely using their fully qualified name, which is the short type name, prefixed with the namespace name. For example, the Form class in System.Windows.Forms on .NET can be referred to using the full name, System.Windows.Forms.Form.
Types can also be referred to using their short name, if one of the following is true:
-
The code referring to the type is part of the same namespace as the referred-to type.
-
The type's namespace has been used/imported using the uses (Oxygene), using (C#) or import (Swift) keyword.
Declaring Namespaces
Oxygene and C# support declaring namespaces via the namespace keyword.
In Oxygene, the default namespace for any file is specified at the very top of each source file, and all types declared in the file will become part of that namespace. If necessary (although uncommon), a type can be declared with a fully qualified name to override that.
In C#, one or more types can be surrounded by a namespace {} scope, and will become part of that namespace. A source file typically contains one such scope, spanning the entire file, but it is perfectly legitimate for a file to declare multiple namespace scopes, if needed.
namespace Foo;
type
MyClass = public class // Foo.MyClass
end;
Bar.MyClass = public class // Bar.MyClass
end;
//...
namespace Foo
{
public class MyClass // Foo.MyClass
{
}
//...
Swift has no support for declaring namespaces on a per-file or per-class level – see below for details.
Language Notes
The Swift language does not currently have support for declaring namespaces. All types you define using the Swift language will become part of the default namespace configured for your project in Project Settings. Swift does have full support for referring to types in different namespaces, both using fully qualified names and by importing namespaces to be in scope via the import keyword.
Namespaces vs. References
It is important to not confuse namespaces with References. While there is often a one-to-one mapping to which libraries contain which namespace, that overlap is arbitrary. A single referenced library can contain types in multiple namespaces (which may or may not be named the same as the library itself), and multiple libraries can contribute to the same namespace.
When using first or third party frameworks and libraries, it is important to know both what namespaces the types you want to use are in, but also which libraries need to be referenced in order to make the types available, as well. For example, all standard Cocoa SDK libraries ship with Elements in library files that match their namespace – Foundation.fx contains the Foundation namespace, UiKit.fx contains the UIKit namespace, and so on. On the other hand, on .NET many core namespaces are located in mscorlib.dll and System.dll.
Nullability
All Elements languages have the ability to specify the nullability of type references. Type references can be variables, fields, properties or method parameters. For brevity, we'll use the term "variables" throughout this topic to refer to all four kinds of references.
Nullable variables may either contain a valid value or they may not — in the latter case they are considered to be nil (in Oxygene and Swift parlance), null (in C# and Java parlance) or Null (Mercury). Non-nullable variables must always contain a value and cannot be null/nil.
The different languages have different ways of expressing the nullability of a variable.
Oxygene, C#, Java, and Mercury
In Oxygene, C#l, Java and Mercury the default nullability of a variable is determined by its type. For value types (structs, enums and simple numeric types), variables are assumed to be non-nullable by default, and always have a value. Reference types (i.e. classes or interfaces) are considered nullable by default, and may be null/nil. Please refer to Value Types vs. Reference Types.
For example:
var i: Int32; // non-nullable by default, initialized to 0
var b: Button; // nullable by default, will be nil
Int32 i; // non-nullable by default, initialized to 0
Button b; // nullable by default, will be null
Int32 i; // non-nullable by default, initialized to 0
Button b; // nullable by default, will be null
Dim i As Int32 ' non-nullable by default, initialized to 0
Dim b As Button ' nullable by default, will be null
Nullability of a type can be changed by explicitly amending the type name with a modifier. In Oxygene, value types can be made nullable with the nullable keyword, and reference types can be made non-nullable with the not nullable keyword combination. In C#, Java and Mercury, value types can be made nullable by appending ? to the typename, and reference types can be made non-nullable by appending !, respectively.
For example:
var i: nullable Int32; // nullable
var b: not nullable Button := new Button(); // not nullable
Int32? i; // nullable
Button! b = new Button() // not nullable
Int32? i; // nullable
Button! b = new Button() // not nullable
Dim i As Int32? ' nullable
Dim b As Button! = New Button() ' not nullable
In the above example, the value type Int32 was modified to make the declared variable nullable, while the reference type Button (we're assuming Button is a class) was made non-nullable. As you will also notice, the non-nullable variable requires immediate initialization (in this case by assigning a newly created Button instance), because the default value of the type, nil or null, would be invalid for a non-nullable variable.
Note that type inference will always favor the type's default nullability. For example, in the code below, s will be inferred to be a regular nullable string, even though it's being assigned a decidedly non-null value.
Swift
The Swift language behaves slightly different. Regardless of the underlying type, all types are treated as being non-nullable by default – even reference types.
For example:
var i: Int32 = 0; // non-nullable by default
var b: Button = Button(); // non-nullable by default
In addition, you'll also notice that Swift requires any non-nullable variable to be explicitly initialized with a default value. Where Oxygene and C# would assume a default value of 0 for the integer, Swift requires an initial value to be provided.
Swift has two ways to mark a variable as nullable, and that is either by appending a ! or a ? to the typename:
var i: Int32! // nullable
var b: Button! // nullable
var i2: Int32? // nullable
var b2: Button? // nullable
Conceptually, the nullable variables declared with ! and ? are the same. Both i and i2 are of type nullable integer and initially are nil; both b and b2 are of type nullable Button and also initially nil.
The difference lies in how the two sets of variables can be used in subsequent code.
The variables declared with ! are what Swift calls implicitly unwrapped nullables. That means that even though the variable may be nil, you can use it as you please, and – for example – directly call members on it or (in the case of the integer) use it in an arithmetic expression. If you try to call into a member of i or b and the actual variable is nil at runtime, a Null Reference Exception will be thrown. (This is how all nullable types behave in Oxygene and C#, meaning that all nullable types in those languages are implicitly unwrapped nullables.)
By contrast, the variables declared with ? do not allow direct access to the type they may (or may not) reference. All you can do with variables i2 and b2 is to compare them to nil, and to explicitly unwrap them in order to gain access to their content.
Note: While this syntax is not recommended for user code, the ¡ (inverted exclamation point) suffix can be used in Silver's Swift dialect to mark a type as being nullable only if it is a reference type – essentially giving it the same nullability behavior of the type name being used on its own in Oxygene or C#. This is mainly used by code generators to express this behavior where the kind of type is not known at generation time.
var i: Int32¡ // not nullable, since Int32 is a value type
var b: Button¡ // nullable, since Button is a reference type
Unwrapping them can be done in two ways:
Unwrapping a Nullable Inline
You can use the ! or ? operator on the variable to explicitly unwrap them in place before calling a member. For example:
let t1 = b2!.title
let t2 = b2?.title
Using ! will check if the b2 variable has a value. If it does, the title property on that Button instance will be called and returned into t1. If it does not, a Null Reference Exception will be thrown. Assuming the title property was declared as type String, then t1 will also be of type String, i.e. it will be assumed to be non-null.
When using ? instead, the variable will still be checked for a valid value, and if it has a valid value, that instance's 'title property will be called. However, if b2 is nil instead, the call to title will be bypassed, and t2 will be initialized to nil instead. As you might expect, this means t2 itself will be of type String? –in other words a nullable String. (In essence ? behaves similarly to the Colon Operator (:) in Oxygene and the similar "Elvis" operator (?.) in C#.)
Conditionally Unwrapping a Nullable
If you are planning to do more extensive calls on a nullable variable, it often makes sense to conditionally unwrap it into a new non-nullable variable with Swift's if let construct:
if let b3 = b2 {
let t3 = b3.title
}
The if let construct checks if the right hand of the assignment contains a value or is nil. If it contains a value, that value is assigned to a new, non-nullable variable (in this case b3) for the scope of the following block, and that block is executed. If the right hand side of the assignment is nil, the whole block is skipped.
Note how inside the block, members of b3 can be called without the need for ! or ?.
Comparing Swift Nullables to the Other Languages
Conceptually, nullable Variables in Oxygene, C#, Java and Mercury behave equivalent to implicitly unwrapped nullables in Swift declared with !. They can contain nil, but you can still access all their members directly – at the risk of a Null Reference Exception (NRE) occurring, if you don't make sure a variable is not nil.
The other languages have no equivalent for Swift's more strict wrapped nullable types declared with ?, which cannot be acecssed without unwrapping
A second crucial difference to keep in mind, especially when working with both C#, Java or Mercury, but also with Swift, is that while Swift uses both ?and ! to mark a variable as nullable, ! has in fact the opposite meaning in RemObjects C#, Java and Mercury, marking an otherwise nullable reference type as *not nullable.
Nullability of Types Compared:
| Type |
Value Type |
Reference Type |
| Oxygene Non-Nullable |
Int32 |
not nullable String |
| Oxygene Unwrapped Nullable |
nullable Int32 |
String |
| Oxygene Wrapped Nullable |
N/A |
nullable String |
| C#/Java/Mercury Non-Nullable |
Int32 |
String! |
| C#/Java/Mercury Unwrapped Nullable |
Int32? |
String |
| C#/Java/Mercury Wrapped Nullable |
N/A |
String? |
| Swift Non-Nullable |
Int32 |
String |
| Swift Unwrapped Nullable |
Int32! |
String! |
| Swift Wrapped Nullable |
Int32? |
String? |
The Oxygene Colon (:) Operator
Oxygene pioneered the colon operator to allow safe member calls on potentially nil variables. C#, Java, Mercry and Swift later took on the same concept by combining the ? operator with a subsequent dot (.) for member access.
For example:
var b: Button;
var i = b:title:length; // i is a nullable Int32
Button b;
var s = b?.title?.length; // i is an Int32?
let b: Button?
var i = b?.title?.length // i is an Int32?
Button b;
var i = b?.title?.length; // i is an Int32?
Dim b as Button
DIm i = b?.title?.length ' i is an Int32?
Exposing Wrapped Nullables to Swift from the Other Languages
For the purpose of being able to create APIs in all languages that play well with Swift, the languages provide a way to mark variables as wrapped, even though the languages themselves do not use the concept. If a class type is explicitly marked as "nullable", it will appear as a wrapped nullable when referred to from Swift:
var b: nullable Button; // already nullable by default, "nullable" makes it wrapped to Swift
Button? b; // already nullable by default, "?" makes it wrapped to Swift
Button? b; // already nullable by default, "?" makes it wrapped to Swift
Dim c As Button? ' already nullable by default, "?" makes it wrapped to Swift
Optional Nullability Warnings in the Other Languages
As discussed above, all nullables in languages other than Swift are considered unwrapped, meaning they can be accessed without explicit unwrapping, and they can be assigned to variables that are declared non-nullable – at the risk of generating an NRE) when an actual null value is encountered. This is of course par for the course for Oxygene, C#, Java and Mercury developers.
When working in those languages with APIs designed for Swift – that is, APIs that make explicit use of nullable and non-nullable type references a lot – the compiler will optionally emit warnings when assigning potential null values to variables that are declared nullable. This can help you spot potential NREs at compile time rather than when debugging.
Because in many cases these warnings are noisy and can provide false positives, they can be turned off in Project Settings via the "Warn on Implicit Not-Nullable Casts" option. When turned on (the default), warnings will be generated in cases such as the one below:
var b: Button! := ...;
var c: Button;
b := c; // warning here, as c might be nil
Button! b = ...;
Button c;
b = c; // warning here, as c might be null
Button! b = ...;
Button c;
b = c; // warning here, as c might be null
Dim b As Button! = ...
Dim c As Button
b = c ' warning here, as c might be Nothing
There are two ways to "fix" these warnings and let the compiler know that the assignment is safe, or that the developer is aware of the potential risk of an NRE. The first is to enclose the assignment in code that ensures the variable is not null in a way that the compiler can detect as part of code flow analysis, for example with an if statement:
if c ≠ nil then
b := c; // no warning here, we know c is assigned
if (c != null)
b = c; // no warning here, we know c is assigned
if (c != null)
b = c; // no warning here, we know c is assigned
vb
if c IsNot Null Then
b = c ' no warning here, we know c is assigned
End IF`
The second option is to explicitly "cast" the value to a non-null version. This can be done either by using type cast syntax with a nullable type name, or by using a shorthand syntax provided by the language. In C#, the shorthand syntax uses the ! operator, similar to Swift. In Oxygene, the as not nullable keyword combination, without an explicit type name, can be used:
b := c as not nullable Button; // type-cast to non-nullable type
b := c as not nullable; // convenience shorthand syntax
b = c as Button!; // type-cast to non-nullable type
b = c!; // convenience shorthand syntax
b = c as Button!; // type-cast to non-nullable type
b = c!; // convenience shorthand syntax
b = DirectCast(c, Button!) ' type-cast to non-nullable type
b = c!; ' convenience shorthand syntax
Exposing Wrapped nullable to Swift from the Other Languages
When writing APIs in Oxygene, C#, Java or Mercury that will (also) be consumed from Swift, it is sometimes (or rather, often) desirable to expose nullable types as wrapped nullables on the Swift side.
Even though these languages have no concept of wrapped nullables themselves, reference types (and only reference types) that are explicitly (and, in a sense, redundantly) marked as nullable in Oxygene and C# will be exported as wrapped nullable when seen from Swift. For example, a type of nullable String (Oxygene) or String? (C#, Java or Mercury) will appear in Swift as wrapped nullable String?, while a regular nullable String will appear to Swift as a unwrapped nullable String!.
There is currently no way to expose nullable value types as wrapped nullables from Oxygene, C#, Java or Mercury.
Starting with the 2015 releases of Apple's Cocoa SDKs, their Objective-C APIs have been annotated with nullability information, marking parameters as nullable or non-nullable (usually wrapped, in the latter case), where appropriate. This applies to iOS 9.0, watchOS 2.0, tvOS 9.0 and OS X 10.11 and later.
Elements has full support for these annotations in Objective-C, and carries the nullability of parameters, method results and properties over into the APIs seen by Oxygene, C# and Silver. Because of this, many APIs are much more expressive and precise when building against the newer SDKs. This also means that your own code consuming these standard Cocoa APIs might need adjustment for more explicit handling of nullability, for example when overriding platform methods, or when dealing with return types.
Nullability information is available in the new SDKs' .FX files, and also when importing custom third party libraries with FXGen.
See Also
Nullable Expressions
All Elements languages allow the use of Nullable Types in standard Arithmetic and Logical Expressions and will
automatically propagate nullability to their result type. So if one element of an expression is nullable, that information will bubble up through the expression tree and the result will be nullable, too.
When using the Swift language, nullables need to be of the implicitly wrapped type (i.e.declared with !) to be used directly, or they can be unwrapped inline with ?.
Consider the following example:
var x: Int32 := 5;
var y: nullable Int32 := 10;
var z: nullable Int32;
var a := x + y + z;
Int32 x = 5;
Int32? y = 10;
Int32? z;
var a = x + y + z;
let x: Int32 = 5
let y: Int32! = 10
let z: Int32?
let a = x + y + z?;
Int32 x = 5;
Int32? y = 10;
Int32? z;
var a = x + y + z;
Dim x As Int32 = 5
Dum y As Int32? = 10
Dum z As Int32?
Dim a = x + y * z;
Both y and z are of nullable type. That means that the subexpression x + y will be promoted to be an nullable Int32 as well, it's value will be 15. Next, this value is then added to z, which is not only potentially nullable but in fact nil. Regardless of z’s value, the end result will be a nullable type again, and because z is nil, the end result, 15 + nil, is nil.
So this code declares a as a nullable Int32 (solely based on the input types of the expression) and at runtime a will evaluate to nil (because one on ifs inlut vaklues was nil)
Determining the Type of a Nullable Expression
To determine the type of an expression, the following rules are applied:
- Initially, the nullability characteristic of the operands is ignored, determining the result base type in the usual way.
- If any one of the operands is nullable, the result type will be nullable as well.
Consider the following example:
var x: Int32 := 5;
var y: nullable Double := 5.0;
var a := x + y; // 10, a will be a nullable Single
In step one, the base types of x and y (Int32 and Double) are considered to determine that the resulting expression will also be of type Double. Then, because one of the parameters (z) is nullable, the entire result is promoted to a nullable Double.
Equality of Nullable Types
The above applies to all operators with only a single important exception: equality comparisons (= and ≠ / <> / !=) always result in a not-nullable Boolean to preserve the established logic of comparing reference-based values. (Other comparison operators, i.e. <, ≤ > and ≥, will produce a nullable boolean as result if one of the operands is nullable, according to the above rules.)
For Example:
var x: Int32 := 5;
var y: nullable Int32 := 5;
var z: nullable Int32;
var a := x = y; // true, a will be a regular Boolean
var b := x = z; // false, b will be a regular Boolean
Determining the Result of a Nullable Expression
When evaluating expressions at runtime, the result will be nil, if one or both of the operands is nil; otherwise the result is the determined just as it would be for non-nullable expressions by applying the operator(s) to the respective values. It is worth noting that a single nil in a complex or nested expression will "bubble up" and turn the entire expression nil.
Examples (assuming the right-hand operator is a nullable Int32 type):
var x: Int32 := 5;
var y: nullable Int32 := 10;
var z: nullable Int32;
var a := x + z; // = nil
var b := x + y; // = 15;
var b := (x + z) * y; // = nil;
Notes
- The above rules are specific to nullable types, but do not necessarily apply to custom class based types that implement their own operators. For example, the
+ concatenation operator on Strings will preserve the original string when appending a nil string via +.
if, while and until statements will accept nullable booleans, and treat nil as false.
Result Tables
The following tables provide a matrix for how nil and Boolean values
interact.
Equality
The following rules apply to the equality (= and ≠/<>/!=)
operators:
- nil = nil =>
true
- nil = non-nil =>
false
- non-nil = nil =>
false
- non-nil = non-nil => compare value
Non-Equality
- nil ≠ nil =>
false
- nil ≠ non-nil =>
true
- non-nil ≠ nil =>
true
- non-nil ≠ non-nil => actual values are compared
Booleans
Truth table for the not / ! boolean operator
- (not
true) => false
- (not
false) => true
- (not
nil) => nil
Truth table for the and / && boolean operator
true and true => truetrue and false => falsetrue and nil => nilfalse and true => false — via Boolean Short-Circuitfalse and false => false — via Boolean Short-Circuitfalse and nil => false — via Boolean Short-Circuitnil and true => nilnil and false => falsenil and nil => nil
Truth table for the or / || boolean operator
true or true => true — via Boolean Short-Circuittrue or false => true — via [Boolean Short-Circuittrue or nil => true — via [Boolean Short-Circuitfalse or true => truefalse or false => falsefalse or nil => nilnil or true => truenil or false => nilnil or nil => nil
Truth table for the xor / ^ boolean operator
true xor true => falsetrue xor false => truetrue xor nil => nilfalse xor true => truefalse xor false => falsefalse xor nil => nilnil xor true => nil — via Boolean Short-Circuitnil xor false => nil — via Boolean Short-Circuitnil xor nil => nil — via Boolean Short-Circuit
Note: There is no XOR operator in SQL, which is where the nullable truth
tables are based on, however, "A xor B" can be expressed as "not (A and
B) and (A or B)" and the above truth table derived from that.
Truth table for the Oxygene implies boolean operator
true implies true => truetrue implies false => falsetrue implies nil => nilfalse implies true => true — via Boolean Short-Circuitfalse implies false => true — via Boolean Short-Circuitfalse implies nil => true — via Boolean Short-Circuitnil implies true => nilnil implies false => nilnil implies nil => nil
Boolean Short-Circuit
Boolean Short-Circuit evaluation is possible for the following operators if the left operand has a specific value:
-
and/&&: false => false
-
or/||: true => true
-
xor/^: nil => nil
(Note that xor/^ does not ever short-circuit for non-nullable expressions.)
All Languages
Interfaces with a single method
When Elements encounters an interface without ancestor interfaces and with a single method, it's treated as a delegate, making it possible to assign anonymous methods, method pointers and lambdas to it.
.NET
Tuples
The Oxygene and Swift Tuple types are mapped to System.Tuple<>
ISequence<T>
The ISequence<T> maps to System.Collections.Generic.IEnumerable<T>.
Java
Tuples
The Oxygene/Silver tuple types are mapped to com.remobjects.elements.system.Tuple*.
ISequence<T>
The ISequence<T> maps to System.Collections.Generic.IEnumerable<T>.
Properties
Java does not natively have the concept of properties, when Elements encounters a get/set pair with matching name and type they're treated as a property. See Property Matching
Cocoa
Tuples
The Oxygene/Silver tuple types are mapped to RemObjects.Elements.System.Tuple*.
ISequence<T>
The ISequence<T> maps to RemObjects.Elements.System.INSFastEnumeration<T>.
Properties
Cocoa does not have the concept of static properties, when Elements encounters a static get/set pair with matching name and type they're treated as a property. See Property Matching
Property Matching
Java has no built in property support but instead uses conventions, while Cocoa does support properties but only on class instances, not static ones. When the compiler here finds a matching pair it turns them into a property.
For example on Java:
class MyClass
{
void setValue(String s);
String getValue();
}
becomes accessible as a read/write instance property on the class instance.Value. Java uses a convention of "get" and "set" methods, followed by a capital letter. Cocoa uses a selector with just the property name as the getter, and setPropertyName for properties:
+(void)setValue(NSString* val);
+(NSString)value();
Like above becomes a property called Value.
Note: The original get and set methods can still be called, the property accessor is just an easier way to use this class.
When the getter or setter has more parameters they are matched and become an "indexer" property:
class Bundle
{
void setString(String key, string value);
String getString(string key);
}
This can be accessed as a read/write indexer property: instance.String["key"].
Property Notifications
Property Notifications allow your code to automatically get notifications when a certain property of a type has changed, and to react to this change with a callback.
Property notifications are provided at system level by each platform, but Elements also provides a platform-agnostic way to work with them in shared code.
Using property notifications involves three steps:
- Enabling individual properties to emit change notifications
- Subscribing to observe changes to a property
- Handling the callback when actual changes occur
Enabling Properties to Emit Change Notifications
Turning on notification for a property could not be simpler. Simply adding the [Notify] aspect to the property, or – on Oxygene – using the notify keyword instructs the compiler to emit all the necessary boiler-plate code under the hood to enable notifications when the property changes:
type
Foo = public class
public
[Notify] property MyProperty: String;
property MyProperty2: String; notify;
end;
public class Foo
{
[Notify] public String MyProperty { get;set; }
}
public class Foo {
@Notify var myProperty: String!
}
public class Foo {
@Notify public String myProperty { __get; __set; }
}
Notifications use the string value of the property name. You can optionally provide a different name to the [Notify] aspect, if you want changes to the property emit notifications under a different name.
Subscribing to Observe Changes
The easiest way to subscribe to change notifications is to use the Observer class in Elements RTL. An observer expects a target object and property name, as well as at least one Block parameter that will be called when the property changes:
var fFoo := new Foo;
var fObserver := new Observer(lFoo, "MyProperty") begin
writeLn("property changed!");
end;
var foo = new Foo()
var observer = new Observer(foo, "MyProperty") {
writeLn("property changed!");
}
let foo = Foo()
let observer = Observer(foo, "myProperty") {
writeLn("property changed!");
}
var foo = new Foo();
var observer = Observer(foo, "myProperty", () => {
writeLn("property changed!");
});
To avoid hardcoding the property name as string literal (and the potential for typos that comes with it), the nameOf() system function can be used to obtain the type-safe name of the property at compile time:
new Observer(lFoo, nameOf(lFoo.MyProperty) ...
new Observer(lFoo, nameOf(foo.MyProperty) ...
new Observer(lFoo, nameOf(foo.myProperty) ...
```
new Observer(lFoo, nameOf(foo.myProperty) ...
The block will be called after the property has been changed, this is referred to as the "did change" callback. Optionally, a "will change" callback may be provided as well; this block will be called before the property changes.
"will change" callbacks are only supported on .NET, Cocoa and the Island-backed platforms. On Java, the Observer API allows passing the second callback to maintain API compatibility, but it will never fire.
Note the that optional "will change" block is the third parameter of the Observer constructor, and comes before the (non-optional) "did change" block parameter.
Handling the Callback
Every time the property in question has changed (or will change), the appropriate callback will be fired. The property will be unchanged (i.e. have its old value) in the "will change" callback, and it will have its final new value (including any adjustments made by the property setter) in the "did change" callback.
Note that the callback(s) will still fire every time the property is set, even if its actual value might not have changed.
On .NET, Android, Java and the Island-backed platforms, the [Notify] aspect or keyword will automatically implement the INotifyPropertyChanged interface, and except on Java it will also implement INotifyPropertyChanging.
On .NET and Island, these are system-level interfaces defined in the standard .NET Framework library or Island RTL, respectively. These interfaces work very similar on both platforms, declaring a single Event member that can be subscribed to for change notifications.
On Java, INotifyPropertyChanged is defined in cooper.jar, and wraps together the Java-standard addPropertyChangeListener and removePropertyChangeListener methods, as described here.
On Cocoa, notify implements the standard Key-Value Observation infrastructure of the Objective-C runtime.
The source code for the Observer class is available on Github and provides an illustration for how the platform-specific notification subscription works.
See Also
Serialization
Elements provides a platform and language-independent infrastructure for encoding classes and structs for serialization and decoding serialized versions back into instances. The most common scenario for this is to save out the contents of objects to Json or Xml, and reading it back.
Codable Types
A custom type is marked as Codable by attaching the Encodable, Decodable or Codable aspect, defined in the RemObjects.Elements.Serialization.dll Cirrus assembly. The aspects will generate an implementation for IEncodable and IDecodable respectively that covers all properties that are Codable themselves, and not marked to be excluded from ending via [Encode(false)].
Simple type (numbers, Chars, Strings, DateTimes, Guids) and some basic collection and array types are also considered codable by defau;t.
Individual properties can optionally be marked with the Encode aspect with a string parameter, to override the name/key they will be encoded under. This is useful for mapping a type to an existing JSON or XML format that does not exactly match the local spelling convention (for example, camelCase vs PascalCase or underscored).
Individual properties can be excluded from coding by marking them with the same Encode aspect, but with Boolean false as a parameter.
Alternatively, a type can of course implement one or both of these interfaces manually. This is useful if a type's structure is vastly different from its encoded representation, or for collection types not supported natively.
type
ICodable = public IEncodable and IDecodable;
IEncodable = public interface
method Encode(aCoder: Coder);
end;
IDecodable = public interface
method Decode(aCoder: Coder);
end;
Encoders and Decoders
A codable type or tree of codable typs can be encoded or decoded using any Encoder or Decoder class. Elements RTL provides encoders for Json and Xml formats, and custom encoders can be implemented by anyone, simply by creating a class that implements the IEncoder or IDedocer interface, defined in Elements RTL.
var lJsonDecoder := new JsonDecoder();
var lUserData := lJsonDecoder.Decode<UserData>(json);
See Also
Using, IDisposable & Finalizers
The Disposable Pattern, centered around the IDisposable interface, can be used to add deterministic disposal of resources that are not managed by the platform's memory allocation system (be it the garbage collector or reference counting). This typically includes non-memory resources such as file or network handles, database connections, or operating-system-level objects such as locks, window handles, or the like. On the Island-backed platforms and on Cocoa it could also include manually allocated memory, such as from calls to malloc().
The IDisposable interface is available on an platforms, and defines a single required method, Dispose. The implied contract is that when allocating any class that implements IDisposable, the Dispose method must be called (explicitly or implicitly, more on that later) when the class is done being used.
After the call to Dispose, the instance should be considered disposed, and no further calls to its members should be performed (unless otherwise documented as safe).
The implementation of Dispose will take care of releasing any resources held by the class that might need explicit disposal.
The Using Pattern & IDisposable
A common pattern for disposing short-lived (i.e. within the scope of a single method) objects is to the using (or __using, in Swift and try in Java) statement.
A using statement combines the declaration of a local variable that's limited in scope to the statement(s) contained within the using with an automatic call to Dispose at the end.
It serves two purposes: for one, because the local variable is limited in scope, accidental calls to it after disposal are prevented. For another, using automatically checks if the instance in question actually implements IDisposable, at runtime, and if so calls it in a way that is protected from exceptions:
using s := new FileSteam(...) do begin
// work with the stream
end;
using (s = new FileSteam(...))
{
// work with the stream
}
__using s = FileSteam(...) {
// work with the stream
}
try (var s = new FileSteam(...)) {
// work with the stream
}
The using statement roughly translates to the following manual code:
var s := new FileSteam(...);
try
// work with the stream
finally
(s as IDisposable):Dispose;
end;
var s = new FileSteam(...);
try
{
// work with the stream
}
finally
{
IDisposable(s)?.Dispose();
}
let s = FileSteam(...)
defer {
(s as? IDisposable)?.Dispose()
}
// work with the stream
var s = new FileSteam(...);
try
{
// work with the stream
}
finally
{
if (s is IDisposable)
IDisposable(s).Dispose();
}
s := FileSteam { ... }
defer func () {
disposable, isDisposable := i.(sDisposable)
if (isDisposable) {
disposable.Dispose();
}
}()
// work with the stream
Finalizers
Finalizers are a secondary fall-back mechanism to free resources held by an object, if Dispose was not called properly (or if the class in question does not properly implement IDisposable). Finalizers are called when the last reference to an object is released (under ARC), or when the object is claimed by the garbage collector (under GC).
Note that under GC, the presence of finalizers adds extra cost to the deallocation and may cause instances to stay in memory longer and until a later GC cleanup than they would normally be cleaned away under. So it is always preferable to properly dispose of instances using the IDisposable pattern.
On the Cocoa platforms, including Cocoa object model classes on Island, Finalizers map to the dealloc method (or deinit, in Swift terms).
Suppressing Finalizers from Dispose
On .NET and Island, it is possible for the Dispose method to mark the current instance as disposed and forgo the overhead associated with a redundant call to the finalizer. This is achieved by calling the GC.SuppressFinalize (.NET) or Utilities.SuppressFinalize (Island) method.
Platfrom-specific Mappings
See Also
The Elements compiler supports building (compiling) projects for several different platforms.
Since Elements' main focus is to leverage the existing platforms it supports, it does not come with an extensive runtime library, class framework or a "platform" of its own – in contrast to many other "cross-platform" development tools that try to abstract platform differences under a new meta-platform.
When using Elements on .NET, Cocoa, Android and Java, the class libraries you work with are those provided by the platform vendor, as well as any free, open source or commercial third-party libraries available for the platform (RemObjects Software even creates some of those as well, independent of Elements). On the lower-level native target, you work directly against the low-level platform APIs (such as the Win32/Win64 API, or the core Linux/Unix "C" APIs), and Elements' own core RTL.
The following links dive into detail on each of the supported platforms (or platform groups):
.NET, including ASP.NET, .NET Core, and Mono
Build managed projects that can run on the Common Language Runtime (CLR), including the "full" Microsoft .NET Framework, ASP.NET, .NET Core, Silverlight, Universal Windows projects and Mono/Xamarin. It is a great platform for building Windows GUI applications, as well as cross-platform servers and command line tools.
Cocoa, for Apple's macOS, iOS, iPadOS, tvOS and watchOS
Build native applications for the Apple platforms, using the high-level Cocoa APIs and Frameworks such as AppKit or UIKit. It is the recommended target for building apps for macOS, iOS, iPadOS, tvOS and watchOS, and can also be used for building macOS command line tools and other projects.
Android, both SDK and NDK
Build applications for the Android platform, with access to both the regular Android SDK as well as the Android NDK for native extensions.
Build projects that compile to Java byte code and can run anywhere that the Java Virtual Machine (JVM) is supported, including Java SE, Java EE and the OpenJDK.
Build CPU-native Windows projects against the Win32 API. — Supports 64-bit (x64) and 32-bit (i386) Windows.
Build CPU-native Linux projects against the Linux/POSIX APIs mdash; Supports 64-bit Intel (x64_64) and both 32-bit and 64-bit ARM (armv6, aarch64).
Build WebAssembly modules that can run in the browser and interact with JavaScript code and the HTML DOM.
Elements supports many platforms, but it is decidedly focused on creating apps for multiple platforms, not single one-size-fits-all cross-platform apps. The following links dive into this distinction and cross-platform development considerations in general:

Elements can build applications for the Common Language Runtime (CLR). Most prominently this includes the Microsoft .NET Framework, but also extends to .NET Core, Universal Windows Apps (the new API layer for Windows 8, Windows 10 and Windows RT applications), Windows Phone, Silverlight and the open-source Mono framework, which brings the CLR to Mac OS X, Linux and a range of other operating systems.
The CLR is designed to be language independent, making Oxygene, RemObjects C#, and Swift, Java and Go first degree citizens next to Microsoft's Visual C# and Visual Basic.NET languages. In fact, Oxygene is the most prominent and most widely used non-Microsoft language available for .NET.
The ".NET" moniker (and the Echoes compiler back-end targeting it) covers several different implementations of the Common Language Runtime:
- .NET Core (Including .NET 5.0 and later)
- .NET Framework (.NET 4.8 and below)
- Mono
- Xamarin
- Compact Framework (deprecated)
- Silverlight (deprecated & Visual Studio 2015 only)
Note that while still being supported for a long time, the current version 4.8 makes the last version of the traditional "Desktop" .NET Framework, and will be superseded by version 5.0 of the .NET Core runtime, as of Fall of 2020. It is recommended to use .NET Core rather than classic .NET for new projects.
Additional Topics
Framework and Technologies
On top of .NET and the CLR, a wide variety of technologies are available for building great applications. .NET comes with an extensive Framework Class Library (FCL) of over 10,000 classes and types that are instantly usable from Oxygene and RemObjects C#, not to mention a wide range of open source and commercial third party libraries that are available and work seamlessly with any CLR language, including Oxygene and RemObjects C#. (RemObjects Software even provides a few of its own, such as Data Abstract.)
Depending on your target platform, the CLR provides a choice of GUI frameworks for creating powerful native applications, including WPF and WinForms for Windows Desktop apps, XAML for WinRT/Metro and Windows Phone apps, and XAML/Silverlight for creating plugin-based web apps. Oxygene supports all of these frameworks and their toolchains natively and out of the box.
On top of that, the .NET Framework also contains classes for just about any business need, from internet communication to working with XML files, from database access to encryption, and so on.
Compiler Back-ends
.NET Core is the next generation of the Common Language Runtime from Microsoft, and will replace the classic ".NET Framework 4.8" runtime with version 5.0 and later as of Fall of 2020,
.NET Core is fully open source and supported on Windows, macOS and Linux. Elements fully supports creating projects for all parts of the .NET Core ecosystem.
An Elements project is determined to target the .NET Core runtime if its "Target Framework" Project Setting is set to a value starting with the ".NETCore", optionally followed by a version number, of if it set to .NET or .NETFramework and the explicit version number is equal or higher than 5.0.
Versions
.NET Core comes in different SDK versions, which can be installed in parallel on the same system. Projects will always target a specific SDK version – by default the newest SDK version installed on the build system.
You can select a different version of .NET Core to target with your project by setting the "Target Framework" project setting to a concrete number, e.g. ".NETCore3.0" instead of just ".NETCore"
Runtimes
.NET Core supports three different runtimes:
Microsoft.NETCore.AppMicrosoft.ASPNETCore.AppMicrosoft.WindowsDesktop.App
The first two runtimes are truly cross-platform and available everywhere .NET Core runs, including Windows, macOS and Linux. The first runtime is used for general application projects – from console applications to services and server tools, while the second one is used for web applications using the ASP.NET Core web frameworks.
The Microsoft.WindowsDesktop.App runtime is only available on Windows, and can be used to build GUI applications using WinForms and WPF. It is the closest analogue to the soon-to-be-deprecated classic .NET Framework 4.x.
Elements supports building projects targeting Microsoft.WindowsDesktop.App in Fire on Mac, but you will not be able to run them.
Runtime Versions and SDKs
You can select a specific runtime version to target, by changing the "Runtime Version (.NET Core)" setting, but typically it is recommended to leave this setting alone and let the build chain pick the appropriate runtime version based on the selected "Target Framework" setting.
.NET Core comes with various SDKs. You can explicitly pick an SDK and version by changing the "SDK (.NET Core)" and "SDK Version (.NET Core)" settings, but once again it is recommended to leave these set to empty/default and let the build chain choose the appropriate SDK and version (based on the selected Runtime).
References
Different than on the classic .NET Framework, all system references are not represented by direct references to .dlls such as mscorlib.dll, System.dll or the like. Instead, system references are provided by a system NuGet Package. Which base package is appropriate depends on the selected runtime and version, and the build chain will add the correct reference automatically, shown in the IDE as "Implicit".
Your projects will only need explicit references to non-standard, optional NuGet Packages or local .NET Core or .NET Standard .dlls that your project might need.
Executables
Different than the classic .NET Framework, .NET Core application projects with an output type of Excutable or WinExe do no compile to an .exe file that contains IL code (and could be run directly on Windows). Instead, they compile to a .dll that contains the IL code and a platform-specific CPU-native stub binary (.exe on Windows, and extension-less on Mac and Linux) that can be run directly locally, whether you are building on Windows, Mac or Linux.
Compiler Back-ends
The "Classic" .NET Framework refers to versions 4.8 and earlier of the standard Microsoft .NET Runtime that ships with Windows, and is not based on .NET Core. .NET Framework 4.8 is tha last version of this runtime that was shipped, and .NET 5.0 and later are based on .NET Core instead.
An Elements project is determined to target the .NET Core runtime if its "Target Framework" Project Setting is set to a value starting with the ".NET" pr ".NETFramework", optionally followed by a version number that ius 4.8 or lower..
Versions
Between 2000 and 2020, Several versions of the .NET Framework ships. By default, new projects target the latest version installed on the development machine.
The following versions of the Classic .NE Framework exist. Elements supports compiling for .NET Framework version 2.0 and higher, although some language features will require version 4.0 or higher.
- 4.8
- 4.7.x
- 4.6.x
- 4.5
- 4.0
- 3.5
- 2.0
- 1.1
- 1.0
You can select a different version of .NET Core to target with your project by setting the "Target Framework" project setting to a concrete number, e.g. ".NETFramework4.5" instead of just ".NETFRamework".
In lieu of a "Target Framework" setting, the legacy "Target Framework Version" setting might also be used to specify a version.
Compiler Back-ends
Elements comes with integrated support for debugging for .NET, .NET Core and Mono projects. Debugging for most project types is supported locally on Mac and Windows, from Fire, Water and Visual Studio.
Note: The (classic) .NET Framework is only available on Windows. When using Fire on a Mac, .NET projects will always be run under the Mono runtime. When using Water on Windows, you can choose whether to use Microsoft's Common Language Runtime or (if installed) the Mono runtime to debug your .NET projects. (Debugging from Visual Studio will always use Microsoft's Common Language Runtime implementation.)
.NET Core projects will use the .NET Core runtime (which might require a separate install), on all platforms.
Also note that not all .NET project types can be run on non-Windows platforms. For example, Support for WPF and WinForms is not available or severely limited on macOS and Linux.
Read more about:
Potentially additional Setup
See Also
To run and debug .NET Core projects, you need to have the .NET Core runtime installed. You can typically check if .NET Core is installed by running the dotnet command in Terminal/Command Prompt.
The IDEs will automatically find the installed .NET Core runtime in its default location. The following topics will help you set up .NET Core, if needed.
Launching
The IDEs will automatically take care of launching your project via the dotnet runtime environment.
Debugging
Once your your application is launched, you can debug your code the same as you would any other project. For example, you can set Breakpoints to pause execution when a certain part of your code is hit, and you will automatically "break" into the debugger, if any Exception occurs.
See Also
To run and debug ASP.NET Core projects, you need to have the .NET Core runtime installed. You can typically check if .NET Core is installed by running the dotnet command in Terminal/Command Prompt.
The IDEs will automatically find the installed .NET Core runtime in its default location. The following topics will help you set up .NET Core, if needed.
Launching
Fire and Water provide extra support to assist especially with ASP.NET Core debugging.
When launching your project, the IDE looks for a file called launchSettings.json and uses its content for determining the best course of action for launching.
In particular, it will look at several values from the first "profile" entry with a commandName of "Project". The environment variables specified in this json block will be passed to the debugged process, in addition to those specified in the Environment Variables Manager.
One or more application URLs can be specified (as semicolon-separted list), and they will also be passed to the process, and determine on which ports and under which protocols the web server will launch. Note that running the server as secure HTTPS might need some additional setup in the project, see Enforce HTTPS in ASP.NET Core in Microsoft's documentation for .NET Core.
On first launch, Fire or Water will also automatically offer to launch the URL provided in launchUrl in the default browser, if the launchBrowser setting is true. If launchUrl is a relative path, it will be appended to the first URL in applicationUrl.
On subsequent restarts (within the same IDE session), this will be skipped, to avoid opening many redundant browser tabs or windows.
"profiles": {
...,
"WebApplication1": {
"commandName": "Project",
"launchBrowser": true,
"launchUrl": "weatherforecast",
"applicationUrl": "https://localhost:5000;http://localhost:5001",
"environmentVariables": {
"ASPNETCORE_ENVIRONMENT": "Development"
}
}
Note that in addition to the above steps, the debugger is hardwired to always provide the ASPNETCORE_ENVIRONMENT=Development environment variable, whether provided in launchSettings.json or not.
Debugging
Once your your ASP.NET Core application is launched, you can debug your code the same as you would any other project. For example, you can set Breakpoints to pause execution when a certain part of your code is hit, and you will automatically "break" into the debugger, if any Exception occurs.
Note that as a server project, ASP.NET Core projects run headless, and provide no direct user interface (aside from informational messages in the Debug Console. You will test your application by interacting with it from a web browser window, or a separate client application that would make requests to it.
See Also
On Windows, (non-Core) .NET projects by default will run on Microsoft's Common Language Runtime (CLR), which ships preinstalled with every version of Windows since Windows XP Service Pack 2.
No additional setup steps should be needed on most systems, but you can install additional, older or newer versions of the .NET Runtime and the CLR, as needed. The latest (and last) version of the CLR is .NET Framework 4.8.
The IDEs will automatically find the best installed version of the CLR for you.
Note that on Mac, debugging always uses the Mono Runtime, instead.
Launching
Both Water and Visual Studio will automatically use the Common Language runtime for launching (non-Core) .NET projects on Windows. (In Water, you can choose between using Microsoft's Common Language Runtime or Mono, by setting the Debug Engine in Project Settings to CLR (the default) instead of Mono.)
Debugging
Once your your application is launched, you can debug your code the same as you would any other project. For example, you can set Breakpoints to pause execution when a certain part of your code is hit, and you will automatically "break" into the debugger, if any Exception occurs.
See Also
To run and debug .NET projects on Mac, or to explicitly test against the Mono runtime on Windows, you need to have the Mono runtime installed. You can typically check if Mono is installed by running the mono command in Terminal/Command Prompt.
With a default installation, the IDEs will usually find the Mono runtime automatically, but the following topics will help you set up Mono or point your IDE to a custom Mono install:
Launching
Fire will automatically use the Mono runtime for launching (non-Core) .NET projects on the Mac. In Water, you can choose between using Mono or Microsoft's Common Language Runtime (the default), by setting the Debug Engine in Project Settings to Mono instead of CLR.
Debugging with the Mono runtime is not supported from Visual Studio.
Debugging
Once your your application is launched, you can debug your code the same as you would any other project. For example, you can set Breakpoints to pause execution when a certain part of your code is hit, and you will automatically "break" into the debugger, if any Exception occurs.
See Also
This section collects information about deploying applications created with the .NET edition of Elements, in various scenarios.
Elements allows you to create a NuGet Package from your project, to deploy a class library for use by other members of your team or the general public.
To have your project build to a NuGet Package (a zip file with the .nupkg extension), simple enable the "Create NuGet Package" option in Project Settings.
The Create NuGet Package option is only available on project level (not per individual Target), and that is because the a package is always built from the entire project and combines all (potential) Targets into one.
In order to qualify for a NuGet package, the project must be
- Single-target (the norm) or Multi-target.
- Every target must be a .NET (Echoes) project (for now).
- Every target must have have an
OutputType of "Library".
If these criteria are not met, the project build will fail with an error.
Configuring The NuGet Package
Once the Create NuGet Package option is set to True/YES, additional settings can be used to configure your package:
- PackageName – the name (and "ID") of your package. Defaults to the AssemblyName/BinaryName
- PackageVersion – the version of your package. Defaults to the AssemblyVersion, if set.
- PackageAuthors – a human-readable string that describes the author(s) of the package
- PackageTags – a list of tags to heklp users find your package
- PackageProjectUrl – URL to a public website that describes the package or the product/project it is part of.
- PackageIconUrl – URL tom a public icon image for your package.
- PackageLicenseUrl – URL to a public web page that shows the license for yur package.
- PackageDescription – a human-readable description of your package.
- PackageReadMe – a Markdown (.md) file that is aprt fo your project and provides a mlore detailed description of the package.
Note that all the produced URLs are merely informational, and will be included as part of the packages metadata. They will not be downloaded/accessed during build. All values are optional, but you will want to make sure you set a valid PackageVersion.
If no PackageVersion or AssemblyVersion is set, EBuild will obtain the assembly version from the main deliverable of the first target – assuming that a version has been set by other means, such as the [AssenblyVersion] attribute, or otherwise fall back to 0.0.0
Multi-Target Packages
As mentioned above, a multi-target project can be built into a single NuGet package, providing a unified distribution of a library for different .NET Target Frameworks (such as Classic, .NET Core, or .NET Standard).
For this to work, each target must have a unique target platform name and/or version. For example, yu might have three targets, with TargetFramework set to .NET 4.8, .NETCore 7.0 and .NET Standard 2.1 (for instance).
You could also have targets for different versions of the same TargetFramework, for example .NET Core 3.0, .NET Core 5.0 and .NET Core 7.0.
During build, EBuild will compile each target individually, as it always does. When it comes to packaging, it will then combine the output of all Targets into the single package, with the .nuspec XML file containing metadata (such as dependencies) for all targets, and each targets built output going into a unique folder within the package structure, named after its TargetFramework.

There are essentially two options for deploying ASP.NET websites created
with Oxygene or Swift to a server: Installing the Elements compiler on the server, or deploying the website as pre-compiled .dll(s).
Installing Elements On the Server
If you simply upload your website to the server and try to access it,
you will most likely be greeted by an error message stating that
"'Oxygene' is not a supported language" or "'Silver' is not a supported language".
This is somewhat expected, as a copy of the Elements compiler is required
on the server in order to compile the .pas or .swift files and the snippets inside
your .aspx files, as needed. There are two ways to achieve this:
Running the Elements Compiler Setup
If your ISP gives you the ability to run and install custom software, the easiest and quickest way to get Oxygene installed is to use the Oxygene installer and uncheck all options. This will install all the binaries required to use Oxygene or Swift with ASP.NET, and it will register the Elements compiler with the global machine.config file so that ASP.NET can find it.
After installation, your Oxygene- or Swift-based ASP.NET website should "just work".
Deploying the Elements Compiler as Part of Your Website
Alternatively, you can also upload the Elements compiler to your web space as part of your website. This comes in handy when using an ISP that does not let you run custom installers, for example when using a shared server. This method of deployment can also be helpful if you want to use different versions of the compiler for different websites on the same server (for example to test a new version of your site, which might leverage newer features, without affecting other sites on the same server).
You can even combine the two deployment methods — install a global copy of the compiler using the command line installer, which will be used by default, and configure individual websites to use a different version, deployed as part of the individual site.
There are two simple steps involved in deploying the Elements compiler as part of your website:
One, deploy the following .dll files (which can be found in the
.\Bin folder of your local Elements install) to the ./Bin folder of
your .ASP.NET web site:
RemObjects.Oxygene.dllRemObjects.Oxygene.AspAppDomainHelper.dllRemObjects.Oxygene.Code.dllRemObjects.Oxygene.Echoes.dllRemObjects.Oxygene.Tools.dllRemObjects.Elements.Cirrus.dll-
Echoes.dll — Only on .NET 4.0, and only
required if you use types.
These .dlls would simply go next to any custom or third-party assemblies
your website might already be using.
Two, add the following compiler section to your Web.config file
in the root of your web site, where you replace "1.0.0.0" with the exact
version of Elements you are deploying (for example "8.0.81.1667", for the
December 2014 release). If you don't have a
Web.config file yet, you can create a new one with full snippet below:
<?xml version="1.0" encoding="UTF-8"?>
<configuration>
<system.codedom>
<compilers>
<compiler language="Oxygene"
extension=".pas"
type="RemObjects.Oxygene.CodeDom.OxygeneCodeProvider, RemObjects.Oxygene.Tools, Version=1.0.0.0, Culture=neutral, PublicKeyToken=3df3cad1b7aa5098" />
<compiler language="Silver"
extension=".swift"
type="RemObjects.Elements.CodeDom.SilverCodeProvider, RemObjects.Oxygene.Tools, Version=1.0.0.0, Culture=neutral, PublicKeyToken=3df3cad1b7aa5098" />
</compilers>
</system.codedom>
</configuration>
Pre-Compiled Deployment
Another way to deploy your project is precompiled into .dlls. Because all the compilation happens on your development machine and no .pas files will need to be updated on the server, this option does not require the compiler to be present on the server machine at all. You can simply upload your .dlls, and your website is good to go.
The Framework Class Library (FCL) is the standard set of types required to run .NET applications and is included with the .NET framework.
These types are spread over several assemblies and in different namespaces. The most important namespace is the System namespace, which contains the classes for base types like Int32, Int64, Double, String and Char. The System.Collections and System.Collections.Generic namespaces contain structures like lists and dictionaries, which are essential for application development.
Other namespaces include the System.IO for reading and writing to files and other streams, System.Net for socket support or System.Reflection for reading and generating assemblies on the fly, and so on.
External Links
The Further Reading section collects topics on various concepts and technologies that are relevant to the .NET platform, but beyond the scope of being covered exhaustively on this documentation site, because they are not specific enough to Elements.
The topics are provided because other pages on this site refer to them, and generally, the topics will provide a short summary or overview of the concept or technology, and then provide pointers to external places that explore the matter in more detail.
Topics are listed in alphabetical order.
Also on This Site
Platform-Relevant Topics Elsewhere on this site:
P/Invoke is a technology part of the .NET runtime
that allows managed code to interact with platform-native libraries such
as Win32 APIs or custom libraries written in languages such as C.
Elements supports P/Invoke via the external (Oxygene), extern (C#) and __external (Swift) keywords and
DllImport attribute.
See Also
.NET projects can choose to export individual static methods to be available as standard native .dll entry points that can be accessed by unmanaged code such as C/C++ or Island/Windows, by applying the UnmanagedExport aspect.
Unmanaged Exports are a feature provided by the Elements compiler.
See Also
While as a managed platform code on .NET is normally inherently type safe, a special Unsafe Code option can be enabled to allow the writing of code that can do more direct (and unsafe) operations, such as direct memory manipulation via pointers.
Here, "Unsafe" means that the code cannot be verified by the runtime, ands thus could lead to more severe crashes than regular code. For this reason, unsafe code may not be allowed in all execution contexts (such as for example for code hosted in SQL Server, or when running apps from a network drive). Unsafe code does not have any other speed or runtime consequences.
In order to use unsafe code, the "Allow Unsafe Code" Compiler Option need to be enabled and each method that uses unsafe code must be marked with the unsafe modifier, available in Oxygene and C#.
In C#, the unsafe keyword is also required on the class itself, if it contains fields or properties of unsafe (e.g. pointer) types. In Oxygene, this is not required.
Alternatively, the "Allow Unsafe Code Implicitly" Compiler Option can be set, for a project to enable unsafe code everywhere, without marking individual types or methods with the unsafe keyword. This is recommended only for projectds that use a vast amount of unsafe code though-out.
To use unsafe code, apply the unsafe keyword:
type
MyClass = public class
private
fData: ^Byte;
public
method WorkWithData; unsafe;
begin
fData^ := fData^ + 1;
end;
end;
public unsafe class MyClass
{
private byte *data;
public unsafe void WorkWithData()
{
*data = (*data)+1;
}
}
Support for unsafe code is currently only available in Oxygene and C#.
See Also

Elements lets you create applications for the Apple platform – macOS, iOS, iPadOS, tvOS and watchOS – using the Cocoa frameworks and the Objective-C runtime as well as native Island APIs.
Elements ships with a wide range of templates to help you get started with your projects for all of Apple's operating systems. You can Debug your applications locally on your Mac or device, or remotely (when developing on Windows in Water or Visual Stuidio).
See below for links to help you get set up for Cocoa development.
Toffee vs. Island
The Elements compiler has two compiler back-ends that support building Cocoa projects.
-
The Toffee compiler is the current default back-end for Cocoa projects, and it directly and exclusively targets the Objective-C runtime that is the backbone of Apple's platforms. Binaries compiled with Toffee will be virtually indistinguishable from those created with Apple's Clang compiler for Objective-C.
-
The Island/Darwin back-end allows you to mix Objective-C code with Elements' own object model (shared between all the Island-backed platforms) as well as (in the near future) the new Swift object model.
You can read more about the two back-ends, and which one is the right choice for you, in the Toffee vs. Island/Darwin topic. If in doubt, use the default Toffee backend.
Supported SDK Versions
Elements for Cocoa is designed to be able to work with any version of Apple's SDKs. The product ships with support for the SDKs that are officially released at the time an Elements release RTMs, but pending any drastic and unexpected changes to the tool chain for Apple's SDKs, you can import newer or beta SDKs using the FXGen tool that is included in the product, even if we have not gotten around to supporting them officially yet.
We usually do try to support new SDK versions, including Betas, within days, and when we do, Elements will download them for you automatically, even without you having to install a new version. You can also manually download SDKs here.
You can also download older SDK versions that shipped with the product, from the URL above, in case you need to work directly with older Xcode versions. However, we generally do recommend using the latest shipping version of the SDKs, and leverage Deployment Targets in order to keep your apps running on older OS versions.
Getting Set Up
In addition to Elements itself, you also need a Mac with Xcode installed. Please follow the links below top learn how to get set up, if you're not familiar with the Apple tool chain:
If you work in Water of Visual Studio on Windows, some build phases will run remotely over the network, on a Mac:
Additional Topics
External Resources
These external links point to great resources on Cocoa development (not specific to, but applicable to Elements) across the web:
Compiler Back-ends
The Cocoa platform is now represented by four separate flavors, or sub-platforms, with the macOS, iOS/iPadOS, tvOS, visionOS, watchOS and SDKs. Each SDK is made up of individual libraries usually referred to as "Frameworks".
On the Objective-C side, each framework is a bundle with the .framework extension that contains both binary (.dylib, which is comparable to .dll on Windows) and Objective-C header files. For Elements, each framework in the SDK is represented by a .fx file that aggregates all the metadata from the headers to make them easier and faster for the Elements compiler to consume.
Elements comes with pre-created .fx files for all frameworks in the standard Apple SDKs that ship with the latest versions of the four SDKs (as well as for select older versions).
You can find a complete list of all frameworks in the lists below. You will see that many of the frameworks are shared by some or even all SDKs, providing a vast library of classes that let you write code that can be compiled for and shared between all sub-platforms, while each SDK also provides a significant number of frameworks that are platform-specific.
Let's have a look at some of these frameworks in more detail.
Foundation
Probably the most critical framework for any Cocoa app is the Foundation framework, because — as the name implies — it provides much of the foundation classes that make up an application on the Objective-C runtime. This includes most of the standard classes with NS* prefixes (aside from GUI classes, more on that below), from simple and essential types such as NSString, NSArray and the like, to classes that provide access to core OS services, such as NSFileManager for disk access, NSNotificationCenter for working with notifications, NSURL* classes to work with network requests, and many many more.
Read more at about Foundation.fx. It is available on all Cocoa sub-platforms.
User Interfaces: AppKit vs. UIKit vs. WatchKit.
The similarities between the iOS, watchOS, tvOS and macOS SDKs dissipate as we enter the realm of user interface development — and for good reason, as the UI for applications on these platforms is vastly different. For this reason, the SDKs provide three very distinct frameworks:
AppKit is included in the macOS SDK only, and provides all the classes and controls you need for creating Mac applications. For legacy reasons, most of these classes share a common naming prefix with Foundation and start with NS*, and classes you will be working with include NSWindow, NSButton, NSTableView and the like.
UIKit is the framework that both iOS and tvOS use to provide their UIs, and its classes start with a UI* prefix. Many concepts are shared by AppKit and UIKit, but the classes are different &mdash some more than others. For example, both frameworks have a class to represent color (NSColor and UIColor, respectively) that work very similarly, while other concepts are pretty unique to UIKit, such as its use of predefined controllers like UINavigationController and UITabBarController. UIKit also has differences (some minor, some very significant) between iOS and tvOS.
WatchKit, finally, is used by watchOS to build UI for the Apple Watch in terms of Apps, Glances and Notifications. (There is also ClockKit for building watch face Complications.) WatchKit uses a different and more simple approach for UI design than UIKit.
The different frameworks force the developer to rethink and design their application UI from the ground up, but that is a good thing, because the UI paradigms on each platform are fundamentally different, with UIKit being largely driven by touch (both direct and via the Siri Remote on Apple TV) and AppKit being used for more traditional mouse+keyboard style interaction.
But a lot of the concepts behind the frameworks are similar, and you will find that learning to create applications on one will in many cases translate easily to the other. For example, all three frameworks embrace the Model-View-Controller paradigm for separating the actual UI from the "controller" class that drives it. This becomes apparent the moment you start creating your first UI, because rather than implementing your own Window or View class (due to the single-window nature of iOS, UIKit applications think mostly in terms of views, not windows) in code as you would in .NET or Delphi, you implement a Window (or View) ''Controller''.
Other topics on this docs site, such as the Working with XIB Files article discuss these concepts in more detail.
Read more at about AppKit.fx, UIKit.fx and WatchKit.fx.
Note: A Cocoa.framework (and matching Cocoa.fx) exists in the macOS SDK. This framework is merely a bundle of Foundation and AppKit. It is not to be confused with our general use of the term "Cocoa" to refer to the entire platform.
More Specific UI Frameworks
Both SDKs contain additional frameworks that build on top of AppKit and UIKit to provide access to more advanced or specific UI elements.
For example:
- The macOS, iOS and watchOS SDKs contain MapKit, which provides classes to integrate Apple Maps into your application, both to show maps, and to work with geographical data. (MapKit also works together tightly with CoreLocation, covered below.)
- Both iOS and macOS contain the new Social framework that lets your application show UI for sharing content on Twitter, Facebook, Sina Weibo and other social networks.
- iOS provides the MessageUI framework for interacting with email and letting the user send emails straight from your application.
- SpriteKit, new in both iOS 7.0 and OS X 10.9 and SceneKit (new in OS X 10.9 and also in iOS as of version 8.0) makes it easier to create great game UI.
System Services
There are also a bunch of frameworks that let your application interact with system services, such as:
- StoreKit to handle in-app purchases for iOS and Mac App Store apps.
- Security to access the system key chain, store and retrieve passwords and certificates, etc.
- CoreLocation to work with GPS (and Wifi-based location services).
- CoreAudio and CoreVideo to work with and play audio and video media.
- Addressbook and EventKit to work with users' Contacts and Calendars (alongside EventKitUI on iOS).
- GameKit to integrate your games with Game Center.
(all shared between all platforms) and more.
Lower-level Frameworks
If you want to go beyond just AppKit/UIKit for your user interface development, both SDKs also provide frameworks that let you get your hands dirtier and work with the UI on lower levels.
- CoreGraphics is the foundation of all graphics rendering in the core UI frameworks, and you can and will work with it when creating your own custom controls.
- QuartzCore contains ''CoreAnimation'', the library that provides sophisticated yet easy access to adding animation to your applications — a must for any modern iOS and Mac app.
- GLKit lets you add OpenGL based elements to your UIKit/AppKit applications, while the lower-level OpenGL (macOS) and OpenGLES (iOS and tvOS) frameworks give you full access to the raw OpenGL APIs.
rtl.fx, libToffee.fx, libSwift.fx
In addition to the core SDK frameworks, Elements provides three additional .fx files that are crucial to its operation.
rtl.fx is even more fundamental than the Foundation framework, and contains all the low-level C-style APIs that make up the core UNIX system of macOS, iOS, watchOS and tvOS; it also contains libraries such as Grand Central Dispatch and CommonCrypto. Essentially, rtl.fx represents most of the headers in /usr/include.libToffee.fx contains helper types that are crucial to the Elements compiler itself. For example, it contains internal support for Future Types, generic NSArray<T> and NSDictionary<T> types, LINQ support, and more.libSwift.fx provides additional types and functions specific to the Swift language.
Any Cocoa application will automatically reference rtl.fx, whether it is explicitly listed in the References or not. References to libToffee.fx and libSwift.fx are optional; the compiler will warn/error if features are used that require a reference to libToffee.fx or libSwift.fx and they are not referenced.
(All projects created from templates will automatically reference libToffee.fx by default; all Swift templates also reference libSwift.fx.)
The following lists the frameworks that are part of the tvOS SDK as of version 13.0.
- AVFoundation.AVFAudio
- AVFoundation
- AVKit
- Accelerate
- Accelerate.vImage
- Accelerate.vecLib
- AdSupport
- AudioToolbox
- AudioUnit
- AuthenticationServices
- BackgroundTasks
- CFNetwork
- CloudKit
- CoreAudio
- CoreAudioTypes
- CoreBluetooth
- CoreData
- CoreFoundation — Lower-level C System APIs
- CoreGraphics
- CoreImage
- CoreLocation
- CoreML
- CoreMedia
- CoreServices
- CoreSpotlight
- CoreText
- CoreVideo
- CryptoTokenKit
- DeviceCheck
- ExternalAccessory
- Foundation — Base library of the standard
NS* classes shared with all Cocoa SDKs
- GLKit
- GameController
- GameKit
- GameplayKit
- HomeKit
- IOSurface
- ImageIO
- JavaScriptCore
- MapKit
- MediaAccessibility
- MediaPlayer
- MediaToolbox
- Metal
- MetalKit
- MetricKit
- MobileCoreServices
- ModelIO
- MultipeerConnectivity
- NaturalLanguage
- Network
- OpenAL
- OpenGLES
- Photos
- PhotosUI
- QuartzCore
- ReplayKit
- SceneKit
- Security
- SoundAnalysis
- SpriteKit
- StoreKit
- SwiftUI (not supported yet)
- SystemConfiguration
- TVMLKit
- TVServices
- TVUIKit
- UIKit
- UserNotifications
- VideoSubscriberAccount
- VideoToolbox
- Vision
- UIKit — The core framework for creating iOS, watchOS and tvOS user interfaces
- rtl — The base C run-time library (
/usr/include) and Elements' own base types
- libToffee — Helper types for Elements compiler features
- libSwift — Helper types for the Swift language
See Also
The following lists the frameworks that are part of the watchOS SDK as of version 6.0.
- AVFoundation.AVFAudio
- AVFoundation
- Accelerate
- Accelerate.vImage
- Accelerate.vecLib
- AuthenticationServices
- ClockKit — Classes for creating custom watch face Complications
- CloudKit
- Contacts
- CoreAudio
- CoreAudioTypes
- CoreBluetooth
- CoreData
- CoreFoundation — Lower-level C System APIs
- CoreGraphics
- CoreLocation
- CoreML
- CoreMedia
- CoreMotion
- CoreServices
- CoreText
- CoreVideo
- EventKit
-
Foundation — Base library of
the standard
NS* classes shared with the iOS and OS X SDK frameworks
- GameKit
- HealthKit
- HomeKit
- ImageIO
- Intents
- MapKit
- MediaPlayer
- MobileCoreServices
- NaturalLanguage
- Network
- PassKit
- PushKit
- SceneKit
- Security
- SoundAnalysis
- SpriteKit
- SwiftUI (not supported yet)
- UIKit
- UserNotifications
- WatchConnectivity
- WatchKit — The core framework for watchOS user interfaces
- rtl — The base C run-time library (
/usr/include) and Elements' own base types
- libToffee — Helper types for Elements compiler features
- libSwift — Helper types for the Swift language
See Also
rtl.fx is the Reference file for the C base library used by the Cocoa platform. It contains many basic functions and C APIs used and needed by Cocoa apps and by the more advanced Cocoa frameworks, such as Foundation.fx, et al.
The types and functions provided by rtl.fx are exposed in the rtl Namespace and its sub-namespaces. Every Cocoa project automatically references rtl.fx, and the rtl namespace is automatically in scope in all source files, so that its members can commonly be accessed directly and without namespace prefix.
Note: rtl.fx has no exact matching static library .a file or .framework file. Instead, it represents code from a variety of base libraries that are linked into every Cocoa project and are part of the core OS X and iOS operating systems.
libToffee.fx and its matching libToffee.a static library is an optional Toffee Base Library provided by the Elements compiler to facilitate some advanced language and compiler features.
It contains helper types that are crucial to the Elements compiler itself, such as internal support for Oxygene Future Types, generic versions of the NSArray<T> and NSDictionary<T> classes, extension methods to enable LINQ support, and more.
Source code for libToffee.fx is available on GitHub, with contributions being welcome.
Unlike rtl.fx, libToffee.fx is not automatically referenced by the Elements compiler, but new Cocoa projects created from templates will have the reference. The compiler will emit appropriate warnings if your code uses features that require libToffee.fx and it is not referenced.
See Also
'Foundation.fx' is probably the most critical framework for any Cocoa app, because — as the name implies — it provides much of the foundation classes that make up an application on the Objective-C runtime. This includes most of the standard classes with NS* prefixes (aside from Mac GUI classes in AppKit.fx), from simple and essential types such as NSString, NSArray and the like to classes that provide access to core OS services, such as NSFileManager for disk access, NSNotificationCenter for working with notifications, NSURL* classes to work with network requests, and many many more.
Foundation is one of the frameworks shared between iOS and Mac OS X, and you will find that the vast majority of its content is identical on both platforms. This means that any code you write with those classes can, most likely, be shared in applications for both. This comes in handy if you are creating an app with both Mac and iOS versions, as much of the non-visual, back-end code can be shared.
There are, however, also platform-specific classes in Foundation. For example, the NSUserNotificationCenter class, new since OS X 10.8 Mountain Lion, which lets your application interact with the notification center UI, is available on the OS X SDK only, as are the NSXML* classes that provide an extensive library for working with XML files.
All types from Foundation.fx are exposed in the Foundation Namespace.
Note: A Cocoa.framework (and matching .fx) exists in the OS X SDK. This framework is merely a bundle of Foundation and AppKit, and not to be confused with our general use of the term "Cocoa" to refer to the entire platform.
External Links
You can find the complete documentation of the Foundation framework here:
See Also
UIKit.fx is the framework that provides the basic building blocks for user interfaces on iOS and tvOS. Its classes start with a UI* prefix.
Many concepts are shared by UIKit and its counterpart on Mac, AppKit.fx, but the classes are different &mdash some more than others. For example, both frameworks have a class to represent color that work very similarly, NSColor and UIColor, respectively, while other concepts are pretty unique to UIKit, such as its use of predefined controllers like UINavigationController and UITabBarController.
UIKit has differences (some minor, some very significant) between iOS and tvOS, but in general follows the same principles on both sub-platforms.
All types from UIKit.fx are exposed in the UIKit Namespace.
External Links
Some recommended topics in Apple's excellent documentation are:
See Also
AppKit.fx is included in the OS X SDK only, and provides all the classes and visual controls you need for creating Mac GUI applications. It is not available for iOS, watchOS or tvOS.
For legacy reasons, most of these classes share a common naming prefix with Foundation and start with NS*. Classes you will be working with include NSWindow, NSButton, NSTableView and the like.
All types from AppKit.fx are exposed in the AppKit Namespace.
Note: A Cocoa.framework (and matching .fx) exists in the OS X SDK. This framework is merely a bundle of Foundation and AppKit, and not to be confused with our general use of the term "Cocoa" to refer to the entire platform. Your projects can choose to either reference Cocoa.fx or Foundation.fx and AppKit.fx individually – the end result is the same.
External Links
Some recommended topics in Apple's excellent documentation are:
See Also
WatchKit.fx is the framework that provides the classes for building the UI for Apps, Glances and Notifications on watchOS. Its UI classes start with a WKInterface* prefix.
All types from WatchKit.fx are exposed in the WatchKit Namespace.
See the Your First watchOS App with Fire tutorial for getting started with Apple Watch development.
Working with watchOS requires Elements 8.2 or later and is currently supported only in Fire.
External Links
Some recommended topics in Apple's excellent documentation are:
See Also
The macOS SDK (formerly "OS X SDK") provides all the types and classes made available by Apple for creating applications and other projects for the Mac.
Each Cocoa SDK is spread over several frameworks and core include files. The core C APIs are located in rtl.fx, which is a package containing pretty much everything defined in /usr/include. The base framework of core Cocoa classes is called "Foundation" (shared with macOS), and contains, among many other things, NSObject, the base type for all Cocoa classes.
More frameworks are shared across sub-platforms, while each sub-platform also provides its own unique frameworks.
Please refer to the Introduction to the Frameworks topic for more information on how the frameworks fit together, and how they differ between the (currently) four separate Cocoa platforms.
For all the SDK frameworks, the Namespace used matches the framework name.
macOS is the oldest of the four platforms, and the ancestor of iOS (and iOS's watchOS and tvOS siblings). As such, it shares many of the lower-level non-UI frameworks with those platforms, but provides its own paradigms for GUI development, in AppKit and related frameworks.
In addition to the macOS SDK, you can also build applications for the Mac using the [iOS]((iOS) SDK, with Mac Catatyst.
See Also
macOS — iOS — tvOS — visionOS — watchOS — Mac Catatyst
The iOS SDK provides all the types and classes made available by Apple for creating applications for iPhone, iPad and iPod touch.
Each Cocoa SDK is spread over several frameworks and core include files. The core C APIs are located in rtl.fx, which is a package containing pretty much everything defined in /usr/include. The base framework of core Cocoa classes is called "Foundation" (shared with macOS), and contains, among many other things, NSObject, the base type for all Cocoa classes.
More frameworks are shared across sub-platforms, while each sub-platform also provides its own unique frameworks.
Please refer to the Introduction to the Frameworks topic for more information on how the frameworks fit together, and how they differ between the (currently) four separate Cocoa platforms.
For all the SDK frameworks, the Namespace used matches the framework name.
iOS is built on the same core operating system as macOS, and shares many of the lower-level non-UI frameworks wth it. It provides its own paradigms for GUI development, in UIKit and related frameworks.
See Also
macOS — iOS — tvOS — visionOS — watchOS— Mac Catatyst
The tvOS SDK provides all the types and classes made available by Apple for creating applications for Apple TV.
Each Cocoa SDK is spread over several frameworks and core include files. The core C APIs are located in rtl.fx, which is a package containing pretty much everything defined in /usr/include. The base framework of core Cocoa classes is called "Foundation" (shared with macOS), and contains, among many other things, NSObject, the base type for all Cocoa classes.
More frameworks are shared across sub-platforms, while each sub-platform also provides its own unique frameworks.
Please refer to the Introduction to the Frameworks topic for more information on how the frameworks fit together, and how they differ between the (currently) four separate Cocoa platforms.
For all the SDK frameworks, the Namespace used matches the framework name.
tvOS is derived from iOS and very closely related to it (more so than iOS and macOS are related), but still a distinctive platform.
Like in iOS, core types for GUI development are provided in UIKit, which is similar but different than the same-named framework on iOS. A lot of frameworks are shared with macOS and/or iOS, but tvOS provides a drastically reduced feature set, and of course some elements that are unique to the platform.
See Also
macOS — iOS — tvOS — visionOS — watchOS — Mac Catatyst
The visionOS SDK provides all the types and classes made available by Apple for creating applications for Apple Vision Pro.
Each Cocoa SDK is spread over several frameworks and core include files. The core C APIs are located in rtl.fx, which is a package containing pretty much everything defined in /usr/include. The base framework of core Cocoa classes is called "Foundation" (shared with macOS), and contains, among many other things, NSObject, the base type for all Cocoa classes.
More frameworks are shared across sub-platforms, while each sub-platform also provides its own unique frameworks.
Please refer to the Introduction to the Frameworks topic for more information on how the frameworks fit together, and how they differ between the (currently) four separate Cocoa platforms.
For all the SDK frameworks, the Namespace used matches the framework name.
visionOS is derived from iOS and very closely related to it (more so than iOS and macOS or even tvOS are related), but still a distinctive platform.
Like in iOS, core types for GUI development are provided in UIKit, which is similar but different than the same-named framework on iOS. A lot of frameworks are shared with iOS (and even macOS), and most iOS and iPadOS projects should port to and compile for visionOS, easily.
See Also
macOS — iOS — tvOS — visionOS — watchOS — Mac Catatyst
The watchOS SDK provides all the types and classes made available by Apple for creating applications for Apple Watch (running watchOS 2.0 or later).
Each Cocoa SDK is spread over several frameworks and core include files. The core C APIs are located in rtl.fx, which is a package containing pretty much everything defined in /usr/include. The base framework of core Cocoa classes is called "Foundation" (shared with macOS), and contains, among many other things, NSObject, the base type for all Cocoa classes.
More frameworks are shared across sub-platforms, while each sub-platform also provides its own unique frameworks.
Please refer to the Introduction to the Frameworks topic for more information on how the frameworks fit together, and how they differ between the (currently) four separate Cocoa platforms.
For all the SDK frameworks, the Namespace used matches the framework name.
watchOS is loosely derived from iOS, but has a severely reduced feature set, and a different model for building user interfaces – the WatckKit and ClockKit frameworks, respectively. It does not provide UIKit-level UI access (although it is build upon UIKit).
See Also
macOS — iOS — tvOS — visionOS— watchOS — Mac Catatyst
Mac Catalyst, also refereed to as "UIKit for Mac", allows you to build [iOS and iPadOD](iOS projects to run natively on the Mac, while still being utilizing the UIKit and other iOS specific APIs and design paradigms. Applications build for this mode can also mix in AppKit and other macOS-specific frameworks.
Mac Catalyst is not a separate SDK or project type on its own, rather, it is an option on iOS project that can be enabled by setting the "Support Mac Catalyst" project setting to True.
See Also
macOS — iOS — tvOS — visionOS — watchOS — Mac Catalyst
If you work in Water of Visual Studio on Windows, some build phases will run remotely over the network, on a Mac.
You need a Mac with Secure Shell (SSH) enabled, and Xcode installed, and connect to it via CrossBox Elements built-in infrastructure for remote debugging.
Please refer to these topics below for more detailed instructions on how to set the Mac up:
When you open a Cocoa project on Windows in Water or Visual Studio, the CrossBox server/device selector in the toolbart will show "(Unsuppoerted)" after the name of your local machine, because Cocoa apps cannot build* and run on WIndows.
Before working in the project, you need to either create a new connection to your Mac, or select an existing one you created before, via said device picker. Refer to the following topics for more detail:
Once a connection is made, you are ready to build, debug and deploy using your Mac for build tasks that cannot be done on Windows, and to test and run your projects of course.
macOS projects will run directly on the Mac selected via the CrossBox device picker; iOS, tvOS and watchOS projects can be run on Simulators on the same Mac, or on physical devices connected to the Mac via USB or WiFi.
Provisioning Profiles & Code Signing Certificates
To run build iOS, tvOS and watchOS applications to be run on-device (whether for local debugging or Deployment you will need a matching Provisioning Profile and Code Signing Certificate that you can obtauin from Apple's developer portal here.
Provisioning Profiles can be dowloaded on the Mac and either double-clicked to have Xcode install them, or manually places in the ~//Library/MobileDevice/Provisioning Profiles folder.
Certificates can be requested and downloaded to the Mac and double-clicked to be installed in the macOS Keychain.
In Project Settings you can select both the certificate (for all Cocoa projects) and profile (where applicable) to use for your project. Commonly, you will se different set of profile and certificate for Deployment or Debugging, in the "Release" and "Debug" configurations.
Water and Visual Studio will automatically obtain the list of available options fro the Mac, but the settings drop-down also provides an option to manually refresh the list, for example if you just recently added a new profile or certificate.
Keychain Access
By default, the build will look for the selected certificate (by name or fingerprint) in the default Keychain of the macOS user that you are connected as in your SSH connection.
If you share a build Mac with multiple users, it might make sense to put your certificates ito a separate keychain, which you can create with the Keychain Access tool that ships with macOS.
If you do so, you will need to provide the name of the keychain to use, in the KeychainName project setting. You can obtain the list of valid names by running the security list-keychains command in terminal on your Mac, and you will want to provide the full name as emitted by this command, for the KeychainName setting, e.g.
"/Users/peter/Library/Keychains/login.keychain-db"
("login" is the default keychain that will be used if no name is provided).
You might also need to provide the password for the keychain, via the keychainPassword setting. The password for the default (login) keychain is usually the same as the password for the user; for custom keychains, you can pick a password upon creation.
What Projects or Build Tasks Require a Mac?
Generally, most real life Cocoa projects will require a Mac for one or more build tasks, but there are a few exceptions.
The following build tasks require connection to a Mac:
- Processing resources such as Storyboards, XIBs, Asset Catalogs or other more rare file formats that require a mac-native tool for conversion.
- Code-signing the final executable or app bundle.
- Linking the final executable, for Toffee (V1) projects.
Trying to build a project that requires a Mac connection with the CrossBox server set tom "Local", will fail on Windows.
The following project types can be compiled locally, provided Code Signing is not needed:
- Static Librares (as they don't require linkling).
- Dynamic Libraries or plain "command line" executables, when using the Toffee V2 or Island back-end.
See Also
Elements for Cocoa uses .fx files to reference frameworks and libraries from the compiler and the IDE. You can think of .fx files as "pre-compiled headers", binary files that encapsulate all the metadata gathered from a framework's or library's .h files. This allows both the compiler and the IDE intelligence (such as Code Completion) to know the contents of a framework or library without having to reparse the .h files (which can be slow).
You can read more about .fx files here.
Elements comes with pre-built .fx files for all the frameworks in the [macOS SDK](macOS, iOS SDK, tvOS SDK and watchOS SDK versions that are officially supported, as well as for a few select non-framework libraries (such as libsqlite3, libxml and libz). You can also generate .fx files for other SDK versions (such as betas) yourself using the FXGen tool as described in Importing New SDKs, and you can import additional non-SDK frameworks and libraries (such as open source libraries, commercial ones, or even your own libraries written in Objective-C) as well, as explained in Import Projects.
When compiling your own library projects with Elements, .fx files will automatically be generated (in addition to the binary and .h files for use from Objective-C), so that other Elements projects can use your library right away.
Supported SDKs
Elements for Cocoa is designed to be able to work with any version of Apple's macOS, iOS, tvOS and watchOS SDKs. The product ships with support for the latest SDKs that are officially released at the time an Elements version was built.
Support for newer SDKs can usually be downloaded within a few days of the new Xcode's availability, here, but pending any drastic and unexpected changes to the tool chain for Apple's SDKs, you can also import newer or beta SDKs using the FXGen tool that is included in the Fire, even if we have not gotten around to supporting them officially yet.
You can also use FXGen to import older SDKs that we do not ship .fx for anymore, or download them from here. We expect Elements for Cocoa to work with any SDK as far back as iOS 5.0 and OS X 10.6 (and newer, of course), and with Xcode 5 or kater. We have not tested Elements and FXGen with SDK and Xcode versions prior to that, and do not officially support those.
See Importing New SDKs for more details on this.
You really should be using the latest released Xcode and SDKs (or newer betas), and setting Deployment Targets to support older devices.
See Also
When building for the Cocoa platform, Elements allows you to choose to build for different CPU Architectures, depending on the target devices and operating system versions you wish to support. Elements allows the creation of so-called "Universal Binaries", or "Fat Binaries", that can include executable code for more than one platform (for example 32-bit and 64-bit).
You can pick one main set of architectures for your application, which might include one or more options depending on the SDK abd version. On iOS, tvOS and watchOS, in addition to picking architectures for the device deployment, you can also select separate architectures for running in the Simulator.
macOS
On macOS, two architecture are supported:
x86_64 is the architecture of Intel's 64-bit CPUs, sometimes also simply referred to as x64. It is the architecture for all Intel Macs shipped between 2005 and 2021.arm64 is the architecture used by newer Macs built on Apple Silicon, shipped in late 2020 and beyond.
You can build Universal binaries that c an include both architectures and can run natively without Rosetta 2 emulation on both Intel-based and Apple Silicon-based Macs.
Elements does not support the 32-bit i386 architecture for macOS, because the "Modern Objective-C Runtime", introduced with Mac OS X 10.5 Leopard, was never supported on 32-bit. The Modern Objective-C Runtime is a prerequisite for ARC, as well as many other runtime features Cocoa developers take for granted these days. 32-bit Mac applications were already largely irrelevant when Elements first shipped, got deprecated with macOS 10.14 Mojave and are now totally unsupported as of macOS 10.15 Catalina.
iOS and iPadOS
On iOS and iPadOS, Elements supports three architectures for device deployment:
arm64 is the current 64-bit ARM CPU architecture, as used since the iPhone 5S and later (6, 6S, SE and 7), the iPad Air, Air 2 and Pro, with the A7 and later chips.armv7s (a.k.a. Swift, not to be confused with the language of the same name), being used in Apple's A6 and A6X chips on iPhone 5, iPhone 5C and iPad 4.armv7, an older variation of the 32-bit ARM CPU, as used in the A5 and earlier.
Very old iOS devices shipped before 2009 had armv6 CPUs, which are no longer supported by current iOS SDKs, nor by Elements.
In Project Settings, you can select to build your projects for one or more architectures. You can either choose architectures explicitly, or you can select Default, in which case no architectures will be hardcoded into the project settings, and the project will automatically be built against a default set of architectures (currently arm64-only). This is the most forward-thinking setting, since it will automatically include new architectures when you rebuild your project against newer SDKs.
arm64 is only available in iOS 7.0 or later.armv7s is only available in iOS 6.0 or later.
Choose carefully when excluding architectures. An application build with armv7 will run on all current iOS devices, even those that support newer architectures (it will run as 32-bit on iPhone 5S and later). But on the other hand, an app build without armv7 will not run on older devices such as the iPhone 4/4S or the original iPad mini.
In addition to the device architecture, Project Settings will also let you choose architectures for the Simulators, where appropriate (i.e. on iOS).
x64_64 (i.e. 64-bit Intel) is optionally available starting with iOS 7.0.i386 (i.e. 32-bit Intel) is the only option on iOS 6.1 and below.
Just as with the device architectures, a special Match Device option is provided for the Simulator Architectures. Selecting this option will once again not hardcode any architectures in the project; instead Elements will automatically pick the appropriate Simulator architectures, based on which device architectures you are building for. If your application includes armv7 and/or armv7s, it will include i386 in the Simulator architectures; if your are building for arm64 on the device, it will build for x86_64 on Simulator.
Just as on the device, Simulator builds can be Universal Binaries and include two (and potentially more, in the future) architectures. If built with both architectures, you can test your application in both 32-bit and 64-bit versions of the Simulator, without needing to rebuild.
Support for the 32-bit armv7 architecture has been deprecated by Apple and removed from it's own tool chain several years ago; eventually, support for it in Elementys will be deprecated, as well.
tvOS
On tvOS, Elements supports one architectures each for device deployment, and one for the Simulator:
arm64 is the current 64-bit ARM CPU architecture and used on Apple TV 4x64_64 (i.e. 64-bit Intel) is used in the Simulator
watchOS
On watchOS, Elements supports two architectures each for device deployment and for the Simulator
arm64_32 is a variant of arm64 with 32-bit pointer sizes, used on Apple Watch Series 4 and later.armv7k is a 32-bit variant of regular armv7, and used from the orginal Apple Watch up to Series 3.x86_64 (i.e. 64-bit Intel) is used in the Simulatori386 (i.e. 32-bit Intel) is used in the Simulator
Mac Catatyst ("UIKit for Mac")
On Mac Catatyst, the same architecture(s) are supported as on macOS, x86_64 and arm64.
Deployment Targets are a powerful concept on the Cocoa platform that allow you to build applications that take advantage of new features in the latest platform SDKs, but can still run on older versions of the operating system. For example, you might want to build your application against the latest iOS SDK to take advantage of all the new capabilities, but set a Deployment Target of 6.0 or 7.0 to let users with older devices still use your application – albeit with possibly reduced functionality.
Which SDK(s) to build for is controlled by two settings in Project Properties, the Target SDK and the Deployment Target.
The Target SDK is the main setting; it tells compiler and linker what version of the SDK you want to build against. This setting defines which of the provided SDK folders with .fx Files the compiler will use, and which classes and other code elements will be available to the compiler. To use features from a new SDK (without runtime hacks or other nasty workarounds), you will need to build against a version of the SDK that contains the feature. In many cases, as iOS and OS X evolve, the choice of Target SDK setting will also drive the operating system to give different behavior to your application by letting it know that it was built to support the new operating system.
For example, to get the new look of standard iOS controls in iOS 7, your application needs to be built with a Target SDK setting of iOS 7.0 (or later, of course). In order to support a 4" screen in iPhone applications, your application needs to be built against iOS 6.0 (or later), and so on. Applications built against an older Target SDK will often run in "compatibility mode" and not gain access to certain new features.
Of course Elements lets you select an explicit Target SDK version in Project Properties (such as "iOS 6.1" or "OS X 10.8") or you can use the more generic setting of "iOS" or "OS X", which causes the compiler and tool-chain to pick the latest version of the SDK that is both supported locally by your .fx Files and the version of Xcode you are using. This is a convenient way to avoid hardcoding an SDK version in your project and make upgrading easier – but it is important to realize that this is just a short-hand: the compiler will still pick a definite Target SDK setting at compile time, and your application will behave as if you had explicitly specified the exact version.
In other words, if you're building your application with the Target SDK set to "iOS", and your Xcode version is 4.6.3, for example, your application will built just as if you had selected "iOS 6.1" explicitly. When you later update to Xcode 6, new builds will compile for "iOS 8.0" automatically, and so on.
By default, applications will only run on versions of the operating system that are the same or newer as the Target SDK. So if you build an application with the "OS X 10.7" Target SDK, it will refuse to run on OS X 10.6, for example. This is where the Deployment Target setting comes in.
The Deployment Target setting does not directly affect what the compiler sees. All it does is mark your application as being OK to run on versions of the operating system that may be older than the Target SDK. For example, if you build your iOS application against "iOS 7.0", but set the Deployment Target to "5.0", the operating system will allow your application to run on any device with iOS 5.0 or later.
Limitations & Solutions
Of course there is no such thing as a free lunch, and there are several limitations to keep in mind when building with Deployment Targets. Most importantly, your use of classes or members that are introduced in newer versions of the SDK is affected.
As mentioned above, it is the Target SDK setting that drives what the compiler sees. If your Target SDK is set to "iOS 8.0", the compiler sees and will let you freely use all the functionality that is provided by iOS 8 – even if that functionality might not be available on iOS 7 or lower. If you use any of the missing functionality, your application will most likely crash at runtime when it tries to instantiate a class that does not exist, or call a method that's not implemented in the older operating system.
But Elements adds a number of compiler and tool-chain features that make it really easy to support different Deployment Targets.
Weak Linking
Elements knows from meta-data in the .fx files which code elements are available in what versions of the SDK. If you are building with a Deployment Target setting that is lower than the Target SDK, Elements will automatically use so-called "weak linking" to refer to any external types or constants that may not exist on older operating systems at runtime.
What this means is that instead of crashing on application start due to missing symbols (as you would, for example, expect on Windows, if you imported functions from a .dll that did not exist on an older OS), your application will launch fine, and those elements will simply be nil.
This means, of course, that you need to be careful in your code to not use classes that are not available – after all, there's no magic in the world that the compiler could do to let you actually use a class that simply does not exist in the version of the OS your app is running on. But this is easily achieved by simply checking for nil.
The snippet below shows the common use case of adding a "Pull to Refresh" control to a UITableView on iOS 6 without breaking the application for iOS 5 and below:
if assigned(typeOf(UIRefreshControl)) then begin
refreshControl := new UIRefreshControl();
refreshControl.addTarget(self)
action(selector(refresh:))
forControlEvents(UIControlEvents.UIControlEventValueChanged);
end;
if (typeOf(UIRefreshControl) != null)
{
refreshControl = new UIRefreshControl();
refreshControl.addTarget(this)
action(__selector(refresh:))
forControlEvents(UIControlEvents.UIControlEventValueChanged);
}
if UIRefreshControl.Type != nil {
refreshControl = UIRefreshControl()
refreshControl.addTarget(this,
action: "refresh:",
forControlEvents: .UIControlEventValueChanged)
}
Readers familiar with the concept of Deployment Targets from Objective-C will notice that Elements even goes a step further with weak linking than Xcode and Objective-C. In Objective-C, directly referring to a class by name would cause the application to fail to load, requiring hacks such as
[[NSClassFromString(@"UIRefreshControl" alloc] init];
to dynamically find the class at runtime. With Elements that is not necessary.
Another common scenario you will find and use is to check for the availability of new methods on old classes. So the above assigned() check could have been rewritten as
if respondsToSelector(selector(refreshControl)) then begin
...
if (respondsToSelector(__selector(refreshControl))
{
...
if (respondsToSelector("refreshControl") { ...
since that method/property would be missing on iOS 5.
The above example checks whether typeOf(UIRefreshControl) is available to determine if the class can be used, but essentially any way of avoiding the code path on older OS versions is valid as well, of course. Maybe your application checks the OS version on start-up and loads totally different views for older OS versions than newer ones, making detailed checks unnecessary.
Deployment Target Hints
Elements has a project setting called "Deployment Target Hints". When enabled, the compiler will emit hints for any code elements you use that are not available on your lowest Deployment Target. For the above code snippet, it would notify you about allocating the UIRefreshControl class, and about calling the UITableView.refreshControl property.
New in Version 8.2, you can use the available() System Function to protect code against running on OS versions it is not supported on and omit deployment target hints in the process.
The idea is that you will turn this setting on temporarily and review any hints that get reported to make sure that the corresponding code is protected sufficiently against running on older versions of the OS. Once satisfied, you would turn the hints back off, or surround the individual areas with the proper if available() checks or {$HIDE NH0}...{$SHOW NH0} Compiler Directives.
In essence, Deployment Target Hints are a first line defense to find places where you need to write version-specific code before your extensive testing and unit testing would catch the crash that happens for trying to use a non-existing class.
Dedicated rtl.fx files
In addition to some types, members and constants not being available on older Deployment Targets, there can also sometimes be fundamental differences in core system RTL types. For example, GCD queues became ARC-compatible in iOS 6, but are not in iOS 5, something that is important for how the compiler generates the executable, even if it won't (usually) affect the code you write yourself.
To allow for this, each SDK import comes with multiple versions of rtl.fx that provide compatibility information about older Deployment Targets. You do not need to handle this manually (or even be aware of this, really), but the compiler will automatically pick rtl-5.1.fx instead of the regular rtl.fx if you are building for an iOS 5 Deployment Target.
Weak References on iOS 4 and OS X 10.6
Automatic Reference Counting (ARC) was introduced with iOS 5 and OS X 10.7, but it is backwards compatible with older versions of iOS and OS X, allowing you to build applications for Deployment Targets of iOS 3 or 4, or OS X 10.5 or 10.6. But there is one exception: weak references (see Storage Modifiers) are not supported on those OS versions.
Elements will emit errors if you are using the weak keyword and your Deployment Target is set to iOS 4 or lower or OS X 10.6 or lower. The only way to build apps for these Deployment Targets is to avoid weak references, possibly changing them to the less convenient unretained type, alongside some extra checks or logic.
Why Bother?
This is all well and good, you say, but surely it must become tedious to be on the lookout for code that may fail on older OS versions? It can be, yes. But supporting different Deployment Targets is an important fact of life on the Cocoa platform – which is why we put so much effort into making the process easier in Elements, with the better weak linking support and the hints, both of which Xcode and Objective-C users need to cope without.
But there is really no simple way around doing this job and proofing your code for older OS versions, if you want to support them. You really only have three options:
- Continue building against the older SDK (and missing out on any new features and capabilities)
- Drop support for older OS versions
- Proper handling of Deployment Target issues
Option one is not really an option in most cases. Old iOS 5 apps will look wrong on an iPhone 5 and 6's larger screens. Most iOS 6 apps will look old and dated on iOS 7 and later. It is generally accepted as best practice (and recommended, if not enforced, by Apple) that you should use the latest shipping Target SDK for your development (and in many cases in the past, Apple has stopped accepting App Store submissions built against older SDKs).
Option two might or might not be feasible, depending on your app's business model. Maybe you can afford targeting the latest OS only, but in many cases you will not want to exclude users on older devices – especially if all the core functionality for your application is supported.
This really just leaves the option of biting the bullet and supporting the full range of OS versions your application needs to support. We hope that we've made this easy and comfortable for you with the improvements in Elements 6.1.
In this article, i want to talk a bit about working with user interfaces in Elements for Cocoa.
As you know, the Cocoa compiler is a native compiler for the Objective-C runtime, meaning that it works directly with the classes provided by Apple's Cocoa and Cocoa Touch frameworks. This extends from low-level classes such as NSString or NSArray to the high-level visual components based around NSView (Mac) and UIView (iOS).
One common way for Mac and (especially) iOS apps to work with UI is to simply create the necessary views and controls that make up an app's UI from code. But sooner or later, especially when dealing with more complex or sophisticated user interfaces, you will want to use the visual designer. This works on the same principles, whether you are using Xcode/Objective-C or Elements.
Mac and iOS interfaces are designed in Interface Builder, which as of version 4 of Xcode is directly integrated into the Xcode IDE, and when working with Elements, that is where you will work with your interfaces, getting the same experience and the same power and flexibility of UI design that developers using Objective-C get.
There are two file formats used for designing UI on Apple's platform – the older XIB format and the newer Storyboard format. The principles for dealing with these files are similar, and for the sake of simplicity we often refer to "XIB files" in places where both XIBs and Storyboards are covered.
Terminology: XIB vs. NIB?
This section talks about XIB files, but many of the methods for working with XIB files all mention NIBs. What's up with that?
XIBs are a newer, XML based format that is used for the UI at design time. When you compile your app, the XIB files are converted to binary NIB files for you, and those binary versions of the files are embedded into your app. All the APIs working with these files predate the new format (and, at runtime, only work with the older NIB format), that's why all the method names refer to NIB, not XIB. When you pass around names, you never need to (or should) specify the file extension anyway, so this is a distinction that you can largely ignore (unless you want to go spelunking into your .app bundle).
What are XIB files? From the point of view of the UI designer, XIB files contain the views or windows that you design in Interface Builder – the controls, their layout and properties, and their connections to your code.
It is important to understand that on a technical level, XIB files are stored object graphs. That means that an XIB file, essentially, is a hierarchical set of objects descriptions. When an XIB file gets loaded at runtime, all the objects defined in the XIB file get instantiated, configured, and connected as described in the XIB.
These objects can be a combination of standard framework classes (such as NSView/UIView, NSButton/UIButton, etc), classes from third party libraries, or even classes defined in your own application code. When the Cocoa runtime loads an XIB, it goes through the list one by one, looks for the classes with the appropriate names and news up the necessary objects.
Each XIB file also knows about a special object called the "File's Owner". This object will not be created when the XIB is loaded. Rather, the object that initiated the loading of the XIB file will take the place of the File's Owner within the XIB's object graph – including any connections and references to it. We will see how that is useful and important, soon.
What are Storyboard Files?
Storyboards are essentially a next step in XIB file's evolution. Where XIB files usually contain a single view, storyboards contain more views (sometimes even all the views for your app), along with information on how the user will navigate between these views, in form of "segues".
The .storyboard files you are working with when designing UI are, similar to XIB files, simple XML files that the Xcode designer presents to you graphically. When your app gets compiled, storyboards get broken down into individual .NIB files, just like XIB files do.
So whether you use XIB files or Storyboards, at runtime your application always contains .NIB files.
Working w/ XIBs & Storyboards
When and how do XIB files (or storyboards) get loaded? There are several possibilities:
NSMainNibFile
If your Info.plist contains an NSMainNibFile entry, the Cocoa runtime will automatically load up that NIB as your application starts up. The global NSApplication/UIApplication instance will become the File's Owner of the NIB, and every object in your NIB will be instantiated.
Similarly, if Info.plist contains a UIMainStoryboardFile entry (on iOS), the system will load the NIB for the view that was marked as entry view in the storyboard, in the same fashion.
This mode is common for most Mac and iOS applications, and in fact you can see it in action in our Cocoa Application template(s). You probably noticed that (aside from the startup code in the Program) the project contains an AppDelegate class that is usually used as the "launching point" for your application's own code.
How does this AppDelegate class get instantiated? Easy: If you open the MainMenu.xib file in Xcode (the XIB that is specified to be the NSMainNibFile in Info.plist from the template apps), you see that – among other pieces – it contains an AppDelegate item. This is your own AppDelegate class.
initWithNib:*
For simple applications, you can get away with just putting all your stuff into MainMenu.xib, but as applications get more complex, that's a bad idea, not only because – as indicated above – when an XIB is loaded, all objects referenced in it are created. If your application contains dozens of windows or views, you don't usually want all of those to be loaded up as your application starts.
Instead, it is common practice to pair individual XIBs for each view or window XIB with a matching ViewController or WindowController class – a practice that you will see in just about all the iOS project templates, and also in the *Controller item templates we provide with Elements.
How does this work?
Simple: Your application will define a custom class, usually descended from UIViewController (or NSViewController/NSWindowController) where you will put all the application logic for that view or window. As far as your app is concerned, this class is your implementation for that particular view (or window – for simplicity reasons we'll stick to talking about iOS views for now, but the same concepts apply for OS X views and windows).
In the initializer for your view controller, you will ask the base class to load up the XIB file that backs your view, for example by calling:
self := inherited initWithNib('MyViewController') bundle(nil);
this = base.initWithNib("MyViewController") bundle(null);
super.init(nib: "MyViewController", bundle: nil);
this = super.initWithNib("MyViewController") bundle(null);
This essentially tells the base class to initialize it by loading MyViewController.xib (from the main application bundle) and creating all the objects defined in it.
So all those objects get loaded up, but how do you then get access to them from your code? Simple: Remember when I said above that the object loading the XIB becomes the File's Owner? When you load an XIB using the initWithNib() call, your view controller class becomes the File's Owner and any connections you set up in the XIB between the File's Owner and the other elements in your XIB will be connected to your view controller class.
Connections
Did we say connections? So how does this work?
Easy, really. XIB files know about two basic kinds of connections between objects: Outlets and Actions.
You can think of outlets as references to other objects. If your view controller class has a property of type UIButton, and your XIB file contains a UIButton, that's a match made in heaven. You can just Ctrl-drag the button onto the File's Owner (or vice versa) in the XIB to hook them up, and now you have access to the UIButton from your code, because as the XIB gets loaded and the UIButton gets created, it gets hooked up to your property automatically.
Actions, you may have guessed, can be thought of as events. If something happens with the objects in the XIB (such as a button being tapped), they send out events. Just as above, if your view controller exposes a method with the right signature (that is, any method with exactly one parameter of type "id" or a concrete class), you can Ctrl-drag it into your XIB file to hook them up, and when the event triggers, that method is called.
Of course outlets and actions can be hooked up between any two objects inside your XIB, not just with the view controller. For example, you can cause an action on one control to trigger a method on a different control.
Ok, so how does the XIB designer in Xcode know about the methods and properties on your view controller (or other classes)? Magic! As you write your classes, Elements will automatically* update the XIB and Storyboard files behind the scenes, with information about all the relevant classes and their properties and methods – i.e. any property marked "[IBOutlet]" and any method marked "[IBAction]". As you work on your XIB file in Xcode, it sees this information and makes the connections available.
If you need to expose a new control to your code or want to hook up a new event, simply add a new property or method to your code, and that's it.
Let's See This in Action
For this example, let's create a new "UIViewController with XIB" from the template and then add the following items to the "MyViewController" class:
[IBOutlet] property myButton: UIButton;
[IBOutlet] property myLabel: UILabel;
[IBAction] method buttonTapped(aSender: id);
[IBOutlet] public UIButton myButton { get; set; }
[IBOutlet] public UILabel myLabel { get; set; }
[IBAction] public void buttonTapped(id sender) { }
@IBOutlet var myButton: UIButton?
@IBOutlet var myLabel: UILabel?
@IBAction func buttonTapped(sender: Any?) { }
@IBOutlet UIButton myButton { __get; __set; }
@IBOutlet UILabel myLabel { __get; __set; }
@IBAction public void buttonTapped(id sender) { }
The following screenshots explore the XIB (and Storyboard) designer in Xcode:
Figure 1: On the left side of the window, you see a hierarchical view of all the objects in the XIB – this includes all visual objects (in this case just the one UIView for now, but also other objects such as the File's Owner).
On the right side, the "Utilities View" has the "Identity Inspector" pane activated, showing details about the selected object (the File's Owner). Note that the XIB designer knows that File's Owner is a "MyViewController". It got that information from the template – but this is editable, so you can just type in or select the right class name. Of course it should match the class that is loading this XIB at runtime.
Figure 2: We have dropped a couple of controls onto the view – you can see them both visually and in the hierarchy on the left. The right pane has been switched over to the "Connections Inspector" tab, which shows all the connections available on our File's Owner. Among them, you see our two properties and the method. There's also a "view" property (defined by the UIViewController base class), already connected to the root view.
Figure 3: Click and drag from the little circle right of the "myButton" name to the button to make a connection to the UIButton. (You can drag to the control on the design surface or to the "Button – Tap Me!" item in the hierarchy.)
Let go when you are over the button, and the connection is made. If you were to go and build your app now, the myButton property would give you access to the button from code.
Figure 4: You can also drag from the hierarchy view to a control. When you let go, the XIB designer will present a list of all properties that match – in this case the UILabel qualifies both for "myLabel", and for the "view" property (because UILabel descends from UIView).
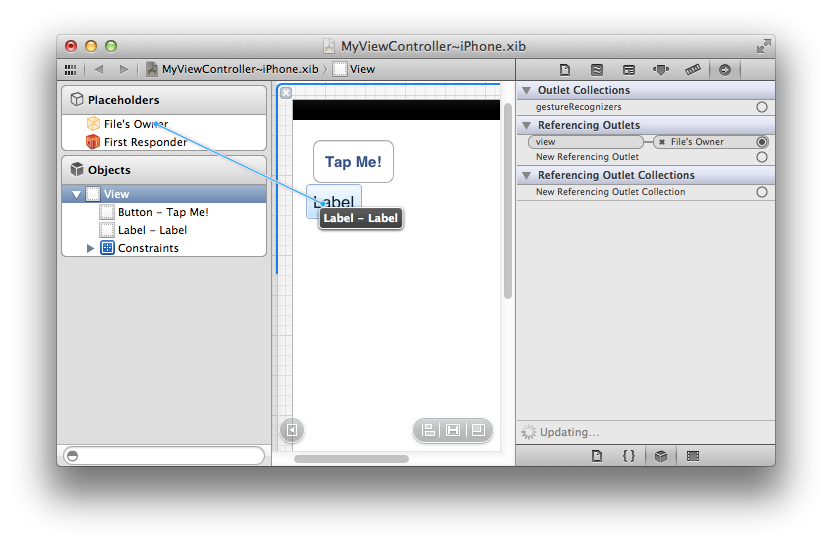
Figure 5: Connection actions work the same way. You can Ctrl-drag from the control to the receiver (here the File's Owner) to connect the default action of that control (in this case, the button tap) to a method. As you can see, the Connections Inspector also shows a complete list of all actions that can originate from the control, so you can, if needed, assign them all to individual methods.
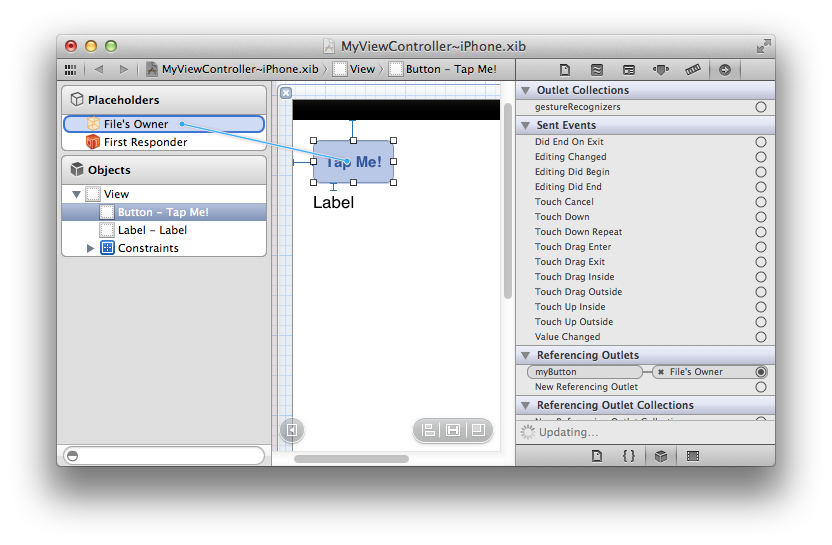
Now all that's left to do is maybe write an implementation for "buttonTapped" such as this:
[IBAction]
method MyViewController.buttonTapped(aSender: id);
begin
myLabel.text := myButton.titleLabel.text;
end;
[IBAction]
public void buttonTapped(id sender)
{
myLabel.text = myButton.titleLabel.text;
}
@IBAction
public func buttonTapped(sender: Any?) {
myLabel.text = myButton.titleLabel.text
}
@IBAction
public void buttonTapped(id sender)
{
myLabel.text = myButton.titleLabel.text;
}
to see both actions and outlet access in – pun not intended – action.
What's "First Responder"?
Similar to File's Owner, "First Responder" is another placeholder object exposed in the XIB file that has special meaning. The First Responder is not a concrete object, but essentially refers to "the first object that has focus that can handle this".
By connecting actions to the First Responder, you can have them dynamically be sent to different parts of your application, depending on the state your app is in. A good example is the "Edit|Copy" menu in a Mac application. If a text field has focus, you would expect the Copy command to apply to the content of that text field. If a different control has focus, different content would be copied. By connecting the menu's action to the First Responder's "copy:" method, Cocoa will take care of calling "copy()" on whatever control or view has focus – in fact, all you need to do to make Copy/Paste work with your own custom view is to implement the corresponding methods, and they will get called if your view has focus as the user invokes the menu item (or Cmd-C keyboard shortcut).
Summary
This article gave you a quick introduction to XIB files and how they work. A good 95% of the content of this article is not really specific to Elements; the same concepts and techniques apply to working on XIB files with Objective-C or Swift in Xcode – that's by design, because Elements is a true first class citizen on the Cocoa frameworks and Objective-C runtime.
One of the
greatest tools in Apple's tool chain is the profiler.

Profiling is an essential debugging tool for every developer, whether
you want to tune the performance of a particularly time-sensitive piece
of code, or drill into some memory issues (be it leaks or general memory
load). With ARC, just like with Garbage Collection on .NET or Java, regular
object leaks are rare, but one scenario where they can still happen
(opposed to GC) is with so-called Retain Cycles — where object A holds on to object B,
and vice versa.
Because Instruments is such an essential tool for the Cocoa developer,
we have deeply integrated support for it into the Oxygene tool chain as
well, and I'd like to demonstrate that in a quick (only somewhat
contrived) sample.
Let's say you have the following code:
type
DummyData = class
private
fData: NSMutableArray;
public
method init: id; override;
method Work; empty;
end;
DummyDataItem = class
private
fOwner: DummyData;
public
property owner: DummyData read fOwner;
method initWithOwner(aOwner: DummyData): id;
end;
implementation
method DummyData.init: id;
begin
self := inherited init;
if assigned(self) then begin
fData := new NSMutableArray;
for i: Int32 := 0 to 1000 do
fData.addObject(new DummyDataItem withOwner(self));
end;
result := self;
end;
method DummyDataItem.initWithOwner(aOwner: DummyData): id;
begin
self := inherited init;
if assigned(self) then begin
fOwner := aOwner;
end;
result := self;
end;
public class DummyData
{
private NSMutableArray fData;
public override id init()
{
this = base.init();
if (this != null)
{
fData = new NSMutableArray();
for (int i = 0; i < 1000; i++)
fData.addObject(new DummyDataItem withOwner(this));
}
return this;
}
public void Work() {}
}
public class DummyDataItem
{
DummyData fOwner;
public DummyData owner { get { fOwner } }
public id initWithOwner(DummyData aOwner)
{
this = base.init();
if (this != nil)
{
fOwner = aOwner;
}
return this;
}
}
public class DummyData {
private var fData: NSMutableArray!
init() {
fData = NSMutableArray()
for var iL Int = 0; i < 1000; i++ {
fData.addObject(DummyDataItem(owner: self))
}
}
public func Work() {
}
}
public class DummyDataItem {
private var fOwner: DummyData;
public var owner:DummyData {
return fOwner
}
init(owner: DummyData) {
fOwner = aOwner;
}
}
Looks innocent enough. DummyData holds an array of
DummyDataItems it initializes on creation; the code (naïvely) assumes
the array and everything else to be released when the DummyData object
itself goes out of scope.
Except it doesn't, and your customer calls to complain that the app's
memory footprint is growing. How do you find out what's going on?
Instruments to the rescue.
In Elements for Cocoa, Instruments is available right from inside Visual
Studio and Fire. We've added a new menu item to the "Debug" menu (and you can also
add it to the toolbar of course): "Start With Instruments" (Visual Studio) and "Run w/ Instruments" (Fire):
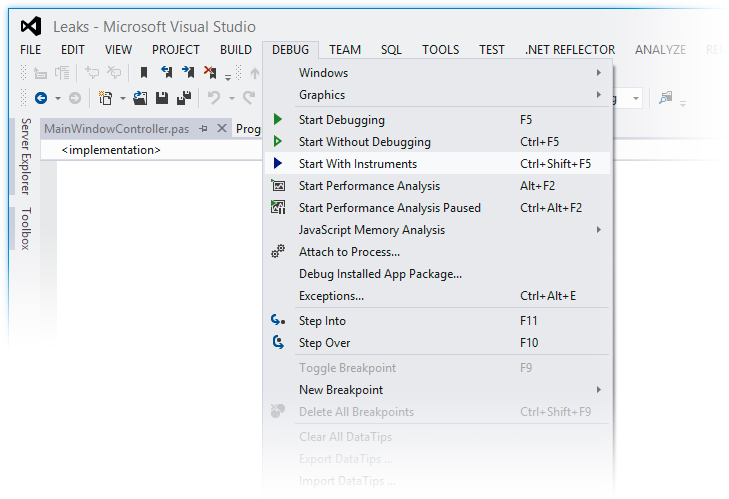
Hit that and Elements will build your app (if necessary), and via the
magic of CrossBox, you'll see Instruments popping up, Mac side — by default
asking you what kind of analysis you want to perform:
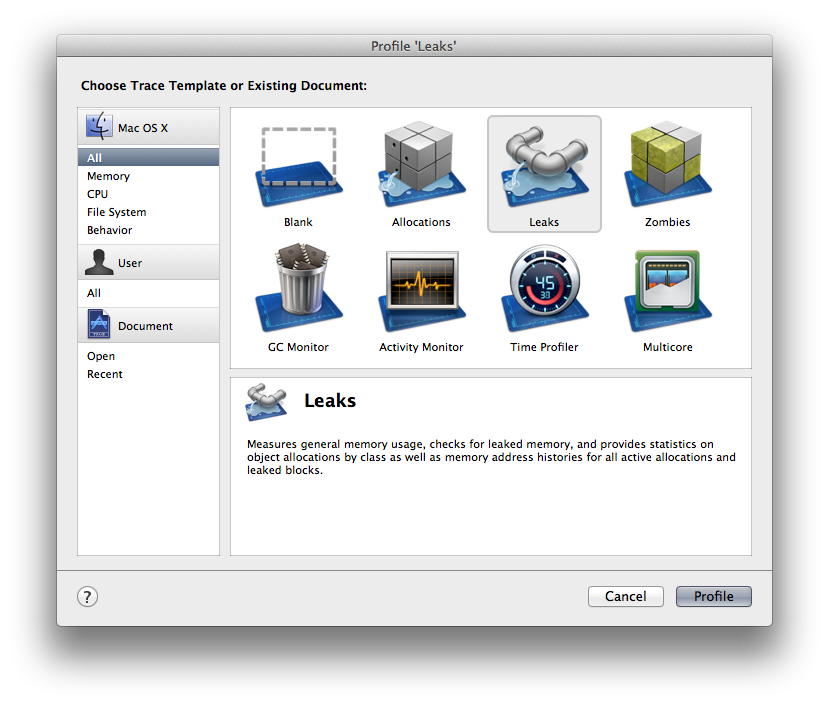
Select "Leaks" and that will open an Instruments document, and also
start your application running. Play around with the app and trigger the
code paths that lead to the memory increase. In the Instruments window,
you san see what's happening, live — the overall memory load of the app
keeps increasing (as shown in the "Allocations" instrument):
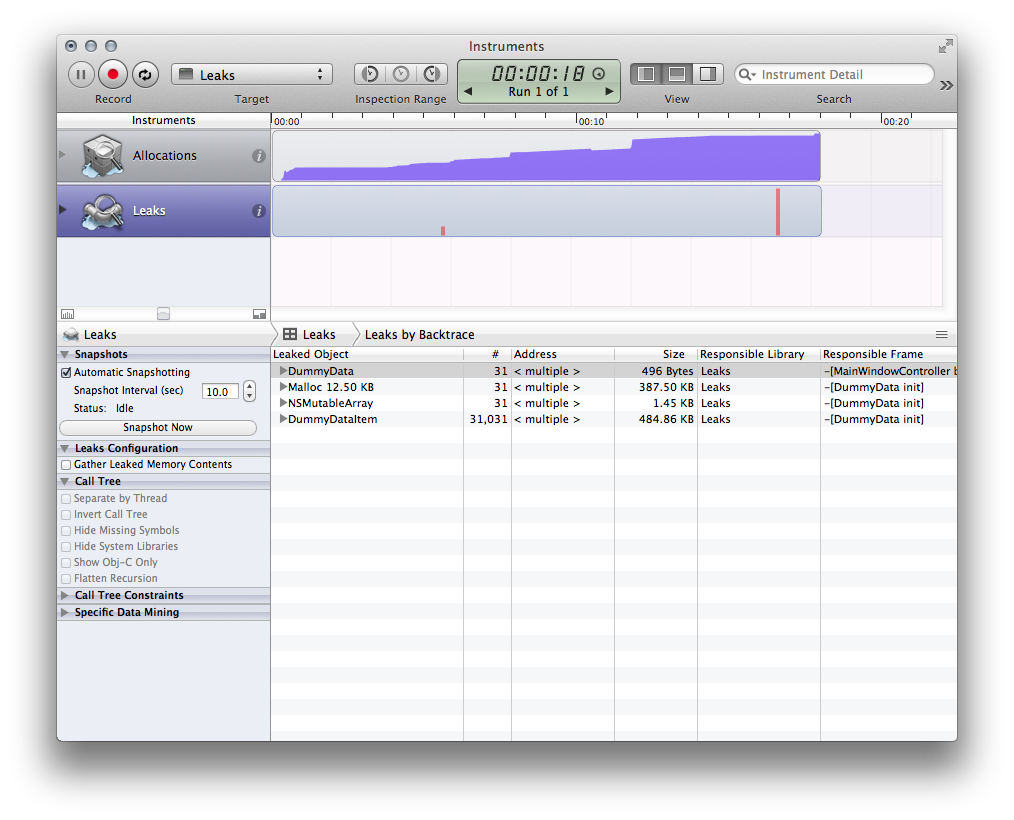
Quitting the app and selecting the "Leaks" instrument shows all the
memory that was leaked — that is, not properly released. The picture is
quite clear — it seems that 31 DummyData instances were created and
never properly released. What's up with that? After all, your code that
creates DummyData is dead simple:
method MainWindowController.buttonClick(aSender: id);
begin
var d := new DummyData();
d.Work();
end;
void buttonClick(id sender) {
DummyData d = new DummyData();
d.Work();
}
func buttonClick(sender: Any?) {
let d = DummyData()
d.Work()
}
d goes out of scope right after it's used, and that should release the
object, right?
Fold open one of the DummyData items in the list and click on the little
arrow next to its address to drill into its retain/release history.
You'll see a huge list of roughly a thousand calls to retain. The call
stack on the right tells you these happen from within
DummyDataItem.initWithOwner:. That makes sense — your code creates a
thousand of them, after all.
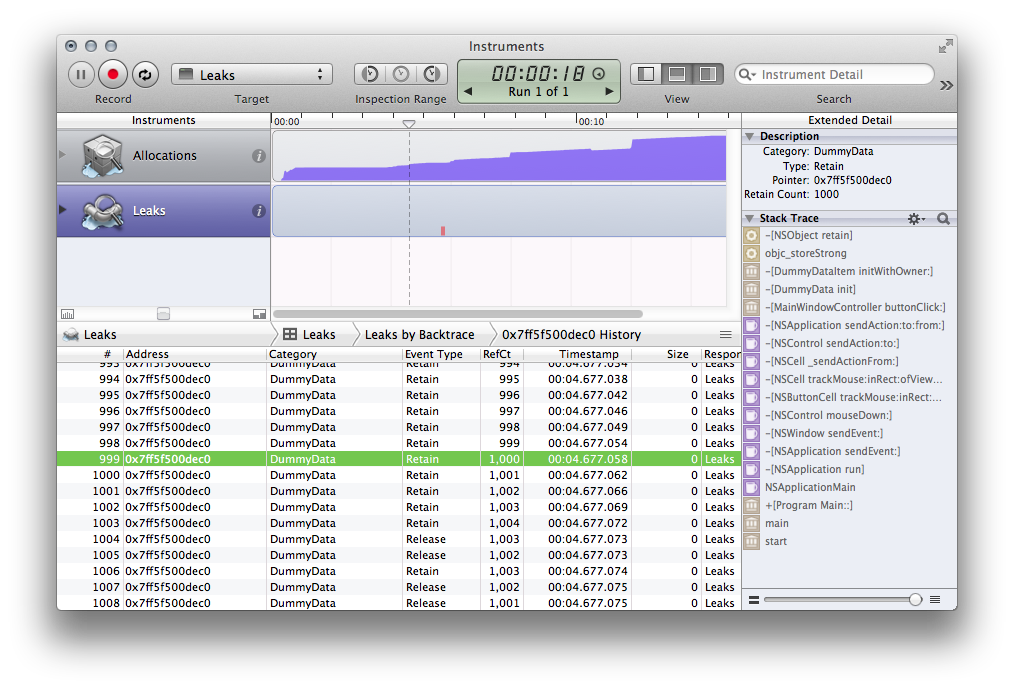
At the very end of the list, you see that from buttonClick your
DummyData is being released though.
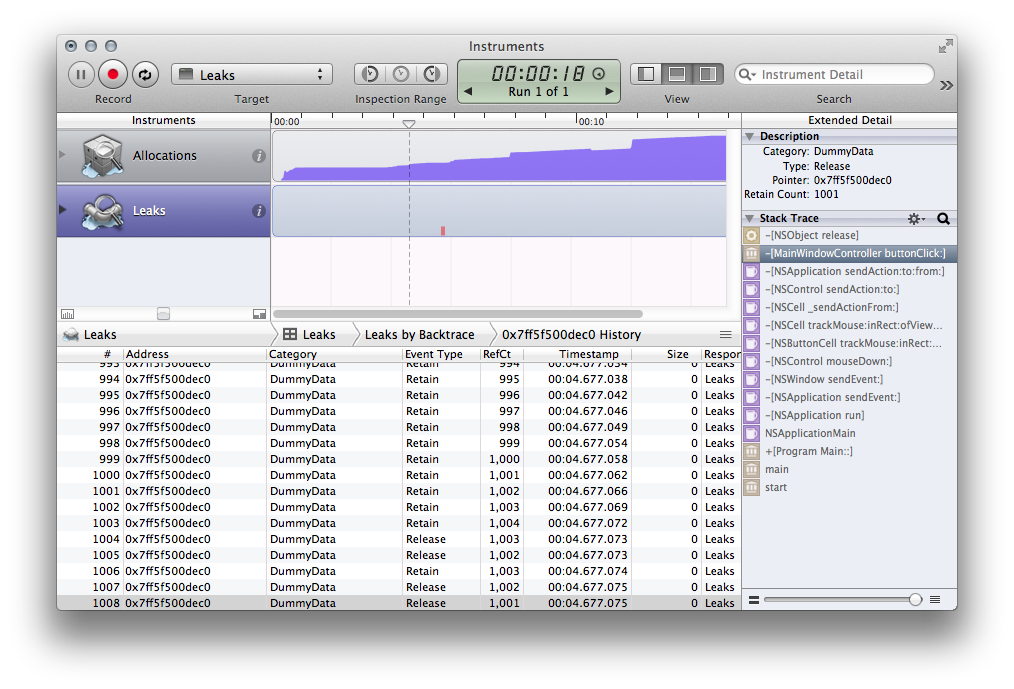
What's going on? Shouldn't d going out of scope release the array,
which in turn releases the DummyDataItems, which in turn… wait, we're
getting close to the problem! It looks like our data structure contains
what is called a "retain cycle". The DummyData holds on to the NSArray,
which holds on to the DummyDataItems which, in turn, hold on to the
DummyData itself. Even though d is going out of scope, its retain
count is only going down to 1001, because all the DummyDataItems still
have references. As a result, the DummyData object actually never gets
freed, and neither does the NSArray or the DummyDataItems inside it,
which, in turn, can never give up their hold on the DummyData itself.
Though in this case we found the issue fairly quickly, Instruments has
one more tool up its sleeve to make it even easier to find retain
cycles: Click on the "Leaks" item in the navigation bar and select
"Cycles & Roots":
<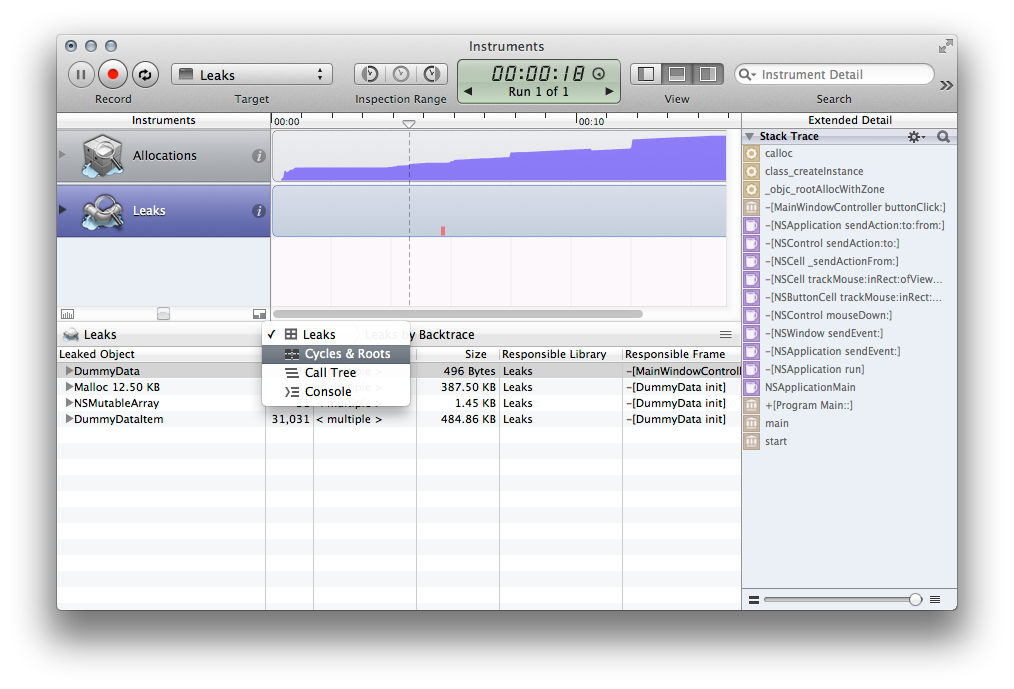
Instruments has actually detected any retain cycles for us and shows
them in a list (in this case, 31 of the same), along with a nice
graphical representation of what is going on.
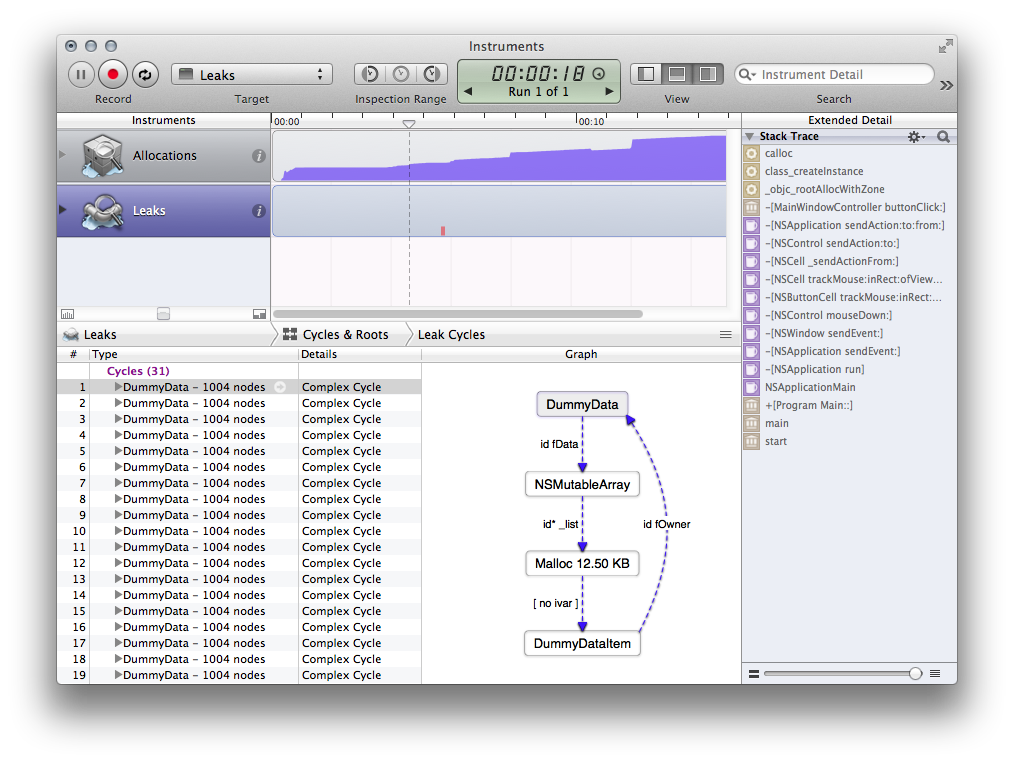
From this view (even without our previous investigation), it becomes
immediately clear that the fOwner reference from DummyDataItem back to
DummyData is the culprit.
How do you break this vicious circle (assuming you cannot simply drop
the owner reference altogether)? Weak references to the rescue!
type
DummyDataItem = class
private
fOwner: weak DummyData;
…
public class DummyData
{
private __weak NSMutableArray fData;
…
public class DummyData
{
weak var fData: NSMutableArray?
…
By default, all variables and fields in Elements (and Objective-C with
ARC) are strong — that means when an object is stored in the
variable, its retain count is increased. By contrast, weak
references just store the object without affecting retain count. In
fact, they do one better: they also keep track of the referenced object
and automatically get set to nil when said object is released — so you
never have to worry about the variable pointing to a stale object (which
is a big problem in non-ARC languages).
Sidebar: A third type of object references are so-called unretained references.
These behave like regular pointers in old-school languages; they store
the object address, and when the object gets released, that address will
be stale — your code will be responsible for worrying about that.
With the code fixed, hit the "Start With Instruments" menu again. Your
app will launch and Instruments will profile, and as you work with your
app, you will notice that the memory load now stays down — as originally
expected.
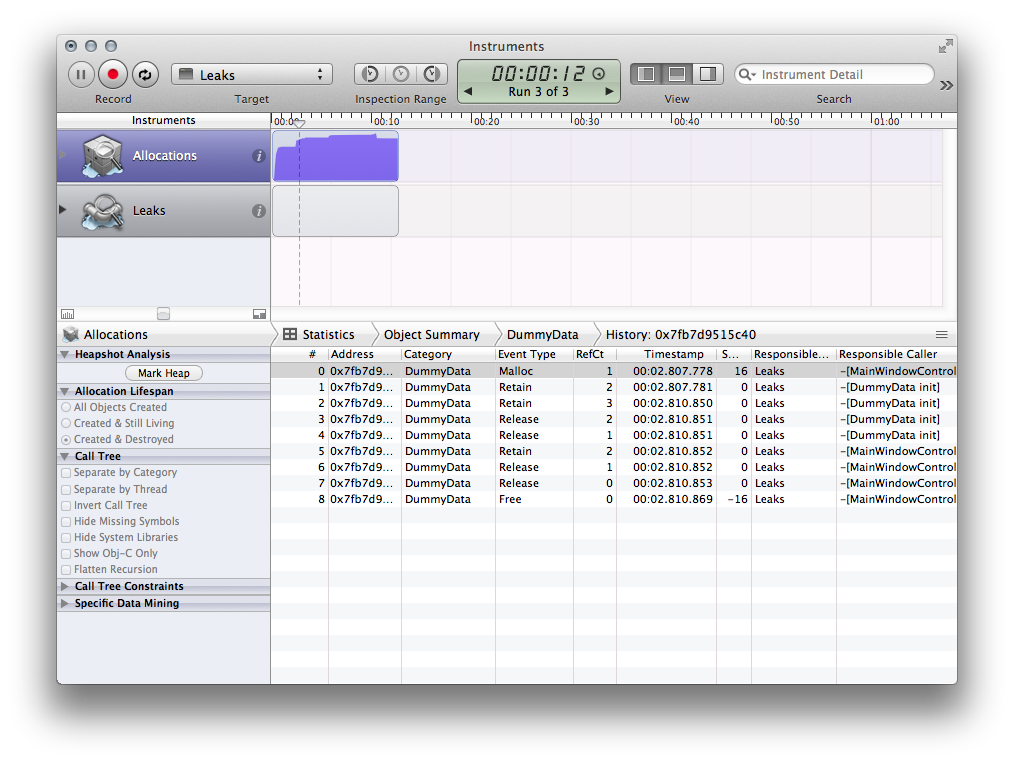
Of course, the Leaks pane will remain empty, but just to confirm, you
can select the "Allocations" instrument, select "Created & Destroyed" in
the sidebar and then locate and drill into one of the DummyData objects.
As you can see, the retain/release history is much more sane now — no
1000 extra retains from DummyDataItem — and the object actually was
released at the end of buttonClick.
Success!
Summary
We've had a quick look at how Instruments works and can be used to inspect
memory allocations (the first phase of the investigation above does not
just apply to bona-fide leaks and retain cycles, but can also be helpful
if you just want to get a general impression of what memory your app is
holding on to, and why), learned about retain cycles and the weak, 'strongandunretained` Storage Modifiers, and we have also seen
how Instruments can be used from Elements.
See Also
On the Cocoa platform, which uses ARC rather than Garbage Collection for memory management, three Storage Modifier keywords are available to control how object references are stored in local variables, fields or properties.
By default, all variables and fields are strong – that means when an object is
stored in the variable, its retain count is increased, and when a variable's value gets overwritten, the retain count of the previously stored object gets reduced by one.
Storage modifiers can be used on type names in:
- local variable and field declarations,
- property declarations,
- method parameter declarations.
The strong, weak and unretained storage modifiers are available in all languages:
| Oxygene |
C# |
Swift |
Java |
strong |
__strong |
strong |
__strong |
weak |
__weak |
weak |
__weak |
unretained |
__unretained |
unretained |
__unretained |
These modifiers are only available for the Cocoa platform and cannot be used in .NET and Java projects unless Cross-Platform Compatibility is enabled, in which case they are ignored on .NET and Java.
Strong
strong storage is implied as default whenever referencing types without any of the other two storage modifiers. The following two variable or field declarations therefore are the same:
var name: NSString;
var name: strong NSString;
NSString name;
__strong NSString name;
var name: NSString?
strong var name: NSString?
NSString name;
__strong NSString name;
Weak
Optionally, weak references store the object reference without affecting the retain count. In addition, weak references also keep track of the referenced object and automatically will get set to nil/null when said object is released — without any interaction from your own code. This makes weak references ideal to hold on to an object "for as long as it stays around", without having to worry about stale object pointers.
The most common use for weak storage is to avoid Retain Cycles, where one object holds on to another and the second object also references the first.
Unretained
A third type of object references are so-called unretained references. These behave like regular object pointers in old-school languages: they store the object address and do not keep track of the objects life cycle.
When the object gets released at a later point in time, an unretained reference will point to stale memory. For this reason, unretained is the most seldom used storage modifier, and should only be used in controlled scenarios when your code has exact control or knowledge about the life cycle of the referenced objects. The upside of unretained is that it has an ever so slight performance benefit over weak.
var name: unretained NSString;
__unretained NSString name;
unretained var name: NSString?
__unretained NSString name;
See Also
There are essentially three ways in which Objective-C APIs pass objects references.
| ObjC |
Oxygene |
C# |
Swift |
NSObject *obj |
obj: NSObject |
NSObject obj |
obj: NSObject |
NSObject **obj |
var obj: NSObject |
ref NSObject obj |
var obj: NSObject |
NSObject *obj[] |
obj: ^NSObject |
NSObject *obj |
obj: UnsafePointer<NSObject> |
Like most modern languages, all Elements languages omit the explicit "pointer" syntax (^ in Pascal, * in C) on class pointers, using just the class name to represent the type and implying automatically that the type is heap based. This comes natural to today's Pascal developers and matches how Oxygene and C# behave on .NET and Java, and how Swift behaves. Delphi too handles class types this way. By contrast, Objective-C, C++ and older Borland Pascal/Turbo Pascal dialects used or still use ^ (or *) to denote heap-based objects.
This topic explains how Objective-C-style pointer references map to the Elements languages.
1. Plain Object References
Therefore, the first reference type listed above is the standard way of passing of an object to a function, and NSObject * simply maps to, say,
method foo(obj: NSObject);
func foo(obj: NSObject) {
2. var/ref`inout` Parameters
The second syntax is used by Objective-C to pass objects "by reference", usually in order let the called function replace the object, or return a new object where none was passed in. All Elements languages have their unique keywords for expressing this concept. The second variant, out/__out, only differs in semantics to emphasize the unidirectional nature of the by-reference variable.
var and out in Oxygene,ref and out in C# and inout and __out in Swift.
So the NSObject ** syntax maps to, say:
method foo(var obj: NSObject);
void foo(ref NSObject obj) {
func foo(inout obj: NSObject) {
So note:
- Elements will allow
nil to be passed to by-reference parameters on the Cocoa platforms only. On .NET and Java, a valid variable must be passed.
- You can use
assigned(@obj) to verify if a valid reference value was passed. This will return false, even if the reference itself is nil.
- It will always be safe to evaluate or assign to the
var parameter, even if nil was passed in.
- The Oxygene [Colon Operator](/Oxygene/Expressions/MemberAccess (
:) and C#/Swift "Elvis" Operator (?.) can be safely used on parameters, so obj:description or obj?.description respectively will validate that both assigned(@obj) and assigned(obj) are true, before calling into description.
3. True Object Pointer Parameters
The third Objective-C syntax above is equivalent to the previous on a technical level, but has different implications in how the passed
reference will be accessed inside the called method, in that commonly not just a single object reference is passed in, but an in-memory array of consecutive object pointers. The NSObject *obj[] syntax maps to:
method foo(obj: ^NSObject);
void foo(NSObject *obj) {
func foo(obj: UnsafePointer<NSObject>) {
Both the address of an object (@someObject in Oxygene, &someObject in C# and Swift) or a dynamic array of objects can be passed into this type of parameter.
4. Dynamic Array Parameters
In addition, Elements of course also allows the declaration of true dynamic array parameters such as:
method foo(obj: array of NSObject);
void foo(NSObject[] obj) {
func foo(obj: NSObject[]) { // not to be confused with [NSObject]
Here, a true reference-counted dynamic array is passed into the function, and this call has no equivalent in Objective-C, since dynamic arrays are unique to Elements.
Elements comes with its own sophisticated debug engine for running, testing and debugging projects on the Apple platform, including Mac projects, as well iOS, tvOS and watchOS applications on device or on the Simulators provided by Xcode and the SDKs.
All debugging happens on a Mac, or a device connected to a Mac (via USB or WiFi), so if you are working from Windows, a CrossBox connection to a Mac is needed.
See Also
Yo can debug your macOS and Mac Catalyst projects on your Mac, directly from Fire or remotely from Water or [Visual Studio](/Visual Studio).
macOS Projects
macOS projects are projects ste to build directly for macOS and it's APIs, including low-level frameworks such as Foundation, and higher-level UI frameworks such as AppKit. macOS projects can run and debug only on the Mac.
In Fire, "Mac" will automatically be selected as the default run destination in the CrossBox device picker. In Water or [Visual Studio](/Visual Studio), you must select (or newly connect to) a remote Mac, first.
Once done, simply select "Run" ("Start" in Visual Studio), or press ⌘R (Fire) or Ctrl+R (Water) or F5 (Visual Studio) to run your app. When developing on Windows, your app[ will first be transfered to or updated on the remote Mac (parts may already be there from the build), before it launches.
Architectures
By default Mac apps build for the architecture of your local Mac – arm64 for newer Apple Silicon-based Macs, and x86_64 for older Intel-based Macs, so that they will run natively.
On Apple Silicon-based Macs, you can optionally also debug the x86_64 version of your project in the Rosetta 2 translation layer. This can be useful of your application contains architecture-specific code or behaviors that need to be tested separately, or to debug problems specific to the Intel build of your app.
With a Mac project open, you will find that in addition to the local "Mac" entry in ther CrossBox device picker, you will also see a second entry named "Mac (Rosetta)". Selecting this item as the target device will force your application to run it's x86_64 slice in the translation layer.
Note that you will need to manually change your project to include the x64_64 architecture in Project Settings for tis to work. Also note that if you set a project to build only for x86_64, it will always run under Rosetta.
No translation for arm64 binaries is available on Intel-based Macs, so you will omly be able to run and debug x86_64 binaries on those machines (although you can of course build from arm64, for deployment.
Mac Catalyst Applications
Mac Catalyst apps are projects that target iOS and use the UIKit based GUI frameworks, but are set to optionally also run as native(-ish) Mac applications (not to be confused with iOS apps themselves that can be run on Apple Silicon-based Macs).
Mac Catalyst can be enabled in your iOS project by setting the "SupportMacCatalyst" Project Settings to True. Once done, "Mac" becomes available as an option in the CrossBox debice picker, next to your real devices and Simulators. Selecting this option and running will build your app for the "Mac" Build Destination and run it locally on your Mac.
Note that the Mac Catalyst build of your app is not the same as your regular iOSM (or Simulator) built, even thou it uses a very similar set of frameworks, and might be targeting the same architecture(a). Mac Catalyst apps have access to additional APIs to make apps more "Mac-like", and you can check for Mac Catalyst vs iOS speciifc code both at compile-time (e.g. if defined("MACCATALYST")) and runtime (e.g. checking UIDevice.current.userInterfaceIdiom for Mac).
iOS Applications on Apple Silicon
While Apple Silicon-based Macs allow installing and running iOS (non-Mac Catalyst) apps from the App Store, it is currently not supported to run and debug apps in this mode. To test your iOS apps, you must either use a Device or Simulator, or a dedicated Mac Catalyst build as mentioned above.
Debug Engines
Elements ships with two debug engines for Cocoa project: the legacy LLDB debug engine and the new Island debug engine.
The legacy LLDB debug engine uses Apples standrad LLDB debugger internally. it is supported for Toffee projects and on Intel-based Macs only. It is the default debug engine on older macOS versions before Big Sur.
The new Island debug engine was developed fully in house, and provides support for both Objective-C ("Cocoa") and Island0native object models (as well as, in the future, Swift ABI). It is the default engine on Big Sur and later, and the only debug engine available when working on an Apple Silicon-based Mac.
Where applicable, you can toggle between the two engines in Project Settings via the Debug Engine setting.
See Also
You can debug your iOS, tvOS and visionOS projects directly on device, running as they would for your users, with a device that is connected to your Mac by USB or WiFi.
Prepare for Debugging
There are a few things that might need to get set up before you first develop on a particular device.
Trust the device
When a device is first connected to a Mac, it restricts what the Mac can do via USB, until you trust it. Your iOS or watchOS device will show a message asking you whether you want it to trust the connected computer, and only after you confirm can the device be used for debugging (and most other tasks you would want to do when connected).
Getting Device Support
iOS, tvOS, visionOS and watchOS Devices often run slightly different versions of the operating system than Xcode ships support for.
When you first start working with a device, or if you updated to a new version or a new beta of the Operating System (even a minor new version, such as from 14.4 to 14.4.1), you should launch Xcode, open the Device Manager (⌘⇧2) and let Xcode download support files for the exact version of the OS you are running.
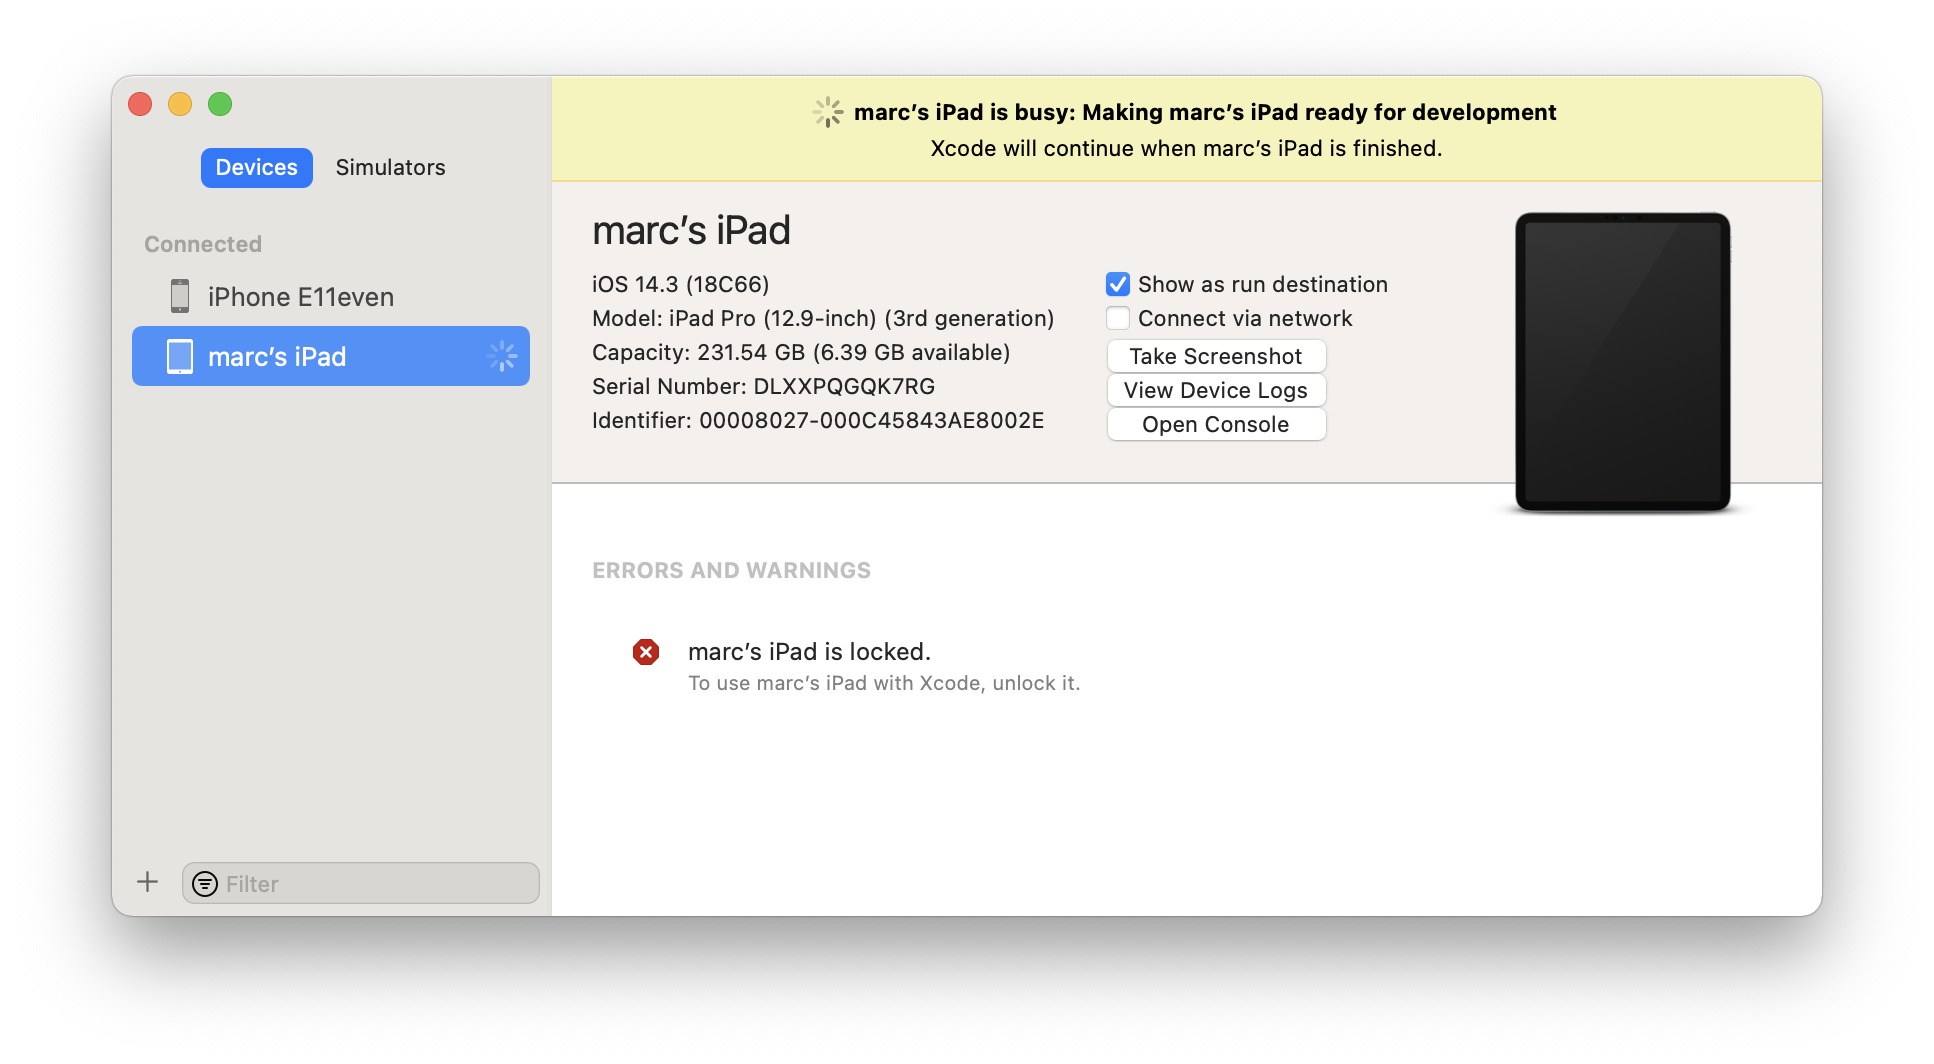
Only after the yellow bar at the top of device manager disappears can will you get the full debugging experience. Without this step, you will be able to run your apps, but you might get incorrect stack traces, as the debugger can not resolve symbols for the OS binaries on device.
Allow WiFi Debugging
On this same screen you can also enable your device for debugging via WiFi, without USB cable connection to your mac, by checking the "Connect via Network" option.
Once checked, you can unplug your device, and it will still remain available for debugging.
Do note that tom preserve battery, your debice will not remain connected to your Mac indefinitely if your devices screen turns off or your device goes out of range of the Mac for a prolonged period of time, you will see it disappear from the CrossBiox device picker in the IDEs (or show as "(not connected)", if it is selected as the active device for tour project.
Usually, just turning the device back on and unlocking it close to your Mac should make it reconnect; if that fails quickly connecting it via USB for a few moments should do the trick.
Project Requirements
While you can run any code you like on your Mac or in the Simulator, deploying apps to your device requires a proper Provisioning Profile and Code Signing Certificate set up for your project. Please refer to the two before-linked topics for details.
Note that profiles and certificates differ between those used for debugging (or simply side-loading onto device_ and deployment (whether via the App Store, TestFlight or otherwise).
It is common to set your "Release" configuration to use your deployment profile and certificate, and the "Debug" configuration to se the debug ones – but these configurations are convention, you can name or set this up differently, if you prefer.
Let's Debug
With these things our of the way, you are ready to debug your project. Simply select the device yu want to debug on from the CrossBox menu and select "Run" fromm the "Debug" menu in Fire or Water (⌘R or Ctrl+R), or press "Start" in Visual Studio (F5).
Your project will be built (if needed), and deployed to your device. If you are working from Windows, it will be uploaded to the Mac, as an intermediate step.
Read more about:
Troubleshooting
in Fire and Water, the Build Log will start to extend beyond the build itself, and update to show details about the deployment and launch of your application. This is a good place to look for more detailed information about what the problem is if deployment or launch of your app failed.
Common scenarios are
-
Your device got locked while building or deploying (or you never unlocked it); simply unlock it, run again, and maybe keep a finger on the screen to keep it from locking.
-
Your Provisioning Profile and/or Certificate do not match, do not contain your device, or you are using the wrong (e.g. deployment) versions.
See Also
In addition to debugging on a real physical Device like an iPhone, iPad, iPod touch or Apple TV, you can also debug your iOS, tvOS and visionOS apps in a Simulator running on your Mac.
In this mode, a separate build of your app will be made that will run natively on your local computer. Debugging in the Simulator can be helpful for efficiency and speed reasons, but – for obvious reasons – does not give the fukll experience and fidelity as running on real hardware, which has different capabilities, sensors and performance characteristics.
Prepare for Debugging
On installation, Xcode will have created a bunch of pre-defined Simulators for various device and OS combinations. You can view, edit and add to these simulators in Xcode's Device Manager, available via ⌘⇧2:
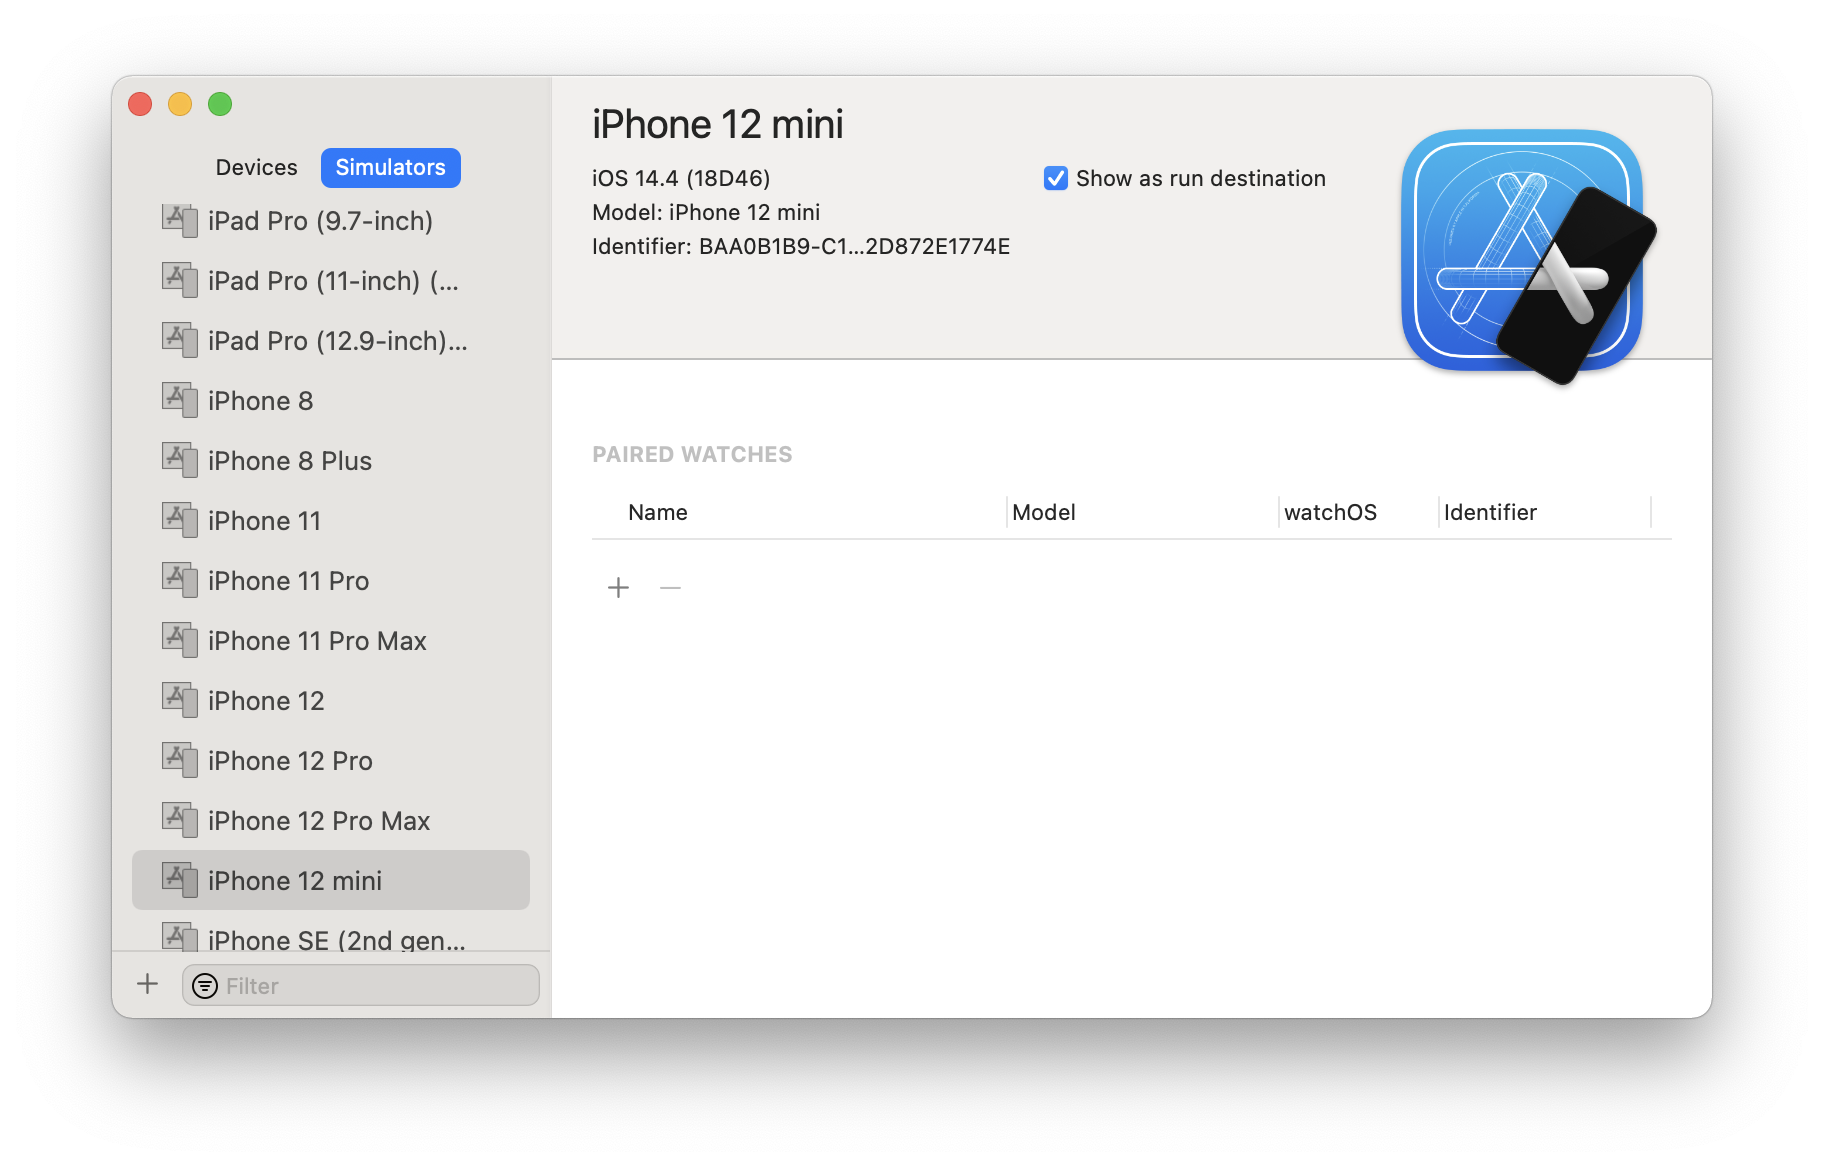
All these Simulators will automatically show in the CrossBox device picker in Fire. In Water or [Visual Studio](/Visual Studio), you must select (or newly connect to) a remote Mac, first.
Once done, simply select "Run" ("Start" in Visual Studio), or press ⌘R (Fire) or Ctrl+R (Water) or F5 (Visual Studio) to run your app. The IDE will automatically boot up the requested Simulator (of not already open from a previous run), install your app, and launch it.
When developing on Windows, your app will first be transfered to or updated on the remote Mac (parts may already be there from the build), as an intermediate step.
Troubleshooting
Just as when debugging on a Device, the Build Log in Fire and Water, will start to extend beyond the build itself, and update to show details about the boot process of the Simulator, deployment and launch of your application. This is a good place to look for more detailed information about what the problem is if deployment or launch of your app failed, of the Simulator fails to boot.
See Also
This section collects information about deploying applications created with the Cocoa edition of Elements, in various scenarios.
The final goal of all your work with an iOS app is probably to submit it to the iOS App Store for distribution – whether it's for sale or as a free app.
Doing so is relatively straight-forward, but does involve a few steps worth outlining here. In principle, these are the same steps when you use Elements as those performed by developers using Apple's own Xcode IDE, so any tutorials or information you find about App Store submissions online will more or less apply to you as an Elements developer, as well.
Refer to Apple's App Distribution Guide as the official documentation for this process.
App IDs, Profiles and Certificates
Since you have been working and testing your iOS app, you will already be familiar with the concepts of App IDs, Provisioning Profiles, as well as Code Signing Certificates. For your local development, you have been using a Development Profile and a Development Certificate to build the app for your devices. Maybe you set these up yourself, or maybe you have let Xcode create them for you when you first connected your device.
For App Store distribution, your first step is to create a dedicated Distribution Profile and a Distribution Certificate. If you have been using the default App ID, you might also want to consider setting up a dedicated App ID for your application, with a unique reverse-name ID string.
All of these tasks are performed on the Certificates, Identifiers & Profiles page of Apple's developer portal, which has become a bit tricky to find a link to recently, but is available via the link above, and also from Fire's "Tools|Cocoa" menu.
Creating an App ID
As mentioned before, this step is optional, but recommended. If you decide to create a dedicated App ID for your app, you will most likely do this early in the development process, and not just shortly before submission.
To do so, click in the "Identifiers" link underneath the "iOS Apps" headline on the page mentioned above. You will see a new view with "App IDs" active on the left, and a list of already configured IDs on the right. Click the "+" button at the top right to create a new ID.
You will be asked to provide a description (this is for your internal use, to recognize the ID later), as well a Bundle ID, which should be in reverse domain notation (e.g. "com.yourcompany.yourproduct").You can choose for the Bundle ID to be "explicit" or "wildcard". An explicit ID contains a full bundle ID that will match exactly one app, while a wildcard ID ends with .* and can be shared by multiple apps.
Near the bottom, you can also enable certain platform services from your App, such as iCloud support, HealthKit access, and the like. Some features (such as Push Notifications) are only available for apps with explicit IDs.
Once you're happy with your setup, click "Continue" to save your App ID.
Creating a Distribution Certificate
Next, click on the "Production link under "Certificates", and once again click the small "+" button in the top right, this time to add a new certificate. Select the "App Store and Ad Hoc" option and press Continue, and then follow the instructions displayed to create your Certificate. These include running the Key Chain Access tool on our Mac, creating a Request, uploading that request and then downloading the generated certificate. Once done, double-click the downloaded certificate file to install it in your local Key Chain, where Elements (and Xcode) will automatically find it.
Creating a Distribution Profile
Finally, click on "Distribution" under "Provisioning Profiles" in the sidebar and – once again – click the "+" button. Choose the "App Store" option and press "Continue". On the next couple of pages, you will be asked to choose an App ID (pick either one you created above, or a wildcard) and the certificate to use. Finally, you'll be asked for a descriptive profile name (make sure to pick one that is unique), and then you can download the profile.
As with the certificate, simply double-click the downloaded file on your mac, and it will be installed. Fire, Visual Studio and Xcode will find it automatically.
App Store Connect
With the steps created above you'd be ready to build your app for distribution, but to actually submit it to the App Store, you will need to visit a second website to set up the actual shop details. Let's get this out of the way first, before going back to Fire or Visual Studio.
Point your browser to Store Connect Connect at https://appstoreconnect.apple.com, log in with your Apple Account and click on the "Apps" icon. A view comes up that shows all the apps you have already configured for the App Store – if you are reading this, it is probably empty.
Click the "+" Button in the top left and choose "iOS App" from the dropdown.
A dialog comes up asking you for some details, the most important being the name (this will be the actual name that shows in the App Store for your app), and the Bundle ID (you can choose from all the App IDs configured in the developer portal, as seen earlier). When you click "Create", iTunes Connect will verify everything is in order, and you're done: the App Store is now ready for your submission.
Building your App for App Store Submission
It's time to leave the web browser and get back to your favorite IDE and build the binary for distribution. Assuming your App development has been going great and your app's code is all ready to go, these will just be a few simple steps.
Open your project in Visual Studio or Fire and go to Project Settings. There's a couple of options you will want to adjust in order to get your app to build form distribution.
As you know, Elements allows you to define project settings for different Configurations, and by default each new project comes with a Debug and a Release configuration. You have probably been using the former as you worked on and tested your app, and that is great. We recommend to keep that one set to your development settings, and update the Release configuration for distribution. Here's how.
First, set the "Provisioning Profile" and "Certificate Name" settings to the newly created profile and certificate. If they don't show up right away, you might need to refresh the list (Visual Studio has a Refresh button, while Fire has a "Refresh Options" item in the drop-down). Again, make sure to set these options for the Release configuration.
Next, locate the "Create .ipa File" option and enable that, as well (check the box in Visual Studio, or set the option to "YES" in Fire).
You should check the "Bundle Identifier" setting to make sure it matches the Bundle ID you want to use, and that you specified for your App ID. If your Bundle ID does not match, App Store submission will fail. What's more though, once you submit your first binary, you cannot change the Bundle ID later on – so make sure you start out using the proper ID you want, as you will be stuck with it for the rest of your App's life on the store.
Finally, you should review the Info.plist file in your project top make sure you're happy with all the information in there. In particular, make sure the CFBundleVersion is the right number (probably 1.0 for your first submission, or 0.1 if you're submitting a beta), and that CFBundleDisplayName, if set, has the proper name you want your app icon to show on the home screen. (If CFBundleDisplayName is not set, Elements will set it to match your project's executable name.)
And with that, you're ready to build. Make sure to activate the Release configuration in the drop-down box in Fire or Visual Studio's toolbar, and hit Build. When all is done, you will see the release version of your .app bundle in the bin/Release folder, alongside an .ipa file (which is essentially a zipped-up version of your .app, with some extra meta-data). This IPA is ready to be submitted to the App Store.
Upload to the App store
To upload the IPA to the store, you will use Apple's "Application Loader" App. If you are using Fire, you can conveniently launch this App from Fire's "Tools|Cocoa" menu. If not, the easiest way to get to it is to launch Xcode on your Mac and go via the "Xcode|Open Developer Tool" menu.
Application Loader presents two big options in the center. Select the left one, "Deliver Your App" and press "Choose". Up comes a standard File|Open dialog, where you can browse for your IPA and upload it. Follow the instructions on screen to answer a few questions, such as which App Store app the binary is for, and then Application Loader will verify and upload your IPA.
Verification will be done both before the upload (locally) and after (by the App Store server), and either step may generate warnings (e.g. point out minor inconsistencies you may want to address for the next upload) or failures (e.g. something that is wrong with your binary that will prevent the app from being submitted as is).
Common pitfalls include:
- invalid architectures (build for
armv7 and arm64, unless you know what you're doing)
- mismatched Bundle ID and Profile/Certificate
- invalid information in
Info.plist or the Entitlements file
- accidentally building against a Beta SDK
Hopefully, your upload will go well and you will be notified by a nice and friendly "ding". Which means it is time to head back to iTunes Connect to finish your submission.
iTunes Connect, Revisited
Go back to the "MyApps" view on iTunes Connect again, and this time click the big icon of your app, which showed up in the main view after you configured it above.
You will see a tabbed view with details for your app, with the left-most "Versions tab being active and showing your version "1.0". You will need to fill in most of the fields in this view with details about your app – including a description, keywords and screenshots for the different device types you support.
If you scroll all the way down, you will see a section called "Build". If you have successfully uploaded an IPA with Application Loader before, you will see a "+" button that will let you select which binary (in theory, you might have uploaded more than one) to use for this version. Click that, and select the version you just uploaded.
Once you're happy with all the details about your app, click the "Submit for Review" button at he top right of the page. The App Store server will do some more verifications (including checking that all the data you entered is valid and more checks on your binary). If all goes well, your app will be submitted for review.
Your next step now is to sit back, relax, and wait the average of 7 days it takes for Apple to review and (hopefully) approve your app. That, or get started on those features for version 1.1.
See Also
The Elements compiler has two compiler back-ends that support building Cocoa projects.
-
The Toffee compiler is the current default back-end for Cocoa projects, and it directly and exclusively targets the Objective-C runtime that is the back-bone of Apple's platforms. Binaries compiled with Toffee will be virtually indistinguishable from those created with Apple's Clang compiler for Objective-C.
-
The Island/Darwin back-end is allows you to mix Objective-C code with Elements' own object model (shared between all the Island-backed platforms) as well as (in the near future) the new Swift object model.
Benefits of the Toffee Mode
Toffee is the current default back-end for targeting macOS, iOS and the other Apple platforms. It has been around for over a decade, is time-proven and well tested on all platforms. Many of our own internal and external projects and products are compiled using Toffee, including the significant code base that makes up our Fire IDE.
- Maps directly to Objective-C, so your generated projects are as indistinguishable as those created with Xcode and Clang as they can get.
Drawbacks of the Toffee Mode
- No support for interfaces on Structs
- No access to Island RTL
- No access to the Island Object Model – all objects are Cocoa classes descending from
NSObject
- No access to (forthcoming) Swift Object Model
Benefits of the Island/Darwin Mode
- Newer compiler infrastructure
- Fewer platform limitations (e.g. such as interfaces on records/structs) than on Toffee
- Access to the Island RTL API, for easier code sharing with other Island platforms.
- Mix more efficient Island Object Model classes with Cocoa classes seamlessly.
- In the future1, access to Swift Object Model types, including Swift-only Apple Frameworks.
Drawbacks of the Island/Darwin Mode
- Rougher and less-well tested compiler toolchain
- Internals can be "more messy" and feel less native Cocoa-like, when mixing Island and Cocoa object models
- (For now) no watchOS support due to limited threading APIs that prevent the use of our GC.
Which Back-End Should You Use?
Right now, Toffee is the right back-end to use if your main goal is to create a native macOS, iOS, tvOS or watchOS GUI application or library.
It provides you with access to all the Cocoa APIs and lower-level C APIs you need and is well-tested and widely used internally and by other Elements users. The executables and code generated with Toffee will be as close to that generated by Xcode and Clang as can be imagined.
Toffee code runs closer to the Objective-C runtime, because every class you create is a pure Cocoa class, and Elements RTL on Toffee is designed on top of Cocoa APIs, for example toll-free bridging types such as List and Dictionary to Apple-provided Foundartion types.
The Island/Darwin back-end is the right option to use if you are porting existing Island/Windows or Island/Linux code, or starting a low-level project targeting all three of those platforms where having the same type semantics provided by the shared Island Object Model and the availability of the Island RTL APIs is helpful. (Of course Elements RTL provides a common set of APIs, for all platforms that is worthy considering, if the shared API is the main driving factor).
"ToffeeV2" Mode
Our long term goal is to move all Cocoa development to the Island/Darwin back-end. A "best-of-both-worlds" mode called "ToffeeV2" is provided to make this migration easier.
ToffeeV2 mode can be enabled by setting the "Use Toffee V1" setting in a Toffee project to False (it defaults to True).
ToffeeV2 mode will switch your project to use the Island/Darwin back-end, but should let most existing Toffee code compile as is, by tweaking the default assumptions. For example, just as in regular Toffee mode, classes that do not specify ancestor or an Object Model will default to Cocoa rather than Island classes.
Please read more about ToffeeV2 mode here.
Overview
There are four steps between "Toffee" and pure "Island":
| Mode/Setting |
Compiler |
User-declared Classes are? |
Elements RTL? |
| Toffee |
Toffee |
Everything is Cocoa and every class is an Objective-C runtime ("Cocoa") class. |
Most Elements RTL types map to native Cocoa classes, for toll-free inter-op with the SDKs. |
| ToffeeV2 |
Island |
User-declared classes are Cocoa by default; you can interact with Island classes, and mark your own classes with the [Island] attribute to make them Island native classes. |
Elements RTL still maps to Cocoa objects. |
| Island + DefaultObjectModel=Cocoa |
Island |
User-declared classes are still Cocoa by default. |
Elements RTL now maps to Island RTL objects (e.g. List<T> is not an NSArray, but maps to the List from Island RTL). |
| Island |
Island |
User-declared classes are Island by default. You can still interact with Cocoa classes, and mark your own classes with the [Cocoa] attribute to make them Objective-C-native classes. |
Elements RTL maps to Island RTL objects |
See Also
In the future, the classic "Toffee" platform for creating applications for the Cocoa platform is being migrated to use the new Island/Darwin compiler and tool chain back-end. This will enable better interoperability with Island and Swift Runtime objects, provide other under-the-hood benefits and improvements, and eliminate the overhead of supporting two separate tool chains for Cocoa.
Right now, the new mode is inactive, and can be enabled by explicitly setting the UseLegacyToffeeMode project setting to False. The setting currently defaults to True. The default will change once the new mode is fully functional and compatible, and the option will be removed completely eventually, when the legacy Cocoa mode will be discontinued (probably not for quite a while).
Disabling UseLegacyToffeeMode in a Cocoa project (or project target) has the following effects:
- The effective Mode during bulld will be "Island" and the SubMode will be "
Darwin".
- The SDK, if not set explicitly, will be se to the origial sub-mode (e.g. "
iOS", "macOS", etc.)
- the Default Object Model setting will be set to "
Cocoa".
- The
COCOA, TOFFEE and (new) TOFFEEV2 Conditional defines will be set (as will be ISLAND (!!)).
- Reference resolving will be instructed to consider "
ToffeeV2" subfolders when looking up library referendes such as Elements RTL, with priority over the "Island/Darwin" ones.
- Reference resolving will ignore references to
libToffee, which is no longer required.
By the combination of these effects, existing "Toffee" Cocoa projects should compile and act mostly as they did before, even though they are now using the newer Island compiler backend. In particular, classes and interfaces will still default to Objective-C runtime types (the only type supported by the old Cocoa mode). But there are a few differences:
- Cocoa code now has access to Island classes, including Island RTL, GoBaseLibrary and any second or third party Island libraries.
- Island code can be intermixed within the Cocoa project seamlessly, if needed.
- Swift Projects now reference the Island-native version of the Swift Base Library, which is relieved from some limitations of the Toffee Cocoa compiler back-end (such as no interfaces on structs).
- Once available1, Cocoa code will also have access to Swift Runtime classes.
Some caveats include:
- The
ISLAND define will now be set, even for Cocoa projects. Cross-platform projects that use conditional compilation using the ISLAND and TOFFEE or COCOA defines might need to be reviewed to change the order the defines are checked or add additional checks, as necessary.
Elements RTL
Projects using Elements RTL will, by default, continue to reference a special Cocoa-based version of the library, where most types are mapped against their Cocoa counterparts (e.g. List<T> continues to map to NSArray, instead of the Island-native List<T>.
This ensures best interoperability of Elements RTL types with system APIs for Cocoa projects.
See Also
The Further Reading section collects topics on various concepts and technologies that are relevant to the Cocoa platform, but beyond the scope of being covered exhaustively on this documentation site, because they are not specific enough to Elements.
The topics are provided because other pages on this site refer to them, and generally, the topics will provide a short summary or overview of the concept or technology, and then provide pointers to external places that explore the matter in more detail.
Topics are listed in alphabetical order.
Also on This Site
Platform-Relevant Topics Elsewhere on this site:
Auto Layout is a system employed by the user interface system in Cocoa and Cocoa Touch since iOS 7.0 and OS X 10.9 Mavericks, which allows user interfaces to be designed (be it in the visual designer in Xcode in Xib and Storyboard files or via code) in a way that can automatically adjust to various screen sizes, windows sizes or device orientations.
Auto Layout is based on *Constraints that specify aspects such as minimum (or exact) spacing between controls, relative alignment within containers and so forth.
Since iOS 8.0, Auto Layout works in combination with Size Classes to also allow the UI to adjust more radically between iPhone and iPad, or between portrait and landscape orientation.
Auto-Layout is available since Xcode 5; it can be enabled for older Xib or Storyboard files (or disabled for newer ones, if you do not want to use it) on the first tab of the Utility pane in Xcode, on a per-file basis. The same is true for size classes, in iOS projects starting with Xcode 6. The exact feature set available to Auto Layout may also depend on the version of Xcode selected in this panel – we recommend selecting "Default".
Read More
Read more about Auto Layout and Size Classes at these external links:
Auto-Release Pools are a concept that is (mostly) used behind the scenes by Automatic Reference Counting to determine when objects can be released. Auto-release pools are created by the Cocoa runtime and live on the current execution stack. When object references are autoreleased (instead of fully released), rather than decrementing the object's reference count, the object is placed in the currently active auto-release pool. When the Auto-release pool later gets released (usually higher up in the call stack), the object references in the pool will be released at that time.
In most cases, you will not need to create auto-release pools manually, and the system will create them for you as needed. For example, in code written to react to a UI event, you can assume that Cocoa created an auto-release pool before calling your handler, and that objects you allocate within the handler that end up being auto-released will be released after your handler returns.
However, sometimes it is necessary to manually create an auto-release pool in code – for example when doing memory allocations in a long-running loop. All Elements languages provide a syntax for this, with Oxygene and C# reusing the using keyword syntax:
using autoreleasepool do begin
// do work here
end;
// the auto-release pool will be cleared here
using (__autoreleasepool)
{
// do work here
}
// the auto-release pool will be cleared here
autoreleasepool {
// do work here
}
// the auto-release pool will be cleared here
See Also
Read More
Read more about Auto-Release Pools at these external links:
Bridging is a technology on the Cocoa platform that allows you to cast low-level Core Foundation entities such as CFStringRef or CFArrayRef to higher-level Foundation objects such as NSString or NSArray. Bridging works toll-free, that is without runtime overhead.
The Elements compiler provides the bridge<T> System Function express bridging functionality, available in all languages.
See Also
Read More
Read more about Bridging at these external links:
Retain Cycles are an aspect (and possibly the one major downside compared to GC) of Automatic Reference Counting. Thyey happen when two (more more) objects strongly reference each other in a circular fashion, causing an infinite loop and keeping each other from being released, even though nothing else may be referencing the interlinked objects externally anymore.
A common example is that of two classes in a parent/child relationship. If both the parent (for example a collection) references its children, and the child objects each reference the parent, the reference count for neither will ever go to zero, even when all outside references to the parent and children have been released.
The Elements compiler, just as Objective-C and Apple's Swift implementation, introduces Storage Modifiers to allow your code to deal with and avoid retain cycles. In the above example it would be common practice to mark the reference from the child class back to its parent with the weak (Oxygene and Swift) or __weak (C#) keyword.
The Profiling with Instruments article gives a more elaborate example for this.
See Also
Selectors are a unique type for the Cocoa platform, and are used to represent a method name for the purposes of passing it on to APIs and have the method with the given name called back at a later time.
They are represented by the SEL type, and the Cocoa base libraries provide functions for converting a string to SEL and back, with the NSSelectorFromString and NSStringFromSelector APIs available in Foundation.
The Elements languages also provide a syntax for declaring selector literals, using the selector (Oxygene) or __selector (C#) keywords, and a string-like syntax in Swift:
var s: SEL := selector(buttonClicked:);
someObject.performSelector(s);
SEL s = __selector(buttonClicked:);
someObject.performSelector(s)
let s: SEL = "buttonClicked:";
someObject.performSelector(s)
Note that selector literals (and NSSelectorFromString) expect the selector in Objective-C Runtime naming convention, with colons in place of each parameter.
In Swift, the selector literal syntax is indistinguishable from a regular string literal. Context of the literal (such as the type of the variable or parameter it is being assigned to) is used to distinguish between strings and selectors.
Using the selector literal syntax will cause the compiler to perform checks if the specified selector is valid and known, and a warning will be emitted if a selector name is provided that does not match any method known to the compiler. This provides extra safety over using the NSSelectorFromString function.
See Also
Read More
Read more about Selectors at these external links:
Xcode is Apple's own IDE for creating Mac and iOS apps using Objective-C and Apple's own implementation of the Swift language.
As Elements developer, you interact with Xcode for two things:
- While building your cocoa projects, the Elements compiler will leverage some of the command line tools provided by Apple as part of Xcode, under the hood.
- When working with XIB and Storyboard Files, you will use the visual designers inside Xcode, also sometimes referred to as "Interface Builder".
Working with Multiple Versions of Xcode
As an experienced Mac or iOS developer, and in particular at times when
there is an ongoing beta for the next release of OS X or iOS, you may
find that you want to work with multiple versions of Xcode on the same
Mac. For example, you might want to use the shipping version of Xcode
for your production app work, and switch to the latest beta of Xcode
when playing around with the latest OS.
Xcode provides a built-in mechanism for that by having the concept of an
"active" version. You can simply keep multiple copies of Xcode.app on
your Mac (either in different folders or by naming them something like
Xcode-45.app with an appended version number) and switch which version
of Xcode is "selected" and will be seen by CrossBox in two ways:
-
Inside Xcode itself, you can go to the "Preference" window, and in the
"Locations" tab you can choose between all the different versions of
Xcode found on your system to decide which one is "active" (this is
regardless of which version of Xcode you are actually in to change
this):
-
Alternatively, you can run
sudo xcode-select --switch ''/path/to/Xcode.app'' in Terminal to
switch the selected version of Xcode (where you'd replace
/path/to/Xcode.app with the actual path to the version of Xcode you
want to use).
You can also use xcode-select --print-path in Terminal to find out
what version of Xcode is currently selected. CrossBox uses this command
line internally, so you can be assured that whatever the output is, it
is what CrossBox will see as well.
See Also
Read More
Read more about Xcode at these external links:

Elements supports creating applications for the Android mobile platform, both using the Android SDK and the Android NDK.
The bulk of most applications will be build against the Java-based Android SDK, which provides a wide range of high level APIs for building GUI applications and accessing system services. Android SDK based applications compile directly to Java Byte Code, and from there are further processed using Android's DEX or D8 processors to a special byte code format used by the Android runtime.
In addition, Elements allows you to build extensions using the native Android NDK (Native Development Kit). NDK executables are extensions compiled to CPU-native code for ARM, and interact with more low-level C-based APIs of the Android and its underlying Linux operating system. NDK extensions can be loaded into an Android SDK-based application, and the two parts can interact via JNI, as needed.
Of course the main use for Android NDK code is to mix with an Java-based Android SDK app, and Elements makes this really easy.
Of course Android projects can use any of the six Elements languages, Oxygene, C#, Swift, Java, Go and Mercury.
Tutorials
Videos
See Also
Compiler Back-ends
- Cooper — for Java-based Android SDK
- Island/Android — for Android NDK
The Android Software Development Kit is the SDK for writing Android applications.
Android depends on the JDK to compile Android applications, but once the application gets installed on Android, the Android Runtime or Dalvik (depending on the Android version) runs the application.
Android's class library (both the core Java classes and Android-specific APIs) is contained in android.jar and has lots of types spread over several namespaces (or "packages", in Java lingo).
See Also
See Also
The Android Native Development Kit (NDK) is a toolset that lets you implement parts of your app in native code, using lower-level "C style" APIs and with direct access to memory and the Linux platform that underlies the Android OS.
Android NDK extensions can be created using all Elements languages; they compile to CPU-native ARM or Intel code, and can be embedded in and interacted with from your Android SDK based main application.
See Also
See Also
Android app development is split into two, very distinct worlds.
On the one side, there's the Android SDK, which is what the bulk of Android apps is being developed in. The SDK is based on the Java Runtime and the standard Java APIs, and it provides a very high-level development experience. Traditionally, the Java language or Kotlin would be used to develop in this space.
And then there's the Android NDK, which sits at a much lower level and allows to write code directly for the native CPUs (e.g. ARM or x86). This code works against lower-level APIs provided by Android and the underlying Linux operating system that Android is based on, and traditionally one would use a low-level language such as C to write code at this level.
The Java Native Interface, or JNI, allows the two worlds to interact, making it possible for SDK-level JVM code to call NDK-level native functions, and vice versa.
Elements makes it really easy to develop apps that mix SDK and NDK, in several ways:
- A shared language for SDK and NDK
- Easy bundling, with Project References
- Automatic generation of JNI imports
- Mixed Mode Debugging
A Shared Language for SDK and NDK
The first part is the most obvious and trivial. Since Elements decouples language form platform, whatever the language of choice is, you can use it to develop both the JVM-based SDK portion of your app and the native NDK part. No need to fall back to a low-level language like C for the native extension.
Easy Bundling of NDK Extensions, with Project References
Once you have an SDK-based app and one or more native extensions in your project, you can bundle the extension(s) into your fina .apk simply adding a conventional Project Reference to them, for example by dragging the extension project onto the app project in Fire or Water.
Even though the two projects are of a completely different type, the EBuild build chain takes care of establishing the appropriate relationship and adding the final NDK binaries into the "JNI" subfolder of your final .apk.
Automatic Generation of JNI Imports
Establishing a project reference to your NDK extension also automatically generates JNI imports for any APIs you expose from our native project. All you need to do is mark your native methods with the JNIExport aspect, as such:
[JNIExport(ClassName := 'com.example.myandroidapp.MainActivity')]
method HelloFromNDK(env: ^JNIEnv; this: jobject): jstring;
begin
result := env^^.NewStringUTF(env, 'Hello from NDK!');
end;
[JNIExport(ClassName = "com.example.myandroidapp.MainActivity")]
public jstring HelloFromNDK(^JNIEnv env, jobject thiz)
{
return (**env).NewStringUTF(env, "Hello from NDK!");
}
@JNIExport(ClassName = "com.example.myandroidapp.MainActivity")
public func HelloFromNDK(_ env: ^JNIEnv, _ this: jobject) -> jstring {
return (**env).NewStringUTF(env, "Hello from NDK!");
}
@JNIExport(ClassName = "com.example.myandroidapp.MainActivity")
public jstring HelloFromNDK(^JNIEnv env, jobject thiz) {
return (**env).NewStringUTF(env, "Hello from NDK!");
}
As part of the build, the compiler will generate a source file with import stubs for any such APIs, and inject that into your main Android SDK project. That source file will contain Partial Classes (or Extensions, in Swift parlance) matching the namespace and class name you specified.
All you need to do (in Oxygene, C# or Java) is to mark your own implementation of the Activity as partial (__partial in Java, and no action is needed in Swift), and the new methods implemented in your NDK extension will automatically be available to your code:
namespace com.example.myandroidapp;
type
MainActivity = public partial class(Activity)
public
method onCreate(savedInstanceState: Bundle); override;
begin
inherited;
// Set our view from the "main" layout resource
ContentView := R.layout.main;
HelloFromNDK;
end;
end;
end;
namespace com.example.myandroidapp
{
public partial class MainActivity : Activity
{
public override void onCreate(Bundle savedInstanceState)
{
base(savedInstanceState);
// Set our view from the "main" layout resource
ContentView = R.layout.main;
HelloFromNDK();
}
}
}
public class MainActivity : Activity {
override func onCreate(_ savedInstanceState: Bundle) {
super(savedInstanceState)
// Set our view from the "main" layout resource
ContentView = R.layout.main
HelloFromNDK()
}
}
package com.example.myandroidapp;
public partial class MainActivity : Activity {
public override void onCreate(Bundle savedInstanceState) {
base(savedInstanceState);
// Set our view from the "main" layout resource
ContentView = R.layout.main;
HelloFromNDK();
}
}
Of course you can use any arbitrary class name in the JNIExport aspect, it does not have to match an existing type in your SDK project. If you do that, rather than becoming available as part of your Activity (or whatever other class), the imported APIs will be on a separate class you can just instantiate.
To see the generated imports, search your build log for "JNI.pas" to get the full path to the file that gets generated and injected into your project. You can also just invoke "Go to Definition" (^⌥D in Fire, Ctrl+Alt+D in Water) on a call to one of the methods, to open the file, as the IDE will treat it as regular part of your project. (The same, by the way, is also true of the R.java file generated by the build that define the R class that gives access to all your resources.)
Mixed Mode Debugging
Finally, Elements allows to debug both your SDK app and its embedded NDK extensions at the same time. You can set breakpoints in both Java and native code, and explore both sides of your app and how they interact.
All of this is controlled by two settings, but Fire and Water, our IDEs, automate the process for you so you don't even have to worry about them yourself.
First, there's the "Support Native Debugging" option in your NDK project. It's enabled by default for the Debug configuration in new projects, and it instructs the build chain to deploy the LLDB debugger library as part of your native library (and have it, in turn, bundled into your .apk). This is what allows the debugger to attach to the NDK portion of your app later.
Secondly, there's the "Debug Engine" option in your SDK project. It defaults to "Java", for JVM-only debugging, but as soon as you add a Project Reference to an NDK extension to your app, it will switch to "Both" (again, only for the Debug configuration), instructing the Elements Debugger to start both JVM and native debug sessions when you launch your app.
This, of course, works both in the Emulator and on the device.
See Also
Note that the video and blog post above were created before the automatic generation of JNI Imports was available, so it still mentions having to define the import manually.
Elements comes with a complete debugging solution for Android projects, whether build using the Java based SDK or the native NDK.
Debugging Android SDK Apps
Android ASK based applications can be debugged right from the Fire, Water or Visual Studio IDE, either on an attached Android device, or on an Emulator.
With an Android project active, the CrossBox dropdown menu in the toolbar shows you a list of all known devices and emulators. Simply select the right item and choose "Run" (Fire/Water, ⌘R or Ctrl+R, respectively) or "Start" (Visual Studio, F5), and the IDE will build, deploy and then launch your app in the debugger.
If the selected device is an emulator that is not started yet, the IDE will automatically boot it for you.
Note: When you connect an Android device for the first time, you will need to approve it for USB debugging on the device. After approving, it might take a few seconds for the device to appear in the CrossBox menu.
Under the hood, the CrossBox menu uses the standard Android command line tools to determine available devices and emulators. If a device does not show in the menu, try running the Android SDK adb devices tool from the command line. Elements can only detect devices shown by this command; if your device does not show in adb devices, you have a more general connectivity or setup problem.
To create and configure Emulators, you can use the Virtual Device Manager, in Android Studio. Please refer to the Android Studio Documentation for details.
Also Note: Android Studio can sometimes interfere with debugging from other IDEs. If you have problems launching your Android app in the debugger, make sure Android Studio is shut down and try again.
Debugging Android NDK Extensions
Android NDK Extensions cannot run on their own, and as such, an NDK project cannot be directly launched in the debugger. However, NDK Extensions can be debugged in the context of the SDK-based android app that contains them. The easiest way to do this is to have both projects in the same solution, and use a Project Reference to add the NDK Extension to the app, as described in the Mixing SDK and NDK topic.
There are two settings to be set for mixed debugging to work:
First, there's the "Support Native Debugging" option in the NDK project. It's enabled by default for the Debug configuration in new projects, and it instructs the build chain to deploy the LLDB debugger library as part of your native library (and have it, in turn, bundled into your .apk). This is what allows the debugger to attach to the NDK portion of your app later.
Secondly, there's the "Debug Engine" option in the SDK project. It defaults to "Java", for JVM-only debugging, but as soon as a Project Reference to an NDK extension is added Fire or Water will automatically switch it to "Both" (again, only for the Debug configuration), instructing the Elements Debugger to start both JVM and native debug sessions when you launch your app.
With these set, you can debug your Android SDK application as described in the section above. You can set breakpoints or react to exceptions from both native and Java-based code.
Android Debug Hosts
Sometimes you need to debug code in the context of an Android app not created with Elements. The most common case would be an Android NDK Extension that you use in an app created with Android Studio.
By adding three settings to your project, you can enable the Fire and Water Debugger to launch an application of your choice in Mixed-Mode db debugging (i.e. with the ability to debug both Java and NDK code). This allows you to debug all parts of the launched application (whether created with Elements or not) that you have debug symbols for, but most importantly, it will allow you to debug any Java or NDK code from your current project that is running in the context of the application.
To enable this three settings (one optional) need to be provided:
DebugHostAPK: Optional, this setting can point to the full path of a ready-to-deploy .apk package file. If set, the debugger will install this package on your Android device or emulator as part of the debug session (instead of your current project's output). If the application you want to debug is already deployed, you can leave this empty.DebugHostPackageName: The name of the application to launch. This is the reverse-domain notation name (a.k.a. Package ID). DebugHostActivity: The full name of the activity to launch.
For Example:
<DebugHostAPK>/path/to/org.me.myapplication.apk</DebugHostAPK>
<DebugHostPackageName>org.me.myapplication</DebugHostPackageName>
<DebugHostActivity>org.me.myapplication.MainActivity</DebugHostActivity>
Note: It is up to you how the code you want to debug gets into the .apk file you are debugging; please refer to the documentation for the development tool you are using to create the .apk on how to embed second-party Java or NDK code.
When embedding NDK Extensions created with Elements for debugging, make sure that the "Support Native Debugging" option is turned on, and that you embed the libgdbserver.so debugger binary that is emitted as part of the NDK's output alongside the main .so file generated from your project.
See Also
In addition to the core compile phase that takes your source code and generates a binary executable, the projects for the Android platform go through a variety of additional build phases for reaching the final deployable app (which is usually an .apk or an App Bundle). In particular, this includes processing of resources and converting Java byte code emitted by the compiler to Android native "Dalvik" or ART format, in a process called Dexing.
- Resource Processing using
aapt or aapt2
- Dexing using
dex oir d8
See Also
Dexing is the process of converting standard Java JVM byte code (in the form of a .jar archive file created by the compiler) into Android's native format, Dalvik or ART.
This is done by a tool called dex or its more modern replacement d8, which is part of the standard Android build tools. EBuild will take care of running this tool for you as part of the regular build process, but it can still be important to know what is going on, for more complex use cases.
By default, EBuild will use the newer d8 tool, when available, falling back to dex on older versions of the Android SDK that do not support d8.
Dexing
...
Pre-Dexing
The dexing process can take some time, and pre-dexing eliminates overhead by dexing referenced libraries ahead of the compile phase, and caching the pre-dexed copies so that they do not have to be processed again for each compile, when they likely have not changed.
Pre-Dexing can be enabled by setting the AndroidDexMode setting to PreDex (the default).
Incremental Dexing
...
Multi-Dexing
Android has a limit on the size for each individual .dex file generated by the dexing process. To allow for larger projects, a technology called "multi-dex" is used, which will spread out the compiled types across multiple .dex files. When using d8, multi-dexing will happen by default, but for the legacy dex tool, multi-dexing can be enabled or disabled manually with a project setting called AndroidPackMultidex, which defaults to False.
For older Android platforms (lower than SDK version 21) some additional concerns might arise when multi-dexing. Devices on 21 or later use the newer Android Runtime (ART) instead of Dalvik, which according to the docs compiles all apps into a single executable using the on-device dex2oat tool. This utility accepts .dex files as input and generates a compiled app executable for the target device.
On ART it doesn't matter which .dex file individual classes end up in, since all .dex files are compiled into a single .oat file at install time, and ART executes this .oat file when launching the app.
For multidexed apps targeting a Deployment SDK of 20 or lower, you will need to follow the Android docs on supporting MultiDex and add a text file with the classname of your custom Application class to the project, as described here. You need to set the AndroidMainDexListFile project setting to point to this file.
Note: EBuild's AndroidMainDexListFile is the exact equivalent of Gradle's multiDexKeepFile. They both pass the same parameter to the same Android build tool and nothing more.
The Further Reading section collects topics on various concepts and technologies that are relevant to the Android platform, but beyond the scope of being covered exhaustively on this documentation site, because they are not specific enough to Elements.
The topics are provided because other pages on this site refer to them, and generally, the topics will provide a short summary or overview of the concept or technology, and then provide pointers to external places that explore the matter in more detail.
Topics are listed in alphabetical order.
Also on This Site
Platform-Relevant Topics Elsewhere on this site:
The Android platform uses XML layout files to define the user interface.
Elements uses these standard files in the same way they are used when working with the Java Language, so Elements developers have access to the same controls and UI capabilities as all other Android developers, fully natively.
You can edit these XML files directly using the regular code editor, or you can ask Fire or Visual Studio to launch Android Studio to design these files using Google's official visual designer, by right-clicking the project node in the Solution tree and choosing "Edit User Interface Files in Android Studio" (Fire) or "Open in Android Studio" (Visual Studio).
Read More
Version Notes
- Integration with Android Studio for visual design of Android Layout files is new in Version 8.1.
The Android platform uses XML files in projects for many purposes, from providing basic configuration of the application in the Manifest File, to using XML Layout Files to define the user interface.
Elements uses these standard files in the same way they are used when working with the Java language, so Elements developers have access to the same controls and UI capabilities as all other Android developers, fully natively.
There are two ways for working with XML Layout files in your Android projects:
-
You can edit the files in XML format using the regular code editor in Fire and Visual Studio. This option is favored by many Android developers, and gives you full control about your UI design down to the most minute detail.
-
You can ask Fire or Visual Studio to launch Android Studio to design these files using Google's official visual designer, by right-clicking the project node in the Solution tree and choosing "Edit User Interface Files in Android Studio" (Fire) or "Open in Android Studio" (Visual Studio).
Any changes you make to your XML Layouts in Android Studio will automatically sync back into your project, and elements defined in your layouts and the other XML files will be available via the static R class in your project's default namespace.
Read More
Version Notes
- Integration with Android Studio for visual design of Android Layout files is new in Version 8.1.
Depending on the Android Devices you want to develop for, some device-specific parts of the Android SDK might need to be installed or configured. This page collects links to setup and development instructions for popular Android devices.
Amazon FireTV

Elements for Java, also referred to as "Cooper", is the flavor of Oxygene, RemObjects C#, Silver and Iodine that allows you to build applications and projects for the Java Runtime Environment and all its variations, including the Java-based Android SDK.
While not as language-independent as the .NET CLR, the Java Runtime Environment (JRE) is distinctly separate from the Java programming language and – just as on .NET – a variety of languages that are not the Java language are available to compile for the JRE. The six Elements languages are among those.
The Elements compiler takes full advantage of the JRE, and creates applications and libraries that are 100% pure Java – allowing your code full access to all the Java (and Android) framework classes, and any third party and open source Java libraries that are available, all fully native within the platform.
While Android certainly is the most exiting and most-in-demand Java-based platform today, the Elements languages allow you to create applications for any place that Java code can run, from Swing GUI apps to JavaServer Pages, Applets, to projects that run on embedded devices or on other Java-based phone platforms.
See Also
Compiler Back-ends
The Java Development Kit is the SDK that provides the tools needed to build apps that can be run on the Java Runtime Environment (JRE). The JDK includes extra tools on top of the JRE to develop applications, while the the JRE is needed to run applications.
Java's class library is contained in rt.jar (or classes.jar for older Java versions on OS X) and has lots of types spread over several "packages", which in Elements are called namespaces. Java has its base classes (Object, String and the object wrappers for the basic types) in java.lang. Other interesting classes list lists and maps are in the java.util namespace.
See Also
Generics
Generics on the Java platform are implemented by doing type errasure, meaning the generics don't exist anymore at runtime and the type parameters are lowered to their underlying types (usually Object).
Copy Local
When using libraries on Java that are not part of the SDK, the "Copy Local" flag on the references has to be set (default) to make sure they're properly referenced from the main jar file. If this flag isn't set, the JRE won't "find" the libraries unless an explicit class path is provided when calling the Java runtime.
Unsigned Types
Java itself does not support unsigned integer types. The compiler emulates this (fairly efficiently, too), however this needs a reference to Cooper.jar to work. When referenced, the "Byte", "UInt16", "UInt32" and "UInt64" types become available (with the default aliases like Cardinal and Word). At runtime these types are the exact same types as their signed counterparts, so overloading by signed vs unsigned is not supported. When boxing these types they'll box in the UnsignedByte, UnsignedShort, UnsignedInteger or UnsignedLong type, defined in Cooper.jar.
Throws
Java has the concept of checked exceptions. Elements ignores these annotations, however, it can emit them by having a Raises node or Throws aspect.
Arrays
Java only supports regular (starting with 0, single index) arrays. Multi dimensional arrays are not supported by the JVM. Elements provides a set of special operators to convert array of T to iterable for all supported types, these are used to allow the LINQ query operators on Java arrays.
Dynamic
Dynamic support in Java is implemented in Cooper.jar through reflection calls, it mimicks the features of the Echoes implementation.
For/For in expressions
This feature needs a reference to Cooper.jar to work.
This section collects information about deploying applications created with the Java edition of Elements, in various scenarios.
The Further Reading section collects topics on various concepts and technologies that are relevant to the Java platform, but beyond the scope of being covered exhaustively on this documentation site, because they are not specific enough to Elements.
The topics are provided because other pages on this site refer to them, and generally, the topics will provide a short summary or overview of the concept or technology, and then provide pointers to external places that explore the matter in more detail.
Topics are listed in alphabetical order.
Also on This Site
Platform-Relevant Topics Elsewhere on this site:
Java Native Interface (JNI) is a technology part of the Java runtime that allows Java code to interact with platform-native libraries such as those written in C.
Elements supports JNI via the external (Oxygene), extern (C#), __external (Swift) or native (Java language) keywords.
JNI can be used both on classic Java VM apps, and also on Android to communicate between SDK- and NDK-based code.
See Also

The "WebAssembly" sub-platform of the Island target lets you build libraries and modules that can run in modern web browsers and interact with JavaScript.
Available APIs:
Of course any other custom, third party or open source C APIs can be imported using FXGen.
Common Projects
WebAssembly supports two common project goals:
-
Web Modules allow you build code that runs in the web browser, typically as part of a website or web application. The code can interact with the Browser object, the Document Object Model (DOM) and the HTML and JavaScript code that runs as part of the web page.
-
Node.js Modules, instead, can be run in the Node.js runtime, usually as part of a larger Node.js server-side application. They can interact with Node.js and other JavaScript that is part of the server application.
In addition to these two "application" project types, you can of course also create Static Library projects. As on the other platforms, static libraries compile to a binary file that can then be used from other (Browser or Node.js) application projects, to share and re-use code.
Additional Topics
Development, Deployment and Debugging
Development of Island apps for WebAssembly is supported in Visual Studio, Fire and Water. The Google Chrome browser needs to be installed to debug WebAssembly Web Modules in a website context, and Node.js is required to debug Node.js modules.
Read moere about debugging and deploying here.
Compiler Back-ends
Of course one important cornerstone of WebAssembly development is inter-operating with JavaScript based APIs.
Elements provides strongly-typed support for working with the Browser APIs and the Document Object Model (DOM) via the Browser class, but oftentimes you will also want to interact with your own JavaScript code, hosted in a separate .js files or in your core .html.
This inter-op works both ways:
Accessing WebAssembly Types from JavaScript
Accessing your Elements classes from JavaScript is easy.
On the WebAssembly side, simply make sure your class is marked with the Export Aspect.
type
[Export]
Program = public class
public
method HelloWorld();
[Export]
public class Program
{
public void HelloWorld()
@Export
public class Program {
public void HelloWorld()
@Export
public class Program
{
public void HelloWorld()
<Export>
Public Class Program
Public Sub HelloWorld
In JavaScript, you can then instantiate an instance of the class simply by calling a method matching its name, on the module, using its name followed by parenthesis. You then can call any public member on it.
You can see this in action with the Program class in the default template:
var program = module.Program();
program.HelloWorld();
If your constructor or your method take parameters, you can of course pass these within the parenthesis. Make sure to only use parameter or return types that are compatible with JavaScript.
Calling JavaScript Functions from WebAssembly
The easiest way to access JavaScript from your Elements code is to use the WebAssembly.Eval method. This method takes a string that can be any arbitrary JavaScript code, but for the purpose of making inter-op calls, it can be a function call to a function inside your JavaScript.
Essentially it works the same as the eval function provided by JavaScript itself.
var x := WebAssembly.Eval('DoSomething(10)');
var x = WebAssembly.Eval("DoSomething(10)");
let x = WebAssembly.Eval("DoSomething(10)")
var x = WebAssembly.Eval("DoSomething(10);");
var x = WebAssembly.Eval("DoSomething(10)");
Dim x = WebAssembly.Eval("DoSomething(10)")
This single line of Elements code could call a function that is declared, for example, like this:
function DoSomething(someParam)
{
...
return 5;
}
Declaring Strongly-Typed Method Stubs
The languages extern/external/native/Declare syntax can be used to declare strongly typed global function stubs that can be called, letting the compiler generate the necessary calls to WebAssembly.Eval() under the hood:
method DoSomething(someParam: Integer): Integer; external;
public extern int DoSomething(int someParam);
public __external func int DoSomething(int someParam);
public native int DoSomething(int someParam);
Declare Function DoSomething(someParam As Int) As Int
The DoSomething method can now be called directly anywhere from Elements WebAssembly code, with strongly-typed parameters and result. Under the hood, the compiler will emit the proper call back to JavaScript.
Calling JavaScript Object APIs from WebAssembly
You can also obtain references to JavaScript object instances from your Elements code. For example, an Eval call as shown above might return such an object, as do many of the existing Browser, NodeJS and DOM APIs exposed by Island RTL.
By default, such objects are typed as Dynamic, which means that – just as in JavaScript itself – the compiler has no intrinsic knowledge of what methods or properties might be available on the object. The compiler will let you make calls to any arbitrary member, and the calls will be dispatched dynamically at runtime – failing at runtime if they cannot be completed (again, just as they would in JavaScript itself).
var x := Eval('GimmeSomeObject()');
x.LetsMakeACall();
var x = Eval("GimmeSomeObject()");
x.LetsMakeACall();
let x = Eval("GimmeSomeObject()")
x.LetsMakeACall()
var x = Eval("GimmeSomeObject();");
x.LetsMakeACall();
var x = Eval("GimmeSomeObject()")
x.LetsMakeACall()
dim x = Eval("GimmeSomeObject()")
x.LetsMakeACall()
This code obtains a Javascript object by calling the GimmeSomeObject function defined in JavaScript. The variable x will be typed as Dynamic, letting us call any method we want.
Creating Strongly-Typed Interfaces
If you know the exact API of a JavaScript object, you can create a strongly typed interface that describes the available members, on the Elements side. You do this by adding the DynamicInterface(GetType(EcmaScriptObject)) Aspect to the interface:
type
[DynamicInterface(GetType(EcmaScriptObject))
ISomeObject = public interface
method LetsMakeACall;
end;
[DynamicInterface(GetType(EcmaScriptObject))
public interface ISomeObject
{
void LetsMakeACall();
}
@DynamicInterface(GetType(EcmaScriptObject)
public interface ISomeObject {
void LetsMakeACall()
}
@DynamicInterface(GetType(EcmaScriptObject)
public interface ISomeObject
{
void LetsMakeACall();
}
<DynamicInterface(GetType(EcmaScriptObject)>
Public Interface ISomeObject
Sub LetsMakeACall()
End Interface
Once implemented, simply cast your Dynamic object reference to an the interface, and you can now make strongly-typed calls to the object that will be checked by the compiler (and you will get code completion, as well):
var x := Eval('GimmeSomeObject()') as ISomeObject;
x.LetsMakeACall();
var x = (ISomeObject)Eval("GimmeSomeObject()");
x.LetsMakeACall();
let x = Eval("GimmeSomeObject()") as! ISomeObject
x.LetsMakeACall()
var x = Eval("GimmeSomeObject();") as ISomeObject;
x.LetsMakeACall();
dim x = CType(Eval("GimmeSomeObject()"), ISomeObject)
x.LetsMakeACall()
Now, x is strongly-typed to be a ISomeObject, and the compiler will enforce that you only call known members. And you will get code completion, as well – for example CC after x. would show you LetsMakeACall as valid option.
Predefined Interfaces
Island RTL already contains pre-defined dynamic interfaces for dozens of common JavaScript objects used by the Browser's Document Object Mode; (DOM). these are declared in the RemObjects.Elements.WebAssembly.DOM namespace.
See Also
Elements provides special support for inter-operating with the most important platform API for Web Modules: the Browserobject, and the Document Object Model (DOM) that it provides access to.
The Browser
The static Browser class provided as part of Island RTL provides a few methods to access and create basic DOM objects:
GetWindowObject gives access to the global "Window" instanceGetElementById and GetElementByName allow look-up of existing HTML elements by ID and by name.CreateElement and CreateTextNode create new DOM objects, for later insertion into the HTML.
Additional APIs are provided to perform Ajax and XmlHttp Requests (NewXMLHttpRequest), create WebSockets (NewWebSocket), and more. Please refer to the Browser Class reference of its source code on GitHub for a more complete overview of what is available.
Strong-Typing the DOM
By default, JavaScript objects present as opaque "Dynamic types that – like in JavaScript itself – allowing arbitrary calls that cannot be checked for validity until runtime.
Under the hood, these are instances of the EcmaScriptObject class provided by Island RTL, which encapsulates the dynamic nature of the object and handles dispatching calls by name, at runtime.
But Island RTL provides strongly-typed interfaces that let the compiler know what APIs should be available on a given object. This
- lets the compiler enforce only valid calls are made, at compile time,
- give you warnings for case mismatches and let you use mismatched case in the case-insensitive languages (Oxygene and Mercury),
- gives you code completion and other IDE help while writing your code.
There are three ways to obtain a strongly-typed reference to a JavaScript object:
- Some APIs, such as
Browser.GetWindowObject mentioned above, already return the proper well-known interface type, instead of dynamic, out of the box.
- Some APIs, such as
GetElementById that cannot know the exact type will return a base type, e.g. Element. If known, these can be cast to the more concrete type that is expected (e.g. Button).
- Any JavaScript object, whether represented as
Dynamic or a strongly-typed interface can simply be type-cast to a strongly-typed interface of your choice, as needed (but see Caveats, below).
Once a variable is strongly typed, the compiler can enforce access to only the known members.
// Window is strongly typed:
var lWidth := Browser.Window.innerWidth;
// Element can simply be cast to a Form, if we know its type:
(Browser.GetElementByName('LoginForm') as HTMLFormElement).checkValidity();
// Window is strongly typed:
var lWidth = Browser.Window.innerWidth;
// Element can simply be cast to a Form, if we know its type:
(Browser.GetElementByName("LoginForm") as HTMLFormElement).checkValidity();
// Window is strongly typed:
let lWidth = Browser.Window.innerWidth
// Element can simply be cast to a Form, if we know its type:
(Browser.GetElementByName("LoginForm") as! HTMLFormElement).checkValidity()
// Window is strongly typed:
var lWidth = Browser.Window.innerWidth;
// Element can simply be cast to a Form, if we know its type:
(Browser.GetElementByName("LoginForm") as HTMLFormElement).checkValidity();
' Window is strongly typed:
Dim lWidth = Browser.Window.innerWidth;
' Element can simply be cast to a Form, if we know its type:
CType(Browser.GetElementByName("LoginForm"), HTMLFormElement).checkValidity()
Caveats
Keep in mind that the strongly-typed interfaces are merely fronts for the compiler to know what members are expected to exist on the underlying JavaScript object. In reality, your WebAssembly code is still interacting with a EcmaScriptObject instance that represents the JavaScript object and will dispatch calls dynamically as needed, at runtime.
That means calls can still fail at runtime, for example if
- the JavaScript object for some reason does not implement the expected member,
- the dynamic interface declaration seen by the compiler was wrong,
- you cast a JavaScript object to the wrong interface.
See Also
To make it easy to interact with HTML elements in your web application from code, Elements offers a Code-behind model, similar to .NET's XAML, where the compiler generates a partial class with strongly typed members representing your HTML.
This model is enabled by default in the "Web Module w/ Code-Behind" template, or you can enable it manually by setting the build action of your .html files to "Html" and manually adding a code file with a partial class to your project.
Any HTML element marked with an id attribute will get represented in the generated object model – where available with a the concrete DOM type, otherwise as the HtmlElement base type.
The head and body elements, will always be exposed, if present. An optional id attribute will override the name they are exposed under.
<input type="button" id="okBbutton">Click Me</button>
From your code in the partial class representing the HTML file, you can then access the button as a local property, call its methods, and react to its events:
okButton.disabled := true;
okButton.disabled = true;
okButton.disabled = true;
Events
In addition to accessing, modifying and calling a DOM object's properties and methods, you can also subscribe to callback events, if the element was marked with events="true" in the HTML.
Events use the standard events mechanism available in all Elements languages, and work similar to how events work on the .NET platform.
Just like on .NET (and the other platforms, although less common there), you can assign any Block, including an instance method, an Anonymous Method or, where available, a Lambda Expression.
okButton.onClick += (sender, ea) -> begin
...
end;
okButton.onClick += (sender, ea) => {
...
};
okButton.onClick += {sender, ea in
...
}
okButton.onClick += (sender, ea) -> {
...
}
okButton.onClick += func(sender, ea) {
...
}
AddHandler okButton.onClick, Sub (sender As HtmlElement, ea As Dynamic)
...
End Sub
For Mercury, the exposed HTML elements are adorned with the WithEvents feature, so that event handlers can optionally use the Handles syntax:
Sub OkClicked(sender, e) Handles okButton.onclick
...
End Sub
Once subscribed, your callback will be called whenever the Browser or DOM triggers the particular event.
Behind the Scenes
Behind the scenes this functionality is supported by a second code file that is generated as part of the build process, and injected to the compile. In Fire and Water, you can access this file via the "Generated Source Files" folder shown for your project in the jump bar. You can also use "Go to Defintion" on a local reference to one of your HTML elements to jump to irt, in all IDEs.
Since this file is generated by the build, it (and Code Completion for the members) is only available after the forst successful build of the project.
The generated file will be have the same name as your .html file, with an added .vb extension. It will always be generated in Mercury, regardless of the language of your project, so that it can enable support for the Handles syntax in Mercury.
Elements comes with integrated support for debugging WebAssembly projects. Web Modules can be debugged in Google Chrome, and Node.js Modules in the Node.js runtime.
Debugging for both project types is supported locally on Mac and Windows, from Fire, Water and Visual Studio.
Read more about :
See Also
To debug Web Modules, you need to have Google Chrome or the Brave Browser installed. With a default installation, the IDEs will usually find Chrome or Brave automatically, but the following topics will help you set up either, or to point your IDE to a custom browser version:
WebAssembly debugging has been tested with Google Chrome, Microsoft Edge (nee Chromium based versions), and the open source Brave Browser, but might also work with other Chromium-based browsers, such as newer Microsoft Edge versions.
Launching
When running your project from the IDE, the Debugger takes care of launching a new browser istance and pointing it to an internal HTTP server that serves all the right files, including all the static files in the Web folder of your project, as well as a virtual wasm subfolder that contains the compiled binary and related files.
This way, the path relationship between the test .html file (and related files you might add such as images or stylesheets) and the compiler-generated files is intact.
By default, your project created with the Web Module template contains a dummy index.html for debugging and testing purposes. That file will be loaded in the browser, load in the compiled .wasm binary, and initialize it. The file contains relative paths that expect the binary in the (virtual) ./wasm subfolder of the HTTP server.
There are two Project Settings used to control this behavior:
-
<DebugIndexHtmlFile>Web\index.html</DebugIndexHtmlFile> – specifies the test .html file. The path to the file (which usually is relative to the project, but may also be absolute) will determine the root folder for the HTTP server, while the filename itself will determine the URL to be opened in the browser on launch.
-
<DebugUrl>http://localhost:1234/</DebugUrl> – optionally, a full URL to a test server can be provided. If so, the debugger will not launch its own HTTP server, but assume a server is running at the given URL, and that you have set it up to properly serve the test HTML and the WebAssembly files.
Debugging
Once your webpage and the .wasm module is loaded, you can debug your code the same as you would any other project. For example, you can set Breakpoints to pause execution when a certain part of your code is hit, and you will automatically "break" into the debugger, if any Exception occurs.
You will notice in the Stack Frames Pane that your own code intermingles with stack frames that show JavaScript code, as well as of course frames of code of the Browser's runtime itself.
See Also
To debug Node.js Modules, you need to have the Node.js runtime installed. You can typically check if Node.js is installed by running the node command in Terminal/Command Prompt.
With a default installation, the IDEs will usually find the Node.js executable automatically, but the following topics will help you set up Node.js or point your IDE to a custom Node.js install:
Launching
On launch, the IDE will automatically spin up a Node.js executable instance, and attach the debugger to it. This is controlled by the <DebugNodeEntryPoint> setting, which specified the entry point .js file. The provided path name must be relative to the project output, eg. to the ./Bin folder, and will typically be pre-set by the project template.
Debugging
Once your your Node.js application is launched, you can debug your code the same as you would any other project. For example, you can set Breakpoints to pause execution when a certain part of your code is hit, and you will automatically "break" into the debugger, if any Exception occurs.
You will notice in the Stack Frames Pane that your own code intermingles with stack frames that show JavaScript code, as well as of course frames of code of the Node.js runtime itself.
See Also
When run from the IDE, the Debugger takes care putting all the pieces for your WebAssembly executable into place. For actual deployment to your own servers and as part of your larger web or Node.js project, some additional thought is needed.
Note that current browsers only execute WebAssembly code in files loaded via HTTP(S) from a remote server. You cannot use local files loaded via a file:/// URL to run WebAssembly. This is a restriction put in place by the browsers, and affects all WebAssembly, not just Elements.
Read more about deployment of:
See Also
When run from the IDE, the debugger takes care of putting all the pieces for your WebAssembly executable into place to run them in the browser. For actual deployment to your own servers, some additional thought is needed.
Essentially, there are at least three files generated by a WebAssembly project:
RemObjectsElements.js – this file is shared by all Elements WebAssembly modules, and contains glue code for the interaction between JavaScript and WebAssembly. While it is generated next to your executable as part of the build, it is a static file and is not affected by the contents of your project. If you deploy more than one WebAssembly module to the same page, you only need one copy of this file.MyModule.js – this file is generated during build and contains project-specific APIs to let JavaScript code interact with the specific types and APIs your module exposes.MyModule.wasm – this, finally, is the actual executable containing the code you wrote, compiled to WASM.
Depending on your project type and contents, additional files might be generated or copied to the output folder, such as resources.
These are in addition to one (or more) HTML pages and reated files that embed and use the WebAssembly module. The project templates create a dummy index.html for you that's mainly used for debugging and testing purposes. For a real-life deployment, this will be replaced by actual .html files or HTML generated server side by your hosting platform such as ASP.NET, PHP or the like, that already exist as part of your site.
Note that current browsers only execute WebAssembly code in files loaded via HTTP(S) from a remote server. You cannot use local files loaded via a file:/// URL to run WebAssembly. This is a restriction put in place by the browsers, and affects all WebAssembly, not just Elements.
To deploy the project as is, including the dummy index.html file, you will want to place the .html into a folder served by your webserver, and the generated files (from the Bin/Release/WebAssemnbly/wasm32 folder) into the wasm subfolder next to index.html:
./index.html
./wasm/RemObjectsElements.js
./wasm/MyModule.js
./wasm/MyModule.wasm
These paths are not a hard convention; they are simply the paths that the dummy index.html file uses to access the files. You can choose a different structure altogether, as long as you adjust the paths in your HTML to match. Within the wasm subfolder, you will want to maintain the folder structure generated from our project's output, for example for resources subfolders.
The important parts are that the two .js files are loaded via a <script tag, and the call to MyModule.instantiate("wasm/MyModule.wasm") (where MyModule is of course the actual name of your executable) to load and start up the WebAssembly module:
<script lang="javascript" src="wasm/RemObjectsElements.js"></script>
<script lang="javascript" src="wasm/MyModule.js"></script>
<script lang="javascript">
MyModule.instantiate("wasm/MyModule.wasm").then(function (result) {
console.log("WebAssembly file MyModule.wasm has been loaded.");
var program = result.Program();
program.HelloWorld();
});
</script>
Also note that not all web servers will automatically serve all file types. In particular, IIS will not serve .wasm files by default, and instead return a 404 error code as if the file does not exist – potentially leading to a "Cannot load MyModule.wasm" error message.
To enable IIS to serve .wasm files open the "MIME Types" configuration panel in IKS admin and add an entry that maps ".wasm" to the "application/binary" MIME type.
The same might apply to other non-standard files that are part of your project, for example .dfm resource files when using Delphi VCL.
See Also
When run from the IDE, the debugger takes care of putting all the pieces for your WebAssembly executable into place and launch them in the Node.js runtime. For actual deployment in your larger Node.js project, some additional thought is needed.
Essentially, there are at least three files generated by with a WebAssembly project:
RemObjectsElements.js – this file is shared by all Elements WebAssembly modules, and contains glue code for the interaction between JavaScript and WebAssembly. While it is generated next to the executable as part of the build, it is a static file and is not affected by the contents of your project. If you deploy more than one WebAssembly module to the same page, you only need one copy of this file.MyModule.js – this file is generated during build and contains project-specific APIs to let JavaScript code interact with the specific types and APIs your module exposes.MyModule.wasm – this, finally, is the actual executable containing the code you wrote, compiled to WASM.
Depending on your project type and contents, additional files might be generated or copied to the output folder, such as resources.
These are in addition to another "entry.js" JavaScript file contained in your project that defines the Node.js entry point that's mainly used for debugging purposes. For a real-life deployment, the APIs exposed by your WebAssembly module will more likely be accessed from existing JavaScript code that is already part of your larger Node.js project.
Using a WebAssembly Module from Your Existing Node.js Project
The default template includes the entry.js file mentioned above, which is there to ease debugging and deployment, but that's not a requirement. The compiler-emitted MyModule.js file can be used directly with Node.js' require() function:
var MyModule = require("./MyModule").MyModule;
MyModuleis the output name of your project. This.jsfile exposes APIs to access all exported member of your WebAssembly project. There is also a matchingMyModule.d.ts` file to allow for use from TypeScript-based projects.
The base MyModule type exposes a single named instantiate(). instantiate() accepts both an URL string or a ByteArray type to load the .wasm file. For Node.js projects, the ByteArray version should be used, for example by loading it with fs.readFileSync():
const fs = require('fs');
const path = require('path');
var MyModule = require("./MyModule").MyModule;
MyModule.instantiate(fs.readFileSync(path.resolve(__dirname, './MyModule.wasm'))).then(function(result) {
...
});
The Promise-typed return of instantiate() will have the resulting WebAssembly module as parameter. This will expose members for the APIs exposed by your WebAssembly module, as static methods (e.g.
result.RemObjects_Elements_System_Math_Sin (for RemObjects.Elements.System.Math.Sin) and exported types (e.g. result.Program in the default template, which can be called to instantiate then and call instance members on).
const fs = require('fs');
var MyModule = require("./MyModule").MyModule;
MyModule.instantiate(fs.readFileSync(path.resolve(__dirname, './MyModule.wasm'))).then(function(result) {
// most roundabout way to call sin:
console.log("Sin call: " + result.RemObjects_Elements_System_Math_Sin(3));
// instantiate Program
var prog = result.Program();
// call the HelloWorld instance method on it:
prog.HelloWorld();
});
Note that the MyModule.js file depends on RemObjectsElements.js.
See Also
The "Windows" sub-platform of the Island target lets you build CPU-native libraries and executables for Windows using the low-level Win32/Win64 API and compiles as CPU-native x64 or i386 code.
Available APIs:
Of course any other custom, third party or open source C APIs can be imported using FXGen.
Development, Deployment and Debugging
Development of Island apps for Windows is supported in both Visual Studio and in Fire on the Mac. Depending on API usage, they can be deployed to any 32-bit or 64-bit Windows version, back from Windows NT and 95 through the latest Windows 10.
Native debugging is supported in Visual Studio and Fire. To remote-debug Windows apps from Fire, you will need CrossBox and an SSH server running on a Windows VM or PC, which is currently a bit tricky, since Windows does not come with SSH support. The Elements "Hokule'a Class" update will bring an easy-to-deploy SSH server to be used with CrossBox 2 for this purpose.
Compiler Back-ends
Elements comes with integrated support for debugging for native Windows apps, either locally on your Windows PC or remotely from your Mac via CrossBox, using its own "Island" debug engine.
In Water, "Windows PC" will automatically be selected as the default run destination in the CrossBox device picker, and then same in [Visual Studio](/Visual Studio). In Fire, you must select (or newly connect to) a remote Mac, first.
Once done, simply select "Run" ("Start" in Visual Studio), or press ⌘R (Fire) or Ctrl+R (Water) or F5 (Visual Studio) to run your app. When debugging via CrossBox, your app[ will first be transfered to or updated on the remote Windows PC or VM (parts may already be there from the build), before it launches.
Architectures
By default Windows apps build for the architecture of your local Windows installation – x86_64 in most modern cases, but potentially i386 on older systems, or arm64 when working on a Windows/ARM device – so that they will run natively.
Depending on your hardware type, you can optionally also debug different architectures of your project in the Windows on Windows translation layer, by setting a different Architecture in Project Settings (If you enable more than one architecture, the debugger will run the one most appropriate).
- Windows/x86_64 can run x86_64 and i386 binaries
- Windows/ARM46 can run arm64, x86_64 and i386 binaries
- Windows/i386 can run onoy i386 binaries
See Also

The "Linux" sub-platform of the Island target lets you build CPU-native libraries and executables for Linux using the low-level Posix API and compiles as CPU-native x64 code.
Available APIs:
Of course any other custom, third party or open source C APIs can be imported using FXGen.
Development, Deployment and Debugging
Development of Island apps for Linux is supported from Water and Visual Studio on Windows, as well as from Fire on the Mac. They can be deployed to any 64-bit Intel (x64_64) system and both 32-bit and 64-bit ARM (armv6, aarch64) systems.
Native debugging is supported. To remote-debug Linux apps, you will need CrossBox and an open SSH connection to your Linux PC or VM. On 64-bit Windows 10 with the Linux Subsystem ("Bash for Windows") installed, Linux applications can also be run and debugged locally from Water and Visual Studio.
Compiler Back-ends
Elements comes with integrated support for debugging for Linux apps, either remotely on a Linux PC or VM connected via CrossBox or locally on the Windows Subsystem for Linux, on Windows 10.
Read more about:
Potential additional Setup:
- Installing Windows Subsystem for Linux for use with Water on Windows
See Also
On Windows 10 and later, you can run and debug Linux applications locally, if you have the Windows System for Linux (WSL), also referred to as Bash for Windows, installed.
If the WSL is found, you will see that instead of "Windows PC", the CrossBox device picker will show an entry called "Windows PC w/ Linux Sub-system". Select this item to run your Linux apps locally.
- Installing Windows Subsystem for Linux for use with Water on Windows
In addition to installing the WLS itself, you also need to install the gdbserver tool on Linux; if you fail to do so, your debug session will fail with an error message to that effect. You can install gdbserver by opening a "Bash" command prompt window from the Start menu, and running the following command in it:
sudo apt-get install gdbserver
Launching
The IDEs will automatically take care of launching your project in the local Linux subsystem, and attaching the debugger, when you run your project.
Debugging
Once your your application is launched, you can debug your code the same as you would any other project. For example, you can set Breakpoints to pause execution when a certain part of your code is hit, and you will automatically "break" into the debugger, if any Exception occurs.
See Also
New in version 12, Elements allows you to reference and directly work with Delphi-compiled code and have access to the full Delphi type system and APIs from your projects on native Windows, Linux and macOS, on the Island platform.
This is achieved by importing Delphi package files (.dcp) into .fx files that make their content available to the Elements compiler. The resulting binary will then reference and depend on the used packages (.bpls).
This includes support for Delphi's base class libraries (including RTL, VCL, dbGo, FireMonkey and everything else), as well as third-party packages and even your own Delphi-compiled packages.
In Elements code, all types, globals and functions/procedures are directly accessible and usable as-is, underneath the Delphi namespace.
Prerequisites!
Before using Delphi libraries, you will need to import the base SDK for the version(s) of Delphi you work with, as described under Setup.
Using a Delphi SDK in Your Project
Using a Delphi SDK in your project is as simple as setting the "Delphi SDK" project setting to the name of Delphi SDK you have imported, for example <DelphiSDK>Delphi 11</DelphiSDK>. This setting becomes available in the IDE for compatible Island project types, as soon as one or more Delphi SDK has been imported.
After setting this, a few things will happen automatically, in the IDE and during build:
- Your project will get an implicit reference to
Delphi.rtl.fx, the core package.
- Your project will get an implicit reference to
Island.DelphiSupport.fx, our small support library for interaction with Island RTL and Delphi's object model.
- Your project will emit additional errors, if you are targeting architectures that your Delphi version does not support (e.g. 64-bit Windows or Linux before Delphi 10.4, macOS before Delphi 10.3 (which added 64bit support, a decade late) or Apple Silicon macOS before Delphi 11. If necessary, you will need to set the
Architecture Project Setting to limit your target architectures.
Delphi.rtl.fx contains the bulk of the basic Delphi APIs. You can add references to any of the other Delphi packages, as you need – for example Delphi.vcl.fx (for Windows), Delphi.dbrtl.fx for database access, and so on – via the standard Add References UI.
Note that all imported packages are prefixed with "Delphi., to avoid name collisions with other standard Elements or OS references (or frameworks, on macOS). This applies to the reference name and the namespace(s) contained within.
Using Delphi APIs
Once referenced, all the APIs exposed by a package are available to your code, the same they would be in Delphi, and the same as any other native Elements types and functions are. All Delphi-imported types have their namespace (or unit name, for older Delphi versions) prefixed with "Delphi.", again to avoid name collisions and overlap.
For example, you could add Delphi.System.SysUtils to your uses clause, and start using SysUtils APIs in your code. Add Delphi.Vcl.Forms to start using VCL classes such as TForm.
You can also set "Default "uses" Prefixes" in project settings to, just like in Delphi, flatten the namespace hierarchy.
From there, all classes, types, and global functions from the Delphi packages you have chosen to reference are available and should be fully usable.
The Delphi Object Model
As you might know, the Island compiler backed suports different Object Models for platform interaction. By default, classes you implement in Elements use the garbage-collected Island object mode, native to Elements, but on Cocoa you have long been able to also use Cocoa and Swift object models for native Objective-C and Swift types, which are reference-counted.
Similarly, all classes, interfaces, and records imported from Delphi use the Delphi Object Model, which means they live in a separate class hierarchy from your Elements-native types, and all the classes ultimately descend from Delphi.System.TObject.
Like in Delphi itself, Delphi object model classes in Elements are not automatically memory-managed – meaning you have to track their life-time, and manually call Free, Destroy, FreeAndNil, or dispose of them by other means.
Any classes you define that descend from Delphi-imported types will automatically use the Delphi object mode, as well. You can also explicitly mark a class to use this model by either adding the [Delphi] attribute to it, or explicitly specifying TObject (or one of its descendants) as the ancestor.
You can also set the "Default Object Model" setting for your project to Delphi to have all your types use that model by default, even when no ancestor or attribute is specified. This might be recommended for porting entire existing code bases over, or writing code that uses Delphi APIs more than it uses native Elements or platform APIs.
Read more about the Delphi Object Model.
Strings
Elements provides extensive support for delphi-compatible String types, which you can read more about here: Working with Strings.
Do note that, by default, strings – such as those created from literals – are still Island-level string types, part of the Island object model tree, and responding to the APIs available on that type.
Island's native String and Delphi's String types provide operators for casting seamlessly between the two, but such casts will have a conversion cost.
The DelphiString type is provided for working Delphi-type strings and is compatible with being passed into and received from Delphi APIs that take strings. It provides the same usage semantics as strings do in Delphi, such as one-based access, copy-on-write semantics, and compatibility with PChar, and is fully memory-compatible with Delphi strings.
Importing Third Party Components and Packages
...
Importing Your Own Packages
...
The Elements tool chain knows about .dfm, .lfm, and .fmx form files, and it will compile text-based forms to binary and perform the necessary steps to embed them into your executable for the VCL or FireMonkey classes to find at runtime.
The recommended way for this is to add .dfm, .lfm and .fmx to your project with a Build Action of "EmbeddResource" (which the Delphi project import will do for you), but the build tool chain can also optionally look for {$R resource tags in your Oxygene source files and pull in resource files from that.
Forms embedded in this way are compatible both with Delphi's VCL/FireMonkey library and the limited VCL support in the (unrelated, and now deprecated) Delphi RTL native-Elements compatibility library.
Note: no equivalent to $R exists in the other languages, so to use the VCL or ForeMonkey from, e.g., C#, you will need to add your form files as "EmbeddResource".
Use Cases for Delphi SDKs
The availability of Delphi SDKs to Elements projects brings a whole slew of possibilities for the migration of Delphi projects to Elements.
- You can simply reference Delphi packages to use your favorite Delphi APIs – and classes you are familiar with – in your new Elements code.
- You can move/copy over code from Delphi to Oxygene more seamlessly, as all the APIs it relies on are there.
- You can even move entire Delphi projects to Oxygene, keep using the VCL and all your third-party components, while at the same time still benefiting from the more advanced Oxygene language, and the Elements tool chain in general.
And, of course, Delphi SDK support is not limited to just Oxygene – you can use these APIs, and even descend from Delphi classes (such as to implement a new TForm, from all six Elements languages!
See Also
In order to use Delphi packages, you will need a copy and license of a version of Delphi of your choice installed on your system. If you are working on Mac or Linux, you can use a copy of Delphi installation's bin and lib folders for the SDK import, as outlined in the next step.
Support for Delphi packages is based on an imported "Delphi SDK", and tied to a single version of Delphi per project (i.e. you cannot mix binaries from different Delphi versions in the same application).
As of this writing, Elements support using libraries from Delphi 7 thru Delphi 11, but extensive testing on our side has bene limited to versions 10.3 and above.
Do note that platform and architecture support is limited for older Delphi versions. For example, Delphi only added support for arm64 on macOS as late as Delphi 11, etc.
Importing a Delphi SDK
For legal and deployment licenses reason, Elements does not ship with binaries for the Delphi SDK, so the first step in using Delphi binaries is to import an SDK using the Water's "Import Delphi SDK" menu item, or the --import-delphi option of the EBuild command line tool.
Importing a Delphi SDK in Water
Simply select the "Import Delphi SDKs" option from the "Tools" menu, and Water will present a list of all supported versions of Delphi it finds installed on your system.

As you see in the screenshot above, Water shows you what platforms are supported (or have support installed) for each version of Delphi, and also which versions you already imported before. You would only need to reimport a version if you upgraded Delphi it to a new .x service-pack version, or if there have been fixes/improvements to the importer that you want to benefit from.
Select the version(s) you would like to import, and click "Import Selected".
Import progress will show in the Build Log pane of Water, which will open automatically.
After the main import of each version/platform of the Delphi SDK, Water will also automatically build the Island.DelphiSupport support library for that version, downloading the source from GitHub if necessary.
Note: you will need to have an active Internet connection and have Git installed for this last step to succeed.
Importing a Delphi SDK with EBuild
From the command line, the Delphi SDK import can be done in three ways, all using the --import-delphi command line switch.
-
You can import support for all versions of Delphi installed on your local Windows system with the --import-all switch. This will check the Registry for all (known and supported) versions of Delphi, and import each in turn. This may take a very long time. You can add the --skip-existing option, if you installed new versions of Delphi, and don't want to reimport the ones already imported previously; otherwise they will all be (re-)imported.
-
Alternatively, you can specify a specific version of Delphi by name by specifying, e.g. --import-delphi "Delphi 11" (note the quotes to preserve the space). If the specified version is not found in the Registry, EBuild will list all versions if did find; if the specified version is not known/invalid/supported ("e.g. "Delphi 5" or "Delphi 27"), EBuild will list all versions it knows about.
-
Finally, you can manually point the importer to the root folder of a copy of Delphi (the folder that contains bin, lib, etc). This is useful if you have a manual Delphi install that is not registered in the Windows Registry, or if you copied these files over to a non-Windows system (Mac or Linux) to run the import.
The imported .fx files will be stored in a well-defined location1, grouped by Delphi version, platform, and architecture.
You can specify the --build-delphi-support command line switch to have EBuild automatically build the (required) Island.DelphiSupport support library.
Once imported, the Delphi SDK is usable from your Island projects.
Using Delphi SDKs on macOS or on a PC w/o Delphi
Of course you can work with projects that depend on Delphi SDKs even if you are working on a computer where you do not (or cannot) have your copy of Delphi installed – for example because it is a Mac and you work in Fire.
You have two options to get your system set up.
For one, you can run the import on your Windows PC where Delphi is installed, and thrn copy the support files over. To do so, go to
%APPDATA%\..\Local\RemObjects Software\EBuild\
on your PC and make a copy of the "Delphi SDKs" and "Delphi Support" subfolders. (Each of them has sub-folders per version, so if you only want to copy over support for a specific version, feel free to copy only the ones you need).
Next, go to the same location on your other PC, or if it is a Mac go to
~/Library/Application Support/RemObjects Software/EBuild/
and place a copy of the subfolders there. You might need to restart Fire (or Water) for it to catch up with the new folders.
For another, you can copy the Bin* and lib folders of your Delphi install(s) over to your other PC or Mac, and run the import with the EBuild command line tool, as described above.
See Also
Elements provides extensive support for Delphi-compatible String types.
The DelphiString type is provided 1 for working with Delphi-style strings in Elements. It is an alias to either DelphiUnicodeString or DelphiAnsiString, depending on the Delphi version and whether it uses Ansi (Delphi 2007 and earlier) or Wide strings by default, and it is 100% memory compatible with the String types used by the Delphi libraries.
This means it can be passed into Delphi code wherever a string is expected, and strings returned from calls into Delphi will be returned as DelphiString (or explicitly one of the four string types discussed below, if the API is defined so).
DelphiString has the same usage semantics as strings have in Delphi. In particular this means:
- Strings are essentially a zero-terminated C-type string, with extra metadata stored at their head.
- Strings can be indexed one-based, and are mutable.
- Strings use copy-on-write semantics for efficiency.
- While Strings are heap-based, copy-on-write means they essentially can be treated as value types, where changes to a copy of the string do not affect the original.
- Strings are compatible with and can (with caution) be used and passed as
PChars.
- And lastly, Strings are reference-counted and will be freed automatically.
Types of Strings
Island.DelphiSupport implements four distinct string types, matching the four types in Delphi itself.
-
DelphiUnicodeString – a UTF16 two-bytes-per-character string type that matches the above description. The default String type, and aliased as DelphiString in Delphi 2009 and later.
-
DelphiAnsiString – a one-byte-per-character string type that matches the above description. The default String type, and aliased as DelphiString in Delphi 2007 and earlier.
-
DelphiWideString – a UTF16 two-bytes-per-character string type is reference counted, burt does not use copy-on-write semantics. but will still be automatically freed when it goes out of scope.
-
DelphiShortString – a legacy one-byte-per-character string type that is stack-based and limited to 255 characters.
As mentioned above, DelphiString is an alias to either DelphiUnicodeString or DelphiAnsiString, depending on the Delphi version, so most commonly you will use that name, rather than the Unicode/Ansi variant, unless you want to explicitly choose a "non-default" string width, or need consistency across Delphi versions.
Delphi.System.string is also defined, in Delphi.rtl, as an alias to either DelphiUnicodeString or DelphiAnsiString.
String APIs
Unlike in Delphi, where the String types are basically pointers and handled by the compiler, the above string types are implemented as records, meaning they provide APIs (such as .Length) that can be called on the types.
Like strings in Delphi, they are not part of the TObject class hierarchy, and cannot be assigned to TObject-typed references. However, being records, they can be boxed to be part of the Island Object type tree. They can also seamlessly be cast to and from Island Strings (and, on Cocoa, to NSString).
Delphi Strings can be indexed via an Integer offset or an Index, and can be concatenated using the + operator.
And of course, Delphi Strings will work with all the String API functions provided by Delphi's RTL and other Delphi libraries.
Interoperability
Do note that, by default, strings declared in Elements code – such as those created from literals – are still Island-level string types (RemObjects.Elements.System.String), part of the Island object model tree, and responding to the APIs available on that type.
This means that if you declare a variable such as
var x := 'Hello Island';
then x will be an Island String, not a Delphi String. However, the compiler will infer the right string type for literals, based on context – for example when passing strings to APIs, or assigning to a typed variable:
var x: DelphiString := 'Hello Delphi';
myStringList.Add('Delphi');
The Delphi String types also provide cast operators for seamlessly converting between the two types, so you can pass Island Strings directly into a Delphi API, or vice versa. But do note that these casts come with a copy cost and – when using Ansi strings – a conversion cost as well.
var x := 'Hello Island';
myStringList.Add(x); // converts to a DelphiString
x := myStringList[1]; // converts back to an IslandString
Assigning or casting a Delphi String to/from an Island Object type variable will also convert it to an Island String object, rather than boxing it.
See Also
This topic covers festures in Oxygene (and other Elements languages) that have been added or perform differently, specifically to support Delphi SDKs and APIs.
Managing life-time with using blocks
The using Statement in Oxygene and other languages that support equivalents work with Delphi object model classes to automatically free them when the using block and its variable goes out of scope.
using lList := new TStringList do begin
lList.Add('Hello');
end;
using lList = new TStringList()
{
lList.Add("Hello");
}
__using lList = TStringList() {
lList.Add("Hello")
}
try (var lList = new TStringList()) {
lList.Add("Hello");
}
Using lList = new TStringList()
lList.Add("Hello");
End Using
This is the equivalent of an explicit try/finally block around the code, with a call to lList:Free in the finally section. And of course the added benefit that lList will be out of scope and unreachable after the block.
In addition to being a great tool for writing apps for each of the three supported platforms, Elements also provides a range of features targeted at sharing code across two or more platforms, for example to allow you to reuse business logic between versions of your app for different platforms, or for just writing certain lower-level non-UI code in a platform agnostic fashion.
Aside from of course the core languages being provided across all platforms with only very minimal differences, Elements provides three core features that enbable cross-platform develop ent and code sharing between platforms:
- Cross-Platform Compatibility Mode is a a special mode of the compiler than can be activated (per project or per individual file) that makes the compiler more lenient towards platform differences and makes it easier to write sharable code. In essence,
- Elements RTL is a cross-platform library of low-level classes an APIs that provide functionality that normally is platform-specific in ways that are platform agnostic. By using Elements RTL APIs instead of (or i addition to) platform-specific APIs, you can make your code more portable.
The Tutorials section provides a range of tutorials specifically about writing cross-platform code using Elements RTL.
Cross-Platform Compatibility Mode (CPM) is a a special mode of the compiler than can be activated (per project or per individual file, via Compiler Directive) that makes the compiler more lenient towards platform differences and makes it easier to write sharable code.
In essence, in Cross-Platform Compatibility Mode the compiler will be less strict in enforcing "clean" code for the current platform, in exchange for allowing you to write code that will work, without or with fewer {$IF}/#ifs, on all platforms. It will also emit additional errors and warnings for code patterns that are not suitable for cross-platform sharing.
More Leniency
The compiler will be lenient and allow the following, which normally would result in errors or warnings:
- Identifiers where the case of the first letter is mismatched (
.ToString vs .toString()).
- Mismatched casing in namespaces (which are generally all lowercase in Java, and PascalCased for the other platforms).
Case mismatches would otherwise of course be errors in C#, Swift, Java and Go, and optionally emit a warning when the "Warn on Case Mismatch" option is turned on in Oxygene or Mercury.
Additional Warnings
In addition, the compiler will emit warnings when using any of the following features, which are not available on all platforms, because using them will make the code inherently not cross-platform.
- Use of BigInteger constants
- Use of function pointers
- Use of
selector (Oxygene) or __selector (C#) syntax
- Use of the Auto-Release Pool syntax
- Use of the
unsafe keyword and unsafe code
- Use of the
raises keyword in Oxygene (supported on Java only)
- Use of the
Optional attribute on interface members (supported on Cocoa only)
- Use of
parallel, and queryable sequence (supported on .NET only)
- Use of the
interlocked*() APIs (not supported on Java)
- Direct calls to
init.alloc instead of a constructor (supported on Cocoa only)
- Use of function, method, procedure pointers, which differ between .NET/Java vs. Cocoa
These warnings will be emitted for any code compiled in Cross-Platform mode that is not surrounded by {$IF}/#ifs for a specific platform.
See Also

Elements RTL is a cross-platform library of low-level classes and APIs that provide functionality that normally is platform-specific in ways that are platform agnostic. By using Sugar APIs instead of platform-specific APIs, you can make your code more portable between .NET, Cocoa, Java and Island.
Examples of functionality provided by Sugar are generic container classes (such as Lists and Dictionaries), support for reading and writing common data formats (such as XML and JSON), and access to low-level system APIs that are available (but different) on each platform (such as file and network access).
We recommend checking out our range of tutorials on Writing Cross Platform Code with Elements RTL, as well as the Elements RTL API Reference.
Sugar is Open Source and available on GitHub, but of course ships in the box with Elements. It is supported for all platfroms and their sub-platforms
See Also
This page collects an overview of the few subtle differences for the Elements compiler and its languages on the different Platforms – .NET, Cocoa, Java, Android, Windows, Linux and WebAssembly).
We strive for 99% language and feature compatibility, but due to the nature of the platforms and underlying runtimes, a small handful of features will not be available on all platforms, and a few platform-specific features are provided that don't make sense on the other platforms.
The following table marks the core points of differentiation between the different Compiler Backends
| Feature |
Echoes (.NET) |
Cooper (JVM) |
Toffee (Cocoa) |
Island |
| Lifecycle Management |
GC |
GC |
ARC |
ARG & GC* |
| Pointers & Direct Memory Access |
In Unsafe Mode |
No |
Always |
Always |
| Generics |
Full Support |
Type-Erased |
Type-Erased |
Full Support |
| Function Pointers |
No |
No |
Yes |
Yes |
| Aspects |
Write & Use |
Use |
Use |
Use |
Garbage Collection vs. ARC
Memory management on .NET, Java and Island-backed
uses Garbage Collection while Cocoa uses Automatic Reference Counting, also referred to as ARC.
On Island projects targeting the Cocoa platform, both GC and ARC are used, the former for Island-native objects, and the latter for Objective-C Runtime-based Cocoa objects and Swift objects. Please refer to the Object Models topic for more details.
In most code scenarios, GC and ARC will behave pretty comparably, and code written that deals wit object references generally will look the same — i.e. will not worry about explicitly freeing object memory. There are however some subtle differences, in particular when it comes to dealing with retain cycles, which GC has no problem resolving, but that can cause leaks in ARC. Special Storage Modifier keywords ,strong (implied by default), weak and unretained, are provided to help with this on the Cocoa platform (and will be ignored on .NET and Java). In C# these three keywords start with two underscores.
Also unique to ARC, a keyword is provided to manually instantiate additional auto-release pools, where needed. This is seldom the case, but might be necessary in some specific cases. The topic on ARC will go into this in more detail.
See Also
Blocks (a.k.a. .NET Delegates)
Blocks types, i.e. method references (also called delegates), are supported on on all platforms, but there are some limitations.
The block keyword is provided on all platforms, and synonymous with the now deprecated delegate keyword (refer to the Blocks topic for reasons for this change).
Oxygene has support for inline block types in method or property declarations. This syntax is supported on all platforms, but limited to block signatures that match an existing
.NET Framework Action or Func delegate signature on .NET.
Note that on Cocoa, the function, procedure and method keywords will declare C-level Function Pointers when used for block type declarations, rather than true Objective-C blocks (i.e. C's * syntax opposed to ^ block syntax). Only the block and delegate keywords declare true Objective-C blocks. (On .NET and Java, all 5 keywords behave the same way.)
Since on .NET and Java it has never been recommended to use function, procedurep and method for block declarations, it is recommended to consistently stick to [[block (keyword)|block]] for cross-platform code.
Note: For RemObjects C#, this equally applies to delegate types. Inline
delegate type declarations are permitted. On all languages, the FunctionPointer Aspect can be applied to mark a delegate as a function (and not a block) pointer in C#.
C Runtime Heritage and Influences on Elements for Cocoa
Due to it being built on the Objective-C runtime, which itself is a true superset of standard C, Oxygene on Cocoa and Island-backed platforms gains support for a wide variety of concepts from the C language, not the least of which being access to the vast C runtime library, with printf() and thousands of other well known functions, records and types. Due to C being inherently non-object-oriented, this means Oxygene for Cocoa provides access to non-OOP libraries and functionalities in a manner that would have been deemed "unacceptable" on the strictly-OOP .NET and Java platforms.
Examples of these are more liberal use of pointers and reference parameters, global constants and functions, and the more traditional method-less Record types.
For the purpose of cross-platform code, this is mainly irrelevant, as such code can (and should) stick to using the higher-level OOP based features and functionality.
Aspects & Custom Attributes
Custom Attributes are supported on all platforms, but are more limited in scope on Cocoa and Island. Querying for custom attributes at runtime currently relies on platform-specific APIs (provided by the platform on .NET and Java, and by libToffee on Cocoa and Island RTL), but a higher-level cross-platform abstraction is available as part of Elements RTL's Reflection APIs.
The standard attribute syntax with square brackets ([]) in Oxygene and C#, the at symbol (@) in Swift and Java and angle brackets (<>) in Mercury is also supported to specify a limited range of Special Attributes defined by the compiler. These special attributes are not backed by classes.
Attributes and Aspects are not supported by the Go language.
Cirrus (Implementing Aspects)
The compiler supports applying aspects on all platforms. But Since aspects essentially run as part of the compiler, aspects can be written using in .NET (Classic and .NET Standard 2.0), no matter the target platform. Aspects can be created so that they are platform-independent and can be applied to any of the four platforms. In fact, that is the default behavior.
Miscellaneous and Minor Differences
- Boxing semantics differ between .NET, Java and Cocoa.
- Nullable Types, like boxing, have some limitations on Cocoa (namely that they support only numerical values, and no Records).
- Arrays support differs on Cocoa, with the availability of non-object Open and Static Arrays.
- As part of ARC, Storage Modifiers are supported on Cocoa only.
- Interfaces/Protocols support
optional members, on Cocoa.
- The
dynamic type is only supported on .NET and Cocoa, and on the latter maps to id type and provides sightly different usage semantics.
unsafe code is not supported on Java, and all code is assumed to be unsafe on Cocoa and Island, making the keyword ignored/unnecessary on that platform.- Generic co/contra-variance is supported on .NET only.
- Differences in [Pointer References in Oxygene for Cocoa](Pointer References in Oxygene for Cocoa).
- The
external keyword is supported on .NET (P/Invoke) and Java (JNI), but not applicable on Cocoa.
- Parallel "for" loops, parallel sequences and queryable sequences are currently only supported for .NET.
- Special Java-style exception handling extensions will be a new platform difference, once implemented.
.NET-Specific Features
Cocoa-Specific Features
Java-Specific Features
Island-Specific Features
Projects
Project Settings
Project Settings in Fire & Water
In Fire and Water, each project has a node called "Settings" listed as the very first item in the Project Tree. Selecting this node will show the project's settings in a grid-like fashion in the main view. You can also bring this view to the front by pressing ⌘I (Fire) or Alt-SHift-I (Water), or selecting "Project|Settings|Show Project Settings" from the menu.
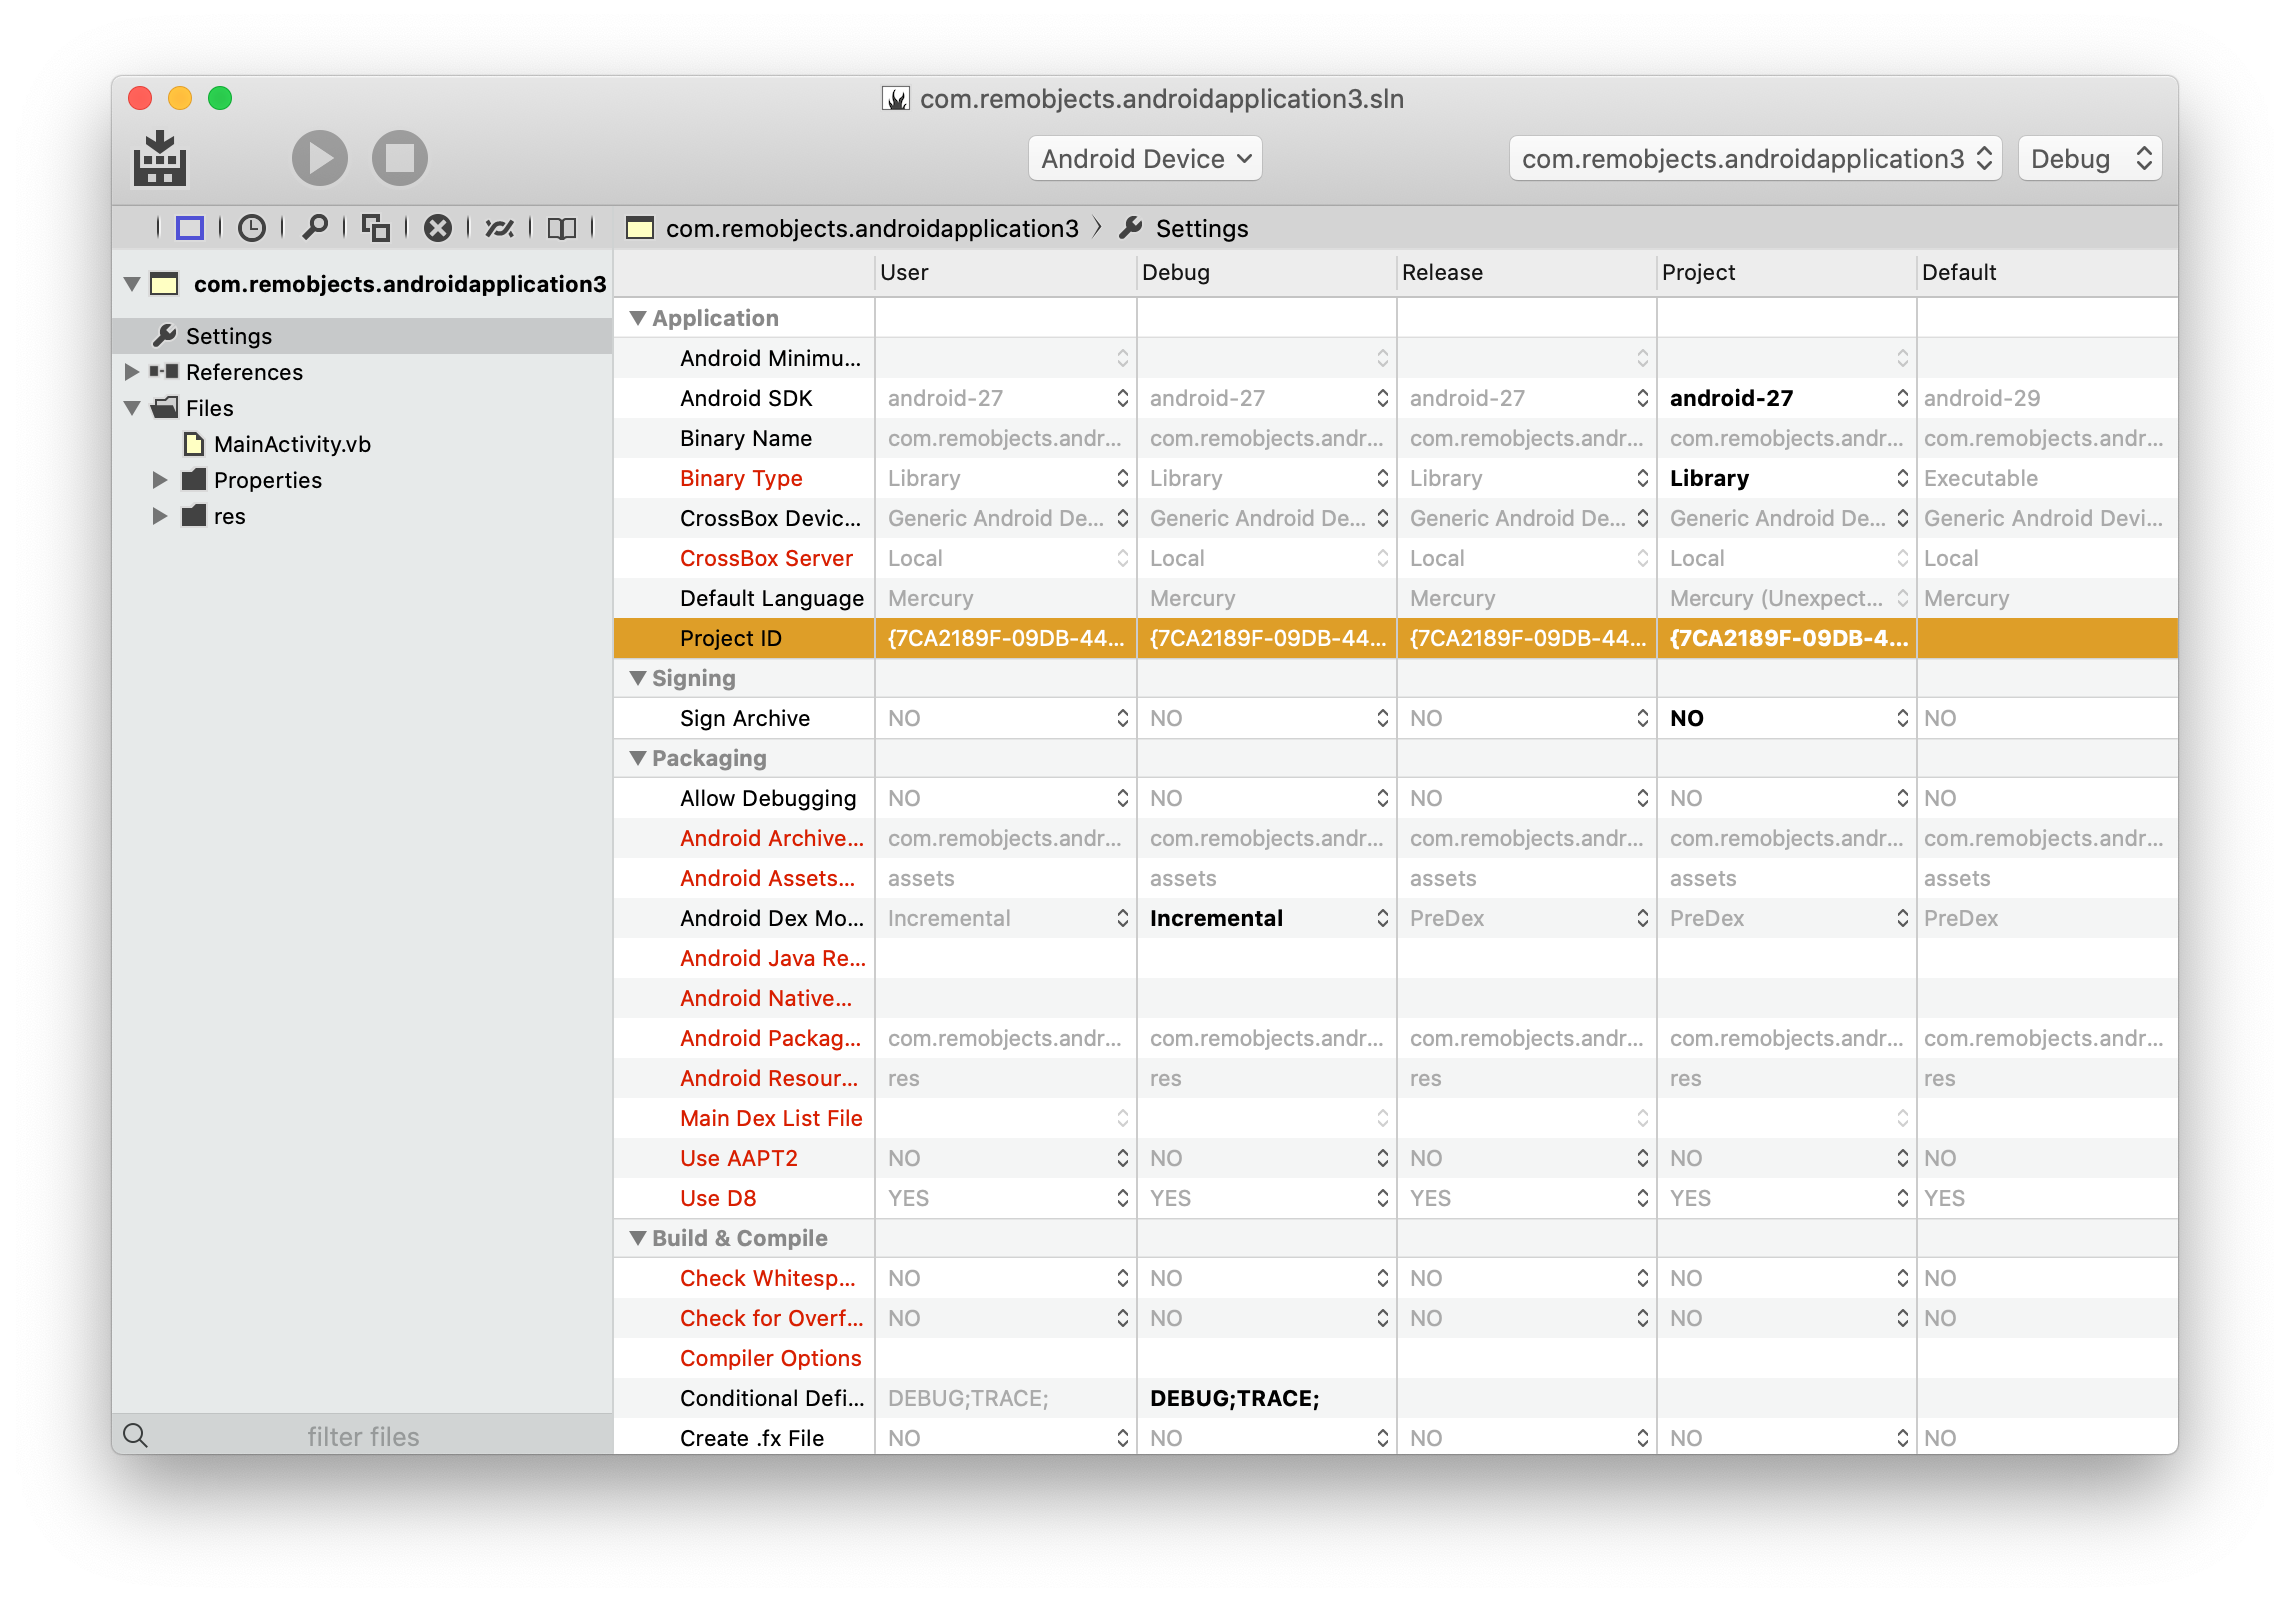
This view shows all the settings available for the project, grouped in logical sections.
Advanced and infrequently used settings are hidden by default, and shown via the "Project|Settings|Display Advanced Project Settings" menu item. They will show with a red caption, if visible.
Also in the "Project|Settings" menu you can toggle whether to show friendly (descriptive) names or the actual names of the underlying EBuild settings, and whether to goup settings by category (the default) or show them as one flat sorted list.
The left-hand column on the grid shows the title for each setting, while the remaining columns (typically five) show the value(s) configured for the settings in different scopes, increasing from right to left.
Settings Levels
The very right-most column, titled Default, will, where applicable, show the default value for the setting that would or will apply if the project does not override it. Not all settings have a default value, and for those that do, that value might be hardcoded, depending on the project type or platform, or be derived from other settings (the Default Namespace setting, for example, defaults to getting its value from the Executable Name).
The second-to-right column, captioned Project, lists values as they are set globally for the full project. If a value is shown in gray, that value is not set, but being inherited from the default; if a value shows in black, it is set at this level.
The next number of columns show the setting values for each of the Configurations set up in the project. Most projects start out with two configurations, called Debug and Release, but this number and their names are arbitrary and can be changed. Just as in the Project column, each configuration column will show the setting value in gray if it is inherited from the project (or the default), or in black when set explicitly for this configuration.
Finally, the left-most column is entitled User, and it allows you to set values that won't be stored in the project's .elements file, but instead in a separate .elements.user file stored next to it. Essentially, this allows you to override settings for local use and without affecting other developers working on your project (by excluding *.user from the files you commit to version control). Like the other columns, this one also shows values inherited from the right in gray, and values set explicitly in black.
Because the User column shows an aggregate of (a) a per-user setting, (b) the active configuration, (c) project level settings and (d) the default, this column also gives you a handy overview of what the current effective values for each of the settings are.
Types of Settings
Fire and Water know three types of settings:
- Free-form settings may contain any manually typed-in string. To change them, simply click into the field and start typing/editing the value you want to set.
- Multiple-choice settings show little black arrows, and clicking them will provide a popup menu with available options to choose from. If a value is set, the menu will also include an option to clear the value. If a setting contains an invalid or unexpected value, it will indicate that.
- Finally, boolean settings allow you to toggle between two values, YES and NO.
Available Settings
You can find an overview of all project settings that are available and understood by the Elements compiler and tool chain in the Project Settings Reference topic.
Applying Settings
Like everywhere in Fire, there is no need to "save" or "apply" settings. As soon as you change them, your project (or (.user) file) will update, and the new setting will be in effect.
See Also
Project Settings in Visual Studio
In Visual Studio, you can access project settings by right-clciking the projects node in Solution Explorer, and choosing "Properties" from the context menu (not to be confused with the "Properties" folder that is in some Elements projects).
![]()
This view shows all the settings available for the project, grouped in logical sections.
The left-hand column on the grid shows the title for each setting, while the remaining columns (typically five) show the value(s) configured for the settings in different scopes, increasing from right to left.
Settings Levels
The very right-most column, titled Default, will, where applicable, show the default value for the setting that would or will apply if the project does not override it. Not all settings have a default value, and for those that do, that value might be hardcoded, depending on the project type or platform, or be derived from other settings (the Default Namespace setting, for example, defaults to getting its value from the Executable Name).
The second-to-right column, captioned Project, lists values as they are set globally for the full project. If a value is shown in gray, that value is not set, but being inherited from the default; if a value shows in black, it is set at this level.
The next number of columns show the setting values for each of the Configurations set up in the project. Most projects start out with two configurations, called Debug and Release, but this number and their names are arbitrary and can be changed. Just as in the Project column, each configuration column will show the setting value in gray if it is inherited from the project (or the default), or in black when set explicitly for this configuration.
Finally, the left-most column is entitled User, and it allows you to set values that won't be stored in the project's .elements file, but instead in a separate .elements.user file stored next to it. Essentially, this allows you to override settings for local use and without affecting other developers working on your project (by excluding *.user from the files you commit to version control). Like the other columns, this one also shows values inherited from the right in gray, and values set explicitly in black.
Because the User column shows an aggregate of (a) a per-user setting, (b) the active configuration, (c) project level settings and (d) the default, this column also gives you a handy overview of what the current effective values for each of the settings are.
Types of Settings
Fire and Water know three types of settings:
- Free-form settings may contain any manually typed-in string. To change them, simply click into the field and start typing/editing the value you want to set.
- Multiple-choice settings show little black arrows, and clicking them will provide a popup menu with available options to choose from. If a value is set, the menu will also include an option to clear the value. If a setting contains an invalid or unexpected value, it will indicate that.
- Finally, boolean settings allow you to toggle between two values, YES and NO.
Available Settings
You can find an overview of all project settings that are available and understood by the Elements compiler and tool chain in the Project Settings Reference topic.
Applying Settings
Like everywhere in Fire, there is no need to "save" or "apply" settings. As soon as you change them, your project (or (.user) file) will update, and the new setting will be in effect.
See Also
Reference
This page provides a reference of all project settings understood by the Elements compiler and EBuildx build tool chain. Most of these options can be set from inside the IDE (see here for how to do this in Fire and Water and in Visual Studio, respectively), but can also be configured manually in the project file, .user file, or passed as parameters to a command line build with MSBuild/XBuild.
Application Settings
The Application Settings control basic attributes of the build project/application, such as target platform versions, executable type, etc.
| Name |
Description |
Platforms |
IDE |
| ApplicationIcon |
The optional .ico file to be used as the application icon for Windows executables. |
.NET, Windows |
|
| ApplicationManifest |
The optional application manifest .xml file for use for Windows executables. |
Island/Windows |
|
| Architecture |
The CPU architecture or architectures (as semicolon-separated list) to build for, or "all" to build all supported architectures. |
.NET, Cocoa, Island |
|
| BinaryName |
The file name of the generated executable, without file-extension or prefix. |
|
|
| CrossBox |
The CrossBox server to use for building Cocoa apps from Visual Studio on Windows. See CrossBox for details. |
|
|
| CrossBoxDeviceID |
The mobile device, simulator or emulator to build for or run on. |
Cocoa, Android |
|
| DefaultLangauge |
Specifies the default language for new files added via templates, in Fire. This can be set in multi-language projects to control the default shown in the New File dialog. |
|
Fire, Water |
| Deployment Target |
Optionally specifies the minimm OS version needed to run this app. See Deployment Targets for details. |
Cocoa, Android Island |
|
| ExtensionType |
For Cocoa projects with OutputType of Extension, the type of extension to build. |
Cocoa |
|
| InternalAssemblyName |
An optional internal name for the generated .NET executable (not the name of the generated fine, which is determined by the BinaryName setting). |
.NET |
|
| MacCatalystArchitecture |
The CPU architecture or architectures (as semicolon-separated list) to build for when targeting Mac Catalyst, or "all" to build all supported architectures. |
iOS |
|
| NETCoreRuntime |
The type of .NET Core runtime to use (e.g. regular .NET Core, ASP.NET Core, or, on Windows, Windows Desktop). |
.NET Core |
|
| NETCoreRuntimeVersion |
The version of the .NET Core runtime to build for. If not set, the project will build for the latest supported runtime that is installed at build time. |
.NET Core |
|
| NETCoreSDK |
Typically inferred from the NETCoreRuntime setting, this can override the type of .NET Core SDK to use (e.g. regular .NET Core, ASP.NET Core, or, on Windows, Windows Desktop.) |
.NET Core |
|
| NETCoreSDKVersion |
Typically inferred from the NETCoreRuntimeVersion setting, this can override the SDK version to be used. |
.NET Core |
|
| NETRuntimeVersion |
The version of the .NET Framework (not Core) runtime to build for. |
.NET |
|
| OuputType |
The type of executable to generate, e.g. Executable, Library, or the like. |
|
|
| ProjectGuid |
Read-only, the unique ID for the project, used for project references and inter-project dependencies. |
|
|
| SimulatorArchictures |
The CPU architecture or architectures (as semicolon-separated list) to build for when targeting the Simulator, or "all" to build all supported architectures. |
iOS, tvOS, watchOS |
|
| SupportMacCatalyst |
For iOS projects, specifies whether the project should build to also run on macOS via Mac Catalyst. |
iOS |
|
| TargetFramework |
Specifies the type and minumum version of the .NET runtime to build against. If no version is specified, the most approriate version will be determined at build time. |
.NET |
|
| SDK |
Specifies the name and version of the platform SDK to build against. If no version is specified, the most approriate version will be determined at build time. |
Cocoa, Android, Island |
|
Legacy Settings
| Name |
Description |
Platforms |
IDE |
| TargetFrameworkVersion |
Superseded by TargetFramework. |
.NET |
|
Code Signing Settings (Cocoa)
The Code Signing Settings for Cocoa control whether and how executables or .app bundles will be signed for deployment. Code signing is needed for deployment to iOS devices and Mac App Store apps, and is recommended for all Mac apps. See Code Signing for more details.
| Name |
Description |
Platforms |
| Codesign Certificate Name |
The optional name or fingerprint of a certificate that should be used to sign the app. macOS apps will only be signed if a certificate is set, while the other Cocoa platforms require signing and will try to find a default certificate to use, when one is specified. |
Cocoa |
| Codesign Options |
Additional options to be passed to the codesign command. |
Cocoa |
| EntitlementsFile |
An (optional) .entitlements file to be used when signing the app. When using a Provisioning Profile, data from this file may be combined with entitlements provided by the profile. |
Cocoa |
| MacCatalystCodesignCertificateName |
For Mac Catalyst, a separate certificate to (optionally) use to sign the app. |
Mac Catalyst |
| MacCatalystEntitlementsFile |
For Mac Catalyst, a separate .entitlements file can be provided to be used for macOS, since macOS and iOS might require different entitlements. |
Mac Catalyst |
| HardenedRuntime |
If enabled, the binary will be signed to run on the more stricter Hardened Runtime on macOS 10.14 and later. Read more here. |
macOS |
| Keychain |
Optionally, the path and filename of a non-default Keychain to be used to look for certificates. If not set, the default keychain for the current user will be used. |
Cocoa |
| KeychainPassword |
Optionally, the password for the keychain, so that builds can access it even when the keychain is locked (locally, or when building over SSH via CrossBox). |
Cocoa |
| ProvisioningProfile |
The ID of the provisioning profile to be used for signing |
iOS, tvOS, watchOS |
| ProvisioningProfileName |
The name of the provisioning profile set for the above setting. Name and ID will be kept in sync when changing the setting in the IDE, and the name will be used as a fallback to locate the right profile, if it can't be found by ID. |
iOS, tvOS, watchOS |
| Team |
The ID if the development team registered with Apple for this project (used to filter the values made available for other settings to avoid clutter for developers who are part of multiple teams). |
Cocoa |
Packaging & Deployment Settings (Cocoa)
The Packaging Settings for Cocoa control whether and how an .app bundle will be created with the compiled executable.
| Name |
Description |
Platforms |
| ApplicationIcon |
The .icns file to be used as the application icon for the macOS app bundles. |
macOS, Mac Catalyst |
| BundleExtension |
The file extension for the created bundle (i.e. ".app", for an application, or ".framework" for a framework. |
Cocoa |
| BundleIdentifier |
The unique identifier for the project, in reverse dotted domain notation. This will be injected into the final Info.plist file, and also used in other parts of the build, such as for provisioning. |
Cocoa |
| BundleIdentifier for Mac Catalyst |
A separate identifier to be used for the Mac Catalyst build of an iOS app. |
Mac Catalyst |
| BundlePackageType |
The four-letter package type, e.g. "APPL" for an application. |
Cocoa |
| Bundle Version |
The three-part dotted version number for the app, to be injected into the final Info.plist file during build. |
Cocoa |
| CreateAppBundle |
If enabled, an .app bundle will be created for the project, rather than just an executable binary. Most settings in this category only have an effect if this or the next option is on. |
Cocoa |
| CreateFrameworkBundle |
If enabled, a .framework bundle will be created for the dynamic library project, rather than just an .dylib. |
Cocoa |
| CreateIPA |
If enabled, an .ipa file is created, conaining the app bundle and additional files and ready for upload to the Apple App Store. |
iOS, tvOS |
| InfoPListFile |
The name of the base .plist file to be used as the Info.plist for the bundle. The build will use the data from this file and extend and update it as needed to generate the final Info.plist that will be bundled. |
Cocoa |
Code Signing Settings (Java and Android)
The Code Signing Settings for Java and Android control whether and how .jar and .apk files will be signed for deployment.
Packaging & Deployment Settings (Android)
The Packaging Settings for Android control whether and how the .apk package will be created from the compiled Java executable.
| Name |
Description |
Platforms |
IDE |
| AndroidArchiveName |
|
(Android |
|
| AndroidAssetsFolder |
|
(Android |
|
| AndroidDexMode |
|
|
|
| AndroidJavaResourcesFolder |
|
(Android |
|
| AndroidMainDexListFile |
|
|
|
| AndroidNativeLibrariesFolder |
|
(Android |
|
| AndroidPackageName |
|
(Android |
|
| AndroidPackMultidex |
|
|
|
| AndroidResourcesFolder |
|
(Android |
|
| UseAAPT2 |
|
|
|
| UseD8 |
|
|
|
Code Signing Settings (.NET)
The Code Signing Settings for .NET
| Name |
Description |
Platforms |
IDE |
| AssemblyKeyFile |
|
.NET |
|
| AssemblyKeyName |
|
.NET |
|
| AssemblyDelaySign |
|
.NET |
|
| AssemblyVersion |
|
.NET |
|
| AssemblyFileVersion |
|
.NET |
|
Packaging & Deployment Settings (.NET Core)
Settings involving packaging and Deployment for .NET Core
| Name |
Description |
Platforms |
IDE |
| Publish |
|
.NET Core |
|
| SpaRoot |
|
ASP.NET Core |
|
Build Settings
The Build Settings control basic compiler behavior and options.
| Name |
Description |
Platforms |
| AllowUnsafeCode |
Off by default, this setting enables the use of "unsafe" Code such as Pointers. It is necessary only on the .NET platform. Cocoa and Island projects always allow pointer support, and unsafe code is not available at all on the Java and Android SDK platforms. |
.NET |
| AllowUnsafeCodeImplicitly |
Off by default, this setting enables the use of "unsafe" Code such as Pointers on the .NET platform, and drops the requirement to explicitly mark each method (or, in C#, type) that contains such code with the unsafe keyword. |
.NET |
| CheckForOverflowUnderflow |
Off by default, this setting enables checks for integer under-flow and overflow. When set, integer operations that would exceed the range of values that can be held by the type will cause a runtime Exception.
Also available on a file-by-file basis via the {$Q+/-} or {$OVERFLOW ON/OFF/DEFAULT} Compiler Directives in Oxygene. |
|
| CheckWhitespace |
Off by default, this setting enables the compiler to emit warnings when the indentation of begin/end or {/} pairs does not match. This can be helpful for maintaining well-formatted code, and can also help narrow down "mismatched begin/end or {/}" errors in complex code. |
|
| CompilerFlags |
|
Cocoa, Island |
| ConditionalDefines |
A ;-separated list of custom conditional defines. See Conditional Defines and Conditional Compilation for more details. |
|
| CreateFXFile |
If enabled (the default for library projects on Cocoa and Island), an .fx file with additional compiler metadata for the binary will be emitted. |
|
| CreateHeaderFile |
If enabled (the default for library projects on Cocoa and Island), a C-compatible .h header file will be emitted to allow the library to be used from C/C++/Objective-C and other compilers that are capable of importing C headers. |
Cocoa, Island |
| CrossPlatform |
Enables enhanced cross-platform compatibility in the languages.
Also available on a file-by-file basis via the {$CROSSPLATFORM ON/OFF/DEFAULT} (Oxygene) or #pragma crossplatform on/off/default (C#, Swift and Java) Compiler Directives. |
|
| DefaultObjectModel |
Island/Darwin only, this option controls the default object model used for classes and interfaces defined without explicit ancestor. The default is "Island", and other valid values include "Cocoa" and "Swift". See Object Models for more details. |
Island/Darwin |
| DefaultUses |
A list of namespaces, separated by ;, that will be considered "in scope" for every file in the project, as if they had been specified in a uses/using/import/Import statement. |
|
| DeploymentTargetVersionHints |
If enabled the compiler will emit hints and warnings when using APIs that are ot available on all deployment targets. the available() can be used to conditionally execute code only on newer OS versions. |
Cocoa, Android |
| EmitTailCalls |
Off by default, this setting enables the compiler to emit optimized recursive calls via a technology called Tail Calls.
Also available on a file-by-file basis via the * {$TAILCALLS ON/OFF/DEFAULT} Compiler Directives in Oxygene |
.NET |
| EnableInlining |
On by default, this setting enables the compiler to inline methods marked as inline (Oxygene), __inline (C#) or @inline (Swift). |
|
| ExportAllTypes |
|
|
| FutureHelperClassName |
|
|
| GenerateBitcode |
Emits Bitcode in addition to CPU-native code. The setting might be required when submitting to the Apple App Store for tvOS and watchOS. |
Cocoa |
| GenerateIRFile |
Enables the generation of intermediate .ll files that contain LLVM IR code as plain text; mainly for diagnostics purposes. |
Cocoa, Island |
| Incremental |
Improves the speed of subsequent builds by only updating the .o files affected by changes to the project, rather than compiling the entire project each time. |
Cocoa, Island |
| LinkerOptions |
Additional custom command line options to pass to the ld or lld linker executable. |
Cocoa, Island |
| LinkerRPaths |
|
Cocoa |
| MangleTypeNames |
|
Cocoa |
| Optimize |
On by default, this setting makes the compiler optimize code for size and performance, sacrificing debuggability and readability of the final binary. Optimize can be set to True (the default) or False. On Island, it can also be set to a numerical value between 0 and 3, for more fine-grained control. |
|
| OutputPath |
The base output path, absolute or relative to the folder containing the project file, where to place the output generated by the project. Note: when passed via the command line to EBuild.exe as --out, a relative path will be treated as relative to the current folder. |
|
| OutputPathUsesModes |
If enabled, the Mode of the current project or Target will be appended to the OutputPath as subfolder. This is useful in multi-target projects to keep the output for different platforms apart. |
|
| OutputPathUsesSubModes |
If enabled, the SUbMode of the current project or Target will be appended to the OutputPath as subfolder. This is useful in multi-target projects to keep the output for different platforms apart. |
|
| OutputPathUsesTargets |
If enabled, the name fo the current Target will be appended to the OutputPath as subfolder. This is useful in multi-target projects to keep the output for different platforms apart. |
|
| Prefer32Bits |
If enabled, marks a .NET binary to run as 32-bit rather than 64-bit, even when the latter is available at runtime. This can be useful, for example, if the .NET process is expected to load unmanaged .dlls that are available only as 32-bit. |
.NET |
| RequireExplicitLocalInitialization |
Oxygene only, enabling this forces the compiler to require all locals to be initialized explicitly. (By default, Oxygene initializes all locals to the equivalent of 0/nil.) |
|
| RootNamespace |
The root namespace for the project that all Swift, Go and Mercury source files will place their content in, unless otherwise specified. Also the default namespace generated in new Oxygene, C# and Java files added to the project. |
|
| StartupClass |
Specifies a class that will provide the static Main() entry-point for an executable project. This is only required if there otherwise is ambiguity. |
|
| StripBitcode |
Remove the native CPU instructions from a binary compiled with Bitcode, leaving only the Bitcode. Projects built with this setting cannot be run, but the setting is required when submitting Bitcode to the Apple App Store. |
Cocoa |
| SuppressedWarnings |
A list of warning codes, separated by , or ;, that will be ignored by the compiler and not emit any messages. |
|
| TreatFixableErrorsAsWarnings |
Off by default (except when compiling from the IDE), this setting causes the compiler to "ignore" errors that have a trivial fix (such as a misspelled identifier or a missing semicolon), and report them as warnings instead. If a project compiles without any other non-fixable errors, the compile will succeed as it would if the trivial fixes had been applied.
Note that this setting will not actually fix or touch the code (although the IDEs support an Auto-Fix feature for certain errors that can be turned on separately from this compiler option). |
|
| TreatWarningsAsErrors |
Off by default, this setting will instruct the compiler to fail compilation if any warnings are encountered during the compile phase, even if there were no errors. This setting is helpful to enforce a "zero warnings" code policy. Note that this does not affect hints and warnings generated during other parts of the build. |
|
| UseLegacyToffeeMode |
Enabled by default; if disabled, a project with a mode of Toffee/Compiler/BackEnds/Toffee will use the newer Island/Darwin compiler back-end, but with provisionings to make it more compatible with classic Toffee mode. See here for more details. |
Cocoa (Toffee) |
| VBOptionStrict |
For Mercury, setting this option to False makes the compiler less strict for enforcing types, as documented here |
|
| VerifyBitcode |
Runs an extra phase to verify the generated Bitcode. |
Cocoa |
| WarnOnCaseMismatch |
Even though Oxygene and Mercury are case sensitive, with this option enabled (the default), the compiler will emit warnings when the case of an identifier does not match the case it was declared with. |
|
| WarnOnDynamic |
Off by default, this setting causes the compiler to emit a warning when inadvertently calling members of a dynamic type. This can be helpful when converting code to be more strongly typed, especially on Cocoa, where the use of id is very common, but can lead to subtle unexpected side effects. |
|
| WarnOnImplicitNotNullableCast |
Off by default, this setting instructs the compiler to emit a warning when potential null values are passed to values marked as expecting non-null values only. See Nullability for more details. |
|
| WarnOnMissingExceptionAnnotations |
Off by default, this setting instructs the compiler to emit a warning when methods are missing Throws Definitions on the Java platform. |
Java, Android SDK |
Delphi Compatibility Build Settings (Oxygene Language Only)
The Compatibility Settings for Oxygene are provided to make the language more compatible with legacy Pascal code imported from or shared with Delphi or other legacy Pascal language implementations. We recommend keeping these settings off (the default) for new projects.
| Name |
Description |
| AllowLegacyCreate |
Allow legacy Delphi .Create syntax for constructors. |
| AllowLegacyOutParams |
Allow calling methods with= out and var parameters without specifying the appropriate parametrer modifier. |
| AllowLegacyWith |
Allow Delphi's unsafe legacy with syntax. |
| AllowLegacyEnums |
Allow enums declared in the current project to be accessed unscoped, without prefixing the enum's type name. |
| DefaultGlobalsToPublic |
Make all globals public (instead of assembly/internal by default. |
| DelphiCompatibility |
Turn on a range of Delphi Compatibility syntaxes for improved code compatibility.
Also available via the {$DELPHI ON/OFF/DEFAULT} Compiler Directive. |
| DelphiDivide |
Turns on Delphi-style behavior of the div and / operators. |
Note: the DelphiCompatibility is a master switch and (in addition to a wide range of compatibility), enabled the AllowLegacy* and DelphiDivide options implicitly, when turned on.
Debug Settings
The Debug Settings control whether and how the application will be built with the ability to be debugged.
| Name |
Description |
Platforms |
IDE |
| AndroidAllowDebugging |
Determnines whether an Android application is marked as allowing debugging or not. By default, this is tied to the presence of Debug Symbols via the GenerateDebugInfo setting, but changing this setting explicitly allows to override that behavior – for example to ship debug symbols to the Play Store, even though the store requires this option not be False. |
Android SDK |
|
| AssertMethodName |
|
|
|
| DebugClass |
|
|
|
| EnableAsserts |
Off by default, this setting enables Assertions, via Class Contracts or the assert() System Function. When turned on, Asserts raise an error and break execution flow. When off, Asserts and Class Contracts will not be compiled into the final code. |
|
|
| GenerateDebugInfo |
Turns on the generation of debug information. |
|
|
| GenerateDSym |
Extracts debug symbols from the binary into a separate .dSYM bundle. |
Cocoa |
|
| GenerateMDB |
Turns on the generation of Mono .mdb information. |
Mono and .NET, except for .NET Core |
|
| GeneratePDB |
Turns on the generation of .NET .pdb debug information. |
.NET, .NET Core |
Water, Visual Studio |
| PDBType |
|
.NET, .NET Core |
|
Run Settings
The Run Settings control how your application is executed when running from the IDE. Currently, some these settings are used by Fire and Water only, as Visual Studio has different mechanisms for configuring these on a Solution level.
| Name |
Description |
Platforms |
IDE |
| AndroidDebugActivity |
The name of the activity to launch when running an Android app in the debugger. If not set, the name of the Main Activity will be determined from the manifest. |
Android SDK |
Fire |
| DebugArchitecture |
Can be used to select/override a specific architecture for debugging p[Island](/Compiler/BackEnds/Island projects. |
|
|
| DebugEngine |
Which debug engine to use for debugging (e.g. CLR vs Mono for .NET projects on Windows, or pure-Java vs Mixed Mode Debugging for Android. |
Cocoa, Island, Android SDK, .NET on Windows. |
|
| DebugHost |
Name and path of an executable to launch instead of the binary built by the current project – for example to debug Library projects hosted inside a third party app. |
|
|
| DebugHostActivity |
The name of the activity inside the package specified by DebugHostPackageName to launch. See Android Debug Hosts. |
Android SDK |
|
| DebugHostAPK |
The local path to an existing Android .apk to install and launch when debugging, instead of the binary created by the current project. See Android Debug Hosts. |
Android SDK |
|
| DebugHostPackageName |
The package name/ID of an existing Android app to launch when debugging, instead of the binary created by the current project. This can be the name of an app already installed, or the name of the .apk specified for the DebugHostAPK setting. See Android Debug Hosts. |
Android SDK |
|
| DebugIgnorePersistentState |
Sets a macOS app to launch without reopening the previous state. This is done by adding -ApplePersistenceIgnoreState YES to the command line arguments. |
macOS |
Fire, Water |
| DebugIndexHtmlFile |
|
WebAssembly/Web |
|
| DebugNodeEntryPoint |
|
WebAssembly/Node.js |
|
| DebugRootFolder |
|
WebAssembly |
|
| DebugUrl |
|
WebAssembly/Web |
|
| DebugWorkingDiretcory |
|
|
|
| DebugZombieEnabled |
Sets a Cocoa app to launch in zombie mode, to assist with debugging memory allocation issues. This is done by adding NSZombieEnabled=YES to the environment variables. |
macOS |
Fire, Water |
| EnableUnmanagedDebugging |
Runs the project using Visual Studio's unmanaged/native debugger (for C++ & Co) in addition to the .NET debugger. |
.NET |
Visual Studio |
| GenerateLLDBDebuggerSupport |
Generates support for Mixed Mode Debugging of an Android NDK extension within an Android SDK app. |
Android NDK. |
|
| TestProject |
Specifies an alternate EUnit test project in the current solution to be run instead of the project's binary, when Testing via ⌘T/Ctrl+T. |
|
Fire, Water |
| TestTarget |
Specifies an alternate Target within the above test project to be run instead of the project's binary when Testing. |
|
Fire, Water |
Note: Debug Arguments and Environment Variables are no longer stored as project settings, to allow more flexible management.
Documentation Settings
The Documentation Settings control whether and how XMLDoc documentation files will be generated from comments found in source code. XMLDOc comments start with three forward slashes, /// (or three single quotes in Mercury, '''), and can contain either XML or a plain text description.
| Name |
Description |
| XmlDoc |
Enables the processing of XMLDoc comments and the generation of .xml documentation files next to the compiler output. |
| XmlDocWarningLevel |
Determines the level of warnings for code without matching documentation tags. |
| XmlDocAllMembers |
|
Settings for Import Projects (Cocoa and Island)
| Name |
Description |
Platforms |
IDE |
| Mode |
|
|
|
| SubMode |
|
|
|
| SDK |
|
|
|
| Project GUID |
|
|
|
| Binary Name |
|
|
|
| RootNamespace |
|
|
|
| ConditionalDefines |
|
|
|
| OutputType |
Read-Only, must be Import |
|
|
| Header Search Paths |
|
|
|
| Link Names |
|
|
|
| Namespace Override |
|
|
|
| Force Includes |
|
|
|
| Black-listed Headers |
|
|
|
| CodeGen |
|
|
|
| SDK |
|
|
|
| Architecture |
|
|
|
| SimulatorArchitecture |
|
|
|
| MacCatalyst |
|
|
|
Website (ASP.NET, Fire only)
| Name |
Description |
Platforms |
IDE |
| UsePublishing |
Enables publishing of changed files on ⌘S for ASP.NET web site projects, via FTPS. |
.NET |
Fire |
| PublishingServer |
FTPS/SSH server to connect to. |
.NET |
Fire |
| PublishingUser |
SSH user to connect as (key required). |
.NET |
Fire |
| PublishingFolder |
Remote folder to publish to. |
.NET |
Fire |
"Undocumented" and Unexposed Settings
The following settings are provided for legacy support and are not recommended to be used. They are not exposed in the IDEs, but can of course be set in the .elements project file, manually. Rely on these options at your own risk, as they are subject to change without warning.
| Name |
Description |
| NoGo |
Do not let # references or other logic add an implied Go Base Library reference. |
| NoMercury |
Do not let # references or other logic add an implied Mercury Base Library reference. |
| NoSwift |
Do not let # references or other logic add an implied Swift Base Library reference. |
| UseLegacyPreprocessor |
Turns on the legacy Elements 9 and earlier macro preprocessor for {$IF and #if processing. This bypasses the more modern Conditional Compilation engine and disables certain advanced features such as using defined(). It is only recommended for legacy projects.
Since enabling this option is highly discouraged, this option is not available from the IDEs and needs to be set manually in the .elements project file. |
See Also
Shared Projects
Shared Projects are a great way to manage files that you want to, well, share between different projects. They come in handy even if you're working on a single platform – maybe you have a few .NET classes you want to use in a desktop app and on Windows phone, or you have some generic Cocoa code you want to share between your Mac and your iOS app – but they really shine when you are working across platforms.
What are Shared Projects?
Conceptually, you can think of Shared Projects as a container for Files. They show up as their own project in your solution in Fire, Water or Visual Studio, and they can hold a bunch of files – usually source files, but they could also hold resources or other content.
On their own, Shared Projects don't do much else. They don't have any project settings and they don't even get compiled on their own. The magic happens when a Shared Project is referenced by a regular project, because all the files contained in the shared project now get compiled (or otherwise used, if they aren't code files) in the real project.
For example, you could have a solution with an iOS project, an Android project and a Windows Phone project, to build three versions of your app for these three platforms. These projects would all contain platform-specific stuff – your iOS project would have view controller code and storyboards, the Android project would have layout files and Activities, and so on. But you would add a forth project, a shared project, that contains all the backend code you want to share between the platforms. Your networking code, your business logic, etc.
You'd maintain those shared files in one place, but they'd get compiled into all three projects, so that their code will end up running on all platforms.
Creating a Shared Project
Elements comes with a template to create an empty shared project. Due to the way Project Templates are presented in the IDEs, the template shows under each of the six languages (or any platform) but the resulting shared project will be identical no matter wich version you pick, because shared projects are not specific to a platform or language, themselves.
In most cases, you will add a shared project to a solution that already contains one or more "real" projects, so you will do that by right-clicking the Solution Node and choosing "Add New Project" or by choosing "File|New Project" from the menu and checking the "Add to Existing Solution" checkbox (in Fire and Water).
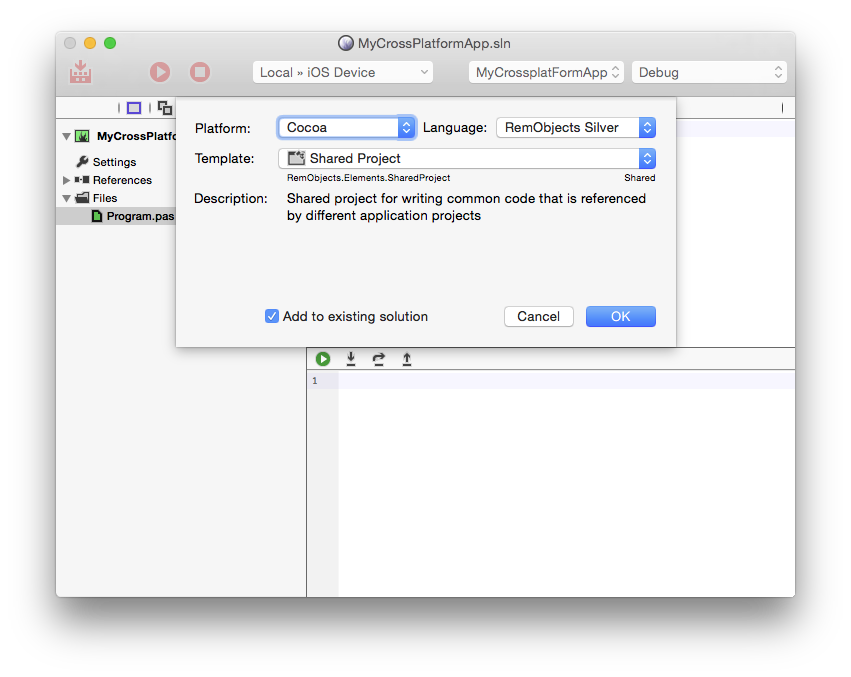
A new shared project will be added to your solution, distinguished by the round "globe" icon that sets the project apart from regular projects.
Referencing Shared Projects
As mentioned above, shared projects don't really become interesting until they are referenced by one or more (ideally more, because else what's the point) real projects. You add references to a shared project just as you would a normal project reference.
You right-click the "References" node of the real project and choose "Add Reference" in Visual Studio or "Manage References" in Fire and Water, and then pick the shared project from the list. In Fire or Water, you can also directly drag a shared project onto the "References" node to add a reference.
As with the project itself, you will notice that shared projects references show another icon instead of the regular "two connected boxes" reference icon.
Once the reference is added, the real project "sees" all the code defined in the shared project, and you can use its types from within the rest of the project.
Because shared projects get compiled as part of their main projects (different than library projects such as .dlls or .a's), you have a lot more flexibility in how code in the shared project and code in the real project can interact. For example, you can have Partial Classes that span across both, and code from the shared project can reference types from the real project, as well.
Working with Code in Shared Projects
In general, there is nothing different about working in shared projects than there is with real projects. You can add files from templates or existing files from disk, and you can remove files. When writing code, you get the full IDE experience, including code completion and other IDE smarts.
Since it's likely that your shared code is relevant in multiple projects, the IDE provides capabilities for selecting which context you want to work in for each project. For example, you might want to write a part of a shared class that is specific to iOS, and get Code Completion for Cocoa classes, then later on you'll write an Android-specific piece in the same file and want CC fore Java types.
In Visual Studio, you can use the Project Switcher UI at the top of the file to change what context you work in. As you switch between projects, you will see the code highlighting (for example for $IFDEF'ed portions) change to match, and when you invoke Code Completion, you will see CC based on the context of the selected project.
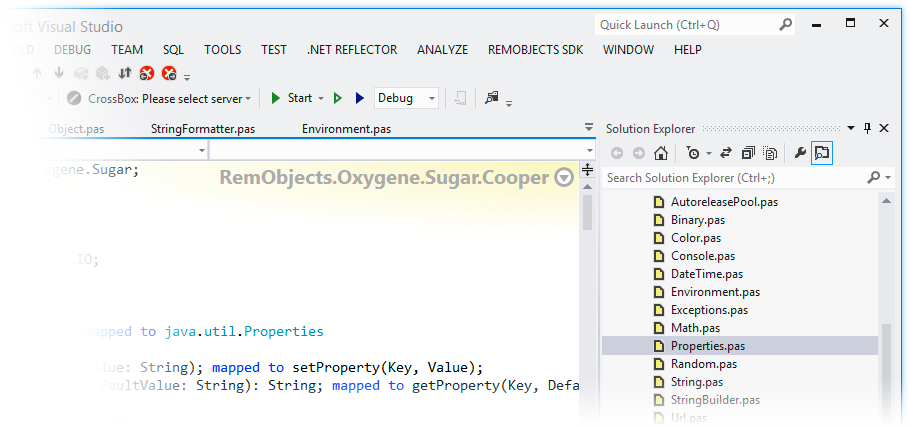
In Fire, you can right-click files in the shared project in the Solution Tree and select what project you wish to work in – the active project will then show next to the filename. You can do the same on the shared project node to switch over all files in the project in one go.
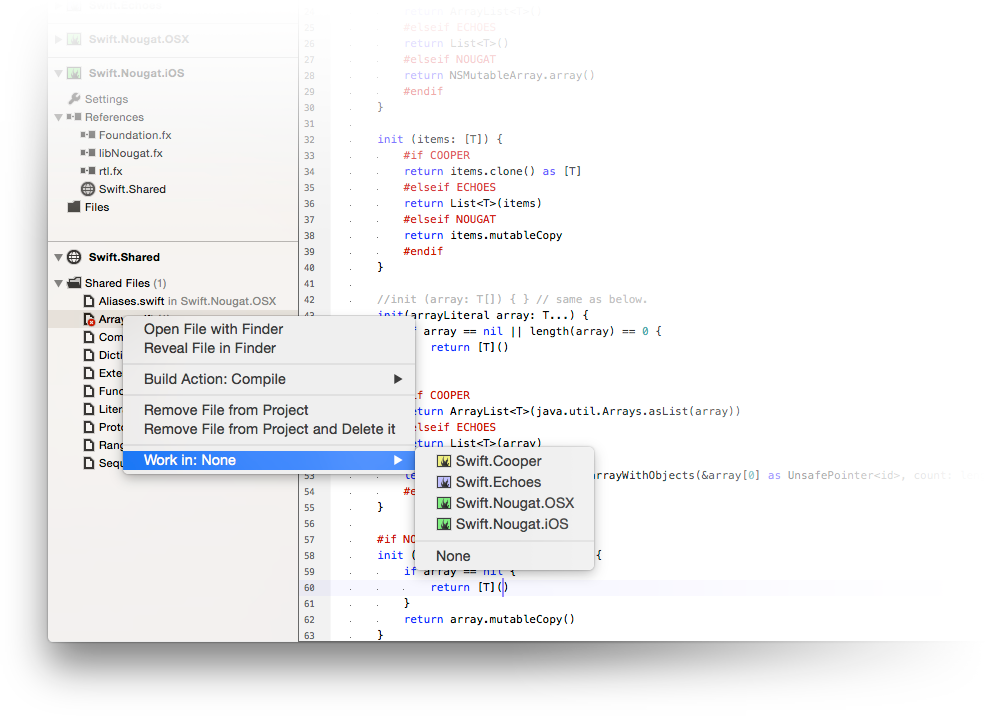
References
The Elements compiler uses references to pull in classes from external libraries – be it core framework libraries for the platform, third party libraries, or even your own libraries you created to contain code you are sharing between projects. Depending on the platform your project is targeting, references are to different file types, but the general concepts of references are the same.
Elements knows different types of references:
Plain References
Plain References are the simplest form of reference, where your project will point directly to a specific named library. The build chain will locate this library – either via a direct Hint Path to a local file or via a process called [Reference Resolving] that locates the library in a number of standard locations.
Once found, the compiler will make all public types and APIs from the library available to your project's code (governed by the rules for accessing types across different Namespaces, of course).
You can read more about Plain References here.
You can add project references via the Add Reference dialog (all IDEs) or by simply dragging a File from Finder or Windows Explorer onto the "References" node of a project (Fire and Water).
Project References
Elements also supports so-called project references. Rather than pointing to a pre-compiled library somewhere on disk, project references point to a second project (that needs to be open as part of the same Solution).
The build tool chain will automatically resolve project references, compile the connected projects in the right order, and make sure the output of the referenced projects will be used when compiling the referencing project. This process also takes into account the current Configuration and device type (e.g. iOS/tvOS/watchOS Device vs. Simulator on Cocoa).
Once resolved, the output of the referenced project is treated the same way as a plain and direct reference to that library file would be.
Project references can also be on Cocoa to establish a relationship between an .app and Extensions or a Watch Kit App. Rather than resulting in a plain reference, the Extension will be embedded in the main app. Similar, Android SDK applications can reference an Android NDK Extension project, to have its code embedded for JNI.
You can read more about Project References here.
You can add project references via the Add Reference dialog described above (Visual Studio) or simply by dragging a library project node onto the "References" node of a different project (Fire and Water).
Remote Project References
Remote Project References are similar to regular Project References, but instead of referencing a another project on the local system, the refer to a project hosted online in a Git repository. As part of the build, EBuild will automatically download (clone) or update the repository to the local disk as needed, and then include the local project as regular reference.
Remote Project References are a great way to maintain dependencies to projects that are maintained by third parties, or librraies shared between teams or solutions within your own company.
Package References
Package references, currently supported for .NET and Java only, are references to pre-compiled bundles of APIs that can be automatically obtained from an online package repository, at build time. These can include platform-vendor-provided or third party packages.
Elements supports:
- NuGet packages on the .NET
- Gradle (i.e. Maven) packages on the Java, most frequently used on Android.
You can read more about Package References here.
You can add and adjust package references via the Add Reference dialog (all IDEs).
Shared Project References
Finally, Elements projects can also reference one or more Shared Projects. Referencing a shared project simply includes all the files contained in the shared project into the current project, and compiles or processes them as if they were part of the local project.
You can read more about Shared Projects in general here, and about working with them in Fire and Water here.
References vs. Namespaces
It is important to not confuse references with Namespaces. While there is often a one-to-one mapping to which libraries contain which namespace, that overlap is arbitrary. A single referenced library can contain types in multiple namespaces (which may or may not be named the same as the library itself), and multiple libraries can contribute to the same namespace.
When using first or third party frameworks and libraries, it is important to know both what namespaces the types you want to use are in, but also which libraries need to be referenced in order to make the types available, as well. For example, all standard Cocoa SDK libraries ship with Elements in library files that match their namespace – Foundation.fx contains the Foundation namespace, UiKit.fx contains the UIKit namespace, and so on. On the other hand, on .NET many core namespaces are located in mscorlib.dll and System.dll.
See Aso
Plain/Direct References
Plain references, also referred to as direct references, are the most basic form of referencing external APIs and libraries from an Elements project.
While Project References and Package References exist as more high-level form of referencing dependencies, these too, get eventually resolved down to one or more plain references as part of the build process.
A plain reference points to a single file (the type of which depends on the target platform) that contains the necessary code and metadata needed by the compiler and the build chain in order to make the types and APIs from that reference available to the code in your project.
Reference Files
.dll (.NET)
On the .NET platform, libraries take the form of regular .dll files containing IL (.NET) code, along with the metadata required to consume it. .dll files can be referenced directly and will be handled immediately by the compiler.
.winmd (.NET)
The .NET platform also supports .winmd files, which contain API metadata for operating system-provided APIs, but no actual code. Like regular .dll references, .winmd files can simply be referenced and the compiler will handle them directly.
.jar (Java)
On the Java platform, code and metadata are provided in the form of .jar files, essentially renamed zip files that contain the individual classes exposed by the library. The compiler will handle .jar files directly.
.jmod (Java)
Starting with JDK 9, the Java platform also uses .jmod files to provide metadata for base runtime files without embedding the code itself, like ,jar files do. The compiler will handle .jmod files directly and make their types available to your project.
.aar (Java/Android)
For Java-based Android SDK projects, .aar (Android Archive) files are another form of reference. .aar files can contain a collection of .jar files, resources and even native NDK binaries. As part of the build process, EBuild will automatically extract .aar references, pass any contained .jar files to the compiler, and also make sure resources and JNI binaries will be processed correctly, as well.
.fx (Cocoa and Island)
On both Cocoa and Island, the Elements-specific .fx file format is used for referencing libraries. .fx files contain meta-data only, and they can represent types from the core OS runtime (such as rtl.fx, or the standard SDK framework .fx files like Foundation.fx on Cocoa), or they can be accompanied by binary files (dynamic libraries, static libraries or, on Cocoa, frameworks) that contain the actual implementation. You can read more about .fx files here.
Finally, projects on all platforms can reference .gx files, which are cross-platform libraries that contain metadata and can optionally also contain intermediate code or be accompanied by platform-specific binaries. .gx files are created using Elements' new Gotham meta platform.
Finding (Resolving) References
Plain references are typically referenced by name only, and EBuild employs a sophisticated pipeline for resolving a name to the actual file that represents the reference. This includes checking in several well-known and user-configurable standard locations (see References XML Paths). The reference resolving logic is handled by the ElementsResolveReferences task, and documented in more detail here.
For .NET and Java, each reference resolves to a single file. For Cocoa and Island, each reference actually resolves to one or more .fx files:
-
On Cocoa for iOS, tvOS and watchOS, a separate .fx file is resolved for the Device and the Simulator build destination, respectively.
-
On Island, a separate .fx file is resolved for each active architecture the project is compiled for (e.g. i386 and x86_64).
EBuild uses folder naming conventions to find the right file for each architecture or build target.
Hint Paths
For references that cannot be found automatically (or to override which version of the reference will used), an optional HintPath meta data field can be provided on a reference. When present and referring to a file that exists on disk, the Hint Path will take precedence and any further resolving logic will be skipped.
Note that an invalid Hint path is not an error, and will simply be ignored, defaulting back to regular reference resolving as described above.
On Cocoa and Island, EBuild will automatically back-resolve from the hint path to find the corresponding references for other architectures or for Device vs. Simulator, of the reference is in an appropriately named subfolder.
For Island, if the folder containing the reference is named after one of the valid architectures for the platform, EBuild will automatically check parallel folders for the other architectures. E.g. if you reference ../Somewhere/i386/foo.fx in your Hint Path, EBuild will automatically find ../Somewhere/x86_64/foo.fx as well.
For Coco, if the folder containing the reference is named after the subplatform, EBuild will assume it is for the Device, and automatically check parallel folders for the Simulator reference. If the folder is named after the subplatform with a Simulator suffix, it will assume the reference is for the Simulator, conversely. E.g if you reference ../Somewhere/iOS/libFoo.fx in your Hint Path, EBuild will automatically find ../Somewhere/iOS Simulator/libFoo.fx, and vice versa.
Fire and Water indicate the presence of a hint path by showing .../, /... or X:\... behind the reference name. This also indicates whether the hint path is relative to the project, or absolute. You can remove a hint path, or change it from relative to absolute and vice versa, via the reference's right-click menu.
Copy Local References
References can be marked with the CopyLocal (or, for backwards compatibility, the Private) meta data value. If set to True, and supported by the platform and reference type, a copy of the reference and related binaries will automatically be copied along the final executable.
-
On .NET, any .dll files can be marked copy-local; corresponding .pdb or .mdb debug symbol files will also be copied. .winmd files cannot be copy-local.
-
On Java, .jar files can be marked as copy-local, and will be copied alongside the main executable (plain Java) or packaged into the .apk (for Android). .jmod files cannot be copy-local.
-
On Cocoa, .fx files can be marked as copy-local when they represent a non-system .framework or a dynamic library (.dylib). .dylibs will be copied alongside the executable, and both .dylibs and .frameworks will be included in the .app bundle, if one is being created as part of the build.
-
On Island, .fx files can be marked as copy-local when they represent a dynamic library (.dll, .so, etc, depending on the target platform). The libraries will be copied alongside the executable.
See Also
Project References
Project References, as their name implies, refer not to a pre-compiled binary to be referenced, but to another project on the local disk that, when compiled, will produce an output that can be referenced.
The referenced project may or may not be part of the same Solution as the project referencing it, and in many cases, EBuild can resolve references to projects that are not part of the solution just fine, assuming all paths are correct and the project was compiled successfully, before.
Project references can be used for traditional "library" projects, but can also bring different (compatible) project types together – for example a Java-based Android app can reference an Android NDK extension project, or an iOS project may reference Extensions or a watchOS app.
How EBuild Resolves Project References
EBuild applies sophisticated logic to try its very best to resolve project references in almost every case.
Firstly, before starting the build, EBuild will check all projects in the current solution for project references. Each project reference is matched against the other projects in the solution, and if a matching project is found, it is connected to the project reference, and marked to be built before the project(s) that reference it.
If a referenced project cannot be found in the solution, EBuild will try to locate the project file on disk using either its name or its ProjectFile meta data value. If found, the project is loaded into the solution implicitly and connected to the project reference, but marked as not Enabled (i.e. it will not be built).
If the referenced project cannot be found either, EBuild checks if the Hintpath of the reference is valid.
If none of these steps are successful, the build will fail.
EBuild will then determine the best build order for all projects, based on the dependencies. If a circular dependency is detected, the build will fail, otherwise EBuild will start to build each project in the order it has decided.
As each project hits the ElementsResolveReferences task, project references are resolved using the following steps:
If a live project was connected to the project reference
If a live project was connected to the project reference in the previous steps (either because it was part of the solution, or could be located on disk), that project is used to fill the reference:
- If the project was built successfully, its output (via the
FinlOutoutForReferencing-| collection) will be used to fulfill the reference.
- If the referenced project is
Enabled but was not built yet, that means a circular dependency was detected, and the referencing project will fail to build.
- If the referenced project failed to built earlier, the referencing project will also fail to build.
- If the project is not
Enabled (either explicitly by the user, or because it was pulled into the solution implicitly as described above), EBuild will try to locate the project's FinalOutput.xml file in the Cache from a previous build. If found, the data from that file (the FinlOutoutForReferencing-| collection) will be used to fulfill the reference.
- If the previous step failed, EBuild will fall back to using the
HintPath, if valid, to fulfill the reference, and otherwise fail the build.
If no live project was connected
Otherwise, EBuild will fall back to simply looking at the HintPath. If valid, it will be used to fulfill the project reference, otherwise the build will fail.
Covered Scenarios
The steps above cover just about any valid scenario for project References:
- Both projects are in the solution and
Enabled.
- Both projects are in the solution, the referenced project is not
Enabled, but was built earlier.
- The referenced project is not in the solution, but can be located on disk and was built earlier.
- The referenced project cannot be located, but the
HintPath is valid.
By default, EBuild will not try to build referenced projects that are not in the solution, so if such projects have not been compiled previously, the built will fail. By passing the --build-missing-projects, switch you can tell EBuild to treat all project references as if they were in fact listed in the solution, and build them, recursively, if needed.
Project References when Hosting EBuild in MSBuild
When building with EBuild inside Visual Studio, EBuild does not see the whole solution, but instead builds each project individually (wrapped in an MSBuild project task). EBuild will rely on option 3 and 4 from above to resolve project references in that case.
The same is true when building an individual project file without .sln from the command line.
See Also
Remote Project References
Remote Project References are similar to regular Project References, but instead of referencing another project on the local system, they refer to a project hosted online in a Git repository. As part of the build, EBuild will automatically download (clone) or update the repository to the local disk as needed, and then include the local project as regular reference.
Remote Project References are a great way to maintain dependencies to projects that are maintained by third parties, or libraries shared between teams or solutions within your own company.
A Remote project Reference is specified using the tag, and like the other package references, it includes a name, and an (optional) version/branch.
The name of the package is the complete URL to a .elements project file in a remote git repository, currently limited to GitHub. The version can be "*", or a valid branch name, tag name or commit ID for the repository. "*" or lack of version will refer to the master branch of the repository.
Note that the proper GitHub URL for a file consists of 'github.com domain name, followed by the username and repository name, and then the path to the relevant file (in this case, an .elements project file). This is not the same URL as is shown when browsing the GitHub repository in the browser. The http:// or https:// prefix is optional, and EBuild will always use HTTPS to access GitHub.
For example, the reference below refers to RemObjects InternetPack open source library.
<RemoteProjectReference Include=“github.com/remobjects/internetpack/Source/RemObjects.InternetPack.elements:master”/>
How EBuild Resolves Remote Project References
EBuild resolves Remote Project References as part of the same pre-build phase that also verifies regular (local) Project References and determines the best build order for all projects involved.
For each Remote Project References encountered, EBuild will determine a standardized local folder to create a local clone in. If a copy of the repository already exists, EBuild will update (i.e. fetch and pull) that repository to be up to date with the remote; if not, it will download (i.e. clone) the repository to that folder.
Remote Project References can specify an optional branch name; if present, EBuild will select that branch, otherwise it will use the master branch of the repository.
EBuild will then load in the local copy of the referenced project, and ensure it will be built as if it had been part of the solution to begin with. EBuild will of course also process any Project References or Remote Project References contained within that project, so that recursive dependencies are handled correctly. The final build order for all involved projects will be determined once all Remote Project References have been pulled and resolved.
If a Remote Project Reference cannot be pulled/cloned, or if the specified project file cannot be found within the repository, the build will fail.
As each project hits the ElementsResolveReferences task, project references are resolved, as described in Project References: How EBuild resolves Project References.
LFS support
Remote Project References can be used with Git repositores that leverage Git Large File Storage (LFS). Git support for LFS must be installed manually from git-lfs.github.com, system wide. After that, Remote Project References can be marked with the <LFS>True</LFS> metadata tag, and EBuild will automatically issue the right commands to initialize and pull LFS data, as needed.
See Also
Package References
Elements supports NuGet (.NET) and Gradle/Maven (Java and Android) package references to automatically download and maintain dependencies for your projects on these platforms.
While these were supported to a limited degree in Elements 9 and earlier, the remainder of this topic focuses on how Package References work in Elements 10 and later, when using EBuild, since for EBuild we have completely revamped the package management system, and EBuild now handles all package resolving internally, without relying on NuGet or Gradle to be installed.
NuGet and Gradle
EBuild handles both NuGet and Gradle package references very similar, so a lot of the things discussed in this topic apply equally to both kinds of packages.
-
NuGet packages are supported on the .NET platform when targeting the full .NET framework, .NET Standard and .NET Core.
-
Gradle packages are supported on the Java platform, and most commonly used with the Android platform (but also available for plain Java projects, as well).
Names and Versions
A Package reference is specified as a combination of a name and a version, separated by colon. For example: com.android.support:support-v4:22.2.1.
Version numbers can be specified in several formats:
- A simple asterisk ("
*") will request any available version and pick the latest non-beta version.
- A simple version number ("
5.0") will request that version or higher, excluding any pre-release builds (e.g, "5.1", but not "5.2-alpha").
- A simple version number with pre-release suffix ("
5.0-beta") will request that version or higher, including pre-release builds.
-
A range of two versions separated by comma will pick the best version in that range:
- "
2.0,4.0" would pick any version starting from 2.0
- A trailing
] will restrict request the exact version (2.0,3.0] would pick the best version starting from 2.0, up and and including 3.0 (but not 3.1)
- A trailing
) will restrict request the highest version below the specified number (2.0,3.0) would pick the highest 2.x version (but not 3.x).
In general, Semantic Versioning rules will be used.
Recursive Dependencies
Package references can have recursive dependencies to further packages (e.g. package "A" might depend on package "B"). EBuild will automatically resolve all recursive dependencies until every necessary reference is pulled in. If references to different versions of the same package are encountered, EBuild will automatically upgrade to use the highest required version, where possible.
Result of Package Reference Resolving
The final result of package resolving will be one or more Plain References that will be processed like any direct reference would. These can be .dll files on .NET, or .jar and .aar files, on Java/Android.
Fire and Water will expand Project references in the Solution Tree to show you the final plain references that resulted from them, and also show you any dependent recursive references, a well:
Repositories
By default, packages will be resolved from the default platform vendor's repositories. For .NET, that is the central repository at api.nuget.org. For Android, that are maven.google.com, repo1.maven.org/maven2 and jcenter.bintray.com, as well as any local repositories in disk in the extras folder of the Android SDK install.
Additional custom repositories can be configured locally within the project by adding one or more repository object, such as:
<NuGetRepository Include="https://www.example.org/nuget" /><GradleRepository Include="https://www.example.org/maven" />
Per-Reference Repositories
Sometimes, it is useful to specify custom repository for a specific reference, to override where this package will be obtained from. This can be done by providing the URL of the repository as metadata for the package reference elements, using the NugetRepository or GradpeRepository name, respectively.
If a repository is specified here, it will be checked first, before looking in the other standard (or per-project) repositories. (The local cache will still be consulted before).
<NuGetReference Include="MyPackage:*">
<NuGetRepository>https://www.example.org/nuget</NuGetRepository>
<Private>True</Private>
</NuGetReference>
or
<GradleReference Include="myorg:mypackage:*">
<GradleRepository>https://www.example.org/maven</GradleRepository>
<Private>True</Private>
</GradleReference>
Caching
Packages downloaded from remote repositories will be cached locally in a central storage shared by all EBuild projects. You can build with the --no-package-cache command line switch to disable any caching and re-download all repositories fresh from the server.
Adding Package References
You can add Package References to your project from Fire and Water via the fourth tab of the Manage References dialog, which can be accessed from the "Project" menu, by right-clicking the "References" node or by pressing ^⇧R (Fire) or Shift-Alt-R (Water):
You can also manually add package reference elements to your project file, e.g.:
<NuGetReference Include="Microsoft.NETCore.App:*" /><GradleReference Include="com.android.support:support-v4:22.2.1" />
See Also
.fx Files
Not all platforms supported by the Elements compiler provide the rich metadata that is required by the compiler to use the library, as part of the binary. For example, the Cocoa platform and many of the base platforms for Island depend on Objective-C or C header files (.h) normally processed by a C compiler at compile time.
Elements uses .fx files to express metadata for these binaries, so that the .h files do not need to be processed on each compile, and/or to provide metadata for libraries created by Elements itself.
.fx files contain a quick-to-process binary representation of the types and APIs exposed by a binary, as well as additional related meta data (for example un-mapping of obfuscated names, Swifty-fied names, and more.
- .NET contains metadata in the
.dll files themselves, so .fx are optional and not required.
- Java contains metadata in the
.jar files themselves, so.fx are optional and not required.
- Cocoa and the Island-packed platforms use
.fx files for libraries (.a, .lib, .dll, .dylib, .so etc) and Cocoa frameworks (.framework).
Imported .fx Files
Some .fx files are imported from C or Objective-C .h Header files using the FXGen tool or an Import Projects. This includes all the base SDK framework .fx files for Cocoa that ship with Elements, as well as the core rtl.fx library that provides the lowlevel platform APIs on both Cocoa and the Island-backed platforms.
If you have existing C or Objective-C style libraries as a binary and one or more .h. files, or as a .framework, then you can import those too with an Import Projects, in order to generate a .fx file that you can then referene in your Cocoa or Island projects.
The core Cocoa SDKs are imported not via Import Projects, but via a special tool that automates framework discovery for a given copy of Xcode and imports all SDKs in one go. While you will rarely need to import these yourself, ths tool is available as open -source project called HI2.
Compiler-Generated .fx Files
When building libraries for Cocoa and Island with Elements, the compiler can of course avoid the extra step of generating and re-importing a .h file, and will emit a rich .fx file with all metadata for the library, automatically.
(You can still have the compiler also generate an optional .h file, if you want the library to be used from Xcode or from any C/C++ compiler available for the respective platform.)
For .NET and Java projects, generation of .fx files can be optionally enabled in Project Settings by setting the CreateFXFile option to True.
See Also
Adding References
New references can be added to a project by right-clicking the "References" node of the project and choosing "Add Reference". In Fire, Water and Visual Studio, this brings up the Add References dialog, which gives you quick access to any standard references provided by the platform or registered with the compiler, but also lets you manually browse for a library to reference on disk:
In Fire and Water, you can also drag reference-able libraries directly from Finder or Windows Explorer onto the "References" node to add references from disk, and you can drag a (different) project node onto the "References" node to add a Project Reference.
Reference Search Path XMLs
In addition to automatically knowing where to locate reference files available as part of the core platforms, the Elements compiler toolchain employs a system of XML files to let it know where to locate referenced libraries.
Some of these XML files will be created by the Elements install itself, by third party libraries registering themselves with Elements, and you can also configure your own paths to let Elements find references you use frequently, without having to rely on Hint Paths.
On Windows, Elements will look for these files in %APPDATA%\RemObjects Software\Elements\Reference Paths and %ProgramData%\RemObjects Software\Elements\Reference Paths.
On Mac, it will look in the subfolder RemObjects Software/Elements/Reference Paths under both ~/Library/Application Support for the current user and the system-wide /Library/Application Support folders. When building from inside of Fire, the compiler will also look at a dedicated set of references provided inside of the Fire .app bundle.
Underneath these folders, the compiler will look in platform-specific subfolders, namely:
as those are the internal codenames for the respective platforms. Any .xml file in these folders will be looked at for potential reference paths. For each platform, the compiler will also look in specific subfolders for reference paths for a particular sub-platform. These are:
Echoes/Full – for full .NET framework referencesEchoes/NETStandard – for .NET Standard referencesEchoes/Silverlight – for Silverlight-only .NET referencesCooper/Android – for Android-only Java referencesCooper/Plain – for non-Android-only Java referencesToffee/iOS – for iOS-only Cocoa referencesToffee/macOS – for Mac-only Cocoa referencesToffee/tvOS – for Mac-only Cocoa referencesToffee/watchOS – for Mac-only Cocoa referencesIsland/Linux – for Linux-specific Island referenesIsland/Windows – for Windows-specific Island referencesIsland/Android – for Android NDK-specific Island referencesIsland/WebAssembly – for WebAssembly-specific Island references
The format of the XML files is as follows, where any number of <path> entries may be provided, and the Name value is purely for display purposes:
<?xml version="1.0" standalone="no"?>
<paths>
<path name="Sugar for .NET">/Users/mh/Code/git/Oxygene/Bin/Sugar/Echoes</path>
</paths>
Reference Paths in the IDE
In Fire and Water, you can view the currently configured reference paths (including those set by Fire itself) on the "Reference Paths" tab of the Preferences dialog:
Broken/missing folders will be shown in red, and double-clicking a valid entry will open the corresponding folder in Finder or Windows Explorer. In the screenshot above, you see that Elements is looking at both externally registered locations from ~Library (indicated by the "(User)" suffix), as well as those inside Fire (indicated by "(Fire)").
You will also be able to add custom paths via this dialog.
In Visual Studio, you can view and configure reference paths in the "Tools|Options" dialog, under "Projects and Solutions|RemObjects Elements|Reference Paths" in the tree:
See Also
Resources
Resources are non-code data, such as images, text, audio or other files, that will be included in your application and can be accessed from code at runtime.
Different kinds of resources are supported on different platforms. In most cases, resources are packed up to be included inside the binary file generated by the compiler or linker; on the Cocoa (Cocoa and Island/Darwin platforms, resources usually remain standalone files inside the Application Bundle.
There are three broad types of resources:
EmbeddedResource
EmbeddedResource files are supported on all platforms, but only very commonly used on .NET and native Island/Windows. As part of the build process, EmbeddedResource files get included in the main executable by the compiler or linker.
On .NET and Java, files of any types can be included as EmbeddedResource. Certain resource types will (based on file extension) be processed and packaged up differently. On Cocoa and all Island platforms, only .res resource files can be included. (A small and specific set of other file types can be set as EmbeddedResource and will automatically packaged as .res file during the build.)
-
.resx files are XML-based files that can contain values or reference to other (usually binary or media, such as bitmaps or icons) files. They will be converted to .resource files that include the data of any reference files, before being embedded.
-
.dfm files are text based files that define Delphi VCL forms. They will be converted to a binary format appropriate for the platform, before being embedded.
-
.rc files are text based files that describe Win32 resource; similar to .resx, they can contain references to other (typically binary or media) files. A future version of EBuild will automatically compile .rc files to .res files, but for now, these files cannot be directly referenced and must be compiled externally using the rc.exe tool that comes with the Windows SDK.
-
.res files contain a set of resources packaged up in a Windows-specific binary format. They will be embedded as is, and are supported on all platforms.
On the .NET and Java platforms , all other files will be embedded as is, and can be accessed directly using the appropriate resource APIs for the platform. On Cocoa and Island, arbitrary resource files are not supported, only .res files (or files from the above list that can be processed to .res files).
How embedded resources are accessed at runtime depends on the platform. Please refer to the following topics to get started:
Resource
Resource files are supported on .NET only. They too are embedded in the executable, but packaged in a different internal format and accessed using different code patterns than EmbeddedResources. They are most commonly used in WPF applications, and built on top of the .NET infrastructure for EmbeddedResources.
See Also Accessing WPF Resources (.NET).
AppResource
AppResource files are supported only on the Apple (Cocoa and Island/Darwin platforms. Any type of file (or even folder) can be marked as AppResource, and the file (or folder) will be copied "as is" into the .app Application Bundle.
See Also Accessing App Resources (Cocoa and Darwin)
Embedded Resources (.NET)
On .NET, Embedded Resources can be accessed by obtaining a Stream via the Assembly.GetManifestResourceStream .NET API, typically on the assembly that contains the current code, or on Assembly.GetEntryAssembly for the main executable:
var lAssembly := typeOf(self).Assembly;
var lResourceStream := lAssembly.GetManifestResourceStream("MyText.txt");
if assigned(lResourceStream) then begin
using lReader := new System.IO.StreamReader(lResourceStream) do begin
var lText := lReader.ReadToEnd();
...
end;
end;
var assembly = typeof(this).Assembly;
var resourceStream = assembly.GetManifestResourceStream("MyText.txt");
if (resourceStream != null)
{
using (var reader = new System.IO.StreamReader(resourceStream))
{
var text = reader.ReadToEnd();
...
}
}
let assembly = dynamicType(this).Assembly
if let resourceStream = assembly.GetManifestResourceStream("MyText.txt") {
__using let reader = new System.IO.StreamReader(resourceStream) {
let text = reader.ReadToEnd()
...
}
}
var assembly = typeOf(this).Assembly;
var resourceStream = assembly.GetManifestResourceStream("MyText.txt");
if (resourceStream != null)
{
using (var reader = new System.IO.StreamReader(resourceStream))
{
var text = reader.ReadToEnd();
...
}
}
The resource name is typically composed of the project's RootNamespace and the path plus filename of the resource relative to the project. If you embed a text file named "MyText.txt" that is placed in the root of a project with default namespace "MyCompany.MyProduct", the resource name would be "MyCompany.MyProduct.MyText.txt".
A list of all resources in an assembly can be obtained using Assembly.GetManifestResourceNames.
WPF Resources (.NET)
Supported on .NET only, WPF Resources can be accessed via the System.Resources.ResourceManager class, as well as via special constructors on certain system classes that represent resources and take an URI as constructor parameter:
var lResourcePath := new System.Uri('pack://application:,,,/MyImage.png');
var lBitmap := new BitmapImage(lResourcePath);
var resourcePath = new System.Uri("pack://application:,,,/MyImage.png");
var bitmap = new BitmapImage(resourcePath);
let resourcePath = new System.Uri("pack://application:,,,/MyImage.png")
let bitmap = new BitmapImage(resourcePath)
var resourcePath = new System.Uri("pack://application:,,,/MyImage.png");
var bitmap = new BitmapImage(resourcePath);
The raw bytes of a resources can be accessed by passing the URI to the Application.GetResourceStream API:
var lInfo := Application.GetResourceStream(uri);
using lMemoryStream := new MemoryStream() do begin
lInfo.Stream.CopyTo(lMemoryStream);
var lBbytes = lMemoryStream.ToArray();
end;
var info = Application.GetResourceStream(uri);
using (var memoryStream = new MemoryStream())
{
info.Stream.CopyTo(memoryStream);
var bytes = memoryStream.ToArray();
}
let info = Application.GetResourceStream(uri)
__using memoryStream = MemoryStream() {
info.Stream.CopyTo(memoryStream)
let bytes = memoryStream.ToArray()
}
var info = Application.GetResourceStream(uri);
try (memoryStream = new MemoryStream())
{
info.Stream.CopyTo(memoryStream);
var bytes = memoryStream.ToArray();
}
Resources are represented by a URI, typically of the format pack://application:,,,/X, where X is the name of the resource file as referenced by the project, possibly including a path.
The System.Resources.ResourceManager class can be used to list available resources, as shown below.
var lAssembly := typeOf(self).Assembly;
var lResourceContainerName = lAssembly.GetName().Name + '.g';
var lResourceManager = new ResourceManager(lResourceContainerName, lAssembly);
var lResourceSet = lResourceManager.GetResourceSet(Thread.CurrentThread.CurrentCulture, true, true);
foreach (var lEesource in lResourceSet)
yield lResource.Key;
var assembly = typeof(this).Assembly;
var resourceContainerName = assembly.GetName().Name + ".g";
var resourceManager = new ResourceManager(resourceContainerName, assembly);
var resourceSet = resourceManager.GetResourceSet(Thread.CurrentThread.CurrentCulture, true, true);
foreach (var resource in resourceSet)
yield return resource.Key;
var assembly = dynamicType(self).Assembly
var resourceContainerName = assembly.GetName().Name + ".g"
var resourceManager = ResourceManager(resourceContainerName, assembly)
var resourceSet = resourceManager.GetResourceSet(Thread.CurrentThread.CurrentCulture, true, true)
for resource in resourceSet {
__yield return resource.Key;
}
var assembly = typeOf(this).Assembly;
var resourceContainerName = assembly.GetName().Name + ".g";
var resourceManager = new ResourceManager(resourceContainerName, assembly);
var resourceSet = resourceManager.GetResourceSet(Thread.CurrentThread.CurrentCulture, true, true);
foreach (var resource in resourceSet)
__yield return resource.Key;
Here, the "resource container name" is the name of the lower-level Embedded Resource that contains the WPF resources for the given assembly.
App Resources (Cocoa & Darwin)
On Cocoa, and Island/Darwin, App resources inside a bundle are accessed at runtime by using a Cocoa API such as NSBundle.pathForResource:ofType: (typically on the application's main bundle instance) to obtain the filename on disk. After that, regular file APIs can be used to load the file in.
var lFileName := NSBundle.mainBundle.pathForResource('MyText') ofType('txt');
var lText = File.ReadText(lFileName);
var fileName = NSBundle.mainBundle.pathForResource("MyText") ofType("txt");
var text = File.ReadText(fileName);
var fileName = NSBundle.mainBundle.pathForResource("MyText", ofType: "txt")
var text = File.ReadText(fileName);
var fileName = NSBundle.mainBundle.pathForResource("MyText") ofType("txt");
var text = File.ReadText(fileName);
Some additional APIs are provided for special resource types. For example image and icon files can also be loaded using the static NSImage.imageNamed or UIImage.imageNamed, on macOS or iOS, respectively.
Please refer to the Cocoa, AppKit and UIKit documentation from Apple for details.
Solutions
Elements, both in Fire, Water and Visual Studio, works with Projects inside of a Solution. You can think of a Solution as a container for one or more related projects, often called a project group or a workspace in other IDEs.
Fire, Water and Visual Studio will always open a solution, not a project – even if that solution only contains a single project. When you open a .elements (or legacy .oxygene) project file directly, the IDE will check if there's a solution (.sln) file with the same name next to it, or else automatically create a solution file for you.
EBuild, our build toolchain, is capable of building either a Solution or an individual project file.
Solution files use the .sln file extension, and just like Elements projects files, they are compatible between Fire, Water and Visual Studio (the file format is defined by Microsoft for Visual Studio, and Fire honors the same format). They are plain text files, but you will not normally want to edit them directly unless you really know what you are doing, as the file format is not well-designed for human readability.
See Also
Fire & Water


Fire and Water are our state of the art development environments for programmers using the Elements compiler on the Mac and on Windows, respectively.
While sharing a lot of common concepts, infrastructure and internal code, each version of the IDE designed specifically and natively for the platform it runs on – the Mac (Fire) and Windows (Water), respectively.
Both Fire and Water support all the Elements languages (Oxygene, RemObjects C#, RemObjects Swift (Silver), Iodine (Java)), Go and Mercury, and each supports developing for all Elements target platforms, including .NET, Cocoa, Java/Android SDK and Island.
Fire and Water are written from the ground up to be a fresh new look at what a development environment could look like. They take some of the best ideas from other IDEs we love and use, including Xcode and Visual Studio, and combine them with unique new ideas that we believe will help improve developer workflow.
One of the fundamental principles of Fire and Water is that they will never get in your way. They are written to be lean and mean, always responsive and mode-less. That means that you will never be pulled out of your flow.
Getting Started
The topics in this section will help you get started working in Fire and Water.
- Navigation will guide you through finding your way around the IDE. Fire and Water are designed around easy and seamless navigation, and understanding a few core concepts will get you productive in no time.
- Code Editor introduces you to the most important part of the IDE, the place where you'll write code for your awesome apps. Fire and Water have an advanced code editor written from scratch specifically for Oxygene, C# and Swift, with many great features.
- Debugging provides you with the first step for debugging your apps – be they iOS, Mac, Android or even .NET and Java apps.
- Our Tutorials section will get you going with writing your first app, cross-platform development, and more.
Prerequisites / Getting Set Up
Depending on what platforms you wish to develop for, Fire, Water and the Elements compiler have a few prerequisites you may need to install in order to have all the tools you need to get started with the platform.
Discussing Fire and Water, and Reporting Feedback
We have separate sub-forums on our Talk site for discussing Fire and Water, reporting bugs, and giving feedback:
Navigation
Fire offers a sophisticated and powerful model for navigating around the IDE and the various places in your code that you work with, aided by two user interface elements, and many helpful keyboard shortcuts.
Navigation UI
For using the mouse, Fire of course has the Navigation Pane on the right, which offers several tabs that let you navigate around your code (by project structure/files, by types, by search results, and – while debugging – by stack frames).
The navigation pane can be shown and hidden by pressing ⌘0, to get out of your way and maximize screen real estate – and you will find that you often do not need it.
At the top of the editor, there's the Jump Bar, which combines elements from the navigation pane in hierarchical structure based around your current active view. Here too, you can navigate though the folders and files in your project, their types and members, as well as other nodes – such as build messages, or debug stack frames.
The Jump Bar always stays in sync to reflect exactly the view you are looking at.
Navigation Shortcuts
Just as important that the navigation UI, Fire provides a set of keyboard shortcuts that work throughout the IDE to help you navigate around your code. These shortcuts are designed in a way to be consistent and and intuitive to learn.
-
^⌘-Left/Right lets you navigate back and forth between the places you have recently been. Every time you move around the IDE, Fire keeps track and adds your location to a navigation stack. Pressing ^⌘-Left takes you back a step to where you came from, and ^⌘-Rightmoves you forward again. The navigation stack even persists across restarts of Fire.
-
^⌘-Up/Down navigates between the items in the Jump Bar. This could mean going between files in the same folder, going from one build message to the next, or going up and down the call stack while debugging. You can also go up and down between types or members within the same file – all depending on what is currently selected in the Jump Bar.
Build Message Navigation
The Jump Bar is also the primary place to work with Build Messages – such as errors, warnings or hints generated from your code.
After a build, you will usually press ⌥⌘M to jump to the first error (or the first warning, if there were no errors) that was generated (or ⌥⇧
⌘M to jump to the first error in the current file). Of course you can also use the mouse to select a build message in the Jump Bar manually.
Once a build message is active in the Jump Bar, you can use the ^⌘-Up/Down shortcut from above to navigate back and forth between the different messages emitted by your build, in the order they came in.
Fire will automatically move between files, or move you around inside the current file, to show you the appropriate message in context. And of course Fire shows you the build messages right inside the editor, inline with your code.
Sometimes, more than one message is generated for the same line of code. There could have been two errors, or an error with an additional hint that gives you more information. You can use ⌥⌘-Left/Right to cycle through the different messages on the same line.
By default, Fire shows shortened messages inline that are concise and to the point, but omit some details that usually can be inferred by context. For example, they might omit the name of an unknown identifier, because that name is already highlighted in the code itself. You can use ⌥⌘L to toggle between seeing the short and the full error message.
Finally, you can use ⌥⌘-Up/Down to navigate between all the build messages in the current file, based on their position.
In summary: ^⌘- shortcuts navigate on a higher level, between items in the jump bar – be they build messages or otherwise. ⌥⌘- shortcuts navigate at a lower level, between messages in the same file.
As a related shortcut that might come in handy, ⌥⌘B lets you jump directly to the full textual build log, in case you need to inspect that in more detail.
Other Editor Navigation
Additional navigation shortcuts:
- ^⌥-Left/Right turns the current token (or selection) at the cursor into a search term and finds the next or previous occurrence.
- ^⌥-Up/Down in Oxygene source files jumps up to the declaration or down to the implementation of a class or method.
And of course the usual OS X standard text navigation shortcuts apply as well:
- ⌘-Left/Right jumps to the start or the end of the current line.
- ⌘-Up/Down jumps to the top or the bottom of the current file.
- ⌥-Left/Right jumps from one word or token to the next.
Code Editor
Writing code is, obviously, one of the most important aspects of software development, and what you spend a lot of time on. That's why Fire and Water come with a sophisticated code editor that was designed and written from scratch to make you productive writing code.
Aside from being good at letting you type code, the editor comes with many advanced features to help you be more productive.
Basic Editing
Of course the editor lets you type and edit code, and navigate around the code file, using the mechanisms and shortcuts familiar to the respective platform, such as using ⌥-Left/Right (on Mac) or Ctrl+Left/Right (on Windows) to navigate between words or tokens. You can find a full overview of all shortcuts in the Keyboard Shortcuts topic.
Fire and Water automatically take care of saving any changes yu make to your code, when needed, and will also automatically reload files when their content changed outside of the IDE. You can focus on coding, and let the editor take care of the rest. (The IDE will save your changes to disk when building, when you focus away from the app, or at 30-second intervalls, to make sure your dode is always safe).
The editor can reformat code for you, to match proper indentation and code style. This can happen automatically, in certain scenarios, as well as be invoked manually.
By default, the editor will adjust the indentation of code when you paste, to a sure the newly added section has the right offsets. For C#, Swift and Java, it will also reformat the current block of code when you type a closing curly brace (}). Of course this can be turned off and back on in Preferences.
You can also manually ask to reformat the current selection or the whole file, using the "Reformat *" menu items or their corresponding keyboard shortcuts.
Reformatting is supported for all Elements languages, whole-file reformatting is also available for XML-based files, including XAML.
Syntax Highlighting
The code editor of course provides syntax highlighting, making different parts of cour code sho in different colors and styles in order to make the code more easy to read and understand, and to notice obvious mistakes better. Syntax highlighting (and some of the other advanced features discussed below) is provided for all Elements languages, as well as some other file formats:
- Oxygene (
.pas)
- C# (
.cs)
- Swift (
.swift)
- Java (
.java)
- Go (
.go)
- Mercury (
.vb)
plus:
- XML (
.xml, .plist, and more)
- XAML (
.xaml)
- HTML with nested JavaScript, CSS, and all Elements languages (
.html, .aspx)
Code Smarts
As you write or adjust your code, the code editor provides a whole bunch of advanced tools to make it easier for you to write the code:
Code Completion
Code Completion can provides a dropdown of all valid identifiers at the current cursor position. It helps you remember the names of classes or their members as you type them, and even lets dou discover new APIs. Code Completion (also referred to as "CC") can be set to pop up automatically as you type (in Preferences) or can be invoked using ⎋ (Escape) on both platforms, or with Ctrl+Space on Windows.
Fire and Water's Code Completion is very sophisticated, and the Code Completion topic dives into all its capabilities in more detail.
Code Completion is supported for all Elements languages, XAML, Android XML Files and .pList files.
Peek at Definition
Peek at Definition can be invoked via ⌘D (Fire) or Ctrl+D (Water) and it shows you a popup window where you can see the definition of the current identifier. This is very handy if you just want to know what type the current variable is, or see all the members of a class.
Peek at Definition lets you have a quick peek, without disturbing your flow. If you need to take a stop further, you can use the next feature:
Go to Definition
Go to Definition ("GTD") works similar to the previous feature, but it takes you from your current position in code to the place where the identifier is defined. This could be a a different location in the same file, or a different file in your project. If thje code in question is not define din your project but externally – say you're invoking GTD on a system type – the IDE will generate a source representation of the type or member for you, in the programming language used by your current file, and open that in a read-only editor.
You can invoke Go to Definition with ^⌥D (Mac) or Ctrl-Alt-D (Windows).
You can optionally turn on Inline Symbol Information in in Preferences in order to always have the editor show you a quick hint at how the identifier currently underneath the cursor is defined.
in XML files, typing </ will automatically insert the matching closing tag, assuming the XML structure of the file is valid up to the current cursor location.
Search and Replace
The code editor (and Fire and Water in general) have extensive support for searching and replacing, in the current code file or solution-wide. The separate Search and Replace topic goes into all the capabilities, in more detail.
You can find all the relevant commands (and their keyboard shortcuts) in the "Edit|Find sub-menu. Most relevant, ⌘F / Ctrl+F will bring up the find pane at the top of the editor. ⌘F / Ctrl+F lets you set the search term to the current selection or the token currently at the cursor, and ⌘G / Ctrl+G let you jump to the next occurence of the search term in the current file.
Build Messages
As you build your project, compiler messages such as errors, warnings or hints will automatically show in the editor, highlighting the relevant line in red, yellow or green, respectively, and showing a short version of the error message at the end if the line.
In the case where there's not enough room and the message overlaps with code, the message will automatically move out of the way as the cursor enters the line in question. If several messages are reported for the same line (e.g., often an error might come with additional hints on how to fix it), you can use ⌥⌘-Left/Right (Mac) or Alt-Shift-Left/Right (Windows) to toggle between them.
Debugging
When Debugging, the editor provides several features that help you test your code.
-
Breakpoints can be set at any line, by clicking the very left few pixels or (when visible) the gutter with the line numbers. A ligt blue bubble will show to indicate a breakpoint, which will turn dark blue when breakpoint becomes active in a debug session, or red when it is invalid. Breakpoints can also be set via the "Debug|Add Breakpoint on Current Line" menu item, or ⌘/.
-
When hitting breakpoints, or otherwise paused on an exception or stepping thru code, each Stack Frame will be highlighted with a colored line and an indicator arrow on the left. This includes the current debugging position, but also any locations up the stack or from other threads. The thread ID will be shown at the end of each such line.
-
The debugger will also attempt to Evaluate the current selection or the token currently underneath the cursor, and – if succesful – will show its value at the end of the line.
-
Finally, for the active stack frame, all known Local Variables will also be evaluated, and their values will show at the end of the line where they were defined.
Refactoring
Refactorings allow you to let the IDE make complex (and not so complex) adjustments to your code for you, rather than having to do them manually. These can go from simple things such as uncommenting a block of code, to changes with wide-ranging effects such as renaming a public member of a class.
Pressing ⌘/ / Ctrl+/ will comment out (i.e. deactivate) the current line or selection or – if it is already commented-out – reactivate it. This feature works as you might expect, in various scenarios:
- Without a selection, it toggles the presence of
// at the beginning of the current line
- With a multi-line selection or a fully-selected line, it toggles the presence of
// at the beginning of the all lines covered by the selection. Even some lines already start with //, each line will get an extra //. Only if all lines start with //, will the // be removed.
- With a partial selection in the current line, the selected part will be surrounded by
/* and */ comment delimiters, or, if the exact selection (ignoring whitespacce) is already wrapped in any comment delimiter valid for the language, it will be removed.
This probably sounds more complex than it is, in reality you will find that ⌘/ / Ctrl+/ simply does what you expect ;).
Flatten/Expand Selection
Flatten Selection (^X on Mac) will collapse the current selection into a single line, converting all line breaks and indentation intoa single space each. This is useful form consolidating a statement that spans multiple lines, or to collapse a simple C# property declaration.
Expand Selection, only available for C#, Swift and Java, will undo the above by (re-)inserting appropriate linebreaks around all curly braces in the current selection, and then reformatting the relevant code to bring it back into proper shape.
Rename
Remove Unused Namespace Usings/Imports
Oxygene: Move Selected Methods into the Class Declaration
Oxygene: Move Selected Methods out of the Class Declaration
Oxygene: Complete current Class
Oxygene: Sort Implementations to Match Declaration Order
Swift 3.0 Migration: Add _ to Unlabeled First Parameters
Oxidizer
Oxidizer is a tool that allows you to convert source code from certain languages (including C#, Java and Objective-C) into the language of your current project. Among other options, it integrates with the editor via the "Edit|Paste" submenu to let you p[aste foreign code and have it converted on the fly.
This is very helpful if you, for example, find code snippets that you want to re-use online, but they are in a different language (say, C# for a .NET snippet, but your project uses Swift, or old Objective-C code, for a Cocoa task.
You can read more about Oxidizer here.
Code Completion
Code completion, also called IntelliSense in Visual Studio parlance, is a crucial part of writing code these days. Instead of reading docs or knowing types and their members by heart, we rely on Code Completion to let us know and discover what APIs are there for us to use. And gone are the days of trying to save keystrokes by making names easy to type — because CC can help us type complex names, easily.
Of course Fire comes with state-of-the-art Code Completion in its code editor, driven by the same back-end engine that also provides CC data for our languages in Visual Studio. But while the content is the same, Fire takes the CC user interface to the next level, as we have really put a lot of thought into how we can improve the general experience.
In Fire, Code Completion will automatically activate as you type, wherever sensible. So you don’t need to think about it much, and it will automatically be there to help you, should you need it. Of course you can also manually invoke CC at the current cursor location, if so desired. You can either press Escape (which is the Mac default for this), or — if you’re still used to Visual Studio, and maybe switching a lot between the two IDEs — you can use ⌘-Space (after changing the global Spotlight shortcut, which you probably already did to use that combo on your VM, anyways).
CC is fast, but sometimes even the tiniest of interruptions can be annoying, so CC in Fire is completely asynchronous. Even while CC gathers info to show you, you can keep typing, or cursor elsewhere. If you type more of the current identifier, CC will adjust as you type to narrow your search. If you type or move away from the current identifier, CC will close (or never show, if you’re a really fast typer ;).
The CC “Soft Selection”
As Code Completion gets activated, you will notice that Fire will add a soft highlight to the current “token” that it considers relevant. This is a helpful indicator as to what part of your code will be replaced should you accept an item from the CC list.

If you use Visual Studio, you might have (consciously or subconsciously) noticed that sometimes when you select an item from CC, VS will replace the full token you are on, and other times, it inserts the new text in front of the existing text. If you’re like me, on more than one occasion you’ll have been annoyed that it did the opposite of what you wanted or expected. Fire’s visual indicator helps with that. For example, if you start typing at the very front of a token, chances are that you are adding a new token in front and don’t want to replace what’s already there, so CC will not absorb the text behind the cursor:

But if you invoke CC in the middle of an identifier, chances are you want to replace the whole identifier, so Fire’s UI will reflect that:

Not only does the “soft selection” show you what to expect, but Fire is also smart about picking the right “mode” for CC, depending on the context it finds itself in.
Partial CC
Fire’s CC also has a nifty way that helps you type complex names. Take the following example of very common Cocoa code:
dispatch_async(dispatch_get_global_queue(DISPATCH_QUEUE_PRIORITY_NORMAL, …)
That is a huge pain to type, even with CC, because each the three identifiers starts with “dispatch_”, and there’s a huge list of those. So you end up either typing most of the names manually or doing a lot of scrolling through the CC list. Not anymore!
In Fire, when you press Tab or underscore (_), CC will automatically advance to the next underscore in the current item (or to the next item with an underscore. So for example, if you just type dis_g_g_q(, CC will smartly navigate you through the list so that you end up with dispatch_get_global_queue(|):

Similarly, Tab also jumps ahead between parts of PascalCased names. So it’s just NSFil<Tab>Ma<Tab> and you have NSFileManager.
The Devil’s in the Details
There are other small details that streamline the CC experience. When CC gets invoked and there’s no current token to soft-select yet (the most common case when you’re starting a new identifier), Fire will show a small “sliver” of a soft selection to the right of the cursor to show you CC is coming:

If you accept CC for a method by typing (, Fire will automatically insert the pair of parenthesis and put the cursor between them — if you accept CC with a different key, for example with space or enter, it will not.
Of course CC also handles multi-part method names in Oxygene, C# and Swift (even if they look like named parameters in the latter) — inserting the full method signature for you, and giving you “jump points” to let you tab from one parameter to the next:

If you ignore CC and “type through”, CC will smartly do the right thing when you come to the end of the identifier. For example, it will adjust the case of what you typed to the proper item in CC. But not if the version you typed would also be valid, as in the case below (which of course only happens in case sensitive languages, i.e. C# and Swift):

When you start typing in the middle of an existing identifier, CC will not drop down automatically. Chances are you’re trying to fix a typo or otherwise know what you’re doing, and our use testing showed that the CC dropdown just gets in the way. (Of course you can still invoke CC manually via Escape for that location — it will then cover the entire identifier.)
Just like these, there are lots of little tweaks and and “special cases” — some even language-specific — that fine-tune CC to behave as you’d want it to and not get in the way. Most of them being cases that you won’t actually notice — except by lack of being annoyed.
Search and Replace
Search and Replace is a core feature of any development environment, so of course Fire has sophisticated support for it. The basics work pretty much exactly how you would expect, but Fire goes a bit beyond, so let's look at the feature in detail.
To start with, as you would expect, you invoke Find/Replace using the standard ⌘F keyboard shortcut (or via Edit|Find in the menu), which brings up the Find/Replace popup:

Here, you can type a search term and — as you’d expect — you can also choose whether this search term should be treated case sensitive, whether to match whole words/tokens only, or whether to treat the term as a RegEx. As you make your selection here, you will see that it will automatically reflect in the open editor, highlighting every occurrence of the search term in text marker yellow. This will persist even as you dismiss the Find/Replace popover.
What’s more, the search term and settings will automatically synchronize between all files you have open — all across your project, and even across multiple solutions. So as you switch files, or switch to a different document window, you will see your search term is highlighted everywhere. And, like just about all state in Fire, it will also persist across restart of the IDE.
The Find/Replace popover gives you the usual options to Find Next, Find Previous, and of course to replace either one or all occurrences of the search term with a new string.
Find Next/Previous
After you dismiss the Find/Replace popover, these options continue be available via keyboard shortcuts and the Edit|Find menu. ⌘G will jump to the next occurrence, and Shift-Cmd-G will jump to the previous, both allowing you to cycle round-and-round in the current file. ⌥⌘G will replace the current/next occurrence of the search term, while ^⌥⌘G will replace all in the entire file.
When replacing, you will notice that the editor also highlights each occurrence of the replace term as well, with a more subtle yellow. This highlighting allows you to easily keep track of what matches your search and what has been replaced already.
Clearing the Search Term
If you had enough of your search, you can clear the search term, and make the yellow highlights disappear with it, by pressing ^⌥⌘F (or choosing Clear Search Term from the Edit|Find menu).
Navigating to Occurrences of the Current Token
But that’s not all. One frequent task while navigating code is navigating between occurrences of the same token, so Fire has a shortcut for that as well. When the cursor is on a word/token, you can press ^⌥-Right or ^⌥-Left to quickly jump to the next (or previous) occurrence of that token. Fire will automatically make the token at the cursor the current search term (so you will see it highlighted all across the file). If not already turned on, Fire will also temporarily enable the “whole words only” option for this search to make sure you only find the exact token (if you want to jump from one use of 'i' to the next, you don't want to also hit the 'i' in 'begin').
When you do a manual search later, the “whole words only” will automatically revert back to its original setting. You’ll find that the ^⌥-Right and ^⌥-Left navigation is something that, once you’re used to it, you can no longer live without
All in all, Fire’s Find and Replace support is well-rounded and — along with Fire’s other navigating mechanisms that I’ll dive into in another post — designed to make it really easy and intuitive to find your way around your code.
CodeBot

CodeBot is your smart, AI-based coding assistant, integrated directly into the Fire and Water development environments.
CodeBot provides a chat-based interface and can help you write, analyze, test, and review code. It has (optional) access to your project, can suggest and make changes for you, and in many cases, even complete entire coding tasks on its own.
Think of CodeBot as a junior pair programmer who’s always ready to help.
Using CodeBot
Before using CodeBot for the first time, you’ll need to set it up, which includes choosing an AI provider and model, and deciding how much access to your code you want to give it.
Once that’s done, you can open CodeBot in the new right-hand panel of Fire or Water by pressing ⌘8/Ctrl+8, or by choosing "Show CodeBot" from the View menu. You can hide it the same way once you no longer need it.
CodeBot provides a chat interface that will feel instantly familiar.
You type your messages into the bottom half of the CodeBot panel and send them with ⌥Enter/Alt+Enter (the default), or simply Enter if you’ve configured it that way.
Your messages and CodeBot’s replies will appear in the top panel—your messages on a gray background, and CodeBot’s on a colored one (yellow in Fire, blue in Water). If CodeBot includes code snippets in its replies, they’ll often come with action links—such as inserting the code directly into your project.
When appropriate (and if you allow it—which is the default), CodeBot can interact with Fire and Water to inspect your project, make changes, add new files, start builds, or run EUnit tests. The chat panel will always inform you of any actions CodeBot performs.

While CodeBot is generating a response, the message field turns gray. You won’t be able to send another message until it finishes (though you can start typing the next one). If it takes too long—or, heaven forbid, gets stuck—you can click the "Cancel" link at the bottom of the chat log.
At the bottom of the chat panel, you may also see two options: "New" and "Clear".
- New starts a fresh conversation. Your next message will not consider the previous chat context. A black separator line in the log will mark the break.
- Clear also starts a new session, but removes the previous conversation from the visible chat log entirely.
CodeBot from the Editor
Instead of typing questions or tasks manually, you can also invoke CodeBot directly from the code editor’s context menu. For example, you can select a piece of code and ask CodeBot to analyze it for issues or explain what it does.

Paste & Convert with CodeBot
The "Paste & Convert" submenu, which traditionally uses the deterministic Oxidizer tool to convert code into your language of choice, now also includes a "Paste & Convert with CodeBot" option that leverages AI for the conversion.
Depending on the code snippet, you may get better results with one or the other—if Oxidizer doesn’t do what you want, try CodeBot, and vice versa.
-
Oxidizer uses a strict language parser to interpret the syntax of the original code and converts it to the target language using CodeGen4. It always produces syntactically valid output, but has no semantic understanding of what the code actually does. It can fail if the input is incomplete or contains edge cases.
-
CodeBot, on the other hand, uses a language model to interpret and convert the code. It tends to generate more natural and idiomatic code, but it may introduce small changes or inaccuracies. It might also adjust the intent of the code (sometimes in unexpected ways)—for example, changing APIs or adapting usage patterns.
See Also
CodeBot Setup
Before using CodeBot, the smart coding assistant in Fire and Water, it needs to be appropriately configured in a few easy steps. This can be done by opening the Settings/Options window, available via ⌘, or "Fire|Settings" (in Fire) and Ctrl_, or "Tools|Options" (in Water) and going to the "CodeBot" tab.

CodeBot needs one (or more) AI models to work with. You have two options here, you can either connect it to an AI provider of your choice from the list below (the recommended option), or — if you're experienced with AI and/or are running on a very powerful machine, you can run the open source LM Studio locally, and have CodeBot use one of the models it supports.
Unless you really know what you are doing, we recommend configuring a third AI provider.
Adding AI Accounts
To do this, click on the "Manage Accounts" button, to bring up the new Account Manager (which is also always available directly from the "Tools" menu):

The Account Manager may already show your RemObjects account that Fire/Water uses to keep your licenses up to date. You can add more accounts by clicking the "..." button at the bottom left, includin accounts for the following AI providers:
- Anthropic (Claude)
- Google (Gemini)
- xAI (Grok)
- Mistral
- OpenAI (ChatGPT)
Simply pick the account type you would like to add, and in the subsequent window, enter your API key. If you are unsure where to find that key (or still need to sign up for an account with the provider in question), you can click the "Visit Website" button to open their site and follow the instructions there.

Once the key is entered, click "Add Account". Account manager will verify that the APi key works, and then add the new account.
If this is the first and only AI account you are adding, it will automatically be set to be your active account.
Selecting AI Accounts and Models
Back in the Preferences window, you can now select between all the AI accounts you have connected (if you connected more than one) by choosing from the "Account:" popup. Your first one should already be selected.
As you pick an account, the "Model:" popup will populate with the lst of different LLM models available (and suitable for CodeBot) from the provider. You can check with the AI provider to see what model they suggest. Note that the capabilities and usage costs can vary drastically between models
Our current recommendations (as of June 2025) are as follows.
-
Anthropic (Claude)
claude-sonnet-4 (general coding, faster & cheaper)claude-opus-4 (more advanced & capable of deeper reasoning, more expensive)
-
Google (Gemini)
gemini-2.5-flash (fast, large context window)gemini-2.5-pro (advanced reasoning and "deep thinking", more expensive)
-
xAI (Grok)
grok-3-minigrok-3-fast (fast, cheaper)grok-3
-
Mistral
-
OpenAI
gpt-4o (great for general use, with reasoning, fast and cheap) gpt-4.1-mini (cheaper and has a much larger context window, but is less capable)
Note: This may change more quickly than we have time to update this page. AI model offerings and names are constantly changing. If you’re seeing different models than listed here, please check the provider’s site or API dashboard for up-to-date information.
Working with Local Models
If you want to let CodeBot use local models running on your system (or local network), you can use its support for LM Studio. LM Studio is an open source application that makes it (fairly) easy to download and run a large variety of LLMs locally on your one development machine or server, including models such as Deepseek, Llama, and more.
Running a local model is a good option if you are concerned about code privacy and your questions and code are shared with a third-party AI provider.
That said, while LM Studio does take away some complexity, this option is still only recommended if you are familiar with the tool and experienced with the system. Please refer to the documentation provided by the creators of LM Studio for how to get it set up.
Once up and running, LM Studio offers the option to run a local server, by default available on http://localhost:1234/v1.
You can configure CodeBut to use LM Studio by selecting the "LM Studio" option from the "Account:" pop-up. This option will always be available, whether you have accounts configured or not. Once selected, you can choose one of the models you have installed, to be used for CodeBot, from the "Model:" popup.
If you are running LM Studio on a different port than the default on a different server on your local network, you can manually provide the URL to it in the LM Studio URL field.
Note: LM Studio allows you to install various models, not all of which are compatible with CodeBot and/or suitable for the tasks CodeBot requires. If you select a model not compatible with CodeBot, your message requests will most likely be met with error messages.
Also note that if you choose a deep reasoning model such as Deepseek, those models are very verbose and not only think deeply (or pretend to, as may be) before answering, but often also share their entire thought process as before the real answer...
Building
Fire and Water are designed to be light-weight and “get out of your way”, and one of the parts where this shines through is when you build. Compiling your project is a frequent task in your day-to-day work, and an essential part of any development environment.
You usually start a build by either hitting ⌘B / Ctrl+B (to just build) or ⌘R / Ctrl+R (to build, and then run), and when you do, the build system goes off to do its thing in the background, but aside from that, nothing much changes. There’s no modal dialog telling you the IDE is building, and the IDE does not lock up or get in your way. After all, building is something that happens passively and once a build is fired off, there isn't much you can do about it (although actually, that’s not quite true, more on that later on), so the IDE might as well just let you keep focusing on your code.
Building
So as Fire or Water go off to build, focus stays on the code editor (or wherever else it was before you sent off the build), and you can just keep on coding. There’s only a couple of small indicators that a build is running: For one, the jump bar at the top of the window turns blue as the build runs and cycles through the build tasks in the status area on the right. And if you’re in full screen “focus mode” with the code editor covering your entire screen, that’s all you see.

The application icon in the Dock or Task Bar also turns blue — which is handy if you actually are switching away from Fire or Water to some other app while you wait for a build. You can now see the build status and success/failure with one glance at the bottom of the screen (or even in the ⌘Tab app switcher, on Mac).
When the build finishes, jump bar and app icon either go back to normal (if all went well), or they turn red (if one or more projects failed to build). That, and an optional notification center message, is your only indication that the build is done — again, nothing happens that pulls you out of the flow, as chances are you just went right on coding while the build was happening.

Messages
Fire and Water have no dedicated “Error Messages” view that pops up when a build fails. Instead, build messages are integrated with the IDE’s regular navigation infrastructure: They fill into the jump bar at the top, for manual selection/browsing, and they also show inline in the text editor. Chances are, new build errors are happening right in the code you are currently working on, so having them show up where you are already looking at — the code window — is the best place for them, and in most cases, you need little else to find out what went wrong.
When you do, your favorite new keyboard shortcut will be ⌥⌘M / Alt+Ctrl+Shift+M (or the "<b<Messages|Show First Message" menu), which – as the name indicates – jumps right to the first message generated by the build. If there have been errors, it brings you to the first error that was encountered; if there were none, it brings you to the first warning or hint, if any.
Of course, you can also look at the jump bar, which shows you all build messages under the Build Log node, and select a message from there.

Once you navigated to a message, you can use the ^⌘Up and ^⌘Down (Fire) or Alt+Up and Alt+Down (Water) keyboard shortcuts (or "Project|Navigation|Up/Down" in the menu) to cycle between messages and jump from one to the other.
If you are the kind of person who does want to get distracted when building, Fire and Water do have a few options for you in the Preferences dialog, under Build & Debug: For one, you can choose to have the build log become visible either when a build starts, or only when it fails. This option can be helpful in certain situations (for example when you are “debugging the build”, i.e. when you’re in a development mode where you’re looking at build issues and expect to look at the build log a lot), but we really recommend not turning it on for day-to-day work. You can also optionally have Fire jump to the first error if a build fails (which is how many IDEs, such as Delphi and Visual Studio, behave – but again we recommend against it, for the reasons outlined above: it pulls out out of the flow when it happens).
Another cool thing you can do with build messages is copying code along with its messages to the clipboard. This is really helpful when you want to share a build problem with team-mates for help, or when you want to post questions about a build error somewhere. Simply select the range of code you’re interested in and press ⌘⌥C / Control+Alt+C (or "Edit|Copy w/ Build Messages" from the menu), and the IDE will copy the code as you expected — but it’ll add any error messages to the code as well (prefixed by a // comment delimiter, so that the copied code remains valid). Really handy.
Don’t Stop Me Now.
Sometimes you press ⌘B / Ctrl+C to start a build, and immediately regret it. You wrote some code, pressed “build” to see if it's any good, and the second you do, you spot that missing semicolon, that typo, or something else that’s just silly. In Visual Studio, you’d now sit there and wait for the build to finish, just to go again, and that always has been a huge frustration for us. Not so in Fire and Wateer.
There’s two things you can do when you started a build that you know will be no good. For one, you can press ⌘. / Ctrl+. (or "Project|Stop" in the menu) and cancel the build, immediately. Bam, it’s stopped. More interestingly, if you just fixed that silly typo and want to build again, you can just hit ⌘B / Ctrl+B again, and it will automatically cancel the current build and start fresh.
This might seem like a small thing, but you’ll find it a game changer in how you work – especially if you’re working on larger projects that take a few seconds to build. For example, a build of Fire itself takes between 30 seconds and two minutes, depending on how large a portion of the project rebuilds, and depending on what kind of Mac you're on (you really notice just how slow a 12" MacBook is, by comparison, when building large projects ;)). Not having to wait that out every time I make a mistake has been a huge productivity boost for me.
Incremental Build Messages
What makes this even more helpful is that error messages from the build will come in and show in the editor one by one, as the compiler encounters them. So even if your build takes, say, 10 seconds, chances are you see your current line of code turn red after just a second or two if you made a mistake. Just fix it, press build again, and off you go.
This is just a small overview of how Fire integrates the build cycle into the IDE, and many of its subtleties are hard to do justice by just describing them. Give Fire a spin for yourself to see how this all works out in action — and make sure to let us know what you think!
Fixed it for You!
Finally, there's a handful of common but trivial errors (such as case mismatch, or a missing ;, that the IDE can actually fix for you automatically. When the build finishes, you might see some of your errors turn from red to gray, with "FIXED" prefixed to the message.
Fire or Water just fixed the typo for you – no action needed!
Debugging
Fire and Water provide sophisticated debugging support for all supported target platforms and all Elements languages.
Depending on the target platform, the debugged applications will run locally, on a remote computer (connected to via CrossBox over SSH), or a physical device (Android, iOS Device or Apple TV) connected locally or to a remote Mac.
Please refer to the Working w/ Devices topic for more details on what options are supported, and how to select the appropriate device.
Launching
After selecting the target machine or device, the remainder of the debugging process is the same, for all platforms. You have several options to launch or deploy your application, available via the "Project" menu and corresponding keyboard shortcuts
- "Run" – the default option, selecting this will build your application, deploy it (where necessary) to the target device, and then run it in the debugger. Most of the remainder of this topic will be focused on this option. (⌘R / Ctrl+R)
- "Run w/o Debugging" – selecting this will run your project, but without the debugger attached. You application will run as it would in production mode, without the overhead of the debugger, but also without its benefits. (⌘⇧R / Ctrl+Shift+R)
- "Run w/o Rebuilding" – this option will run your (already built) executable, but will not initiate a prior build, even if your application's code has changed. This is useful if you have partial changes but want to re-run the current version, or if you made (for example cosmetic) changes since building that do not affect your current debugging, and woukld prefer to skip the delay a new build would cause.
- "Deploy w/o Running" – where applicable (i.e. only for applications running on external devices, this option will deploy your app, but not launch it. This is helpful to just get your app installed, if you want to launch it manually. (⌘⇧D / Ctrl+Shift+D)
- "Test" – builds and runs a test application (which can be either the active project, or a dedicated Test Project associated with it) in the debugger, but in a special Testing mode for EUnit unit testing. (⌘T / Ctrl+T)
- "Test All Projects" – builds and runs all test applications in the special Testing mode. (⌘⇧T / Ctrl+Shift+T).
There are three optional phases that might need to happen before debugging can start:
- Building (if your project has changed since it was last built)
- Uploading (when using a remote computer) and/or
- Deploying (when using a device).
The IDE is smart about not repeating these preparational phases unnecessarily, for example skipping a rebuild or re-deployment if your application code has not changed between runs.
The IDE also will smartly decide which projects to build as part of the run, avoiding to build projects (even if Enabled) that do not factor into the current project.
You will see the status of each of these phases in the top right corner of the Jump bar, and also by its color-coding. The Jump Bar (and the application icon) will turn blue while building, and yellow when the debugs session starts. The status will show the different steps, and end up reading "Debugging", once the session is fully started.
You can also see the status (and more details about your debug sessions), in the Thread Pane and Callstacks, the fourth tab of the Navigation Pane which can be opened via ⌘4 / Ctrl+4) or via the "View|Show Threads and Callstacks" menu item.
Debugging
Once a debug session is active and running, you can use the debugger to control it, including the following features:
Further Topics
See Also
Deploying
As part of running your application on a device, such as an iPhone, iPad, Apple TV, Android phone or even Simulator or Emulator, a deployment phase might be needed to bring your application from your local computer to the device in question.
Deployment happens separately from the Build, as first phase of the Debugging process when you initiate a launch (even to Run without Debugger). Deployment is cached, so if you initiate multiple debug sessions in a row and your application has not changed, it will not be re-deployed each time.
You can manually force a re-deployment (or to deploy without launching) by selecting the "Deploy w/o Running" menu item, or pressing (⌘⇧D / Ctrl+Shift+D).
See Also
Uploading
As part of running your application on a remote computer, an upload phase might be needed to bring your application from your local computer to debug target. This could be when debugging Mac or Linux applications from Windows, or Linux, Windows or (optionally) .NET applications from a Mac.
Upload happens as first phase of the Debugging process when you initiate a launch (even to Run without Debugger). Upload status is cached, so if you initiate multiple debug sessions in a row and your application has not changed, it will not be re-uploaded each time.
Note that when debugging on a iOS or tvOS device from Windows, both an upload (to the Mac) and a subsequent Deployment (from the Mac to the connected device) will be involved.
See Also
Start-Up Arguments
Fire and Water provide a powerful and flexible view to manage the start-up arguments that will be passed to your application when debugging. This is especially helpful when working with command-line projects and testing various parameters.
You can invoke the Start-Up Arguments Sheet by choosing "Project|Manage Start-Up Arguments" from the menu, or pressing ^⇧A / Alt+Shift+A.
The main view of the Start-Up Arguments sheet consists of a list of any and all arguments you have set up to be passed to your application.
Individual arguments can be checked or unchecked, and only checked arguments will be used. This allows you to flexibly switch between testing different options of your application. Your project will maintain a list of all arguments, so you can always easily re-enable them. Arguments are maintained per Project, and the Start-Up Arguments sheet will always show the arguments for the active project selected in the top right of the main window.
You do not need to worry about quoting arguments that contain spaces. Each line will be treated as an individual argument, and the IDE will automatically apply quotes to them as needed, depending on how your application is launched, and what the platform's rules for passing arguments are.
Copy and Paste
You can paste arguments from the clipboard into the list using the regular ⌘V/Ctrl+V shortcut. If you have a full command line with multiple arguments on the clipboard (e.g. copied from a console window, or obtained from a user of your app), you can use the "Paste & Split" button to have it parsed into individual items. This will take into account quoted arguments.
You can also copy one or more selected arguments using ⌘C/Ctrl+C.
Drag and Drop
You can drag in files or folders from Finder or Windows Explorer (or any other source) into the Start-Up Arguments list to easily add existing files as parameters for your app. You can also (currently in Fire only) drag and drop arguments within the list to change their order.
Color Highlighting
The Start-Up Arguments sheet will automatically detect arguments that look like (absolute) file paths (starting with / on Mac, or with a drive letter or \\ on Windows). If a file path points to a file that does not exist on disk, the argument will be highlighted in red, letting you spot unexpected typos.
See Also
Environment Variables
In addition to Start-Up Arguments, Fire and Water also allow you to manage the environment variables that will be passed to your application when debugging. Note that any variables specified here will be passed in addition to those defined by default for the current user or runtime environment.
You can invoke the Environment Variables Sheet by choosing "Project|Manage Environment Variables" from the menu, or pressing ^⇧V / Alt+Shift+V.
The main view of the Environment Variables sheet consists of a list of name/value pairs of variables arguments you have set up to be passed to your application, ordered alphabetically.
Individual variables can be checked or unchecked, and only checked variables will be used. This allows you to flexibly switch between testing different options of your application. Your project will maintain a list of all variables, so you can always easily re-enable them. Variables are maintained per Project, and the Environment Variables sheet will always show the arguments for the active project selected in the top right of the main window.
You do not need to worry about quoting variable values that contain spaces.
Copy and Paste
You can paste arguments from the clipboard into the list using the regular ⌘V/Ctrl+V shortcut. If the clipboard text contains an equal sign (=), the paste will automatically be split into name and value. You can have multiple variables in the clipboard as separate lines, and paste them in one go.
Of course you can also copy one or more selected variables using ⌘C/Ctrl+C.
Pause, Step, Continue
When your debug session initially starts (or after you attached to a running process) the application will be actively running. You can interact with the application itself, or view its console output in the Debug Console.
To do more in the debugger, you will typically need your application to break into a paused state. When breaking, the debugger freezes the app in its current state, and you can interact with and inspect it.
Breaking can happen in one of three ways:
- You can press the Pause button in the debug toolbar (or hit ^⌘Y/Alt+Ctrl+Break or choose "Debug|Pause from the menu).
- Your application can hit a Breakpoint you have set.
- Your application can raise an Exception, either explicitly from your own code, or in an API your code called.
In each of these cases, your application pauses, breaks into the debugger, and you will see a few things changing:
- The Threads and Callstacks Pane will expand, showing you all the threads running in your application and the stack frames for each of them.
- The current or most relevant frame will be highlighted in the Threads and Callstacks Pane, and also show in the main editor. The debugger will try to be smart and show the most relevant frame containing your own code, even if the actual break occurred depper into system or third party APIs.
- The Debug Console activates and shows the
(edb) prompt, indicating you can interact with it.
Working with the Debugger in Paused state
While the application is in paused state, you can interact with the debugger in various ways.
You can navigate between different stack frames (and different threads) by selecting them in the Threads and Callstacks Pane.
For stack frames that contain code from your project, you will automatically see the corresponding code in the editor, with the current line highlighted as Execution Point in orange.
For stack frames outside of your project, the debugger will still try to find the proper source code file to show, if the code was compiled with debug symbols. If no source file can be found, a generic view with details about the stack frame will be shown, potentially allowing you to Locate the Source File manually, if the frame has debug symbols that just did not match a file on your local disk.
You can inspect variables in scope at the local stack frame by putting the cursor on them (or selecting more complex expressions) in the editor, to see their value drawn on the right-hand side of the code. You can also see all local variables in the Debug Inspector, where you can also set up custom expressions to watch.
And of course you can interact with the textual Debug Console to perform more complex actions, as well.
Continuing
Once you are done inspecting the state of your app, you might want to resume it. You can do so by pressing the Continue (black-and-white Play button) in the debug toolbar, by pressing ^⌘Y/F5, or by choosing "Debug|Continue" from the menu.
You can also type the "c" or "continue" command in the Debug Console.
Execution of your application will resume, and continue until it is paused again or hits a new Breakpoint or Exception.
Note: In some other IDEs, the "Run" and "Continue" commands are overlaid, so that the same command or shortcut will start a new debug session when none is active, and resume the current session when it is paused.
Fire and Water separate the two commands; choosing "Run" (or ⌘R/Ctrl+R) will terminate the current debug session and start the project anew.
Stepping
Instead of having execution of your app continue, you might want to step through it slowly, line by line, to see what is going on. This can be done by the three Debug|Step commands:
- "Step Into" will execute the next statement, and (where possible) try to step into the methods or properties that make up the statement. This allows you to follow the execution down into the individual methods that are being called next.
- "Step Over" will execute the next statement as a whole, without stopping inside the methods or properties that make up the statement. Instead, execution will stop again once the statement is completed, before the next statement (i.e. the next line) of the current method is run.
- "Step Out, finally, will continue to run the remainder of the current method until it's completed, and pause on the next statement following the call to the current method.
All three commands are available from the "Debug" menu, via keyboard shortcuts (F7, F6, F8 in Fire and F11, F10 and F12 in Water), and via the three "arrow" buttons in the debug toolbar.
After a Step action is complete, the debugger will be in paused state again. Note that depending on the complexity of the statement(s) being stepped over or out of, this might not happen immediately (since that code needs to run, first), and that a different Breakpoint or Exception might be encountered, before.
Setting the Next Statement
Sometimes, stepping through code might not be enough, and you need to take more drastic influence into the execution flow of your app.
Using the "Debug|Set Next Statement to Current Line" menu item, you can instruct the debugger to move the instruction pointer to a different location (within the current method). When you then Step or Continue, execution will resume from the new line – potentially skipping or re-executing statements that have already run.
Note that there are limits to how drastically the Next Statement can be changed. For example, you cannot move it to a different method, or into or out of a try/finally block. If the current line is not valid for "Set Next Statement to Current Line", the debugger will emit an error message, and the next line will remain unchanged.
Breakpoints
Breakpoints are a debugger feature that instruct the debugger to automatically pause your application when it reaches a certain code location , so that you can inspect its state.
Breakpoints can be configured based on a file location in your code (file and line number), or, for some debug platforms, based on a symbol, such as the name of a function or method.
Adding Breakpoints
There are a few ways to set a breakpoint:
- You can click on the line number of a line in the code editor (or on the very left of the line in the editor, if line numbers are hidden) to add a breakpoint, or to remove an existing breakpoint.
- You can also toggle a breakpoint on the current line using the "Debug|Add/Remove/Toggle Breakpoint on Current Line" menu item, or the ⌘\ or F9 keyboard shortcut.
- Finally, yu can invoke the "Add Breakpoint sheet via the "Debug" menu and use it to manually specify a filename and line number, or a symbol name.
While the first two options are usually the most convenient, the third option is helpful because it lets you set breakpoints on files that are not part of your project (as long as the libraries that the code comes from were compiled with Debug Symbols.
Location-based breakpoints will show as a blue bubble on the left of the code line.
Managing Breakpoints
You can manage your existing breakpoints in two ways: via the "Manage Breakpoints" Sheet that's available through the "Debug" menu (⇧⌘B or Alt+Shift+B), or in the Jump Bar, where breakpoints get their own section, once one or more breakpoints are defined.
The jump bar is also convenient for locating your breakpoints, as selecting a (location-based) breakpoint there will automatically jump to that breakpoint in the code editor, and you can then use Up/Down Navigation (^⌥Up/Down in Fire, Alt+Up/Down in Water) to move between breakpoints.
Breakpoint Status
As your application runs, the debugger automatically tries to resolve breakpoints to the actual memory locations of the code they represent. This can be successful, or fail (for example if a breakpoint is on a line that no code was generated for, or if there are no Debug Symbols.
The status of each breakpoint is indicated in a number of ways:
-
The bubble shown in the editor on each line with a breakpoint will change color according to the status. When no debug session is active, breakpoints are shown in a light blue. As a debug session starts, the bubble changes to either a solid blue (if the breakpoint was resolved) or red (if there was a problem resolving the breakpoint).
-
Both the Jump Bar and the "Manage Breakpoints" Sheet will change the icon for breakpoints as they resolve.
Note that depending on the platform, the code for your breakpoints might load incrementally, so not all breakpoints will show as resolved right away, and some might not resolve until execution nears them and the appropriate class or method is loaded or JIT-compiled.
Nonetheless, the breakpoint status indicator is a good help if you are wondering why a certain breakpoint might not be hitting.
Disabling All Breakpoints
You can temporarily disable breakpoints by toggling the "Stop on Breakpoints" (or "Stop on Breakpoints when Testing") option in the "Debug" menu. When breakpoints are disabled, their bubble will show as light gray, instead of blue or red.
Breakpoints can be disabled separately, for regular debug sessions or for Testing sessions.
Disabling Individual Breakpoints
You can also temporarily disable individual breakpoints, without removing them completely. To do that, you can ⌘-Click (Fire) or Ctrl+Click (Water) the breakpoint in the gutter, or right-click in the editor and choose "Disable Breakpoint" (or "Enable Breakpoint", to re-enable it) from the context menu.
Disabled breakpoints will also show as light gray, instead of blue or red.
Clearing All Breakpoints
Finally, you can remove all breakpoints for your solution, using the "Clear All Breakpoints" option in the "Debug" menu.
Breakpoint Persistence
Breakpoints are stored per solution, and will persist across debug sessions and across restarts of Fire or Water. They are stored in a per-user cache file next to the .sln.
See Also
Exceptions and Signals
Exceptions and Signals are unexpected conditions that may occur as your application runs – either because your code or an API call explicitly raises an Exception using using the raise or throw keywords, or because it triggers an error condition (such as a null object reference, a missing file or a similar problem).
Exceptions as a language feature are discussed in more depth here.
By default, the debugger will pause execution of your project when an exception occurs, and show you details about the exception and the code location that the exception occurred at. This gives you a chance to inspect the state of your project and determine the cause of the exception.
If an exception is non-fatal, you can resume execution of your project.
Ignored Exceptions
While not common and a discouraged practice, some exceptions are expected and "normal" to occur during the execution of your project, or are known to be handled at a higher level (for example, an exception might occur when a network connection in your app closes, but that exception would he handled appropriately by the networking library).
Individual exceptions can be ignored, so that they no longer break into the debugger when they happen. By default this list includes a small number of common system exception types (especially on Java/Android), but you can add or remove from this list as you please, using the "Manage Exceptions" Sheet available from the "Debug" menu (⇧⌘E or Shift+Alt+E).
The sheet shows you a list of known exceptions, with checkmarks next to the exceptions that are set to be ignored.
You can check or uncheck any of the exceptions, as you like, and you can also add additional (not yet listed) exceptions by pressing the "Add" button, so simply Pressing ⌘V/Ctrl+V to paste an exception type name you have on the clipboard.
You can also "Uncheck All" to stop ignoring any Exceptions, or "Reset to Default" to restore the original list of ignored Exceptions provided by Fire/Water.
The list of ignored exceptions is maintained per platform, and persisted system-wide across all debug sessions, and across restarts of Fire or Water.
Disabling Exceptions
You can temporarily disable stopping on any exception by toggling the "Stop on Exceptions" (or "Stop on Exceptions when Testing") option in the "Debug" menu.
Stoping on Exceptions can be disabled separately, for regular debug sessions or for Testing sessions; in Testing sessions, EUNit Assert Exceptions will be ignored by default (as they are "expected", and will be collected as test results), instead. This is covered in more detail in the Testing with EUnit topic.
See Also
Threads and Callstacks Pane
The "Threads and Callstacks" Pane is the fourth tab of of the Navigation Pane that makes up the left side of the Fire/Water user interface.
It can be reached by clicking the thread button at the top, via the ⌘4 or Ctrl+4 keyboard shortcut, or by selecting "View|Show Threads and Callstacks" from the menu. By default, it will also automatically show when a Debug Session breaks and pauses the execution of your app.
The pane is your one-stop place for navigating around the current state of your debug session. It shows you a tree hierarchy of all active Debug Sessions (usually only one), as well as – when the debug session is paused – all the active threads and all their stack frames:
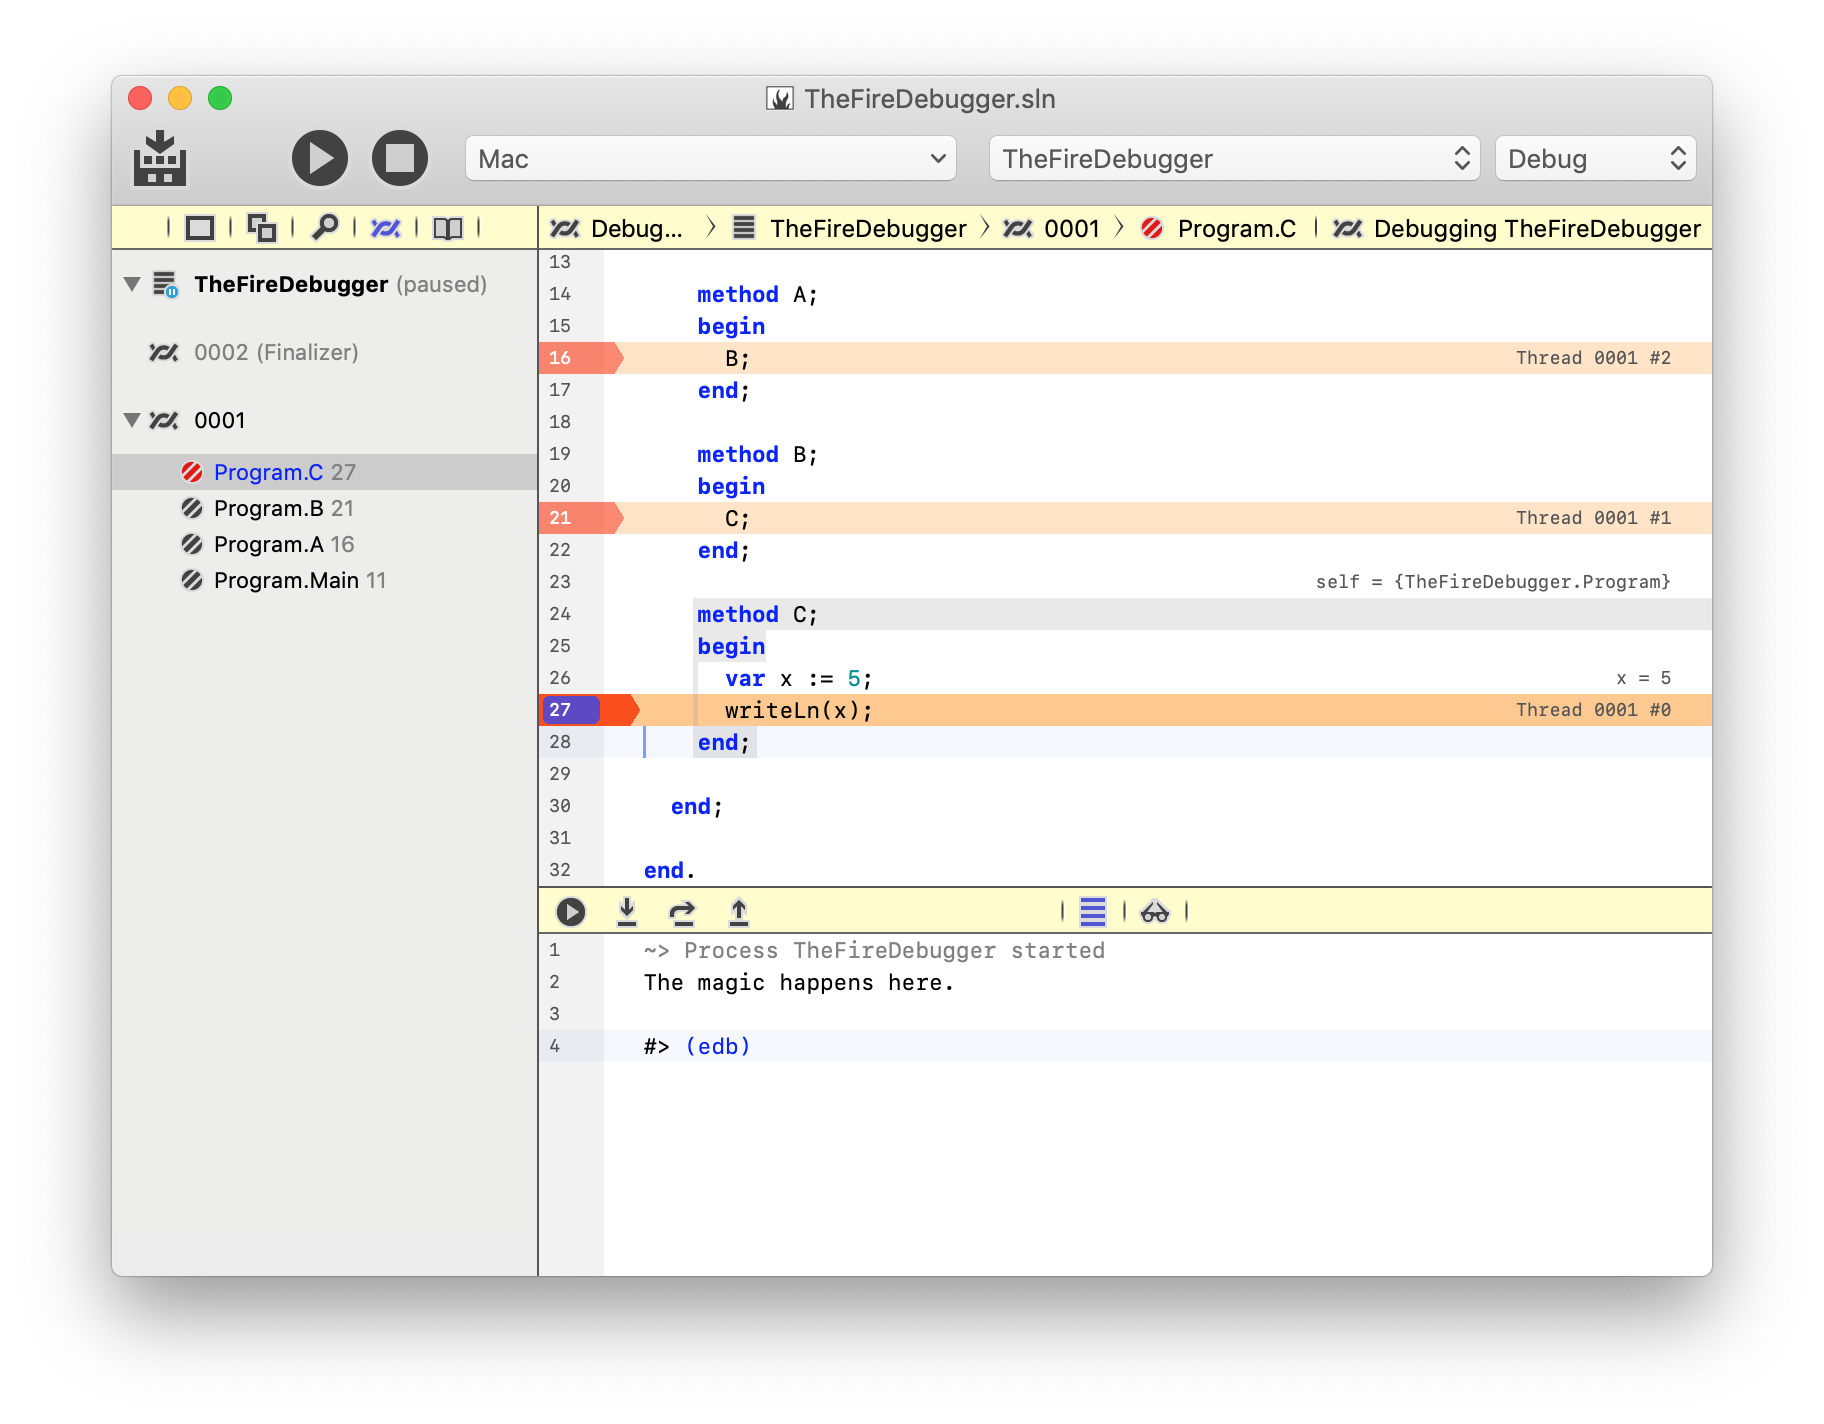
Above you see a .NET application being debugged in Fire, it is stopped on a Breakpoint on line 27, indicated by the blue breakpoint bubble, and the darker orange Execution Point highlight across the line.
The thread pane is active on the left-hand side, it shows a single Debug Session, with the name of the app being debugged ("TheFireDebugger") and the current status ("paused"). Below, you see two Threads, one called "Finalizer" which is implicitly created for each .NET application, and the (unnamed) main thread of your app, numbered "0001".
For the main thread, you see four Stack Frames. Top to bottom, you see the execution flow that this thread went through to reach the current location, with the top frame at the top (method "C" with the breakpoint, and the application's entry point, Main at the bottom).
The coloring of each frame gives you additional information about its status:
-
The top frame with debug symbols is colored blue, as this is likely the most relevant frame for your investigation. In this example, it is the very top frame, because the debugger stopped on a breakpoint in your own code. But one can imagine a case where application code called into a system library and that library raised an exception. The call stack would list all the stack frames, even those within the system libraries – but the blue frame would indicate the top frame from "your code".
-
Frames without Debug Symbols will be colored light or dark gray, depending on whether they have at least a known function name associated with them (dark gray) or are completely unknown (light gray). Most likely, these are stack frames of system code.
-
Finally, frames with debug symbols are colored black. Most likely, these are the frames in your own application, but they could also be stack frames from other libraries that you have debug symbols and source code for.
Browsing between Stack Frames
The "current" stack frame is highlighted by the selection in the tree and – more importantly – by a red (instead of black) icon. This is the stack frame that debugger interactions work on, for example when you evaluate the contents of variables in the Debug Inspector.
You can select a different frame just by clicking it, or by using Up/Down Navigation (^⌥Up/Down in Fire, Alt+Up/Down in Water). As you select a different frame, you will see the rest of the UI adapt – the code editor will jump to the proper location for the newly selected frame (assuming it has source code associated with it), and the orange Execution Point highlight will change. Also, inline debug evaluation is shown in the editor, and the contents of the Debug Inspector will change as well.
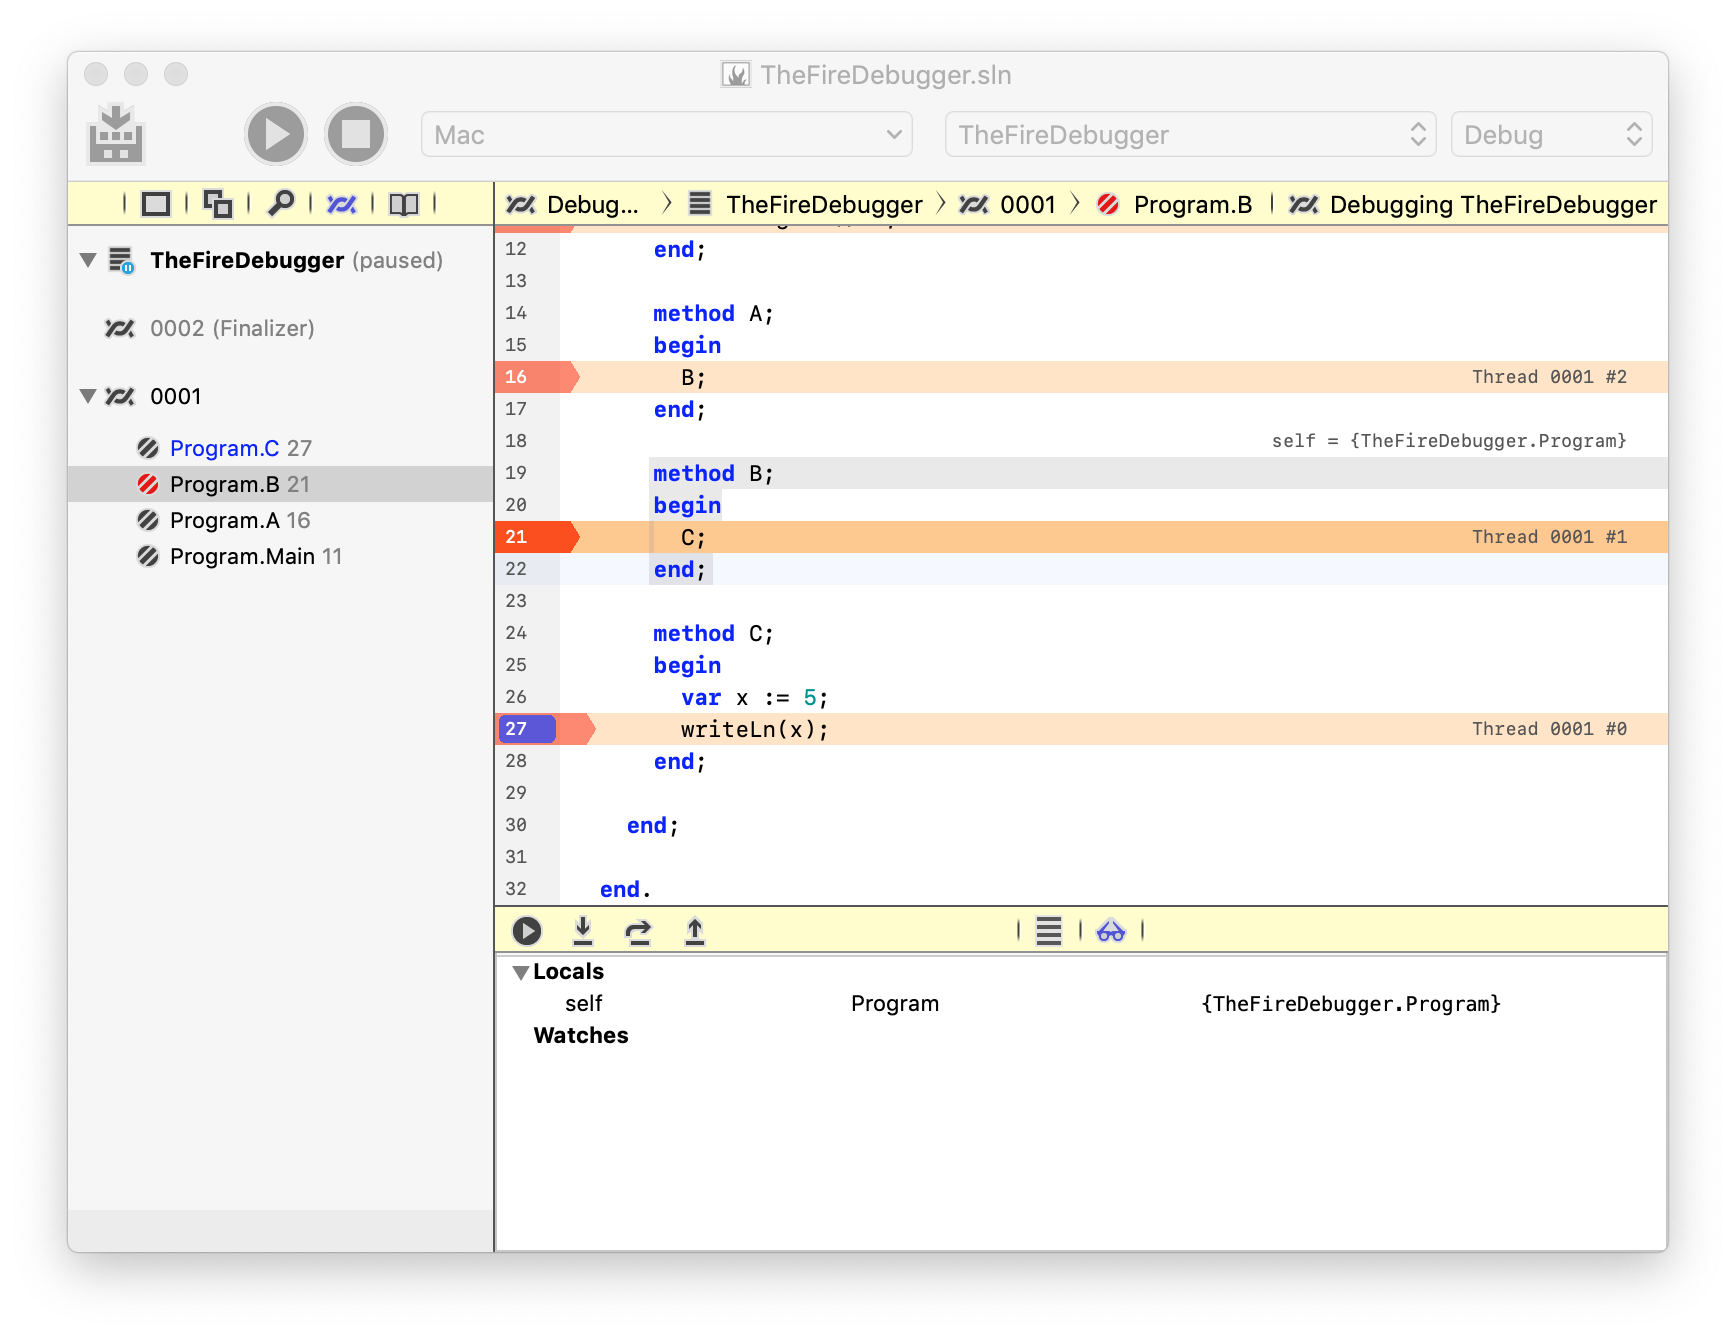
In the above screenshot, stack frame "Program.B" was selected. Note how it now has the red icon, and how the execution point highlight on line 21 is now deep orange. Also, the inline evaluation for x and self on method C have disappeared in the editor, and instead it now shows an inline evaluation for self on method B instead (which has no other variables).
Debug Sessions
A Debug Session refers to a single running instance of your project being debugged in the debugger. While in theory Fire and Water can manage multiple debug sessions at the same time, in most cases you will have either zero or one debug session active.
A debug session can be started either by Choosing "Run" from the menu (⌘R or Ctrl+R), or by Attaching to an already running process via the "Debug|Attach to Process..." menu.
A debug session can be stopped by choosing ""Stop" from the menu, pressing ⌘. or Ctrl+., or right-clicking the debug session's node in the Threads and Callstacks pane and choosing "Stop" or "Detach". Running an app again while a debug session is active will also terminate the active debug session for it.
The Jump Bar and the toolbar of the Debug Pane will show in yellow when one or more debug sessions are active (unless a Build is also underway, in which case the Jump Bar will show blue to indicate that).
In the above screenshot, a single Debug Session for the application named "TheFireDebugger is active, currently paused on a Breakpoint.
See Also
Threads
A process running in the debugger will run one or more Threads, including the main thread that drives core application flow (usually numbered "1"), as well as any additional threads the application may have started.
Additional threads might have been created by your code explicitly, or can have been launched under the hood by regular operations of the runtime or some of the frameworks and APIs your application uses, so it is not uncommon to see threads in the debugger that do not run any of your own code.
A thread will show as black in color in the Threads and Callstacks pane if it contains one or more Stack Frames with Debug Symbols, or in a lighter gray if none of its frames have symbols (usually a sign that it's a worker thread created by the system and not (currently) running any of your own code).
In the above screenshot, the paused application is running two threads, with the unnamed main thread "0001" containing four Stack Frames stack frames of application code, and the named "Finalizer" thread not containing any known stack frames.
See Also
Stack Frames
Each Thread of a Debug Session will usually have one or more Stack Frames.
The stack keeps track of the execution flow of your program; each time one method calls another, the current Execution Point is added to the stack, so that when the method is finished, it can return execution to where it was called from. As your application does its job, the call stack grows.
Each stack frame also keeps track of the current state of the program at the time, including values of local variables and the like. In the debugger, you can examine each stack frame individually, to see how your program got to its current state.
A stack frame will be shown in black color in the Threads and Callstacks pane if Debug Symbols are available for it (which usually means it is a location in your own code), or in a lighter gray if not (usually a sign that it's in library or system code).
To make it easy for you to find the most relevant stack frame for you when an application pauses, the top stack frame that has debug symbols is highlighted in blue text (and selected by default). This way, even when your application stops deep in system code, you can easily find the place where your code called into the system APIs.
In the above screenshot, the main thread of the application is paused four methods deep. In this case, all four stack frames are application code, so they all show black, and the very top frame shows blue because it's the most relevant frame to why the application paused (on Breakpoint in the "Program.C" method).
You can see Execution Points highlighted in the Editor
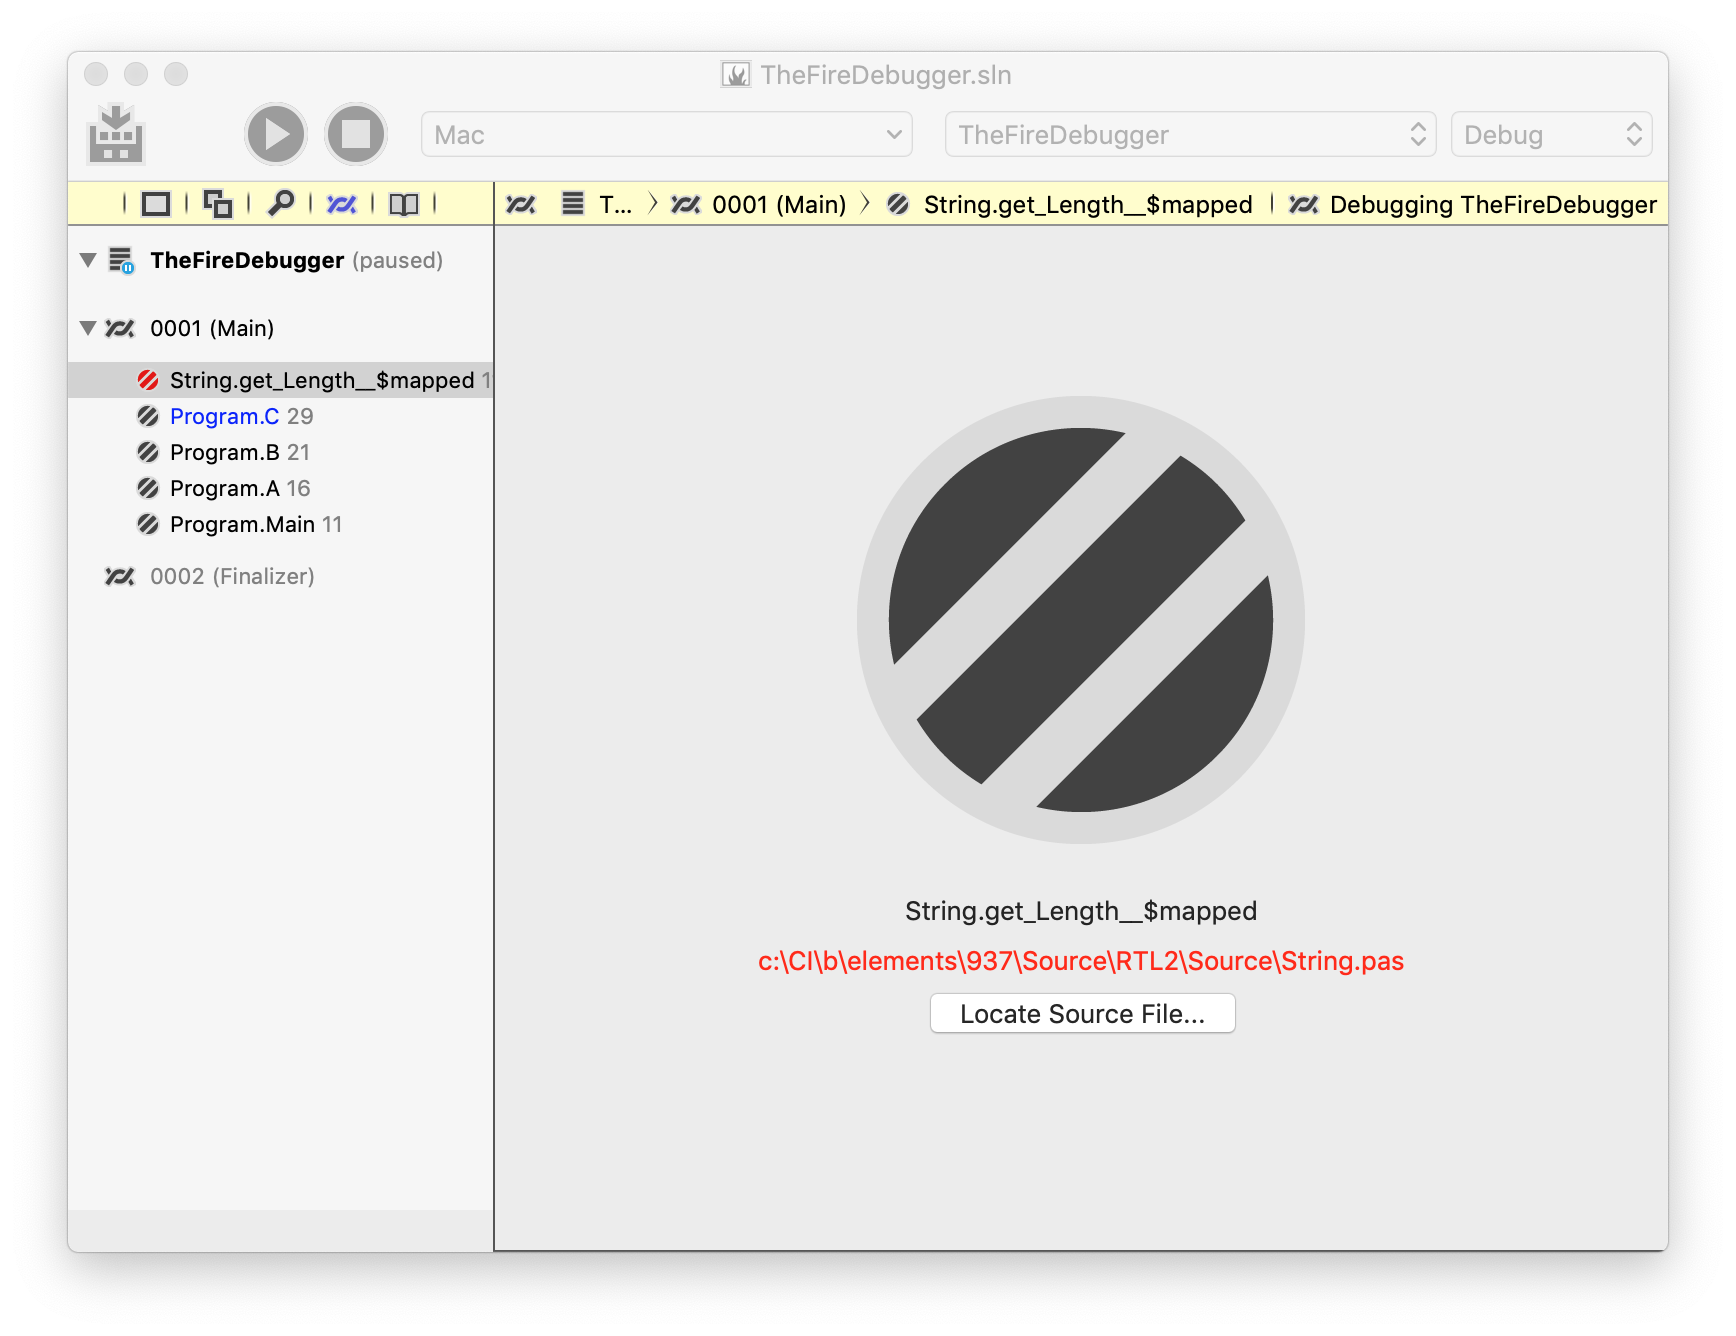
In this second example, the application stopped on an Exception in a library function, where source is not available. Instead of the code editor, a special Stack Frame view is shown with details.
Note how Program.C is still the stack frame highlighted in blue (because it will be the most relevant for investigating the exception). In fact, that stack frame was also selected by default when the application stopped, and String.get_Length__$mapped was selected manually before the screenshot was taken.
Note also that in this case, while source code for the method in question was not found, the library was compiled with Debug Symbols – it is just that the file name in the symbols does not match what we have on the local disk (the library in question is Elements RTL, and from the file path we can see that it was build on the RemObjects CI system as part of the Elements distribution).
Because the stack frame has debug symbols and a known file name and location (String.pas, line 116), the option is provided to "Locate Source File..".
If you happen to have source code for the library (in this case, you could get a copy of Elements RTL from GitHub, you could browse for where your local copy of String.pas is on your disk, and then view the source, set additional breakpoints, and more.
For platforms that support it, an additional option will be available to see the assembly code for the method in question:
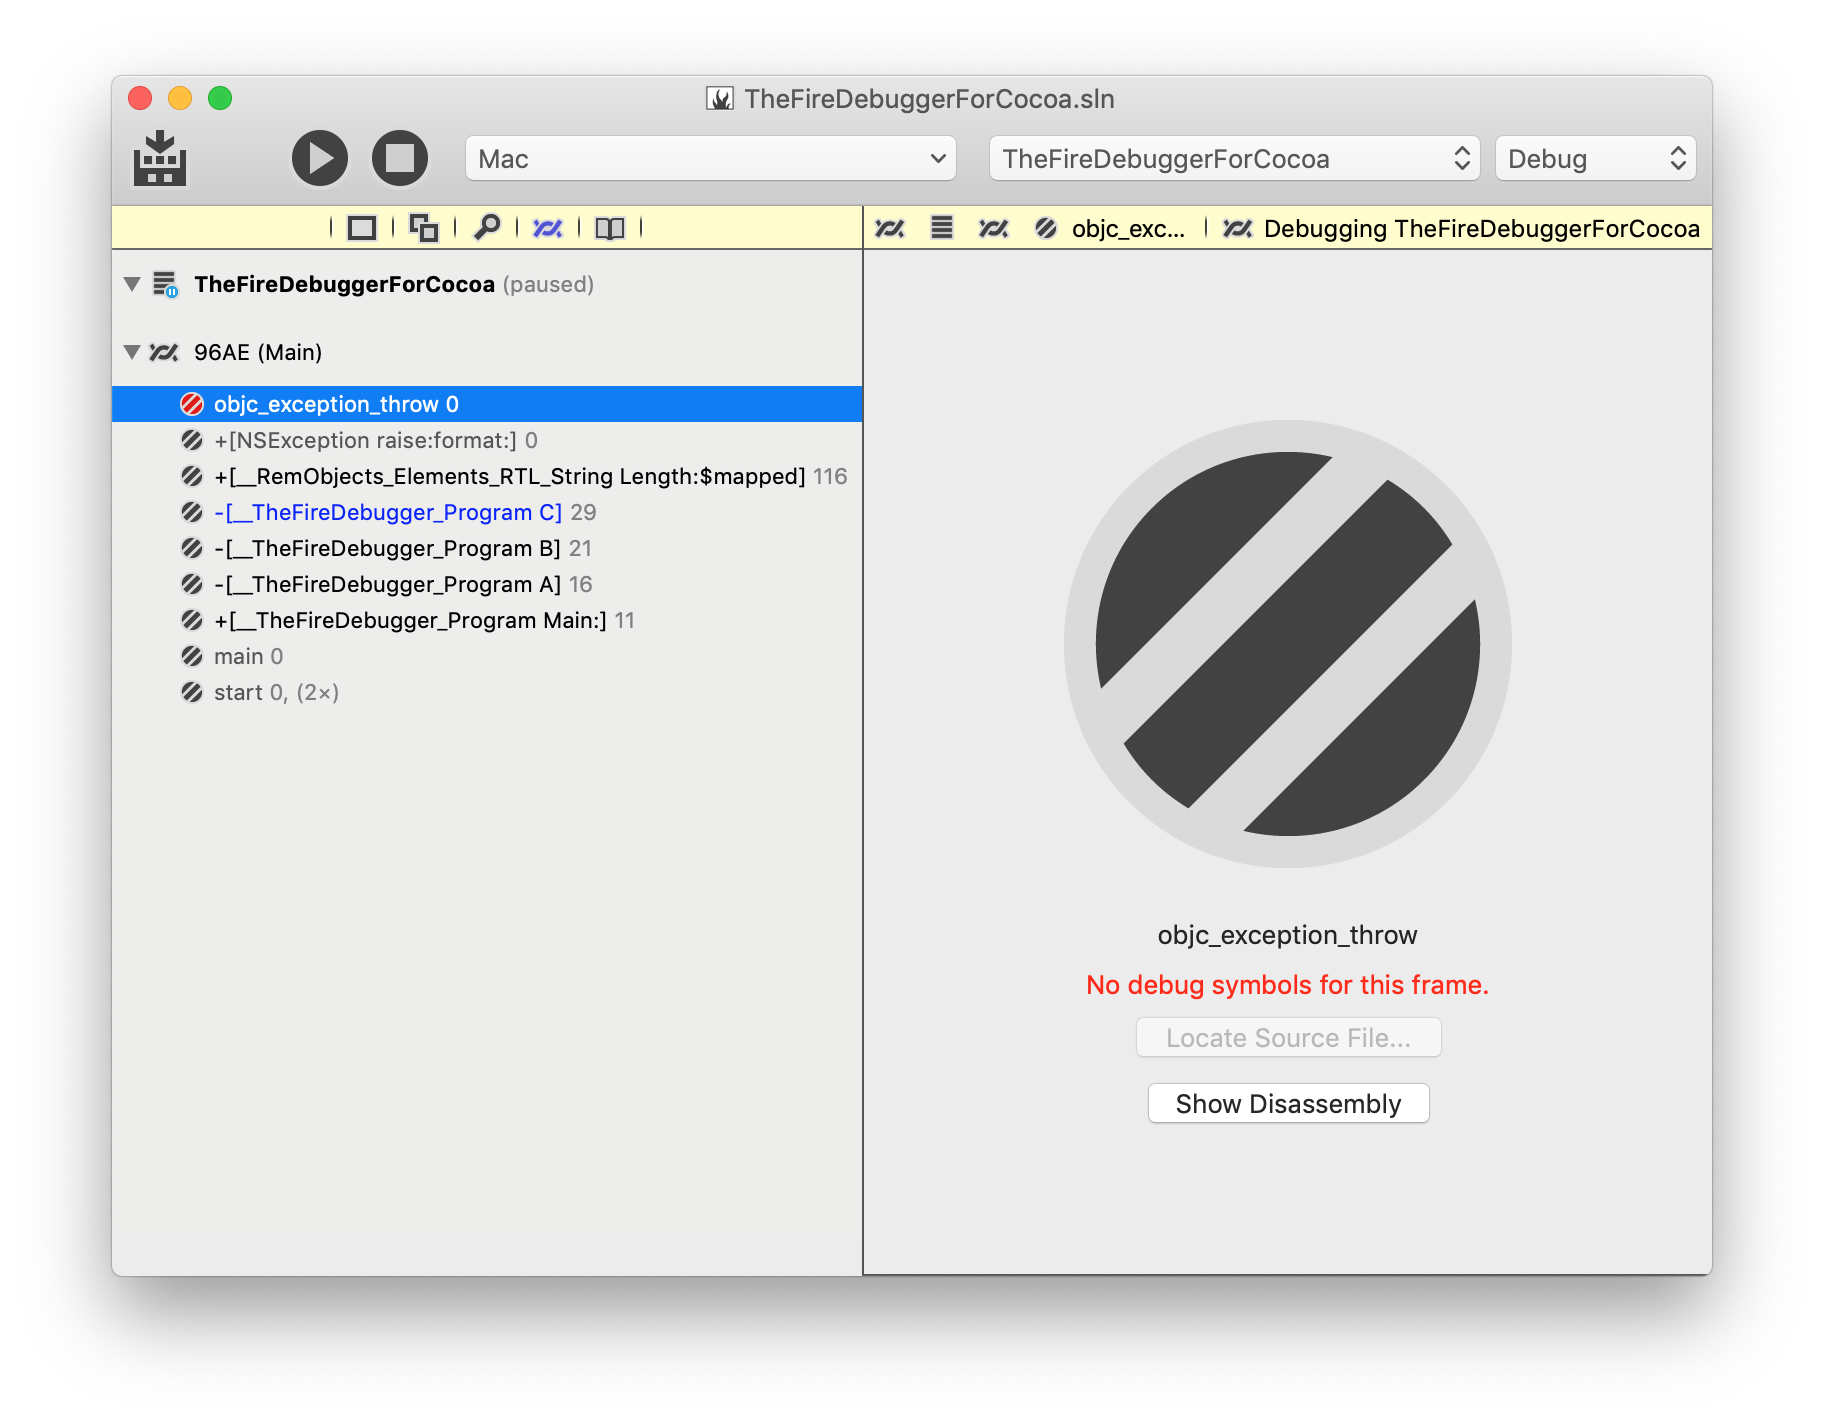
This screenshot shows a similar exception as earlier, but in the Cocoa project. Two things of interest can be seen here:
For one, the "Show Disassembly" button becomes available; clicking it will switch the view to show the low-level Assembly Code for the method. For another, you see that in the case of Cocoa a few extra system stack frames are on the stack, both before the Main and at the place where the exception occurred. Because no debug symbols are available for these frames, they show in gray, and the Locate Source File.. button is disabled.
Note how +[__RemObjects_Elements_RTL_String Length:$mapped] still shows black (but not blue) because it has symbols, but no source code was found, just as in the case with the .NET project earlier.
Disassembly is available for Cocoa and Island.
Recursion
The debugger automatically detects recursions, whether intentional or when your application crashes with a Stack Overflow. Instead of showing you hundreds (or tens of thousands, as might be the case for a stack overflow) of the same stack frame, it will collapse them to a single entry and show (999×) behind the frame, if it ran 999 times.
See Also
Execution Points
For each Stack Frame that is mapped to a source location, an Execution Point will be highlighted in the source code for the appropriate location.
Depending on the number of threads and the depth of the stack for each of them when your application is paused, there can be many active execution points, across multiple files and methods (and sometimes even within the same method, if recursion is involved).
In the screenshot above, three execution points are visible (and a fourth is further up, off screen), one for each of the A, B and C methods you see in the Threads and Callstacks pane. Each execution point is marked by an orange highlight across the entire line and a darker arrow on the lefthand side by the line numbers. Also, room permitting, the ID of the Thread and the index of the stack frame will be drawn on the right (e.g. "Thread 0001 #0"). This allows you to easily see which thread each execution point belongs to, and their order.
In a paused Debug Session there is always exactly one current, active Stack Frame. The execution point of that stack frame is drawn in a deeper orange, and the editor will also try and draw inline evaluations for local variables declared around that execution point.
The active stack frame is also indicated by a red icon in the Threads and Callstacks pane, and you can change it simply by selecting a different stack frame in the tree.
See Also
DebugPane
The Debug Pane can optionally be shown at the bottom of the Fire/Water user interface.
It can be opened and closed using the ⌘⇧Y or Ctrl+Shift+Y keyboard shortcut, or via the ""View|Show/Hide Debug Pane" menu.
Depending on the Platform of the current Debug Session, it consists of either two or three tabs, which can be toggled between with the buttons at the center of its toolbar, or via the ⌘⇧1, ⌘⇧2, ⌘⇧2 or Ctrl+Shift+1, Ctrl+Shift+2, Ctrl+Shift+3 keyboard shortcuts.
On the left hand side, the toolbar also provides buttons to Pause, Step or Continue the current debug session or (when no session is running) to start a fresh debug session for the active project:
Just like the Jump Bar at the top of the window, the Debug Pane's toolbar will show yellow when a debug session is active.
See Also
Debug Console
The Debug Console is the first tab in the Debug Pane that can optionally be shown at the bottom of the Fire/Water Window, and it is the main way you can interact with the Debug Session and the application you are debugging (in addition of the apps UI, of course). It can be called up with the ⌘⇧1 (Fire) or Ctrl+Shift+1 (Water) keyboard shortcut.
The Debug Console consolidates three main functionalities in one view
- It shows the console output of your program (for console applications, as well as for GUI applications that use the console e.g. for diagnostic messages.
- It shows debugger notifications such as the start and end of the debug session, or Exceptions or Signals that occur.
- It provides an interactive command line to interact with the debugger, when your application is paused.
Console Output
Elements projects generally fall into two broad categories: console applications and GUI applications.
Console applications are meant to be run in a Terminal or Command Prompt window, and emit textual output to what is referred ot as the Console, or stdout ("Standard Output").
GUI applications present a graphical user interface using the platforms GUI APIs, for the user to interact with. This includes mobile apps on iOS, tvOS and Android, or Windows, Mac or Linux Applications. GUI applications typically don't use console output, but they may opt to do so, for debug messages or additional error information.
There are a few ways for an application to emit text to the console:
- The platform- and language-independent
write() and writeLn() System Functions.
- The platform- and language-independent and expandable
Log() infrastructure in Elements RTL.
- Language-specific functions such as
print() from the Swift Base Library.
- Platform-specific APIs such as
System.Console.Write on .NET or NSLog on Cocoa.
Any content emitted by your application to the console will show in the Debug Console (instead of a separate Terminal or Command Prompt Window!), when debugging your app from Fire or Water. (When running outside of the debugger, a Terminal or Command Prompt Window will open (and mighty close immediately after your app finishes).
Debugger Notifications
The Debug Console also shows debugger notifications. You can tell these apart from console output by the fact that they are color-coded, as gray for benign debugger output, and red for Exceptions.
You will see a notification when the process starts, and when it ends (including the total run time, and the exit code, where relevant). You will also see informational messages for all exceptions (including the ones that pause the debug session, and those that are set to be ignored (the latter show in gray), and for other debugger events.
Interactive Debug Prompt
The console window is read-only normally, with one exception: when your debug session is paused (on a breakpoint, due to an exception, or because you manually hit the Pause button or menu item), the #> (edb) command prompt will appear on the last line, and you will be able to enter and execute commands to interact wit the debugger.
Some commands will emit information while others will affect and control the sate of the debugger. for example the "continue" (or "c") command will resume debugging of your app, same as if you pressed the Continue button or selected the "Continue" menu.
You can type "help" to see a full list of all supported commands. Availability of some commands might depend on the platform or debug engine you are using at the time.
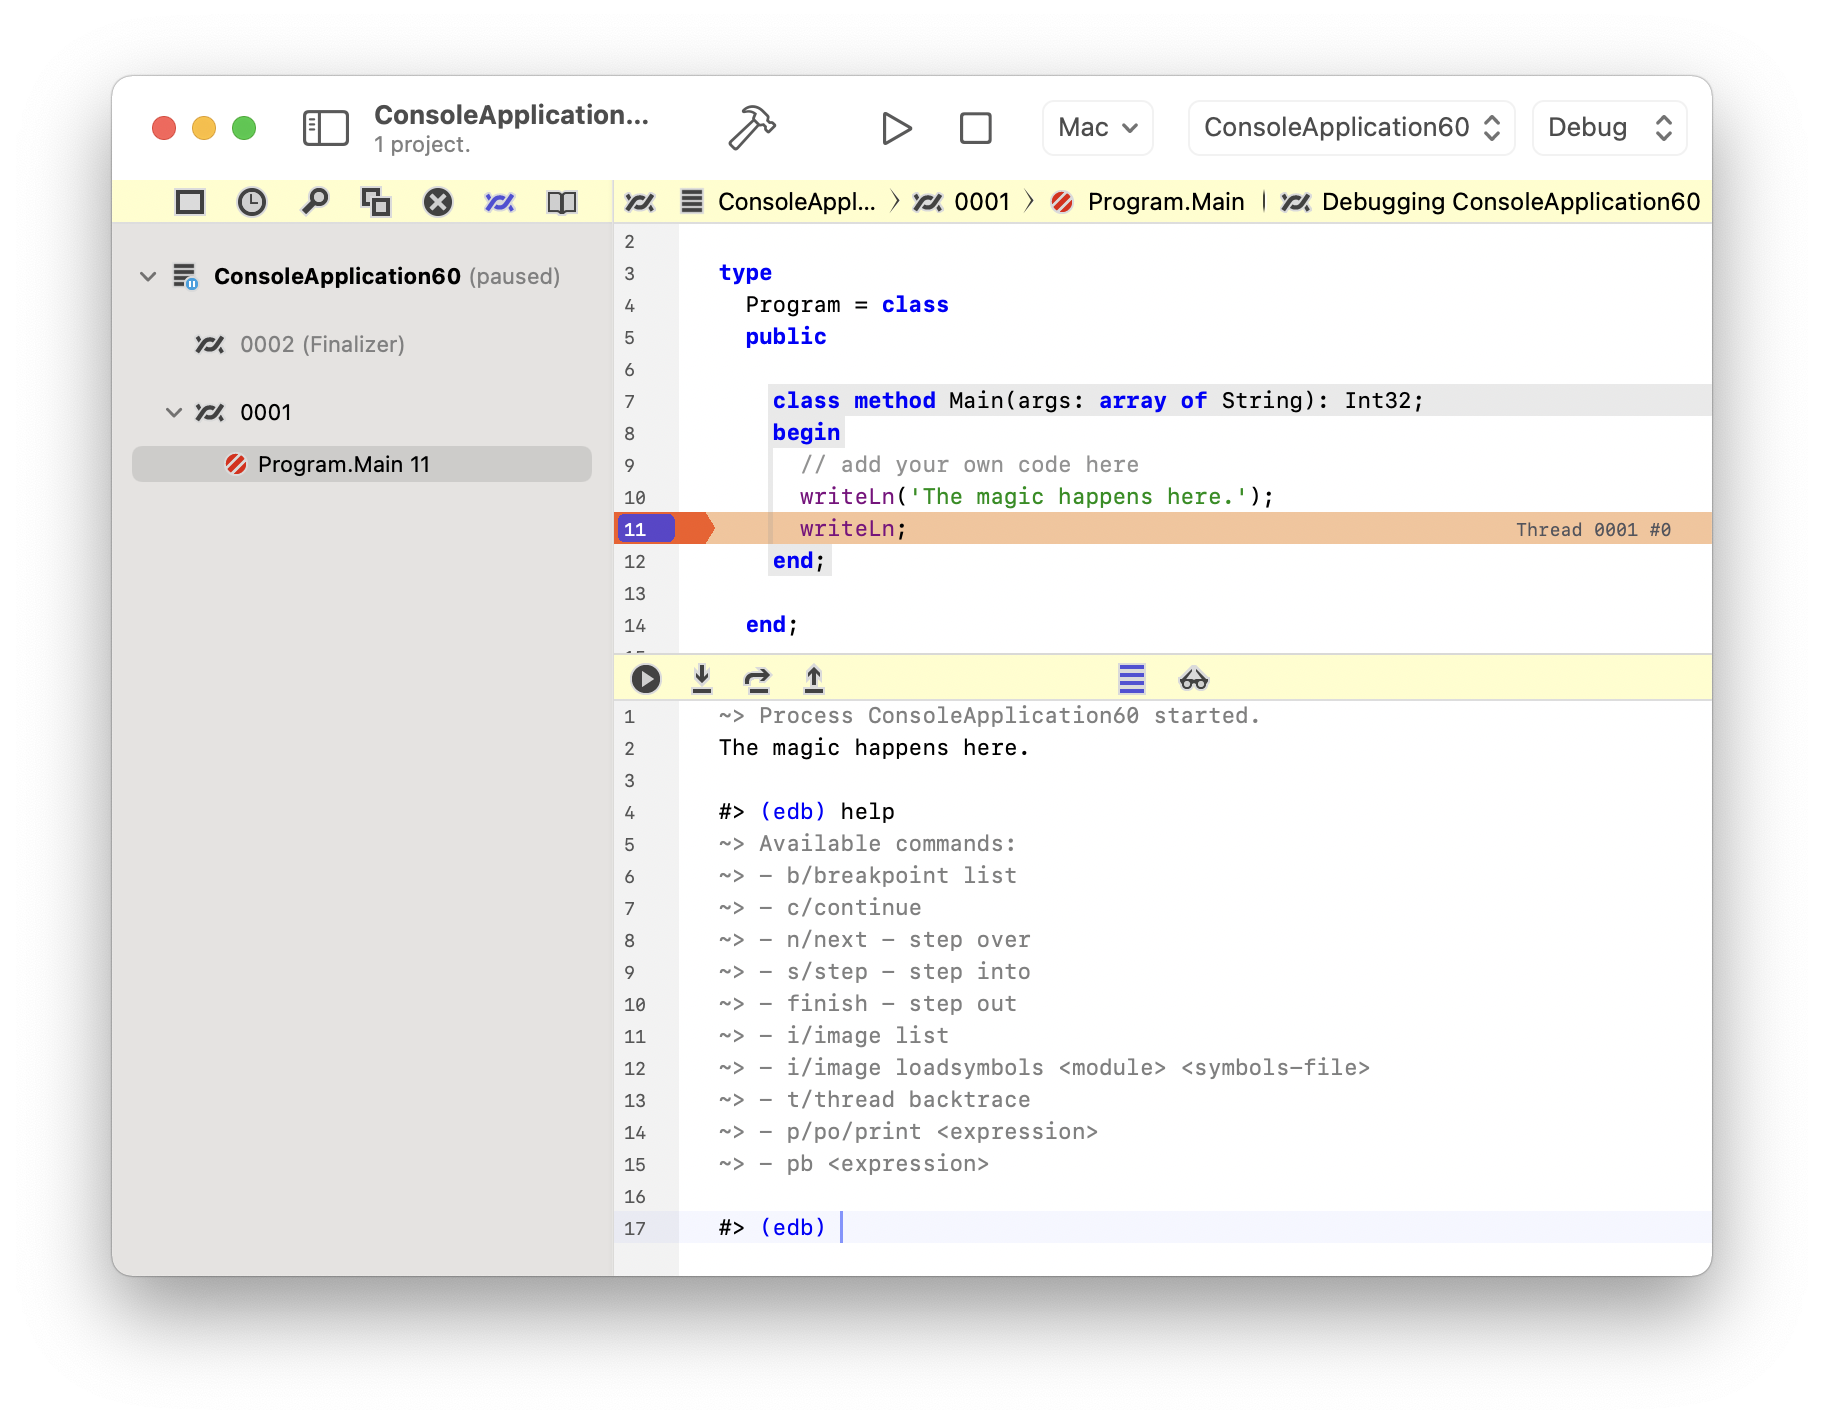
Where "help" lists commands with a slash (/), you can use either the short version or the long for to execute the same command. for example "s" will do the same as "step".
WHile the cursor is on the line with the #> (edb), you can use the cursor-up and cursor-down keys to recall previous commands to emit them again without retyping.
Command Reference
"breakpoint" Command
The "breakpoint" command, or "b" for short, works with breakpoints. Right now, it only supports one subcommand, "list" that will emit a list of all defined breakpoints and their details.
"backtrace" Command
The "backtrace" command, or "bt" for short, will list all frames of the call stack for the current thread. If the optional "all" parameter is provided, the debugger will loop all threads and emit the backtrace for each one.
"continue" Command
The "continue" command, or "c" for short, will resume execution of the debug session, same as the "Debug|Continue" menu item or the black "Play" button in the Debug Pane tool bar.
"step" Command
The "step" command, or "s" for short, will step into the next statement, same as the "Debug|Step Into" menu item or the "Step Into" button in the Debug Pane tool bar.
"finish" Command
The "finish" command, or "f" for short, will step out of the current method or scope, back to the calling stack frame same as the "Debug|Step Out" menu item or the "Step Out" button in the Debug Pane tool bar.
"image" Command
The "image" command, or "i" for short, provides information about the binary images or modules loaded into the current process.
The "image list" command emits a list of all loaded images, including their address and file path. This can be helpful to determine if a library was loaded from the expected path, or confirm it's location in memory.
The "image loadsymbols" command allows to manually load debug symbols for a given image. The index iof the image (as shown by "image list") must be provided a second parameter. A path can be provided as thirds parameter; if it is omitted, a File Open dialog will sow and let you pick the file manually.
The "image loadelementssymbols" is for internal use when debugging Water and Elements.
"thread" Command
The "thread" command, or "t" for short, works with threads. Right now, it only supports one subcommand, "backtrace" that will emit the backtrace for the current thread (same as backtrace).
"print" Command
The "print" command, or "p"/"po" for short, will print the value of an expression to the console. It must be followed by the an expression understood by the language of the current source file and is valid in the current debug scope.
The expression evaluator does not have the full capabilities of the comiler. f an expression cannot be evaluated, try simplifying it.
"pb" Command
The "pb" command, or "pb" for short, works similar to "print", but will also copy the resulting value to the pasteboard/clipboard, in addition to printting it to the console.
"help" Command
The "help" command will print a list of all know commands.
See Also
Debug Inspector
The Debug Inspector is the second tab in the Debug Pane that can optionally be shown at the bottom of the Fire/Water Window, and can be called up with the ⌘⇧2 (Fire) or Ctrl+Shift+2 (Water) keyboard shortcut. It provides a quick and convenient way to inspect the contents of variables and memory used by your application.
The Debug Inspector appears in the form of a tree view, separated into two main section, "Locals" and "Watches".
Locals
The "Locals" section is populated automatically by the debugger to show the local variables available for the currently selected Thread and Stack Frame. As you step thru your paused program, or navigate between stack frames in the {Thread Pane](ThreadPane), its content will automatically adjust.
For each local variable, the Debug Inspector will show its name, the type it contains, as well as the value. For complex types such as classes or records/structs, a disclosure triangle will show, and you can expand the tree view item to drill into the details contents of the variable and its fields.
Watches
The "Watches" section, empty by default, can e used to add custom expressions that you want to evaluate frequently. Once expressions are added to the Watches list, they will persist until you remove them.
As you move through debugging your program, certain watches might become valid or invalid, depending on whether the identifiers used in the expression are available in the current scope. Th Debug Inspector will mark invalid watches as such, but always maintain a consistent list.
Watches are stored per Solution, and will persist across debug sessions or restarts of the IDE.
There are several ways to add Watches to the list:
- Right-click the "Watches" node in the Debug Inspector, and choose "Add Watch..." from the context menu.
- Right-click an identifier in the Editor and choose "Add Watch with '...'" from the context menu/
- Right-click an selected text in the Editor and choose "Add Watch with Selection" from the context menu.
- Choose "Debug|Add Watch..." or "Debug|Add Watch from Selection" from the main menu.
You can remove watches by right-clicking them and selecting "Remove Watch" or by choosing "Clear all Watches" from the "Watches" node's context menu or the "Debug" main menu.
Note: do evaluate an expression only once, without setting a watch, you can use the po command in the Debug Console or, if applicable, simply select the expression in the Editor to see it evaluated inline.
See Also
Android Device Log
The Device Log, visible for Android projects only, is the third tab of the Debug Pane, and can be activated with the ⌘⇧3 (Fire) or Ctrl+Shift+3 (Water) keyboard shortcuts or via the "View|Show Device Log" menu.
When an Android Debug Session is active, it will show a live view to the system log from the Android devide or Emulator that the application is running one. While verbose (it contains log messages from all parts of the systen, not just the current application), the device log, often referred to as "logcat", can contain crucial messages that can help diagnose problems and crashes, beyond the information provided by the debugger.
You can also run logcat in a Terminal or Console window by running the "adb logcat command.
- In Fire, you can open a Terminal window to the appropriate folder from the "Tools|Java" menu.
- On Windows
adb should be on the system path and available in any Command window, if the Android SDK is installed.
See Also
Code Editor
The Code Editor integrates with the debug engines in Fire and Water in several ways, to allow you to accomplish debugging tasks directly within your code.
Breakpoints
- Breakpoints can be set and removed by clicking on the line numbers in the editor (or clicking close to the left edge of the window, kif you have disabled line n numbers in Preferences.
- Breakpoints can also be added, removed and edited by right-clicking or Control-clicking onto the line number or near the lefthand gutter.
Once set, breakpoints will show as small bubbles over the line number or as nubs on the left side of the editor, for each line. Thye will be color-coded for status:
- Blue indicates an resolved and active breakpoint, or any breakpoint when no debug session is active.
- Red indicates an unresolved breakpoint in an active debug session. This could mean a breakpoint on a line that has no valid code or has no debug symbols, or a breakpoint in code that simle has not been loaded into memory yet (but will resolve once execution nears it)
- Gray indicates a disabled breakpoint that will be ignored.
If "Stop on Breakpoints" is disabled in the "Debug" menu, all breakpoints will show as gray.
Stack Frames
When execution of your project is paused, an orange highlight will be drawn across each line representing an active Stack Frame; the selected stack frame will be highlighted in a deeper color. The highlight includes the Thread name/id and the index of the stack frame, on the right edge of the editor.
In most cases, as in the screenshot below, you will only see a single frame in view, but if methods that call each other are located in close proximity to each other, you may additional frames below or above your current execution point highlighted as well.
Inline Locals
Where available (depending on provided debug symbols), the code editor will show inline evaluations for locals in the current scope, at the right edge of the editor for the line where the variable was declared. This is is similar to the Locals shown in the Debug Inspector.
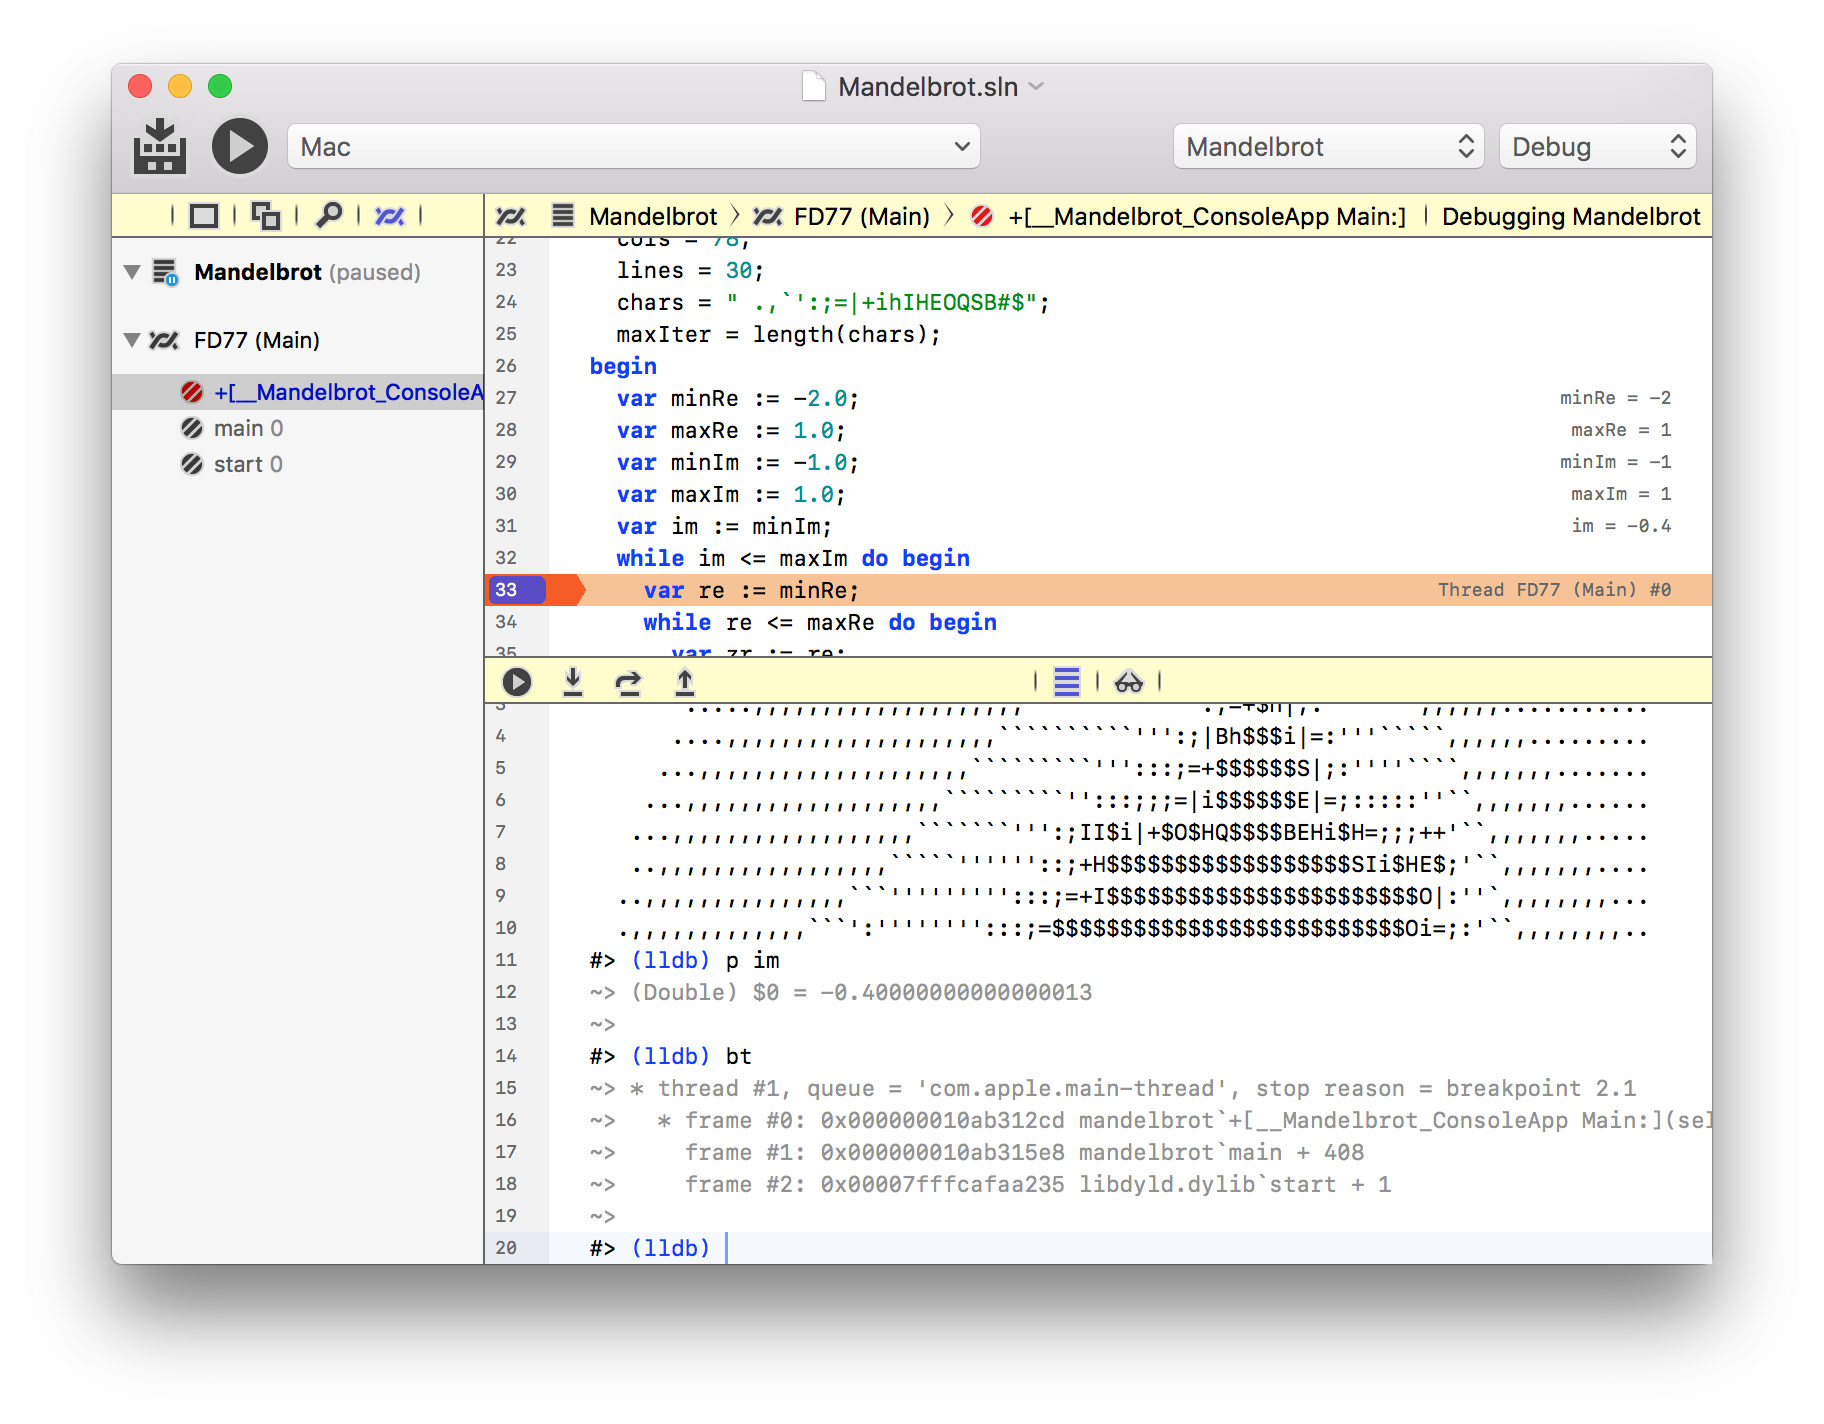
Inline Watch Expressions
In addition, if your cursor resides on an expression that can be evaluated (including the last part of a compound expression such as "SomeClass.SomeVariable", the editor will try to evaluate ths expression and, if successful, show its value on the right edge..
You can also explicitly select a more complex expression (such as "a + b") to evaluate it.
This is is similar to the custom Watches shown in the Debug Inspector.
See Also
Disassembly
On supported platforms (currently Cocoa and Island), you can opt to see a Disassembly view of the underlying assembly code for a given Stack Frame. This option is available whether Debug Symbols are present for the frame in question, or not.
When no Debug Symbols (or no Source) for a frame is available, you can invoke Disassembly directly from the Stack Frame view, by clicking the "Show Disassembly" button:
The view will switch from the generic view to a read-only text view that contains the assembly code for the stack frame. Execution Points will be highlighted, just as they would be for regular source code view – in this case indicating the exact machine instruction that the application is paused on:
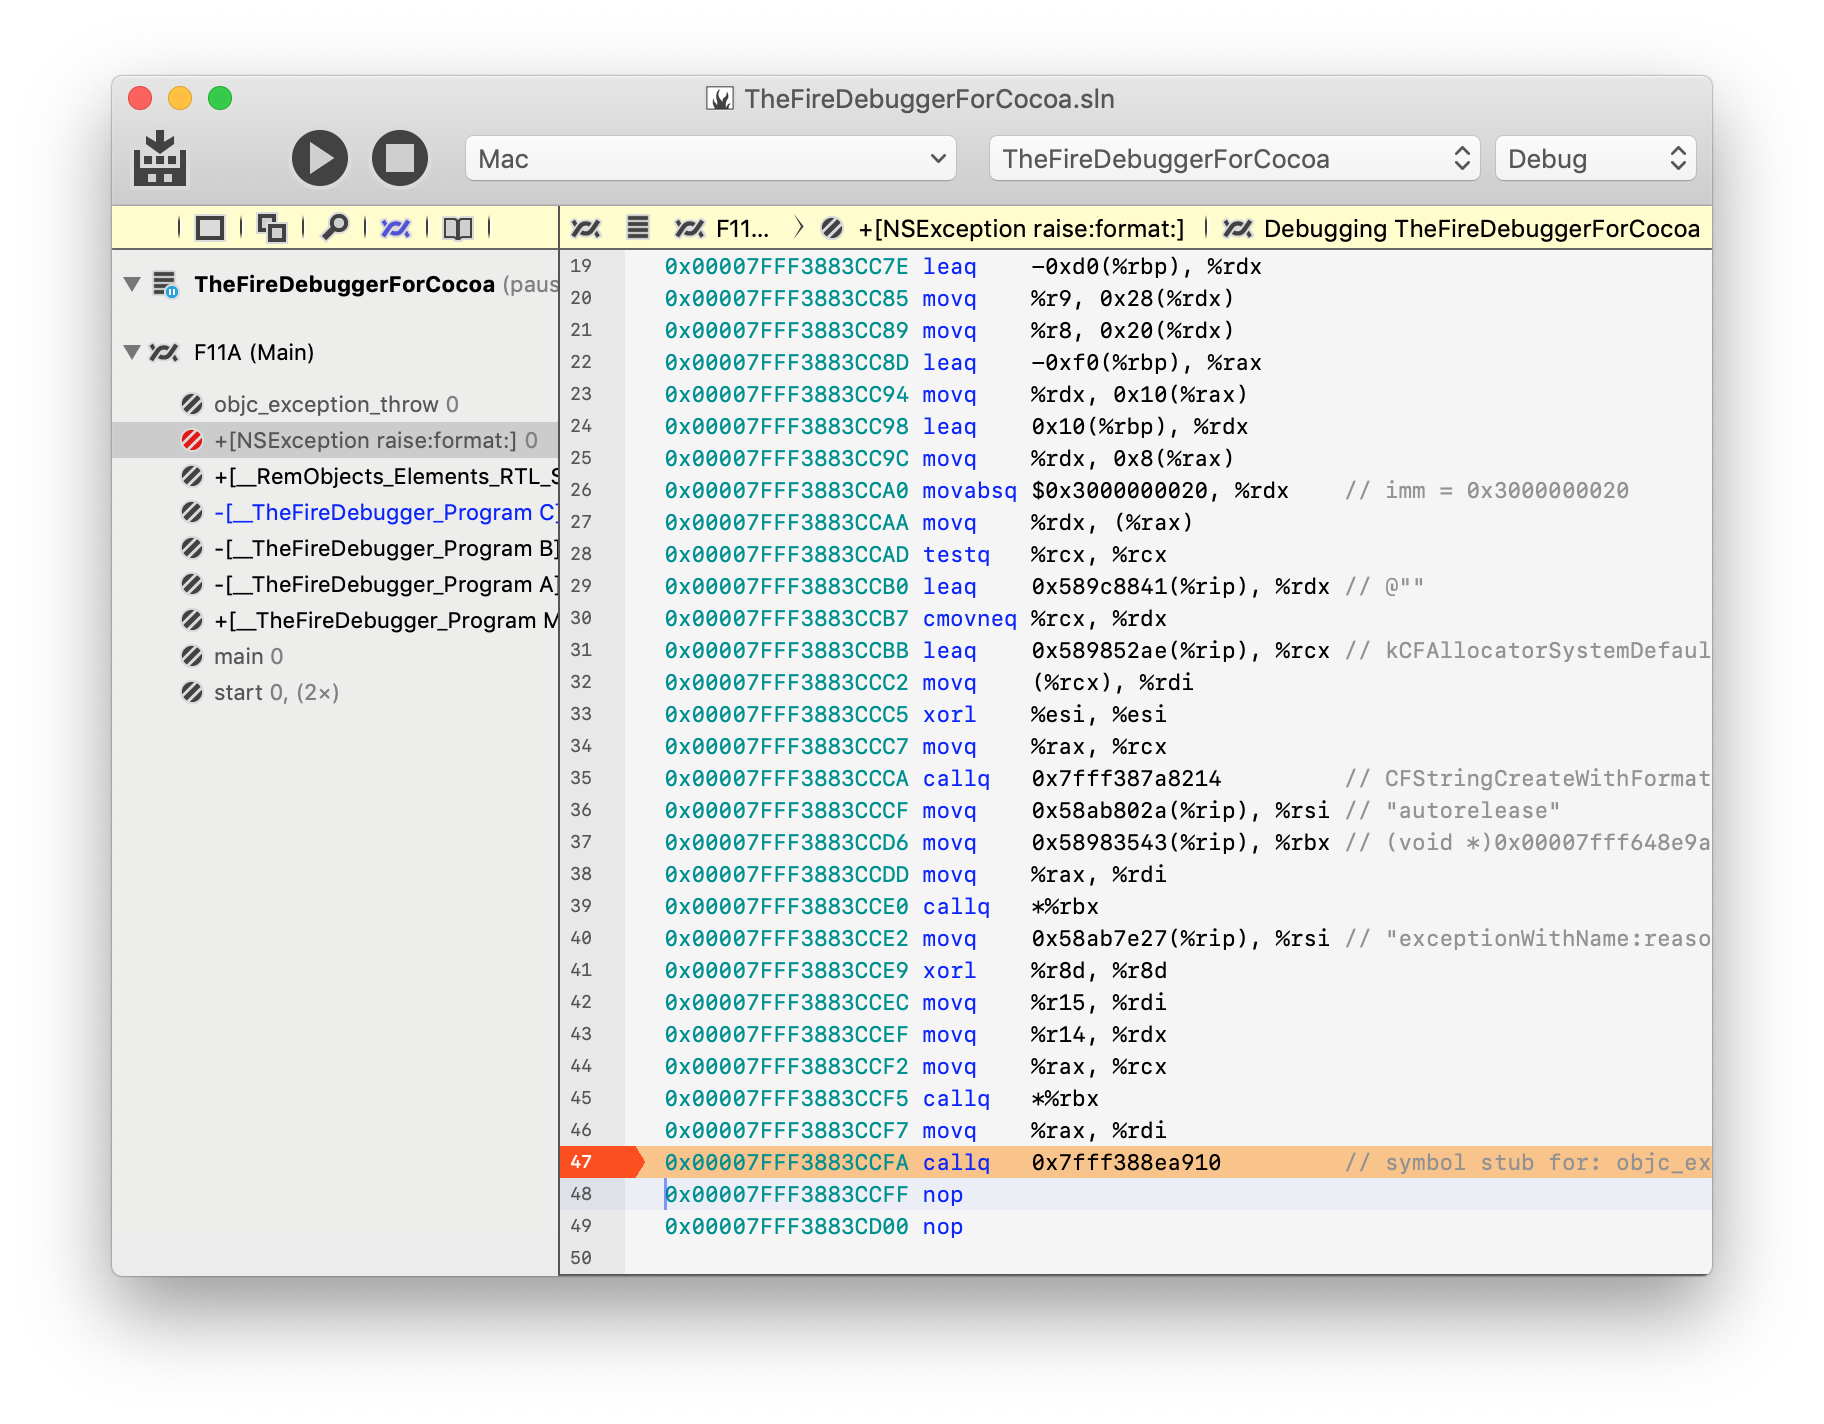
As you can see, comments provide more detailed information about known symbols, where available.
Even if source is available for a method, sometimes it can be helpful to see the underlying assembly, to get a clearer understanding of what exactly is going on, under the hood. For this reason, Disassembly view is also available by right-clicking a stack frame in the Threads and Callstacks pane and choosing "Show Disassembly" from the menu:
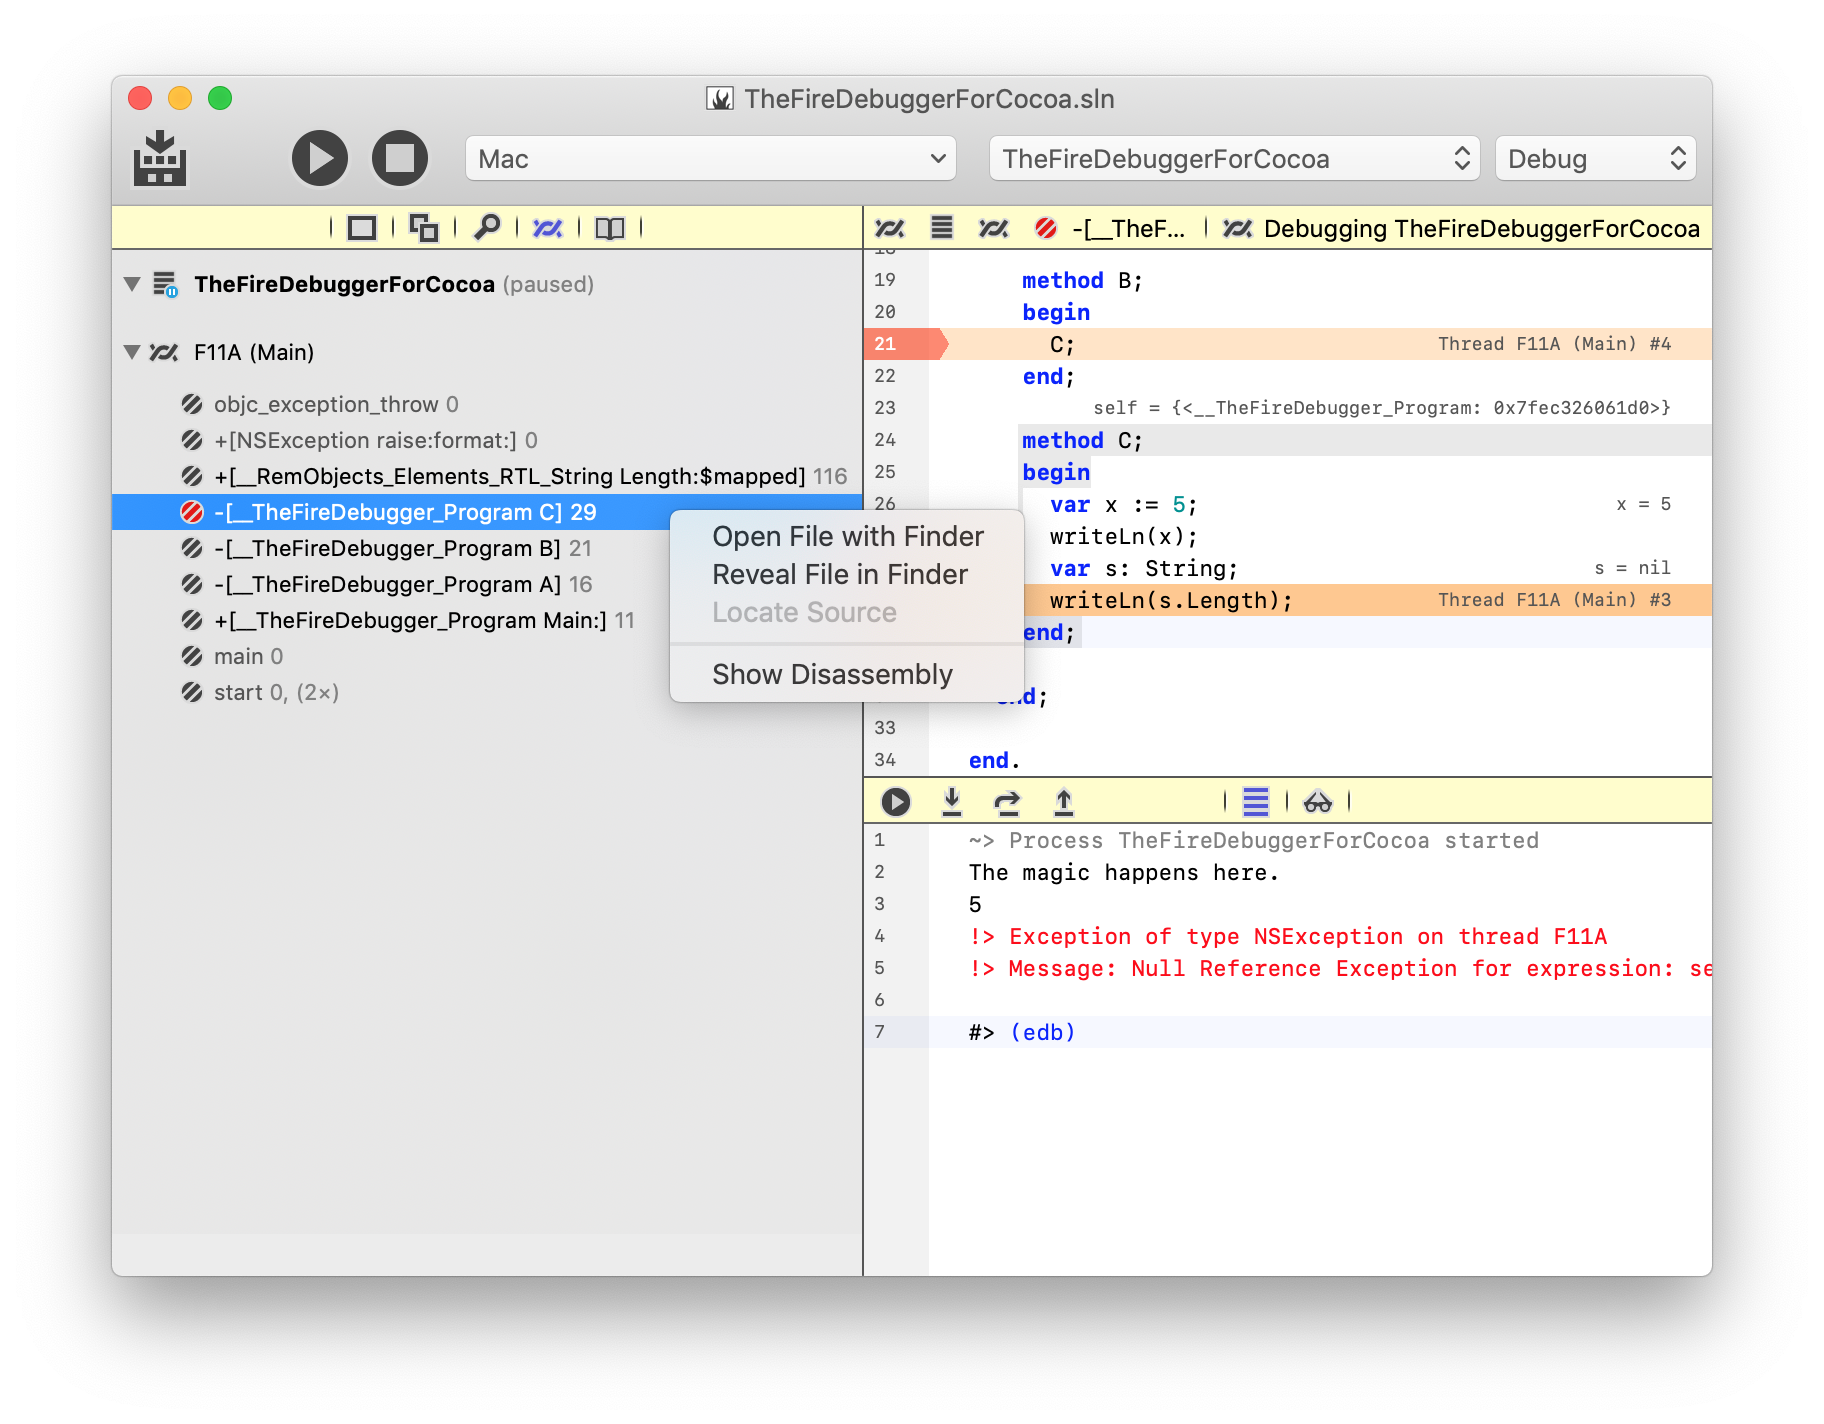
Whether an individual stack frame shows disassembly or not wil persist until the Debug Session is resumed, even when switching between frames.
To revert to viewing source code (or the generic Stack Frame view as shown in the first screenshot), you can right-click the frame again, and choose "Hide Disassembly".
See Also
Testing w/ EUnit
The Debugger in Fire and Water has a special "Testing" mode that makes it easier for you to run tests created with EUnit, the cross-platform Unit Testing framework for Elements.
This mode provides two main benefits (on top of the existing debugging capabilities available to all applications:
- It captures EUnit results and shows them as messages in-line in the code editor (much like compile-time warnings and errors).
- It allows you to conveniently run a different project than you would when debugging your app.
Running a Test Application in the debugger.
Fire and Water detect if the active project is a Test application based on EUnit, and enable the special "Debug|Test" menu item (and ⌘T/Ctrl+T keyboard shortcut).
When invoking "Test", the IDE will go through the same steps to launch your application in the debugger as it would for a normal "Run", but the resulting debug session will behave slightly different.
-
For one, separate settings are used for whether to stop on Breakpoints and Exceptions, and by default testing exceptions raised by EUnit itself will be ignored.
-
More importantly, for any test failure that happens, details (including the file and line number) are recorded, and the failure is marked inside the editor (and shows up as message in the Jump Bar:
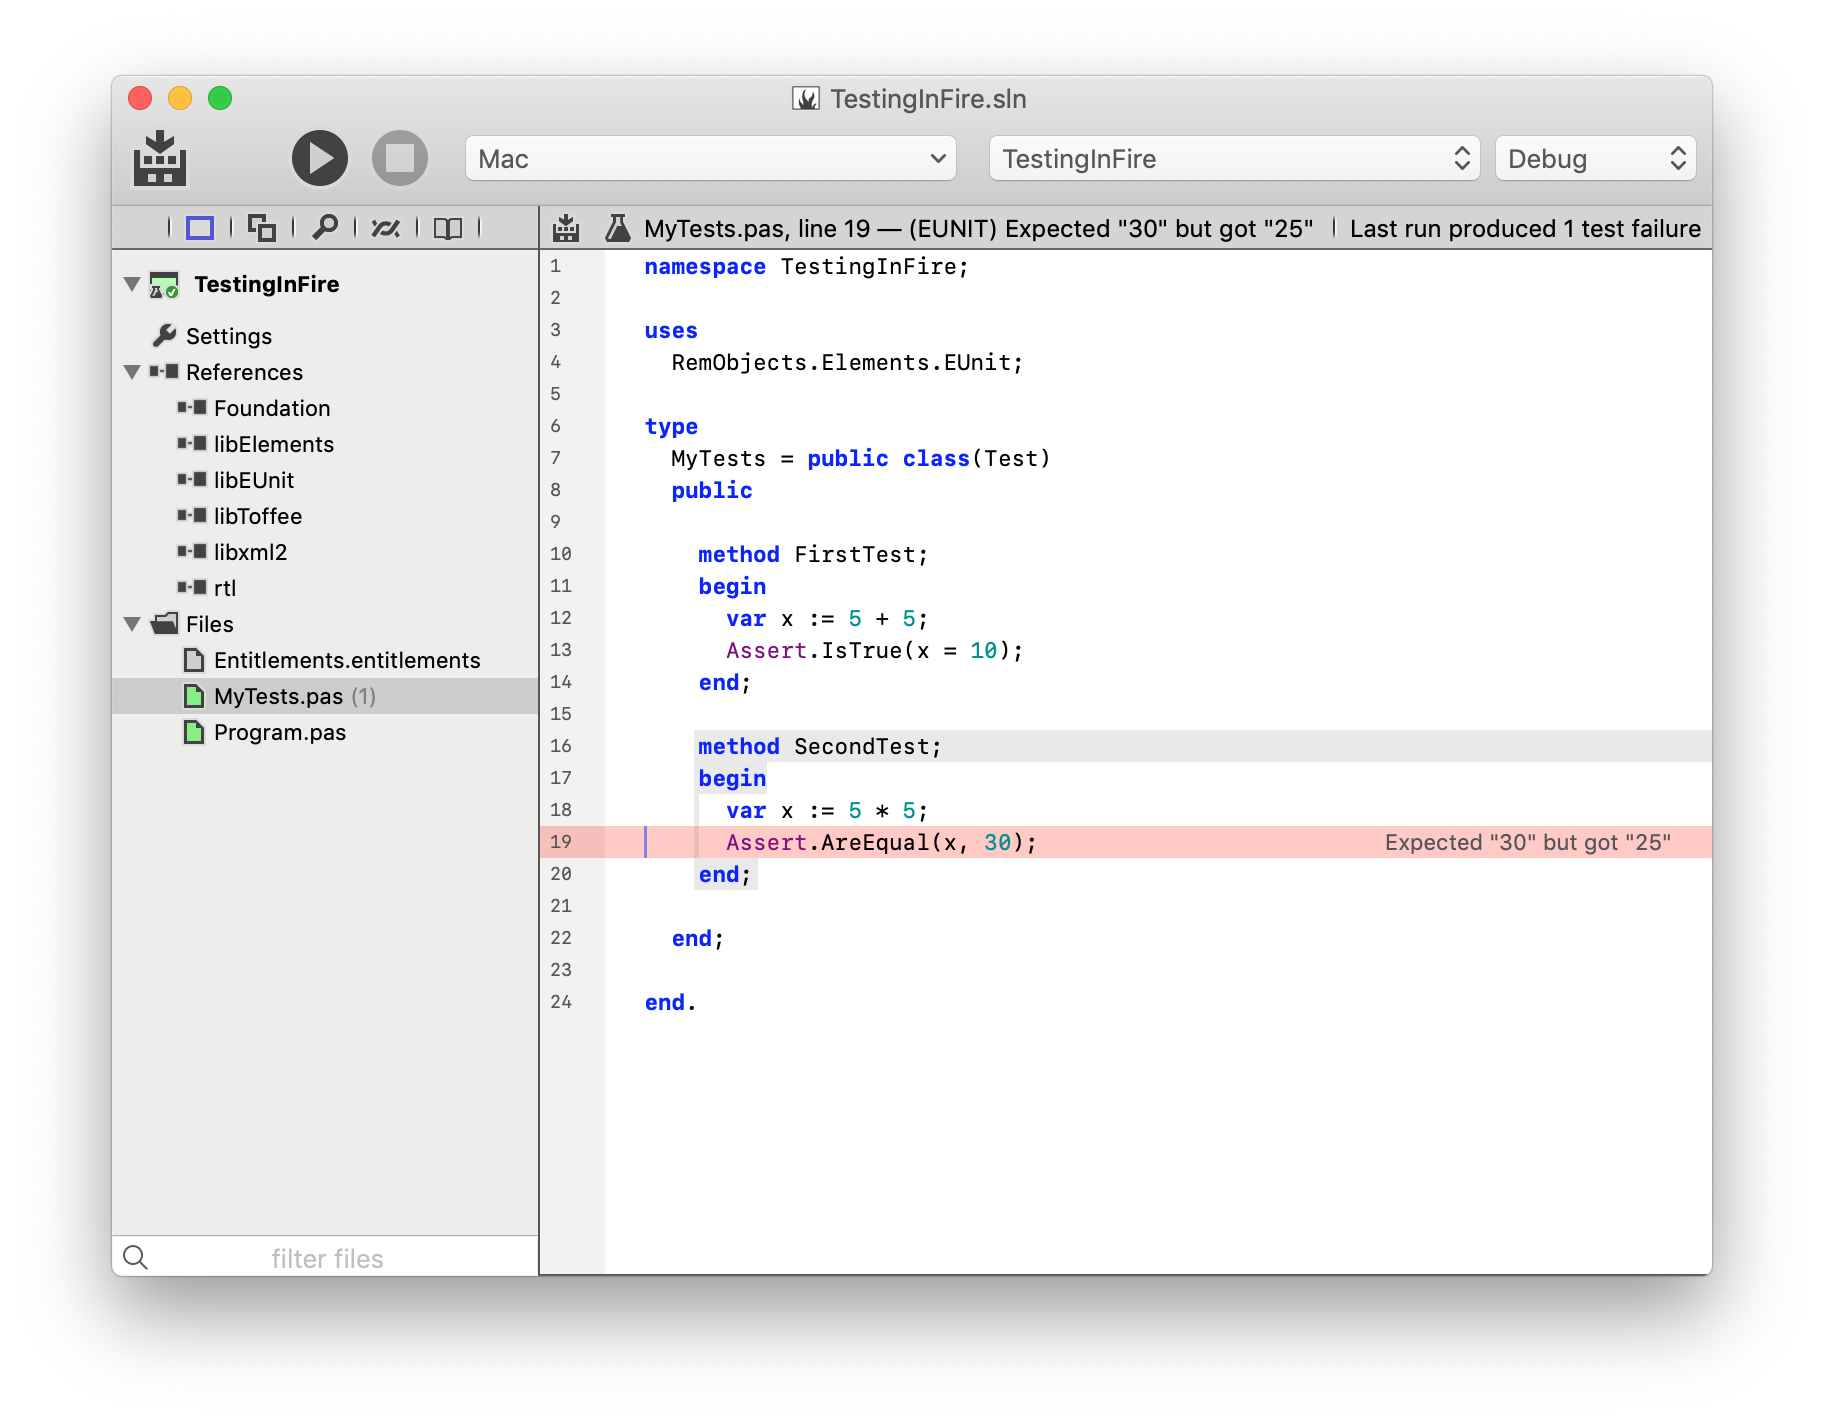
As you can see in the screenshot above, of two (silly) tests in the project, one failed. A detailed message is shown right in the editor, and the Jump Bar at the top contains the test message, alongside any comiler errors or warnings. Of course this means that, once you have selected one failure, you can then use Up/Down Navigation (^⌥Up/Down in Fire, Alt+Up/Down in Water) to move between any other test messages from the run.
In the top right corner, you also see the total number of test failures that were recorded (just one, in this case).
Test Failures in the Debug Console
When you look at the Debug Console at the bottom of the IDE, you will also see test failures highlighted alongside of any other expected output your tests might be generating.
This helps you see your failures in context of their surrounding code – for example, a complex test case might print out a variety of details between checks, and in the Debug Console you can expect all that information.
The color-highlighted Test result messages can also be double-clicked right in the console, to jump you to the code place in your code where the test failure occurred.
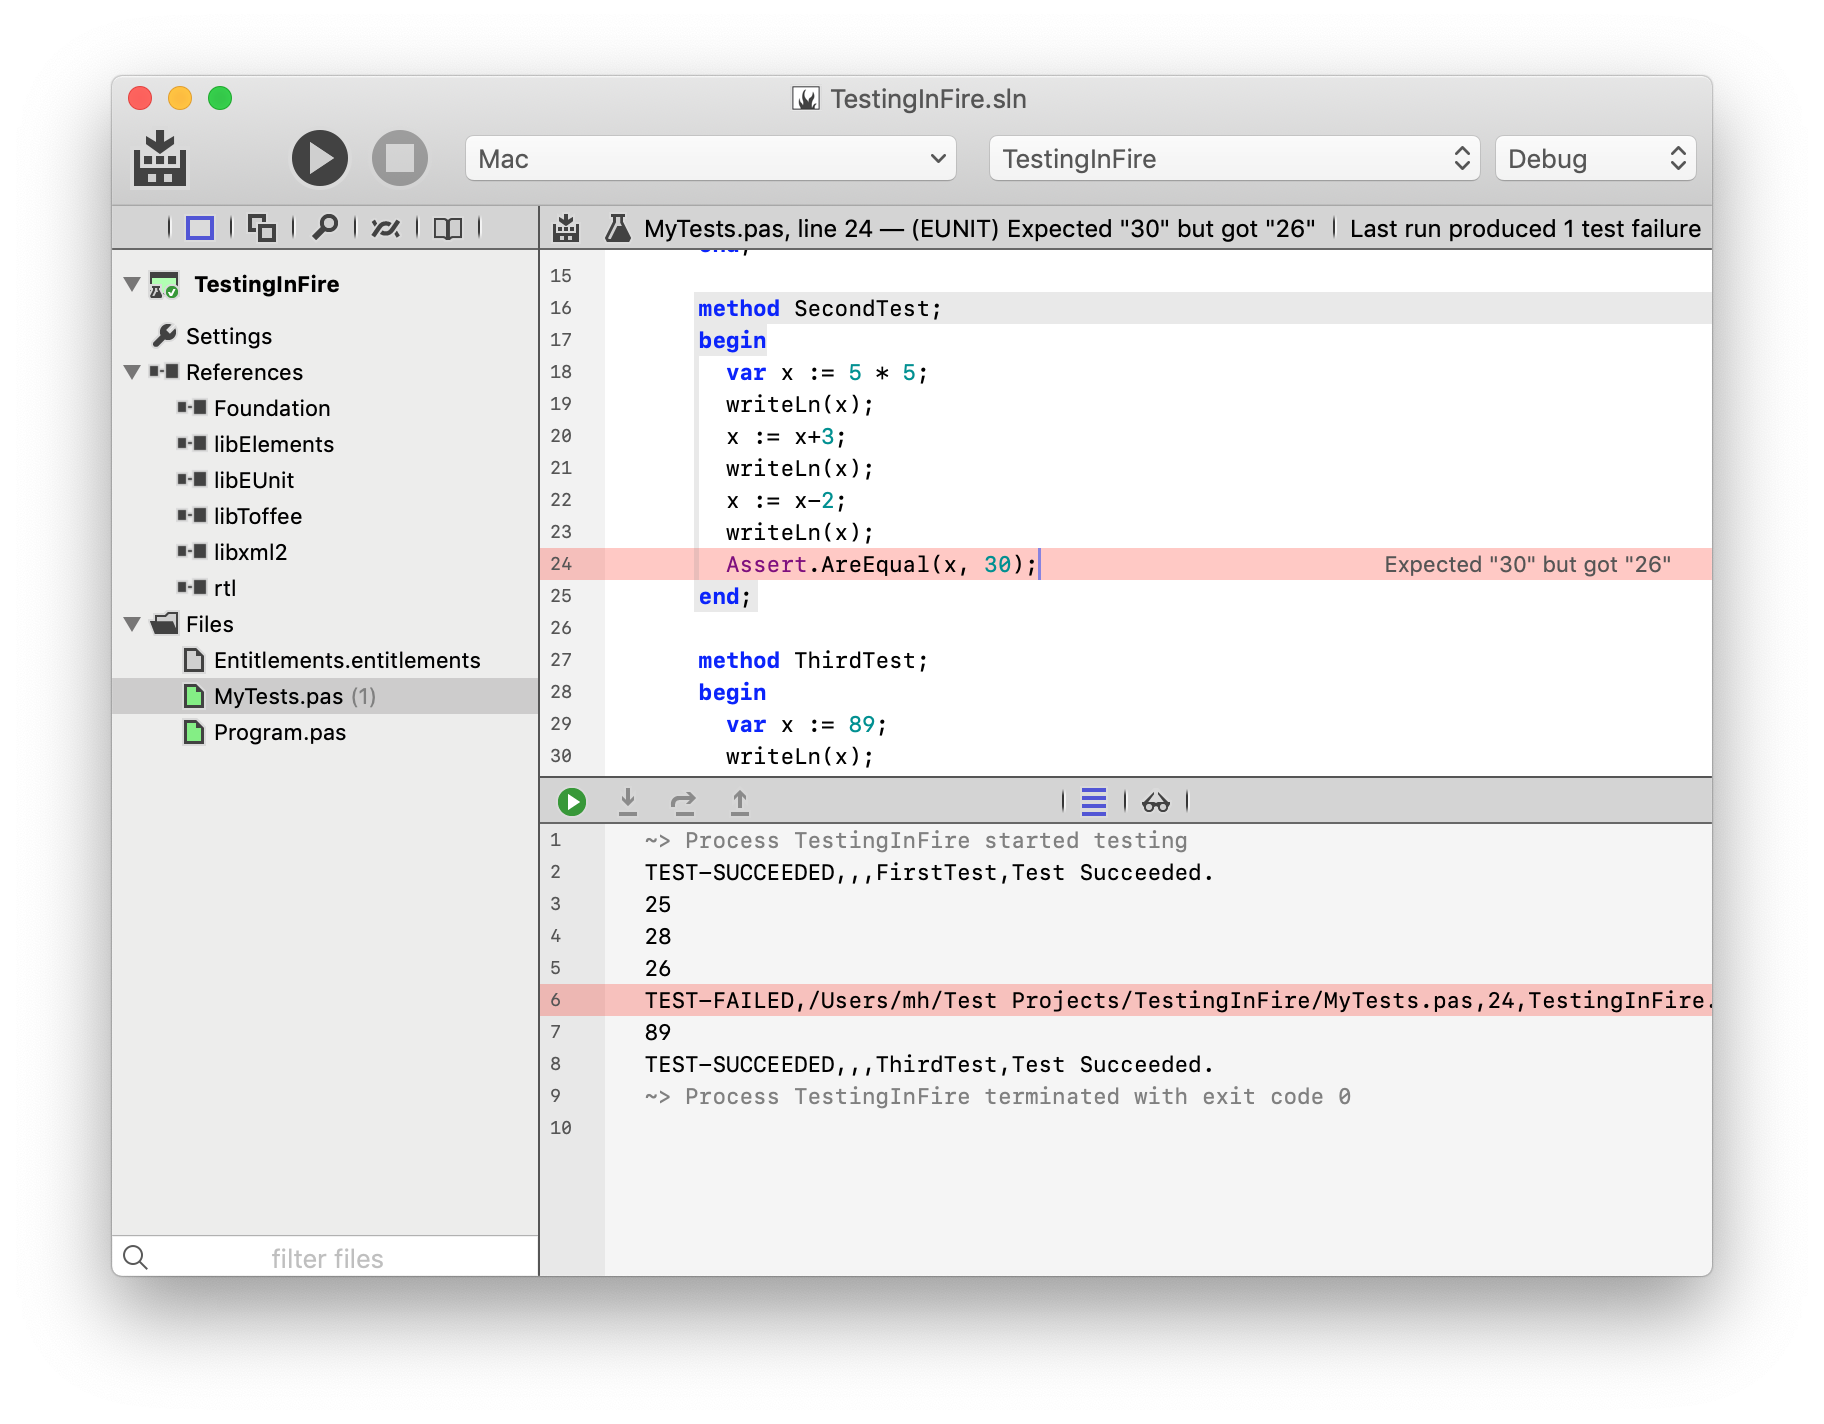
Regular Debugging Tasks
Of course, your tests run in the regular Debugger, so you have all the capabilities described in the rest of this section to interact with your tests as they run. For example, you can set a Breakpoint on or before the line of a test failure you want to investigate, and then step through the test case to see what is going on.
You can control the breakpoint and exception behavior in Testing mode via three dedicated menu items in the "Debug" menu: "Stop in Breakpoints when Testing", "Stop on EUnit Asserts when Testing" and "Stop on Other Exceptions When Testing".
Using a Dedicated Test Project
Usually, your Test application is separate from the actual project you are working on, and you might want to switch seamlessly between running tests and debugging your actual application, as you make changes to your code.
Fire And Water allows you to set a dedicated Test Application that will be launched when you start a "Test" run, separate from the "Active Project" selected in the top right, which controls which project you are working with and which project will run when you do a normal "Run".
To do this, you will want to have both your main application and the test application in the same Solution, possibly alongside other libraries or Shared Projects.
If you select the "Settings" view (⌘I or Alt+Shift+I) for your main application, you will find a setting called "Test Project", with a picker that lets you choose between any EUnit projects found in the current solution.
Setting the "Test Project" to the right value will tie the two projects together. You can now select your main Application as the "Active Project" in the top right, and work with it as you always would. When you "Run", your application will run normally in the debugger. But when you "Test", your test application will run instead.
Of course, the IDE is smart enough to only recompile the relevant project(s), so for example your main application will not build when you start a test run, and your test application will not be rebuilt when you start a normal debug session.
Running Multiple Test Projects at Once
In some cases, you might have more than one test project in a solution – be it to split tests up into separate suites you can easily run individually, or because your solution is cross-platform and you have a separate test project (or separate targets) for each platform.
Using the "Debug|Test All Projects" menu, you can have all test projects built and run, one after the other. The IDE will start a fresh debug session for each, run the tests, connect all the results, and then move on to the next. At the end, you get all of your test results, across all the individual projects, in one list.
See Also
Attaching
Sometimes, rather than launching thje project you are currently working on in the debugger, you need to attach to a process that is already running on your system to debug it.
There can be many reasons for this. Maybe your application is already running "in production" and you encounter a bug you want to debug live. Or maybe your project is library that's "hosted" in a different process, out of your own control.
It is also possible to debug application not created with Elements, as long as they are of a type supported by the Elements debugger. If those applications have debug symbols and your (optionally) have the source code, you can even step through code written in different languages, such as C, C++, Objective-C, Visual Basic, or the like.
Attaching to process from Fire or Water is simple. Via the "Debug|Attach to Process.." menu item, you can open the "Attach to Process" sheet, which allows you to select a process to debug:
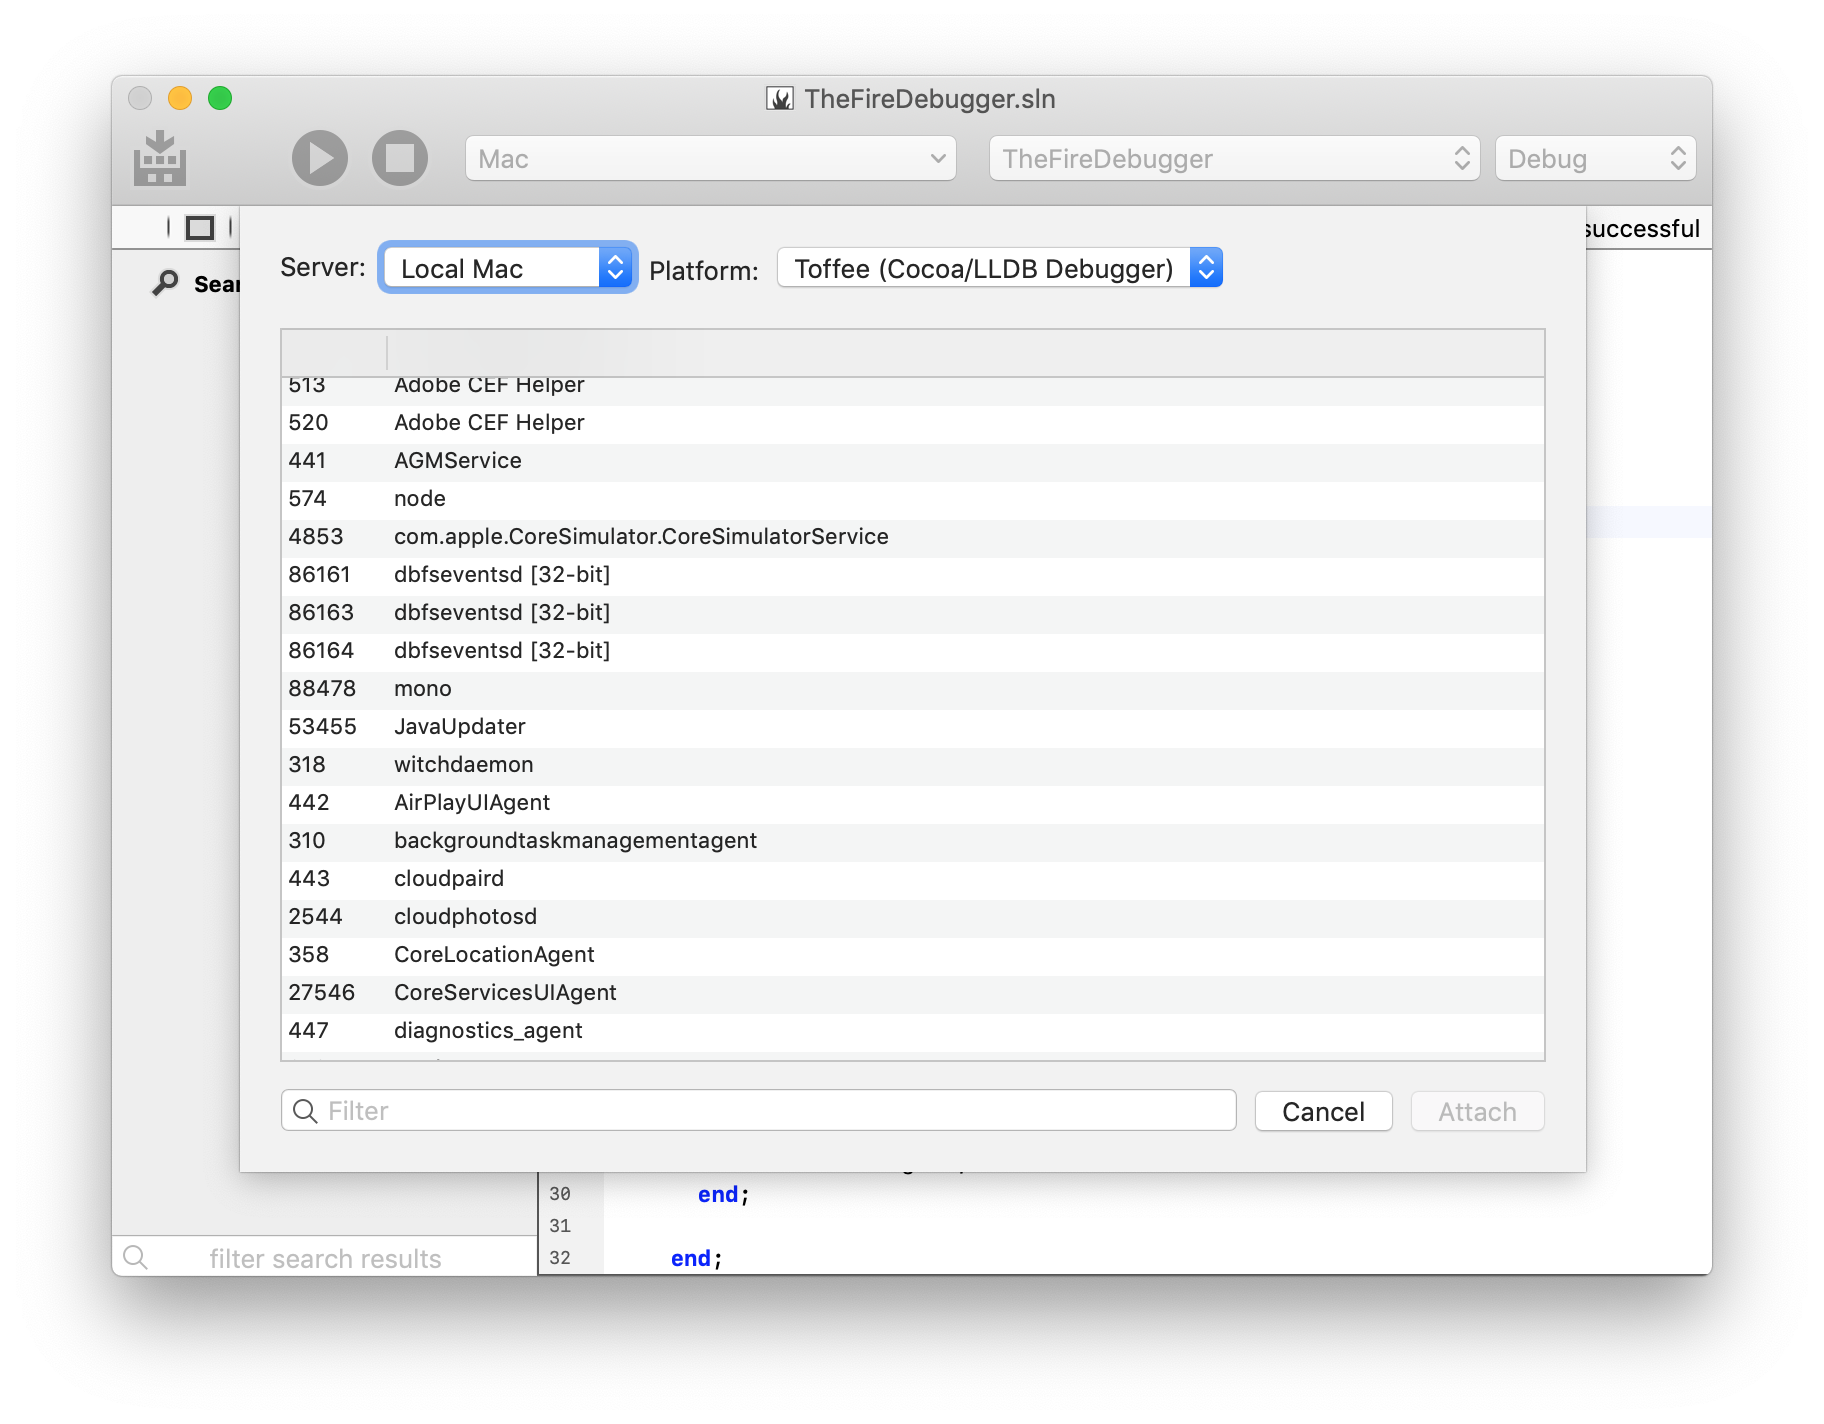
In Fire on Mac, you can attach to native processes, using either the LLDB-based Cocoa debugger (the same debug engine used by Xcode), or Elements' own native Island debugger. Both engines can debug Cocoa, Island and other native Mac applications.
Fire does not support attaching the Mono or Java debugger, because unfortunately neither the Mono or the Java runtime support this feature; Mono and Java processes can only be debugged (on managed level) when launched with the debugger. (Of course you can attach the native debugger to Mono and Java processes, to debug them on native level).
Right now Fire only allows attaching to local processes running on your Mac.
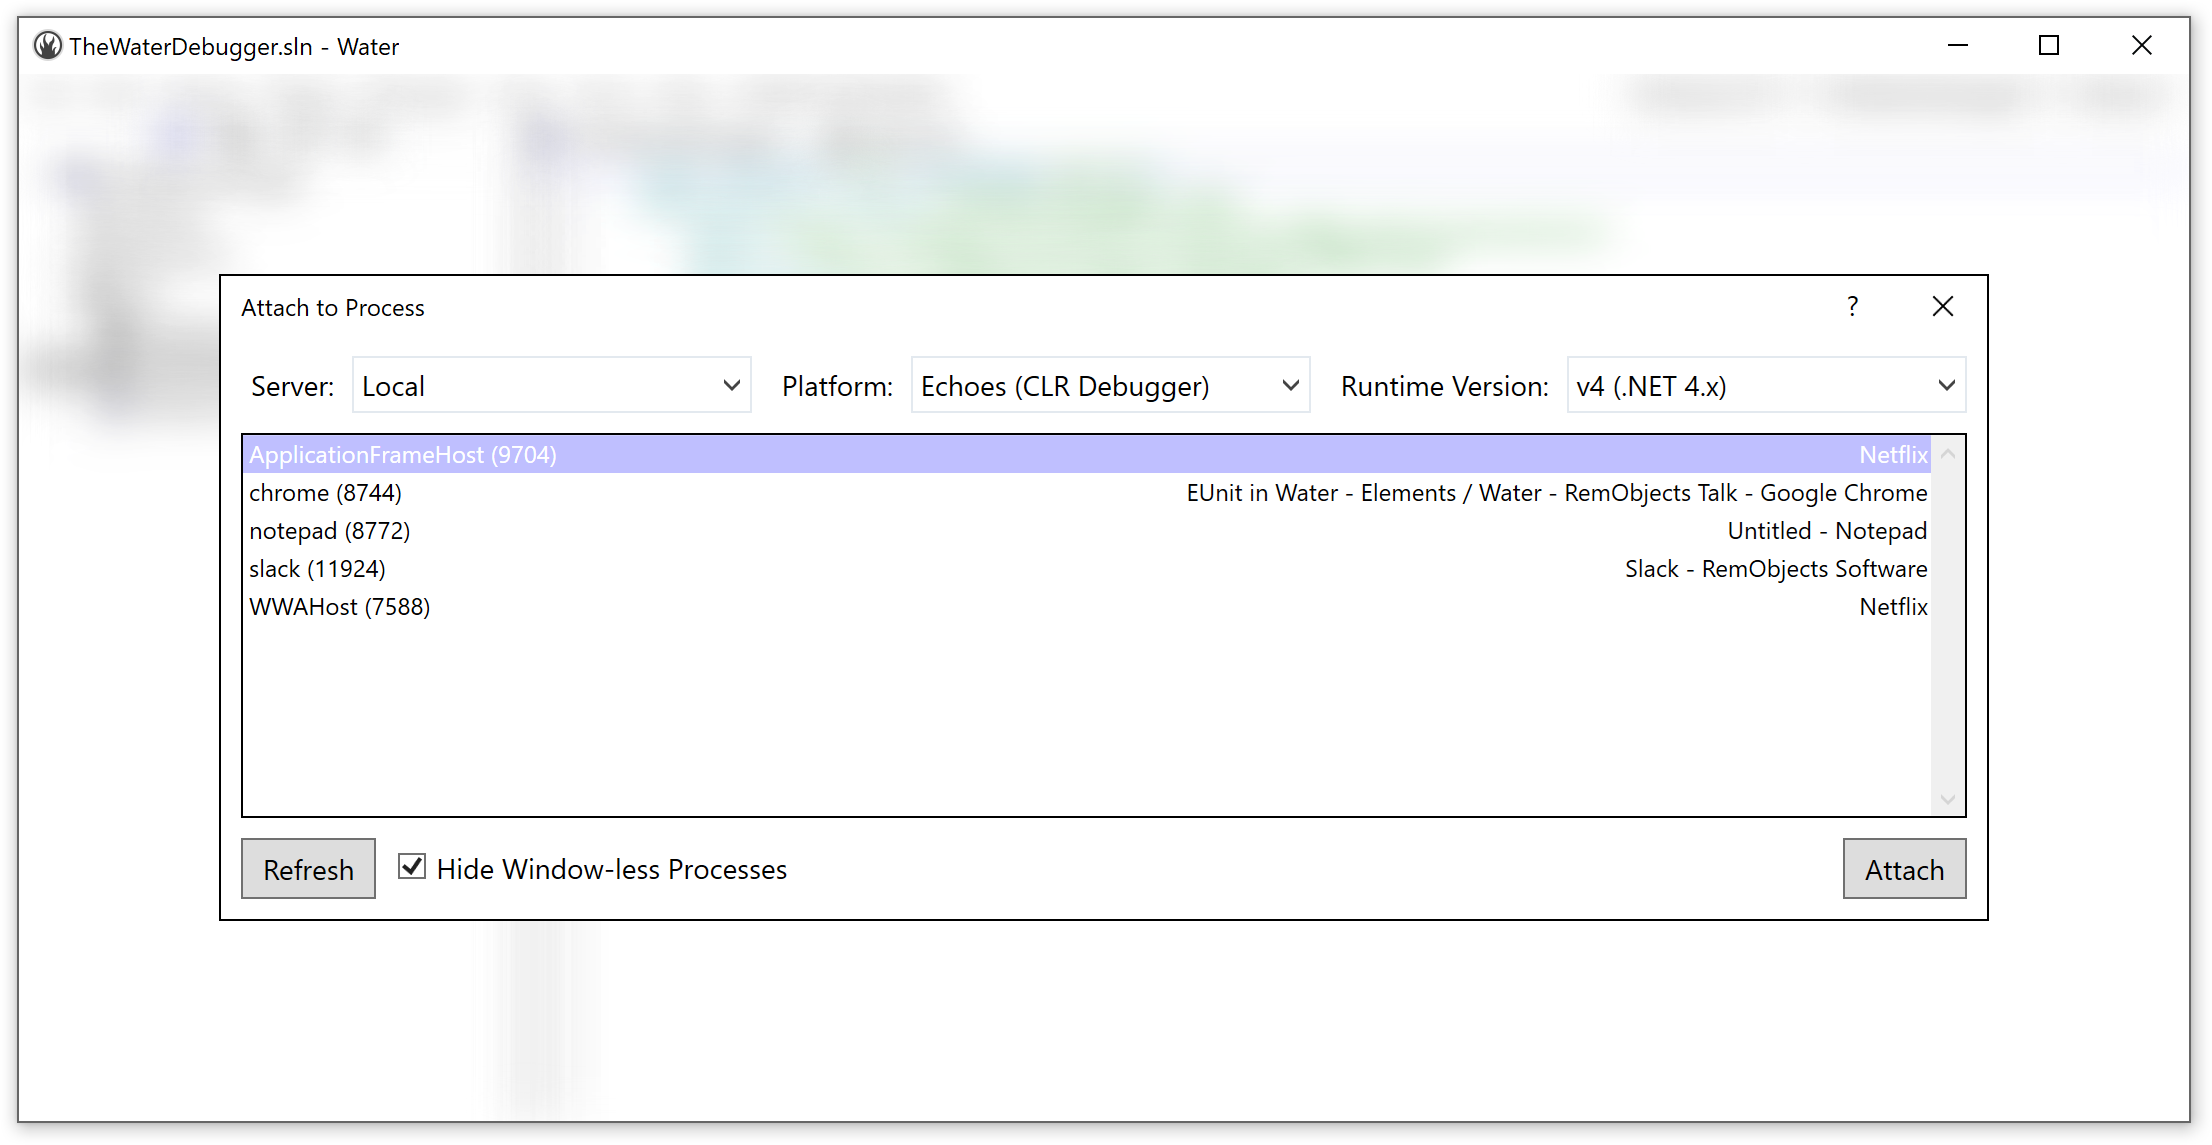
In Water on Windows, you can attach to
- .NET Framework processes, using the CLR debugger.
- natively processes using the Island debugger (which can be used even on non-Island apps).
For CLR debugging, you can (must) choose whether to attach to the .NET 2.x or .NET 4.x runtime, which use separate debugging APIs. (Most modern .NET applications use .NET 4.0 or higher.)
Water does not support attaching the Mono or Java debugger, because unfortunately neither the Mono or the Java runtime support this feature; Mono and Java processes can only be debugged (on managed level) when launched with the debugger. (Of course you can attach the native debugger to Mono and Java processes, to debug them on native level).
Water also allows you to attach to remote processes on known CrossBox servers. You can use the native Island debugger on Windows and Linux servers, and either the Island debugger or the LLDB-based Cocoa debugger, on macOS.
You can can choose which debug engine to use (and, in Water, what server to connect to or which CLR version to use), using the popup buttons at the top of the "Attach to Process" sheet.
The main area of the sheet provides a list of all processes that are running on the local computer or, in Water, the selected CrossBox server. You will see the process ID name and (on Windows) application title. Processes that are 32-bit will have an additional indicator.
Select the process you want to debug to and click "Attach". This will (try to) start a new Debug Session.
Note that not all processes can be attached to. Some processes might run in a protected mode that disallows debugging (such as many Apple-provided system applications, on macOS), or your user account might not have the proper rights to attach to them. Also, you might be trying to attach the CLR debugger to a process that does not host the .NET runtime.
If attaching fails, you will see an error message, and the "Attach to Process" sheet remains open. If attaching is successful, you will see the Jump Bar turn yellow, the "Attach to Process" sheet will close, and you'll be ready to debug, for example by Pausing the application.
Note that a Debug Session can be ended either by detaching from the process (but leaving it running) or by stopping the process. The default ⌘./Ctrl+. shortcut will default to "detach", for attached debug sessions, and to "stop" for debug sessions launched via "Debug|Run.
You can stop a session by right-clicking the debug session's node in the Threads and Callstacks pane and choosing "Stop" instead of "Detach".
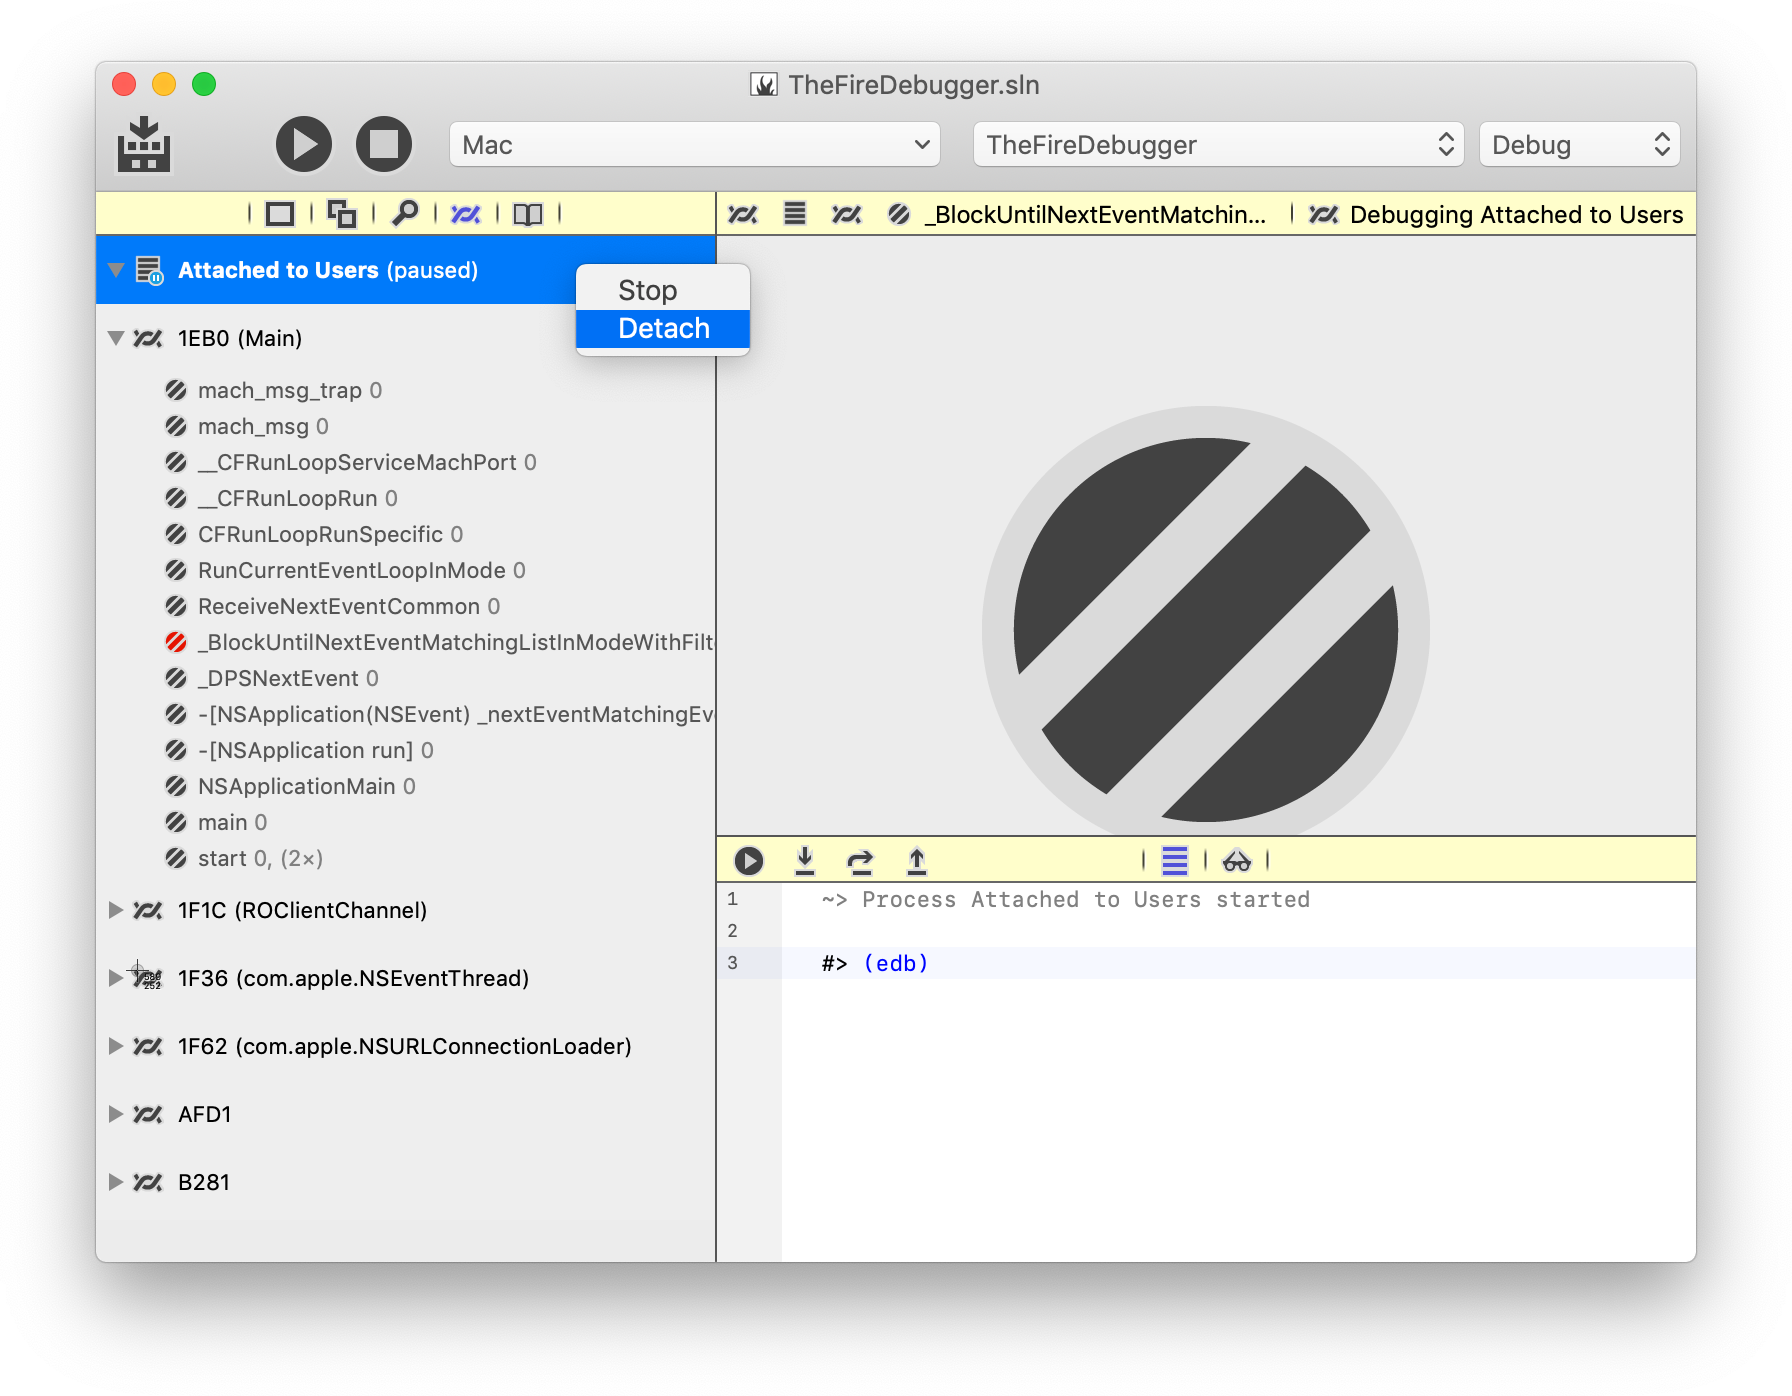
See Also
Working w/ Devices
Both Fire and Water provide built-in support for deploying, running and debugging your apps on devices other than your local Mac or PC. This includes real physical iOS and Android devices, the iOS Simulator and Android Emulators, as well as remote computers (for example to test a Mac app from Water, or a Linux app from either Fire or Water).
In the toolbar at the top of each project window, you will see the "CrossBox" device menu. In Fire, it is in the middle of the tool bar, in Water it is the first of three combo boxes at the right side of the menu bar:
By default, it will show "Mac" or "Windows PC or VM", potentially followed by a device name, such as the name of your iPhone:
Depending on the target platform for the project(s) in the open solution, this popup will show you either the single option of "Mac" (in Fire) or "Windows PC or VM" (in Water) or a selection of either iOS or Android devices and/or remote CrossBox 2 servers.
Selecting a device from the dropdown will affect which target device will be used to run and debug your application when you do so, and – in the case of iOS – will also determine which version of your project will be built (device vs. simulator).
iOS Projects
For iOS projects, the device popup will show three sections: a list of all available iOS Simulators, a generic "iOS Device", and any actual physical devices you may have connected to your Mac via cable. With latest versions of the SDKs, you can also run iOS applications, unchanged, on visionOS devices and Simulators.
In Fire, these will be the devices connected right to your local Mac; in Water, you will need to Connect to your Mac via CrossBox to see the devices on that Mac.
The list of simulators will reflect the simulators you have configured in Xcode itself, and you can use Xcode to change them or add more. This list will refresh each time you start the IDE.
Actual devices will become visible within a few seconds of being connected to your Mac via cable, and the list of devices will change live as you connect and disconnect devices. If you select a device and then disconnect it, or open an existing project and the device you last used is not currently connected, the popup will continue showing that device's name with an annotation of "(not connected)" until you select a different device from the list (or reconnect the device).
The "iOS Device" is provided as a special placeholder to allow you to build your projects for physical hardware (opposed to the simulator), even when no actual device is connected. Selecting this option will let you compile, but for obvious reasons you will not be able to run or debug your application with this option.
Read more about Cocoa Debugging on Devices and Simulators.
visionOS and tvOS Projects
visionOS and tvOS projects work the same way as iOS outlined above – you will see the list of visionOS and tvOS Simulators and any physical devices connected to your Mac. Just like with iOS, Water will need a connection to a Mac to build and run.
Android Projects
For Android projects, the device popup will show all configured Emulators, a generic "Android Device" option, physical Android devices currently connected to your local Mac or PC, as well as remote devices connected via the WiFi, and any Android Virtual Machines.

Android Devices connected via USB
Devices connected straight to your Mac or PC via USB will automatically show up in the device popup within 30 seconds of being connected, and similarly will disappear automatically after being disconnected.
When you connect a new device for the first time, it might not be authorized to talk to your computer yet. In that case, an item will show in the list reading "Unauthorized Android Device", and a message should show on your device's screen asking for permission to connect.
Once you allow the connection on the device, the popup will update to show the device's name and OS version, and the device can then be selected and used for debugging.
Android Emulators
Android Emulators can be managed by the Virtual Device Manager provided by the Android SDK in Android Studio. Unfortunately Google deprecated the standalone Virtual Device Manager, so you need to fight your way through Android Studio to get to it :(.
The IDE will include all configured emulators in the list, whether they are running or not. When Debugging, the selected Android emulator will automatically be booted up for you, if needed. Note that Android emulators can be notoriously slow, both to boot up and to run in general. So be patient.
Android Devices on the Network
You can also connect the Android SDK to devices running on your network so that they will show up as known devices in Fire and Water (and any other Android SDK tools). The IDE does not currently provide any UI to automate this process for you, but you can use the ./adb connect <ipaddress> terminal command to initiate this connection.
Once connected, the device will show up in Fire's device popup within 30 seconds.
Please refer to the Android SDK documentation, the documentation for the adb tool, and the documentation provided by your device's vendor for details. See also Device-Specific Setup.
Troubleshooting Note: The IDE only sees devices listed by the abd devices and emulator -list-advs command line tools, since those are its interface to the Android SDK.
Whenever physical a device does not show in adb devices`, the IDE will not see it, by design, and the problem needs to be sorted out between the system and the Android SDK. Fire and Water can only show the devices reported by the Android SDK, and this is the query point it uses; everything below that is outside of our control.
Read more about Android Debugging.
Island Projects
Both Fire and Water can connect to remote Windows or Linux machines via CrossBox, to run and debug Island projects on the respective platforms. Of course Water can also run and debug Windows projects locally, and can also run Linux projects on the local Linux Sub-System ("Bash for Windows") on Windows 10, when available.
WebAssembly projects can be debugged locally using Chromiu based browsers, or Node.js, which must be installed separately.
Island projects for Android can currently not be debugged directly, except in the context of being hosted in a Java-based Android app.
No remote connection is needed, from Fire or Water, to build Island projects.
Read more about debugging on Windoows, Linux and WebAssembly.
Mac Projects
While Fire can and will of course run Mac projects locally, in Water you need to Connect to a Mac via CrossBox in order to build and run Mac applications.
Read more about macOS Debugging.
Other Projects
Both .NET and Java projects will run always locally on your Mac or PC, so "Mac" or "Windows PC or VM" will be the only option in the device popup for them. In Fire, this includes macOS Cocoa projects (discussed above), as well.
Future versions of Fire and Water and CrossBox might provide the ability to remote-debug .NET and Java applications, as well.
If you have a mixed-platform solution, you will see a mixture of all devices supported by any of the platforms, and the popup itself will read "Multiple Devices".
Selecting a device in a multi-platform solution will set the active device for all applicable projects, and leave the other projects untouched. For example, if you have a solution with two iOS projects and two Android projects, and you select your connected iPhone as target device, both iOS projects will be switched to use the iPhone, while the Android project will be unaffected, of course. Selecting your Android tablet will switch over the Android project only.
You can also control the selected device for each project individually in the project's Project Settings view.
See Also
Working w/ External Designers
Elements does not reinvent the wheel for UI design, but instead embraces each platform's native UI toolsets and with that, each platform's native way to write and design UIs.
-
For Cocoa, these are XIB and Storyboard files that can be edited in Xcode.
-
For Android, these are XML Layout Files that can be edited either as plain text XML, or using visual designers in Android Studio.
-
For Windows, both XAML (WPF) and WinForms based UI files can be edited in Visual Studio, simply by opening the same project in that IDE.
Fire and Water (and Elements in Visual Studio) integrate directly with Xcode and Android Studio to make it easy, convenient and most of all seamless to work with UI files in the platform's native designers alongside your Elements projects inside Fire.
Since Elements projects are compatible between Fire and Visual Studio, you can simply open your WPF and WinForms projects .elements project in Visual Studio, where Elements integrates directly with the .NET designers. Fire and Water also provide a great editor experience when editing XAML files, including Code Completion.
Read more
Editing Cocoa UI Files in Xcode
Fire provides integration with Xcode, Apple's official IDE for Mac and iOS development that is also used by Objective-C developers and people using Apple's Swift language, to allow you to edit visual resource files for your Mac and iOS applications — from XIB and Storyboard files to Asset Catalogs and other platform-specific files, such as Core Data models.
This allows you to take full advantage of Apple's visual designers for Mac and iOS.
With a Cocoa project open, simply right-click the project node or a .xib, .storyboard or .xcassets file in the solution tree and choose "Edit User Interface Files in Xcode":
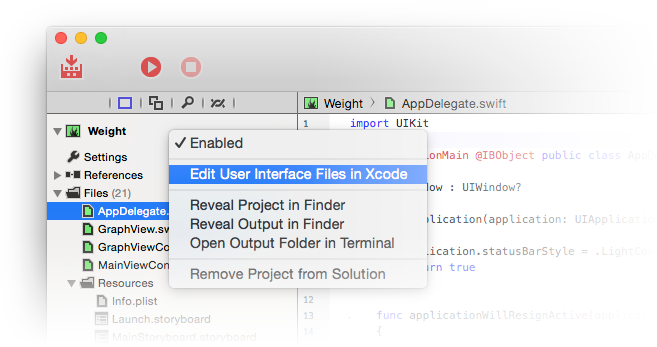
Behind the scenes, Fire will create a wrapper .xcodeproj project that references all the relevant files, and then launch Xcode.
In Xcode, you will see all the relevant files and you can edit them with all the visual designers Xcode provides for Xibs, Storyboards and for Asset Catalogs. As you make changes and save them, they will automatically reflect back into your Elements project inside Fire.
Connecting Code and UI
As part of the Xcode project, Fire also generates a small stub of Objective-C code that contains all the classes you marked with the [IBObject]/@IBObject attributes in your code, along with all their outlets and actions. This way, Xcode's visual designers know about your code, and you can connect user interface elements to your classes in the designer, as covered in the Working with XIBs and Storyboards topic.
If the "Update Xcode UI Project on Save" option in Preferences is set (it will be, by default), the Xcode project will automatically be updated to your latest code changes when you press ⌘S or when you build. This way, you can keep Fire and Xcode open in parallel, and switch back and forth between them seamlessly.
See Also
Editing Layouts in Android Studio
Fire provides integration with Android Studio, Google's official IDE for Android development that is used by Java language developers, to allow you to edit XML Layout Files and other Android-specific XML resource files (such as AndroidManifest.xml or strings.xml).
This allows you take full advantage of Google's visual designers for Android.
With an Android project open, simply right-click the project node in the solution tree and choose "Edit User Interface Files in Android Studio":
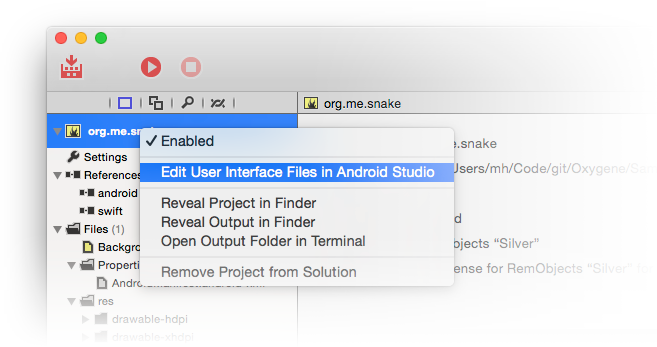
Behind the scenes, Fire will create a wrapper Android Studio project folder with the relevant files, and then launch the Android Studio application (provided it is installed).
In Android Studio, you will see all the projects's XML files and can edit them with all the tools Android Studio provides, including the visual designers. As you make changes and save them in Android Studio, they will automatically reflect back into your Elements project inside Fire.
Connecting Code and UI
The way Android user interfaces work, the UI you design in Android Studio has no direct knowledge of the classes in your code. Instead, your code has a one-way connection to all the resources in your XML files via the static R Class, covered in more detail in the The R Class topic.
As you design your UI and add new controls or other resources, the R class will gain new properties that allow you to access these resources from your code.
See Also
Online Help
The IDE provides integrated online help that can be invoked by pressing F1 on any identifier in the code editor, and also browsed via the fifth "Help" tab of the navigation pane (⌘5 in Fire).
Elements ships with pre-made indexes for this documentation site, the documentations for RemObjects Software's other library products, as well as the vendor-provided first-party platform documentations:
An offline index is included for fast lookup, but the actual content will load from the online sources linked above. In Fire, you have the option of having help topics invoked with F1 open in the embedded help tab or externally in the system's default web browser. This can be toggled in Preferences. In Water, help topics will always open externally in the browser.
Templates
Fire and Water provide a wide range of Templates to help you get started with new Projects, or to add New Files to an existing project.
Templates are provided for all platforms and languages.
You can start a new Project right from the Welcome screen, or by choosing "File|New Project..." (⌘⌥N or Ctrl+Shift+N) from the main menu. You can also choose to add a new project to an already open Solution.
You can add new Files to an open Project by choosing "Project|Add New File..." (⌘N or Ctrl+N) from the main menu, or by right-clicking any folder in the Solution Tree and choosing the same item in the context menu.
See Also
Projects
The New Project sheet allows you to start a new Project to work in and write code. By default, creating a project will also create a new Solution, but you can also decide to add a new project to an existing, already open, solution.
The New Project sheet can be invoked by choosing "File|New Project..." (⌘⌥N or Ctrl+Shift+N) from the main menu, and it looks like this:
It provides a range of options to choose from:
At the very top, you can choose what platform you want to create a new project for. The choices include:
-
.NET: Projects for the Common Language Runtime, aka .NET. This includes regular .NET (Console, WinForms, WPF), .NET Core, WinRT, Silverlight, Mono and ASP.NET.
-
Cocoa: Projects for Apple's Cocoa platform. This includes macOS, iOS, tvOS and watchOS, using both out classic Toffee back-end as well as the newer Island/Darwin.
-
Android: Projects for the Android platform. This includes Java-based Android SDK apps, as well as extensions using the native Android NDK
-
Java: Projects for the Java Virtual Machine platform. This includes regular Java apps, such as Applets, JSP and Swing.
-
WebAssembly: Projects using Elements in the Browser via WebAssembly.
-
Windows: CPU-Native 32- and 64-bit Windows apps using the Win32 API.
-
Linux: CPU-Native Linux apps for Intel and ARM.
-
Shared: Shared Projects that can contain code and other files that are shared between two or more projects (possibly across platforms).
All of these platforms are of course supported for any of Elements languages.
2. Template Type
In the middle of the sheet, you can select what kind of project you want to create. For most platforms, a wide range of different options will be provided, from a simple console/command line application to sophisticated GUI applications.
Different templates will provide different sets of starting points to help you get started, but of course you are free to change and evolve the resulting code (within the confines of the platform and sub-platform you choose. For example, you may start with a "TableView" app for iOS, but might later replace the provided table view with something else.
3. Language and Options
Finally, at the bottom, you can choose which language you want to create your project in. Elements projects are not tied to a specific language, so this choice only affects the code that is initially generated for you – you can add more files using a different language, or even convert/translate your existing code later.
You can also choose whether your project will use Elements RTL by default, or not. Elements RTL provides platform APIs for many basic functions, allowing you to write code that can be ported more easily. (You can always add Elements RTL to your project later.)
If you already have a Solution open, you will also be given the option to decide whether to add the new project to that solution (e.g. if it is a related project), or start a fresh solution (e.g. if you are starting on a new, separate endeavor).
OK
Once you made your choices, press "OK". Fire or Water will ask you for the location on disk where to store your new project, and then open it so that you can get coding!
You can configure the default location where the IDE will offer to save new projects, in Preferences.
Files
The New File sheet allows you to add new files to your Project from templates, including pre-filled source files, resources and more.
The New File sheet can be invoked by choosing "Project|Add New File..." (⌘N or Ctrl+N) from the main menu, or by right-clicking/command-clicking any folder in your project and choosing "New File..." from the context menu.
The New File sheet looks like this:
- Platform
At the very top, you can choose what platform you want to create a new project for. The choices include.
Depending on your project type, only one or all platforms will be available, in addition to the "Shared" tab, which includes items valid for any platform.
Your projects platform will be pre-selected, where available.
2. Template Type
In the middle of the sheet, you can select what kind of project you want to create. For most platforms, a wide range of different options will be provided, from a simple code files for a class, interface or extension, to UI files, resources, and more.
3. Language
Finally, at the bottom, you can choose which language you want to create your project in. Elements projects are not tied to a specific language, so you can add files of any language to your existing project.
By default, the New File sheet will pre-select the most prominent existing language in your project (but you can can set a Default Language for your project in Project Settings, if you prefer.
OK
Once you made your choices, press "OK". Fire or Water will ask you for the location on disk where to store your new file.
By default, it will offer to save the file in your project's root folder or, if you invoked the sheet from a specific folder, in said folder. But you can browse around tom change the location, and trom override the unique default name.
Custom Templates
Fire and Water let you provide custom project or file templates to assist if you if you often create projects or items of a specific configuration.
The template format is based on the standard .vstemplate file format defined by Visual Studio, with some custom extensions. The best way to get started creating a custom template is by creating a copy of an existing template folder (founds within the Fire.app bundle under (./Contents/Resources/Templates), or in the Templates subfolder of your install of Elements with Water) and modifying it to suite your needs.
Custom templates should not be placed inside the Fire.app bundle or the standard Templates folder, as that will break the code signature (for Fire) and also mean they will get lost when you upgrade.
Instead place custom templates into the following folders:
- ~/Library/Application Support/RemObjects Software/Elements/Templates (on Mac)
- %APPDATA%\RemObjects Software\Elements\Templates (on Windows)
Underneath this folder (which does not exist until you create it), the subfolders must match the same sub-folder structure as used by by the standard templates:
- ./Language/Platform/Projects for project templates
- ./Language/Platform/Files for file/item templates
For example, an Oxygene project for .NET might be placed in .../Templates/Oxygene/Echoes/Projects/MyTemplate/MyTemplate.vstemplate.
Make sure your templates have unique IDs that does not start with RemObjects. Also, all templates should contain an <Elements:Type> tag that specifies the language and platform, e.g. <Elements:Type>Oxygene.Echoes</Elements:Type>.
Samples
We're working on integrating sample projects with Fire to deploy them with the .app and make them available for browsing from within. Until that is done, you can find the Elements sample projects on GitHub, where you can download or clone them.
Contributions are of course welcome as well!
For Water, sample projects will be installed (unless that option was disable during setup) in the Documents folder shared between all users of the system. The exact location might differ depending on your version of Windows. The installed samples are a reviewed and approved sub-set of those available in the GitHub repository mentioned above.
See Also
Preferences
The Preferences (or Options) dialog lets you control many aspects of how Fire and Water look and behave as you work with them, as well as configure paths to prerequisites, and more.
You can invoke the dialog by choosing "Fire|Preferences" (⌘,) in Fire or "Tools|Options" (Ctrl+Comma) in Water. The dialog has the various preferences arranged into multiple tabs, and changing any setting will take effect immediately:
General Preferences
The General Preferences tab lets you set common preferences for Fire and Water not specific to any of the areas that have their own tab.
You can set:
-
The default/preferred language for new projects and new files in multi-language projects that have not have a preferred language set in Project Settings, themselves.
-
A default location where new projects (not added to an existing solution) will be offered to save
-
A company name and a dotted reverse-domain name to be used template that support pre-filling it.
You can also choose, what Elements Channel to receive updates from: Stable, Preview or Experimental.
Finally, at the bottom a few options are presented that are mainly for internal use in debugging or trouble-shooting Fire and Water. We suggest to not touch these settings, unless instructed otherwise by RemObjects Sopport. In particular, do not disable the Managed Project System in Fire, unless you know what you are doing, as it will render large portions of Fire's IDE smarts non-functional.
Editor Preferences
The Editor Preferences tab lets you control variosu aspects of how the Code Editor looks and behaves.
You can adjust the look of the editor by setting:
-
Font size and line spacing.
-
A color theme for the editor (depending on the theme, the rest of the UI for Fire will also adapt to force Dark Mode or Light Mode, on Macs where that is available).
-
Whether to draw a gutter with line numbers on the left hand of the editor pane, or not.
You can adjust the behavior of the editor in the following ways:
-
For files shared between projects, select whether errors are shown for all projects, or only the one active for the file.
-
To optionally show information about the identifier currently under the cursor, on the right edge of the editor.
-
To optionally highlight the range of the closest inner code block (e.g. { ... } or a begin/end pair or similar constructs surrounding the cursor.
-
To optionally show the Code Completion popup automatically as you type, rather then requiring Esc or (in Water) Ctrl+Space to be pressed to invoke it.
-
To optionally reformat and indent code to fit its surroundings, as you paste it.
-
To optionally reformat code in the enclosed block as you type a closing }, in the languages that use { and } as block delimiters.
For Oxygene, you can also choose whether to sue uppercase for
- Directives such as "
{$IF ..." (the default).
- Keywords such as "
begin" and "end" (a terrible idea, but to each their own ;)
Sheets
Fire and Water provide a number of sheets that be be brought up to manage certain aspects of yor project, from References over BreakPoints and Exceptions to Default Namespaces.
These sheets are available from the "Project" and "Debug" menus,, with command starting with the word "Manage ...". Consistent shortcuts for to bring up these sheets are ^⇧ (Fire) or Alt+Shift (Water), plus the corresponding letter of the sheet:
Keyboard Shortcuts
Code Editor
| Fire |
Water |
Description |
| ^⌘-Left |
Alt-Left |
Navigate back to the previous view |
| ^⌘-Right |
Alt-Right |
Navigate forward again, after navigating back |
| ^⌘-Up |
Alt-Up |
Navigate up within the current jump bar level (previous file in same folder previous build message, etc.) |
| ^⌘-Down |
Alt-Down |
Navigate down within the current jump bar level |
|
|
|
| ⌥⌘-Right |
Alt-Shift-Right |
Show next message on the current line |
| ⌥⌘-Left |
Alt-Shift-Left |
Show previous message on the current line |
| ⌥⌘-Down |
Alt-Shift-Down |
Go to next message in the same file |
| ⌥⌘-Up |
Alt-Shift-Up |
Go to previous message in the same fine |
|
|
|
| ^⌥-Right |
Alt+Ctrl-Right |
Search forward for the selection or the token at the cursor |
| ^⌥-Left |
Alt+Ctrl-Left |
Search backward for the selection or the token at the cursor |
| ^⌥-Up |
Alt+Ctrl-Up |
Go up to the declaration of current member (Oxygene) |
| ^⌥-Down |
Alt+Ctrl-Down |
Go down to the implementation of current member (Oxygene) |
|
|
|
| ⌥-Left |
Ctrl-Left |
Move cursor one token to the left |
| ⌥-Right |
Ctrl-Right |
Move cursor one token to the right |
| ⌥-Up |
|
Move cursor to start of line, or up one line |
| ⌥-Down |
|
Move cursor to end of line, or down one line |
| ⌘-Left |
Home |
Move cursor one token to the start of text on the current line, then to the start of the line |
| ⌘-Right |
End |
Move cursor to the end of the line |
| ⌘-Up |
Ctrl-Home |
Move cursor to the start of the file |
| ⌘-Down |
Ctrl-End |
Move cursor to the end of the file |
|
|
|
| Fn-Left (Home) |
|
Scroll to the start of the file, w/o moving the cursor |
| Fn-Right (End) |
|
Scroll to the end of the file, w/o moving the cursor |
| Fn-Up (PageUp) |
|
Scroll up one page w/o moving the cursor |
| Fn-Down (PageDown) |
|
Scroll down one page w/o moving the cursor |
|
PageUp |
Move the cursor one page up |
|
PageDown |
Move the cursor one page down |
|
|
|
| ⎋, Cmd-Space |
Ctrl-Space, Esc |
Show Code Competion |
| ⇧⎋ |
Shift-Esc |
Show Code Competion error list or status |
|
|
|
| ⌥-Delete |
Ctrl-Delete |
Delete until start of current token |
| ⌥-Fn-Delete |
Ctrl-Backspace |
Delete until end of current token |
| ⌘-Delete |
Ctrl-Shift-Delete |
Delete until start of line |
| ⌘-Fn-Delete |
Ctrl-Shift-Backspace |
Delete until end of line |
|
|
|
| ⌘], Tab |
Tab |
Indent selection (if any) |
| ⌘[, Shift-Tab |
Shift-Tab |
Unindent selection (if any) |
| ⌘/ |
Ctrl+Shift+/ |
Comment or Uncomment selection |
|
|
|
| ⌘X |
Ctrl-X, Shift-Delete |
Cut selected text to clipboard |
| ⌘C |
Ctrl-C |
Copy selected text to clipboard |
| ⌥⌘C |
Ctrl-Alt-C |
Copy selected code with any error messages |
| ⌘V |
Ctrl-V, Shift-Insert |
Paste text from clipboard |
|
|
|
| ⌘A |
Ctrl-A |
Select the entire file |
| ⌘D |
Ctrl-D |
Show definition for token at cursor |
| ⌥⌘D |
Ctrl-Alt-D |
Go to definition for token at cursor |
|
|
|
| ⌘E |
Ctrl-E |
Make the selection or the token at the cursor the active search term |
| ⇧⌘E |
Ctrl-Shift-E |
Make the selection or the token at the cursor the active replace term |
| ⌘F |
Ctrl-F |
Initiate the search pane, w/o changing the active search term |
| ^⌥⌘F |
Ctrl-Alt-Shift-F |
Clear the active search term, close the search pane, if visible |
| ⌘G |
Ctrl-G |
Find the next occurence of the search term in the current file |
| ⇧⌘G |
Ctrl-Shift-G |
Find the previous occurence of the search term in the current file |
| ⌥⌘G |
|
Find the next occurance of the search term in the current file and replace it |
|
|
|
| ⌘L |
Ctrl-L |
Toggle long/short inline build messages |
| ⌘P |
Ctrl-P |
Show parameters for method call at cursor |
| ⌥⌘P |
Ctrl-Alt-P |
Show project picker (in shared projects) |
| ⌘Z |
Ctrl-Z |
Undo |
| ⇧⌘Z |
|
Redo |
|
|
|
| ^C |
Ctrl+Shift+C |
Complete Class (Oxygene) |
| ^I |
|
Reformat the current selection |
| ^⇧I |
|
Reformat the entire file |
| ^R |
Ctrl+Shift+R |
Refactor/Rename the current token |
| ^T |
|
Switch around the two characters at the cursor |
| ^Y |
|
Delete the current line |
Navigation
Fire and Water provide several levels of navigating using cursor keys:
-
Cursor navigation within the current file follows the platform conventions, using the plain cursor keys, as well as combinations with ⌥ or ⌘ (Mac) or Ctrl (Windows), as well as Home/End/PageUp and PageDown keys (Fn+Cursor keys, on most Macs).
-
Global navigation in the IDE, between different files and other logical views is handled with the cursor keys and ^⌘ (Mac) or Alt (Windows).
-
Message navigation between build messages within the current file is handled with the cursor keys and ⌥⌘* (Mac) or Alt+Shift (Windows).
-
Search navigation within the current file is handled with the cursor Right/Left keys and ^⌥ (Mac) or Alt+Ctrl (Windows). The Up and Down keys perform "Go to Declaration/Implementation" within Oxygene code files, with the same modifiers.
See Navigation for more details.
Notes
- Several editor shortcuts work on "the selection, or the token at the cursor". If single-line selection is active, the selected text will be used; if no selection is active, the token underneath the current cursor position will be selected and used.
- Commands with ^ (Mac) or Ctrl+Shift (Windows) often perform modifications, such as refactoring, reformatting, etc.
- For Water, our goal is to achieve a good mixture of adhering to Windows keyboard standards while also retaining symmetry with Fire. For example, shortcuts with ⌘ in Fire will usually map to Ctrl in Water; ^ in Fire will map to Ctrl+Shift in Water. Basic cursor movement of course use the standard Windows keybinding and behaviour.
Legend
| ⇧ |
Shift |
Shift key |
| ^ |
Ctrl |
Control Key |
| ⌥ |
Alt |
Option or Alt key |
| ⌘ |
- |
Command (cmd) key, Mac only |
| - |
Win |
Windows Key, PC only |
| ⎋ |
Esc |
Escape key |
Getting Set Up
Fire is a standalone app for Mac that runs under OS X 10.12 (Sierra) and later. There is no setup needed for Fire itself – simply open the .dmg and copy Fire.app to a location of your choice (typically the /Applications folder) and run it. Done.
Water willm be installed by the Elements with Water version of the Elements installer for Windows. After installation, you should see Water as itenm in thr Start menu.
Prerequisites / Getting Set Up
Depending on what platforms you wish to develop for, Fire, Water and the Elements compiler have a few prerequisites you may need to install in order to have all the tools you need to get started with the platform.
Getting Set up w/ Fire on your Mac
Fire is a standalone app for Mac that runs under OS X 10.12 (Sierra) and later. There is no setup needed for Fire itself – simply open the .dmg and copy Fire.app to a location of your choice (typically the /Applications folder) and run it. Done.
Prerequisites
Depending on what platforms you wish to develop for, Fire and the Elements compiler have a few prerequisites you may need to install in order to have all the tools you need to get started with the platform.
Setup for Cocoa Development
Xcode is required to build Cocoa apps for Mac or iOS in Fire. We recommend using Xcode 10 or later.
Setup for .NET, .NET Core and Mono Development
Mono 4.6 or later is required if you want to run and debug .NET/Mono applications from within Fire. We recommend using the latest version of Mono 6 or later. (Mono is not needed to build .NET or Mono projects.)
With the .NET Core SDK, version 2.0 or later, you can also build applications for .NET Core, the cross-platform open source next-generation version of .NET. We recommend using .NET Core 3.0 or later.
Setup for Java and Android Development
You need to install the Java Development Kit (JDK) version 6 or later to develop Java apps.
To develop Android apps you will need to install both the JDK, and the Android SDK. (If you install Android Studio, no separate JDK od ADK install is required for Android development, as the Androids Studio installation provides both)
Setup for Island Development
No special setup is required for Island development, per se.
You need to have Google Chrome or another Chromium-based browser installed to run and debug WebAssembly projects from within Fire. To debug Windows or Linux projects, you will need to connect to a Windows PC or VM via CrossBox over SSH.
See Also
Xcode
Fire (or rather the Elements compiler) requires a latest Xcode to be installed on your Mac for Cocoa development.
Once Xcode is installed, Fire should pick it up automatically. If it does not, you might need to explicitly select set the Command Line Tools option in Xcode, as shown below:
Working with Multiple Xcode Versions
If you have multiple versions of Xcode installed on your Mac and want Elements to use a specific version (of if the one version of Xcode you have installed is for some reason not detected by default), you can explicitly select a version of Xcode from the "Command Line Tools" dropdown in the Xcode Preferences window:
Alternatively, you can run
sudo xcode-select --switch /path/to/Xcode.app
in Terminal to switch the selected version of Xcode (where you'd replace /path/to/Xcode.app with the actual path to the version of Xcode you want to use).
You can also use
xcode-select --print-path
in Terminal to find out what version of Xcode is currently selected. CrossBox uses this command line internally, so you can be assured that whatever the output is, it is what CrossBox will see, as well.
SDK Versions
Please note that in order for things to work out of the box, the version of Xcode you install needs to contain SDK versions supported/known by Elements in form of a folder with .fx files.
In most cases, Elements and CrossBox will automatically determine the highest version of the SDK supported by both Elements and the version of Xcode you have installed.
Any version of Elements will come with pre-built .fx files for the latest SDKs that were released at the time that version of Elements shipped, as well as support for some older SDKs. Please refer to the .fx Files topic for more details.
Elements will automatically download newer (or older) SDK versions form our website as needed, on first build. You can also downlaod SDK support manually from elementscompiler.com/elements/sdks and, if needed, you can also manually import SDKs from an Xcode version; please refer to the Importing new SDKs topic for more details on this.
Mono
Fire requires Mono 3.10 or later to be installed if you want to run and debug .NET/Mono applications from within Fire, or to optionally use the External Compiler.
Note that Mono is not required to merely build .NET projects (for example to run on a Windows PC or VM) or to work with the Cocoa or Java platforms within Fire.
.NET Core
Fire (or rather, the Elements compiler) requires the .NET Core SDK to be installed on your Mac, if you want to build .NET Core projects. Once installed, Elements will detect it automatically.
You will want to pick the download from the "Build apps - SDK" column, as the "Runtime" download will enable you to run, but not build projects. We recommend using the "Installer" download and following its instructions.
JDK
Fire (or rather, the Elements compiler) requires the Java SDK 6 or later to be installed if you want to build Java apps. If Java is installed, Fire should select it automatically, and the Java paths should show (in gray) in Fire's Preferences dialog:
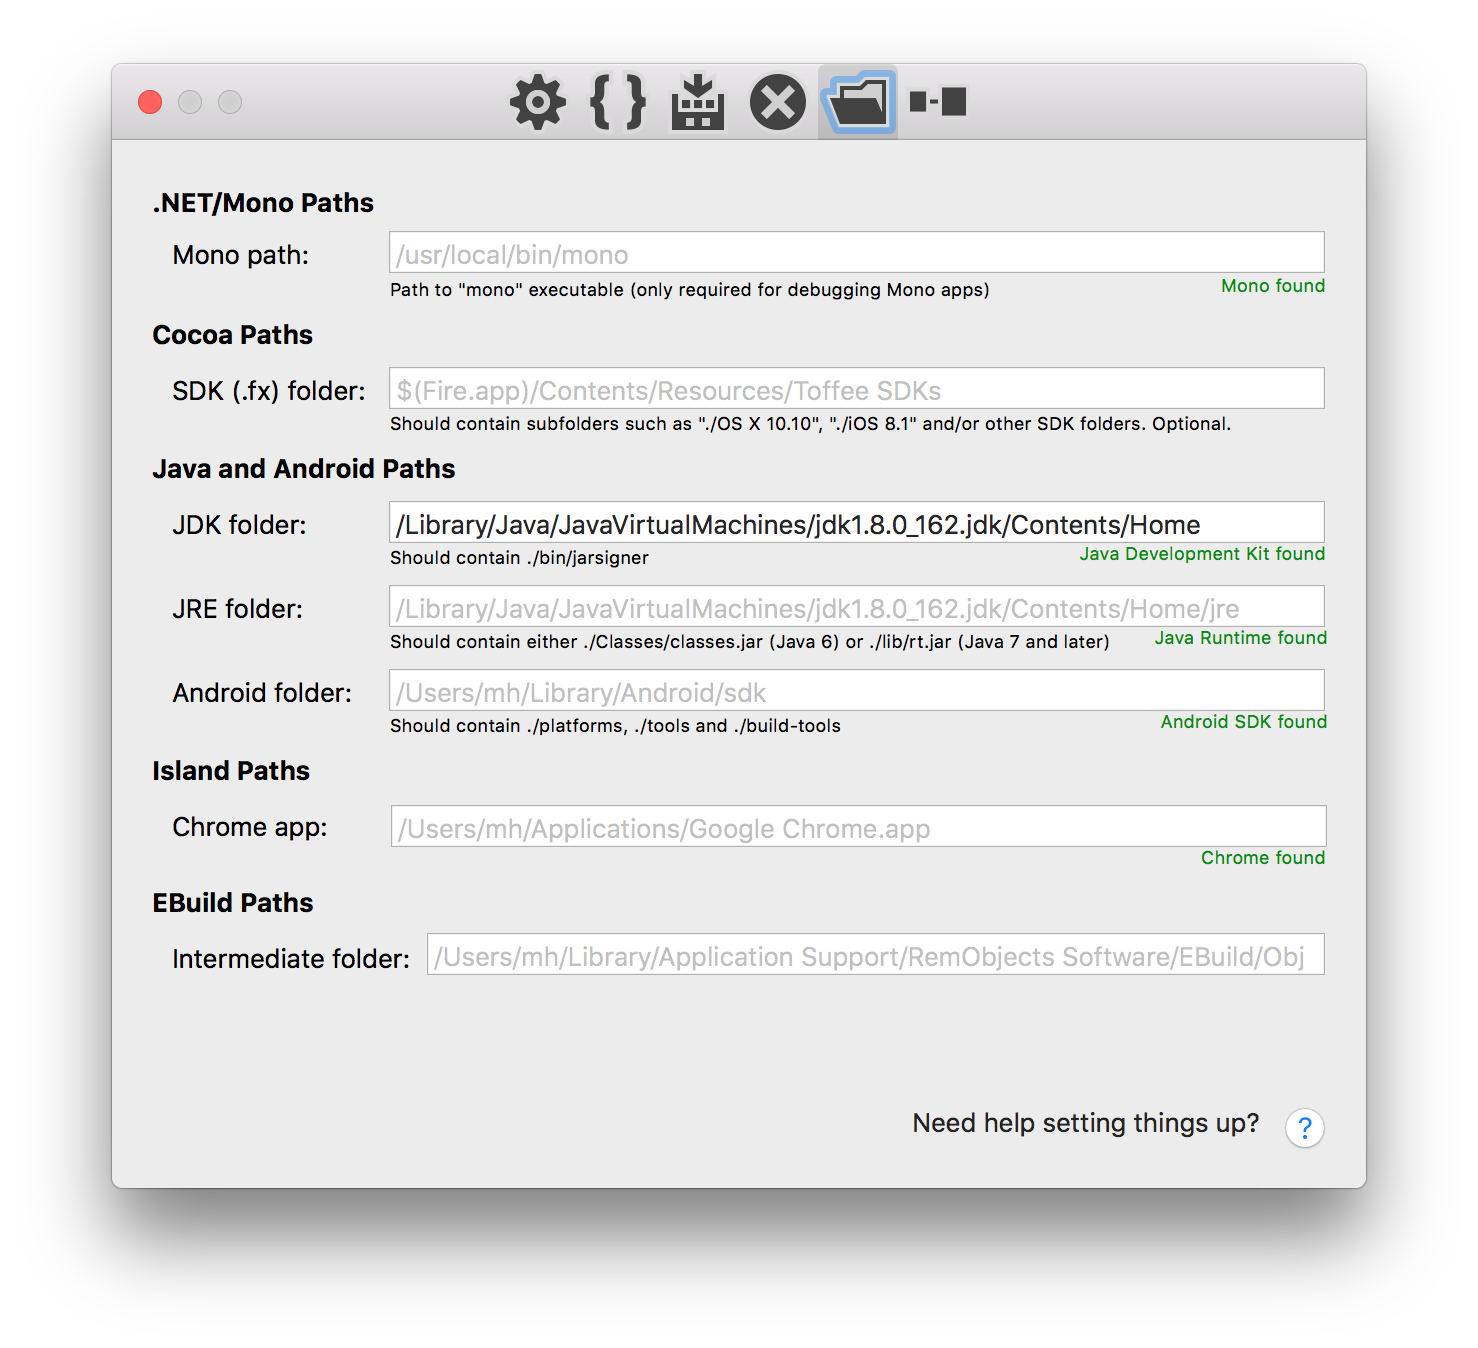
If Java is not installed, or you want to use a newer version of Java than comes with Mac OS X, you can obtain the latest download at the URL below, or by typing java into Terminal and pressing enter. After installing Java, Fire should pick it up automatically.
If you have a custom version of Java installed that Fire for some reason does not detect on its own, or if you want to override the JDK and JRE paths manually (and know what you are doing), you can manually change the paths in the Preferences dialog, overriding the default.
See Also
Android SDK
In addition to Installing the Java JDK, Fire (or rather, the Elements compiler) also requires the Android SDK in order to build apps for the Android platform. Optionally, you might also want to install Android Studio for visually designing Android user interface files.
The simplest way to set up the prerequisites is to download "Android Studio for Mac", run it, and follow the "Setup Wizard" it will present to guide you through installing the Android SDK. After that, the Android SDK will be available in ~/Library/Android/sdk, where Fire will pick it up automatically.
Note that Android Studio has some weird requirements for how it detects the installed Java runtime. Please refer to this Stack Overflow Thread for details and a fix/workaround, if Android Studio does not detect Java on your system, even though you have it installed.
Installing Required SDK Packages
After the Android SDK is installed, you will want to launch the "SDK Manager" tool and install some additional packages. You can run the SDK Manager via the "Tools|Java|Launch Android SDK Manager" menu item in Fire.
You will want to select and install at least the following packages, if they are not already installed.
- Android SDK Tools
- Android SDK Platform-Tools
- Android SDK Build-Tools
- One (or more) Android Platforms (such as 5.0.1 / API 21 in the screenshot below).
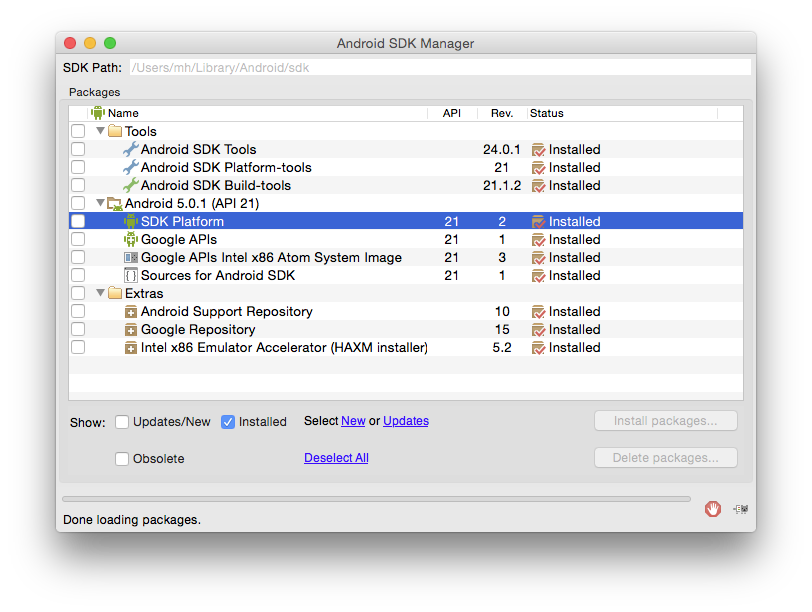
Manually Downloading the SDK
If you don't want to use Android Studio, you can also download the Android SDK as a plain .zip that can be extracted to an arbitrary location. You will then need to manually specify the path to it in Fire's Preferences dialog:
Make sure to specify the path to and including the sdk folder. This folder should contain, among others, the ./platforms and ./tools subfolders. The Preferences dialog will show a red "Invalid path" message if not all required items could be found in the location you specified.
You can obtain the latest download at the URL below:
Device-Specific Setup
Depending on the Android Devices you want to develop for, some device-specific parts of the Android SDK might need to be installed or configured. Check out the page below for links to setup and development instructions for popular Android devices.
See Also
Chrome or Brave
A copy of Google's Chrome or another Chromium-based browser is required to debug WebAssembly Web Modules.
Debugging has only been tested with Chrome and Brave, but it might also work with other other Chromium-based browsers.
By default, Fire will automatically detect your copy of Chrome.app or Brave Browsere.app, if it is properly named and located in the /Applications or ~/Applications folder. If you have placed it in a different location, or want to use a different Chromium-based browser, you can manually specify a path to the .app bundle in the "Paths" tab of the Preferences Window.
See Also
Node.js
A copy of the Node.js runtime is required to debug WebAssembly Node.js Modules.
By default, Fire will automatically detect your copy of Node.js, if it is properly installed as /usr/local/bin/node. If you have Node.js installed a different location, you can manually specify a path to the node executable in the "Paths" tab of the Preferences Window.
See Also
External Compiler
When you download Fire, it comes with everything you need to run Fire and the Elements compiler, bundled in Fire.app. This includes a stripped-down version of the Mono runtime, as well as the Elements Compiler itself.
The version of the compiler inside Fire always matches the version of Fire itself.
In some cases, you might want to install an external version of the Elements Compiler. There can be several reasons for this – you might, for example, want to use the compiler from the command prompt or in automated builds, or maybe you received a newer version of the compiler with bug fixes from our support team and don't have a new version of Fire to match. It's also conceivable that you want to use an older version of the compiler (for whatever reason), but use it with the latest version of Fire.
The Elements Compiler "Mac & Linux Distro"
The Elements compiler is made available as a separate download on elementscompiler.com and/or on the Beta portal
Please refer to the Installing the Command Line Compiler topic for details on how to install the "External" compiler, system wide.
Once installed, the compiler is available globally to be used with xbuild, Mono's command line build tool. For example, you can build a project simply by calling xbuild MyProject.sln in Terminal.
Using the External Compiler inside of Fire
By default, Fire will keep using its internal version of the compiler for building. But you can change that by going to the Preferences dialog via ⌘, or the "Fire|Preferences" menu, switching to the "Build" tab, and checking the "Use external Elements Compiler" checkbox at the very bottom:
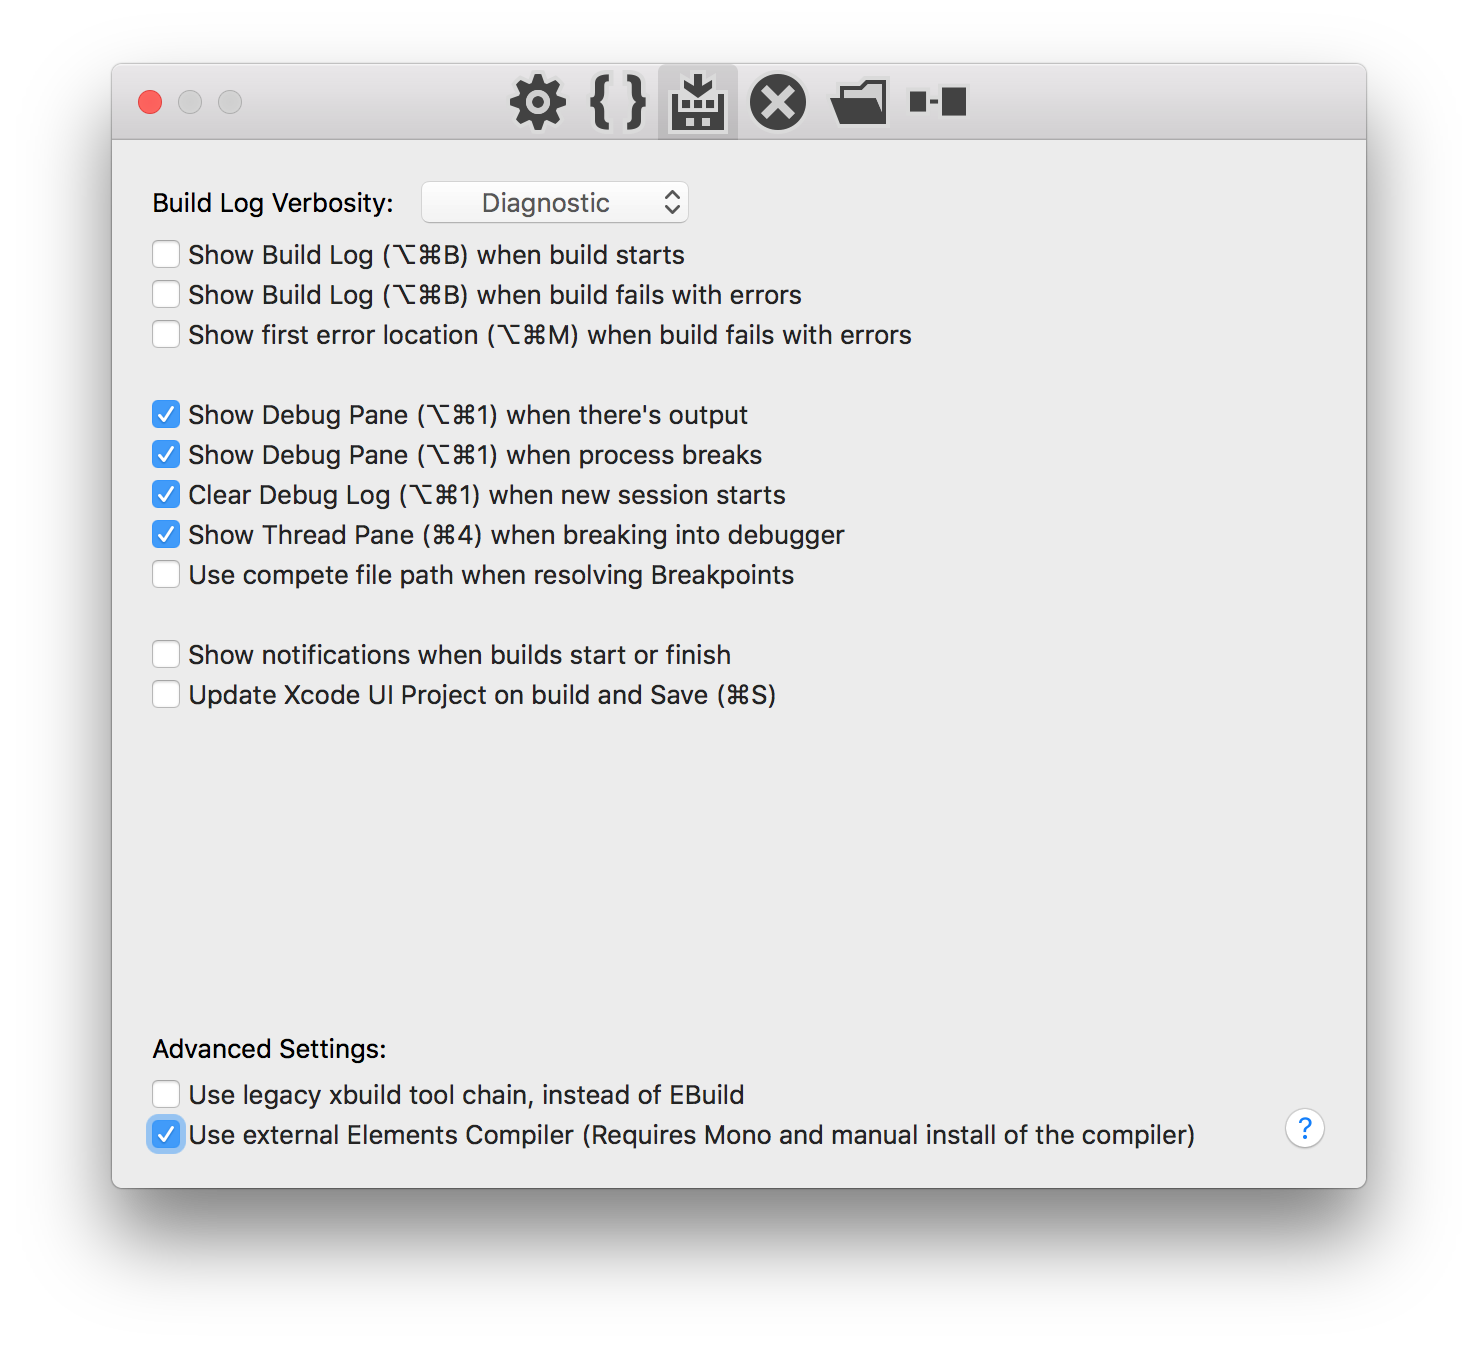
The next time you hit Build (⌘B) or Run (⌘R), Fire will use the externally installed compiler.
Note: Don't forget about this setting, and to turn it back off should you later want to go back to the embedded compiler (which is recommended for normal use). If you leave this setting on and later update Fire, Fire will keep using the (older) external compiler, unless you remember to always update that as well.
See Also
Getting Set up w/ Water on Windows
Water is a standalone app for Windows. We're officially supporting and testing with the latest Windows 10 releases, but Water should also run without any problems on Windows 7 and Windows 8.
Water is installed by running the appropriate "Elements with Water" installer download for Elements. This setup will install (or update in place) all required components, including the compiler, Samples, Templates and Water itself. There is no need to uninstall first when updating to a newer build.
If you are also using Elements in Visual Studio, the "with Water" installer will also update Elements within Visual Studio as well, there is no reason to run the other installer versions to update (unless you actually still need to install the Visual Studio 2015 Shell itself).
Prerequisites
Depending on what platforms you wish to develop for, Water and the Elements compiler have a few prerequisites you may need to install in order to have all the tools you need to get started with the platform.
Setup for .NET, .NET Core and Mono Development
No special setup is required for development using the classic .NET Framework (version 4.8 and below), but depending on your needs, you might want or need to install additional versions of the .NET Framework and/or the Windows SDK. Water does optionally support explicitly running/debugging apps on Windows version of Mono, if Mono 4.x or later is installed.
With the .NET Core SDK, version 2.0 or later, you can also build applications for .NET Core, the cross-platform open source next-generation version of .NET. We recommend using .NET Core 3.0 or later. Note that ".NET 5.0" and later are based on .NET Core.
Setup for Cocoa Development
A Mac running the latest Xcode is required to build Cocoa apps for Mac or iOS in Visual Studio (you will work on Windows, but Elements will communicate with your Mac in the background).
Setup for Android Development
To develop Android apps you will need to install Android SDK, which comes included with Android Studio. (If you install Android Studio, no separate JDK or Android DK install is required for Android development, as the Androids Studio installation provides both)
Setup for Java Development
You need to install the Java Development Kit (JDK) version 6 or later to develop Java apps.
Setup for Island Development
No special setup is required for Island development, per se.
You need to have Google Chrome or another Chromium-based browser installed to run and debug WebAssembly projects from within Water. To debug Linux projects, you will either need a version of Windows 10 that includes the Linux Sub-System, also known as "Bash on Windows", or connect to a Linux PC, VM or server via CrossBox over SSH.
See Also
Xcode
Water (or rather, the Elements compiler) requires a Mac with the latest Xcode to be installed for Cocoa development.
Once Xcode is installed, and you have connected to your Mac, Water will handle the rest.
Working with Multiple Xcode Versions
If you have multiple versions of Xcode installed on your Mac and want Elements to use a specific version (of if the one version of Xcode you have installed is for some reason not detected by default), you can explicitly select a version of Xcode from the "Command Line Tools" dropdown in the Xcode Preferences window:
Alternatively, you can run
sudo xcode-select --switch /path/to/Xcode.app
in Terminal to switch the selected version of Xcode (where you'd replace /path/to/Xcode.app with the actual path to the version of Xcode you want to use).
You can also use
xcode-select --print-path
in Terminal to find out what version of Xcode is currently selected. CrossBox uses this command line internally, so you can be assured that whatever the output is, it is what CrossBox will see, as well.
SDK Versions
Please note that in order for things to work out of the box, the version of Xcode you install needs to contain SDK versions supported/known by Elements in form of a folder with .fx files.
In most cases, Elements and CrossBox will automatically determine the highest version of the SDK supported by both Elements and the version of Xcode you have installed.
Any version of Elements will come with pre-built .fx files for the latest SDKs that were released at the time that version of Elements shipped, as well as support for some older SDKs. Please refer to the .fx Files topic for more details.
Elements will automatically download newer (or older) SDK versions form our website as needed, on first build. You can also downlaod SDK support manually from elementscompiler.com/elements/sdks and, if needed, you can also manually import SDKs from an Xcode version; please refer to the Importing new SDKs topic for more details on this.
.NET Core
Water (or rather, the Elements compiler) requires the .NET Core SDK to be installed on your PC, if you want to build .NET Core projects. Once installed, Elements will detect it automatically.
You will want to pick the download from the "Build apps - SDK" column, as the "Runtime" download will enable you to run, but not build projects. We recommend using the "Installer" download and following its instructions.
.NET Framework (Classic)
Windows ships with a version of thew .NET runtime, and that will usually suffice to build and test .NET Framework applications.
However, you might want to install specific versions of the .NET Framework in your applications, depending on your development target or the feature set you need. These can be downloaded from Microsoft as needed:
Mono
Water can optionally use the Mono runtime for running and debugging CLR apps. To do this, you need to download and install Mono.
Once installed, you can choose the option to run your (Echoes) projects via Mono, both globally in the "Tools|Options" dialog as well as on a per-project basis in Project Settings.
Note that Mono is not required at all to work in Water, for any target platform.
JDK
Water (or rather, the Elements compiler) requires the Java SDK 6 or later to be installed if you want to build Java apps.
Once Java is installed, Water should select it automatically, and the Java paths should show (in gray) in Water's Options dialog:
![]()
If Water for some reason does not detect on its own, or if you want to override the JDK and JRE paths manually (and know what you are doing), you can manually change the paths in the same Options dialog, overriding the default.
See Also
Android Studio
Water (or rather, the Elements compiler) requires the Android SDK in order to build apps for the Android platform. The best way to install this is to install Android Studio (which you can then also use for visually designing Android user interface files.
The simplest way to set up the prerequisites is to download "Android Studio for Windows", run it, and follow the "Setup Wizard" it will present to guide you through installing the Android SDK. After that, the Android SDK will be available in %APPDATA%/Android/SDK, where Water will pick it up automatically.
Installing Required SDK Packages
After the Android SDK is installed, you will want to launch the "SDK Manager" tool and install some additional packages. You can do this from the Android Studio Splash screen, via the Configure menu:
On the "SDKs Platforms", tab, make sure one or more SDK Versions are installed. In general;, you will want to build for the hightest available (non-Beta) SDK, even if you support older versions via a Deployment Target.
On the "SDK Tools", you will want to select and install at least the following packages, if they are not already installed:
- Android SDK Build-Tools
- Android SDK Command-line Tools
- Android SDK Platform Tools
Depending on your needs, yu might also want to install
- Android Emulator
- NDK (for Native NDK Extension development)
Manually Downloading the SDK
If you don't want to use Android Studio, you can also download the Android SDK as a plain .zip that can be extracted to an arbitrary location. You will then need to manually specify the path to it in Water's Preferences dialog:
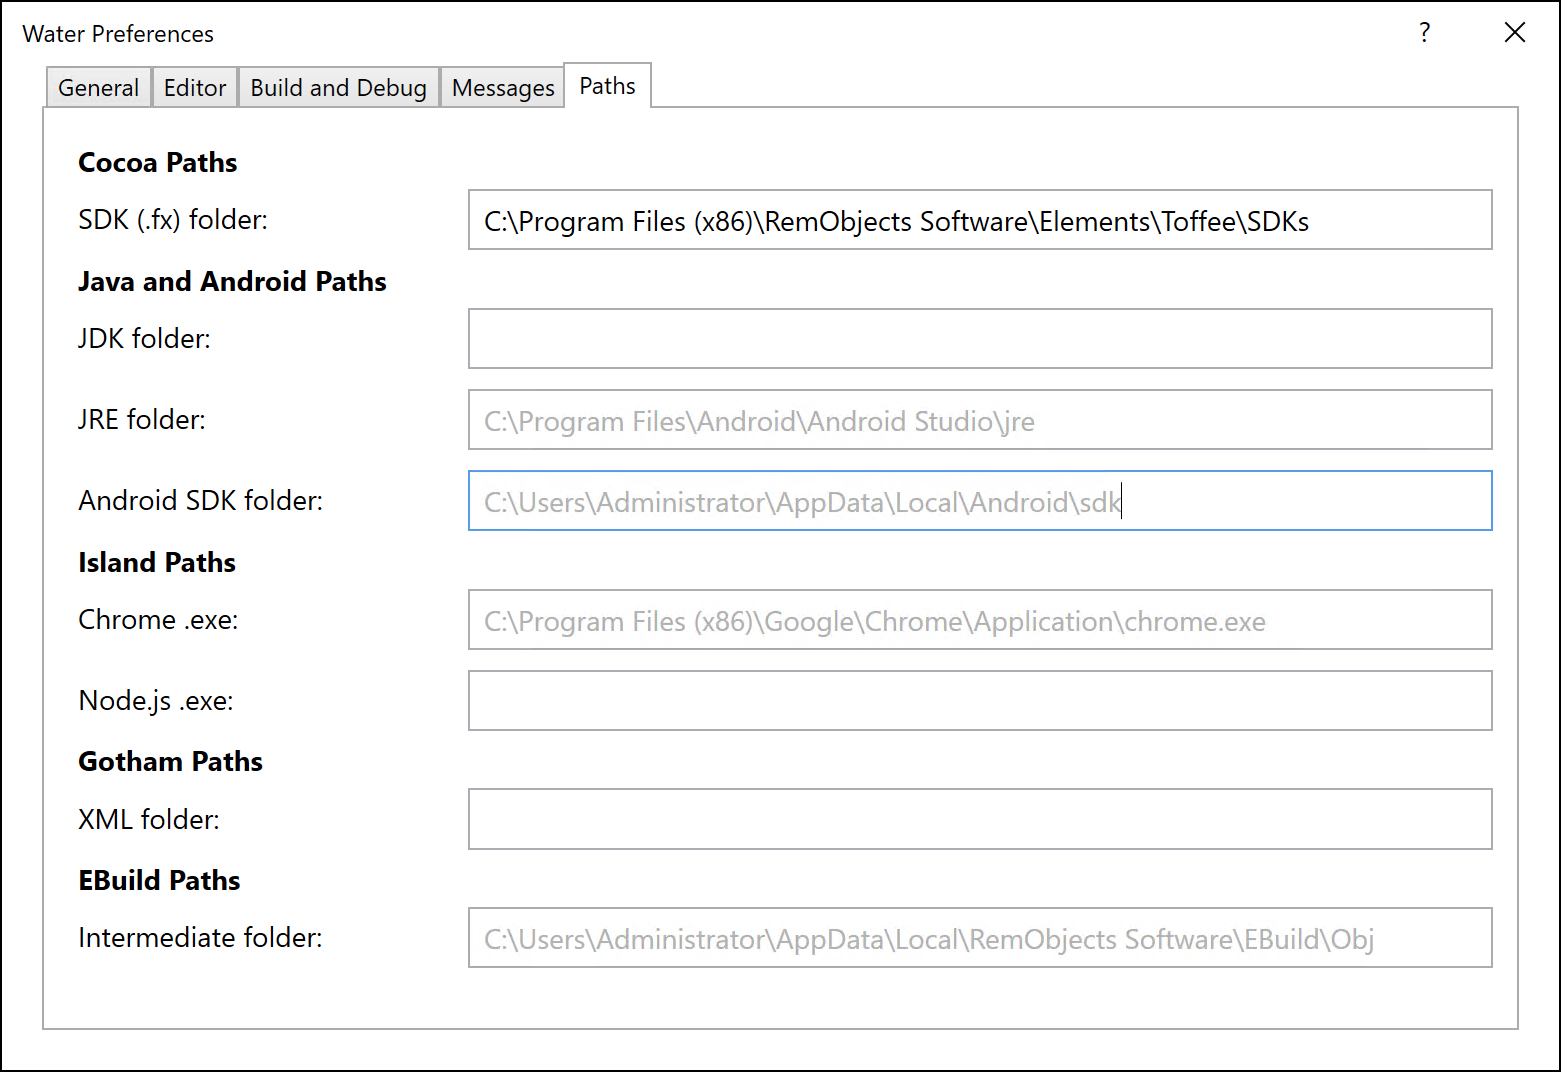
Make sure to specify the path to and including the sdk folder. This folder should contain, among others, the ./platforms and ./tools subfolders. The Preferences dialog will show a red "Invalid path" message if not all required items could be found in the location you specified.
You can obtain the latest download at the URL below:
Device-Specific Setup
Depending on the Android Devices you want to develop for, some device-specific parts of the Android SDK might need to be installed and configured, or Windows device drivers might be needed. Check out the page below for links to setup and development instructions for popular Android devices, or check your device vendor's support pages.
See Also
Chrome, Edge or Brave
A chromium-based browser such as newer versions of Microsoft Edge, Google Chrome or the open source Brave Browser is required to debug WebAssembly Web Modules.
Debugging has only been tested with Edge, Chrome and Brave, but it might also work with other other Chromium-based browsers.
By default, Water will automatically detect your copy of Edge, Chrome or Brave, if it was properly installed using the standard installer, and registered in the Registry. If necessary, you can manually specify a path to msedge.exe, Chrome.exe or brave.exe (or a different Chromium-based browser) in the "Paths" tab of the Preferences Window.
See Also
Node.js
A copy of the Node.js runtime is required to debug WebAssembly Node.js Modules.
By default, Water will automatically detect your copy of Node.js, if it is properly installed and registered in the Registry. If you have Node.js installed a different location, you can manually specify a path to the node.exe executable in the "Paths" tab of the Preferences Window.
See Also
Getting Set up on Linux
The Elements compiler can be used form the command line via the ebuild command, on Linux (just as on Mac and Windows). Please refer to the Installing the Command Line Compiler topic for details.
Prerequisites
Depending on what platforms you wish to develop for, the Elements compiler have a few prerequisites you may need to install in order to have all the tools you need to get started with the platform.
Setup for .NET, .NET Core and Mono Development
No special setup is required for .NET/Mono development, beyond the requirement for Mono, which is necessary to run the compiler, to begin with.
With the .NET Core SDK, version 2.0 or later, you can also build applications for .NET Core, the cross-platform open source next-generation version of .NET. We recommend using .NET Core 3.0 or later.
Setup for Cocoa Development
A Mac with Xcode is required to build Cocoa apps for Mac or iOS from Linux. We recommend using Xcode 10 or later. You will connect to the Mac via CrossBox over SSH.
Setup for Java and Android Development
You need to install the Java Development Kit (JDK) version 6 or later to develop Java apps.
To develop Android apps you will need to install both the JDK, and the Android SDK. (If you install Android Studio, no separate JDK od ADK install is required for Android development, as the Androids Studio installation provides both)
The JAVA_HOME environment variable needs to be set, for the compiler and tool chain to find your local copy of the JDK.
Setup for Island Development
No special setup is required for Island development, per se.
To debug Mac or Windows projects, you will need connect to a Windows PC, VM or server via CrossBox over SSH.
See Also
Xcode
The Elements compiler requires a Mac with the latest Xcode to be installed for Cocoa development.
Once Xcode is installed, and you have connected to your Mac, EBuild will handle the rest.
Working with Multiple Xcode Versions
If you have multiple versions of Xcode installed on your Mac and want Elements to use a specific version (of if the one version of Xcode you have installed is for some reason not detected by default), you can explicitly select a version of Xcode from the "Command Line Tools" dropdown in the Xcode Preferences window:
Alternatively, you can run
sudo xcode-select --switch /path/to/Xcode.app
in Terminal to switch the selected version of Xcode (where you'd replace /path/to/Xcode.app with the actual path to the version of Xcode you want to use).
You can also use
xcode-select --print-path
in Terminal to find out what version of Xcode is currently selected. CrossBox uses this command line internally, so you can be assured that whatever the output is, it is what CrossBox will see, as well.
SDK Versions
Please note that in order for things to work out of the box, the version of Xcode you install needs to contain SDK versions supported/known by Elements in form of a folder with .fx files.
In most cases, Elements and CrossBox will automatically determine the highest version of the SDK supported by both Elements and the version of Xcode you have installed.
Any version of Elements will come with pre-built .fx files for the latest SDKs that were released at the time that version of Elements shipped, as well as support for some older SDKs. Please refer to the .fx Files topic for more details.
Elements will automatically download newer (or older) SDK versions form our website as needed, on first build. You can also downlaod SDK support manually from elementscompiler.com/elements/sdks and, if needed, you can also manually import SDKs from an Xcode version; please refer to the Importing new SDKs topic for more details on this.
Mono
Elements requires Mono 3.10 or later to be installed, both ti run the compiler itself, and to build .NET/Mono applications.
.NET Core
Rhe Elements compiler requires the .NET Core SDK to be installed, if you want to build .NET Core projects. Once installed, make sure the DOTNET_ROOT environment variable is set as outlined in the installation instructions, and the compiler and tool chain will find your local copy of the .NET Core runtime, automatically.
You will want to pick the download from the "Build apps - SDK" column, as the "Runtime" download will enable you to run, but not build projects.
Unzip the archive to a folder of your choice and then set the DOTNET_ROOT environment variable to point to it, e.g.:
From Microsoft's instructions:
mkdir -p $HOME/dotnet && tar zxf dotnet-sdk-XXX-linux-x64.tar.gz -C $HOME/dotnet
export DOTNET_ROOT=$HOME/dotnet
export PATH=$PATH:$HOME/dotnet
The above commands will only make the .NET SDK commands available for the terminal session in which it was run.
You can edit your shell profile to permanently add the commands. There are a number of different shells available for Linux and each has a different profile. For example:
- Bash Shell:
~/.bash_profile, ~/.bashrc
- Korn Shell:
~/.kshrc or .profile
- Z Shell:
~/.zshrc or .zprofile
Edit the appropriate source file for you shell and add :$HOME/dotnet to the end of the existing PATH statement. If no PATH statement is included, add a new line with export PATH=$PATH:$HOME/dotnet.
Also add export DOTNET_ROOT=$HOME/dotnet to the end of the file.
JDK
The Elements compiler requires the Java SDK 6 or later to be installed if you want to build Java apps. Make sure the JAVA_HOME environment variable points to the root of your JSDK install
You can obtain the latest download at the URL below.
If you have a custom version of Java installed that Fire for some reason does not detect on its own, or if you want to override the JDK and JRE paths manually (and know what you are doing), you can manually change the paths in the Preferences dialog, overriding the default.
See Also
Android SDK
In addition to Installing the Java JDK, the Elements compiler also requires the Android SDK in order to build apps for the Android platform. Optionally, you might also want to install Android Studio for visually designing Android user interface files.
The simplest way to set up the prerequisites is to download "Android Studio for Linux", run it, and follow the "Setup Wizard" it will present to guide you through installing the Android SDK. After that, the Android SDK will be available in ~/Library/Android/sdk, where Fire will pick it up automatically.
Note that Android Studio has some weird requirements for how it detects the installed Java runtime. Please refer to this Stack Overflow Thread for details and a fix/workaround, if Android Studio does not detect Java on your system, even though you have it installed.
Installing Required SDK Packages
After the Android SDK is installed, you will want to launch the "SDK Manager" tool and install some additional packages. You can run the SDK Manager via the "Tools|Java|Launch Android SDK Manager" menu item in Fire.
You will want to select and install at least the following packages, if they are not already installed.
- Android SDK Tools
- Android SDK Platform-Tools
- Android SDK Build-Tools
- One (or more) Android Platforms (such as 5.0.1 / API 21 in the screenshot below).
Manually Downloading the SDK
If you don't want to use Android Studio, you can also download the Android SDK as a plain .zip that can be extracted to an arbitrary location. You will then need to manually specify the path to it in Fire's Preferences dialog:
Make sure to specify the path to and including the sdk folder. This folder should contain, among others, the ./platforms and ./tools subfolders. The Preferences dialog will show a red "Invalid path" message if not all required items could be found in the location you specified.
You can obtain the latest download at the URL below:
Device-Specific Setup
Depending on the Android Devices you want to develop for, some device-specific parts of the Android SDK might need to be installed or configured. Check out the page below for links to setup and development instructions for popular Android devices.
See Also
Visual Studio

Developers working on Windows can also use Elements within Microsoft's Visual Studio IDE.
Elements can integrate with Visual Studio 2017, 2019 and 2022 for Windows, Community, Professional and Higher. The Community Edition is a free download available from Microsoft at visualstudio.microsoft.com/downloads.
From inside the Visual Studio IDE, you can develop, deploy and debug on all the platforms supported by Elements. When targeting the Mac and iOS platforms, Elements inside Visual Studio will communicate with tools on the Mac, as necessary, using a small utility called
CrossBox.
In general, working with Elements inside Visual Studio behaves the same as working with Microsoft's languages and platforms. Please refer to Microsoft's documentation for Visual Studio.
There are a few additional topics for Elements-specific areas of Visual Studio:
You might also want to refer to these topics from other sections of the documentation:
Prerequisites / Getting Set Up
Depending on what platforms you wish to develop for, the Elements compiler and Visual Studio have a few prerequisites you may need to install in order to have all the tools you need to get started with the platform.
See Also
Templates
Elements provides a wide range of Templates in Visual Studio to help you get started with new Projects, or to add New Files to an existing project.
Templates are provided for all platforms and languages.
You can start a new Projects by choosing "File|NewProject..." (Ctrl+Shift+N) from the main menu. You can also choose to add a new project to an already open Solution via "File|Add|New project...".
You can add new Files to an open Project by right-clicking it in Solution Explorer and choosing "Add|New Item...".
See Also
Projects
The New Project dialog allows you to start a new Project to work in and write code. By default, creating a project will also create a new Solution, but you can also decide to add a new project to an existing, already open, solution, as well.
The New Project dialog can be invoked by choosing "File|New|Project..." (Ctrl+Shift+N) from the main menu, and it looks like this:
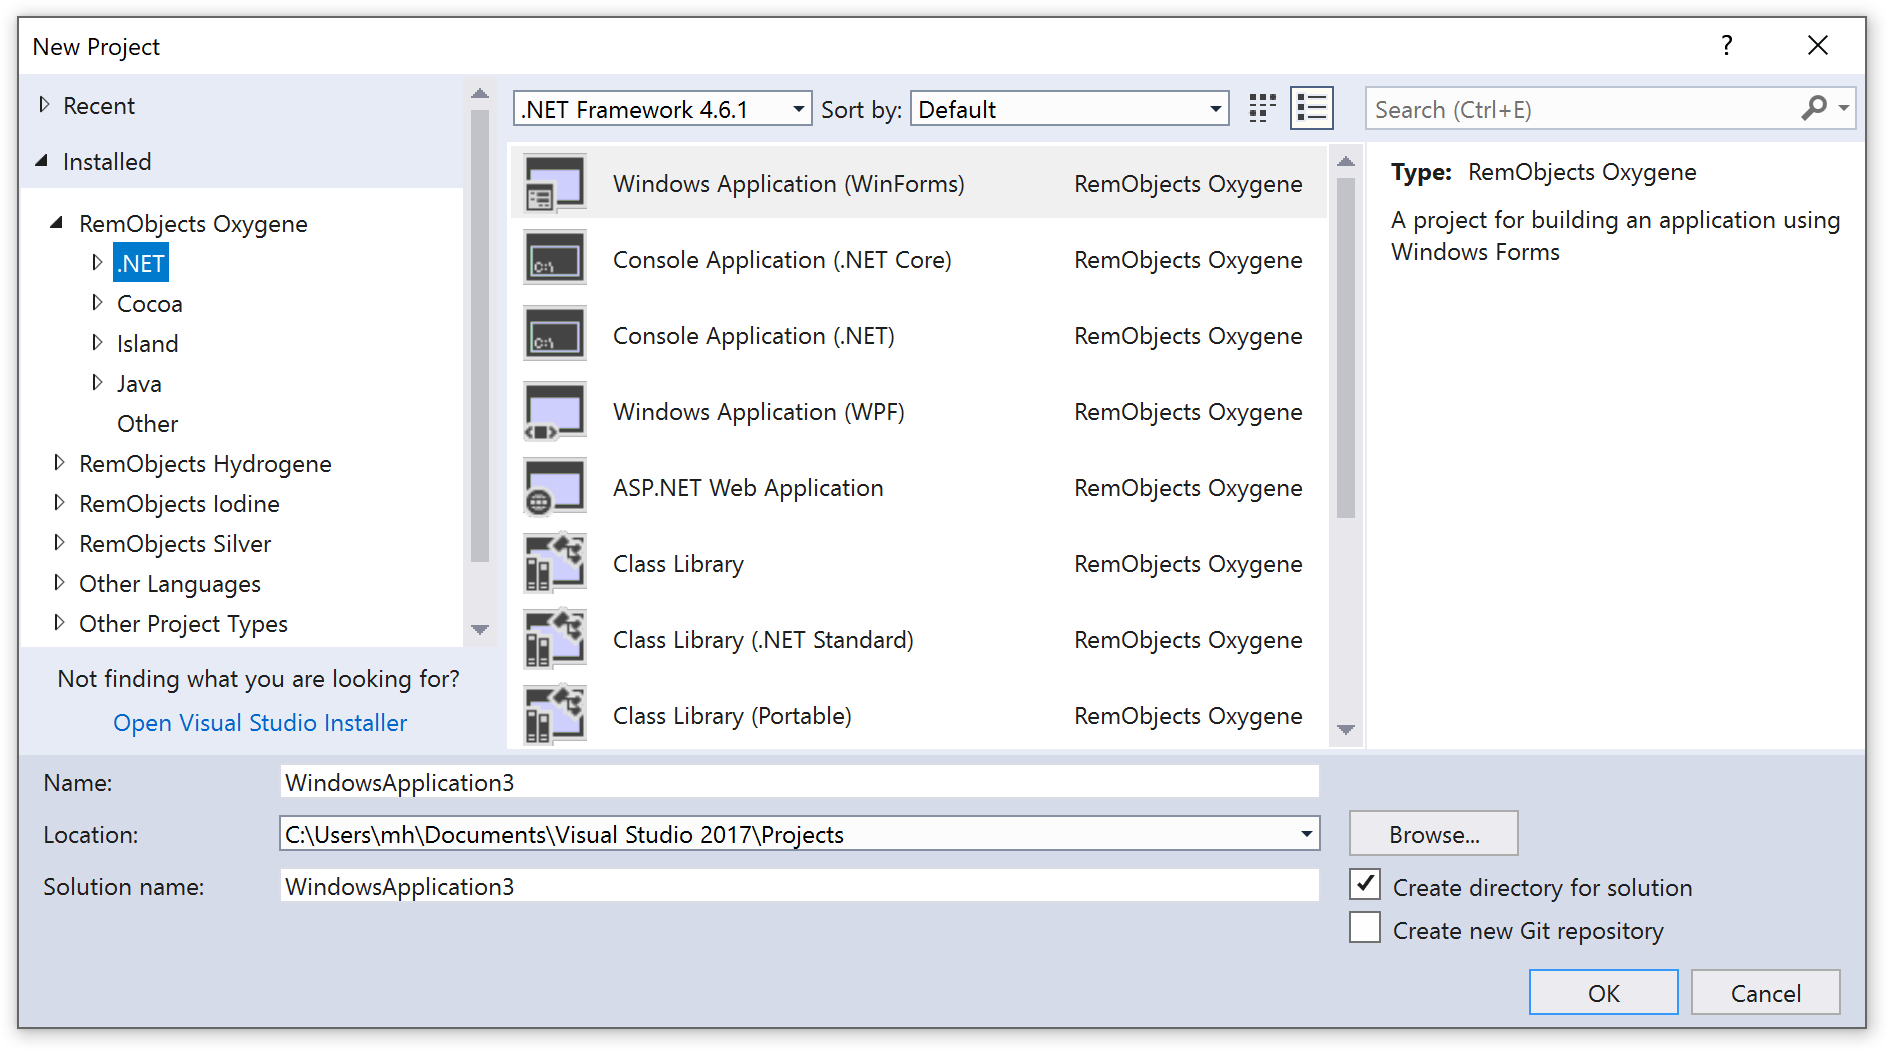
The dialog shows templates for all project types supported by Visual Studio, including Elements projects, as well as those provided by Visual Studio itself (such as Visual C#, Visual Basic or F#). To start a new Elements project, choose one of the six language names starting with "RemObjects" from the language dropdown:
In the next dropdown, you can pick your platform:
All of these platforms are of course supported for any of Elements languages.
Finally, you can select what kind of project you want to create. For most platforms, a wide range of different options will be provided, from a simple console/command line application, to sophisticated GUI applications.
Different templates will provide different sets of starting points to help you get started, but of course you are free to change and evolve the resulting code within the confines of the platform and sub-platform you choose. For example, you may start with a "TableView" app for iOS, but might later replace the provided table view with something else.
Name and Location
Finally, you can provide a name for your project, the location where you want to create it and – optionally; a different name for the Solution that will be created to contain it.
OK
Once you made your choices, press "Create". Visual Studio will create the project in the location you specified, and open it so that you can get coding!
See Also
Project Switcher
The Project Switcher is a small but nifty
enhancement to the code editor that makes it easier to work with files
that are shared between multiple projects within the same solution.
Different projects might have different Conditional Defines or References, or might even be targeting different Platforms, so when you are writing code, it is important that the source file is seen in the context of the right project, so that the editor can highlight and gray out the right sections of \$IF'ed code, and show the proper elements in Code Completion and other editor smarts.
Project Switcher helps with this in two ways:
Project Indicator
Project Switcher can show an indicator in the top right corner of the
editor, letting you know which project the current source file is in.
The project indicator shows you two pieces of information:
-
The name of the project the current file is in (RemObjects.Sugar.Cooper, in the example above).
-
The platform the project uses, using the background color (Blue is for .NET, Green for Cocoa and Yellow for Java. This also matches the color of the icons in your Solution).
Project Switcher
For files that actually are part of multiple open projects, there is
also a little disclosure triangle shown next to the name. Clicking that,
you will get a list of all the projects this file is part of. If you
select a different one, not only does the Project Switcher change its
display, but all conditional defines and other code editor smarts for
this file change to match the new project:
This allows you to seamlessly switch the "context" in which you are
working. You might write a few lines of code for the .NET version of
your project, then switch over, and write a few lines for the Java
version. But this is similarly useful if you have several projects for
the same platform that share source code.
Options
By default, the Project Switcher UI only shows for files shared between two or more projects or in a shared project, but if you like, you can also enable to show the Project Indicator (minus the switcher triangle) for any file in a
multi-project solution, or even when only a single project is open.
You can configure Project Switcher in the "Tools|Options" Dialog under "Text Editor|Oxygene|Miscellaneous":
Working with the Visual Designers
Elements does not reinvent the wheel for UI design, but instead embraces each platform's native UI toolsets and with that, each platform's native way to write and design UIs.
-
For Windows, there's WinForms, as well as the new XAML-based UI design paradigm used by WPF, WinRT, SIlverlight, Windows Phone and the Universal Application Platform (UAP).
-
For Cocoa, these are XIB and Storyboard files that can be edited in Xcode.
-
For Android, these are XML Layout Files that can be edited either as plain text XML, or using visual designers in Android Studio.
Visual Studio (as do Fire and Water) integrate directly with Xcode (on the Mac) and Android Studio (on Windows and Mac) to make it easy, convenient and, most of all, seamless to work with UI files in the platform's native designers alongside your Elements projects inside Visual Studio.
And of course Visual Studio already provides embedded designers for the Windows platform – WinForms, and XAML – and Elements integrates directly with these designers*.
Read more
Version Notes
- Integration with Android Studio for visual design of Android Layout files is new in Version 8.1.
Editing Cocoa UI Files in Xcode
Fire provides integration with Xcode, Apple's official IDE for Mac and iOS development that is also used by Objective-C developers and people using Apple's Swift language, to allow you to edit visual resource files for your Mac and iOS applications — from XIB and Storyboard files to Asset Catalogs and other platform-specific files, such as Core Data models.
This allows you take full advantage of Apple's visual designers for Mac and iOS.
With a Cocoa project open, simply right-click the project node or an .xib, .storyboard or .xcassets file in the Solution Explorer, and choose "Sync User Interface Files to Xcode":
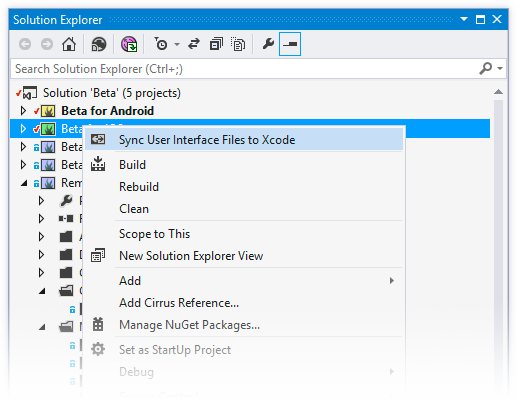
Behind the scenes, Elements will create a wrapper .xcodeproj project that references all the relevant files in the obj subfolder of your project. Assuming your project is located in a folder that is shared between your Mac and your Windows PC or VM running Visual Studio, you can open this project file in Xcode to work on the UI.
In Xcode, you will see all the relevant files and you can edit them with all the visual designers Xcode provides for XIBs, Storyboards and for Asset Catalogs. As you make changes and save them, they will automatically reflect back into your Elements project inside Visual Studio.
Connecting Code and UI
As part of the Xcode project, Elements also generates a small stub of Objective-C code that contains all the classes you marked with the [IBObject]/@IBObject attributes in your code, along with all their outlets and actions. This way, Xcode's visual designers know about your code, and you can connect user interface elements to your classes in the designer, as covered in the Working with XIBs and Storyboards topic.
If you update your code, you can simply invoke the "Sync User Interface Files to Xcode" menu command again, and what Xcode knows about your project gets updated. No need to close or restart Xcode. This way, you can keep Visual Studio and Xcode open in parallel, and switch back and forth between them as needed.
See Also
Editing Layouts in Android Studio
Elements in Visual Studio provides integration with Android Studio, Google's official IDE for Android development that is used by Java language developers, to allow you to edit XML Layout Files and other Android-specific XML resource files (such as AndroidManifest.xml or strings.xml).
This allows you take full advantage of Google's visual designers for Android.
With an Android project open, simply right-click the project node in the Solution Explorer and choose "Edit User Interface Files in Android Studio":
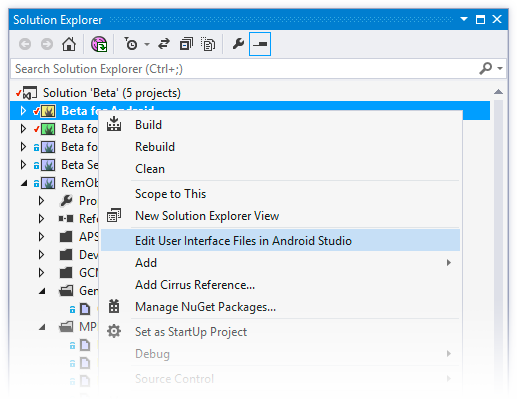
Behind the scenes, Elements will create a wrapper Android Studio project folder with the relevant files, and then launch the Android Studio application (provided it is installed).
In Android Studio, you will see all the projects's XML files and can edit them with all the tools Android Studio provides, including the visual designers. As you make changes and save them in Android Studio, they will automatically reflect back into your Elements project inside Visual Studio.
Connecting Code and UI
The way Android user interfaces work, the UI you design in Android Studio has no direct knowledge of the classes in your code. Instead, your code has a one-way connection to all the resources in your XML files via the static R Class, covered in more detail in the The R Class topic.
As you design your UI and add new controls or other resources, the R class will gain new properties that allow you to access these resources from your code.
See Also
Version Notes
- Integration with Android Studio for visual design of Android Layout files is new in Version 8.1.
Debugging
Just as in Fire and Water, Elements provides sophisticated sophisticated debugging support for all supported target platforms and all Elements languages in the Visual Studio IDE.
For developing .NET projects, Elements will use the built-in Managed debugger provided by Visual Studio; for all other Platforms, Elements integrates its own debug engines (the same used in Fire and Water) with the IDE.
Depending on the target platform, the debugged applications will run locally, on a remote computer (connected to via CrossBox over SSH), or a physical device connected locally (Android) or on a remote Mac (iOS Device or Apple TV).
Please refer to the Working w/ Devices topic for more details on what options are supported, and how to select the appropriate device.
Launching
After selecting the target machine or device, the remainder of the debugging process is the same, for all platforms. You have several options to launch or deploy your application, available via the "Project" menu and corresponding keyboard shortcuts
- "Start" – the default option, selecting this will build your application, deploy it (where necessary) to the target device, and then run it in the debugger. Most of the remainder of this topic will be focused on this option. (F5)
- "Start without Debugging" – selecting this will run your project, but without the debugger attached. You application will run as it would in production mode, without the overhead of the debugger, but also without its benefits. (Ctrl+F5)
There are three optional phases that might need to happen before debugging can start:
- Building (if your project has changed since it was last built)
- Uploading (when using a remote computer) and/or
- Deploying (when using a device).
The IDE is smart about not repeating these preparational phases unnecessarily, for example skipping a rebuild or re-deployment if your application code has not changed between runs.
The IDE also will smartly decide which projects to build as part of the run, avoiding to build projects (even if Enabled) that do not factor into the current project.
Debugging
Once a debug session is active and running, you can use the debugger to control it, including the standard debugging capabilities provided by the Visual Studio IDE.
Please refer to the Visual Studio debugger documentation provided b y Microsoft, for more details.
Note that different than Fire and Water, Console applications run from Visual Studio will not emit their output to a debug console in the IDE, but launch in a separate Command Prompt window, same as if they were double-clicked from File Explorer. This means that once the application terminates, the window will disappear.
You might want to add a call to readLn() at the end of your Entry Point to prevent the window from closing.
Further Topics
- Startup Arguments
- Environment Variables
See Also
and
Options Dialog
Getting Set Up
Elements integrates with Visual Studio 2017, Visual Studio 2019 and 2022, for the Community, Professional or higher editions (the Express editions do not allow integration, and are thus not supported). If Elements finds a suitable copy of Visual Studio, it will offer to integrate with it.
Visual Studio Community Editions are also available for free from Microsoft, here:
Prerequisites
Visual Studio and the Elements compiler require Windows 7 Service Pack 1 or later, and the .NET Framework 4.0 or later.
Depending on what platforms you wish to develop for, the Elements compiler has a few prerequisites you may need to install in order to have all the tools you need to get started with the platform.
Setup for .NET and Mono Development
No further prerequisites are required for .NET and Mono development. Elements automatically supports every version of .NET and .NET Core that is installed on your system, independent of which versions might be supported by Microsoft's languages in your version of Visual Studio.
Depending on your needs, you might want or need to install additional versions of the .NET Framework, .NET Core SDKs and/or the Windows SDK.
Setup for WinRT and Windows Phone Development
If you are using Visual Studio Community Edition or higher, you should be all set to develop for WinRT/Metro and Windows Phone out of the box.
Setup for Android Development
To develop Android apps you will need to install Android SDK, which comes included with Android Studio. (If you install Android Studio, no separate JDK or Android DK install is required for Android development, as the Androids Studio installation provides both)
Setup for Java Development
You need to install the Java Development Kit (JDK) version 6 or later to develop Java apps.
Setup for Cocoa Development
A Mac running the latest Xcode is required to build Cocoa apps for Mac or iOS in Visual Studio (you will work on Windows, but Elements will communicate with your Mac in the background).
Setup for Island Development
No additional dependencies are needed for developing Island projects for Windows from Visual Studio.
If you have a 64-bit version of Windows 10 Creators Update or later installed, you can also use the local Ubuntu sub-system ("Bash on Windows") to debug Linux applications, as well.
Otherwise, you will need a Linux server or VM with an open SSH connection in order to test and debug Linux applications from inside Visual Studio. See CrossBox for more details.
.NET Core
The Elements compiler requires the .NET Core SDK to be installed on your PC, if you want to build .NET Core projects. Once installed, Elements will detect it automatically.
You will want to pick the download from the "Build apps - SDK" column, as the "Runtime" download will enable you to run, but not build projects. We recommend using the "Installer" download and following its instructions.
.NET Framework (Classic)
Windows ships with a version of thew .NET runtime, and Visual Studio includes all the tools required to build projects for one or more version of the .NET Framework.
However, you might want to install specific versions of the .NET Framework in your applications, depending on your development target or the feature set you need. These can be downloaded from Microsoft as needed:
JDK
The Elements compiler requires the Java SDK 7 or later to be installed if you want to build Java apps.
After Java is installed, Elements should detect it automatically. If it does not, you can manually configure the JRE and JDK paths in the "Tools|Options" Dialog:
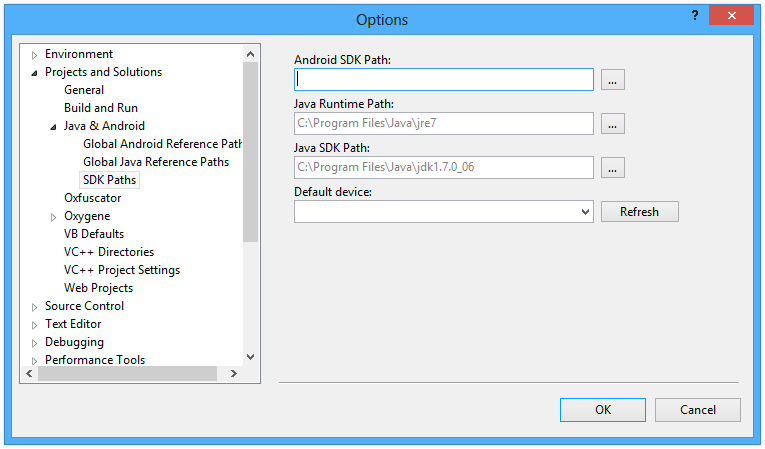
See Also
Android Studio
Elements requires the Android SDK in order to build apps for the Android platform. The best way to install this is to install Android Studio (which you can then also use for visually designing Android user interface files.
The simplest way to set up the prerequisites is to download "Android Studio for Windows", run it, and follow the "Setup Wizard" it will present to guide you through installing the Android SDK. After that, the Android SDK will be available in %APPDATA%/Android/SDK, where Water will pick it up automatically.
Installing Required SDK Packages
After the Android SDK is installed, you will want to launch the "SDK Manager" tool and install some additional packages. You can do this from the Android Studio Splash screen, via the Configure menu:
![]()
On the "SDKs Platforms", tab, make sure one or more SDK Versions are installed. In general;, you will want to build for the hightest available (non-Beta) SDK, even if you support older versions via a Deployment Target.
![]()
On the "SDK Tools", you will want to select and install at least the following packages, if they are not already installed:
- Android SDK Build-Tools
- Android SDK Command-line Tools
- Android SDK Platform Tools
Depending on your needs, yu might also want to install
- Android Emulator
- NDK (for Native NDK Extension development)
![]()
Manually Downloading the SDK
If you don't want to use Android Studio, you can also download the Android SDK as a plain .zip that can be extracted to an arbitrary location. You will then need to manually specify the path to it in Water's Preferences dialog:
![]()
Make sure to specify the path to and including the sdk folder. This folder should contain, among others, the ./platforms and ./tools subfolders. The Preferences dialog will show a red "Invalid path" message if not all required items could be found in the location you specified.
You can obtain the latest download at the URL below:
Device-Specific Setup
Depending on the Android Devices you want to develop for, some device-specific parts of the Android SDK might need to be installed and configured, or Windows device drivers might be needed. Check out the page below for links to setup and development instructions for popular Android devices, or check your device vendor's support pages.
See Also
Xcode
Elements compiler requires a Mac with the latest Xcode to be installed for Cocoa development.
Once Xcode is installed, and you have connected to your Mac, Elements will handle the rest.
Working with Multiple Xcode Versions
If you have multiple versions of Xcode installed on your Mac and want Elements to use a specific version (of if the one version of Xcode you have installed is for some reason not detected by default), you can explicitly select a version of Xcode from the "Command Line Tools" dropdown in the Xcode Preferences window:
Alternatively, you can run
sudo xcode-select --switch /path/to/Xcode.app
in Terminal to switch the selected version of Xcode (where you'd replace /path/to/Xcode.app with the actual path to the version of Xcode you want to use).
You can also use
xcode-select --print-path
in Terminal to find out what version of Xcode is currently selected. CrossBox uses this command line internally, so you can be assured that whatever the output is, it is what CrossBox will see, as well.
SDK Versions
Please note that in order for things to work out of the box, the version of Xcode you install needs to contain SDK versions supported/known by Elements in form of a folder with .fx files.
In most cases, Elements and CrossBox will automatically determine the highest version of the SDK supported by both Elements and the version of Xcode you have installed.
Any version of Elements will come with pre-built .fx files for the latest SDKs that were released at the time that version of Elements shipped, as well as support for some older SDKs. Please refer to the .fx Files topic for more details.
Elements will automatically download newer (or older) SDK versions form our website as needed, on first build. You can also downlaod SDK support manually from elementscompiler.com/elements/sdks and, if needed, you can also manually import SDKs from an Xcode version; please refer to the Importing new SDKs topic for more details on this.
Chrome, Edge or Brave
A chromium-based browser such as newer versions of Microsoft Edge, Google Chrome or the open source Brave Browser is required to debug WebAssembly Web Modules.
Debugging has only been tested with Edge, Chrome and Brave, but it might also work with other other Chromium-based browsers.
By default, Elements will automatically detect your copy of Edge, Chrome or Brave, if it was properly installed using the standard installer, and registered in the Registry. If necessary, you can manually specify a path to msedge.exe, Chrome.exe or brave.exe (or a different Chromium-based browser) in the "Paths" tab of the Preferences Window in Water.
See Also
Node.js
A copy of the Node.js runtime is required to debug WebAssembly Node.js Modules.
By default, Visual Studio will automatically detect your copy of Node.js, if it is properly installed and registered in the Registry.
See Also
Compiler
The Compiler is the core piece of the Elements tool chain, as it is the part that takes one or more source files (written in the Oxygene, C#, Swift, Java, Go or Mercury programming languages) and turns it into executable code for one of the supported Platforms.
The most common use case is to use the compiler embedded into a development environment or IDE, of which we provide two: our own Fire for developers on Mac and Water or Microsoft's Visual Studio for developers on Windows (all languages and all target platforms are supported from all three IDEs).
But you can also use the compiler from the Command Line and integrated with our EBuild build chains and command line tool, to use Elements without an IDE, for example for automated builds and continuous integration, or on Linux.
This section covers various topics about interacting with the compiler directly. For discussion about the different languages, please refer to the language sections instead.
See Also
- Languages: Oxygene, C#, Swift, Java, Go or Mercury
- Platforms: .NET, Cocoa, Android, Java, Windows, Linux, WebAssembly
- The Compiler in IDEs: Fire & Water, Visual Studio
Compiler Directives
Compiler Directives are annotations in code that are not part of the actual code flow, but influence the behavior of the compiler, for example to control options or perform Conditional Compilation.
In Oxygene, compiler directives are enclosed in curly braces (like comments) and start with a dollar symbol, for example "{$HIDE ...}". They can occur anywhere in code. In C# and Swift, directives start with the hash symbol (for example "#hide ...") and must be in a fresh line, preceded only by whitespace. Case sensitivity for directives follows that of the language (case sensitive for C# and Swift, not case sensitive – but uppercase by convention – for Oxygene).
Defines and Conditional Compilation
The following directives allow you to set, unset and check for Defines for the purpose of Conditional Compilation.
{$DEFINE x} – sets a Conditional Define{$UNDFINE x} or {$UNDEF x} – un-sets a Conditional Define{$IF expr} or {$IFDEF expr} – checks for a single define or a boolean expression combining multiple defines with AND, OR and NOT. See Conditional Compilation for details.{$IFNDEF x} – reverse of "{$IF ...}"{$IFOPT x} – provided for Delphi compatibility, always acts like an undefined "{$IF FALSE}"{$ENDIF} – closes off an "{$IF ...}" section{$ELSE} – closes off an "{$IF ...}" section and starts a new section that will compile only if the "{$IF ...}" section was false{$ELSEIF x} – combines "{$ELSE}" with a new "{$IF ...}" section
#define – sets a Conditional Define#undef – un-sets a Conditional Define#if or #ifdef – checks for a single define or a boolean expression combining multiple defines with &&, || and !. See Conditional Compilation for details.#endif – closes off an "#if ..." section#else – closes off an "#if ..." section and starts a new section that will compile only if the "#if ..." section was false#elif, #elseif or #elsif – combines "#else" with a new "#if ..." section
#define – sets a Conditional Define#undef – un-sets a Conditional Define#if or #ifdef – checks for a single define or a boolean expression combining multiple defines with &&, || and !. See Conditional Compilation for details. Also supports the special os() and arch() macro defines.#endif – closes off an "#if ..." section#else – closes off an "#if ..." section and starts a new section that will compile only if the "#if ..." section was * #elseif – combines "#else" with a new "#if ...}" section#elseif — combines "#else" with a new "#if ..." section
#define – sets a Conditional Define#undef – un-sets a Conditional Define#if or #ifdef – checks for a single define or a boolean expression combining multiple defines with &&, || and !. See Conditional Compilation for details.#endif – closes off an "#if ..." section#else – closes off an "#if ..." section and starts a new section that will compile only if the "#if ..." section was * #elseif – combines "#else" with a new "#if ...}" section#elseif — combines "#else" with a new "#if ..." section
Messages
The directives below allow you to control or emit custom error and warning messages:
{$HINT msg} – emits a custom hint message{$WARNING msg} – emits a custom warning message{$ERROR msg} – emits a custom error message and fails the build{$MESSAGE msg} – emits a custom message{$HIDE N123} – disables the given warning or hint message for subsequent code{$SHOW N123} – re-enables the given warning or hint message for subsequent code{$HIDEMESSAGE N123} – same as above{$SHOWMESSAGE N123} – same as above
#hint msg – emits a custom hint message#warning msg – emits a custom warning message#error msg – emits a custom error message and fails the build#message msg – emits a custom message#pragma disable N123 disables the given warning or hint message for subsequent code#pragma enable N123 re-enables the given warning or hint message for subsequent code
#hint msg – emits a custom hint message#warning msg – emits a custom warning message#error msg – emits a custom error message and fails the build#message msg – emits a custom message#pragma disable N123 disables the given warning or hint message for subsequent code#pragma enable N123 re-enables the given warning or hint message for subsequent code
#hint msg – emits a custom hint message#warning msg – emits a custom warning message#error msg – emits a custom error message and fails the build#message msg – emits a custom message#pragma disable N123 disables the given warning or hint message for subsequent code#pragma enable N123 re-enables the given warning or hint message for subsequent code
ASP.NET support
The "Line" directive can be used to influence the line number information the compiler emits for error and warning messages. You will generally not use this in your own code, but ASP.NET (and other code-generating frameworks) may use this to map errors originating from auto-generated code back to source files the developer is aware of.
{$LINE n} – all subsequent messages will be reported relative to the line number provided{$LINE HIDDEN} – all subsequent messages will be hidden{$LINE DEFAULT} – all subsequent messages will be reported with their actual location again
#line n – all subsequent messages will be reported relative to the line number provided#line hidden – all subsequent messages will be hidden#line default – all subsequent messages will be reported with their actual location again
#line n – all subsequent messages will be reported relative to the line number provided#line hidden – all subsequent messages will be hidden#line default – all subsequent messages will be reported with their actual location again
#line n – all subsequent messages will be reported relative to the line number provided#line hidden – all subsequent messages will be hidden#line default – all subsequent messages will be reported with their actual location again
Ignored Directives
The following directives are ignored by the compiler, either for compatibility reasons or (in case of the "Region" directives) because they are interpreted by the IDE only.
Ignored Directives (Oxygene Only)
{$R+/-} or {$RANGE ON/OFF/DEFAULt} – (controls range checking in Delphi){$REGION} and {$ENDREGION} – used by the IDE for code folding{$HPPEMIT}{$EXTERNALSYM}{$EXCESSPRECISION}{$WARN}{$RTTI}{$NODEFINE}{$OBJTYPENAME}{$M+}, {$M-}, {$H+}, {$H-}, {$I+}, {$I-}, {$W-}, {$W+}{$G+/-} or {$GLOBALS ON/OFF/DEFAULT} – turn on support for Globals (now always on){$CCOMPATIBILITY ON/OFF/DEFAULT} – unsupported and ignored
#region and #endregion – used by the IDE for code folding#hppemit#externalsym
#region and #endregion – used by the IDE for code folding#hppemit#externalsym
#region and #endregion – used by the IDE for code folding#hppemit#externalsym
Cross-Platform warnings, hints and compiler behavior can be toggled via the {$CROSSPLATFORM} (Oxygene) and #pragma crossplatform (C# and Swift) directive. C# and Swift will ignore any other/unknown #pragma directives.
{$CROSSPLATFORM ON} – turn on Cross-Platform Compatibility for subsequent code{$CROSSPLATFORM OFF} – turn off Cross-Platform Compatibility for subsequent code{$CROSSPLATFORM DEFAULT} – use the project default for Cross-Platform Compatibility for subsequent code
#pragma crossplatform on – turn on Cross-Platform Compatibility for subsequent code#pragma crossplatform off – turn off Cross-Platform Compatibility for subsequent code#pragma crossplatform default – use the project default for Cross-Platform Compatibility for subsequent code
#pragma crossplatform on – turn on Cross-Platform Compatibility for subsequent code#pragma crossplatform off – turn off Cross-Platform Compatibility for subsequent code#pragma crossplatform default – use the project default for Cross-Platform Compatibility for subsequent code
#pragma crossplatform on – turn on Cross-Platform Compatibility for subsequent code#pragma crossplatform off – turn off Cross-Platform Compatibility for subsequent code#pragma crossplatform default – use the project default for Cross-Platform Compatibility for subsequent code
#CrossPatform On – turn on Cross-Platform Compatibility for subsequent code#CrossPlatform Off – turn off Cross-Platform Compatibility for subsequent code#CrossPlatform Default – use the project default for Cross-Platform Compatibility for subsequent code
Additional Directives (Oxygene Only)
These directives are supported for Oxygene only:
{$Q+/-} or {$OVERFLOW ON/OFF/DEFAULT} – turn overflow checking on or off{$R+/-} or {$RANGE ON/OFF/DEFAULT} – turn range checking on or off{$TAILCALLS ON/OFF/DEFAULT} – enables or disables compiler optimizations for Tail Calls{$INCLUDE file.inc} or {$I file.inc} – includes code from the specified .inc file in the current location. Deprecated, provided for compatibility only.{$PARAMETER X} – allows parameters passed to the command line compiler to be used as a string literal. Deprecated.{$DELPHI ON/OFF/DEFAULT} – enables or disables Delphi Compatibility Mode{$DELPHICOMPATIBILITY ON/OFF/DEFAULT} – same as above
These directives also map to Compiler Options that can be set globally for the entire project, via the Project Settings.
Enhanced C-Language Compatibility
These directives for toggling Enhanced C-Language Compatibility are supported, for C# only:
#pragma ccompatibility on – turn on C-Language Compatibility for subsequent code#pragma ccompatibility off – turn off C-Language Compatibility for subsequent code#pragma ccompatibility default – use the project default for C-Language Compatibility for subsequent code
See Also
Compiler Options
A handful of Compiler Options are available to customize how the compiler works. Most of these options can be set either globally via Project Settings and locally for a file or a sub-section of a file using special Compiler Directives.
The available compiler options are covered in more details in the Build Settings section of the Project Settings Reference
See Also
Enhanced C-Language Compatibility
The Enhanced C-Language Compatibility option changes a few compiler behaviors of the C# language in order to more easily port C code. These mainly affect compatibility between integers, booleans and pointers. It is controlled via the #pragma ccompatibility on Compiler Directive.
This option is not intended for general use, but for specific sections of code ported from the C language. It's effects are:
- Integers, Pointers and and Floats become compatible with boolean, where
0 or null equals false. This e.g. allows pointers to be used as an if condition, as one would in classic C, C++ or Objective-C:
if (myObject) // runs only if myObject is not nil
{
}
-
Method pointers become assignment compatible with Blocks, if the target is a block type.
-
Otherwise incompatibility pointer become assignment compatible without type checks. For example an Integer* can be assigned to a Float*, or vie versa.
-
The value Literal 0 becomes assignment compatible with enums and unmanaged pointers (essentially, it is treated as equivalent to null/nil.
Conditional Defines
The Elements compiler provides the following defines that can be used with {$IF} (Oxygene) and #ifdef (C# and Swift) and related Compiler Directives to do conditional compilation based on compiler version or target platform. The defines listed here are provided intrinsically by the compiler, but they can be joined by further user defines set up in the Project Properties or defined in code via the {$DEFINE} (Oxygene) or #define (C# and Swift) Compiler Directive.
The ELEMENTS Define
The ELEMENTS define can and should be used to conditionally compile for Oxygene, RemObjects C# and Silver vs. other Pascal, C#, Swift or Java dialects:
ELEMENTS - Version 7.0 and up, recommendedOXYGENE - Version 3.0 and up, for all languages, despite the nameADRENOCHROME - Legacy, version 1.0 and upCHROME - Legacy, version 1.0 and up
Versions
The following defines are available to check for specific compiler versions. As a general rule of thumb, the defines ending with a version number are only defined for this version and will disappear for future major versions, while defines ending in UP will remain forever, and can be used to check for "version x and later".
ELEMENTSxxxx - Where xxxx is the current build number (.2601 and later)ELEMENTS100 - Version 10 onlyELEMENTS90 - Version 9.x onlyELEMENTS80 - Version 8.x onlyELEMENTS70 - Version 7.x onlyELEMENTS100UP - Version 10 and upELEMENTS90UP - Version 9.0 and upELEMENTS83UP - Version 8.3 and upELEMENTS80UP - Version 8.0 and upELEMENTS70UP - Version 7.0 and upOXYGENE100 - Version 10 onlyOXYGENE90 - Version 9.x onlyOXYGENE80 - Version 8.x onlyOXYGENE70 - Version 7.x onlyOXYGENE60 - Version 6.x onlyOXYGENE50 - Version 5.x onlyOXYGENE100UP - Version 10 and upOXYGENE90UP - Version 9.0 and upOXYGENE80UP - Version 8.0 and upOXYGENE70UP - Version 7.0 and upOXYGENE60UP - Version 6.0 and upOXYGENE50UP - Version 5.0 and upOXYGENE40UP - Version 4.0 and upOXYGENE30UP - Version 3.0 and upVER100 - Version 10 onlyVER90 - Version 9.x onlyVER80 - Version 8.x onlyVER70 - Version 7.x onlyVER60 - Version 6.x onlyVER50 - Version 5.x onlyVER100UP - Version 10 and upVER90UP - Version 9.0 and upVER80UP - Version 8.0 and upVER70UP - Version 7.0 and upVER60UP - Version 6.0 and upVER50UP - Version 5.0 and upVER40UP - Version 4.0 and upVER30UP - Version 3.0 and up
One of the following will be defined, depending on the target platform.
Also, defines based on the internal edition code names will be defined
as well:
One (or more) of the following will be defined, depending on the sub-platform of your target:
-
For .NET:
NET – for Classic (non-Core) .NETNETSTANDARD – for .NET StandardNETCOREAPP – for .NET Core
-
For Cocoa (Toffee and Island/Darwin)
MACOSIOSTVOSWATCHOSSIMULATOR – defined along with one of the above, when building for the iOS, tvOS or watchOS Simulator instead of for a physical device.MACCATALYST – defined along with IOS and MACOS, when building an iOS app for Mac Catalyst.DARWIN – for all Cocoa projectsTOFFEEV2 – in ToffeeV2 mode
-
For Java:
ANDROID – defined when building against the Android SDK (i.e. android.jar instead of the regular JDK).
-
For Island:
LINUX – for the Linux and Android sub-platformsWINDOWS – for the Windows sub-platformDARWIN – for the Apple sub-platforms (macOS, iOS, tvOS, watchOS)ANDROID – for the Android sub-platformWEBASSEMBLY – for the WebAssembly sub-platform
Note that ANDROID will be defined both in Java-based and NDK-based Android projects!
Features
GENERICS - Defined if Generics are supported, currently on .NET 2.0 and higher, Java, Island and as of Elements 7.1 also for Cocoa.GC - Defined if the platform uses Garbage Collection, i.e. on .NET and Java on Version 6 and up, as well as on Island.ARC - Defined if the platform uses Automated Reference Counting, i.e. on Cocoa.
On .NET projects only, the following two defines can be
used to distinguish whether the project is being compiled on the
Microsoft .NET platform (DOTNET) or on Mono (MONO). Note that
this define only indicates what platform the compiler is being run on,
since no distinction is made between .NET, Mono or other CLR
implementations for the target output.
-
DOTNET - On .NET only, if the compiler is
running on Windows on the Microsoft .NET runtime
-
MONO - On .NET only, if the compiler is running
on the Mono runtime
Framework-driven Defines
On Elements for Cocoa, the following defines are
passed to or defined by FXGen and will thus be available via the imported
SDK's rtl.fx reference. It is important to note
that none of the defines below (in contrast to COCOA and TOFFEE) are
defined by the compiler; in theory, a different
rtl.fx (such as a custom-import with FXGen) could
provide different defines.
__LITTLE_ENDIAN____APPLE____APPLE_CC____MACH____OBJC____OBJC2____TOFFEE__JSC_OBJC_API_ENABLED
Mac OS X (64-bit)
__X86_64__ – when building for Intel__ARM64__ – when building for Apple\ Silicon__SSE____SSE2____LP64__OSXMACOS
iOS (32-bit)
iOS (64-bit)
__ARM____ARM64____LP64__IOS
iOS Simulator (32-bit)
__I386____SSE____SSE2__IOSIOSSIMULATORSIMULATOR
iOS Simulator (64-bit)
__X86_64____SSE____SSE2____LP64__IOSIOSSIMULATORSIMULATOR
watchOS (32-bit)
watchOS Simulator (32-bit)
__I386____SSE____SSE2__WATCHOSWATCHOSSIMULATORSIMULATOR
tvOS (64-bit)
__ARM____ARM64____LP64__TVOS
tvOS Simulator (64-bit)
__X86_64____SSE____SSE2____LP64__TVOSTVOSSIMULATORSIMULATOR
Note that the above list might change or expand for future SDK versions or for different future platform combinations (such as they did for 64-bit iOS, and may for a future ARM-based Mac OS X).
In addition, any value-less #defines and any #defines with a value of "1" that are present in the Objective-C headers will also be defined if the respective namespaces are in use.
For example, TARGET_OS_IPHONE and TARGET_IPHONE_SIMULATOR are two handy defines to check for iOS (vs. macOS), and TARGET_OS_WATCH can be used to check for watchOS, just as TARGET_OS_TV can be used for tvOS. Caveat: TARGET_OS_MAC is also defined on iOS and watchOS, and TARGET_OS_IPHONE is also on watchOS and tvOS!
Architecture Based Defines
On the Cocoa and Island and platforms, defines are provided for the CPU architecture being built for
I386 – 32-bit Intel (Windows only)X86_64 – 64-bit Intel/AMD (Windows, Linux, macOS and Simulators)ARM64 – 64-bit ARM (macOS, Windows, Linux)
Back-Ends
-

Echoes – the Echoes back-end compiles projects for .NET platforms (including Mono, .NET Core, ASP.NET, WinRT and UWP). Code will compile to IL code, same as Microsoft's Visual C# or Visual Basic compilers, and your code will run everywhere there's a Common Language Runtime.
-

Island – the Island back-end supports building CPU-native projects for Window, Linux, Darwin (Apple macOS, iOS, tvOS and watchOS) and the native Android NDK, as well as WebAssembly projects that run in the browser.
-

Cooper – the Cooper back-end compiles projects for the Java Runtime, and related platforms, including Android. Your code will be compiled to Java byte code that can run in the JVM, and possibly post-processed from there for Android and other sub-platforms.
-

Toffee – the legacy Toffee back-end compiles for the Cocoa platform and the Objective-C runtime employed by Apple's operating systems. In time, it will be fully replaced by the Island/Darwin back-end.
-

Gotham – "Gotham" is the code name for a new target (meta-)platform for cross-platform library development that we are working on for the Elements compiler; it is currently in internal development and not quite ready for external testing, but it will be in alpha/beta in 2019/2020.
Echoes

The Echoes compiler back-end is used for projects that compile for the .NET Common Language Runtime (CLR). It emits Intermediate Language (CLR IL) byte code that is compatible with .NET, .NET Core Mono/Xamarin and other CLR implementations.
Island

The Island compiler back-end allows you to build low-level libraries and executables against the platform's native "C level" APIs. Island is an open platform that can and will be extended to many physical targets; currently it supports:
Island compiles to CPU-native code.
On most platforms, choosing Island as a target trades the rich frameworks provided by a more high-level runtime such as .NET or Java for the benefit of writing code that gets compiled directly against the native CPU (e.g. x64 or i386) and can directly access the lowest level of operating system or hardware APIs. On Darwin, inter-operability with Cocoa classes is provided.
Libraries
-
Island applications have full access to the platform's native low-level APIs. On Windows, that is the Win32 or Win64 C-style API, on Linux it is the standard UNIX/Posix C API. These APIs are provided in the rtl.fx reference and namespace, included by default, where applicable.
-
On Darwin, all Cocoa APIs and classes from the Apple's SDKs can be accessed as well.
-
In addition, Island comes with a very minimal core runtime, "Island RTL", that provides a basic class and type system. This includes the Object type, which is the ancestor of any classes you define yourself, as well as simple types such as String, DateTime, core collection classes, Exception handling (and the base Exception class) and more. Island RTL is open source and available on GitHub.
-
On WebAssembly, Island RTL includes strongly-typed access to the Browser and DOM JavaScript objects.
-
A version of the Swift Base Library is also provided, for supporting higher-level Swift functionality and types; as on the other platforms, SBL can be used from all languages, and is optional-but-referenced-by-default from Swift/Silver projects.
-
A version of the Mercury Base Library is also provided, for supporting higher-level Mercury functionality and standard-APIs; as on the other platforms, MBL can be used from all languages, and is optional-but-referenced-by-default from Mercury projects.
-
On Window,s Linux and Darwin, the full Go Base Library is also provided, from Go but also all other languages. GBL provides a rich set of useful APIs.
-
Also available is of course our cross-platform Elements RTL library, as well as the Delphi RTL compatibility library.
See Also
Object Models
By default, class and interface types on the Island platform are native Island types, adhering to Elements' own object model created specifically for Island. Class types will descend from System.Object or one of it's descendants, forming a single tree of classes.
On some Island sub-platforms, additional, platform-native object and/or interface models are supported. Classes or interfaces defined using these models adhere to a different object model, and live in their own class hierarchy, with classes typically descending from a root object class provided by the platform.
Right now, the following object models are supported:
- Island – native Island objects and interfaces; the default
- Cocoa – Objective-C objects (descending from
Foundation.NSObject) and protocols.
- Delphi – Delphi objects (descending from
Delphi.System.TObject) and protocols.
- COM – to work with COM interfaces
- Swift – native Swift objects and protocols.
Darwin
On the Darwin sub-platform for Cocoa, two additional object models are (or will be) supported, in addition to native Island classes. These models are available both for classes and interfaces
- Cocoa – Objective-C objects (descending from
Foundation.NSObject) and protocols.
- Swift – Native Swift objects (descending from
Swift.Object) and protocols.
The Darwin sub-platform provides full support for the Objective-C class model, as needed to interact with the core Cocoa APIs from Foundation over AppKit/UIKit to more specialized frameworks provided by Apple and third parties.
Note: The Swift object model is not to be confused with using the Swift language dialect provided by Silver. As with all OOP Elements languages, classes written in Silver can be native Island classes, Objective-C Runtime classes or, optionally, Swift Runtime classes.
Delphi
On selected platforms (currently desktop Windows, Linux and macOS, Elements is introducing support for working directly and natively with types and APIs from Delphi-built packages.
- Delphi – to work with Delphi-build packages, types and APIs.
Refer to the upcoming Delphi SDKs topic for more details.
Delphi support is limited to platforms and architectures your particular version of Delphi supports, and will for now not extend to mobile platforms.
Note: Delphi SDK support is still highly experimetal
COM
While mostly useful on the Windows platform, Interface types on any Island sub-platform can, optionally, be cdeclared as COM-compatible interfaces for interaction with other COM-compatible environments.
- COM for declaring and using COM-compatible interfaces based on
IUnknown.
Please refer to the COM topic for more details.
Mixing Object Models
Objects and interfaces from the different object models can freely interact with each other. Classes declared in one model may have fields, properties or method parameters of the other model, and the interaction will work seamlessly as one would expect.
The same interfaces can be implemented by classes of either model, allowing code to interact with the types without needing to be aware of the underlying class model – even though the classes themselves do no share a common ancestor. Similarly, Island-native generics can be used with classes or interfaces of either model, seamlessly and without runtime overhead (e.g. an Island-native List<T> may be instantiated to hold Cocoa objects, Island Objects or Swift objects).
Automatic wrapping and unwrapping will happen when assigning objects to a base Object/NSObject/TObject-type variable of a different object model, using wrapper classes provided by Island RTL, such as CocoaWrappedIslandObject et al, but this will rarely affect strongly typed user code.
Default Object Model
As indicated above, the default object model for classes and interfaces normally is the native Island object model, and classes and interfaces without ancestor will become part of this model.
A new "Default Object Model" Compiler Option is provided to change that. By setting this option to, e.g., "Cocoa", classes and interfaces declared without ancestor will become Objective-C types by default instead, making the compiler behave much like the classic Cocoa platform, where all classes were based on the Objective-C runtime.
This option is useful when writing code that is highly Cocoa-centric (such as macOS or iOS GUI apps), and best used with the New Cocoa Mode that provides additional compatibility with classic Cocoa projects.
Of course Cocoa classes in this mode can still freely interact with native Island types and Swift Runtime types, as described in the previous section.
The same goes for setting a default object model of "Delphi" or – later, when fully supported – "Swift".
Note that the default object model only applies to types declared without explicit ancestor. Classes that declare an ancestor will automatically be of the same object model as said ancestor, so for example inheriting a class from TObject (or any of its descendants, such as TForm) will automatically make it a "Delphi" object model class.
Instead of providing an ancestor, you call also specify a class's object mode by attaching its model as an Aspect.
Standard Types
Setting a default object model also brings the RemObjects.Elements.System.ObjectModel namespace into scope (where ObjectModel is the actual name, e.g. RemObjects.Elements.System.Island or RemObjects.Elements.System.Cocoa. This is how Common standard type names (mainly Object, String and Exception) get mapped to their appropriate model.
For setting the default to "Cocoa" brings RemObjects.Elements.System.Cocoa.String into scope, which aliases to NSString; setting it to "Delphi" brings in RemObjects.Elements.System.Delphi.String, which aliases to DelphiAnsiString or DelphiUnicodeString, depending on version, and RemObjects.Elements.System.Delphi.Object, which aliases to TObject.
In C#, the object and string keywords will map to whatever Object or String type is thus in scope.
Determining a Type's Model
The modelOf() system function accepts as its single parameter the name of a specific type know at compile time or a generic type parameter in scope, and returns a string value describing it's model, currently one of Island, Cocoa, Swift Delphi or COM.
See Also
Island
The "Island" object model is the default model for classes on all Island-backed platforms, and the only class model available across all sub-platforms and without external dependencies.
- Island – native Island objects and interfaces.
- Cocoa – Objective-C objects (descending from
Foundation.NSObject) and protocols.
- Delphi – Delphi objects (descending from
Delphi.System.TObject) and protocols.
- COM – to work with COM interfaces
- Swift – native Swift objects and protocols.
Island classes share a single hierarchy, rooted in RemObjects.Elements.System.Object.
Life-Cycle Management
"Island" object model classes partipate in Garbage Collection, and will automatically be freed when n o longer referenced.
Default Types
When set as Default Object Model (the default), the following three base types come into scope to be used for Objects,, Strings and Exceptions (and for the C# object and string keywords):
RemObjects.Elements.System.Island.Object = public IslandObject;
RemObjects.Elements.System.Island.String = public IslandString;
RemObjects.Elements.System.Island.Exception = public IslandException;
These again alias directly to the base types provided by Island RTL:
IslandObject = public System.Object;
IslandString = public System.String;
IslandException = public System.Exception;
See Also
Cocoa
On the Darwin sub-platform for Cocoa, two additional object models are (or will be) supported, in addition to native Island classes. These models are available both for classes and interfaces
- Island – native Island objects and interfaces.
- Cocoa – Objective-C objects (descending from
Foundation.NSObject) and protocols.
- Delphi – Delphi objects (descending from
Delphi.System.TObject) and protocols.
- COM – to work with COM interfaces
- Swift – native Swift objects and protocols.
In addition to the Objective-C class model used for most of the standard classic Cocoa APIS on Apple's platforms (AppKit, UIKit, and so on), Apple introduced a new object model alongside the Swift language, the "SWift ABI".
Swift APIs shipped by Apple are not compatible with the Cocoa/Objctive-C object model but use this new object model. We are in the process of implementing support for Swift ABI types (to be implemented, and to be consumed), but this is currently experimental and a work of progress – mostly due to lack of documentation from the side of Apple and/or the Swift compiler team.
Once Apple Swift reaches proper and documented ABI stability, the Darwin sub-platform might gain official support for consuming and extending classes implemented in Apple's Swift dialect, and directly participating in Apple Swift's object model (Swift ABI). Swift objects will form a third class hierarchy.
Cocoa classes share a single hierarchy, rooted in Foundation.NSObject.
Life-Cycle Management
"Cocoa" object model classes use Automatic Reference Counting to keep track of their life-cycle. They will in general be freed automatically when no longer needed, however, retain cycles are a concern, as with all ARC-based systems.
Default Types
When set as Default Object Model, the following three base types come into scope to be used for Objects,, Strings and Exceptions (and for the C# object and string keywords):
RemObjects.Elements.System.Cocoa.Object = public CocoaObject;
RemObjects.Elements.System.Cocoa.String = public CocoaString;
RemObjects.Elements.System.Cocoa.Exception = public CocoaException;
These again alias directly to the base types provided by the Cocoa Foundation framework:
CocoaObject = public Foundation.NSObject;
CocoaString = public Foundation.NSString;
CocoaException = public Foundation.NSException;
See Also
Delphi
Island/Delphi mode in Elements (currently experimental) allows the use of Delphi-built types and APIs, compiled into one or more Delphi packages, from your Island projects on desktop Windows, Linux and macOS. The "Delphi" object model is provided to enable using and implementing classes based on Delphi's TObject class hierarchy.
- Island – native Island objects and interfaces.
- Cocoa –Objective-C objects (descending from
Foundation.NSObject) and protocols.
- Delphi – Delphi objects (descending from
Delphi.System.TObject) and protocols.
- COM – to work with COM interfaces
- Swift – native Swift objects and protocols.
Delphi support is limited to platforms and architectures your particular version of Delphi supports, and will for now not extend to mobile platforms. Please refer to the Delphi Platform topic for more details.
Several prerequisites, described under the link above, are required to use the "Delphi" object model, most importantly a reference to an imported Delphi SDK.
Delphi classes share a single hierarchy, rooted in Delphi.System.TObject.
Life-Cycle Management
Just like in Delphi itself, "Delphi" object model classes do not receive any automatic life cycle management – meaning user code must manually track their use and release them when needed by calling Free, FreeAndNil, the Destroy destructor, or other appropriate APIs.
Please refer to the Delphi documentation for more details on life-cycle managemernt of Delphi objects.
Default Types
When set as Default Object Model, the following three base types come into scope to be used for Objects,, Strings and Exceptions (and for the C# object and string keywords):
RemObjects.Elements.System.Delphi.Object = public DelphiObject;
RemObjects.Elements.System.Delphi.String = public DelphiString;
RemObjects.Elements.System.Delphi.Exception = public DelphiException;
These again alias directly to the base types provided by Delphi:
DelphiObject = public Delphi.System.TObject;
DelphiChar = public {$IF ANSI_STRING}Delphi.System.AnsiChar{$ELSE}Delphi.System.WideChar{$ENDIF};
DelphiString = public {$IF ANSI_STRING}Delphi.System.AnsiString{$ELSE}Delphi.System.UnicodeString{$ENDIF};
DelphiException = public Delphi.System.SysUtils.Exception;
Note that depending on the Delphi version used, DelphiString will be 8-bit Ansi or 16-bit Unicode. In both cases it will be a reference-counted string with internal copy-on-write semantics, and of course compatible with all Delphi String APIs.
DelphiString will seamlessly cast from and to Island's native string type and (on the macOS platform) to NSString and Swift.String.
Like in Delphi, DelphiStrings are a non-class data structure, and not part of the TObject class hierarchy, but they will be assignable to Island-model Objects (and seamlessly cast to a native Island String, for that purpose).
Read more about Delphi String Support.
Wrapping
Note that Delphi types will get wrapped when assigned to an (Island-model) Object variable or parameter, just as native Island types will get wrapped when passed to a TObject type variable or parameter. This is necessary because the two hierarchies do not share a common ancestor.
Basic operations such as checking for equality or a type's hash will work for two wrapped instances, and of corse wrapped objects can be cast back to a concrete type.
See Also
While mostly useful on the Windows sub-platform, Interface types on any Island sub-platform, optionally, be declared as COM-compatible interfaces for interaction with other COM-compatible environments.
- Island – native Island objects and interfaces.
- Cocoa – Objective-C objects (descending from
Foundation.NSObject) and protocols.
- Delphi – Delphi objects (descending from
Delphi.System.TObject) and protocols.
- COM – to work with COM interfaces
- Swift – native Swift objects and protocols.
Most interfaces are native Island (or Cocoa or Swift) interfaces, and not compatible with COM, by default. If an interface is declared to descend (directly or indirectly) from IUnknown, it automatically becomes a COM-compatible interface. Alternatively, it can also be marked with the [COM]/@COM Aspect (and will then automatically descend from IUnknown).
COM interface must specify a unique GUID, using the Guid Aspect.
type
[COM, Guid('4daa7c37-aa4d-4c39-9c49-7a97cc0129f1')]
IMyInterface = public interface
method DoSomething(i: Integer);
end;
[COM, Guid("4daa7c37-aa4d-4c39-9c49-7a97cc0129f1")]
public interface IMyInterface
{
void DoSomething(int i);
}
@COM, @Guid("4daa7c37-aa4d-4c39-9c49-7a97cc0129f1")]
public interface IMyInterface {
func DoSomething(i: Int);
}
@COM, @Guid("4daa7c37-aa4d-4c39-9c49-7a97cc0129f1")]
public interface IMyInterface
{
void DoSomething(int i);
}
On Windows, pre-defined COM interfaces declared by the Windows SDK are automatically imported as COM interfaces and available for use; this includes IUnknown, IDispatch and other well-known APIs. On other platforms, IUnknown is declared in Island RTL.
When implementing a COM interface on a class, the compiler will automatically emit the necessary infrastructure to let the class be used in a COM-compatible manner. This includes adding (hidden) implementations for the three IUnknown members.
MyClass = public class(IMyInterface)
public
method DoSomething(i: Integer);
end;
public class MyClass : IMyInterface
{
public void DoSomething(int i) {}
}
public class MyClass : IMyInterface {
public func DoSomething(i: Int) {}
}
public class MyClass : IMyInterface
{
public void DoSomething(int i) {}
}
Instances of the object can then freely be cast to COM-compatible interfaces, and assigned to fields/variables or passed to API parameters of those types, including external Windows APIs or APIs created in other programming languages such as C, C++ or Delphi.
COM Interfaces can only be implemented by native Island classes, not by classes other Object Models such as Cocoa or Swift, nor on records.
A COM Interface reference can be obtained mainly in two ways:
- by casting an Island object to a COM interface and/or assigning it to a variable/field of a COM Interface type
- by calling an external API that creates or returns COM interfaces
In the second case, it will be likely that the obtained interface is not implemented by an Island class, but via some other development too chain, such as C, C++ or Delphi. But this does not matter, as COM is specifically designed as a tool-independent binary standard.
When working with a COM Interface referendes, the compiler automatically activates the COMRC Life-Time Strategy, which will use calls to the AddRef/Release methods of IUnknown to manage the lifecycle of the object.
The comiler will also use QueryInterface, when casting to from one COM interface to another.
Casting Back to Island Objects
For COM Objects implemented as native Island Objects, it is possible to cast back from a COM Interface to the underlying object (be it to Object, or a more concrete type). Of course, this cast will fail of the object in question is not an Island object (but was implemented in a different development tool).
var x: IUnknown := ...;;
var y: Object := x as Object;
IUnknown x = ...;
object y = (Object)x;
let x: IUnknown = ...
var y: Object = x as Object
IUnknown x = ...;
object y = (Object)x;
Under the hood, this implemented using a special Guid ({5b9e00e5-c1da-4f0d-8d92e06842bd5df5}) being passed to QueryInterface, that will be handled only by Island objects. But that is an implementation detail that should not affect the developer.
Note that casting back to from COM Interfaces to native Island Objects should be done sparingly, and only when you can be sure the original object was instantiated within your code base.
Objects obtained from external sources (such as a COM Object instantiated via a CLSID stored in the registry) might be implemented using Island, but may have been created using a different/binary-incompatible version of Elements, or linked against a different version of core libraries such as Island RTL.
Implementation Details
The infrastructure for COM support is shared between special logic handled by the compiler and helper types and APIs in Island RTL.
ElementsCOMInterface is the record used at runtime for COM Interfaces; it contains a reference count, the VMT and the original Island Object reference.COMHelpers contains functions to convert COM to Island and back__elements_Default_AddRef, __elements_Default_Release and IUnknown_VMTImpl_QueryInterface are the default implementations for the three IUnknown members.COMRC is the compilers Life-Time Strategy for COM support.
Since COM uses reference counting, the ElementsCOMInterface has it's own reference count for that instance, independent of Garbage Collection. Additionally, the class itself has global reference count to make sure the object does not get garbage collected until all COM references are released. This works by creating a GC handle for the object when reference count becomes larger then zero, and releasing it when it goes down to zero again.
Note: The new COM support described here supersedes the old ComInterface and ComClass aspects, as they conflict with the new model.
See Also
- COM Aspect
guidOf() System FunctionIUnknownCOMRC Life-Time Strategy
Swift
On the Darwin sub-platform for Cocoa, two additional object models are (or will be) supported, in addition to native Island classes. These models are available both for classes and interfaces
- Island – native Island objects and interfaces.
- Cocoa – Objective-C objects (descending from
Foundation.NSObject) and protocols.
- Delphi – Delphi objects (descending from
Delphi.System.TObject) and protocols.
- COM – to work with COM interfaces
- Swift – native Swift objects and protocols.
The Darwin sub-platform provides full support for the Objective-C class model, as needed to interact with the core Cocoa APIs from Foundation over AppKit/UIKit to more specialized frameworks provided by Apple and third parties.
All Cocoa classes descend (directly or indirectly) from Foundartion.NSObject. Classes declared in code will automatically become Cocoa classes, if they descend from a Cocoa class. For classes without an explicit ancestor, the [Cocoa] Aspect](/API/Aspects/ObjectModels) can be applied to mark a class as belonging in the Cocoa hierarchy (it will then descend from Foundation.NSObject instead of System.Object.
Once Apple Swift reaches proper and documented ABI stability, the Darwin sub-platform might also gain support for consuming and extending classes implemented in Apple's Swift dialect, and directly participating in Apple Swift's object model (Swift ABI). Swift objects will form a third class hierarchy.
Note: this is not to be confused with using the Swift language dialect provided by Silver. As with all OOP Elements languages, classes written in Silver can be native Island classes, Objective-C Runtime classes or, optionally, Swift Runtime classes.
Swift classes share no a single class hierarchy and must not all have a common ancestor. However, the Any and AnyObject umbrella types can be used to hold any Swift object model instance, regardless of ancestry.
See Also
Life-Time Strategies
Life-Time Strategies are a way to control how the life-time of objects is managed, i.e. to determine how an object gets generated and released.
By default, each Island sub-platform and/or Object Model defines a default life-time strategy to be used, and it is very rare that developers would everneed to override that in normal application code.
To explicitly specify a life-time strategy for an individual field or variable, the Oxygene lifetimestrategy keyword can be used as a type modifier, similar to how Storage Modifiers are used in the Cocoa platform. The keyword takes the name of a life-time strategy as parameter in parentheses.
var x: lifetimestrategy(Manual) String;
Since this is longwinded to type, and only available in the Oxygene language, Island RTL provides a generic alias for each life-time strategy, that can be used to wrap an object, instead:
var x: Manual<String> := ...;
let x: Manual<String> = ...
Dim x As Manual(Of String) = ...
For the example above, the Manual<T> alias is defined in Island RTL like this:
type
Manual<T> = public lifetimestrategy(Manual) T;
Available Life-Time Strategies
Island RTL predefines these strategies:
Manual: When used, allocates the object on the heap without any life-time management. Objects need to be explicitly freed by calling Manual.FreeObject(), like they would be in more classic development environments such as C or Delphi.RC: Uses reference counting for the object and frees it automatically when the last reference to the object goes to nil/null.BoehmGC: Uses the Boehm Garbage Collector to allocate and cleanup the objects. This is the default for native Island objects, on all platforms other than WebAssembly.ForeignBoehmGC: Same as BoehmGC but used when a Garbage-Collected reference is stored in a non-garbage-collected object, like for example a Cocoa class. This ensures it's properly taken in account in both GC and the Referende Counting life-cycle of the containing object.SimpleGC: A simple single-threaded garbage collector implementation for WebAssembly, used as the default on that sub-platform.ObjcStrong and ObjcWeak: Automatically used for the Cocoa class model when using strong and weak references in cocoa using the respective Storage ModifiersCOM: Used for COM Interface support, to manage life-time via calls to AddRef/Release calls to the IUnknown interface.
Lifetime strategies are not compatible with each other without an explicit conversion operator defined on the strategies themselves. Right now, only the ObjcStrong/ObjcWeak strategies support this.
Aspects
Three special Aspects are provided to work with life-time strategies:
DefaultObjectLifetimeStrategy: defines the default lifetime strategy for a project. Only 1 of these can be applied, and the Island RTL binary does ths for you.GCSkipIfOnStack: skip this lifetime strategy's management if the target can be proven to remain on the stack. Useful for scanning garbage collectors.LifetimeStrategyOverride: Globally override the lifetime of a pointer type to use another strategy. This can be used, for example, to turn an opaque Win32 pointer type such as HString into a native island type managed by the specified lifetime strategy.
Implementing Life-Time Strategies
Generally, developers will not have to implement a strategy themselves, but Elements does provide the provision to do so, if needed.
Life-Time Strategies are Records/Structs that implement the ILifetimeStrategy<T> and a Finalizer and Constructors, if needed. They should have a single field of type IntPtr, that can hold the pointer for the maintained object. The compiler will do the work of casting this to the real type.
For example, the RC Reference-Counting Life-Time Strategy is defined like such:
type
RC<T> = public lifetimestrategy (RC) T; // Alias
RC = public record(ILifetimeStrategy<RC>)
private
fValue: IntPtr;
public
class method &New(aTTY: ^Void; aSize: IntPtr): ^Void;
begin
result := ^Void(malloc(aSize + sizeOf(^Void)));
^UIntPtr(result)^ := 1;
result := result + sizeOf(^Void);
^^Void(result)^ := aTTY;
memset(^Byte(result) + sizeOf(^Void), 0, aSize - sizeOf(^Void));
end;
class method &Copy(var aDest, aSource: RC);
begin
var lSrc := aSource.fValue;
if lSrc = 0 then exit;
InternalCalls.Increment(var ^IntPtr(lSrc)[-1]);
aDest.fValue := lSrc;
end;
constructor &Copy(var aSource: RC);
begin
var lSrc := aSource.fValue;
if lSrc = 0 then exit;
InternalCalls.Increment(var ^IntPtr(lSrc)[-1]);
fValue := lSrc;
end;
class operator Assign(var aDest: RC; var aSource: RC);
begin
Assign(var aDest, var aSource);
end;
class method Assign(var aDest, aSource: RC);
begin
if (@aDest) = (@aSource) then exit;
var lInst := aSource.fValue;
var lOld := InternalCalls.Exchange(var aDest.fValue, lInst);
if lOld = lInst then exit;
if lInst <> 0 then begin
InternalCalls.Increment(var ^IntPtr(lInst)[-1]);
end;
if lOld <> 0 then begin
if InternalCalls.Decrement(var ^IntPtr(lOld)[-1]) = 0 then
FreeObject(lOld);
end;
end;
finalizer;
begin
var lValue := InternalCalls.Exchange(var fValue, 0);
if lValue = 0 then exit;
var p := InternalCalls.Decrement(var ^IntPtr(lValue)[-1]);
if p = 0 then
FreeObject(p);
end;
class method Init(var Dest: RC); empty;
class method Release(var Dest: RC);
begin
var lValue := InternalCalls.Exchange(var Dest.fValue, 0);
if lValue = 0 then exit;
var p := InternalCalls.Decrement(var ^IntPtr(lValue)[-1]);
if p = 0 then
FreeObject(p);
end;
class method FreeObject(aObj: IntPtr); private;
begin
if aObj = 0 then exit;
try {$HIDE W58}
InternalCalls.Cast<Object>(^Void(aObj)).Finalize;
{$SHOW W58}
free(^Void(aObj - sizeOf(IntPtr)));
except
end;
end;
end;
New gets called when creating a new object instanceInit gets called when a variable or field is set to the default 'not assigned' value- The
Copy constructor and method both perform the same, but the constructor is required when using ComGC directly. This is called when creating a new instance based on another, and it ignores the value in the destination and overwrites it without any action to release it.
- The
Assign operator and method work the same as Copy, except they releases the old value of the object before assigning.
Release and/or the Finalizer are called when releasing the object.
Island & Cocoa
Right now, the Elements compiler provides two different modes that target the Apple platform, the new Island/Darwin back-end and the more currently default Toffee back-end.
The long term goal is to merge these two modes, and have the Island/Darwin platform mode be able to completely take over support for Cocoa, deprecating the separate "Toffee" toolchain.
Differences between Island/Darwin and Toffee
Both platforms compile CPU-native code for Apple's platforms, including macOS, iOS, tvOS and watchOS, using the LLVM compiler back-end, and tools from Apple's tool chain for secondary build tasks (such as processing storyboards).
Both platforms allow you to create any kind of project, from a simple class library to a full-fledged .app bundle for Mac or iOD devices.
The main difference is the core object model. The traditional "Toffee" tool chain for Cocoa is built completely on top of the Objective-C runtime, with its benefits and limitations. All classes defined in a Toffee project are, essentially, native Objective-C Runtime classes, and all external class-based APIs that apps interact (such as Foundation, AppKit or UIKit) with are Objective-C classes.
By contrast, the "Island" platform provides its own object model defined by Elements itself, and feature-compatible between all the Island sub-platforms. It is independent of the Objective-C runtime, and uses Island RTL and optionally Elements RTL as class library.
Object Models
On the Darwin sub-platform, the Elements compiler now provides support for separate class hierarchies, or Object Models, allowing access to both the Island-native classes and Cocoa APIs.
The two form two entirely separate class and type hierarchies, based on Foundation.NSObject and System.Object respectively. But the two class hierarchies can interact seamlessly, and objects from one hierarchy can be bridged to or wrapper up for use with the other. For example, you can store Island objects is a Cocoa NSArray class, or pass a Cocoa NSString to an Island API that expects a native String.
This is handled automatically by the compiler. Where compatible classes exist, they can be bridged or seamlessly cast between their corresponding types (in some cases toll-free). And classes specific to one object model can be automatically wrapped and unwrapped when passed to more generic APIs of the other model.
Interfaces can be declared, implemented on classes of both types, and be used to seamlessly work with objects regardless of which class hierarchy they live in.
By default, as on all Island platforms, when a new class type is declared without an ancestor it will become part of the Island-native class library, and descend directly from System.Object.
When an ancestor class type is provided as part of a class declaration, it will determine what class hierarchy the type will live in. Classes descendent from System.Object will be Island classes, and classes descendant from NSObject (or any of its sub-classes) will become part of the Objective-C (Cocoa) class hierarchy.
The [Island] or [Cocoa] aspects can also be used to explicitly mark a class as being part of the respective class hierarchy, when not providing an ancestor.
Default Object Model
For easy compatibility with the legacy Toffee platform, a new "Default Object Model" project setting is provided, and defaults to "Island". When set to "Cocoa" instead, classes will become part of the Cocoa class hierarchy by default.
In "Cocoa" mode, projects should behave pretty much 100% compatible with the legacy "Toffee" platform.
Cooper

The Cooper compiler back-end is used for projects that compile for the Java Runtime (JVM). It emits Java byte code that is compatible with the JVM, but also derrivative Java platforms, most notably including the Android SDK.
Toffee

The Toffee compiler back-end is used for projects that compile against the Objective-C runtime and Cocoa frameworks for use on Apple's macOS, iOS, iPadOS, tvOS and watchOS.
At the time of writing, it is the default back-end used for Cocoa projects, but we are in the process of building the Island/Darwin sub-platform back-end to fully and seamlessly replace the Toffee back-end.
- Cocoa — macOS, iOS, iPadOS, tvOS, watchOS
Gotham

"Gotham" is the code name for a new target (meta-)platform for cross-platform library development that we are working on for the Elements compiler; it is currently in internal development and not quite ready for external testing.
Stay tuned for more details.
Installing the Command Line Compiler
You can use the Elements Command Line Compiler, via EBuild.exe, if you do not want to build your projects from inside the IDE, or to use it from automated build scripts or on your CI servers.
On Windows, the command line compiler is installed and made available automatically as part of the regular setup. To just install the command line compiler, you can simply disable the "Water" and "Visual Studio" option when running setup.
On Mac and Linux, the command line compiler can be installed manually. This is necessary to use the compiler form Terminal even if you already have Fire, because Fire comes with the compiler embedded, but does not register it system-wide. See also Setting up the External Compiler for use with Fire for details.
Note: Installing and using the external compiler on Mac or Linux requires Mono 4.0 or later to be installed system-wide and in the default location beforehand.
The Elements Compiler "Mac & Linux Distro"
The Elements compiler is made available as a public download on elementscompiler.com (latest stable version) and/or on the Licensed Downloads Page (all versions, login required).
It is called: "RemObjects Elements - Mac & Linux Distro - *.zip"
Installing this compiler is easy, with just a couple of simple steps:
- Unzip the zip archive to a location where you can keep the files (do not unzip right in
~/Downloads and then delete it after installing. The files must persist in the location you perform the next steps from).
- Open a Terminal window to the unzipped folder.
- Run
sh install.sh (you might be asked for your root password).
Once installed, the compiler is available globally to be used, simply by typing ebuild. For example, you can build a project simply by calling ebuild MyProject.sln in Terminal.
Using the External Compiler inside of Fire
See Setting up the External Compiler for use with Fire for details on how to make Fire use the externally installed compiler (opposed to the embedded version).
Uninstalling the External Compiler
If you later want to uninstall the external compiler, simply open a Terminal prompt to the folder from above and run sh uninstall.sh.
However, note that you do not need to uninstall when updating the compiler to a newer version. Simply download the new version, extract it to a new (or the same) folder, and run ./install.sh to update to it. The old folder can then be safely deleted.
Using the External Compiler inside of Visual Studio
On Windows, there will always be one centrally installed compiler, and both it, Water and the Visual Studio integration will be updated in sync. The command line and the IDE will automatically always use the last version you installed.
Using the External Compiler inside of Water
You can ask Water to use a different, separately installed copy of the compiler, by adding string value a called CustomExternalEBuildExe in the Registry under HKEY_CURRENT_USER\Software\RemObjects\Elements\Water (you will already see other settings stored by Water in the same key), and pointing it the full path of the EBuild.exe that you want to use, and adding a second string value called UseCustomExternalEBuildExe and setting it to True.
See Also
MSBuild / xbuild (Legacy)
Before the introduction of EBuild, Elements used Microsoft's MSBuild tool for running builds (or xbuild, Mono's version of the same, on Mac and Linux).
Elements in Visual Studio still uses MSBuild for Silverlight, WinRT, Universal Windows Projects and ASP.NET, but EBuild is now used for standard .NET projects and all other platforms.
See Also
EBuild

EBuild is a new build chain infrastructure that we are developing, both for Elements and for general use. Once fully implemented, it will eventually replace our use of MSBuild/xbuild throughout the product.
EBuild is already the default build chain for
- All projects when working in Fire and Water (as of Elements 10)
- All Cooper, Toffee and Island projects, as well as non-UWP, non-WinRT and non-Classic ASP.NET .NET projects, in Visual Studio
In Visual Studio, you can right-click a project and choose "Convert Project to Use EBuild" to manually opt individual .NET projects to using EBuild. Work is ongoing to make EBuild the default for all projects in Visual Studio, very soon.
Fire and Water also use EBuild internally for resolving references inside the IDE. The resolve log can be seen when selecting the "References" node of a project.
Please refer to the Status page for more details on the current status of EBuild, and what parts are useable. Feedback is appreciated, as the only way to get EBuild completely solid is to hear how it fares with your projects.
Internal Structure
The EBuild project is structured into several components, some of which are Elements-specific, and some are not:

-
The core RemObjects.EBuild library implements the basic EBuild system. It is not tied to and does not depend on Elements, and can, in theory, be used for any compiler or tool chain.
-
The RemObjects.Elements.Basics library provides core functionality for Elements, shared by both the build/compile and the IDEs. It does not depend on EBuild.
-
The RemObjects.Elements.CrossBox library provides builds upon Basics, and implements the CrossBox infrastructure, including server and device management, remote connections, and deploy/run/debug scenarios. It too does not depend on EBuild.
-
The RemObjects.EBuild.Elements library brings both pillars together, and implements the concrete build tasks for Elements. It depends on both core EBuild and on Basics and CrossBox, and contains all the actual build logic to build Elements projects. Aside from the actual compiler itself, all build phases are part of the EBuild open source project.
The IDEs (Fire, Water and, to a lesser degree, Visual Studio) also leverage Basics and CrossBox for base tasks, and for deployment and debugging. Fire and Water also use the ElementsResolveReferences task from EBuild.Elements to resolve references for Code Completion and other IDE smarts.
- The
RemObjects.EBuild.MSBuild library, finally, provides a wrapper to host EBuild within MSBuild. This is used when building inside Visual Studio, and can also be used to integrate EBuild with other tasks in a larger MSBuild-based build script. Please refer to last section of the Building topic for more details.
Feedback, Support and Discussion
A discussion forum for EBuild is available here on Talk.
Building Projects w/ EBuild
EBuild can build both individual Elements projects (.elements), as well as Visual Studio-style Solution files (.sln) as used by Elements both in Visual Studio and also in Fire and Water.
Builds can be done both from the command-line, from within the IDEs and hosted in MSBuild.
Building from the Command-Line
The EBuild executable is installed as part of the Elements setup (Windows) or installing the External Compiler from the Command-Line Zip Distro (Mac, Linux and Windows). See the Installing the Command-Line Compiler topic for more details.
You can confirm that everything is installed correctly by opening a Terminal or Command Prompt window and simply typing ebuild and pressing enter – which will show the EBuild command-line help and also tell you which version is installed, e.g.:
RemObjects EBuild. An open source build engine for Elements and beyond.
Copyright RemObjects Software 2016-2018. All Rights Reserved.
Version 10.0.0.2262 (develop) built on talax, 20180306-124819. Commit 53408a6.
Syntax: ebuild [project or solution file] <switches>
To build a project or a solution with multiple projects, in most cases you can simply pass the project or solution filename as only parameter, and EBuild will go off and build.
ebuild MyProject.elements
Additional Command-Line Switches can be provided to control the build process, including limiting the set of projects in a solution that will be built, changing build log verbosity, overriding project settings, or more.
By default, EBuild will build the configuration named "Release", if present, or the first configuration found, otherwise. You can override this by passing the --coonfiguration switch:
ebuild MyProject.elements --cofiguration:Debug
Also by default, EBuild will perform an incremental build that only performs those tasks that need performing, based on what files in our project have changed and what tasks ran before. You can optionally pass --rebuild to have EBuild start fresh and build all parts of your project from scratch. Or you can pass --clean to "undo" a build and have EBuild remove all cached information and all output files files generated by a previous build. (Rebuild actually performs a clean, followed by a Build.)
ebuild MyProject.elements --rebuild
Building from the Fire and Water
Both Fire and Water use EBuild as the default build chain, as of early 2018. That means whenever you do Build (⌘B or Ctrl+B) or a related task in the IDE, you are already using EBuild to build, rebuild or clean the project.
By the way: As first line of the Build Log (which you can bring up by pressing ⌘⌥B in Fire or Alt+Ctrl+Shift+B in Water), you can see the full command-line with which the IDE is invoking EBuild. You can copy/paste that into a Terminal window or a build script, if needed, or just look at it to see what options the IDE might be passing.
Fire and Water also use EBuild within the IDE to resolve the references in your project. You can select the "References" node in your project tree to see the log file from this process – which can be helpful for diagnosing problems or broken references.
Building from Visual Studio
Visual Studio will automatically use EBuild (hosted in MSBuild, as described in the Building with EBuild within MSBuild section, below) when building most projects.
For some .NET sub-platforms, such as Silverlight, Classic ASP.NET, and UWP, using EBuild is still opt-in: the project can be "Converted to EBuild" by right-clicking the project node in Solution explorer and choosing "Converted to EBuild". After conversion, these projects too will be built with EBuild hosted in MSBuild.
Building with Train
Train, our free open source build script tool has built-in support for running EBuild via the ebuild.runEBuild() task. The method takes two parameters, the name of a project or solution, and an optional string with command line parameters. runEBuild() will automatically locate the installed version of Elements and EBuild.
Building with EBuild within MSBuild
On Windows, EBuild comes with a special MSBuild task that allows you to use EBuild within the MSBuild build chain to build projects. This can be useful if you have mixed solutions that include non-Elements projects EBuild cannot process, or have a larger build infrastructure structured around MSBuild.
Simply passing a solution that contains one or more EBuild projects to MSBuild will work. The bulk of your solution will be build in MSBuild as you'd expect, and MSBuild will automatically host EBuild to build the Elements project(s) in question.
Command-Line Switches
EBuild supports a range of command-line switches you can use to control the build, and also defines a number of build settings that make sense to override from the command-line, as well.
In general, the EBuild command-line expects a single file name parameter (which can be a .sln or .elements project file), as well as zero or more switches (which always start with --. Running EBuild without a file name parameter, or passing the --help switch, will show a summary of all available commands, and exit with a positive exit code.
Build Action
EBuild can run one of three actions on the project (or solution), determined by one of the following three command-line switches being passed.
--build – incrementally build the project--rebuild – rebuild the project from scratch, ignoring all cached output from previous builds--clean – delete all output from previous builds, including intermediate files and final binaries
If none of the three switches is passed, --build is implied.
EBuild will exit with a 0 exit code if it successfully performed the action, or with a positive code if any errors or problems occurred.
Configurations
Projects can have one or more named configurations, usually called "Debug" and "Release". The --configuration switch can be passed to decide which configuration will be built; if not passed, "Release" is assumed:
Choosing which Projects to Build
When building a .sln with multiple projects, it is often desirable to only have a subset of the contained projects built. EBuild provides switches to specify one or more explicit projects (plus their dependencies) to build, or to exclude one or more projects from the build (even if they are dependencies of a different, not included project):
--projects:<list of project ids or names>--skip-projects:<list of project ids or names>
Each switch can be followed by a semicolon-separated list of one or more project IDs (GUID) or project names (as specified in the project's <Name> setting or, when not set, the project's filename without extension.
When specifying --projects, EBuild will process the project or projects listed, as well as any other projects that the listed projects depend on.
When specifying --skip-projects, EBuild will process all projects in the solution, except those listed. If other projects depend on one or more listed projects, EBuild will try and resolve this dependency based on output from previous builds, but it will not, under any circumstances build the listed projects.
The --skip-projects switch is used by Fire and Water to exclude disabled projects from being build.
Choosing which Targets to Build
If you are working with multi-target projects, you can similarly specify a list of targets to build, or to exclude from the build:
--targets:<list of target names>--skip-targets:<list of target names>
Each switch can be followed by a semicolon-separated list of target names.
When specifying --targets, only targets matching one of the names will be built. For projects with no target matching the name, no action will occur.
When specifying --skip-targets, only targets not matching any of the names will be built. For projects with no target matching the name, no action will occur.
The --skip-targets switch is used by Fire and Water to exclude disabled targets from being build.
Build Goals
Another option to limit what to build is to specify a single project (and, optionally, a single target in that project) as a build goal.
In this mode, EBuild will build the specified project (either all of it's targets, or the one specified), and and projects it depends on. It will not build any projects that aren't necessary for the build goal.
EBuild will still honor the --skip-projects and --skip-targets switches, allowing you to further narrow down the scope of what gets build. Even if a project is set to be skipped, it will still be looked at for dependencies, and its dependencies will still be included in the build. This allows you to selectively skip projects anywhere on the dependency chain (including even the goal project, itself).
This switch is used by Fire and Water when executing a Run, Deploy or Test command, to build ony the Active Project and its (enabled) dependencies. It is not used when doing a Build or Rebuild, those commands will always build all enabled projects.
Output Folders
By default, projects generate their final output to the folder specified by the <OutputFolder> or <OutputPath> project setting, which can be absolute, or relative to the project (and, if not specified, defaults to ./Bin/<Configuration>).
You can override this target folder with the --output-folder switch, which takes a path that can be absolute or relative to the current working directory (!!).
--output-folder:<folder>--out:<folder>
Optionally, you can also have the output folder appended by either the target name, and/or the name of the Mode or SubMode. This applies regardless of whether the base output folder was overridden from the command-line with the previously discussed switch, or is taken from the project.
This is particularly useful when building multiple projects or targets that would otherwise generate similarly-named output that would overwrite each other:
--output-folder-uses-target-name--output-folder-uses-mode-name--output-folder-uses-submode-name
Note that --output-folder-uses-submode-name or rather, the OutputPathUsesSubModes setting that this switch affects, already defaults to True for Cocoa and for Island projects.
Finally, you can also override the folder where EBuild will place and look for intermediate files and cache files generated as part of the build, using the --intermediatebasefolder switch.
--intermediatebasefolder:<folder>
Parallel Builds
You can enable Parallel Builds in order to build multi-project or multi-target solutions more quickly on multi-code systems, with the --parallel switch.
Overriding Arbitrary Project Settings
You can use the --setting switch to override any setting used by the build chain, including all the known and documented project settings normally stored inside the project. This includes settings that go into the compiler, as well as those handled by other parts of the build chain.
The --setting switch can of course be repeated as many times as needed, to override multiple settings. If the same setting name is provided more than once, the last occurence "wins".
Commonly used Settings
Most settings that are core to the project will be set in the project file, and make very little sense to override from the command-line. For example, little good will come out of changing the Mode of a project for a build.
But there are a handful settings that are common and useful to set from the command-line and from build scripts:
General
--setting:AdditionalReferencePaths=<list of folders> – a semicolon-separated list of additional folders where to look for references. This can be helpful e.g. if you run EBuild multiple times on different solutions, and want to to see files generated by earlier runs.--setting:TreatWarningsAsErrors=True/False – make the build fail, if any non-fatal warnings are encountered.
Cocoa:
--setting:CrossBox=<Name of your CrossBox Server> – pass a different CrossBox 2 Server to be used for the build of Cocoa projects.--setting:Device=True/False – toggle whether to build an iOS, tvOS or watchOS project for device, or not (default is True).--setting:Simulator=True/False – toggle whether to build an iOS, tvOS or watchOS project for Simulator, or not (default is True).
Note that you can pass both --setting:Device=True and --setting:Simulator=True to have both versions built in one go.
--setting:ToffeeSDKFolder=<folder> – pass an optional path to the Cocoa base SDK files, to use instead of the default.
Island
--setting:IslandSDKFolder=<folder> – pass an optional path to the Island base SDK files, to use instead of the default.
Cocoa and Island
--setting:Architecture=<list of architectures> – – a semicolon-separated list of architectures to build. You can also pass All, to build all architectures known for the platform and be future-proof.
Other Switches
--verbosity:Silent/Quiet/Normal/Verbose/Debug – control how chatty EBuild is as it does its work. Normal is the default, and should be fine in most scenarios. Verbose or Debug will enable additional levels of detail (but also clutter).--statistics – emit statictics about which build phases took the longest times, at the end of the build.
Caching
--no-cache – ignore any cached info from previous builds (implied when doing a --rebuild)--no-package-cache – ignore any information in the local Gradle or NuGet Package References caches and re-resolve and re-download all packages (also implied when doing a --rebuild)
Debugging
--debug – emit even more diagnostic messages as part of the build, useful for debugging un-obvious build proplems or problems with EBuild itself. Implies --verbosity:Debug--debug-caching – emit additional debug logging for cache resolving issues.--debug-smart-copy – emit additional debug logging for incremental/smart copy.
IDE
--logger:Console/Fire – choose the layout of the console output. Console is the default and meant for human-readability; Fire adds additional machine-parsable output and is what is used by the Fire and Water IDEs to parse the output.--xml:<filename> – emit an XML file with error messages, fix-its and other details about the build.
Help
--help – emit a list of all available switches.--wait – wait for a press of the Enter key after the build finishes.
Caching
When doing an iterative build (the default), EBuild will use caches created during previous build cycles to avoid doing work that is unnecessary, and to result in overall faster build times.
Caching takes into account the change date of certain input files (inout validation), the existence of cache files kept in the project's (actually, the target's) Intermediate Folder, and the presence and timestamp of resulting files.
Input validation is specific for each task and can take into account
- the timestamp of the project file
- the timestamps of specific input files
- the exact structure of specific input folders
If one of the inputs does not match the cache, the cache will be ignored and the task will run as normal. If the cache can be used, the task will instead be skipped, and information about objects and settings created by the previous run will be loaded from the cache file.
For tasks that work on a folder structure that is hard to keep track of with just relying on timestamps (for example, Cocoa Asset Catalogs, where files might simply have been removed), EBuild also stores a full listing of all files along with the cache, and uses that listing when validating the cache.
In EBuild, each target that gets build has an "Intermediate Folder", where all build output (including intermediate files that are not considered to be deliverables, and including the final deliverables, as well) gets created and stored during the build (the Final Deliverables are only copied to the designated output folder, at the very end of the build). This Intermediate Folder also stores caches, in the "./Caches" subfolder.
The Intermediate Folder can be located in one of two places, and during build, the target's IntermediateFolder setting refers to the full path of the folder.
By default, EBuild keeps the Intermediate Folder away from the project tree, and stores them in a central location called the "Intermediate Base Folder". On Windows, this is located in the non-roaming user data folder (%APPDATA\RemObjects Software\EBuild\Obj), on Mac under ~/Library/Application Support/RemObjects Software/EBuild/Obj. Its location can be overridden by the --intermediatebasefolder Command-Line Switch, and globally in ElementsPaths.xml.
Underneath the Intermediate Base Folder, EBuild will create a folder named as a combination of the project's name and the project's project ID (to ensure both discoverability and uniqueness), with a subfolder for each configuration and target. E.g.:
~/Library/Application Support/RemObjects Software/EBuild/Obj/MyApplication222-EC5A3A4C-B040-4DBB-BC0B-D4AEBA237A91/Debug/Toffee-macOS
For Cocoa projects build from Windows on a CrossBox 2 Server with a Shared Root, EBuild instead creates a folder named "obj" parallel to the project file (much like MSBuild used to do) and uses that as Intermediate Folder for the project, so that the intermediate files can be accessed both locally and by the build tasks running on the Mac.
Underneath that obj folder, EBuild will still create a subfolder for each configuration and target. E.g.:
C:\Code\MyApp\obj\Debug\Toffee-macOS
How Caching Works
When a task that supports caching succeeds, it writes an XML file with details about all the EBuild objects and settings it created to the ./Caches folder, under a unique name. Oftentimes, a single task will create separate cache files, for example one for each architecture, in case of the compiler and linker for Island. This file contains, among other info, the full paths of generated files (within the Intermediate Folder), as well as their meta data. In some cases, for example for Reference Resolving, it may also contain paths to external files.
When a cache is restored, EBuild will verify that all referenced files still exist, and otherwise will discard the cache.
Cached Tasks
The following EBuild tasks currently support caching:
Final Output
The end-goal of an EBuild build is of course a set of one or more Final Deliverables. This could be an executable, a library or an app bundle, and it might include additional files such as a .fx file for a native library, or a .h file that lets a Cocoa library be used from Xcode.
During build, EBuild assembles all files in an Intermediate Folder (as described in more detail here). It is only a pair of final tasks that run as the very last phase of a build that (a) determine what files are deemed part of the final deliverable (ElementsDetermineFinalOutput) and (b) copy those files to their final location (ElementsCopyFinalOutput).
ElementsDetermineFinalOutput runs for each target and, with code specific to each platform and sub-platform, determines which of the many files a build has generated (or referenced externally) should become part of the final delivery.
ElementsCopyFinalOutput then runs and copies all files over to the OutputFolder, and generates a FinalOutput.xml file in the Intermediate Folder.
The OutputFolder
The actual OutputPath for a project is determined by several steps. If the project or target contains an OutputFolder or OutputPath setting, its value will be used in that order, and it can be an absolute path or (most common) a path relative to the project file.
The OutputFolder setting can of course be overridden from the command-line with the --output-folder Command-Line Switch. If the specified value is not an absolute path, it will be treated as relative to the current working directory (not the project!).
If no path is specified in either the project or on the command-line, EBuild will use a folder called Bin parallel to the project, with an additional subfolder named after the selected configuration (e.g. ./Bin/Debug).
For multi-target projects (or to have more unique output folders when building multiple projects that emit similarly-named output), EBuild can optionally use additional sub-folders for target, mode and/or submode name, if the following command-line switches are passed or the following settings are set to True in the project:
--output-folder-uses-target-name (or OutputPathUsesTargets = True)--output-folder-uses-mode-name (or OutputPathUsesModes = True)--output-folder-uses-submode-name (or OutputPathUsesSubModes = True)
OutputPathUsesSubModes defaults to True for Cocoa and Island projects, resulting in the final output folder by default being e.g. Bin/Debug/macOS or Bin/Release/Linux. The other options default to False.
Finally, Cocoa deliverables built for the Simulator get the FinalOutputFolderSuffix meta data value of "Simulator, resulting in those final deliverables to be copied into a folder separate from the deliverables for real physical devices.
The FinalOutput.xml File
After copying all output to its final location, the ElementsCopyFinalOutput task also generates a FinalOutput.xml file that contains details about all the files it delivered.
This file can be used by IDEs or custom build scripts to locate and enumerate all the final deliverables. It also aso used by EBuild when doing "Clean", to determine what deliverables to delete, and as a fallback when resolving Project References to projects that are disabled or not part of the solution.
See Also
Pre- and Post-Build Scripts
EBuild projects may specify custom shell scripts to run before the main build process for the project starts, or after it (successfully) finishes. These scripts can be provided in a <PreBuild> or <PostBuild> element, respectively, on the top level of the project XML.
For backward compatibility with MSBuild, the <PreBuildEvent> or <PostBuildEvent> element names may be used instead.
Since Elements projects can be built on different platforms, and each platform has a different shell environment, separate <PreBuild> or <PostBuild> tags can be provided, each specifying a platform or – on Windows – a shell to run in (Cmd vs PowerShell).
EBuild will pick the scripts marked for the current platform, and the scripts that have no platform marker:
<PreBuild Configuration="'$(Platform)=='macOS'">
ls -la
</PreBuild>
<PreBuild Configuration="'$(Platform)=='Cmd'">
dir
</PreBuild>
Valid values for the "Platform" attribute are:
| OS |
Values |
Comment |
| Windows |
Windows, Cmd, PowerShell |
Runs cmd.exe, except for PowerShell |
| macOS |
Mac, macOS, sh |
Always runs /bin/sh |
| Linux |
Linux, sh |
Always runs /bin/sh |
The script will run with the project folder (i.e. the folder containing the .elements file) as the current working directory.
Variables
Any settings known to the project can be used in the script, using the $(SettingName) syntax. Literal occurences of $( can be escaped using a second dollar sign: $$(.
<PreBuild>
echo "$(BinaryName)"
</PreBuild>
Parallel Builds
EBuild allows for the option to parallelize build tasks, in order to make more efficient use of multi-core systems. Parallel builds optimize for build speed in exchange for build log readability.
By default, EBuild runs build tasks in sequential order. You can enable parallel builds in two ways:
- On the command line, specify the
--parallel command line switch.
- In Fire or Water, enable the "Parallel Builds" option in Preferences (on the Build tab).
EBuild will parallelize the following operations:
- In a multi-project solution, EBuild will try to build multiple projects at once, in parallel. Of course it will take into account project dependencies, and how well a solution can be parallelized depends on how inter-dependent the projects are.
- For multi-target projects, EBuild will run certain tasks in parallel for all (or some, depending on available CPU resources) targets.
Downsides/Drawbacks of Parallel Builds
Parallel builds optimize for build speed, but sacrifice some convenience in the process.
For command-line builds, EBuild will emit log messages as they occur (where necessary, prefixed with the project and/or target name). Because multiple projects and/or targets build at once, this means messages from different processing threads will intermix, leading to a log output that can be harder to be processed by a human reader. This is especially true for high-verbosity log output.
We recommend to turn off parallel builds when you need to diagnose a build log in more detail, beyond just acting on errors and warnings.
In Fire and Water, the Build Log will attempt to automatically resort incoming log messages according to project and/or target. This will result in a more readable output, but will cause new log messages to be inserted in various locations of the current log view, rather than at the end.
Also, for technical reasons, Fire and Water will not highlight error and warning messages in the log output for parallel builds, and will not allow double-clicking them in order to navigate to the source locations from the build log. (Of course error and warning messages are still highlighted in-line in the code editor, and available in the Jump Bar, as always.)
Again, we recommend turning of parallel builds when you need to work with the build log.
Supported Tasks
The following EBuild tasks currently support parallelization:
Solutions, Projects & Targets
A Solution contains one or more projects. A Project contains one or more targets. A Target defines a singular project build goal for a single platform/sub-platform combo.
Solutions
EBuild will process standard .sln solution files, as generated and used by Visual Studio, Fire and Water.
EBuild will consider only the top section of the .sln file to get a list of projects and their types, as well as explicitly defined inter-project dependencies. EBuild does not use solution configurations, nor honor the "active" state of projects within a solution file.
Projects can be included or excluded from a build with the --projects or --skip-projects command line switches, respectively. By default, all non-shared projects will be built.
EBuild will smartly determine the best build order, based on both explicit inter-project dependencies gathered from the solution file, as well as from Project References within the projects.
Read more about Elements Solutions.
Projects
A project is a collection of source and other files, references (to binaries or other projects) and settings targeted at generating one or more "equivalent" output binaries.
Each project has at least one target, and as such would generate a single executable (.NET, Java and Cocoa/macOS), a set of the same executable for several architectures (Island) or two executables for a physical device and a simulator (Cocoa iOS, tvOS and watchOS).
Multiple targets can be defined to have the same project generate multiple sets of output described above (e.g. for different platforms or sub-platforms), but generally the goal would be to build (roughly) the same set of files for each target.
Good examples for multi-target projects would be:
- A library, compiled for different Island platforms (e.g. Windows and Linux).
- A library, compiled for different platforms (eg .NET, Java, Cocoa and Island).
- A console application compiled for .NET, Linux and Cocoa.
(While it is technically feasible to have multiple targets that generate vastly unrelated outputs, that is not their intention; that is what multiple projects (possibly with a shared project with common code) are best for.)
Targets can be included or excluded from a build with the --targets or --skip-targets command line switches; they can also be disabled inside a project by specifying the <Enabled>False</Enabled> as meta data flag. By default, all targets in the active projects will be built.
Read more about Elements Projects.
Targets
Targets live within a project, and by default share any files, settings and references within that project, unless those are explicitly marked as belonging to a specific target.
Each target has an exact Mode (i.e. platform: Echoes, Cooper, Toffee or Island) and an optional SubMode (i.e. sub-platform, for example "iOS" for a Cocoa project, or "WebAssembly" for an Island project).
If a project defines no explicit targets, Mode and SubMode are determined based on the name of the legacy MSBuild ".target" import included in the project, and an implicit target is defined, named after the mode and submode (eg "Echoes", or "Island-Android"). If the Mode cannot be determined, compilation will fail.
Read more about Targets.
Targets
Targets live within a project, and by default share any files, settings and references within that project, unless those are explicitly marked as belonging to a specific target.
By default, each project will have one implicit target, named after the mode (and, optionally, submode) set for the project, eg "Echoes", or "Island-Android". For such single-target projects you can pretty much ignore the concepts of targets at all (although you might see the target namne mentioned in build logs).
Additional targets can be defined in a project by providing one or more "PropertyGroup" tag declaring a specific named target. The property group's Condition attribute must match the exact syntax shown below (where TargetName is of course replaced by the name of the target):
<PropertyGroup Condition=" '$(Target)' == 'TargetName' ">
...
Within the property group, standard Project Settings can be providede that will be specific for the target. Much like with Configuration sections, settings set for a specific target will override the same setting set on project level.
One common use for Targets is to set a separate Mode (and SubMode) in order to build the same project for multiple platforms. But targets can be distinguished by any type of setting – for example it would be entirely valid to have a project that builds for .NET, and have several targets that only differ in the SDK version, or on other settings.
Objects
By default, all objects declared in a project (in ItemGroup elements) will belong to all targets. You can limit objects tom a single target by providing a metadata value named Target on them, set to the name of the target the object belongs to:
<ItemGroup>
<Reference Include="System.Whatever">
<Target>Echoes</Targete>
</Reference>
</ItemGroup>
Again keep in mind that target names do not have to match a platform name (although they often will), but can be any arbitrary string.
"#" References
One special case (not really tied to targets, per se) that is worth mentioning here is "#" referendes.
The base References used by a project often differ vastly between platforms. If you add a reference object named "#" to your project, it will automatically resolve to the common set of base references needed by most projects, for the current platform. Since reference are resolved by target, a single # reference item can cover the basics for all your targets, alleviating the need to add many separate references all manually tied to a specific target.
<ItemGroup>
<Reference Include="#" />
</ItemGroup>
Building Targets
By default, building a project from the command-line will build all targets, and building the active project from the IDEs will build the active target.
You can manually control what targets to build via the following two EBuild Command-Line Switches:
--targets:<list of target names>--skip-targets:<list of target names>
Each switch can be followed by a semicolon-separated list of target names.
In Fire and Water, you can also right-click (command-click) each Target in the project tree (underneath the project's main node), and choose which targets to enable and disable.
Please Note that Visual Studio does not currently support multi-target projects, and multi-target project support in Fire and Water is limited to working with existing targets and does not allow adding or changing targets or their settings, yet.
Build Destinations
For some platforms (currently only used on Cocoa), an EBuild project or target has the concept of building for separate "Build Destinations".
Different than Targets (which build a conceptually diferent set of files and settings, usually to target differen platforms), Build Destinations build the same project, with the same settings, with the goal of running or deploying to a different device type.
When building a project (or target), it can potentially be built for a single, multiple, or all available build destinations. The available build destinations are platform-specific and hard-coded into the EBuild build chain; unlike Targets (or Configurations) they cannot be extended or individually named.
Cocoa projects know the following three build destinations:
"Device"
This is the default build destination, and will build an iOS, tvOS or watchOS project to run on a physical device, or a macOS application to run on the Mac. It will build the architecture(s) configured via the "Architecture" project setting.
For macOS applications, this is the only available build destination.
"Simulator"
This build destination will build an iOS, tvOS or watchOS project to run in the Simulator on the Mac. It will build the architecture(s) configured via the "SimulatorArchitecture" project setting.
"Mac"
Finally, this build destination will build an iOS project to run nativekly onn the Mac via Mac Catalyst. It will build the architecture(s) configured via the "MacCatalystArchitecture" project setting.
This build destination is available only for iOS projects, and only if the SupportMacCatalyst Project Settings is enabled.
Determining What to Build
When working ion Fire, Water or Visual Studio, the IDE will automatically as to build the right build destination based on the currently selected device in the CrossBox device picker. It does this by passing the appropriate setting to EBuild internally.
In Fire ands Water a rebuild (⌘⇧R / Ctrl+Shift+R) will always build all (available) build destinations.
From the command line, you can enable or disable build destinations by passing a setting with the name of the build destination, and a value of True or False.
Note that by default EBuild will build only the "Device" build destination, but if you specify a one or more diffrent destinations, "Device" will only build if it among thiose specified. e.g.:
ebuild – will build for Device.ebuild --setting:Device=true – will also build for Device.ebuild --setting:Simulator=true – will only build for Simulator.ebuild --setting:Simulator=true --setting:Device=true – will build both.
Modes & SubModes
EBuild of course supports building projects on all the Platforms and Sub-Platforms supported by the Elements compiler. EBuild refers to platform and sub-platform as Mode and SubMode (as in, "which mode of the compiler is used"), so this topic will adhere to the same nomenclature, as well.
Mode will be equivalent to the Compiler Back-end used (except for Toffee projects that opt out of Legacy Toffee V1 Mode, which EBuild will internally map over to use Island mode).
This topic will dive into specifics on how EBuild determines the Mode and SubMode for a given project or target, and also explain any caveats that targeting a specific platform might entail.
Determining Mode and SubMode
Mode (and SubMode) can be set either globally for a project or – for multi-target projects – for each individual target. There are two ways how EBuild will determine the mode:
For legacy projects compatible with the old MSBuild tool chain, EBuild analyzes the <Import> tags and determines the mode from the name of the imported RemObjects.Elements.*.targets file(s). (Different than MSBuild, EBuild does not actually process these <Imports>, beyond looking at their name).
EBuild recognizes the following names, and sets the Mode and SubMode setting accordingly:
RemObjects.Elements.Echoes.targets (.NET)RemObjects.Elements.Cooper.targets (Java/Plain)RemObjects.Elements.Cooper.Android.targets (Java/Android)RemObjects.Elements.Toffee.targets (Cocoa, SubMode determined by SDK)RemObjects.Elements.Nougat.targets (Cocoa, SubMode determined by SDK)RemObjects.Elements.Island.*.targets (Island, SubMode determined by *)
For non-legacy EBuild-specific projects (projects that do not have one of the above targets included), EBuild expects the <Mode> setting to be present, either on project level, or for each individual target; for Island and Toffee modes, the <SubMode> also must be set.
Note that non-legacy projects can (optionally) import the RemObjects.Elements.targets file, which allows them to be built with EBuild, hosted in MSBuild. Please refer to this topic for more details on this.
Echoes projects compile for the Common Language Runtime (CLR) in all its variations. Echoes projects do not require a <SubMode> to be set, as EBuild will determine the appropriate SubMode as part of the ElementsPrepareEchoesPlatform task by looking at the TargetFramework or the (deprecated) TargetFrameworkVersion project setting. If neither is set, a default of (currently) v4.6.2 is assumed, for backward compatibility.
TargetFramework can contain either a plain .NET Framework version number (e.g. v4.6.2), or a standard Framework Type+Version specifier in either long (e.g. .NETStandard,Version=2.0) or short (e.g. .NETStandard2.0) format.
If only a version number is provided, the SubMode is assumed to be the full .NET Framework (SubMode = "Classic"). Otherwise, the following supported SubModes will be derived from the TargetFramework value:
.NETStandard (.NET Standard).NETCore (.NET Core).NET (Full Framework)Universal (Windows 10)WindowsPhone (8.1 or later)PortableMono
After ElementsPrepareEchoesPlatform finishes, SubMode will be set to one of the above values. The SubMode will determine reference resolving and the behavior of other build tasks.
Cooper projects compile for the Java Virtual Machine (JVM). If no SubMode is set, the ElementsPrepareCooperPlatform task will set a value of Plain. Valid SubModes are:
Plain (regular Java/JVM)Android (Java-based Android SDK)
The SubMode will determine reference resolving (e.g. whether base types are referenced from installed JDK or android.jar) and the behavior of other build tasks, including support for .aar references on Android, and pre- and post-compile Android-specific tasks such as DEX and APK generation.
Toffee projects compile for Cocoa and the Objective-C Runtime. The SubMode is determined in the ElementsPrepareToffeePlatform task by looking at the SDK setting or vice versa. If the SDK value is present, SubMode will be set/overwritten accordingly; if no SDK value is set, the latest SDK for the specified SubMode will be set. (PrepareToffeePlatform will fail if neither value is provided.)
Valid SubModes are:
The SubMode will determine which base SDK will be used, as well as the behavior of other build tasks, including linking and .app bundle creation.
Island projects compile to CPU-native binaries for a range of Sub-Platforms. Different than for the other three modes, a SubMode is required for Island projects. Valid SubModes are:
The SubMode will determine which base SDK will be used, as well as the behavior of other build tasks.
Objects & Settings
EBuild Projects are made up of two types of items: Objects and Settings.
-
Objects represent the pieces that make up your project. These can be input files, references and more. Objects have a Kind and a Name, and you can have many objects of the same kind (e.g. multiple source files of the "Compile" kind).
-
Settings represent named string values that control how EBuild behaves to build your project. Settings have a Name and a Value, and only one setting for each name can be active at a time.
Objects can be present globally in the project, or they can be associated with a specific target.
Settings can be set globally, or for a specific configuration or a specific target.
Objects
EBuild Projects are made up of two types of items: Objects and Settings.
Objects represent the pieces that make up your project. These can be input files, references and more. Objects have a Kind and a Name, and you can have many objects of the same kind (e.g. multiple source files of the "Compile" kind).
Inside the project, objects can specified globally, or for a specific target.
How Objects are Maintained
At build time, EBuild maintains a flat space of known objects, with each object optionally being constrained to a specific target and/or configuration.
The initial set of objects is entirely driven by content from the project itself.
During build, tasks can add new objects, or amend existing objects with additional meta data.
Querying Objects
Objects are queried by Kind, either project wide or filtered to the current Target.
Object Kinds can be sub-categorized with a dash followed by an additional string, for example to distinguish between objects for a particular architecture or device type. For instance, while CompilerOutput is normally used as kind for the items returned from the Elements compile phase, on the Island platform, compiler output is separated by architecture, e.g. CompilerOutput-x86_64 or CompilerOutput-arm64.
Wildcards can be used to query for objects with subkinds, as the following examples show:
Objects["CompilerOutput"] would return only exact matches.Objects["CompilerOutput-*"] would return "CompilerOutput" objects, as well as any sub-kinds (e.g. "CompilerOutput-arm64" and "CompilerOutput-x86_64").Objects["CompilerOutput-|arm64"] would return "CompilerOutput" objects, as well as objects matching the exact sub-kind (e.g. "CompilerOutput-arm64" but not "CompilerOutput-x86_64").
Finally,
Objects["CompilerOutput*"] would return "CompilerOutput" objects, as well as any kind that starts with "CompilerOutputFoo".
Object Meta Data are string-based key-value pairs (following rules similar to Settings) that can be set on individual objects. These are free-form, and valid values depend on the specific object kinds.
However, a few meta data values have special meaning and/or are frequently used:
ResolvedPath refers to the actual path of the object on disk (if applicable to the Kind). If ResolvedPath is set, it must be valid and point to a file or folder that exists locally. This avoids extra unnecessary "if file exists" checks.CopyLocal is a boolean flag indicating whether the object should be considered part of the final deliverable and copied to the output folder.Ignored can be set to fully ignore an object in subsequent queries. Once ignored, an object will be excluded from any future queries.
See Also
Settings
EBuild Projects are made up of two types of items: Objects and Settings.
Settings represent named string values that control how EBuild behaves to build your project. Settings have a Name and a Value. Only one setting for each name can be active at a time.
Inside the project, settings can be set globally, or for a specific configuration or a specific target.
If a setting is set on multiple levels, the most precise setting "wins" (e.g. if a setting is defined globally and for a configuration, the latter setting overrides the former). If a setting is specified multiple times on the same level, the last value encountered in the project file "wins". If a setting is not specified at all, a well-defined default value may be used.
How Settings are Resolved
At build time, EBuild starts out with a flat list of settings driven by two inputs
- the settings specified in the project itself
- any settings overridden from the command line via the
--setting: Command Line Switch.
During build, tasks can add new or override existing settings with new values.
When a build task asks for a setting by name, the following logic is used to determine the value. The first value encountered will be used:
- Value overridden/set with a new value earlier during the same build cycle.
- Value overridden from the command line via
--setting:.
- Value defined in the
.user file for the project.
-
If the current task runs within the context of a specific target:
- Value defined in the .user file, matching the target name and the active configuration.
- Value defined in the .user file, matching the target name and without configuration.
- Value defined in the project, matching the target name and the active configuration.
- Value defined in the project matching the target name and without configuration.
- Value defined in the project without target name and matching active configuration.
- Value defined in the project without target name or configuration.
- Value from the active Defaults Provider (see below).
If neither of the above steps returns a value, the setting is considered undefined.
Note that EBuild does not distinguish between undefined settings and an empty string value. If any of the steps above returns an empty string (e.g. due to an empty element in the project file), the behavior is the same as if the setting was not defined at all.
Undefined required settings are considered a fatal error. In particular, this applies to boolean (True/False) or enum settings.
For boolean settings, the string "True" is considered true, regardless of case, any other values will be considered false.
Defaults Providers
As last resort, a project-specific Defaults Provider is considered for determining a default value for the setting. For Elements projects, this is the ElementsDefaultProvider.
ElementsDefaultProvider is the canonical reference for all defaults for Elements. No other part of the build chain is to have hard-coded assumptions on what the lack of a certain setting means, and all required settings (most importantly including all boolean flags, such as toggles for compiler behavior) must be covered by ElementsDefaultProvider.
ElementsDefaultProvider is used by all parts of the build tool chain, including the compiler, and also by the development environments to represent default values in Project Settings and elsewhere where settings affect IDE behavior.
See Also
Tasks
This section lists all tasks that make up the build process for Elements projects.
EBuild starts a build by invoking ElementsCopyFinalOutput, which is the last task to actually execute, and copies the final generated output to the OutputFolder. The actual build is of course performed by the various Pre-Tasks connected to this task.
Entry Tasks
All Tasks
.NET Core Publish
- Implemented in
ElementsEchoesNetCorePublish, runs once per target
Pre-Tasks
Post-Tasks
Apply Legacy Settings
- Implemented in
ElementsApplyLegacySettings, runs once per target.
Pre-Tasks
Post-Tasks
Check for Target-less References
- Implemented in
ElementsCheckForTargetlessReferences, runs once per project.
Pre-Tasks
Post-Tasks
CodeSign (Darwin)
Compile
The compile task, as the name implies, runs the core compiler that takes source files and generates executable code (binaries) from them. Run once per project, the task smartly analyses all targets and runs the actual compile phase as needed – usually separately for each target, architecture (Cocoa and Island) and for Device vs. Dimulator (Cocoa and Island/Darwin).
- Implemented in
ElementsCompile, runs once per project.
Pre-Tasks
Post-Tasks
Execution
Actual compilation is implemented in parts of the Elements tool chain that are not part of EBuild, and beyond the scope of this documentation.
Output
On success, new CompilerOutput-* objects will be created, per architecture (Cocoa and Island) and Device (Cocoa only).
Caching
The result of compilation is cached in CoreCompile-*.caches per target, architecture and device/simulator, subject to the date of the project file and any input files (sources, resources, and resolved references).
Copy Final Output
The ultimate task, this is the task that will be invoked by EBuild.exe or the IDEs when initiating a full build of a project. It largely defers to ElementsDetermineFinalOutput for kicking of the main build.
- Implemented in
ElementsCopyFinalOutout, runs once per project.
Pre-Tasks
Post-Tasks
Execution
...
Create .app Bundle (Darwin)
Create .ipa (Darwin)
Determine Final Output
The penultimate task (run as pre-task from `ElementsCopyFinalOutput'), Determine Final Output gathers the files generated by the build that are considered the final deliverable.
Usually this will include the main binary and possible CopyLocal libraries, but it might also include .fx and .h files (for Cocoa and Island), or not include the binary but instead an application bundle (for Android or Cocoa apps).
Pre-Tasks
Post-Tasks
Execution
As it runs, the task loops over all active targets, and runs the appropriate platform-specific subtasks to perform the reference resolution:
Output
-
A CopyLocal object will be created for each file determined to be part of the final output, the exact rules of which depend on the platform and output type.
-
A FinalOutputForReferencing or FinalOutputForReferencing-* object will be created for each binary that should be included in project references. This will include the main binary and might include any CopyLocal libraries, as well. For Island, this object will be generated per architecture, for Cocoa it will be generated per device/simulator.
-
For Island/Android projects, a FinalOutputForReferencing-JNI object will be created, which is used for project references from Cooper/Android projects.
Caching
No caching is done (yet).
Determine Final Output (Base)
Abstract base class for per-platform ElementsDetermineFinalOutput sub-tasks.
Concrete Subclasses
Determine Final Output (Cooper)
Descends from
Pre-Tasks
Post-Tasks
Determine Final Output (Echoes)
Descends from
Pre-Tasks
Post-Tasks
Determine Final Output (Gotham)
Descends from
Pre-Tasks
Post-Tasks
Determine Final Output (Island)
Descends from
Pre-Tasks
Post-Tasks
Determine Final Output (Toffee)
Descends from
Pre-Tasks
Post-Tasks
ElementsCooperGenerateAndroidResources
- Implemented in
ElementsCooperGenerateAndroidResources, runs once per target
Pre-Tasks
Post-Tasks
ElementsDarwinMerge
The Merge task, invoked for Cocoa and Island/Darwin targets only, is used to merge different architectures into a single "fat" binary.
When building projects for multiple architectures (for example arm64 and armv7, for iOS), the compiler and linker run separately for each architecture, generating independent executables. The MergeToffee task takes the binaries for each architecture and combines them into the final "fat" or "universal" binary that you will ship.
Currently the only platforms that support/need merging are iOS apps, when they are set to include legacy 32-bit (armv7 or device or i386 for simulator) support.
- Implemented in
ElementsMergeToffee, runs once per target.
Pre-Tasks
Post-Tasks
Execution
If only a single architecture is set, the task merely re-adds the inputfile, unchanged, as output to MergedLinkerOutput-*. If multiple architectures are present, the files are combined, using custom merge logic for static libraries, and by calling lipo for all other project types.
CompilerOutput-* objects (for static libraries)LinkerOutput-* objects (for all other projects)
Output
On success, new MergedLinkerOutput-* objects will be created, for device and/or simulator.
Caching
The result of merging resolving is cached in LinkerMerge-*.caches, per Device/Simulator (Cocoa only), subject to the date of the project file and the compiler/linker input.
ElementsExpandPaths
Abstract base class for tasks that resolve the oaths and check for existence of various object types.
Concrete Subclasses
Expand CopyToOutput Directory Paths
- Implemented in
ElementsExpandCopyToOutputDirectoryPaths, runs once per project.
Descends from
Pre-Tasks
Post-Tasks
Find Manifest File (Cooper/Android)
- Implemented in
ElementsCooperFindAndroidManifest, runs once per target
Pre-Tasks
Post-Tasks
Gather Xcode Details (Darwin)
- Implemented in
ElementsDarwinGatherXcodeDetails, runs once per project.
Pre-Tasks
Post-Tasks
Generate .apk (Cooper/Android)
- Implemented in
ElementsCooperAndroidPack, runs once per target
Pre-Tasks
Post-Tasks
Generate .deps.json File (Echoes)
- Implemented in
ElementsGenerateDepsJsonFile, runs once per target
Pre-Tasks
Post-Tasks
Generate .runtime.config.json File (Echoes)
- Implemented in
ElementsEchoesGenerateRuntimeConfigJsonFile, runs once per target
Pre-Tasks
Post-Tasks
Generate Manifest File (Cooper/Android)
- Implemented in
ElementsCooperGenerateAndroidManifestFile, runs once per target
Pre-Tasks
Post-Tasks
Generate VB "My" Class
- Implemented in
ElementsEchoesGenerateVBMyClass, runs once per target
Pre-Tasks
Post-Tasks
Java-Sign (Cooper/Android)
- Implemented in
ElementsCooperAndroidJavaSign, runs once per target
Pre-Tasks
Post-Tasks
Link
The Link task, which is required for the unmanaged platforms, Cocoa and Island only, is used to post-process the compiler output, which is in form of "object' files, into the finished. This may include combining the binary with any referenced static libraries.
Linking is only required for non-Static Library projects on all Cocoa and Island sub-platforms. On Cocoa, the ElementsMergeToffee task might be additionally used to then merge different architectures into a single "fat" binary.
- Implemented in
ElementsLink, runs once per project.
Pre-Tasks
Execution
As it runs, the task loops over all active targets, and runs the appropriate platform-specific subtasks to perform the reference resolution, for Cocoa or Island targets.
For Echoes and Cooper targets, no linking phase is needed, so this task is a no-op, there.
CompilerOutput-* objects (per architecture and device)
Output
On success, new LinkerOutput-* objects will be created, per architecture (Cocoa and Island) and Device (Cocoa only).
Caching
The result of linking resolving is cached in Linker-*.caches, per architecture (Cocoa and Island) and Device (Cocoa only), subject to the date of the project file and the compiler input.
See Also
Link (Island)
- Implemented in
ElementsIslandLink, runs once per target.
Pre-Tasks
Post-Tasks
Link (Toffee)
- Implemented in
ElementsToffeeLink, runs once per target.
Pre-Tasks
Post-Tasks
Locate Provisioning Profile (Darwin)
- Implemented in
ElementsDarwinLocateProvisioningProfile, runs once per project.
Pre-Tasks
Post-Tasks
NPM Build (Echoes ASP.NET Core)
- Implemented in
ElementsEchoesAspNetCoreNpmBuild, runs once per target
Pre-Tasks
Post-Tasks
NPM Install (Echoes ASP.NET Core)
- Implemented in
ElementsEchoesAspNetCoreNpmInstall, runs once per target
Pre-Tasks
Post-Tasks
Post-Compile
- Implemented in
ElementsPostCompile, runs once per target.
Pre-Tasks
Post-Tasks
Sub-Tasks
Post-Compile (Cooper)
- Implemented in
ElementsPostCompileCooper, runs once per target.
Pre-Tasks
Post-Tasks
Sub-Tasks
Post-Compile (Darwin)
- Implemented in
ElementsPostCompileDarwin, runs once per target.
Pre-Tasks
Post-Tasks
Sub-Tasks
Post-Compile (Echoes)
- Implemented in
ElementsPostCompileEchoes, runs once per target.
Pre-Tasks
Post-Tasks
Sub-Tasks
Post-Compile (Island)
- Implemented in
ElementsPostCompileIsland, runs once per target.
Pre-Tasks
Post-Tasks
Sub-Tasks
Post-Compile (Toffee)
- Implemented in
ElementsPostCompileToffee, runs once per target.
Pre-Tasks
Post-Tasks
Sub-Tasks
Pre-Compile
- Implemented in
ElementsPreCompile, runs once per target.
Pre-Tasks
Post-Tasks
Sub-Tasks
Pre-Compile (Cooper)
- Implemented in
ElementsPreCompile2Cooper, runs once per target.
Pre-Tasks
Post-Tasks
Sub-Tasks
Pre-Compile (Darwin)
- Implemented in
ElementsPreCompileDarwin, runs once per target.
Pre-Tasks
Post-Tasks
Sub-Tasks
Pre-Compile (Echoes)
- Implemented in
ElementsPreCompileEchoes, runs once per target.
Pre-Tasks
Post-Tasks
Sub-Tasks
Pre-Compile (Island)
- Implemented in
ElementsPreCompileIsland, runs once per target.
Pre-Tasks
Post-Tasks
Sub-Tasks
Pre-Compile (Toffee)
- Implemented in
ElementsPreCompileToffee, runs once per target.
Pre-Tasks
Post-Tasks
Sub-Tasks
Pre-Compile, Part 2
Pre-Tasks
Post-Tasks
Sub-Tasks
Pre-Compile, Part 2 (Echoes)
- Implemented in
ElementsPreCompileEchoes2, runs once per target.
Pre-Tasks
Post-Tasks
Sub-Tasks
Pre-Flight (Cooper)
- Implemented in
ElementsPreflightCooper, runs once per project.
Pre-Tasks
Post-Tasks
Pre-Flight (Echoes)
- Implemented in
ElementsPreflightEchoes, runs once per project.
Pre-Tasks
Post-Tasks
Pre-Flight (Gotham)
- Implemented in
ElementsPreflightGotham, runs once per project.
Pre-Tasks
Post-Tasks
Pre-Flight (Island)
- Implemented in
ElementsPreflightIsland, runs once per project.
Pre-Tasks
Post-Tasks
Pre-Flight (Toffee)
- Implemented in
ElementsPreflightToffee, runs once per project.
Pre-Tasks
Post-Tasks
- Implemented in
ElementsPrepareCooperPlatform, runs once per target.
Pre-Tasks
Post-Tasks
- Implemented in
ElementsPrepareEchoesPlatform, runs once per target.
Pre-Tasks
Post-Tasks
- Implemented in
ElementsPrepareGothamPlatform, runs once per target.
Pre-Tasks
Post-Tasks
- Implemented in
ElementsPrepareIslandPlatform, runs once per target.
Pre-Tasks
Post-Tasks
- Implemented in
ElementsPrepareToffeePlatform, runs once per target.
Pre-Tasks
Post-Tasks
- Implemented in
ElementsPreparePlatforms, runs once per project.
Pre-Tasks
Execution
As it runs, the task loops over all active targets, and runs the appropriate platform-specific subtasks to prepare the platform for each target:
Process .aar References (Cooper/Android)
- Implemented in
ElementsCooperProcessAndroidAarReferences, runs once per target.
Pre-Tasks
Post-Tasks
Process ASP.NET Core Razor Files
- Implemented in
ElementsEchoesProcessRazorFiles, runs once per target
Pre-Tasks
Post-Tasks
Process Asset Catalogs (Darwin)
- Implemented in
ElementsDarwinProcessAssetCatalogs, runs once per project.
Pre-Tasks
Post-Tasks
Process CoreML Models (Darwin)
- Implemented in
ElementsDarwinProcessCoreMLModels, runs once per target.
Pre-Tasks
Post-Tasks
Process Gradle References
- Implemented in
ElementsProcessGradleReferences, runs once per target.
Pre-Tasks
Post-Tasks
Process IntentDefinitions (Darwin)
- Implemented in
ElementsDarwinProcessIntentDefinitions, runs once per target.
Pre-Tasks
Post-Tasks
- Implemented in
ElementsDarwinProcessMetalShaders, runs once per target.
Pre-Tasks
Post-Tasks
Process NuGet References
- Implemented in
ElementsProcessNuGetReferences, runs once per target.
Pre-Tasks
Post-Tasks
Process Resources
The Process Resources task handles gathering and pre-processing [Resources] for inclusion with your project. Resources are non-code data, such as images, text, audio or other files, that will be included in your application and can be accessed from code at runtime.
Different kinds of resources are supported on different platforms. In most cases, resources are packed up to be included inside the binary file generated by the compiler or linker; on the Cocoa platforms (Cocoa and Island/Darwin, resources usually remain standalone files inside the Application Bundle.
Please refer to the Resources topic for details.
Process Resources (Cooper)
- Implemented in
ElementsCooperProcessResources, runs once per target.
Pre-Tasks
Post-Tasks
Process Resources (Echoes)
- Implemented in
ElementsEchoesProcessResources, runs once per target.
Pre-Tasks
Post-Tasks
Process Resources (Island)
- Implemented in
ElementsIslandProcessResources, runs once per target.
Pre-Tasks
Post-Tasks
Process Resources (Toffee)
- Implemented in
ElementsToffeeProcessResources, runs once per target.
Pre-Tasks
Post-Tasks
Process XIBs and Storyboards (Darwin)
- Implemented in
ElementsDarwinProcessStoryboards, runs once per project.
Pre-Tasks
Post-Tasks
Resolve Android Files (Cooper/Android)
- Implemented in
ElementsCooperResolveAndroidFiles
Descends from
Pre-Tasks
Post-Tasks
Resolve AppResource Files (Darwin)
- Implemented in
ElementsDarwinResolveResourceFiles
Descends from
Pre-Tasks
Post-Tasks
Resolve Asset Catalog Files (Darwin)
- Implemented in
ElementsDarwinResolveAssetCatalogFiles
Descends from
Pre-Tasks
Post-Tasks
Resolve Content
- Implemented in
ElementsResolveContent
Descends from
Pre-Tasks
Post-Tasks
Resolve CoreML Models
- Implemented in
ElementsDarwinResolveCoreMLModels
Descends from
Pre-Tasks
Post-Tasks
- Implemented in
ElementsResolveHeaderImportFiles
Descends from
Pre-Tasks
Post-Tasks
Resolve Intent Definitions
- Implemented in
ElementsDarwinResolveIntentDefinitions
Descends from
Pre-Tasks
Post-Tasks
Resolve Manifests (Cooper/Android)
- Implemented in
ElementsCooperResolveAndroidManifests
Descends from
Pre-Tasks
Post-Tasks
- Implemented in
ElementsDarwinResolveMetalShaders
Descends from
Pre-Tasks
Post-Tasks
Resolve Razor (.cshtml) Files
- Implemented in
ElementsEchoesResolveRazorFiles
Descends from
Pre-Tasks
Post-Tasks
Resolve References
The Resolve References task makes sure that every reference in each project and target is resolved to a proper full path on disk, for all active architectures (Island) and for all device types (Device or Simulator, for Cocoa).
An unresolved reference, unlike in the old MSBuild build system, is a failing error. The task will attempt to resolve each reference, even when an error occurs, so that all reference problems will be reported in one go.
- Implemented in
ElementsResolveReferences, runs once per project.
Pre-Tasks
Execution
As it runs, the task loops over all active targets, and runs the appropriate platform-specific subtasks to perform the reference resolution:
First, regular references are resolved, followed by Project References.
The basic flow is identical for each platform. References are resolved using the following steps:
-
If a reference has a HintPath metadata and a file exists at that path (absolute or relative to the project), it will be used.
-
If the name of the reference itself refers to a valid file (absolute or relative to the project), it will be used.
If the name of the reference includes a valid reference file extension for the platform, it is stripped for the purpose of the remaining lookup. E.g. "Foundation.fx" becomes simply "Foundation", but otherwise dotted names are preserved, "System.Data.dll" becomes "System.Data", but "System.Core" remains untouched.
-
If the reference can be located via the platform-specific XML Reference Files, it will be used (FindReferenceFromXml).
-
Finally, platform-specific steps will be invoked to try and resolve the reference (FindPlatformSpecificReference).
-
For Full-Framework .NET, the CLRs reference folders matching the projects Target Framework Version will be searched for the reference, as well as relevant AssemblyFolder locations marked in the registry.
-
For Java, the reference is checked for either in the Java Runtime folder (Plain) or in the Android SDK folder and its extras subfolders (Android). For backwards compatibility, a reference to rt.jar will be resolved to classes.jar and ui.jar, instead.
-
For Cocoa, the project's active SDK folder will be checked for the reference. If a Deployment Target Version is set, the rtl.fx reference will get adjusted to the one matching the deployment target, if available. An unsupported deployment target is a warning, not a failing error. For non-macOS sub-platforms, the reference will be resolved for both the device SDK and the Simulator SDK.
-
For Island, the specified IslandFXFolder will be used to locate the reference, for each active architecture. If not specified, or not found there, it will be looked up via the [XML Reference Files]((/Projects/References/ReferencesXMLPaths).
If the reference was resolved successfully, additional platform-specific steps are run for Island and Cocoa, to make sure the reference covers all architectures (Island) or devices (Cocoa) (AdjustReferenceIfNeeded). If that fails, the reference is considered unresolved, and the task fails.
-
For Cocoa, non-macOS: If the parent folder name of the resolved reference matches the SDK name ("iOS", "tvOS", "watchOS"), it will be marked as for-Device, and its sibling folders will be checked for a matching simulator reference. And vice versa. Failure to resolve the reference for both device and simulator will result in error.
-
For Island: If the parent folder of the resolved reference matches a valid architecture for the sub-platform, its sibling folders will be checked to try and resolve the reference for all active architectures. Failure to do so will result in error.
If the reference was not resolved properly, the task fails.
Output
On success, each reference will have its ResolvedPath meta data set to the path of the resolved reference file.
For Island, ResolvedPath-* will be set, where * is each of the active architectures. The main resolved path will contain one of the architectures, but it is undefined which one.
For Island, ResolvedPath-Device and ResolvedPath-Simulator will be set to the respective paths. The main resolved path will contain the Device path, as well.
Caching
The result of reference resolving is cached in ResolveReferences.caches, subject only to the date of the project file.
Note: This means that subsequent incremental builds will not pick up changes in available references, unless the project file was touched.
After a cache restore, a special tasks is run to verify all files referenced by the cache are present, for Cocoa and Island projects.
Resolve References for Target (Cooper)
- Implemented in
ElementsResolveCooperReferencesForTarget, runs once per target.
Pre-Tasks
Post-Tasks
Resolve References for Target (Echoes)
- Implemented in
ElementsResolveEchoesReferencesForTarget, runs once per target.
Pre-Tasks
Post-Tasks
Resolve References for Target (Island)
- Implemented in
ElementsResolveIslandReferencesForTarget, runs once per target.
Pre-Tasks
Post-Tasks
Resolve References for Target (Toffee)
- Implemented in
ElementsResolveToffeeReferencesForTarget, runs once per target.
Pre-Tasks
Post-Tasks
Resolve Source Files
- Implemented in
ElementsResolveSourceFiles
Descends from
Pre-Tasks
Post-Tasks
Resolve XAML Files
- Implemented in
ElementsEchoesResolveXamlFiles
Descends from
Pre-Tasks
Post-Tasks
Resolve XIB and Storyboard Files (Darwin)
- Implemented in
ElementsDarwinResolveStoryboardAndXibFiles
Descends from
Pre-Tasks
Post-Tasks
Run Predex (Cooper/Android)
- Implemented in
ElementsCooperAndroidRunPredex
Pre-Tasks
Post-Tasks
Sanity Check
- Implemented in
ElementsSanityCheck, runs once per target.
Pre-Tasks
Post-Tasks
Strip (Darwin)
- Implemented in
ElementsDarwinStrip, runs once per target.
Pre-Tasks
Post-Tasks
Validate Cached References (Island)
- Implemented in
ElementsValidateCachedIslandReferencesForTarget, runs once per project.
Pre-Tasks
Post-Tasks
Validate Cached References (Toffee)
- Implemented in
ElementsValidateCachedToffeeReferencesForTarget, runs once per project.
Pre-Tasks
Post-Tasks
Other Functions
In addition to Building projects, the Ebuild command line tool has the option to perform a few other command line functions relevant to Elements projects. All of these tasks are initiated with a specific command kline switch, and might come with their own set of additional switches and parameters:
Converting Projects: --convert
Converts a foreign project format to Elements. Currently supports .vbproj and .csproj projects.
Dumping binary files: --dump
Lists the contest of certain binary file types relevant to Elements. Currently supports .apk, .dex, .jar, .far and .fx files.
Importing Go Projects: --import-go-project
Imports a Go library (including its dependency tree) from Git into a set of Go library projects that can be built and used from Elements.
Importing Delphi Packages: --import-delphi
Imports a Delphi SDK or Set of Packages to enable the use of Delphi APIs such as the VCL, FireMonkey, dbGo or your own Delphi code in your Island projects.
Registering CrossBox Servers: --register-crossbox-server
Registers a new CrossBox server for use with builds and the IDEs.
See Also
Folders
EBuild stores caches and other relevant data in a central location in the application data folder:
- Windows:
%APPDATA%\..\Local\RemObjects Software\EBuild
- macOS:
~/Library/Application Data/RemObjects Software/EBuild
- Linux:
~/.ebuild
(Next to the EBuild folder, there is also one for Elements specific files, as well as potentially folders for other RemObjects Software products)
Underneath this, EBuild maintains a set of different folders:
- CrossBox – data from remote clients of the current system has been accessed as a remote CrossBox Server, as well as cached information for local CrossBox functionality.
- Delphi SDKs – imported base Delphi SDKs, categorized by version, platform and architecture.
- Delphi Support – builds of the Island.DelphiSupport library compiled as part of a Delphi SDK import, also categorized by version, platform and architecture.
- Downloads – temporary downloaded files
- Obj – intermediate files and caches from building your own projects.
- Packages – caches of NuGet, Gradle, and EBuild remote packages used by your projects.
- Predex – cache of pre-dex'ed files from your Android projects.
- RemoteReferences – source for any Remote Project References you may use or have used
- SDKs – auto-downloaded versions of SDKs used for your Toffee or Island projects, if you targeted SDK versions not covered by your local Elements install
Note: Content in these folders can get large (especially for Obj, if you create and build many projects, over time). Data in all of these folders is used for caching purposes only, and can safely be deleted manually at any time, to free space (though it would be inadvisable to delete folders while building a project with EBuild 😉). It is also safe to be excluded from your backups.
If you delete the Delphi SDKs or Delphi Support folders, you will have to re-run the Import for your Delphi version(s), before you can build any Island/Delphi projects.
Status
Below is the current status of EBuild, as of August 21, 2018. Feedback and bug reports on EBuild are very much appreciated (ideally here on Talk), but keep the status in mind for what you expect to work and what not. Source access via GitHub is available upon request.
- Fire: EBuild is the default tool chain for all projects.
- Water: EBuild is the default tool chain for all projects.
- Visual Studio: EBuild is the default tool chain for all except UWP, WinRT and Classic ASP.NET Echoes projects.
Echoes (.NET)
Works:
-
Compile plain projects (.exe, .dll)
- .NET Framework (full), including WinForms and WPF
- .NET Standard
- .NET Core
- ASP..NET Core
- Resolving NuGet package references internally
-
Secondary build tasks:
Does not work yet:
- Resource .dlls
-
Advanced tool chain support for:
- Universal Windows Platform
- Classic ASP.NET (mostly deprecated)
- WinRT (deprecated)
- Windows Phone Platform (deprecated)
- Silverlight (deprecated)
EBuild is now the default tool chain for all Echoes projects except UWP, Classic ASP.NET and the deprecated WinRT, Windows and Silverlight.
Cooper (Java)
Fully functional, EBuild is now the only supported build chain for Cooper, and all Java and Android projects will always build with EBuild.
Toffee (Cocoa)
Fully functional. EBuild is now the only supported build chain for Cocoa, and all macOS, iOS, tvOS and watchOS projects will always build with EBuild.
Island
Fully functional, EBuild is now the only supported build chain for Island, and all Island projects will always build with EBuild.
Projects with multiple targets are fully supported and functional in EBuild, and partially supported in the Fire and Water IDE (targets will show details, but cannot be added or edited yet, except by manually tweaking the project file XML). Mixed/multi-target projects are not and will not be supported in Visual Studio.
Check out the open source libToffee and Delphi RTL projects for two examples that have an (optional) single project that builds on all platforms.
Compiler support for Gotham is in progress and not publicly available yet.
A CrossBox Server is used to facilitate building and debugging Elements projects on operating systems other than that used by the developer. For example, a developer working on Windows might want to debug a Mac or Linux app, or a developer working in Fire on Mac might want to run an application on a Windows or Linux host for debugging.
The new CrossBox 2 system is used in all scenarios where a remote connection is needed. CrossBox 1 (which required a a dedicated CrossBox server app on the Mac) is deprecated and no longer required/used.
CrossBox works via SSH and is used for both Cocoa and Island projects, to run them remotely on Macs, Linux or Windows (from a Windows PC or a Mac). (SSH is available on Linux, Mac and newer Windows versions by default, and can easily be installed, via OpenSSH, if needed)
From Fire, a CrossBox connection is required for running and debugging both Windows or Linux applications, since neither can be run locally on the Mac, for obvious reasons. Of course this Windows or Linux machine can be a dedicated PC or server, or a Virtual Machine running inside Parallels or VMware on your Mac.
From Water and Visual Studio, a CrossBox connection is required for building, running and debugging Cocoa apps, and can also optionally be used for running and debugging Island projects on Linux and Mac.
From Linux build servers or when working with the command line compiler, a CrossBox connection is required for building Cocoa apps.
Support for running .NET apps via cross-box is experimental and in development.
Island/Windows and Linux applications can be built locally on both Mac, Windows and Linux, without the need for a remote connection.
Connecting to CrossBox
Connecting your development system to CrossBox is easy:
CrossBox in Water and Visual Studio
The following table shows how CrossBox is involved for various project types when working on Windows, whether in Water or Visual Studio (on Windows). Only Cocoa projects need a remote connection to build, all other platforms (including Island/Linux) build and link locally. For obvious reasons, Cocoa projects debug remotely. Island/Linux can debug locally, if Bash for Windows is installed, as well as remotely.
| Platform |
SubPlatform |
Build |
Debug |
Comments |
| .NET |
|
local |
local |
.NET projects build and run locally on Windows |
| Java |
Plain |
local |
local |
Java projects build and run locally on Windows |
| Java |
Android |
local |
locally attached device |
Java projects build and run locally on Windows |
| Cocoa |
macOS |
CrossBox |
CrossBox |
Need a Mac to build and will debug remotely |
| Cocoa |
iOS |
CrossBox |
CrossBox |
Need a Mac to build and will debug remotely |
| Cocoa |
tvOS |
CrossBox |
CrossBox |
Need a Mac to build and will debug remotely |
| Island |
Windows |
local |
local, CrossBox |
Build locally, debug locally or remotely |
| Island |
Linux |
local |
local, CrossBox |
Build locally, debug locally or remotely |
| Island |
Darwin |
local/CB2 |
CrossBox |
Build libraries and executables locally, but .app projects or code signing will need a CrossBox connection to build; debug remotely |
| Island |
WebAssembly |
local |
local |
Build and debug locally |
CrossBox in Fire
The following table shows how CrossBox is involved for various project types when working in Fire on a Mac. Here, all platforms (including Island/Linux and of course Cocoa) build and link locally, and only Island/Linux projects debug remotely.
| Platform |
SubPlatform |
Build |
Debug |
Comments |
| .NET |
|
local |
local |
.NET projects build and run locally on Mac |
| Java |
Plain |
local |
local |
Java projects build and run locally on Mac |
| Java |
Android |
local |
locally attached device |
Java projects build locally on Mac |
| Cocoa |
macOS |
local |
local |
Cocoa apps build and run locally on Mac |
| Cocoa |
iOS |
local |
locally attached iOS device |
Cocoa apps build locally on Mac |
| Cocoa |
tvOS |
local |
locally attached Apple TV |
Cocoa apps build locally on Mac |
| Island |
Windows |
local |
CrossBox |
Build locally, debug remotely |
| Island |
Linux |
local |
CrossBox |
Build locally, debug remotely |
| Island |
Darwin |
local |
local, CrossBox |
Build locally, debug locally or remotely |
| Island |
WebAssembly |
local |
local |
Build and debug locally |
See Also
CrossBox 2 uses SSH co communicate between client and server, so no or very little setup is required to be able to connect to your Mac, Linux or Windows machines from your IDE.
SSH can use passwords (usually not recommended/used) or public/private key pairs for authentication.
If password authentication is enabled, connecting is easy – simply provide your username and password in the IDE when connecting, and you're done.
To use key based authentication, you will have two key files, a public and a private key. The private key should be kept secret and not shared with anybody; you need this key on the client (e.g. in Fire, Water or Visual Studio) to connect. On the server, only the public key is needed. This key file, as the name implies, is safe to share freely and unsecurely.
- If you already have an existing key pair on the client, you can also simply add the public key on the server, as described below.
- If not, you can create a new key pair on any Mac or Linux machine. Copy the private key over to where you're running Fire, Water or Visual Studio.
1. Creating or Finding a Key Pair
If you already know about SSH and know you have a key pair you can use, you can skip this step.
Mac
macOS comes with SSH already installed, and you might already have a key pair. Open Terminal.app on your Mac and look at the ~/.ssh folder (if it exists), by typing ls ~/.ssh. If the folder exists and contains two files called id_rsa and id_rsa.pub, you are already set, and can use these files as private and public key file.
If they do not exist, you can run the following command: ssh-keygen -m PEM -t rsa -C "you@example.com", replacing the email address with your real address. This should create id_rsa and id_rsa.pub files for you.
Linux
Most Linux environments come with SSH already installed, in the form of OpenSSH. You can see if your Linux machine is reachable by SSH using the ssh command. If OpenSSH is not installed (or not configured for remote access), please consult your distribution's documentation for setting up SSH (usually by running something like sudo apt install openssh-server).
Windows
With OpenSSH installed as shown under point 2 below, open a Command Prompt window with Administrator privileges, and run
c:\windows\system32\Openssh\ssh-keygen -A
and follow its instructions, to generate a key pair. Afterwards, you will find your key pair in the C:\Users\{username}\.ssh\ folder.
Again you can refer to this tutorial for more details.
2. Enabling SSH Access on the Server
Mac and Linux
Enabling access to your Mac or Linux machine via SSH is easy. Simply take the contents of your public key file and add it as a new line to the ~/.ssh/authorized_keys files in the home directory of the appropriate user. If the file does not exist, you can simply copy the id_rsa.pub into ~/.ssh/ and rename it to authorized_keys.
On Mac, you might also need to enable SSH by opening the "System Preferences" app, selecting "Sharing" and then checking the "Remote Login" option.
If you have any Firewalls installed/active, also make sure that port 22 is open.
Windows
Windows 10 comes with OpenSSH included. To enable it, go to the "Settings" app, and search for "Apps and features". Click on "Optional features" and then "Add a feature". Select "OpenSSH Server" from the list of options, check it, and click "Install". You might have to restart Windows to enable the SSH server.
You can refer to this tutorial for more details.
3. Connecting from the Client
If in the first step above you used an existing (or created a new) key pair on your client machine, then Fire, Water or Visual Studio should automatically pick that file up and use it when you try to register a new server. If not, you can copy the id_rsa perivate key file to any location of your choosing, and browse to it from the "Register CrossBox Server" dialog.
Additional Steps
Most Linux environments also already come with GDB, the GNU Debugger, installed. You can confirm this by running gdb from the command line. If GDB is not installed yet, please consult your distribution's docs on how to install it (usually by running something like sudo apt-get install gdb).
REMEMBER to keep your private key file private and never share it with anyone. It is like a password, and anyone getting access to your private key will be able to connect to any servers where your public key is configured to allow access.
See Also
Connecting to your CrossBox server is easy, and only needs to be done once, after which the server will automatically be available for all your projects.
If an open solution contains one or more qualifying projects (currently, that means Island projects), the "CrossBox" popup button in the middle of the toolbar will automatically show you a selection of all registered CrossBox servers matching your app's platform, as well as an option to "Connect to a CrossBox Server".
Select this option to add a new connection, and you will be shown the following sheet:
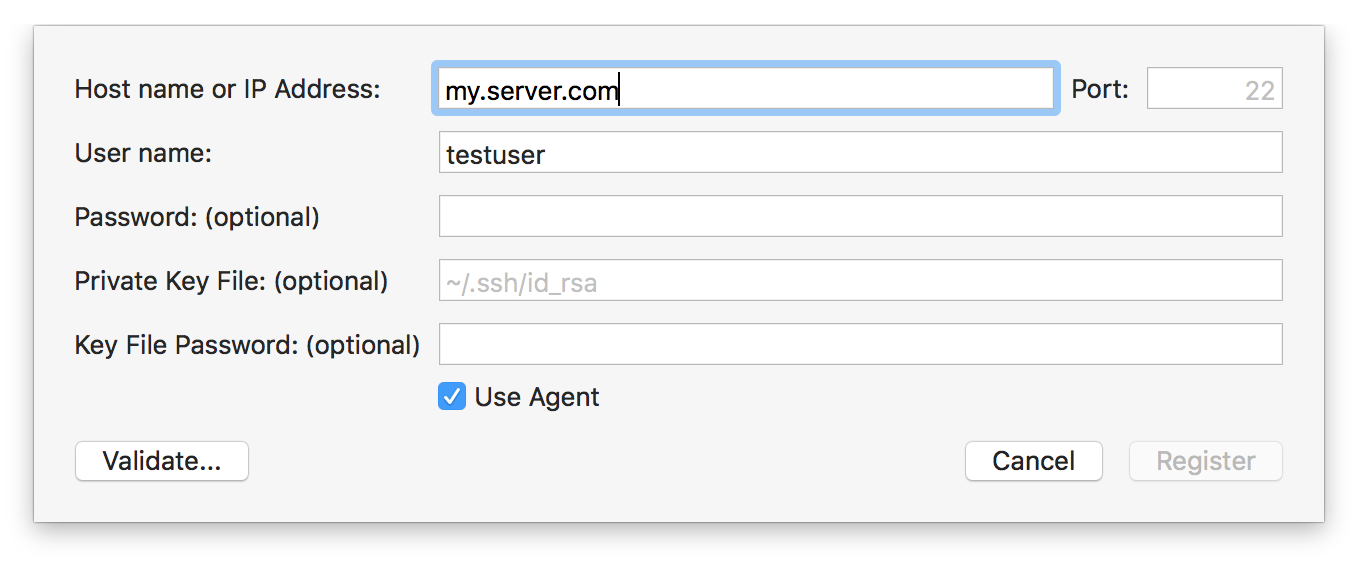
In many cases, especially if you are already using SSH for CrossBox or for other purposes, all you need to specify is the host name or IP address of your remote machine. This can be a Linux PC or VM, another Mac, or a Windows PC or VM running our OpenSSH.
The default port for SSH is 22, but you can override this with a different value if your server is listening on a different port, or you have NAT redirects in place that change the port. The machine you are trying to connect to must be reachable on this port.
It is also common to provide a username, in case you want to connect to an account named differently than your local user.
If your local SSH is fully set up, you already have a key pair, and the server knows your public key, that's all you need to connect. Alternatively, you can also provide a password (not recommended) or a different local private key file to use. We recommend consulting general documentation about SSH on macOS if you are unfamiliar with the topic, please refer to the links at the bottom to get started.
Once you provided all the information needed, you can click "Validate..." to check the connection. If all is well, after a few seconds you should see a message stating the type of the server you are connecting to, and the "Register" button becomes available.
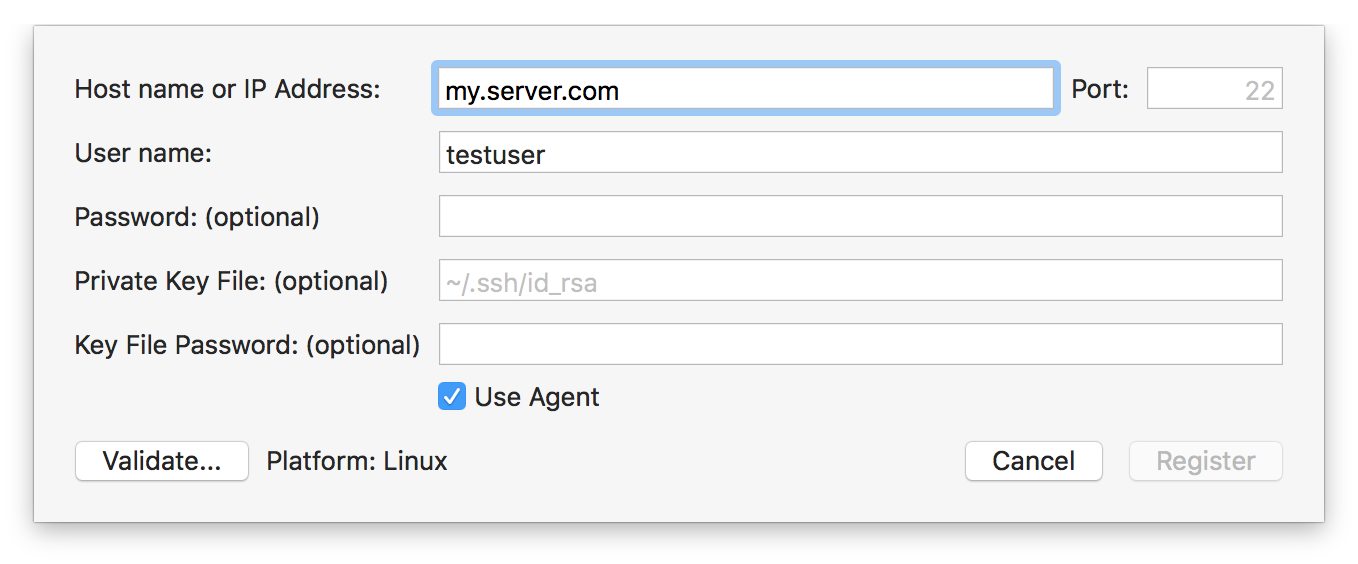
Click "Register" and the server will be added to your list, the dialog will close, and any project in your solution that is a match for the server's platform will automatically be set to use the new server.
With that, you're now ready to press ⌘R and run your Island project on Linux (or Windows).
See Also
Connecting to your CrossBox server is easy, and only needs to be done once, after which the server will automatically be available for all your projects.
If an open solution contains one or more qualifying projects (currently, that means Cocoa and Island projects), the "CrossBox" popup button in the middle of the toolbar will automatically show you a selection of all registered CrossBox servers matching your app's platform, as well as an option to "Connect to a CrossBox Server".
Select this option to add a new connection, and you will be shown the following sheet:
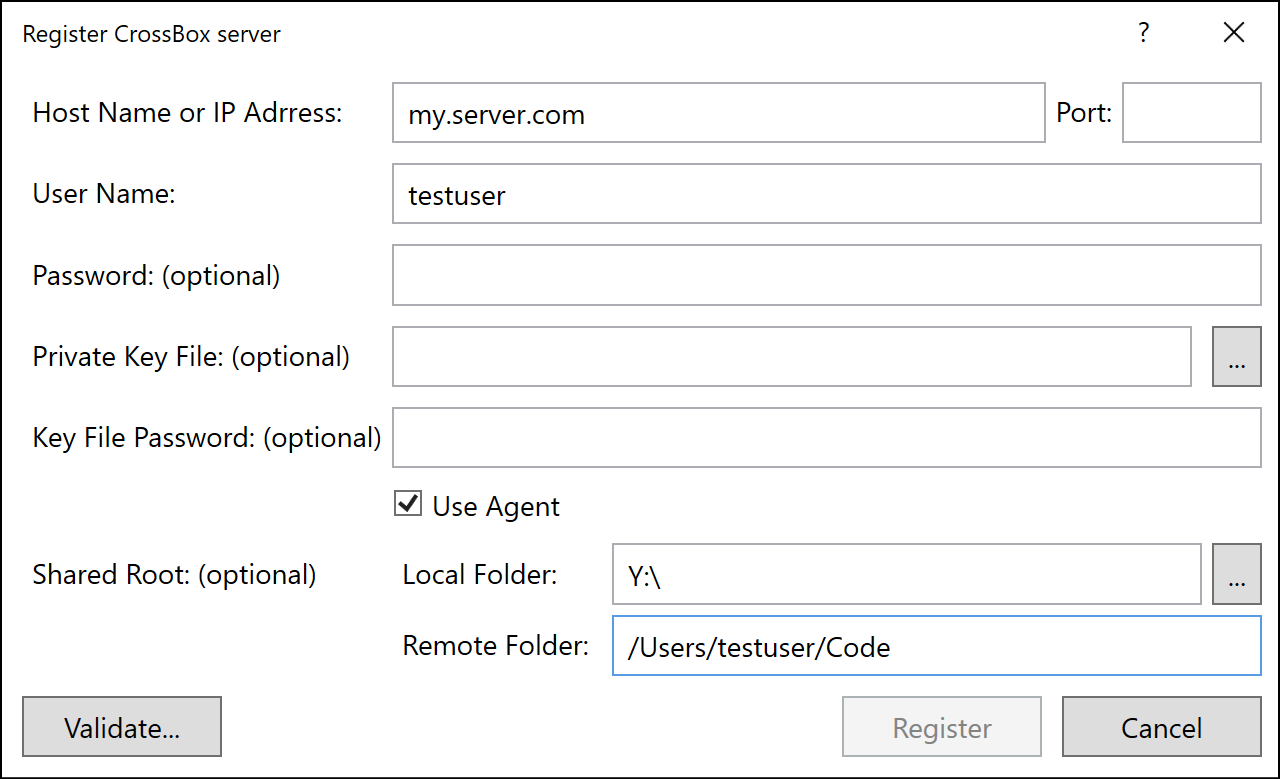
At the very least, you will need to specify the host name/address and the username for the CrossBox Server you want to connect to.
Depending on how your SSH is set up locally, Visual Studio might automatically pick up your default public key file; if it does not, you can browse for the key file manually, or simply provide a password, if your server allows password-based authentication.
The default port for SSH is 22, but you can override this with a different value if your server is listening on a different port, or you have NAT redirects in place that change the port. The machine you are trying to connect to must be reachable on this port.
(We recommend to familiarize yourself with how SSH works in general, via the link(s) provided below).
Once you provided all the information needed, you can click "Validate..." to check the connection. If all is well, after a few seconds you should see a message stating the type of the server you are connecting to, and the "Register" button becomes available.
Click "Register" and the server will be added to your list, the dialog will close, and any project in your solution that is a match for the server's platform will automatically be set to use the new server.
With that, you're now ready to press Ctrl+R and run your Island project on Linux (or Windows).
Shared Roots
You can also optionally specify a so-called "shared root folder" for your CrossBox server, if you have a folder from the server mapped as a local drive, or vice versa. This is helpful especially for Cocoa (where some build phases use the Mac, and can cause a lot of files to be transferred over SSH), but provides an extra speed boost for Island debugging, as well.
Essentially, you will provide two paths that point to the same folder, one local to your PC or VM and one that's valid on the CrossBox server.
Whenever you work with projects located within the shared root, CrossBox will forego manually transferring files back and forth via SSH. Instead, it will just build the project locally, and use the shared root to map the file paths whenever it needs to execute things remotely – both for building and for debugging.
For example, say you work in a Windows VM on a Mac. All your projects are located on your Mac, in /Users/paul/Code, and you have that folder mapped into your VM as drive Z:\. You can set the "Remote Folder" and "Local Folder" settings of your shared root respectively, and whenever you work in a project from drive Z:, CrossBox will use the shared root. (If you open a project located elsewhere, say in C:\, CrossBox will fall back to transferring files via SSH as needed.)
Another example, say you are working on a Windows PC, but have a Linux VM for testing Island projects. Your C:\Projects\ folder is mapped as /mnt/projects/ into the VM. Once again you can set the "Local Folder" and "Remote Folder" settings approriately.
Note: Before using the shared root, CrossBox will make sure the two folders do indeed match up, by creating a small temporary file.
Also note: Shared roots require the use of Elements 10 and EBuild.
See Also
Connecting to your CrossBox server is easy, and only needs to be done once, after which the server will automatically be available for all your projects.
If an open solution contains one or more qualifying projects (currently, that means Island projects), the "CrossBox" popup button in tool bar will give you the option to select or register a new remote server, by clicking "CrossBox: Please select server" and then "Register server..." from the menu that opens.
Selecting this option will present you with the following dialog:
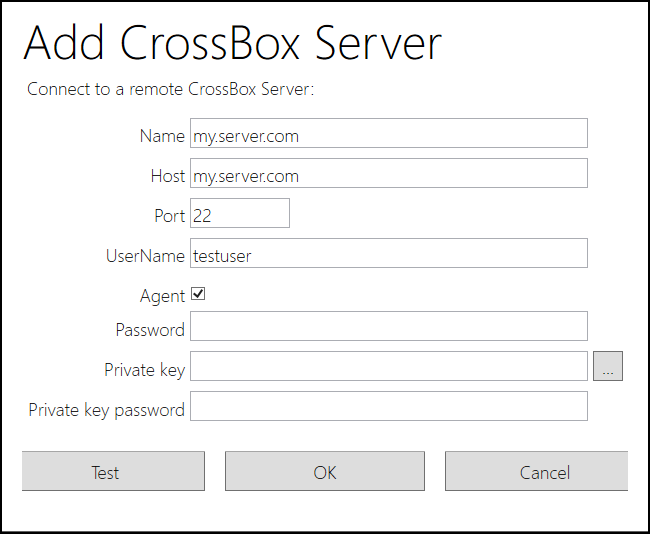
At the very least, you will need to specify the host name/address and the username for the CrossBox Server you want to connect to.
Depending on how your SSH is set up locally, Visual Studio might automatically pick up your default public key file; if it does not, you can browse for the key file manually, or simply provide a password, if your server allows password-based authentication.
The default port for SSH is 22, but you can override this with a different value if your server is listening on a different port, or you have NAT redirects in place that change the port. The machine you are trying to connect to must be reachable on this port.
(We recommend to familiarize yourself with how SSH works in general, via the link(s) provided below).
Once you provided all the information needed, you can click "Test" to check the connection. If all is well, after a few seconds you should see a confirmation message. If you see an error instead, verify your settings and make sure that your server is reachable.
Once the test succeeds, you can click "OK", and your server will be registered. It can now be selected for this and any future projects from the "CrossBox" toolbar dropdown button.
See Also
Connecting to your CrossBox server is easy, and only needs to be done once, after which the server will automatically be available for all your projects.
The EBuild command line tool provides an option to do this from the command line, for cases where you do not have access to an IDE, for example on build servers, or when developing with the command line compiler on Linux.
This can be done by invoking the ebuild command with the --register-crossbox-server parameter, which then introduces a few new command line parameters that can be used to specify details about the server to register.
--host:<hostname or ip address>
--port:<port>
--name:<name>
--user:<name>
--password:<password>
--keyfile:<name>
--keyfilepassword:<password>
--agent:<true/false>
--local-shared-root:<local path>
--remote-shared-root:<remote path>
- The
--host parameter is always required to specify the host name or IP address of the remote server. This can can be an IPv4 or IPv6 address, or a DNS name.
All other parameters are optional, and can be omitted:
- The
--port parmeter can specify a custom port for the SSH connection. The default is port 22.
- The
--name parameter can be used ot override the user-visible name that the server will be registered under. By default, the host address will be used.
- The
--user parameter specifies the name of the remote user. If not specified, the name of the current local user will be used.
Either a password or a key file (recommended) are required for authorization. If a default private key file is present in the local SSH installation (and has its public key registered on the server), both parameters can be omitted and the default key file will be used.
Optionally, a key file password can be provided, or the --agent option can be set to true to use the local SSH agent system for login, instead.
We recommend to familiarize yourself with how SSH works in general, via the link(s) provided below.
Shared Roots
You can also optionally specify a so-called "shared root folder" for your CrossBox server, if you have a folder from the server mapped as a local drive, or vice versa. This is helpful especially for Cocoa (where some build phases use the Mac, and can cause a lot of files to be transferred over SSH), but provides an extra speed boost for Island debugging, as well.
Essentially, you will provide two paths that point to the same folder, one local to your PC or VM and one that's valid on the CrossBox server.
Whenever you work with projects located within the shared root, CrossBox will forego manually transferring files back and forth via SSH. Instead, it will just build the project locally, and use the shared root to map the file paths whenever it needs to execute things remotely – both for building and for debugging.
For example, say you work in a Windows VM on a Mac. All your projects are located on your Mac, in /Users/paul/Code, and you have that folder mapped into your VM as drive Z:\. You can pass the --local-shared-root and --remote-shared-root parameters, and whenever you work in a project from drive Z:, CrossBox will use the shared root. (If you open a project located elsewhere, say in C:\, CrossBox will fall back to transferring files via SSH as needed.)
Note: EBuild will verify that the local shared root folder exists, and that it maps to the remote root, on registration (and on subsequent use, as well), by creating a small temporary file. If the check fails, the server will be registered without the shared root option.
See Also
FXGen is a GUI front-end to the HeaderImporter command line tool (and its supporting Train scripts) that makes it easy to import whole SDKs and custom libraries as .fx Files, so that they can be used with the Elements languages, on the Cocoa and Island platforms.
Previously a standa-alone tool, FXGen is now integrated into Fire and Water and the EBuild tool chain.
FXGen currently supports:
See Also
The EBuild tool chain supports a special kind of project called an Import Project that allows you to automatically import a C or Objective-C library and generate the necessary .fx file(s) to use it in your Elements projects.
Import projects contain no code themselves; instead they reference am existing binary, one or more C or Objective-C .h header files or a .framework. When build, the project will analyze the header file and generate one or more .fx files as output.
You can reference Import Projects via Project References in your regular Elements project, or youcan reference the final .fx files directly, depending on your need.
Fire and Water provide support to help you create import projects, by simply dragging a .framework from Finder into your solution, or using the provided project templates.
Structure of an Import Project
An Import Project is a regular .elements project file, with the OutputType setting set to Import. The project mode must be either Toffee or Island, as imports are only supported for these two platforms.
An import project may contain no source files, but it can contain additional settings and objects, depending on the type, and it may contain References to other libraries needed by the import, base SDK frameworks or Project References to other imports it depends on.
<?xml version="1.0" encoding="utf-8" standalone="yes"?>
<Project DefaultTargets="Build" xmlns="http://schemas.microsoft.com/developer/msbuild/2003" ToolsVersion="4.0">
<PropertyGroup>
<OutputType>Import</OutputType>
<SDK>iOS</SDK>
</PropertyGroup>
<Import Project="$(MSBuildExtensionsPath)\RemObjects Software\Elements\RemObjects.Elements.Toffee.targets" />
</Project>
Importing Frameworks
Frameworks are the easiest to import, as they collect all the required information in a simple bundle. .frameworks are supported only by the Apple platform, typically created by Xcode, so they are available for Cocoa.
To import a framework, make sure to specify Mode and SubMode (Toffee) or Mode, SubMode and SDK for Island/Darwin, as well as any core references needed (usually at least rtl, Foundation and UIKit or AppKit), as well as a single .framework file:
<?xml version="1.0" encoding="utf-8" standalone="yes"?>
<Project DefaultTargets="Build" xmlns="http://schemas.microsoft.com/developer/msbuild/2003" ToolsVersion="4.0">
<PropertyGroup>
<ProjectGuid>{...}</ProjectGuid>
<OutputType>Import</OutputType>
<Mode>Toffee</Mode>
<SubMode>iOS</SubMode>
</PropertyGroup>
<ItemGroup>
<Reference Include="rtl" />
<Reference Include="Foundation" />
<Reference Include="UIKit" />
<ImportFramework Include="My.framework" />
</ItemGroup>
<Import Project="$(MSBuildExtensionsPath)\RemObjects Software\Elements\RemObjects.Elements.targets" />
</Project>
<?xml version="1.0" encoding="utf-8" standalone="yes"?>
<Project DefaultTargets="Build" xmlns="http://schemas.microsoft.com/developer/msbuild/2003" ToolsVersion="4.0">
<PropertyGroup>
<ProjectGuid>{...}</ProjectGuid>
<OutputType>Import</OutputType>
<Mode>Island</Mode>
<SubMode>Island</SubMode>
<SDK>iOS</SDK>
</PropertyGroup>
<ItemGroup>
<Reference Include="rtl" />
<Reference Include="Foundation" />
<Reference Include="UIKit" />
<ImportFramework Include="My.framework" />
</ItemGroup>
<Import Project="$(MSBuildExtensionsPath)\RemObjects Software\Elements\RemObjects.Elements.targets" />
</Project>
The path to the framework, My.framework in the example above, can be relative to the project, or absolute.
That's it. You can now build this project, and it will import the headers and generate one or more .fx files for you, as well as a zipped copy of the .framework, you can use when later compiling projects on Windows (since .frameworks are bundle folders, and do not survice the move to Windows).
Simulator vs. Device, and Architectures
If you have separate copies of your frame work for device vs simulator, make sure the two versions are in properly named subfolders next to each other (e.g. iOS/My.framework and iOS Simulator/My.framework).
EBuild will automatically detect this, and switch between the two versions, depending on whether you build the project for Simulator, Device or both.
Automatically Creating Import Projects in Fire
In Fire, you can simply drag a .framework from Finder onto the References node of your project, just as would when referencing an existing .fx (or a .dll or .jar on other platforms).
Fire will automatically create an Import Project for you, add it to your solution, and add a [Project Reference](/Projects/References/ProjectReferences to that Import project to your existing project.
Importing Multiple Frameworks with Dependencies
To import multiple .frameworks that depend on each other, simply create an individual Import project for each Framework. Then add project references between them as necessary.
E.g. if Second.framework depends om First.framework, import "First" as shown above. To the import project for "Second" add a project reference to "First" (e.g. via drag and drop in Fire or Water), before you build:
<ProjectReference Include="First">
<HintPath>/optional/path/to/First.fx</HintPath>
<Project>{...GUID of First.elements...}</Project>
<ProjectFile>/path/to/First.elements</ProjectFile>
</ProjectReference>
Importing Libraies
Static (.a) or Dynamic (.dll, .so, .dylib) libraries require a bit more configuration to import, as you will need to manually provide EBuild with information on on where to find the .h header files that describe them.
...
Additional Settings and Objects
Setting: ConditionalDefines
Optionally, a set of conditional defines can be provided to affect the import. This is a semicolon-separated list, and each entry will be treated as if it was provided via #define directive in source. Since this is C, defines may be name/value pairs with an = sign.
<CondirtionalDefines>DEBUG;TRACE</CondirtionalDefines>
Setting: RootNamespace
Optionally, this setting can provide the base namespace for the imported APIs. Header files in the root level of the import will use this namespaces, heders in subfolders will get their folder structure appended to the namespace hierarchy.
Note that since Cocoa Frameworks are always contained in a folder, hey will by default get the framework name as namespace name, when RootNamespace is empty (then default).
Object: ImportFramework
A single ImportFramework object can be provided to import a Cocoa .framework, as described above. This may not be combioned with the ImportFile objects.
Object: ImportHeader
One or more C header file can be provided as ImoportHeader objects in order to drive a manual import. These files can be specified relative to the project or provided as absolute path.
Inside the file, regular #include directives can be used to pull in the required actual headers. When parsing
Object: ImportVirtualFile
The ImportVirtualFile object can be used to provide "missing" files that are being #imported by some of the header files but, for one reason or another, cannot be found. ImportVirtualFile objects reference an actual file in the project, that well be used whenever the imported header request a dfile hy that name.
Object: ImportLinkLibrary
The ImportLinkLibrary object can be used to specify one or more binary files that will need to be linked, in order for the imported library to be used in an application. These can be static libraries (.a, .lib) or dynamic ones (.dll, .so, .dylib).
The referenced file must exist on disk, and can be referred to with a path relative to the project, or with an absolute path. If the file is set to CopyLocal (or Private), it will be copied next to the generated .fx file(s) as part of the build.
For each ImportLinkLibrary object, an ImportLinkName (see below) will be set automatically, using the filename, dropping the file extension (and, on Cocoa or Island/Darwin, any lib prefix).
Object ImportLinkNames
The ImportLinkNames setting can specify the name of one or more binary files (as semicolon-separated list) that will need to be linked, in order for the imported library to be used in an application. This setting affects only the generated linker comm and when applications using the library are built.
Use the ImportLinkName (instead of the ImportLinkLibrary object described above), if the actual binary is not available/required at import time, or is part of the standard platform libraries. For example for importing libz or libxml2 on Cocoa, the actual binary is found on the system, so merely specifying a link name of z or xml2 will suffice for the linker to locate the right library.
Setting: ImportBlacklist
Optionally, a semicolon-separated list of filenames can be provided to black-list files from being imported into the .fx.
Setting: ImportForceInclude
C Headers are often inconsistent and sometimes depend on the implied assumption that the user will #import another file ahead of using a specific header file. The ImportForceInclude option can be used to manually inject such an include into a file before import.
There is no fast and easy rule for when to add a force-include. Typically, you will encounter an error about a missing type or identifier during import; locate the header that defines the item in question, and try adding a force-include for it.
Force includes come as key/value pairs separated by the = sign. The name of the problematic file will be on the left, and the name of the file shat should be force-included when importing that problematic file will be on the right.
Multiple force-inlcues can be provided, separated by semicolons:
<ImportForceInclude>MaterialComponents/MDCMultilineTextInputDelegate.h=MaterialComponents/MDCTextInput.h</ImportForceInclude>
Setting: ImportDropPrefixes
Setting: ImportSearchPaths
A semicolon-separate list of search paths where to look header files. Each path must either be absolute, or relative to the project.
Both EBuild settings and environment variables may be used in the search path, for maximum flexibility, using the $(VarName) syntax. For example, the following search path would find files in the current Xcode SDK for macOS (since the XcodeDeveloperFolder setting is automatically filled by EBuild, for Toffee and Island/Darwin projects):
<ImportSearchPaths>$(XcodeDeveloperFolder)/Platforms/MacOSX.platform/Developer/SDKs/MacOSX.sdk/usr/include</ImportSearchPaths>
Object: ImportOverrideNamespace
Object: Reference
See Also
SDK import is done by a combination of tools:
-
HI2 provides high-level logic for importing SDKs and other related tasks. HI2 does not ship as a command line tool, as it is meant to be tweaked as needed for each new Xcode version, as a "work in progress", but its code is open source on GitHub at github.com/remobjects/HI2, so you can review what it does (and build, tweak and run it yourself, if you wish). The HI2 code is also what used to be embedded in Fire for the integrated SDK import functionality there.
-
HeaderImporter, integrated into the compiler, does the actual processing of .h and related files, and generating of .fx files. This codebase is also used for Import Projects.
Simply put, HI2 knows about how Cocoa SDKs are structured. It looks at Xcode, finds all the SDKs, their frameworks and core rtl files, includes and excludes the right parts, and creates an "import recipe" in form of a .json file (and some additional flags). It then passes that on to HeaderImporter to do the dirty work.
There's a lof of knowledge about the SDKs hardcoded in HI2, and the code base is designed to be flexible, but in reality needs adjustments for most major new Xcode versions (say to handle new architectures, such as with Xcode 12). The Constants.pas source file gives a good overview of that. HI2 also knows what files from the core rtl to include and exclude (this is information arrived on by continous tweaks, and cannot be inferred automatically), as well as what files (and what whole frameworks) to not import due to problems (for example, some frameworks include Objective-C++ code APIs, or bad headers).
For each version of Xcode, HI2 can import all five supported SDKs (macOS, iOS, tvOS, watchOS and Mac Catalyst. For iOS, tvOS and watchOS, the import is run twice, separately for device and simulator versions.
Given the path to an Xcode version, HI2 automatically finds what versions of SDKs are included.
Running HI2 yourself
As mentioned above, HI2 is not mean to be a read-to-use tool you just run, it is meant to have its source tweaked to the right options, and then run form the IDE. Unless specified differenly, HI2 looks for Xcode versions in ~/Applications (if that folder exists) or in /Applications, if the former does not.
Before you run HI2, you will want to open the ./Importer.Darwin.Tasks.pas source file and change the ImportCurrentXcode method to point to the version of Xcode you want to import. For this, the Xcode app bumdle must be renamed to Xcode-${Version)-Beta(BetaNumber).app, e.g. Xcode-13.4.app or Xcode-14.0-Beta3.
You might also want to tweak the ImportSDKs method to enable/disable certain aspects of the import (by default, all SDKs will be imported).
Once ready, hit "Run" (**⌘R) to build and run HI2.
How the Import Works
Importing an SDK consists of two main parts:
- Importing the base
rtl library (./usr/include)
- Importing the actual named frameworks (
./System/Library/Frameworks)
For rtl, HI2 has a fixed list of files to include, based on SDK type and architecture. These are defined in Constants.Darwin.RTL.pas. That list of files, as well as paths to ./usr/include and ./usr/lib are passed to HeaderImporter.
For the named frameworks, HI2 dynamically discovers all frameworks found in ./System/Library/Frameworks for the current SDK – so newly added frameworks will be picked up automatically, as Apple adds them. As mentioned before, a hardcoded blacklist exists for frameworks that cannot be imported successfully, in Constants.Darwin.Blacklists.pas.
For each framework, HI2 collects a number of details:
-
Most frameworks are Cocoa frameworks, written in Objective-C. For these, the main source for information comes from the .h files included in the frameworks, and the classes defined therein will get imported as Cocoa Object Model classes, available to both Toffee and Island/Darwin projects.
-
Some frameworks are pure Swift frameworks. For these, the core information comes from .swiftinterface files contained within. Import of Swift frameworks is experimental (not shipping yet), and the imported types will be Swift Object Model types, available only on Island/Darwin.
-
In addition, ./usr/lib/swift includes additional "shadow frameworks" with Swift-specific addendums to Cocoa frameworks. These will be imported and also be available on Island/Darwin only.
API Notes
"API Notes" files provide the "Grand Rename" mapping that turn the beautiful Cocoa API names into cryptic unreadable names seen by the Swift language.
HI2 will locate .apinotes for the base rtl in /usr/include/swift, as well as within the named frameworks, where present. API Notes will import alternative/optional names, and both real and mapped names will be available to user code, in both languages. In Swift source files, Code Completion will favor to showing renamed APIs, while in all other languages it will show the original and more expressive Cocoa names.
Finally, the Import
With all this information gathered, HI2 passes off the import to the core header importer, as a .json file and additional parameters.
A typical command line looks like this:
HeaderImporter.exe
import
-o ".../Toffee/macOS 11.0/arm64"
--json=.../import-Toffee-macOS-11.0-arm64.json
--sdk=/Applications/Xcode-12.app/Contents/Developer/Platforms/MacOSX.platform/Developer/SDKs/MacOSX11.0.sdk
--toolchain=/Applications/Xcode-12.app/Contents/Developer/Toolchains/XcodeDefault.xctoolchain
--libpath=/Applications/Xcode-12.app/Contents/Developer/Platforms/MacOSX.platform/Developer/SDKs/MacOSX11.0.sdk/usr/lib
-i /Applications/Xcode-12.app/Contents/Developer/Platforms/MacOSX.platform/Developer/SDKs/MacOSX11.0.sdk/usr/include
-f /Applications/Xcode-12.app/Contents/Developer/Platforms/MacOSX.platform/Developer/SDKs/MacOSX11.0.sdk/System/Library/Frameworks
-i /Users/mh/Code/Elements/Frameworks/Toffee
and the (trimmed for readability) Json file:
{
"TargetString": "arm64-apple-macosx",
"Version": "11.0",
"SDKVersionString": "11.0",
"Imports": [
...
{
"Name": "Accelerate",
"Framework": true,
"Prefix": "",
"FrameworkPath": "{sdk}/System/Library/Frameworks/Accelerate.framework",
"APINotes": [
"{sdk}/System/Library/Frameworks/Accelerate.framework/Headers/Accelerate.apinotes"
]
},
...
{
"Name": "SwiftUI",
"Framework": true,
"Prefix": "",
"FrameworkPath": "{sdk}/System/Library/Frameworks/SwiftUI.framework",
"Swift": true,
"SwiftModule": "{sdk}/System/Library/Frameworks/SwiftUI.framework/Modules/SwiftUI.swiftmodule",
"SwiftInterface": "{sdk}/System/Library/Frameworks/SwiftUI.framework/Modules/SwiftUI.swiftmodule/arm64.swiftinterface"
},
...
{
"Name": "rtl",
"Framework": false,
"Prefix": "",
"Core": true,
"ForceNamespace": "rtl",
"DropPrefixes": [
"NS"
],
"Files": [
"assert.h",
...
"xar/*.h"
],
"IndirectFiles": [
"_wctype.h",
...
"os/*.h"
],
"ImportDefs": [
{
"Name": "dyld_stub_binder",
"Library": "/usr/lib/libSystem.B.dylib",
"Version": "81395766,65536"
},
...
],
"APINotes": [
"{sdk}/usr/include/Darwin.apinotes",
"{sdk}/usr/include/objc/ObjectiveC.apinotes",
"{sdk}/usr/include/xpc/XPC.apinotes",
"{toolchain}/usr/lib/swift/apinotes/Dispatch.apinotes",
"{toolchain}/usr/lib/swift/apinotes/os.apinotes"
]
}
],
"Defines": [
"__arm__",
"DARWIN",
...
"__ELEMENTS",
"__TOFFEE__",
],
"Blacklist": [
"sys/_symbol_aliasing.h",
...
"Foundation/FoundationLegacySwiftCompatibility.h"
],
"Platform": "macOS",
"SDKName": "macOS",
"Island": false,
"OverrideNamespace": [
{
"Key": "objc/NSObject.h",
"Value": "Foundation"
},
{
"Key": "objc/NSObjCRuntime.h",
"Value": "Foundation"
}
],
"VirtualFiles": {
"os/availibility.h": "#include <os/availability.h>"
}
}
One of the main use cases of the Go language with Elements is to use functionality from one of the countless existing Go libraries in your own project. Of course, it is always possible to just add the .go source files to your project directly, but for using complete libraries there's an easier way: Go Imports.
The EBuild command line tool offers a special option to import a Go library project, along with all its dependencies, from a git repository, create one or more.elements projects from it for you, and build it — so that all that is left for you to do is add a Project Reference to the project where you need it.
This mode of EBuild is run by specifying the --import-go-project command line switch, alongside the URL of the G o project (same as you would pass it to "go get") and a set of additional parameters. e.g.:
ebuild --import-go-project https://github.com/nakagami/firebirdsql
Since pretty much all Go libraries depend on a fully covered Go Base Library, Go Import is only supported for .NET and Island-based projects.
The mode for the generated project(s) can be determined via the --mode switch, and defaults to Echoes (.NET), if not specified.
For Island imports, a --submode and optional --sdk can be specified, as well, by default the import will happen for the platform of the current system (i.e. Windows on a Windows PC, Darwin (Cocoa) on a Mac, etc.
For .NET imports, an optional --target-framework can be provided, e.g. to import for .NET Core or .NET Standard. The default is ".NETFramework4.5".
How the Import Works
The import will determine the base URL of the repository specified by the URL. Supported are GitHub repositories, gopkg.in URLs, as well as any valid Git URL or any URL that supports the ?go-get=1 parameter.
It will clone that URL into a folder underneath the output folder and generate a .elments project containing all .go files within the specified subdirectory.
It will then check the import sections of all these .go files for additional external dependencies, and repeat the same steps, recursively if necessary, until all dependencies are covered.
A separate .elements project will be generated for each repository; if import dependencies request subdirectories of the same repository, the project for that repository will be extended to include the additional files.
If the --build switch is provided, the root project and all its dependencies will be build using a regular EBuild build run, as the final step.
Note that some Go projects have many dependencies, sometimes in the hundreds or even thousands of different folders. The import may take a while, and depending on the amount of projects generated, the generated .sln file might not be well-suited to be opened by the IDEs.
We recommend building it from the command line (either as part of the import by specifying --build, or by calling ebuild with the solution file at a later point) first, and then simply adding the main .elements project as Project Reference to your real projects.
Switches
Supported switches are:
--mode:<Island|Echoes> — the target Mode for the new project.--submode:<Windows|Linux|Darwin|Android> — the submode, for Island imports.--sdk:<sdk> — the SDK, for Island imports.--target-framework:<framework> — the Target Framework, for .NET imports.--output-folder:<folder> — the output folder.--build — causes the generated project(s) to be actually build, as final step.--debug — emits more detailed diagnostics and debug info.
Also any specified --settings: will be ignored by the import, but passed on to project for the build.
See Also
- Go
- Target Frameworks on .NET
Elements, as of Version 10, includes a cross-platform Instrumenting Performance Profiler that can be used on all platfroms to find bottlenecks and get an overall understanding of where your application or parts of your application spend the most processing time.
The profiler is a combination of an Aspect that instruments your code, a cross-platform library that links into your application to gather data, and IDE-integrated tools that let you evaluate the results.
Profiling can be enabled with a few simple steps:
- Add the profiler library for your platform to your app as reference.
- Add the profiler aspect Cirrus Reference to your project.
- Annotate the class or classes you want to profile with the
Profile Aspect.
- Add the
PROFILE Conditional Define.
- (Re-)Build and run your app.
Both Fire and Water include a new Profiler view (available via "Debug|Show Profiler" and from the Jump Bar) that automatically loads in the results and presents them visually, after your app finished running.
As you tweak your code and run again and again, the profiler view updates with the latest results.
Let's look at these steps in more detail.
1. Adding the Profiler Library
Adding a reference to the profiler library is as easy as opening the "Manage References" sheet (from the "Project" menu, or via ^⇧R in Fire or Alt-Shift-R in Water), selecting the "Other References" tab, and picking the right reference, depending on your platform:
- RemObjects.Elements.Profiler.dll for .NET
- remobjects.elements.profiler.jar for Java
- libElementsProfiler.fx for Cocoa
- ElementsProfiler.fx for Island
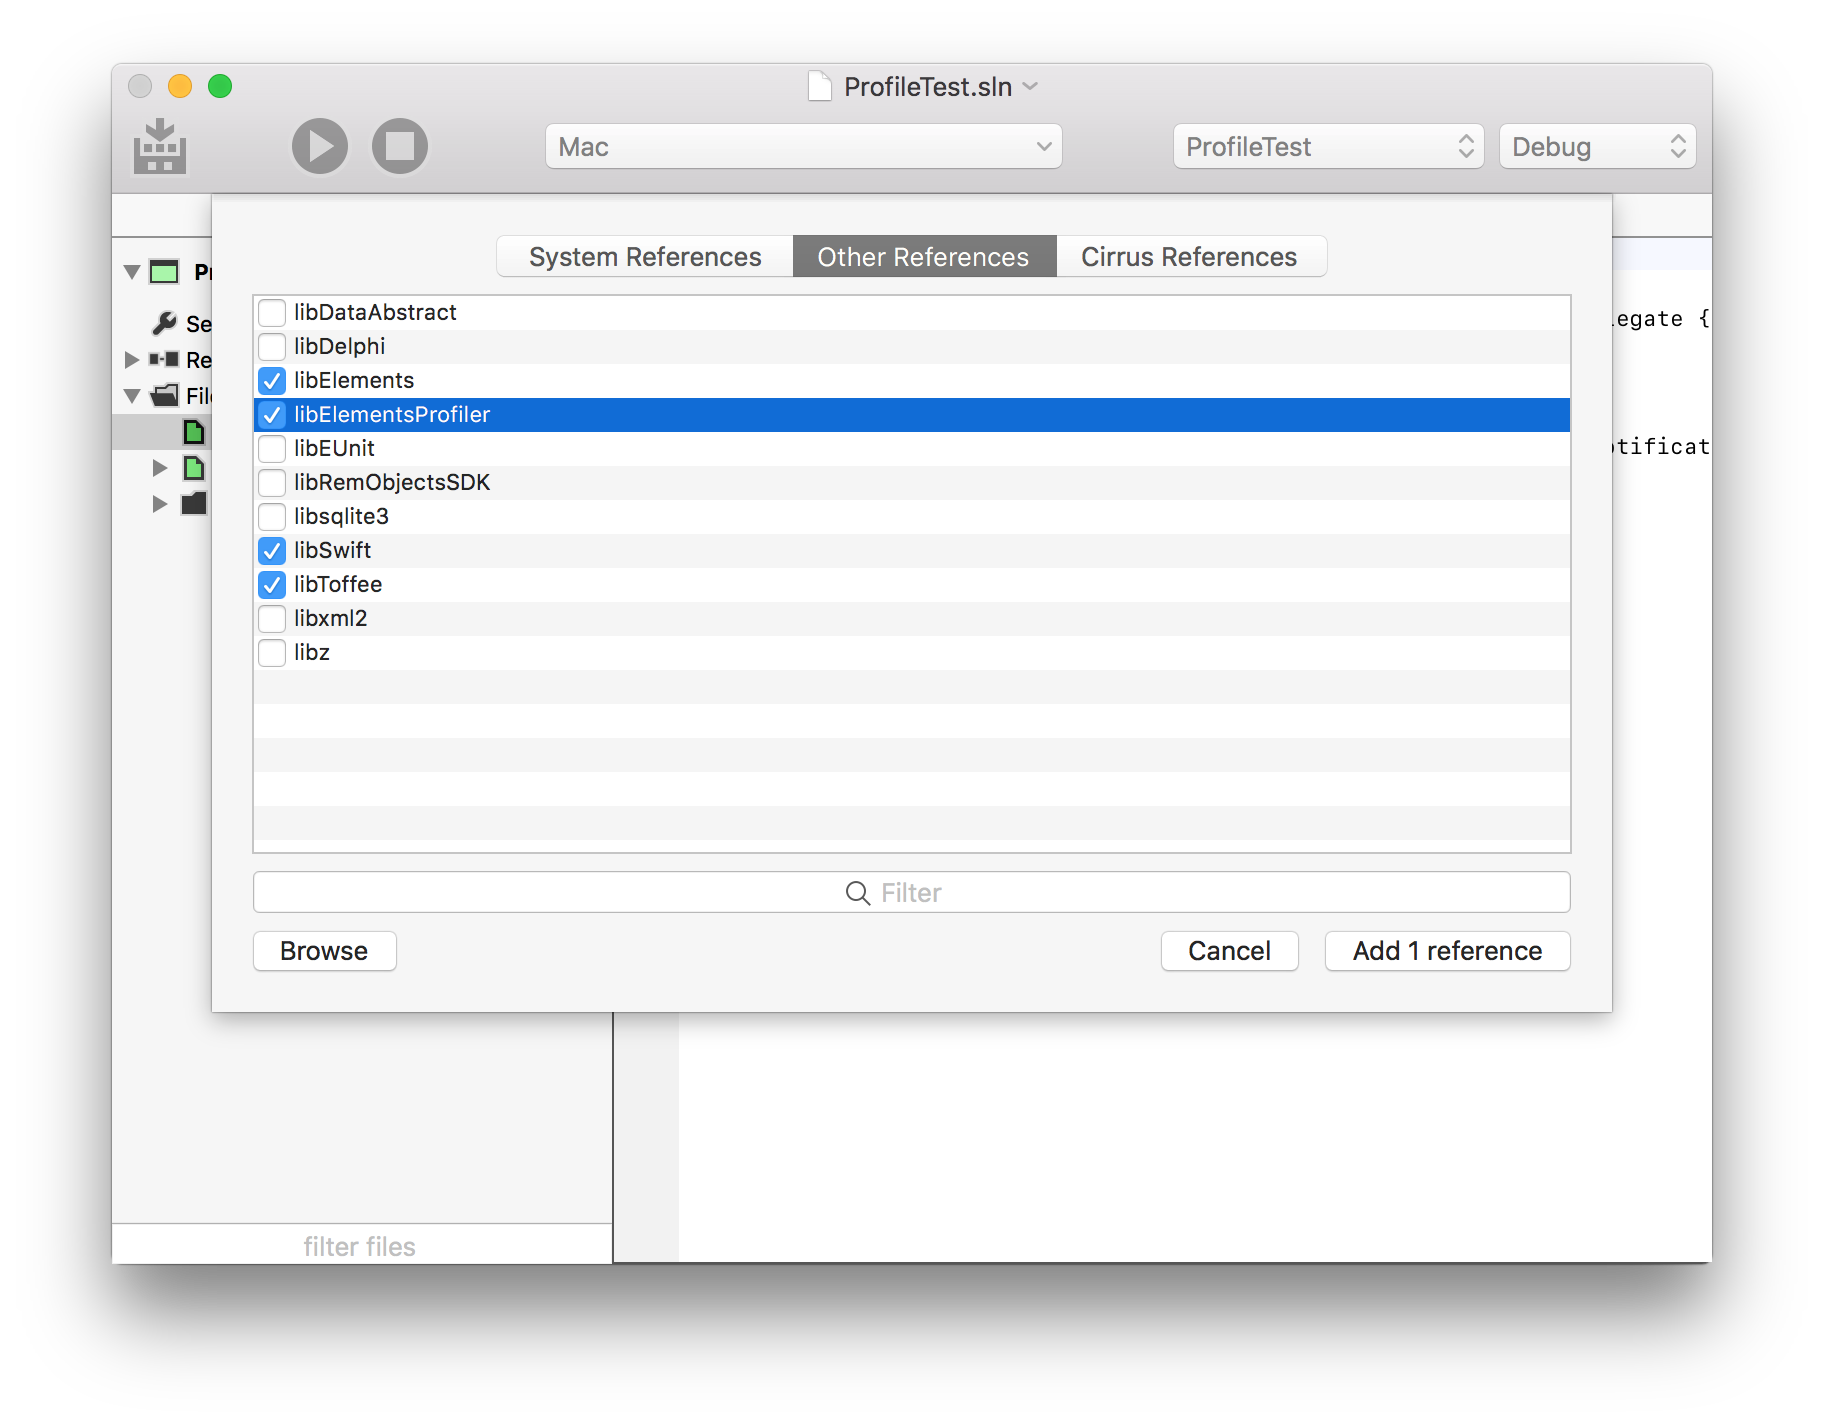
3. Annotate your Classes
Next, choose the classes you want to profile, and mark them with the RemObjects.Elements.Profiler.Profile aspect. You can mark as few or as many classes as you want, but you will get best results if you keep profiling focused on a specific area of interest. For example, if loading of documents in your app is slow, annotate the classes that deal with that area of code, but not the rest:
uses
RemObjects.Elements.Profiler;
type
[Profile]
MyDocument = public class
...
end;
using RemObjects.Elements.Profiler;
[Profile]
public class MyDocument
{
...
}
import RemObjects.Elements.Profiler
@Profile
public class MyDocument {
...
}
import RemObjects.Elements.Profiler.*
@Profile
public class MyDocument
{
...
}
By default, any class marked with [Profile] (Oxygene and C#) @Profile (Swift and Java) or <Profile> (Mercury) will be profiled. But if you want to keep different sets of profiling annotations in place, you can amend the aspect with the name with an optional conditional define that needs to be present for profiling on that class to become effective.
E.g. [Profile("PROFILE_DOCUMENT_LOAD")] vs. [Profile("PROFILE_BUSINESS_LOGIC")].
4. Add the PROFILE Define
Your code is now almost ready to profile, but if you run your app, you will see no change yet. That is because the Profiler aspect takes no effect unless PROFILE is defined as Conditional Define in your project.
This is done so that you can easily enable and disable profiling without having to keep adding and removing annotations from your code. When you're done profiling, simply remove the define and rebuild, and the aspect will have no effect – no instrumentation will
be added to your code, and you will have absolutely zero run-time overhead.
To add the define, open the "Manage Conditional Defines" sheet (again via the "Project" menu, or or via ^⇧D in Fire or Alt-Shift-D in Water), choose "Add" and type in PROFILE as the name of the new define. You can also simply copy the string PROFILE from here, and press ⌘V (Fire) or Ctrl-V (Water) to paste it in as new define.
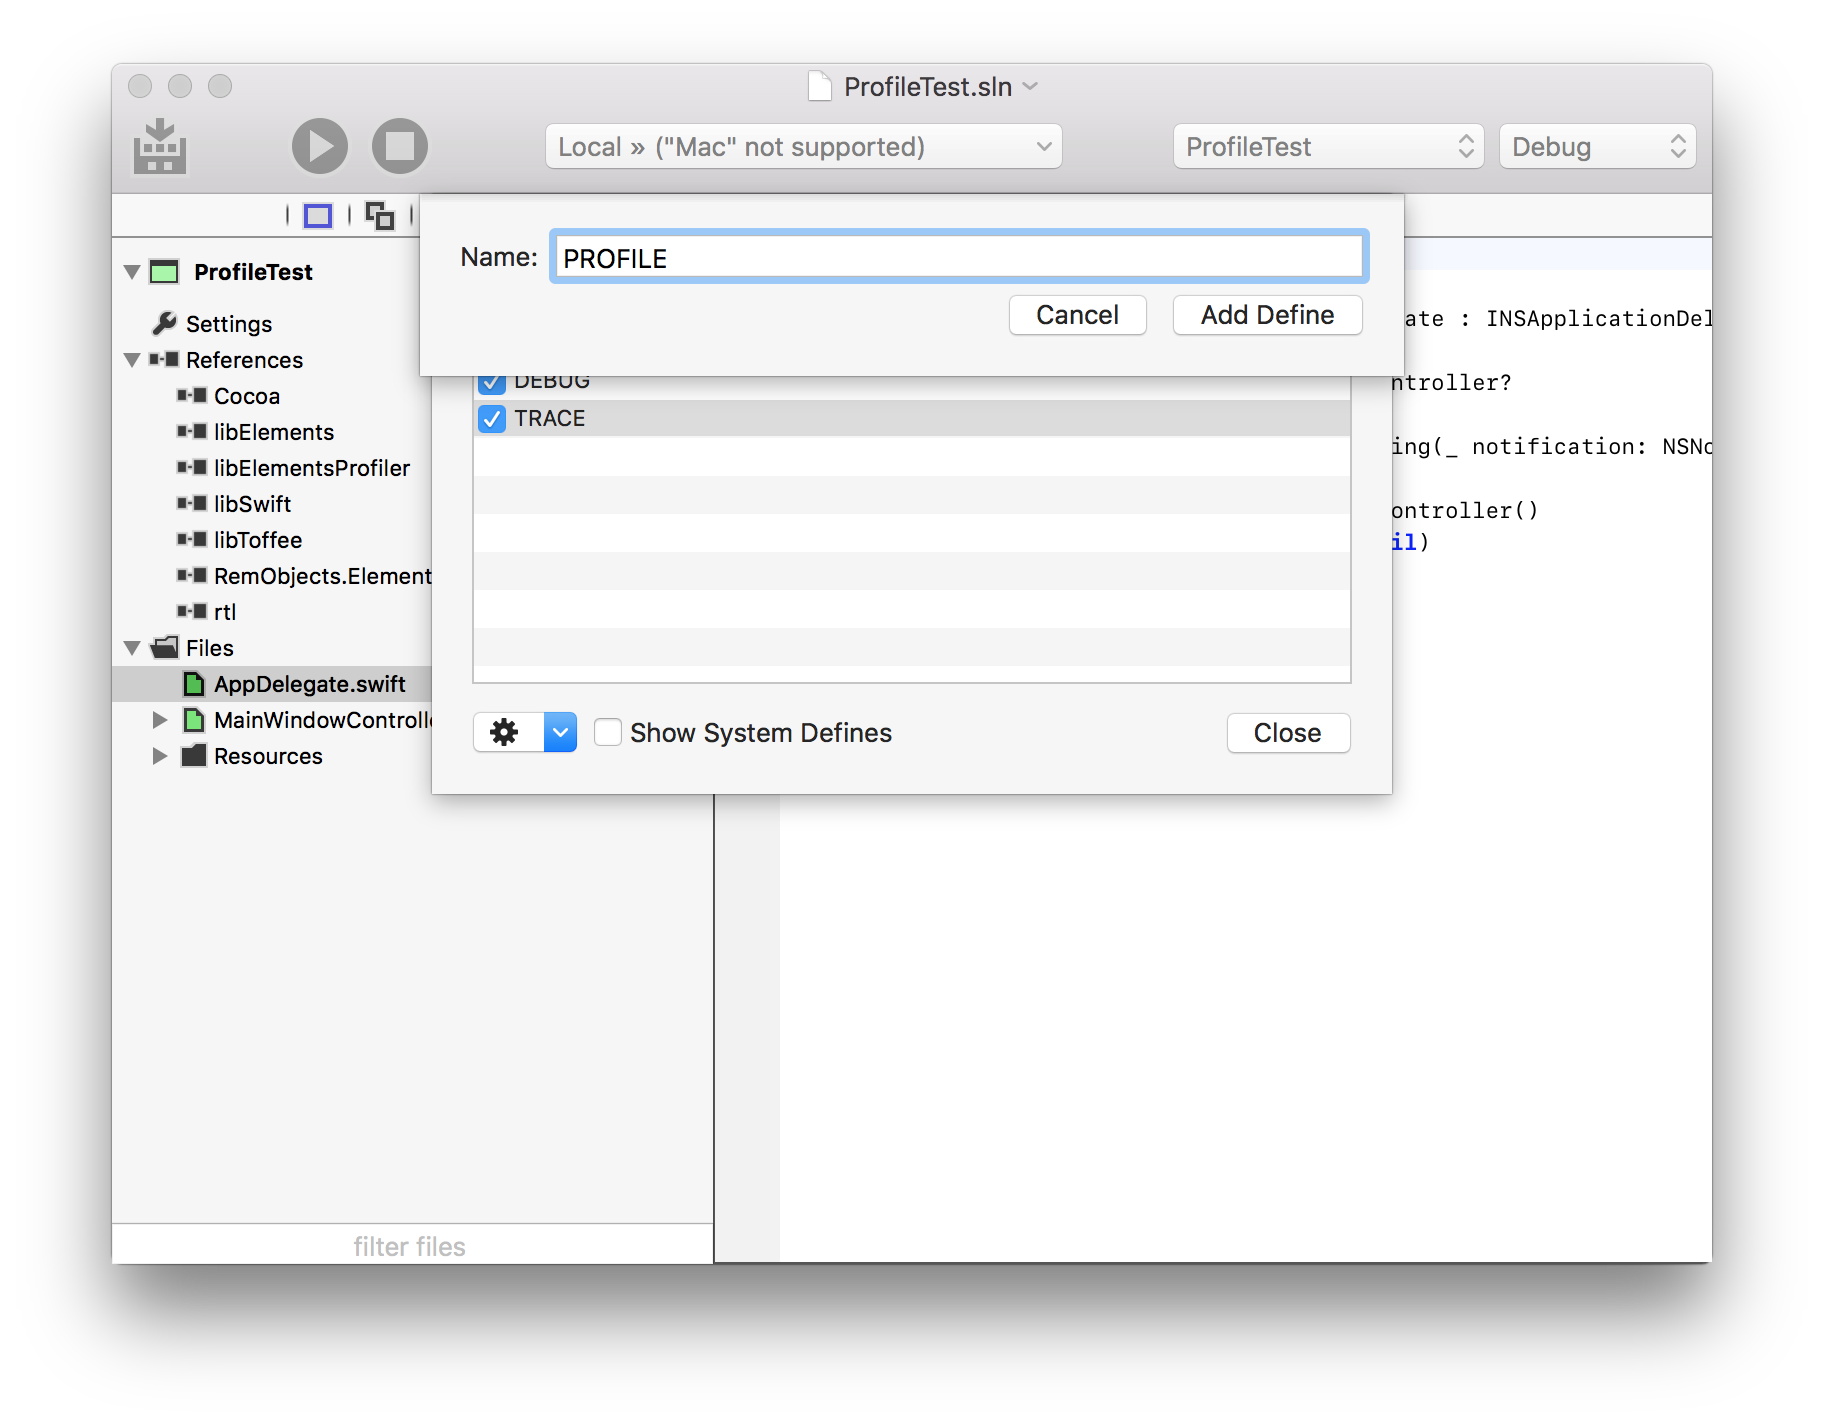
4. Rebuild and Run Your App
You can now simply run your app, via "Project|Run" or ⌘R (Fire) or Ctrl-R (Water). Exercise the app as you normally would, to hit the code paths you want to profile (e.g. because they are slow). When you're done, simply quit your app naturally.
The IDE will automatically pick up the profiling results, and you can view them by choosing "Debug|Show Profiler" from the menu, or by choosing the "Profiler" item in the jump bar at the left-most level. (If the Profiler View is already visible, it will automatically update to the latest results.)
Analyzing the Results
The Profiler View consists of two panes.
The top pane shows you a list of all methods that have been marked for profiling and have been hit as part of your projects run. You can sort the list by various values, and you can also choose to either show all calls or filter down to a single thread.

In addition to the name and parameters, for each method you will see how often it was called, as well has how much time it took to execute (all executions combined). The Gross time is the full time the method took to run, from start to finish; the Net time will exclude any time spent in (profiled) sub-calls.
For example, if you have a method Load() that delegates work to LoadFromFile() and ProcessData(), then the Gross time includes the entire duration of Load, including the actual load and the processing. The Net time shows only the time spent in Load() itself (or any calls that the profiler does not see because they are not instrumented), and excludes the time spent in LoadFromFile() and ProcessData().
In other words, the Gross time gives you the total that a specific task took, while the Net tells you how much time was spent at this level, opposed to deeper in the call hierarchy. If Net time is very small, you know the bulk of the work happened in child calls, and you can focus your investigation there; if Net time is relatively large, you know the most processing happened in that method (or in calls you have not profiled).
As you select a method in the top pane, the bottom pane will adjust to show you all the child methods called from this method, as well as (optionally) all the methods that called into it (you can toggle which ones to show via the "Show" popup button).
For these callees or callers, you too will see the Net and Gross time.
Double-clicking a method in the bottom view will activate it in the top (showing its callees and/or callers, in turn) – allowing you to quickly drill in and out of call hierarchies.
While profiling is supported on all platforms, technically, some deployment targets (such as iOS, watchOS, tvOS or Android devices) don't have a good way to provide the results back to the IDE. Currently, gathering profiling results is supported for
- .NET
- Plain Java
- macOS (in Fire)
- iOS Simulator (in Fire)
- Island/Windows (in Water)
- Island/Linux (in Water, when running in local Bash for Windows)
Automatically gathering profiling results is not supported when running on devices, or when running on a remote CrossBox server.
See Also
Elements supports state of the art code obfuscation on compiler level, to protect your code against decompilation and reverse engineering. Obfuscation is available for all platforms, but is especially relevant on .NET, Java and Cocoa, which normally expose human-readable class and member names in the executable.
When obfuscation is applied (controlled via the compiler-provided Obfuscate aspect), the compiler will mangle the names of all types and their members to be unreadable and confusing to reverse engineers. It can do so even for class libraries, without impacting your ability to reference these libraries and reference the obfuscated types and members via their original readable names.
Enabling Obfuscation
To enable Obfuscation, you simply apply the Obfuscate aspect to your code, either for the entire project, or to individual types or members you want obfuscated.
Referencing Obfuscated libraries
On library projects, the optional "Create .fx File" project setting will task the compiler to generate an optional .fx file with metadata that allows you to still reference the obfuscated members with their real names. (.fx files are always generated (and required for referencing) for Cocoa and the Island-backed platforms, but are optional for .NET and Java).
The binary files emitted by the compiler (e.g. .dll, .jar, .a, .dylib or .so files) will only contain the obfuscated and unreadable names – and those are the files that will make up or contribute to your shipping product. The .fx file for your libraries will contain additional metadata that allows the Elements compiler to refer to your types and members using their original, readable names
See Also
Elements includes Oxidizer, a powerful tool that can convert code from C#, Java, Objective-C and Delphi code to Oxygene, C#, Swift, Java and Go. This makes it easy to reuse code snippets or even whole classes found online, or to convert pieces of code from an existing project to Elements.
Oxidizer is integrated into the IDEs and can be invoked in one of two
ways:
- The Paste As feature lets you paste code from your clipboard straight into your current code file, and converts it on the fly.
- The Import feature lets you select one or more code files from disk and import them into your project as new files, translating them in the process.
For platform-specific code written in C# (for .NET), the Java language (for, well, Java), and Objective-C (for Cocoa), chances are the converted code will work right away, as Elements of course uses the exact same classes and APIs as those languages, on the respective platform.
Note that Oxidizing from Swift will not "undo" Swifty-fied API names on the Cocoa platform to their proper Objective-C level names, since Oxidizer processes only the language syntax.
However, Oxidizer can also be useful for converting code between different platforms. For example, you might have an algorithm implemented in Java and want to use that in your .NET project. Using "Paste Java as Oxygene" will convert the algorithm into proper Oxygene code, you just might have to replace any Java-platform-specific APIs the code used with their .NET, Cocoa or Sugar equivalent to use that same code on different platforms.
Oxidizer is also useful for migrating Delphi code to Oxygene. As in the previous example, Oxidizer will not magically get rid of the Delphi RTL or VCL APIs your code uses, but it will adjust the core language syntax for the differences between Delphi and Oxygene.
Supported Conversions
Oxidizer does not currently support converting from and to all language combinations. In particular, Delphi code can only be converted to Oxygene, and conversion from Go is not available. Also note that conversion to Go is severely limited, since many core constructs of the other langages (such as even Classes) cannot be expressed in Go.
The following conversions are supported:
| ↓ From / To → |
Oxygene |
C# |
Swift |
Java |
Go |
Mercury |
| Oxygene |
- |
|
|
|
|
|
| C# |
✔ |
- |
✔ |
✔ |
✔ |
✔ |
| Swift |
✔ |
✔ |
- |
✔ |
✔ |
✔ |
| Java |
✔ |
✔ |
✔ |
- |
✔ |
✔ |
| Go |
|
|
|
|
- |
|
| Mercury |
|
|
|
|
|
- |
| Delphi |
✔ |
|
|
|
|
|
| C |
✔ |
✔ |
✔ |
✔ |
✔ |
✔ |
| Objective-C |
✔ |
✔ |
✔ |
✔ |
✔ |
✔ |
Oxidizer online
You can also try Oxidizer online, at elementscompiler.com/elements/oxidizer
Reporting Conversion Issues
While Oxidizer's support is extensive, it is always possible that there will be some code constructs it does not handle yet. If you encounter any problems, we would appreciate bug reports: simply paste the original code (and ideally the wrong result produced by Oxidizer) into an email and send it to support@remobjects.com or post a bug report on Talk.
Paste & Convert with CodeBot
The "Paste & Convert" submenu now also includes a "Paste & Convert with CodeBot" option that leverages AI for the conversion.
Depending on the code snippet, you may get better results with one or the other—if Oxidizer doesn’t do what you want, try CodeBot, and vice versa.
-
Oxidizer uses a strict language parser to interpret the syntax of the original code and converts it to the target language using CodeGen4. It always produces syntactically valid output, but has no semantic understanding of what the code actually does. It can fail if the input is incomplete or contains edge cases.
-
CodeBot, on the other hand, uses a language model to interpret and convert the code. It tends to generate more natural and idiomatic code, but it may introduce small changes or inaccuracies. It might also adjust the intent of the code (sometimes in unexpected ways)—for example, changing APIs or adapting usage patterns.
See Also
Oxidizer is integrated directly with the clipboard/pasteboard operations of the code editor in both Fire and Visual Studio to allow you to convert code snippets on the fly, while pasting them into your project.
Simply copy a piece of C#, Objective-C, Java, Swift or Delphi code from an existing source (e.g. from a sample project or an article you found on the web), and then select the appropriate "Paste" option from the menu.
You only need to pick the right source language your original code is in, as Oxidizer will already know what the target language is, based on the current source file.
Note that not all source languages are available, based on the target language (for example, Delphi code can only be converted to Oxygene, and converting C# to C# or Swift to Swift makes little sense, of course).
Fire and Water
In Fire and Water, the Paste As options can be found under the "Edit|Paste" main menu, and also in the editor's context menu:
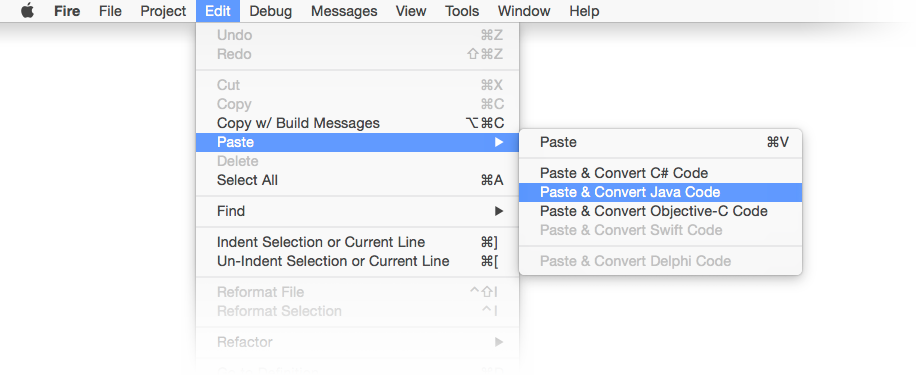
Visual Studio
In Visual Studio, the Paste As option is in the editor's context menu under "Oxidizer":
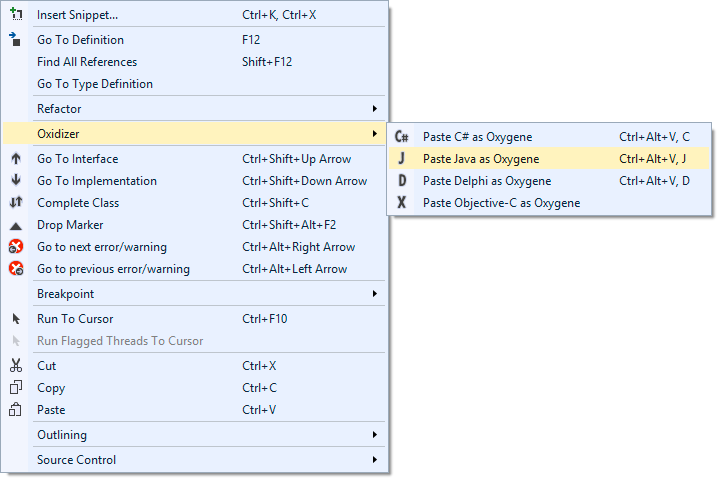
Oxidizer can convert existing code files on the fly and add the converted code to your project, in both Fire and Visual Studio.
Simply select one or more C#, Objective-C, Java, Swift or Delphi code files from disk via the menu options shown below, and Oxidizer will convert the code in the files to your language of choice and add the new files to the project.
Because Elements allows you to mix different languages in the same project, you can pick the language you want to have the imported files converted to, Oxygene, C# or Swift.
Note that not all source languages are available for each target language (for example, Delphi code can only be converted to Oxygene).
Fire and Water
In Fire and Water, the Import options can be found under the "File|Add & Convert" main menu:
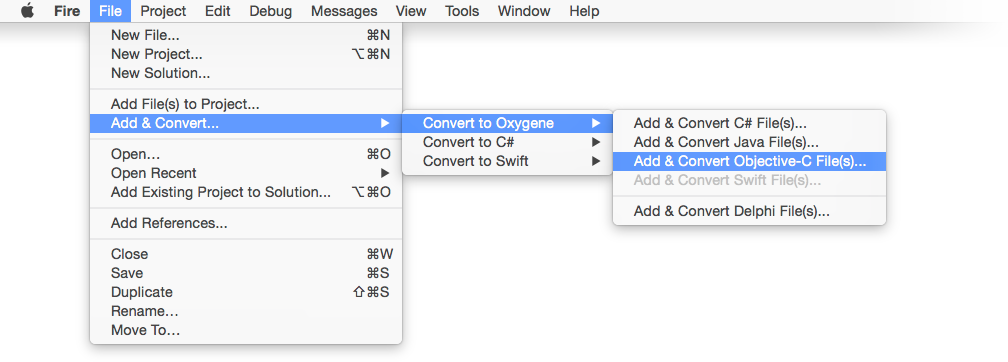
Visual Studio
In Visual Studio, the Import option is in the Solution Explorer's context menu under "Add":
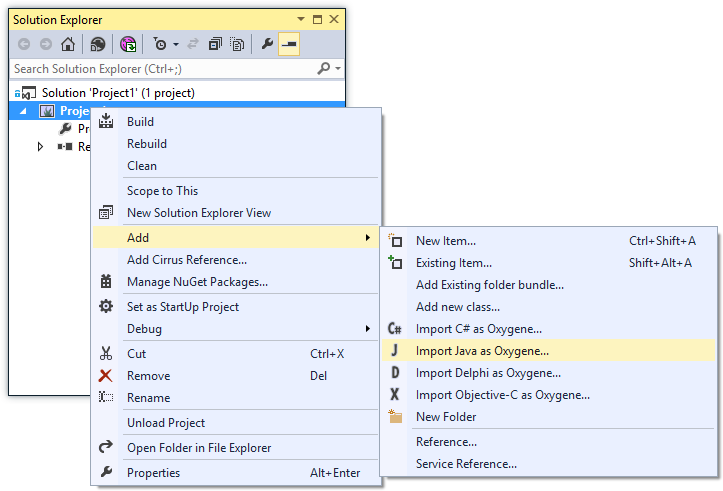
What is Marzipan?
Marzipan is a technology that makes it easier to run managed (.NET) code
in your native Mac (Cocoa) applications by embedding Mono.
Marzipan is in early development, and was mainly conceived due to the
need to host Mono and the managed compiler inside
Fire, a project currently under development here at
RemObjects. Marzipan is made to do exactly what is needed by Fire, and
not much more. That said, it is usable, and we want to make it available
for everyone to use. Feedback and contributions are appreciated, and we
plan to improve this project moving forward.
Background
Mono is made for embedding, but traditionally, interaction between the
native and managed side has been clumsy, with an awkward C-based API.
Marzipan fixes this by providing wrapper classes that allow you to (a)
interact with the Mono runtime using object oriented APIs and more
importantly, (b) interact with your ‘’own’’ classes directly.
Marzipan comes in two parts. ‘’’Part one’’’ is a native Cocoa library
you can link into your app that makes it easy to embed Mono, launch up
an instance of the Mono runtime, and also takes care of a lot of the
background tasks for making everything work. ‘’’Part two’’’ is a code
generator that takes your managed .dlls and a small config file that
describes what classes you want to expose and generates Cocoa source
files for wrapper classes you can use in your native app.
Right now, this second part generates Oxygene or RemObjects C# code,
but eventually, we will expand it to support generating Objective-C and
Swift code as well.
Requirements
The following requirements exist to run and use Marzipan:
-
a 64-bit version of Mono to be either installed globally on the Mac
or embedded into your .app (the latter requires a bit of manual
work, described below)
-
Elements (because as mentioned above, we currently only generate
Elements code, no Objective-C or Swift)
Note that currently, Mono only ships as 32-bit version. Since you’re
most likely (especially if you’re using Elements) building 64-bit Mac
apps, you will need to manually build Mono for 64-bit. It’s pretty easy,
and described here,
but it comes down to four simple command line steps to run in Terminal
after you check out mono from git
(replace "someplace" with a path of your choice):
./autogen.sh --prefix=/someplace/Mono --disable-nls
make
make install
install_name_tool /someplace/Mono/lib/libmono-2.0.dylib -id @loader_path/../Frameworks/libmono-2.0.dylib
The last part is only needed if you want to later embed Mono into your
.app bundle (which is recommended if you actually want to ship your app
to users without them needing to have Mono installed themselves).
Importing
The next step is to have some .dll(s) with managed code that you want to
expose to your native app, and to create a small .xml config file that
describes what you want to export. Note that Marzipan is pretty good at
marshaling stuff, but there are limitations to what it can do. In
general, most classes that don’t do anything too awkward should export
fine and be usable. If your classes expose other classes as properties
(or expect them as parameters), make sure to include all the classes in
your export config. Any class not exported by Marzipan will be shown
as a black box MZObject type when used as parameter or result.
An example XML config looks something like this (this is taken from
Fire):
<?xml version="1.0" encoding="utf-8"?>
<import>
<namespace>RemObjects.Fire.ManagedWrapper</namespace>
<outputfilename>FireManagedWrapper\ImportedAPI.pas</outputfilename>
<outputtype>Oxygene</outputtype>
<libraries>
<library>..\..\Bin\RemObjects.Oxygene.Tools.dll</library>
<library>..\..\Bin\RemObjects.Oxygene.dll</library>
<library>..\..\Bin\RemObjects.Oxygene.Fire.ManagedHelper.dll</library>
...
</libraries>
<types>
<type>
<name>RemObjects.Oxygene.Fire.ManagedHelper.LogLevel</name>
</type>
<type>
<name>RemObjects.Oxygene.Fire.ManagedHelper.XBuilder</name>
</type>
<type>
<name>RemObjects.Oxygene.Code.Compiler.CodeCompletionCompiler</name>
</type>
...
</import>
Essentially, you specify the namespace and language type; valid right
now are “Oxygene” and “Hydrogene” (for RemObjects C#) to use at the
top, followed by the list of .dlls and then the list of types. It does
not matter what language or compiler those .dlls were compiled with, as
long as they are pure IL assemblies.
You then run MarzipanImporter.exe against this file (you can run it
using mono MarzipanImporter.exe on the Mac, if you wish), and the
result will be a .pas or .cs file with Cocoa wrappers for all the
classes and types you specified.
Don’t worry about the details of the implementation for these classes —
they will look pretty messy, because they do a lot of C-level API
fiddling to hook everything up. What matters is the public API of these
classes — and you should see all your methods and properties.
You can now add this file to your Mac .app project, add a reference to
libMarzipan, and you're ready to use it.
Using Marzipan
Start by adding “RemObjects.Marzipan” to your uses/using clause (or
‘’import’’ing it or the respective libMarzipan.h header file in Swift or
Objective-C).
Next, you will want to initialize the Mono runtime and load your dlls.
All the following code snippets are RemObjects C#, but the same
principles apply no matter what language you use:
var fRuntime: MZMonoRuntime; // class field
...
fRuntime := new MZMonoRuntime withDomain('MyApp') appName('"MyApp') version('v4.0.30319') lib(/path/to/mono/etc') etc(/path/to/mono/etc');
MZMonoRuntime _runtime; // class field
...
_runtime = new MZMonoRuntime withDomain("MyApp") appName("MyApp") version("v4.0.30319") lib("/path/to/mono/etc") etc("/path/to/mono/etc");
var _runtime: MZMonoRuntime // class field
...
_runtime = MZMonoRuntime(domain: "MyApp", appName: "MyApp",version: "v4.0.30319", lib: "/path/to/mono/etc", etc:"/path/to/mono/etc")
Rather than hardcoding the paths, you will probably determine them at
runtime — for example by looking into your bundle to find the embedded
Mono folder in its resources (see below). You will want to hold on to
the _runtime instance in a global object, so that it does not get
released. That said, once a runtime was instantiated, you can also
always access it globally via MZMonoRuntime.sharedInstance.
Next, load in the .dll or .dlls that contain your code, as well as any
dependent .dlls that won’t be found on their own:
MZMonoRuntime.sharedInstance.loadAssembly("/path/to/MyManagedCode.dll")
Once again you’ll probably want to determine the paths dynamically.
Finally, as the very last step, you need to make sure to attach Mono to
each thread that you want to use it on. If all your code is on the main
thread, just call this once; if you create threads or use GCD queues,
you’ll need to call it at least once (you can call it again without
harm) the first time you call into managed code on any given thread.
Keep in mind that GCD queues will use random/new threads. Even serial
queues do not always use the same thread for each block.
MZMonoRuntime.sharedInstance.attachToThread()
And with that, you’re set up and ready to use your own classes as
imported. Just new them up (or alloc/init them up) as you always do and
call their methods as if they were native Cocoa classes.
Building your .app
There are a couple of items to note for building your .app:
-
Most likely, you'll want to embed the Mono folder into your bundle
as resource. Just add it to your project. In Visual Studio or Fire,
set the build action to "AppResource". In Xcode, make sure to add it
as "Folder Reference" (it will show up as blue folder icon, not
yellow) and add it to the Copy Files build phase, alongside your
other resources.
-
You will need to link against libmono-2.0.dylib (or
libmono-2.0.fx) and have libmono-2.0.dylib copied into your
app bundle into the
Frameworks folder. In Xcode, you will need to
create a new build phase for it. In Visual Studio or Fire, just set
the build action to AppFramework after adding the file to the
project (you'll want to add both the .fx file as reference and the
.dylib file as resource with the AppFramework build action). Make
sure to use the version of libmono-2.0.dylib that's part of your
actual Mono build, as the versions need to match.
-
You will also need to embed all your .dlls to be packaged into the
resource folder, as well (just as regular AppResource file
resources).
You can use the following code to locate the Mono folder at runtime for
passing to the new MZMonoRuntime ... call shown above:
var lMonoPath := NSBundle.mainBundle.pathForResource('Mono')
ofType('');
var monoPath = NSBundle.mainBundle.pathForResource("Mono")
ofType("");
let monoPath = NSBundle.mainBundle.pathForResource("Mono",
ofType: "")
The same works for locating your .dlls:
var lMyDll := NSBundle.mainBundle.pathForResource('MyManagedAssembly')
ofType('dll')
inDirectory('');
var myDll = NSBundle.mainBundle.pathForResource("MyManagedAssembly")
ofType("dll")
inDirectory("");
let myDll = NSBundle.mainBundle.pathForResource("MyManagedAssembly",
ofType: "dll",
inDirectory: "");
Tutorials
This section provides tutorials to guide you through various tasks working with Elements.
"Your First App"
The following two sub-sections provide tutorials to get you started building your first app with Elements, grouped by your IDE of choice: Fire and Water or Visual Studio.
Each tutorial starts from the very beginning, introducing you to both the Elements language you'll be using, and the platform. The tutorials cover all Elements languages, allowing you to choose which language to view your source code in by selecting your language of choice in the top right corner of each code snippet.
So you can pick the platform you are most interested in, and make this your first read on this site. If you later come back to read about a second platform, there might be some redundancies and you can opt to read the first section diagonally.
This next sub-section introduces you to Elements RTL, our library for writing code that can be platform-independent and be shared across platforms.
Languages
Learn the Oxygene Language:
Your First App w/ Fire & Water
This section provides a handful of tutorials to get you started building your first app in Fire and Water, for various platforms. Each tutorial starts from the very beginning, introducing you to both the Fire and Water IDE, the Elements language you'll be using, and the platform.
The tutorials cover all Elements languages, allowing you to choose which language to view your source code in by selecting your language of choice in the top right corner of each code snippet.
So you can pick the platform you are most interested in, and make this your first read on this site. If you later come back to read about a second platform, there might be some redundancies and you can opt to read the first section diagonally.
Please note: Some of these tutorials have not been updated explicitly for Water, and have screenshots and terminology for Fire only. The same steps and principles apply, however, when working in Water on Windows.
Available tutorials (more coming over time):
Your First Mac App
The first time you start Fire, before opening or starting a new project, it will present you with the Welcome Screen, pictured below. You can also always open up the Welcome screen via the "Window|Welcome" menu command or by pressing ⇧⌘1.
In addition to logging in to your remobjects.com account, the Welcome Screen allows you to perform three tasks, two of which you will use now.
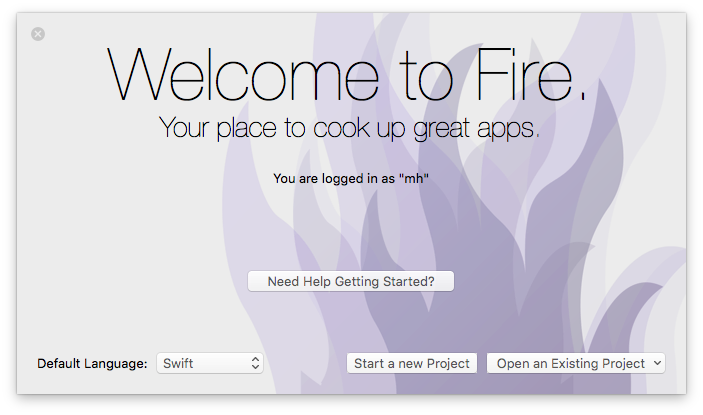
On the bottom left, you can choose your preferred Elements language. Fire supports writing code in Oxygene, C# and Swift. Picking an option here will select what language will show by default when you start new projects, or add new files to a multi-language project (Elements allows you to mix all fivwe languages in a project, if you like).
This tutorial will cover all languages. For code snippets, and for any screenshots that are language-specific, you can choose which language to see in the top right corner. Your choice will persist throughout the article and the website, though you can of course switch back and forth at any time.
After picking your default language (which you can always change later in Preferences), click the "Start a new Project" button to bring up the New Project Wizard sheet:
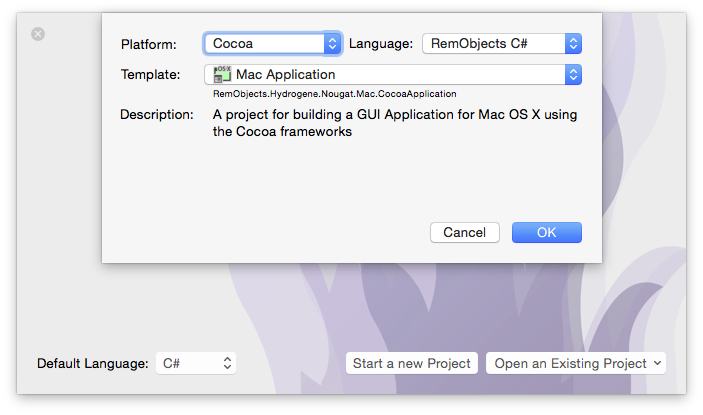
You will see that your preferred language is already pre-selected at the top right – although you can of course always choose a different language just for this one project.
On the top left you will select the platform for your new application. Since you're going to build a Mac app, select Cocoa. This filters the third list down to show Cocoa templates only. Drop down the big popup button in the middle and choose the "Mac Application " project template, then click "OK".
Next, you will select where to save the new project you are creating:

This is pretty much a standard Mac OS X Save Dialog; you can ignore the two extra options at the bottom for now and just pick a location for your project, give it a name, and click "Create Project".
You might be interested to know that you can set the default location for new projects in Preferences. Setting that to the base folder where you keep all your work, for example, saves you from having to find the right folder each time you start a new project.
Once the project is created, Fire opens its main window, showing you a view of your project:
Let's have a look around this window, as there are a lot of things to see, and this windows is the main view of Fire where you will do most of your work.
The Fire Main Window
At the top, you will see the toolbar, and at the very top of that you see the name MyFirstApp.sln. Now, MyFirstApp is the name you gave your project, but what does .sln mean? Elements works with projects inside of a Solution. You can think of a Solution as a container for one or more related projects. Fire will always open a solution, not a project – even if that solution might only contain a single project, like in this case.
In the toolbar itself are buttons to build and run the project, as well as a few popup buttons that let you select various things. We'll get to those later.
The left side of the Fire window is made up by what we call the Navigation Pane. This pane has various tabs at the top that allow you to quickly find your way around your project in various views. For now, we'll focus on the first view, which is active in the screenshot above, and is called the Project Tree.
You can hide and show the Navigation Pane by pressing ⌘0 at any time to let the main view (wich we'll look at next) fill the whole window. You can also bring up the Project Tree at any time by pressing ⌘1 (whether the Navigation Pane is hidden or showing a different tab).
The Project Tree
The Project Tree shows you a full view of everything in your project (or projects). Each project starts with the project node itself, which is larger, and selected in the screenshot above, as indicated by its blue background. Because it is selected, the main view on the right shows the project summary. As you select different nodes in the Project Tree the main view adjusts accordingly.
Each project has three top level nodes.
-
Settings gives you access to all the project settings and options for the project. Here you can control how the project is built and run, what exact compiler options are used, etc. The project settings are covered in great detail here.
-
References lists all the external frameworks and libraries your project uses. As you can see in the screenshot, the project already references all the most crucial libraries by default (we'll have a look at these later), and you can always add more by right-clicking the References node and choosing "Add Reference" from the context menu. You can also drag references in directly from the Finder, as well as, of course, remove unnecessary references. Please refer to the References topic for more in-depth coverage.
-
Files, finally, has the meat of your application. This is where all the files that make up your app are listed, including source files, images and other resources.
The Main View
Lastly, the main view fills the rest of the window (and if you hide the Navigation Pane, all of the window), and this is where you get your work done. With the project node selected, this view is a bit uninspiring, but when you select a source file, it will show you the code editor in that file, and it will show specific views for each file type.
When you hide the Navigation Pane, you can still navigate between the different files in your project via the Jump Bar at the top of the main view. Click on the "MyFirstApp" project name, and you can jump through the full folder and file hierarchy of your project, and more.
Your First Mac Project
Let's have a look at what's in the project that was generated for you from the template. This is already a fully working app that you could build and launch right now – it wouldn't do much, but all the basic code and infrastructure is there.
First of all, there are two source files, the AppDelegate and the MainWindowController, with file extensions matching your language. There's an .xib file nested underneath the MainViewController, and finally there's a handful of non-code files in the Resources folder.
The Application Delegate
The AppDelegate is a standard class that pretty much every Mac (and iOS) app implements. You can think of it as a central communication point between the Cocoa frameworks and your app, the go-to hub that Cocoa will call when something happens, such as your app launching, shutting down, or getting other external notifications.
There's a range of methods that the AppDelegate can implement, and by default the template provides one of them to handle application launch: applicationDidFinishLaunching:.
For this template, applicationDidFinishLaunching: creates a new instance of the main window and shows it:
method AppDelegate.applicationDidFinishLaunching(aNotification: NSNotification);
begin
fMainWindowController := new MainWindowController();
fMainWindowController.showWindow(nil);
end;
public void applicationDidFinishLaunching(NSNotification notification)
{
mainWindowController = new MainWindowController();
mainWindowController.showWindow(null);
}
public func applicationDidFinishLaunching(_ notification: NSNotification!) {
mainWindowController = MainWindowController();
mainWindowController?.showWindow(nil);
}
Another thing worth noticing on the AppDelegate class is the NSApplicationMain Attribute that is attached to it. You might have noticed that your project has no main() function, no entry point where execution will start when the app launches. The NSApplicationMain attribute performs two tasks: (1) it generates this entry point for you, which saves a whole bunch of boilerplate code and (2) it lets Cocoa know that the AppDelegate class (which could be called anything) will be the application's delegate class.
type
[NSApplicationMain, IBObject]
AppDelegate = class(IUIApplicationDelegate)
//...
end;
[NSApplicationMain, IBObject]
class AppDelegate : IUIApplicationDelegate
{
//...
}
@NSApplicationMain @IBObject public class AppDelegate : IUIApplicationDelegate {
//...
}
The Main Window Controller
The second class, and where things become more interesting, is the MainWindowController. Arbitrarily named so because it is the first (and currently only) window controller for your application, this is where the actual logic for your application's UI will be encoded.
It too is fairly empty at this stage, with two placeholder methods – a constructor and a method that get called when the window loads (windowDidLoad). The constructor already has code to load the window from the MainWindowController.xib file, and you'll fill this class up with real code in a short while. But first, let's move on to the other files in the project.
The Resources
There are four resource files in the project, nested in the Resources subfolder. This is pure convention, and you can distribute files within folders of your project as you please.
-
App.icns is the main icon file for the application and defines what your app will look like in Finder and in the Dock.
-
MainMenu.xib is one of two .xib files in the project. As the name indicates, it contains the menu for the application, and it is also the file that will be loaded by Cocoa on application startup to initialize the Application Delegate, which it contains a reference to. It is common practise to add other global views and objects, like an About window or a preference window, to this file as well.
-
Entitlements.entitlements is a mostly empty XML file to start with. The entitlements file drives code signing and can be used to configure application capabilities such as Sandboxing, CloudKit or MapKit access, among others. Check out the Entitlements topic for more details.
-
Finally, Info.plist is a small XML file that provides the operating system with import and parameters about your application. The file provides some values that you can edit (like the name of the MainMenu.xib mentioned above), and as part of building your application, Elements will expand it and add additional information to the file before packaging it into your final app. You can read more about this file here.
<!DOCTYPE plist PUBLIC "-//Apple//DTD PLIST 1.0//EN" "http://www.apple.com/DTDs/PropertyList-1.0.dtd">
<plist version="1.0">
<dict>
<key>NSMainNibFile</key>
<string>MainMenu</string>
<key>NSPrincipalClass</key>
<string>NSApplication</string>
...
The Main Window Controller
The main window controller – which will be the central place for the code you'll be writing for this app – consists of two parts. There's a source file that defines the MainWindowController class (descended from the NSWindowController Cocoa base class), and there's a MainWindowController.xib file that holds the visual representation of the window.
If you look at the init method for MainWindowController, also called the constructor, you can see that there's already code in place that loads in the xib file by passing its name to the ancestor's initWithWindowNibName: method:
method MainWindowController.init: instancetype;
begin
self := inherited initWithWindowNibName('MainWindowController');
if assigned(self) then begin
// Custom initialization
end;
result := self;
end;
public override instancetype init()
{
this = base.initWithWindowNibName("MainWindowController");
if (this != null)
{
// Custom initialization
}
return this;
}
init() {
super.init(windowNibName: "MainWindowController");
// Custom initialization
}
If you are using Oxygene or C#, you notice a pattern that is common for init* methods on the Cocoa platform: The init* method calls the ancestor, assigning its result to self/this, and then proceeds to do further initialization only if the ancestor did not return nil/null. At the very end, self/this is returned to the caller.
This is the Cocoa and Objective-C way to write initializers. Alternatively, you can also use classic Oxygene and C# "constructor" syntax to express the same:
constructor MainWindowController;
begin
// Custom initialization
end;
public MainWindowController() : base withWindowNibName("MainWindowController")
{
// Custom initialization
}
In Swift initializers/constructors always use the init keyword, as shown above.
Any additional initialization needed for the class can be added where indicated by the comment – although for window controllers, it is more common to do this in the windowDidLoad: method instead, as that method has full access to all the objects loaded from the .xib file.
Editing .xib files is done in Xcode, using Apple's own designer for Mac and iOS.
For this step, and for many other aspects of developing for Mac and iOS, Xcode needs to be installed on your system. Xcode is available for free on the Mac App Store, and downloading and running it once is enough for Fire to find it, but we cover this in more detail here in the Setup section.
When you select the .xib file, the main view will populate with information about the .xib, including its name, build action ("Xib"), and a helpful "Edit in Xcode" button:
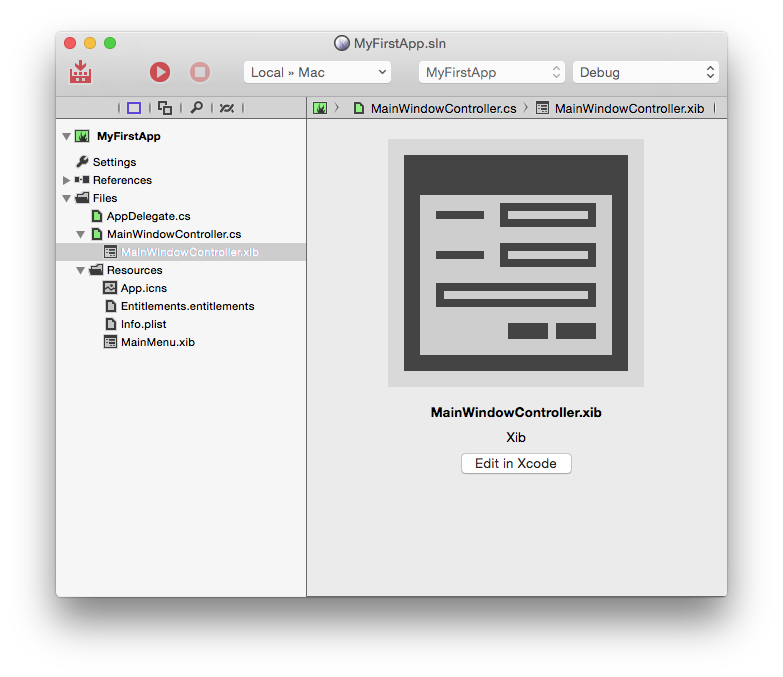
Clicking this button will generate/update a small stub project that will open in Xcode and give you access to all the resources in your project. Instead of using the button, you can also either right-click a resource file and select "Edit in Xcode" from the menu, or right-click the project node and choose "Edit User Interface Files Xcode".
Xcode will come up, and look something like this:
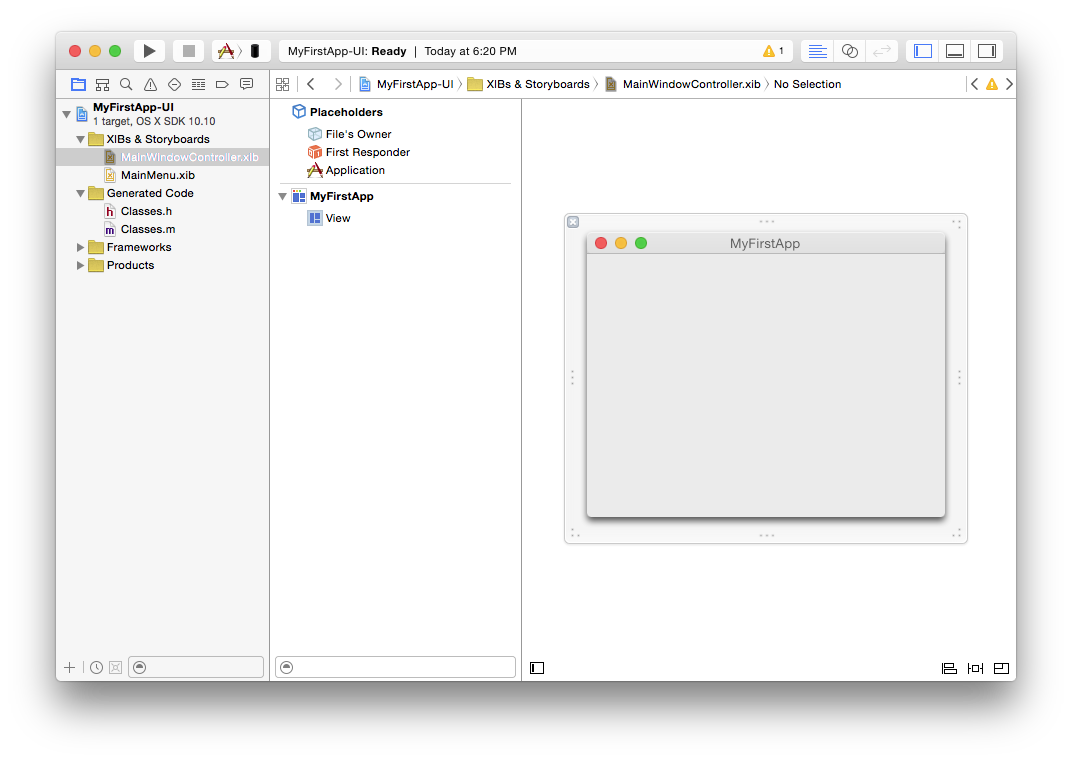
On the left, you see all your resource files represented – there's the MainViewController and MainMenu .xib files. Selecting an item will open it on the right, as is happening with the MainViewCortroller.xib in the screenshot above. To make more room, let's hide the file list (⌘0 just like in Fire), and press ⌥⌘1 to show the Utility pane on the right instead:
On the left, you see a tree view showing all items contained in the .xib file (currently, the Window tiled "MyFirstApp" and, nested below it, the window's main View). There are also a few "special" items listed at the top, including the "File's Owner" that we'll get back to in a short while.
In the center, you see the window designer itself, currently looking empty.
On the right, finally, the Utility pane shows properties and information about the currently selected item, divided across 8 tabs (at the top), and the palette of available components at the bottom.
The .xib file represents a hierarchy of objects that will be loaded into memory when the .xib is loaded. The window will result in an actual NSWindow class being created, the view in an NSView, and so on. "File's Owner" is special, in that it is not a class that's created from the .xib; it represents the class that loaded the .xib. In our case, that's the MainWindowController class. And indeed, if you select "File's Owner" in the tree, and then select the third tab in the Utility View (⌥⌘3), you will see that its "Class" property is set to "MainWindowController":
The presence of "File's Owner" here is what will allow you to make connections between objects added to the .xib, and properties and methods defined in your code.
So let's go back to Fire and start adding some (very simple) functionality to this window controller. You can close Xcode, or leave it open and just switch back to Fire via ⌘Tab – it doesn't matter.
Back in Fire, select the MainWindowController source file and let's start adding some code. We're going to create a really simple app for now, just an edit box, a button and a label. The app will ask the user to enter their name, and then update the label with a greeting message.
Let's start by adding two properties so that we can refer to the edit box and the label:
public
[IBOutlet] property edit: NSTextField;
[IBOutlet] property label: NSTextField;
[IBOutlet] public NSTextField edit { get; set; }
[IBOutlet] public NSTextField label { get; set; }
@IBOutlet var edit: NSTextField!
@IBOutlet var label: NSTextField!
Note the IBOutlet attribute attached to the property. This (alongside the IBObject attribute that's already on the MainWindowController class itself) lets Fire and Xcode know that the property should be made available for connections in the UI designer (IB is short for Interface Builder, the former name of Xcode's UI designer).
Next, let's add a method that can be called back when the user presses the button:
[IBAction]
method MainWindowController.sayHello(sender: id);
begin
label.stringValue := "hello, "+edit.stringValue;
end;
[IBAction]
public void sayHello(id sender)
{
label.stringValue = "hello, "+edit.stringValue;
}
@IBAction func sayHello(_ sender: Any?) {
label.stringValue = "hello, "+edit.stringValue
}
Similar to the attribute above, here the IBAction attribute is used to mark that the method should be available in the designer.
Note: If you are using Oxygene as a language, methods need to be declared in the interface section and implemented in the implementation section. You can just add the header to the interface and press ^C and Fire will automatically add the second counterpart for you, without you having to type the method header declaration twice.
Now all that's left is to design the user interface and hook it up to the code you just wrote. To do that, right-click the Main.storyboard and choose "Edit in Xcode" again. This will bring Xcode back to the front, and make sure the UI designer knows about the latest change you made to the code. (Tip: you can also just press ⌘S at any time to sync.)
Drag a couple of labels, a button and an edit field from the bottom-right class palette onto the Window and align them so that they look something like this:
Then select all four controls via ⌘-Clicking on each one in turn, press the first button in the bottom right, check "Horizontally Center in Container" and click "Add 4 Constraints". This configures Auto Layout, so that the controls will automatically be centered in the view, regardless of screen size. In a real app, you would want to set more constraints to fully control the layout – such as the spacing between the controls, and possibly to adjust the layout for different window sizes. But for this simple app, just centering them will do:
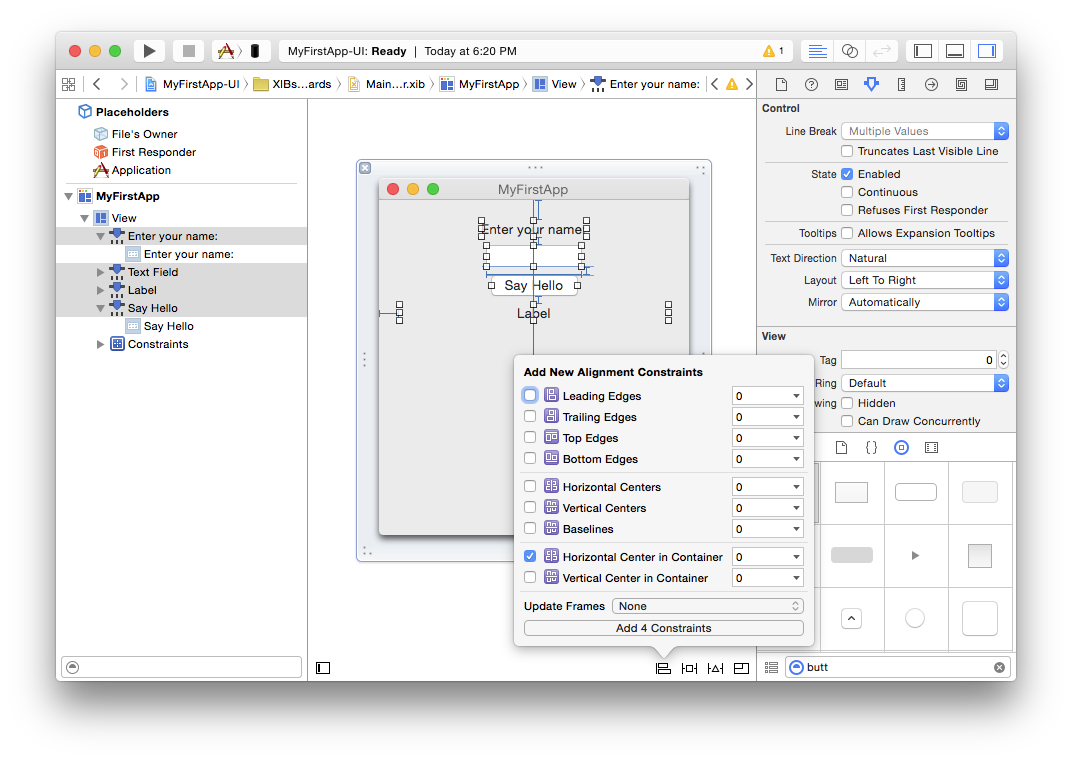
Finally, it's time to connect the controls to your code. There are three connections to be made in total – from the two properties to the NSTextFields, and from the NSButton back to the action.
For the first two, click on the "File's Owner" (which, remember, represents your MainWindowController class) while holding down the Control (^) key, and drag them onto the text field, as shown below:
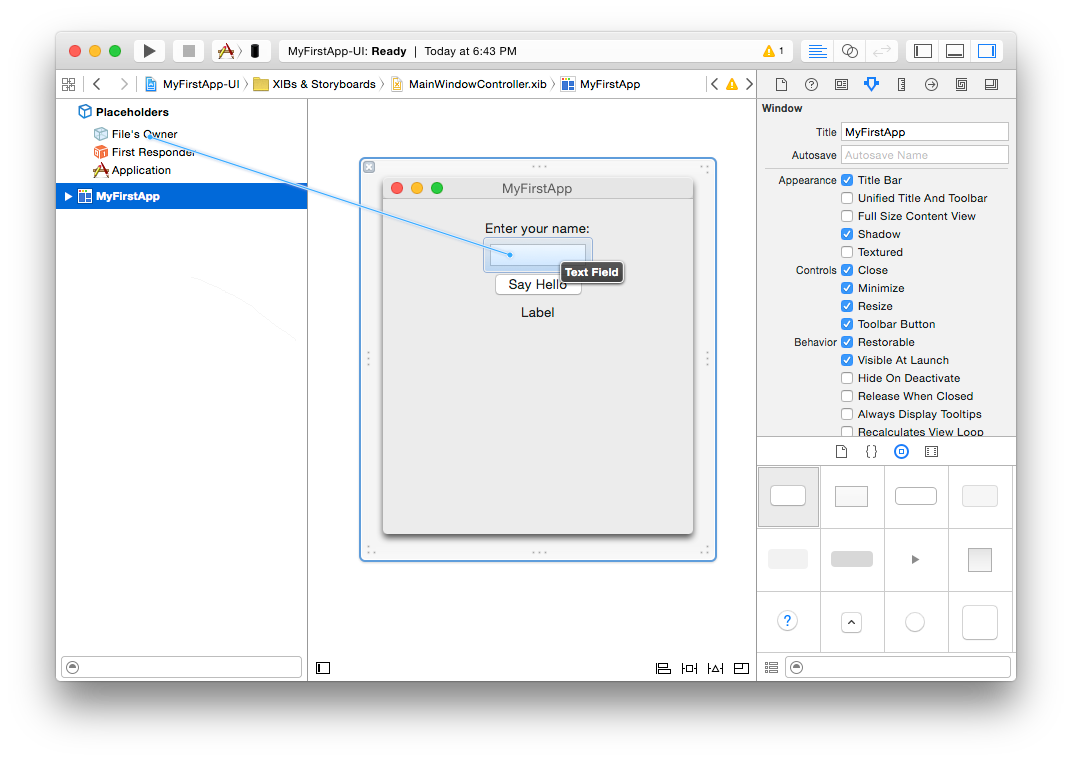
When you let go, a small popup appears, listing all properties that match up for connecting. In this case, it will be the edit and label properties we defined earlier (since both are of type NSTextField).
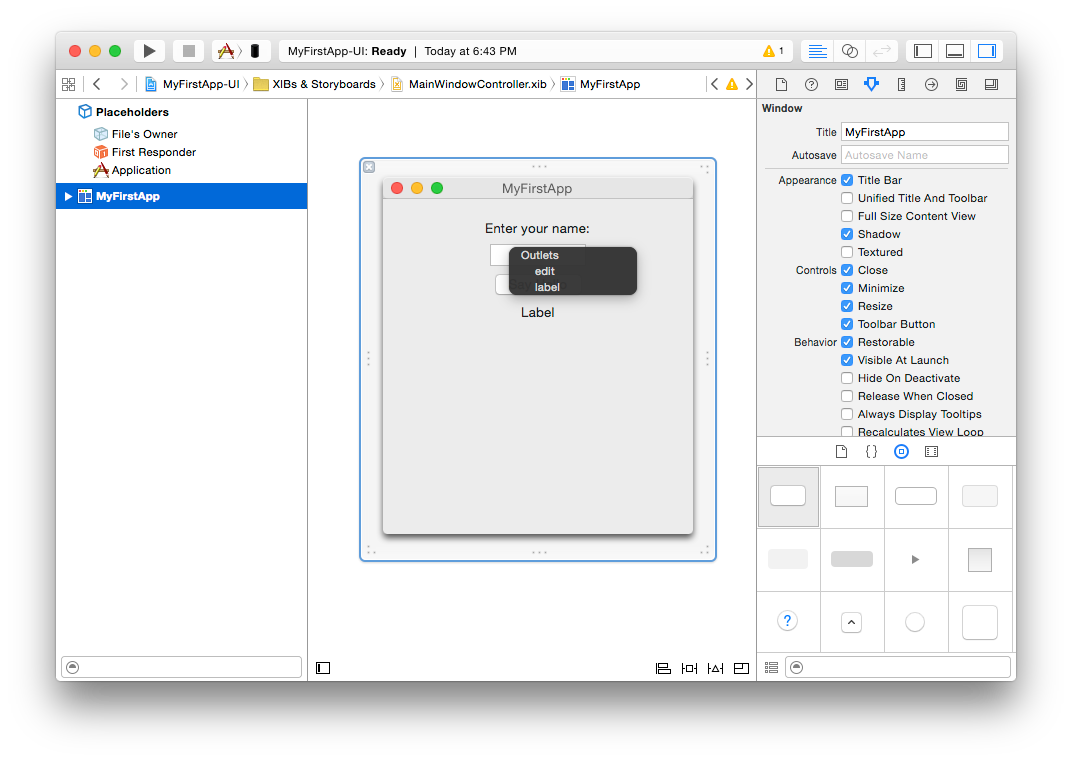
Click on "edit" to make the connection, then repeat the same step again, but this time dragging to the label, and connect that by clicking "label".
Connecting the action works the same way, just in reverse. This time, Control-drag from the button back to "File's Owner". Select "sayHello:" from the popup, and you're done.
And with that, the app is done. You can now close Xcode, go back to Fire, and run it.
Running Your App
You're now ready to run your app. To do so, simply hit the "Play" button in the toolbar, or press ⌘R.
Fire will now build your project and launch it. You will notice that while the project is compiling, the Jump Bar turns blue and shows the progress of what is happening in the top right of the window. The application icon will also turn blue for the duration; this allows you to switch away from Fire while building a more complex/slow project, and still keep an eye on the progress via the Dock.
If there were any errors building the project, the Jump Bar and application icon will turn Red, and you can press ⌥⌘M or use the Jump Bar to go to the first error message. But hopefully your first iOS project will build ok, and a few seconds later, the App should start up.
Type in your name, press the "Say Hello" button, and behold the application performing its task:
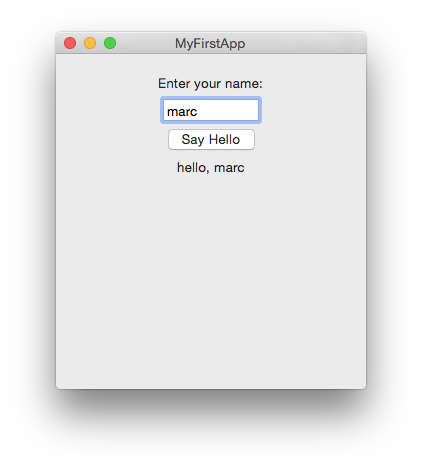
Your First iOS App
The first time you start Fire, before opening or starting a new project, it will present you with the Welcome Screen, pictured below. You can also always open up the Welcome screen via the "Window|Welcome" menu command or by pressing ⇧⌘1.
In addition to logging in to your remobjects.com account, the Welcome Screen allows you to perform three tasks, two of which you will use now.
On the bottom left, you can choose your preferred Elements language. Fire supports writing code in Oxygene, C# and Swift. Picking an option here will select what language will show by default when you start new projects, or add new files to a multi-language project (Elements allows you to mix all fivwe languages in a project, if you like).
This tutorial will cover all languages. For code snippets, and for any screenshots that are language-specific, you can choose which language to see in the top right corner. Your choice will persist throughout the article and the website, though you can of course switch back and forth at any time.
After picking your default language (which you can always change later in Preferences), click the "Start a new Project" button to bring up the New Project Wizard sheet:
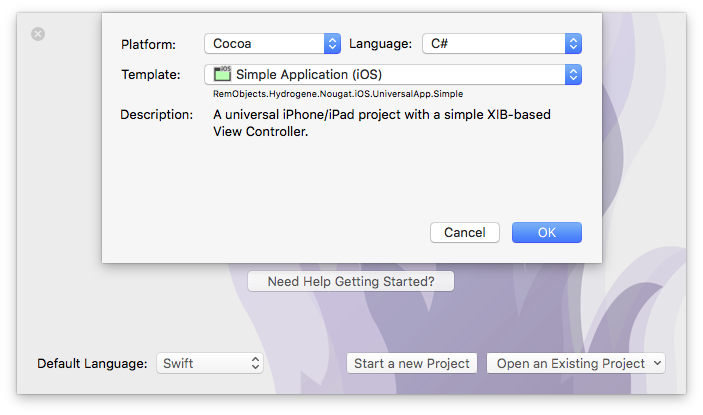
You will see that your preferred language is already pre-selected at the top right – although you can of course always choose a different language just for this one project.
On the top left you will select the platform for your new application. Since you're going to build an iOS app, select Cocoa. This filters the third list down to show all Cocoa templates only. Drop down the big popup button in the middle and choose the "Simple Application (iOS)" project template, then click "OK".
In the latest version of Elements, all iOS templates are Universal – meaning that by default they will work for both iPhone/iPod touch, and for the bigger iPad form factor. This is recommended practice for new apps, but if you want your application to only work on one of the two device sizes, you will learn how to adjust that later on.
Next, you will select where to save the new project you are creating:
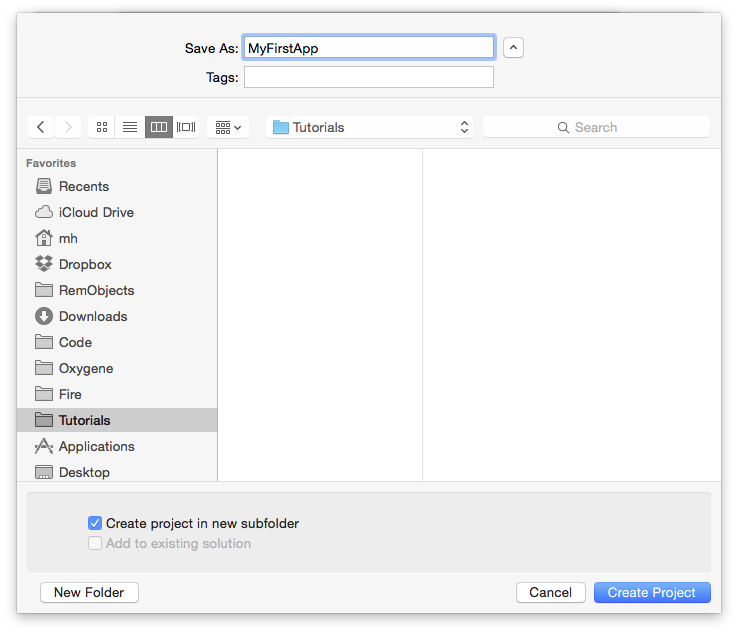
This is pretty much a standard Mac OS X Save Dialog; you can ignore the two extra options at the bottom for now and just pick a location for your project, give it a name, and click "Create Project".
You might be interested to know that you can set the default location for new projects in Preferences. Setting that to the base folder where you keep all your work, for example, saves you from having to find the right folder each time you start a new project.
Once the project is created, Fire opens its main window, showing you a view of your project:
Let's have a look around this window, as there are a lot of things to see, and this windows is the main view of Fire where you will do most of your work.
The Fire Main Window
At the top, you will see the toolbar, and at the very top of that you see the name MyFirstApp.sln. Now, MyFirstApp is the name you gave your project, but what does .sln mean? Elements works with projects inside of a Solution. You can think of a Solution as a container for one or more related projects. Fire will always open a solution, not a project – even if that solution might only contain a single project, like in this case.
In the toolbar itself are buttons to build and run the project, as well as a few popup buttons that let you select various things. We'll get to those later.
The left side of the Fire window is made up by what we call the Navigation Pane. This pane has various tabs at the top that allow you to quickly find your way around your project in various views. For now, we'll focus on the first view, which is active in the screenshot above, and is called the Project Tree.
You can hide and show the Navigation Pane by pressing ⌘0 at any time to let the main view (wich we'll look at next) fill the whole window. You can also bring up the Project Tree at any time by pressing ⌘1 (whether the Navigation Pane is hidden or showing a different tab).
The Project Tree
The Project Tree shows you a full view of everything in your project (or projects). Each project starts with the project node itself, which is larger, and selected in the screenshot above, as indicated by its blue background. Because it is selected, the main view on the right shows the project summary. As you select different nodes in the Project Tree the main view adjusts accordingly.
Each project has three top level nodes.
-
Settings gives you access to all the project settings and options for the project. Here you can control how the project is built and run, what exact compiler options are used, etc. The project settings are covered in great detail here.
-
References lists all the external frameworks and libraries your project uses. As you can see in the screenshot, the project already references all the most crucial libraries by default (we'll have a look at these later), and you can always add more by right-clicking the References node and choosing "Add Reference" from the context menu. You can also drag references in directly from the Finder, as well as, of course, remove unnecessary references. Please refer to the References topic for more in-depth coverage.
-
Files, finally, has the meat of your application. This is where all the files that make up your app are listed, including source files, images and other resources.
The Main View
Lastly, the main view fills the rest of the window (and if you hide the Navigation Pane, all of the window), and this is where you get your work done. With the project node selected, this view is a bit uninspiring, but when you select a source file, it will show you the code editor in that file, and it will show specific views for each file type.
When you hide the Navigation Pane, you can still navigate between the different files in your project via the Jump Bar at the top of the main view. Click on the "MyFirstApp" project name, and you can jump through the full folder and file hierarchy of your project, and more.
Your First iOS Project
Let's have a look at what's in the project that was generated for you from the template. This is already a fully working app that you could build and launch now – it wouldn't do much, but all the basic code and infrastructure is there.
First of all, there are two source files, the AppDelegate and the RootViewController, with file extensions matching your language. And there's a handful of non-code files in the Resources folder.
The Application Delegate
The AppDelegate is a standard class that pretty much every iOS, tvOS and Mac app implements. You can think of it as a central communication point between the Cocoa (Touch) frameworks and your app, the go-to hub that Cocoa will call when something happens, such as your app launching, shutting down, or getting other external notifications.
There's a range of methods that the AppDelegate can implement, and by default the template provides four of them to handle application launch, shutdown, suspension (when the app moves into the background) and resuming, respectively. For this template, they are all empty, because what gets your app off the ground and running happens elsewhere, as we'll see in a second.
If you wanted to add your own code to run when the app starts, you would add that to the implementation of the application:didFinishLaunchingWithOptions: body:
method AppDelegate.application(application: UIApplication)
didFinishLaunchingWithOptions(launchOptions: NSDictionary): Boolean;
begin
result := true;
end;
public BOOL application(UIApplication application)
didFinishLaunchingWithOptions(NSDictionary launchOptions)
{
return true;
}
func application(_ application: UIApplication!,
didFinishLaunchingWithOptions launchOptions: NSDictionary!) -> Bool {
return true
}
As it stands, the method just returns true to let Cocoa know that everything is A-OK and the app should start normally.
Another thing worth noticing on the AppDelegate class is the UIApplicationMain Attribute that is attached to it. You might have noticed that your project has no main() function, no entry point where execution will start when the app launches. The UIApplicationMain attribute performs two tasks: (1) it generates this entry point for you, which saves a whole bunch of boilerplate code and (2) it lets Cocoa know that the AppDelegate class (which could be called anything) will be the application's delegate class.
type
[UIApplicationMain, IBObject]
AppDelegate = class(IUIApplicationDelegate)
//...
end;
[UIApplicationMain, IBObject]
class AppDelegate : IUIApplicationDelegate
{
//...
}
@UIApplicationMain @IBObject public class AppDelegate : IUIApplicationDelegate {
//...
}
The Root View Controller
The second class, and where things become more interesting, is the RootViewController. Arbitrarily named so because it is the first (and currently only) view controller for your application, this is where the actual logic for your application's view will be encoded.
It too is fairly empty at this stage, with two placeholder methods that get called when the view loads (viewDidLoad) and when there is a shortage of memory (didReceiveMemoryWarning), respectively. You'll fill this class up with real code in a short while. But first let's move on to the other files in the project.
The Resources
There are four resource files in the project, nested in the Resources subfolder. This is pure convention, and you can distribute files within folders of your project as you please.
-
The Images.xcassets file is an Xcode Asset Catalog – essentially a collection of images (and possibly other assets) in various sizes. Like most resource files, you can edit this file in Xcode (we'll see how in a few moments). By default, it only contains the application icon, which for tvOS is made up of several layers to create a parallax 3D effect. Here you can also add a launch image, or a Top Shelf image for your TV app.
-
LaunchScreen.xib is a static user interface resource in form of a XIB file that iOS will use to show on the screen while your application is loading. In past versions of iOS, applications used static images for every screen size, but as of iOS 8, an XIB or Storyboard file is used instead. You can design this file in Xcode to determine what your users see while/before your app starts.
-
Main.storyboard, by contrast, is the real UI of your application that will show once it is launched. This file will also be designed in Xcode, and different than the launch screen file, it will have connections to your code, so that it can interact with the application logic you will write.
-
Finally, Info.plist is a small XML file that provides the operating system with import and parameters about your application. The file provides some values that you can edit (such as the name of the Launch Screen and Main Storyboard above, or what types of devices your app will run on), and as part of building your application, Elements will expand it and add additional information to the file before packaging it into your final app. You can read more about this file here.
<!DOCTYPE plist PUBLIC "-//Apple//DTD PLIST 1.0//EN" "http://www.apple.com/DTDs/PropertyList-1.0.dtd">
<plist version="1.0">
<dict>
<key>UILaunchStoryboardName</key>
<string>LaunchScreen</string>
<key>UIMainStoryboardFile</key>
<string>Main</string>
<key>UIDeviceFamily</key>
<array>
<integer>1</integer>
<integer>2</integer>
</array>
...
The Main Storyboard
As stated earlier, no startup code is necessary in the AppDelegate method, because Cocoa already knows how to get your app up and running. And that is via the UIMainStoryboardFile entry in the Info.plist file. As you can see above, it points to Main, which is the Main.storyboard file in your project. Let's have a look.
Editing .storyboard files is done in Xcode, using Apple's own designer for Mac and iOS.
For this step (and for many other aspects of developing for Mac and iOS) Xcode needs to be installed on your system. Xcode is available for free on the Mac App Store, and downloading and running it once is enough for Fire to find it, but we cover this in more detail here in the Setup section.
When you select the .storyboard file, the main view will populate with information about the storyboard, including its name, build action ("Storyboard"), and a helpful "Edit in Xcode" button:
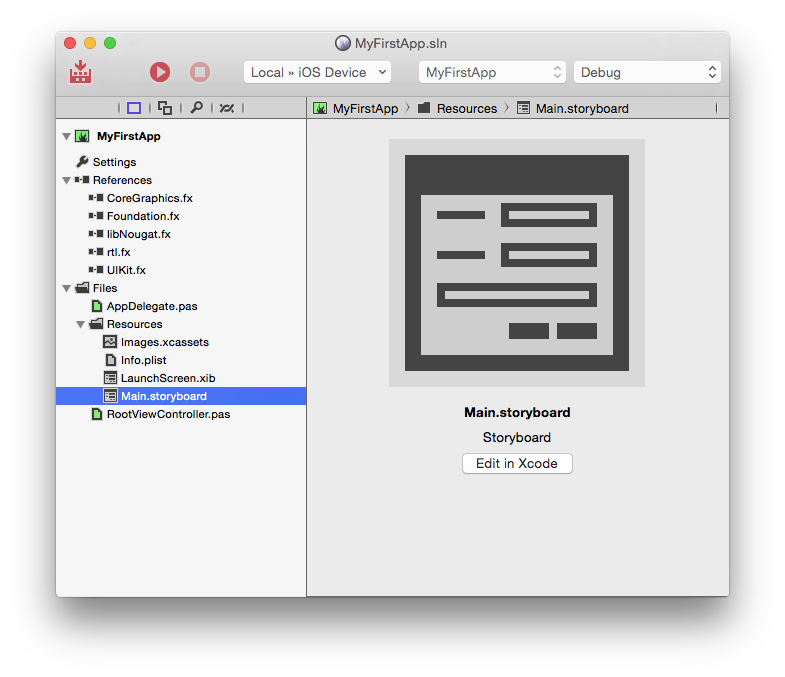
Clicking this button will generate/update a small stub project that will open in Xcode and give you access to all the resources in your project. Instead of using the button, you can also either right-click a resource file and select "Edit in Xcode" from the menu, or right-click the project node and choose "Edit User Interface Files Xcode".
Xcode will come up and look something like this:
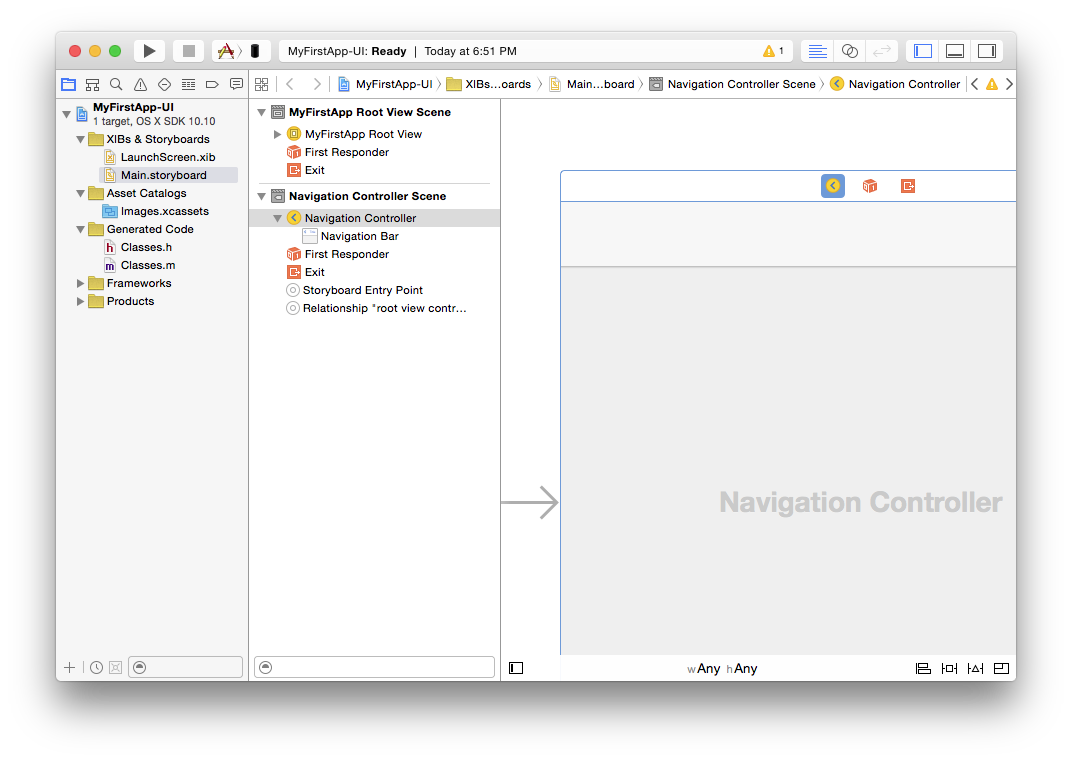
On the left, you see all your resource files represented – there's the LaunchScreen and the Main storyboard, and there's also the Asset Catalog. Selecting an item will open it on the right, as is happening with the Main.storyboard in the screenshot above. To make more room, let's hide the file list (⌘0 just like in Fire) and the Document Outline (via the small square button in the bottom left). Also, press ⌥⌘1 to show the Utility pane on the right instead:
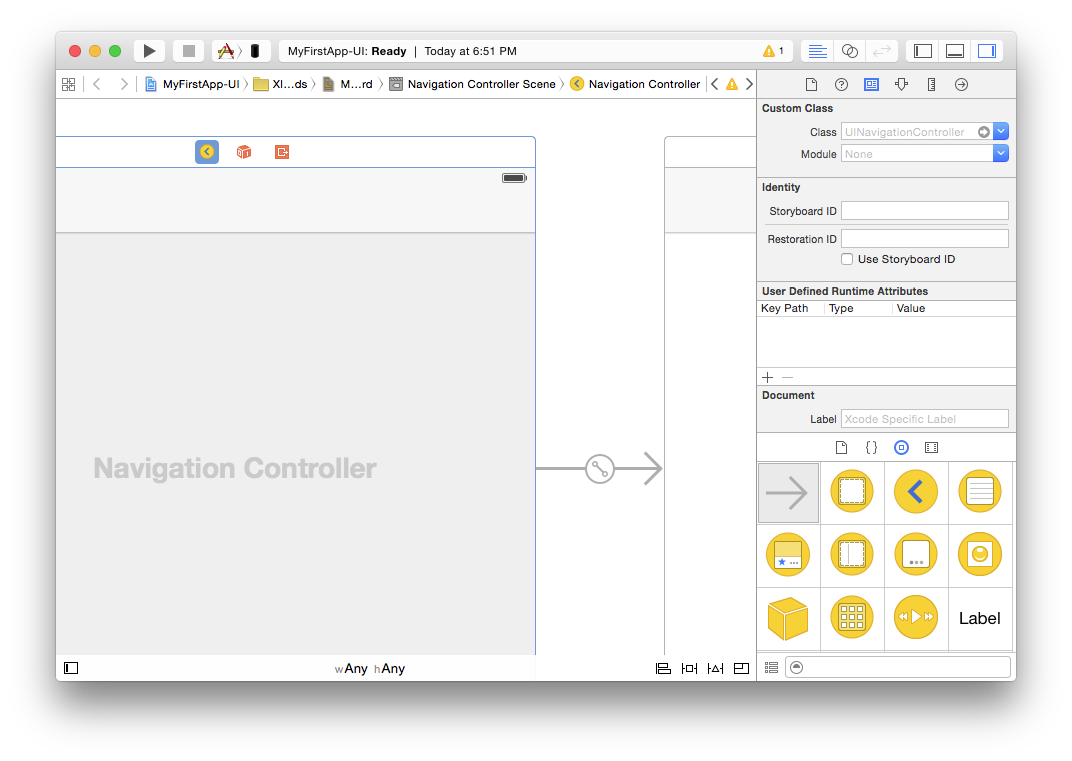
The view for the screenshots is a bit constraint, but if you resize the window or scroll around, you will see that by default the storyboard contains two items. The first is a "Navigation Controller". The navigation controller is a standard Cocoa class (UINavigationController) that takes care of showing a navigation bar at the top and letting the user navigate back and forth (actually really just back) between different views. Many, if not most, iOS apps use a navigation controller, for example the default iOS Email app.
You will see a small arrow from the left pointing from empty space into the navigation controller. This indicates that the navigation controller is the first thing Cocoa will show when it loads your storyboard.
To the right of the navigation controller, there's a second view titled "MyFirstApp Root View". This is the first (and currently only) view of your application, and at the moment it's pretty empty.
If you select the view controller by clicking its title bar and then select the third tab in the Utility View (⌥⌘3), you will see that its "Class" property is set to "RootViewController". This is the RootViewController class in your code.
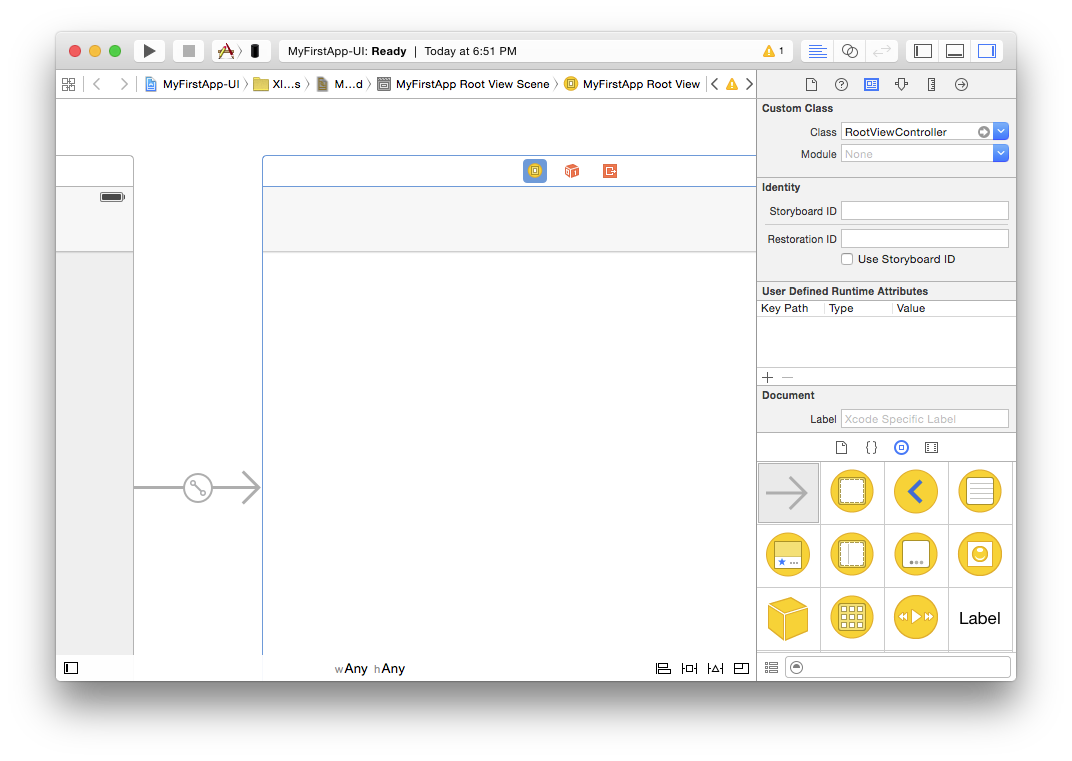
So let's go back to Fire and start adding some (very simple) functionality to this view controller. You can close Xcode, or leave it open and just switch back to Fire via ⌘Tab – it doesn't matter.
Back in Fire, select the RootViewController source file, and let's start adding some code. We're going to create a really simple app for now, just an edit box, a button and a label. The app will ask the user to enter their name, and then update the label with a greeting message.
Let's start by adding two properties, so that we can refer to the edit box and the label:
public
[IBOutlet] property edit: UITextField;
[IBOutlet] property label: UILabel;
[IBOutlet] public UITextField edit { get; set; }
[IBOutlet] public UILabel label { get; set; }
@IBOutlet var edit: UITextField
@IBOutlet var label: UILabel
Note the IBOutlet attribute attached to the property. This (alongside the IBObject attribute that's already on the RootViewController class itself) lets Fire and Xcode know that the property should be made available for connections in the UI designer (IB is short for Interface Builder, the former name of Xcode's UI designer).
Next, let's add a method that can be called back when the user presses the button:
[IBAction]
method RootViewController.sayHello(sender: id);
begin
label.text := 'hello, '+edit.text;
end;
[IBAction]
public void sayHello(id sender)
{
label.text = "hello, "+edit.text;
}
@IBAction func sayHello(_ sender: Any?) {
label.text = "hello, "+edit.text
}
Similar to the attribute above, here the IBAction attribute is used to mark that the method should be available in the designer.
Note: If you are using Oxygene as a language, methods need to be declared in the interface section and implemented in the implementation section. You can just add the header to the interface and press ^C and Fire will automatically add the second counterpart for you, without you having to type the method header declaration twice.
Now all that's left is to design the user interface and hook it up to the code you just wrote. To do that, right-click the MainWindowController.xib and choose "Edit in Xcode" again. This will bring Xcode back to the front and make sure the UI designer knows about the latest change you made to the code. (Tip: you can also just press ⌘S at any time to sync.)
Drag a couple of labels, a button and an edit field from the bottom-right class palette onto the Root View, and align them so that they look something like this:

Then select all four controls via ⌘-clicking on each one in turn, press the first button in the bottom right, check "Horizontally Center in Container" and click "Add 4 Constraints". This configures Auto Layout, so that the controls will automatically be centered in the view, regardless of screen size. In a real app, you would want to set more constraints to fully control the layout – such as the spacing between the controls, and possibly to adjust the layout for iPhone vs. iPad or for landscape vs. portrait orientation. But for this simple app, just centering them will do:
Finally, it's time to connect the controls to your code. There are three connections to be made in total – from the two properties to the UITextField and UILabel, and from the UIButton back to the action.
For the first two, click on the yellow view controller icon (which represents your RootViewController class) while holding down the Control (^) key, and drag onto the text field, as shown below:
When you let go, a small popup appears, listing all properties that match up for connecting. In this case, it will be the view property (which links the base view for the controller, and you don't want to mess with that), and the edit one you defined earlier.
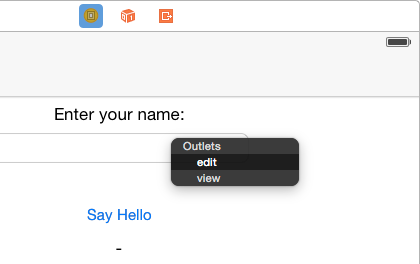
Click on "edit" to make the connection, then repeat the same step again, but this time dragging to the label, and connect that by clicking "label".
Connecting the action works the same way, just in reverse. This time, Control-drag from the button back to the yellow view controller icon. Select "sayHello:" from the popup, and you're done.
And with that, the app is done. You can now close Xcode, go back to Fire, and run it.
Running Your App
You're now ready to run your app in the Simulator.
Earlier on we looked at the top toolbar in Fire. In the middle of the toolbar, you will find a popup button that is the device selector, which should by default be set to "iOS Device". That is a placeholder that, when selected, tells Fire to build your application for a real, physical iOS device, and is available whether you have an actual iOS device connected or not. However, because "iOS Device" does not represent a real device, you cannot run your app on it.
If you open up the popup, you will see a menu with a whole lot more options. For one, you will see all the different iOS Simulator models that are available; for another, you will also see any real iOS devices you have connected to your Mac (such as "marc's iPad", in the screenshot below), along with their device type and OS version.
For now just select one of the Simulators, for example "iPhone 6". When done, you can hit the "Play" button in the toolbar, or press ⌘R.
Fire will now build your project and launch it in the simulator. You will notice that while the project is compiling, the Jump Bar turns blue and shows the progress of what is happening in the top right of the window. The application icon will also turn blue for the duration; this allows you to switch away from Fire while building a more complex/slow project, and still keep an eye on the progress via the Dock.
If there were any errors building the project, Jump Bar and application icon would turn Red, and you could press ⌥⌘M or use the Jump Bar to go to the first error message. But hopefully your first iOS project will build ok, and a few seconds later, the iOS Simulator should come to the front, running your app.
You will notice that initially it shows a static screen with some text (this is what's in your LauchScreen.xib) and once the app is fully loaded, it will show the user interface you just designed.
Type in your name, press the "Say Hello" button, and behold the application performing its task:
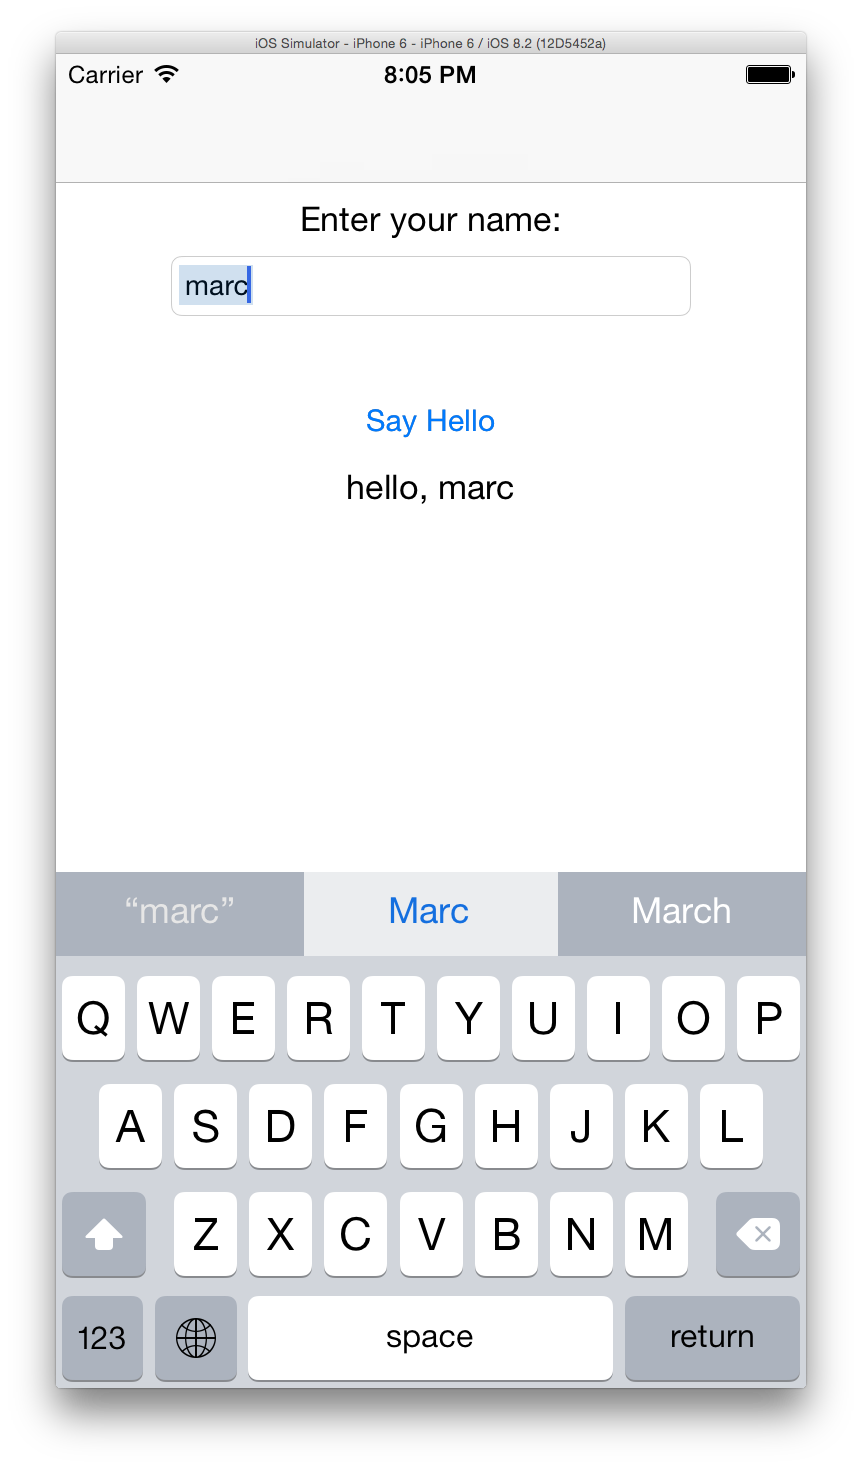
Running on your device should be just as easy, assuming you have your iOS developer account set up and registered with Xcode as discussed here. Simply select your real device from the device picker popup, hit ⌘R again, and you will see your app get deployed to and launch on your iPhone or iPad.
You will see two warnings being emitted when building for a device. That is because your project has no Provisioning Profile and Developer Certificate selected yet. Fire will pick the default profile and certificate (assuming one is present), so that you can run your application without hassle, but the two warnings will remind you that, eventually, you will want to explicitly select the exact profile and certificate you want to use for this app.
To do so, simply select the "Settings" (⌘I) node on the Project Tree, which brings up the Project Settings Editor:
You can select both your certificate and your Provisioning Profile from the list (once again, see here if your profiles or certificates don't show up as you expect them to).
Your First watchOS App
With watchOS SDK, it is now possible to build native applications for the Apple Watch running watchOS 2.0 or later.
An Apple Watch solution consists of three distinct Elements projects:
- A regular iPhone (or universal) iOS Application project
- A Watch App project
- A WatchKit Extension project
Apple Watch apps ship as companions to an iPhone app, so they are hosted inside a regular iOS app. This can be an application you are already shipping, or a new app you create specifically to host your watch app. For the purpose of this tutorial, we assume you are already familiar with creating an iOS app, as shown in the Your First iOS App tutorial. If you are not, you should read that tutorial first.
For the remainder of this text, we'll assume you already have an iPhone (or universal) app created that you want to add watch support to.
Creating the Extension and WatchKit App Projects
The first step will be to add a Watch App project to your solution via the "File|New Project" menu item. Make sure to select "Cocoa" as platform, and your language of choice. Then pick the "WatchKit App (watchOS)" project template. Make sure you check the "Add to existing solution" option:
Next, pick a place to save your new project. It makes sense to save it underneath or parallel to your existing iOS app. For the purpose of this tutorial, save the project as "WatchKitApp".
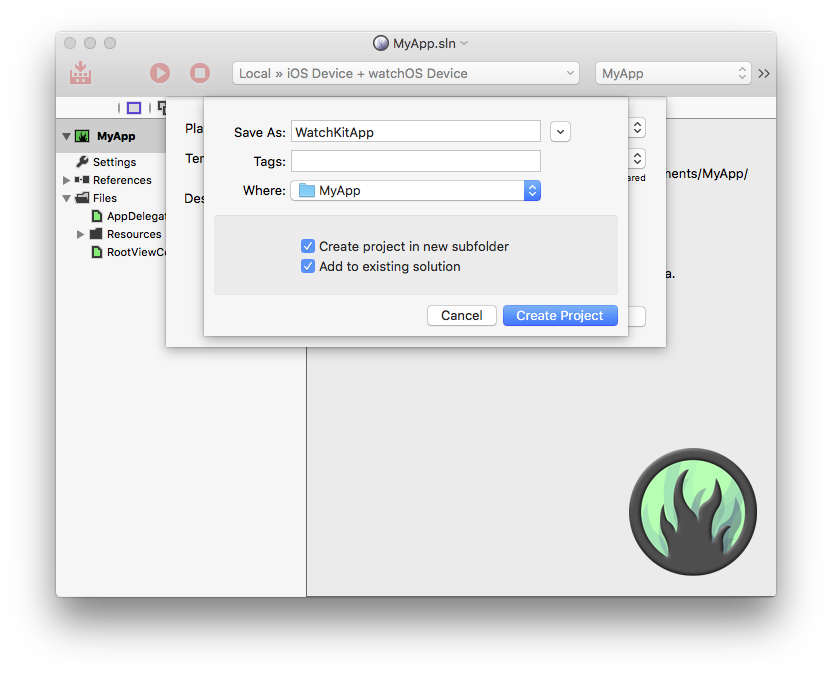
Click "Create Project" and the WatchKit App project will be saved and added to your solution.
Next, a sheet will pop up asking you to embed your app into one of the iOS applications in your solution. Since you only have one project open, you can just click "OK". If you had more than one application in the solution, you could choose the one you want your watch extension to be hosted in.
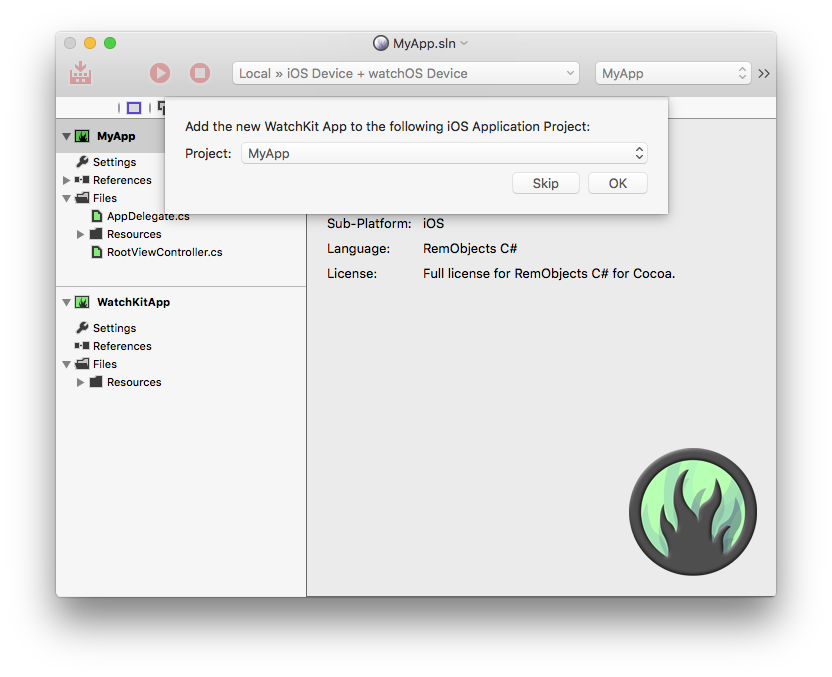
After the sheet closes, you're back in your solution, which now has thee projects:
- your original app
- the new "WatchKitApp" project
- a third "WatchKitApp Extension" project
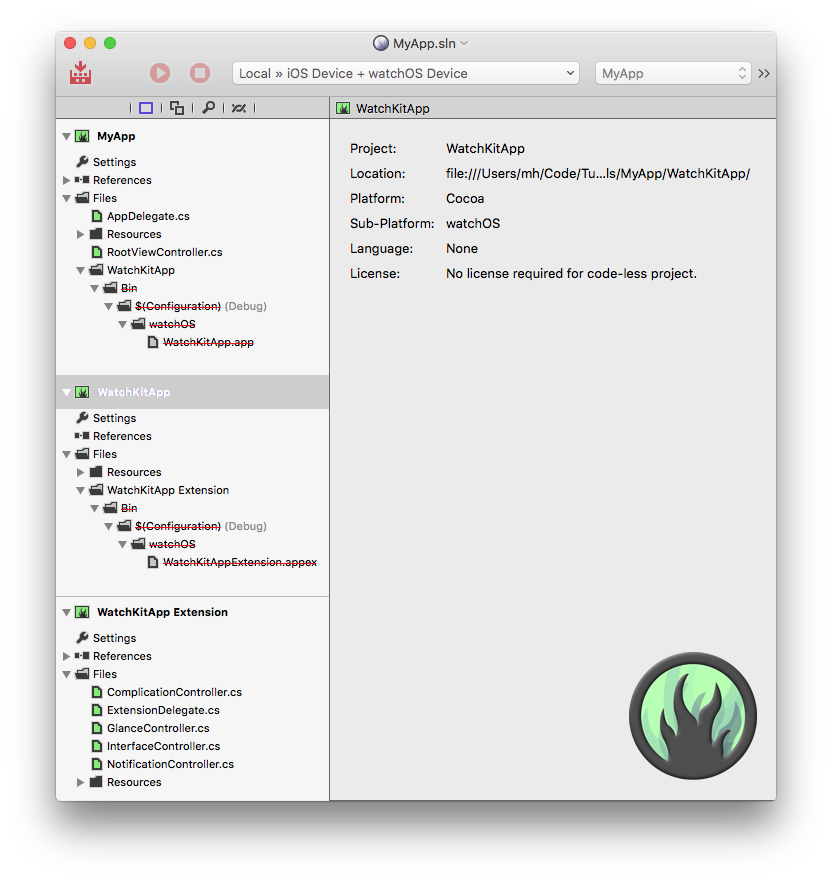
In addition to marking your watch app for embedding in the iOS app, the post-template wizard performed a few more steps for you automatically:
- It added the third "WatchKit Extension" project to your solution, as seen above.
- It adjusted the Bundle Identifiers of both new projects to match that of your iOS host application. watchOS requires these identifiers to be nested, so that the Watch App has your iOS app's ID as a prefix, and the extension in turn has the watch app's ID as prefix.
- It updated certain keys in the new projects'
Info.plist files to match these Bundle Identifiers.
- It added a reference to your watch app to the iOS app. You can see the
WatchKitApp.app file, which is shown crossed-out in red because it doesn't exist yet (once you build the project by pressing ⌘B, the cross-out will go away), listed in the project tree.
- It added a reference to your extension to the watch app – you can see the
.appex file in the project tree.
- It added build dependencies between the three projects, so they will always be built in the right order.
Note: If you later change the Bundle Identifier of your app, you will need to adjust the IDE identifier for the two watch projects to match, both in Project Settings and also in the Info.plist.
The Projects
Your Apple Watch app is ready to run now, even if it does not do much (or anything, really) yet: connect your iPhone, hit ⌘R (or ⌘⇧D to "Deploy" to your phone without actually launching the iOS app) and everything will build and install. Your app should show up in the Apple Watch Companion App, where you can choose to have it installed onto your Watch (once you do, the watch will automatically update when you deploy a new version to your phone).
But let's have a look a what is actually inside the projects now.
Your iOS Application, MyApp in this example, has not been touched at all, except for the above-mentioned reference to the WatchKitApp bundle. It will still work just as before, except now it contains your Watch App. Of course, you might later want to expand it to support explicit interaction with the watch app, depending on your specific case.
Next, the Watch App itself, WatchKitApp, contains just a couple of files that are of interest: An Asset Catalog that contains your app icon, and a Storyboard file where you will design your UI. We will look at those shortly.
Finally, all the code for your watch app lives in the Extension, called WatchKitApp Extension in this case. Here you will find five source files waiting for you to fill with code: one ExtensionDelegate class that acts as the central entry point for your app, and one controller class for each of the four potential interaction models your app might want to provide: The App interface itself (Interface), a Glance, a Notification view, and a custom watch face Complication.
Read more:
- Implementing your Watch App
- Implementing a Glance for your Watch App
- Implementing a Custom Notification View for your Watch App
- Implementing a Custom Watch Face Complication for your Watch App
Of course, depending on your goals, you might not want or need to implement all four of these parts; only the main app is mandatory. If you don't need a glance, notification view or complication, you can simply delete the file (and later delete the corresponding element(s) from the storyboard, as well).
Filling the App with Life
So your app runs and deploys, but it doesn't do much yet. Let's see how to change that.
In many ways, creating the user interface for a Watch App is similar to what you are probably already familiar with from UIKit (or even the Mac). You have a .storyboard file (contained in the WatchKitApp project), and classes that define view controllers (called InterfaceControllers in WatchKit parlance) in the Extension project.
To edit the Storyboard in Xcode, you can select the file and click the "Edit in Xcode" button. You can also right-click the file and choose "Edit in Xcode" from the menu, or right-click the project node and choose "Edit User Interface Files in Xcode" (on either the Extension or the WatchKit App):
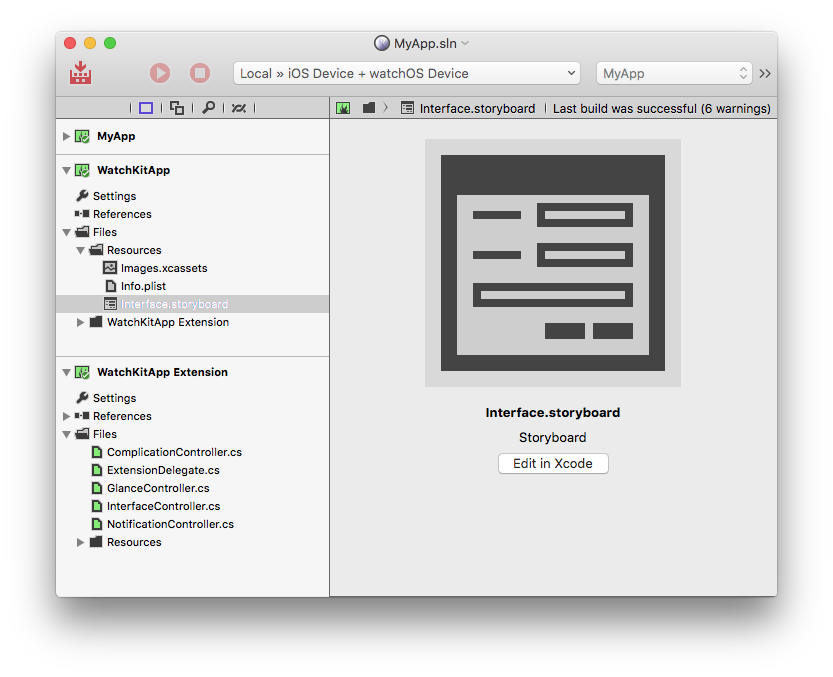
By default, the WatchKit template creates three views: the main interface of your Watch app (InterfaceController), a Glance view (GlanceController) and a Notification view (NotificationController). All three are represented by both a code file and a view inside the storyboard (the fourth view type, the Complication, is not designed in Interface Builder).
As mentioned above, if you do not want to offer glance view and/or a custom notification view, you can simply delete the corresponding code files and views.
You should read up more in Apple's excellent WatchKit Programming Guide to get familiar with the UI paradigms in depth, to understand the difference between the main application and Glances, and how custom notifications work. For the purpose of this tutorial, we will focus on the main application UI, but the same paradigms apply to all views.
When you open the Storyboard in Xcode, it will look a bit like this:
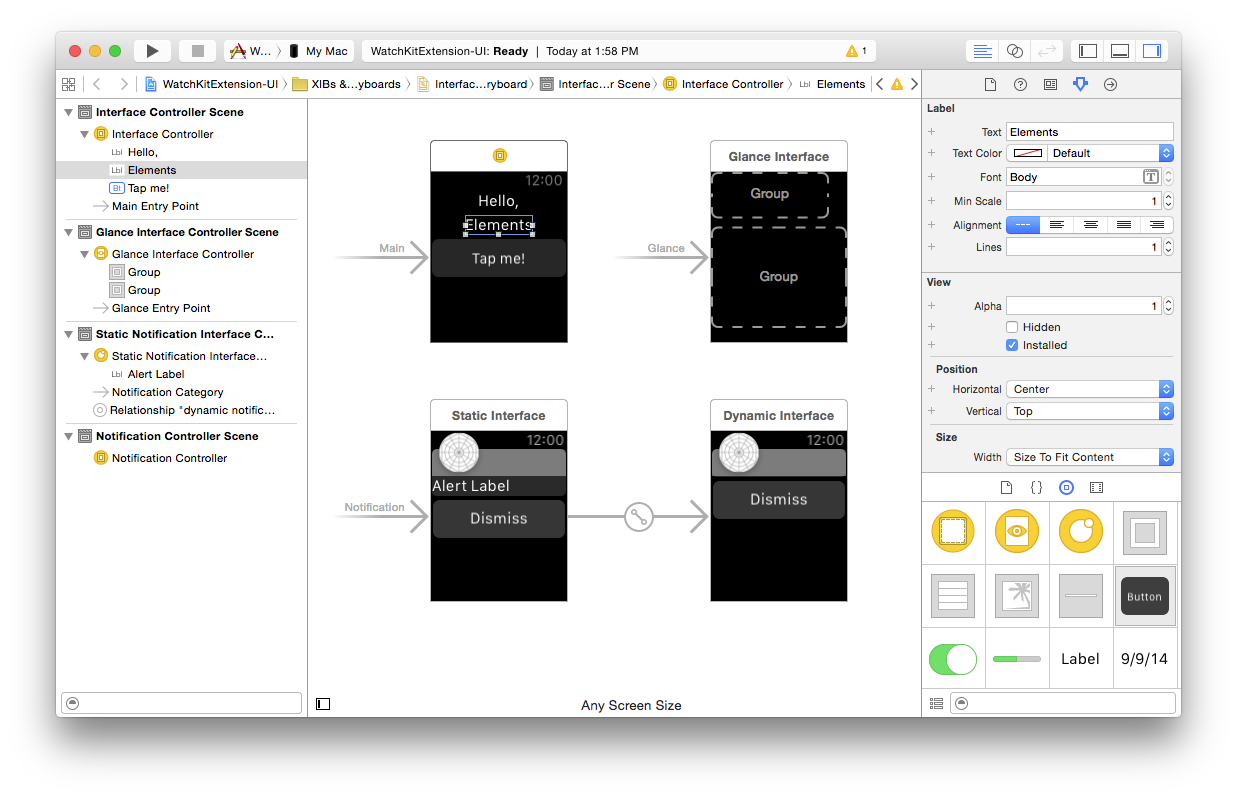
Note the three separate sets of views (with two views for notifications – static and dynamic). Let's focus on the top-left one, the Interfacecontroller for your main app, as it is what will launch when the user taps its icon on the Watch home screen.
WatchKit uses a different layout paradigm than UIKit. Rather than positioning controls at arbitrary coordinates, all UI elements float into shape on a stack. By default, you will see a first label sticking to the top. As you add more controls, you will see them stack up below each other automatically. Apple's WatchKit Programming Guide covers this in more detail.
For now, drop a second label and a button, and then set the horizontal alignment for the two labels to "Center" to make the UI look somewhat like in the screenshot above.
Next, let's hook these up to some code, so switch back to Fire, select the InterfaceController source file and add the following two pieces of code:
[IBOutlet] property label: weak WKInterfaceLabel;
[IBAction] method buttonTapped;
// ...
method InterfaceController.buttonTapped;
begin
label.text := 'Oxygene';
end;
[IBOutlet] public __weak WKInterfaceLabel label { get; set; }
[IBAction]
public void buttonTapped()
{
label.text = "RemObjects C#";
}
@IBOutlet weak var label: WKInterfaceLabel
@IBAction func buttonTapped() {
label.text = "Silver"
}
Choose "Edit in Xcode" again, and now you can hook this property and method up to the UI elements you dropped before, just as you would in a regular iOS app. Control-drag from the InterfaceController onto the second label and connect it to the label property, and control-drag from the button back to InterfaceController to hook up its tap event to the buttonTapped method.
When you now save and re-run your app, tapping the button will update the label with the new string.
![]()
Version Notes
Working with watchOS requires Xcode 7.0 or later to be your active Xcode version, as well as Elements 8.2 or later. It is currently supported only in Fire.
Please also note that deploying on the Apple Watch Simulator is currently not supported.
But Deploying and testing your apps on real hardware is fully functional.
See Also
Your First tvOS App
The first time you start Fire, before opening or starting a new project, it will present you with the Welcome Screen, pictured below. You can also always open up the Welcome screen via the "Window|Welcome" menu command or by pressing ⇧⌘1.
In addition to logging in to your remobjects.com account, the Welcome Screen allows you to perform three tasks, two of which you will use now.
On the bottom left, you can choose your preferred Elements language. Fire supports writing code in Oxygene, C# and Swift. Picking an option here will select what language will show by default when you start new projects, or add new files to a multi-language project (Elements allows you to mix all fivwe languages in a project, if you like).
This tutorial will cover all languages. For code snippets, and for any screenshots that are language-specific, you can choose which language to see in the top right corner. Your choice will persist throughout the article and the website, though you can of course switch back and forth at any time.
After picking your default language (which you can always change later in Preferences), click the "Start a new Project" button to bring up the New Project Wizard sheet:

You will see that your preferred language is already pre-selected at the top right – although you can of course always choose a different language just for this one project.
On the top left you will select the platform for your new application. Since you're going to build an tvOS app for Apple TV, select Cocoa. This filters the third list down to show all Cocoa templates only. Drop down the big popup button in the middle and choose the "Single View App (tvOS)" project template, then click "OK".
Next, you will select where to save the new project you are creating:

This is pretty much a standard Mac OS X Save Dialog; you can ignore the two extra options at the bottom for now and just pick a location for your project, give it a name, and click "Create Project".
You might be interested to know that you can set the default location for new projects in Preferences. Setting that to the base folder where you keep all your work, for example, saves you from having to find the right folder each time you start a new project.
Once the project is created, Fire opens its main window, showing you a view of your project:
Let's have a look around this window, as there are a lot of things to see, and this windows is the main view of Fire where you will do most of your work.
The Fire Main Window
At the top, you will see the toolbar, and at the very top of that you see the name MyFirstApp.sln. Now, MyFirstApp is the name you gave your project, but what does .sln mean? Elements works with projects inside of a Solution. You can think of a Solution as a container for one or more related projects. Fire will always open a solution, not a project – even if that solution might only contain a single project, like in this case.
In the toolbar itself are buttons to build and run the project, as well as a few popup buttons that let you select various things. We'll get to those later.
The left side of the Fire window is made up by what we call the Navigation Pane. This pane has various tabs at the top that allow you to quickly find your way around your project in various views. For now, we'll focus on the first view, which is active in the screenshot above, and is called the Project Tree.
You can hide and show the Navigation Pane by pressing ⌘0 at any time to let the main view (wich we'll look at next) fill the whole window. You can also bring up the Project Tree at any time by pressing ⌘1 (whether the Navigation Pane is hidden or showing a different tab).
The Project Tree
The Project Tree shows you a full view of everything in your project (or projects). Each project starts with the project node itself, which is larger, and selected in the screenshot above, as indicated by its blue background. Because it is selected, the main view on the right shows the project summary. As you select different nodes in the Project Tree the main view adjusts accordingly.
Each project has three top level nodes.
-
Settings gives you access to all the project settings and options for the project. Here you can control how the project is built and run, what exact compiler options are used, etc. The project settings are covered in great detail here.
-
References lists all the external frameworks and libraries your project uses. As you can see in the screenshot, the project already references all the most crucial libraries by default (we'll have a look at these later), and you can always add more by right-clicking the References node and choosing "Add Reference" from the context menu. You can also drag references in directly from the Finder, as well as, of course, remove unnecessary references. Please refer to the References topic for more in-depth coverage.
-
Files, finally, has the meat of your application. This is where all the files that make up your app are listed, including source files, images and other resources.
The Main View
Lastly, the main view fills the rest of the window (and if you hide the Navigation Pane, all of the window), and this is where you get your work done. With the project node selected, this view is a bit uninspiring, but when you select a source file, it will show you the code editor in that file, and it will show specific views for each file type.
When you hide the Navigation Pane, you can still navigate between the different files in your project via the Jump Bar at the top of the main view. Click on the "MyFirstApp" project name, and you can jump through the full folder and file hierarchy of your project, and more.
Your First tvOS Project
Let's have a look at what's in the project that was generated for you from the template. This is already a fully working app that you could build and launch now – it wouldn't do much, but all the basic code and infrastructure is there.
First of all, there are two source files, the AppDelegate and a ViewController, with file extensions matching your language. And there's a handful of non-code files in the Resources folder.
If you are already used to iOS development, then a lot of this will be very familiar to you already.
The Application Delegate
The AppDelegate is a standard class that pretty much every iOS, tvOS and Mac app implements. You can think of it as a central communication point between the Cocoa (Touch) frameworks and your app, the go-to hub that Cocoa will call when something happens, such as your app launching, shutting down, or getting other external notifications.
There's a range of methods that the AppDelegate can implement, and by default the template provides four of them to handle application launch, shutdown, suspension (when the app moves into the background) and resuming, respectively. For this template, they are all empty, because what gets your app off the ground and running happens elsewhere, as we'll see in a second.
If you wanted to add your own code to run when the app starts, you would add that to the implementation of the application:didFinishLaunchingWithOptions: body:
method AppDelegate.application(application: UIApplication)
didFinishLaunchingWithOptions(launchOptions: NSDictionary): Boolean;
begin
result := true;
end;
public BOOL application(UIApplication application)
didFinishLaunchingWithOptions(NSDictionary launchOptions)
{
return true;
}
func application(_ application: UIApplication!,
didFinishLaunchingWithOptions launchOptions: NSDictionary!) -> Bool {
return true
}
As it stands, the method just returns true to let Cocoa know that everything is A-OK and the app should start normally.
Another thing worth noticing on the AppDelegate class is the UIApplicationMain Attribute that is attached to it. You might have noticed that your project has no main() function, no entry point where execution will start when the app launches. The UIApplicationMain attribute performs two tasks: (1) it generates this entry point for you, which saves a whole bunch of boilerplate code and (2) it lets Cocoa know that the AppDelegate class (which could be called anything) will be the application's delegate class.
type
[UIApplicationMain, IBObject]
AppDelegate = class(IUIApplicationDelegate)
//...
end;
[UIApplicationMain, IBObject]
class AppDelegate : IUIApplicationDelegate
{
//...
}
@UIApplicationMain @IBObject public class AppDelegate : IUIApplicationDelegate {
//...
}
The View Controller
The second class, and where things become more interesting, is the ViewController. Arbitrarily named so because it is the only view controller for your application (you started with the "Single View" app template, after all), this is where the actual logic for your application's view will be encoded.
It too is fairly empty at this stage, with two placeholder methods that get called when the view loads (viewDidLoad) and when there is a shortage of memory (didReceiveMemoryWarning), respectively. You'll fill this class up with real code in a short while. But first let's move on to the other files in the project.
The Resources
There are four resource files in the project, nested in the Resources subfolder. This is pure convention, and you can distribute files within folders of your project as you please.
-
The Assets.xcassets file is an Xcode Asset Catalog – essentially a collection of images (and possibly other assets) in various sizes. Like most resource files, you can edit this file in Xcode (we'll see how in a few moments). By default, it only contains the application icon, in the various sizes to support iPhones and iPads at different resolutions.
-
Main.storyboard contains the real UI of your application that will show once it is launched. This file will also be designed in Xcode, and it will have connections to your code, so that it can interact with the application logic you will write.
-
Finally, Info.plist is a small XML file that provides the operating system with important parameters about your application. The file provides some values that you can edit (such as the name of the Launch Screen and Main Storyboard above, or what types of devices your app will run on), and as part of building your application, Elements will expand it and add additional information to the file before packaging it into your final app. You can read more about this file here.
<!DOCTYPE plist PUBLIC "-//Apple//DTD PLIST 1.0//EN" "http://www.apple.com/DTDs/PropertyList-1.0.dtd">
<plist version="1.0">
<dict>
<key>UIMainStoryboardFile</key>
<string>Main</string>
<key>UIDeviceFamily</key>
<array>
<integer>1</integer>
<integer>3</integer>
</array>
...
The Main Storyboard
As stated earlier, no startup code is necessary in the AppDelegate method, because Cocoa already knows how to get your app up and running. And that is via the UIMainStoryboardFile entry in the Info.plist file. As you can see above, it points to Main, which is the Main.storyboard file in your project. Let's have a look.
Editing .storyboard files is done in Xcode, using Apple's own designer for Mac and iOS.
For this step (and for many other aspects of developing for tvOS) Xcode needs to be installed on your system. Xcode is available for free on the Mac App Store, and downloading and running it once is enough for Fire to find it, but we cover this in more detail here in the Setup section.
When you select the .storyboard file, the main view will populate with information about the storyboard, including its name, build action ("Storyboard"), and a helpful "Edit in Xcode" button:
Clicking this button will generate/update a small stub project that will open in Xcode and give you access to all the resources in your project. Instead of using the button, you can also either right-click a resource file and select "Edit in Xcode" from the menu, or right-click the project node and choose "Edit User Interface Files Xcode".
Xcode will come up and look something like this:
On the left, you see all your resource files represented – there's the Main storyboard and the Asset Catalog. Selecting an item will open it on the right, as is happening with the Main.storyboard in the screenshot above. To make more room, let's hide the file list (⌘0 just like in Fire) and the Document Outline (via the small square button in the bottom left). Also, press ⌥⌘1 to show the Utility pane on the right instead:
The view for the screenshots is a bit constraint, but you should see the 1080p main view for your application, alongside an arrow pointing to it from the left, which indicates that this is the initial screen for your app that Cocoa will show when it loads your storyboard.
If you select the view controller by clicking its title bar and then select the third tab in the Utility View (⌥⌘3), you will see that its "Class" property is set to "ViewController". This is the ViewController class in your code.
So let's go back to Fire and start adding some (very simple) functionality to this view controller. You can close Xcode, or leave it open and just switch back to Fire via ⌘Tab – it doesn't matter.
Back in Fire, select the ViewController source file, and let's start adding some code. We're going to create a really simple app for now, just a button and a label. Clicking the button will update the label with a greeting message.
Let's start by adding a property, so that we can refer to the label from code:
public
[IBOutlet] property label: UILabel;
[IBOutlet] public UILabel label { get; set; }
@IBOutlet var label: UILabel
Note the IBOutlet attribute attached to the property. This (alongside the IBObject attribute that's already on the ViewController class itself) lets the compiler and Xcode know that the property should be made available for connections in the UI designer (IB is short for Interface Builder, the former name of Xcode's UI designer).
Next, let's add a method that can be called back when the user presses the button:
[IBAction]
method ViewController.sayHello(sender: id);
begin
label.text := 'Hello from Oxygene';
end;
[IBAction]
public void sayHello(id sender)
{
label.text = "Hello from C#";
}
@IBAction func sayHello(_ sender: Any?) {
label.text = "Hello from Swift"
}
Similar to the attribute above, here the IBAction attribute is used to mark that the method should be available in the designer.
Note: If you are using Oxygene as a language, methods need to be declared in the interface section and implemented in the implementation section. You can just add the header to the interface and press ^C and Fire will automatically add the second counterpart for you, without you having to type the method header declaration twice.
Now all that's left is to design the user interface and hook it up to the code you just wrote. To do that, right-click the Main.storyboard and choose "Edit in Xcode" again. This will bring Xcode back to the front and make sure the UI designer knows about the latest change you made to the code. (Tip: you can also just press ⌘S at any time to sync.)
Now drag a label and a button from the bottom-right class palette onto the View, and align them so that they look something like this:
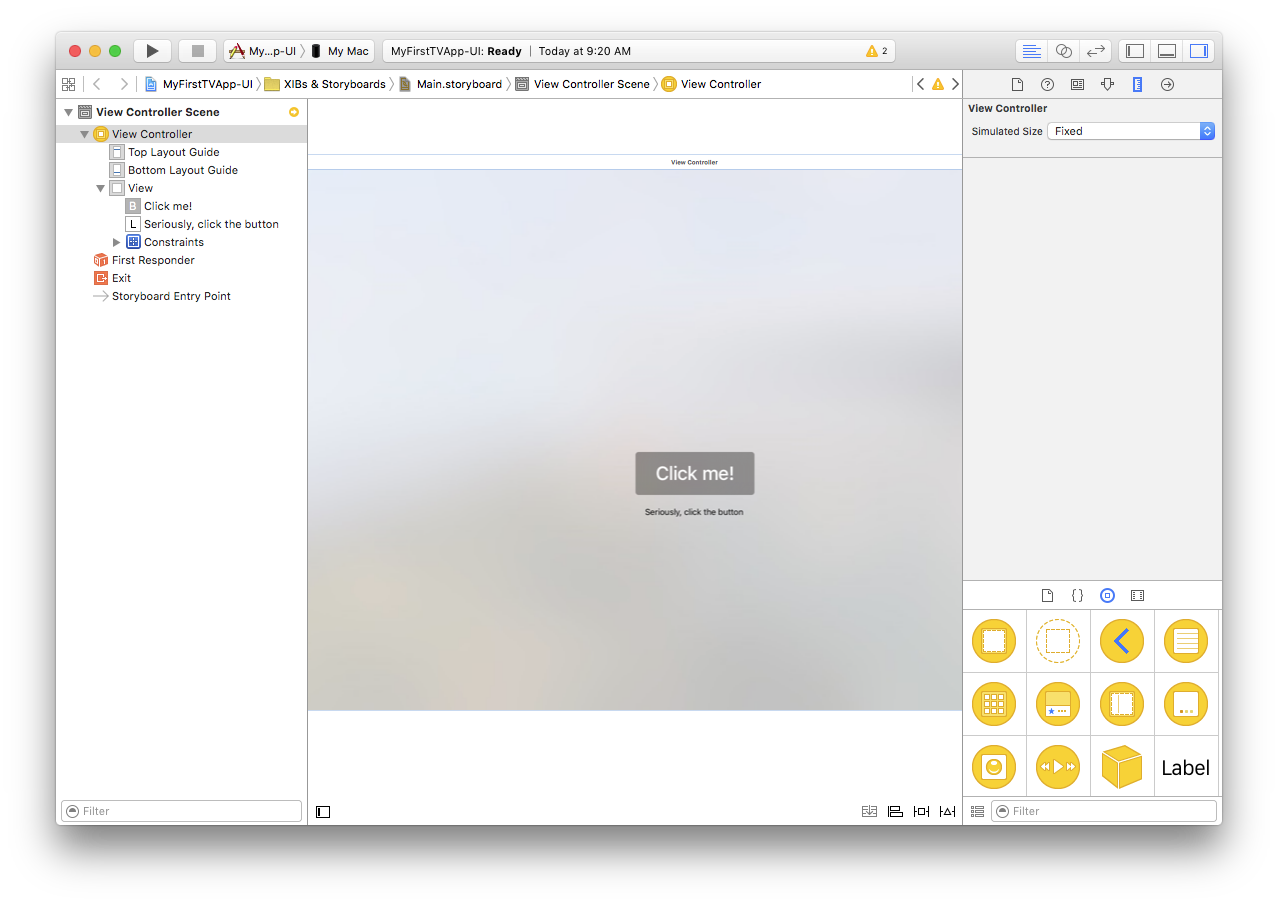
(Tip: you can zoom the view by right-clicking or control-clicking into the empty white space of the designer and choosing a scale factor, if you cannot fit the whole view on your screen.)
Then select both controls via ⌘-clicking on each one in turn, press the first button in the bottom right, check "Horizontally Center in Container" and click "Add 2 Constraints". This configures Auto Layout, so that the controls will automatically be centered in the view, regardless of screen size. In a real app, you would want to set more constraints to fully control the layout, such as the spacing between the controls, but for this simple app, just centering them will do.
Finally, it's time to connect the controls to your code. There are two connections to be made in total – one from the property to the UITextField and UILabel, and one from the UIButton back to the action.
For the first, click on the yellow view controller icon (which represents your ViewController class) while holding down the Control (^) key, and drag onto the text field, as shown below:
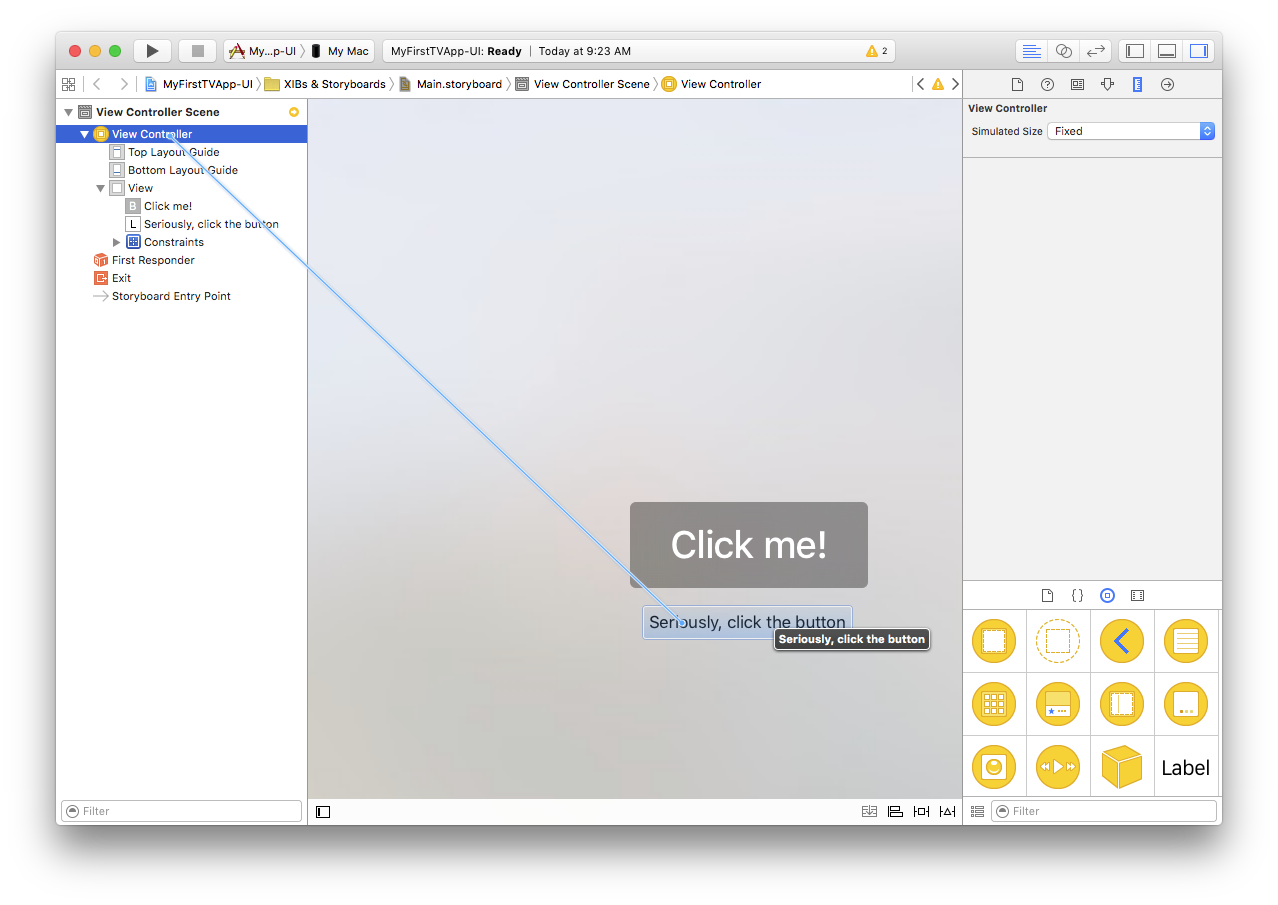
When you let go, a small popup appears, listing all properties that match up for connecting. In this case, it will be the view property (which links the base view for the controller, and you don't want to mess with that), and the label one you defined earlier.
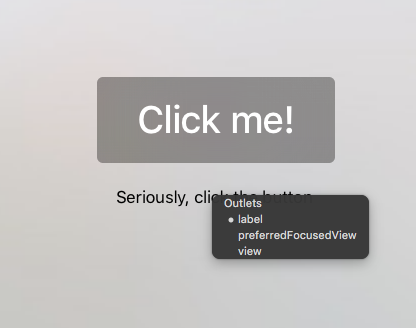
Click on "label" to make the connection.
Connecting the action works the same way, just in reverse. This time, Control-drag from the button back to the yellow view controller icon. Select "sayHello:" from the popup, and you're done.
And with that, the app is done. You can now close Xcode, go back to Fire, and run it.
Running Your App
You're now ready to run your app in the Simulator.
Earlier on we looked at the top toolbar in Fire. In the middle of the toolbar, you will find a popup button that is the device selector, which should by default be set to "tvOS Device". That is a placeholder that, when selected, tells Fire to build your application for a real, physical Apple TV device, and is available whether you have an actual Apple TV connected or not. However, because "tvOS Device" does not represent a real device, you cannot run your app on it.
If you open up the popup, you will see a menu with more options. For one, you will see the tvOS Simulator; for another, you will also see any real Apple TV devices you have connected to your Mac (such as "Apple TV 4" in the screenshot below), along with their device type and OS version.
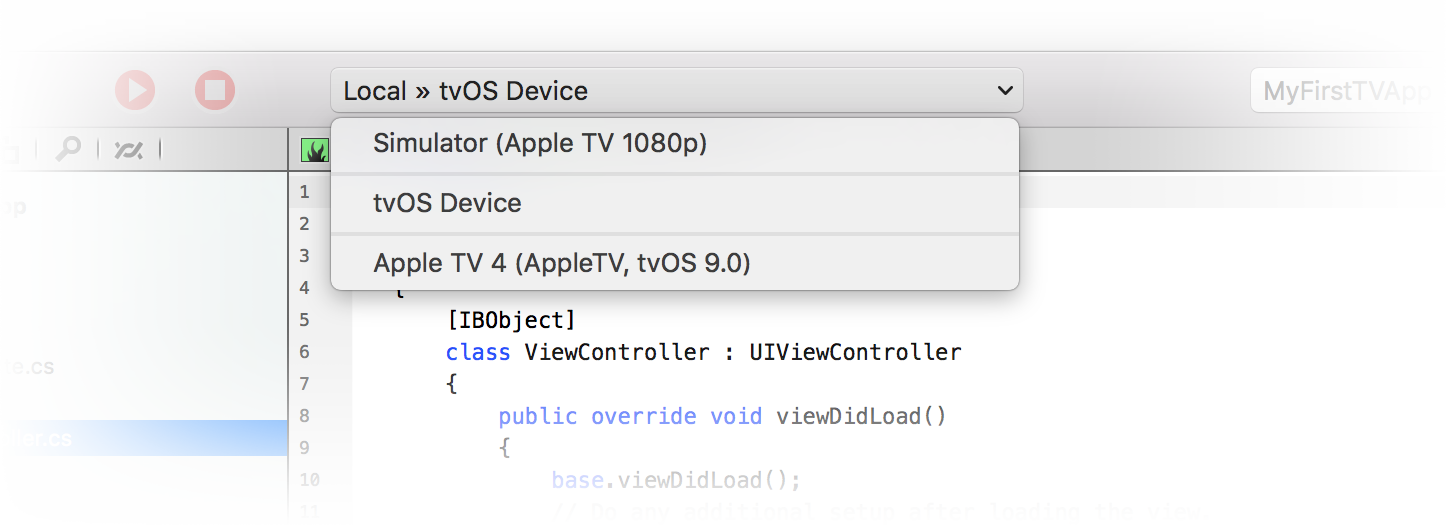
For now just select the simulator. When done, you can hit the "Play" button in the toolbar, or press ⌘R.
Fire will now build your project and launch it in the simulator. You will notice that while the project is compiling, the Jump Bar turns blue and shows the progress of what is happening in the top right of the window. The application icon will also turn blue for the duration; this allows you to switch away from Fire while building a more complex/slow project, and still keep an eye on the progress via the Dock.
If there were any errors building the project, the Jump Bar and application icon would turn red, and you could press ⌥⌘M or use the Jump Bar to go to the first error message. But hopefully your first iOS project will build ok, and a few seconds later, the iOS Simulator should come to the front, running your app.
Press "Enter" to press the button (the Apple TV Simulator will not respond to mouse clicks, only cursor key and Enter. Or you can pair an Apple Remote control with your Mac and use that with the Simulator, as well), and the label will update, as per your code.
Running on your device should be just as easy, assuming you have your Apple developer account set up and registered with Xcode as discussed here. Simply select your real device from the device picker popup, hit ⌘R again, and you will see your app get deployed to and launch on your Apple TV.
You will see two warnings being emitted when building for a device. That is because your project has no Provisioning Profile and Developer Certificate selected yet. Fire will pick the default profile and certificate (assuming one is present), so that you can run your application without hassle, but the two warnings will remind you that, eventually, you will want to explicitly select the exact profile and certificate you want to use for this app.
To do so, simply select the "Settings" (⌘I) node on the Project Tree, which brings up the Project Settings Editor:
You can select both your Certificate and your Provisioning Profile from the list (once again, see here if your profiles or certificates don't show up as you expect them to).
Your First Android App
The first time you start Fire, before opening or starting a new project, it will present you with the Welcome Screen, pictured below. You can also always open up the Welcome screen via the "Window|Welcome" menu command or by pressing ⇧⌘1.
In addition to logging in to your remobjects.com account, the Welcome Screen allows you to perform three tasks, two of which you will use now.
On the bottom left, you can choose your preferred Elements language. Fire supports writing code in Oxygene, C# and Swift. Picking an option here will select what language will show by default when you start new projects, or add new files to a multi-language project (Elements allows you to mix all fivwe languages in a project, if you like).
This tutorial will cover all languages. For code snippets, and for any screenshots that are language-specific, you can choose which language to see in the top right corner. Your choice will persist throughout the article and the website, though you can of course switch back and forth at any time.
After picking your default language (which you can always change later in Preferences), click the "Start a new Project" button to bring up the New Project Wizard sheet:
You will see that your preferred language is already pre-selected at the top right – although you can of course always choose a different language just for this one project.
On the top left you will select the platform for your new application. Since you're going to build an Android app, select Java. This filters the third list down to show all Java-based templates only. Drop down the big popup button in the middle and choose the "Android Application" project template, then click "OK".
Next, you will select where to save the new project you are creating:
This is pretty much a standard Mac OS X Save Dialog; you can ignore the two extra options at the bottom for now and just pick a location for your project, give it a name, and click "Create Project".
You might be interested to know that you can set the default location for new projects in Preferences. Setting that to the base folder where you keep all your work, for example, saves you from having to find the right folder each time you start a new project.
Note: Android projects are required to be named lowercase, and have a dotted name, usually using a reverse domain notification. By default, Fire will use org.me. as prefix for project names, but you can configure a different default,such as your company's domain, in Preferences.
When you create apps for publishing in the Google Play Store, make sure to use a unique prefix that you "own".
Once the project is created, Fire opens its main window, showing you a view of your project:
Let's have a look around this window, as there are a lot of things to see, and this windows is the main view of Fire where you will do most of your work.
The Fire Main Window
At the top, you will see the toolbar, and at the very top of that you see the name MyFirstApp.sln. Now, MyFirstApp is the name you gave your project, but what does .sln mean? Elements works with projects inside of a Solution. You can think of a Solution as a container for one or more related projects. Fire will always open a solution, not a project – even if that solution might only contain a single project, like in this case.
In the toolbar itself are buttons to build and run the project, as well as a few popup buttons that let you select various things. We'll get to those later.
The left side of the Fire window is made up by what we call the Navigation Pane. This pane has various tabs at the top that allow you to quickly find your way around your project in various views. For now, we'll focus on the first view, which is active in the screenshot above, and is called the Project Tree.
You can hide and show the Navigation Pane by pressing ⌘0 at any time to let the main view (wich we'll look at next) fill the whole window. You can also bring up the Project Tree at any time by pressing ⌘1 (whether the Navigation Pane is hidden or showing a different tab).
The Project Tree
The Project Tree shows you a full view of everything in your project (or projects). Each project starts with the project node itself, which is larger, and selected in the screenshot above, as indicated by its blue background. Because it is selected, the main view on the right shows the project summary. As you select different nodes in the Project Tree the main view adjusts accordingly.
Each project has three top level nodes.
-
Settings gives you access to all the project settings and options for the project. Here you can control how the project is built and run, what exact compiler options are used, etc. The project settings are covered in great detail here.
-
References lists all the external frameworks and libraries your project uses. As you can see in the screenshot, the project already references all the most crucial libraries by default (we'll have a look at these later), and you can always add more by right-clicking the References node and choosing "Add Reference" from the context menu. You can also drag references in directly from the Finder, as well as, of course, remove unnecessary references. Please refer to the References topic for more in-depth coverage.
-
Files, finally, has the meat of your application. This is where all the files that make up your app are listed, including source files, images and other resources.
The Main View
Lastly, the main view fills the rest of the window (and if you hide the Navigation Pane, all of the window), and this is where you get your work done. With the project node selected, this view is a bit uninspiring, but when you select a source file, it will show you the code editor in that file, and it will show specific views for each file type.
When you hide the Navigation Pane, you can still navigate between the different files in your project via the Jump Bar at the top of the main view. Click on the "MyFirstApp" project name, and you can jump through the full folder and file hierarchy of your project, and more.
Your First Android Project
Let's have a look at what's in the project that was generated for you from the template. This is already a fully working app that you could build and launch now – it wouldn't do much, but all the basic code and infrastructure is there.
There's a single source files, the MainActivity. Android apps can consist of one or more activities, and you can think of each activity as a unique "view" or a unique "task" that your app offers to the user. One activity is designated the main activity, and that's the one that will show when the user launches your app from the home screen.
The project also contains a handful of resources, including four versions of the application icon in different sizes (icon.png), and two XML files with string constants (strings.android-xml) and a layout for your main view (main.layout-xml). More on those later.
Finally, there's the AndroidManifest file. Another XML file, this file provides the Android OS and the GooglePay store with basic information about your app, such as what name and icon to show, what permissions the app requires and which activities the app offers. For the purpose of this tutorial, the pre-created manifest will do fine, but you can read more about this file format and how to change it here.
The Main Activity
As mentioned before, the Main Activity is the first (and currently only) view on your app, and will show when the user launches your app. While it is possible to create an activity entirely in code, most activities consist of a pair of files – a class descending from Activity, and a .layout-xml file that describes what the view looks like, and which can be edited by hand or in the visual designer.
To start out, your MainActivity implementation is pretty basic: it overrides a single method, onCreate(), and loads the view from the layout file when that method is called:
method MainActivity.onCreate(savedInstanceState: Bundle);
begin
inherited;
// Set our view from the "main" layout resource
ContentView := R.layout.main;
end;
public override void onCreate(Bundle savedInstanceState)
{
base.onCreate(savedInstanceState);
// Set our view from the "main" layout resource
ContentView = R.layout.main;
}
public override func onCreate(_ savedInstanceState: Bundle!) {
super.onCreate(savedInstanceState)
// Set our view from the "main" layout resource
ContentView = R.layout.main
}
The R Class
The code snippet above makes use of a special class in your project, the R class. R is not a class you define yourself; it is created behind the scenes by Elements and the Android tool chain to give you access to all the resources in your projects.
In this case, layout.main refers to the main.layout-xml file in your project, which contains the layout for this activity. As you add more resources to the project, R will automatically gain more members.
You can see what's in the R class by switching the Navigation Pane to the second tab to show the Types Tree by pressing ⌘2 and locating the class in your (currently pretty short) list of types. If the class doesn't show yet, hit ⌘B to build your project; the class will update every time the project is built.
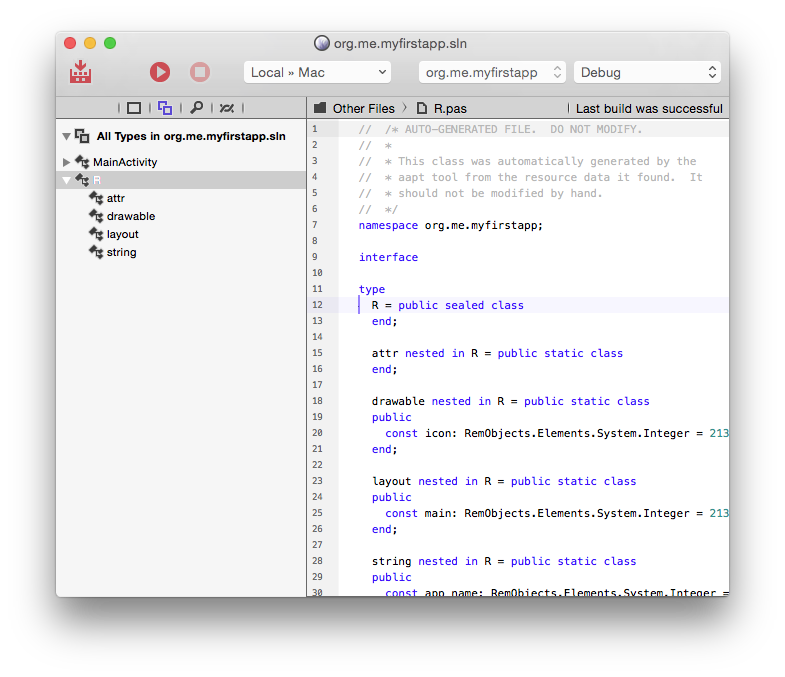
You will see that the R class contains several nested classes for each type of resource (such as images, strings and layouts), which in turn contain constants that uniquely identify that resource with an ID. You never need to worry about or handle the numerical values of these yourself.
When you look at the source for the R class, you'll also notice that it is presented in the Oxygene language, no matter what language your project is in. This too is an implementation detail of the tool chain, and should not be of any concern, as you will never edit or work with this file directly.
Layouts
Next, let's look at the main.layout-xml file.
Elements uses the standard Android layout format, the same you would be using if you were working with the Java language as most less fortunate Android developers. This means that any examples for Android layouts you find online will work exactly the same way in Elements, and it also means that you can use any of the design tools available.
Fire offers two ways to create your layouts. The first option, and preferred by many Android developers, is to simply edit the XML directly in Fire's code editor. Just select the file in the project tree, and edit away. The Android layout language is very simple and intuitive, and you should make yourself familiar with it, even if you choose to use a visual designer most of the time.
The second option is to use the visual designer provided by Google in Android Studio (ADS). If you have Android Studio installed and set up, you can simply right-click the project node and choose "Edit User Interface Files in Android Studio".
Fire will automatically create or update an Android Studio project file for you, and launch Android Studio for you to edit your layouts. As you make changes in ADS, they will automatically get synced back into Fire, and vice versa.
After ADS starts up, you should see a view similar to the one pictured below, but with an empty canvas. Drop a few controls to make the view look like depicted in the screenshot:
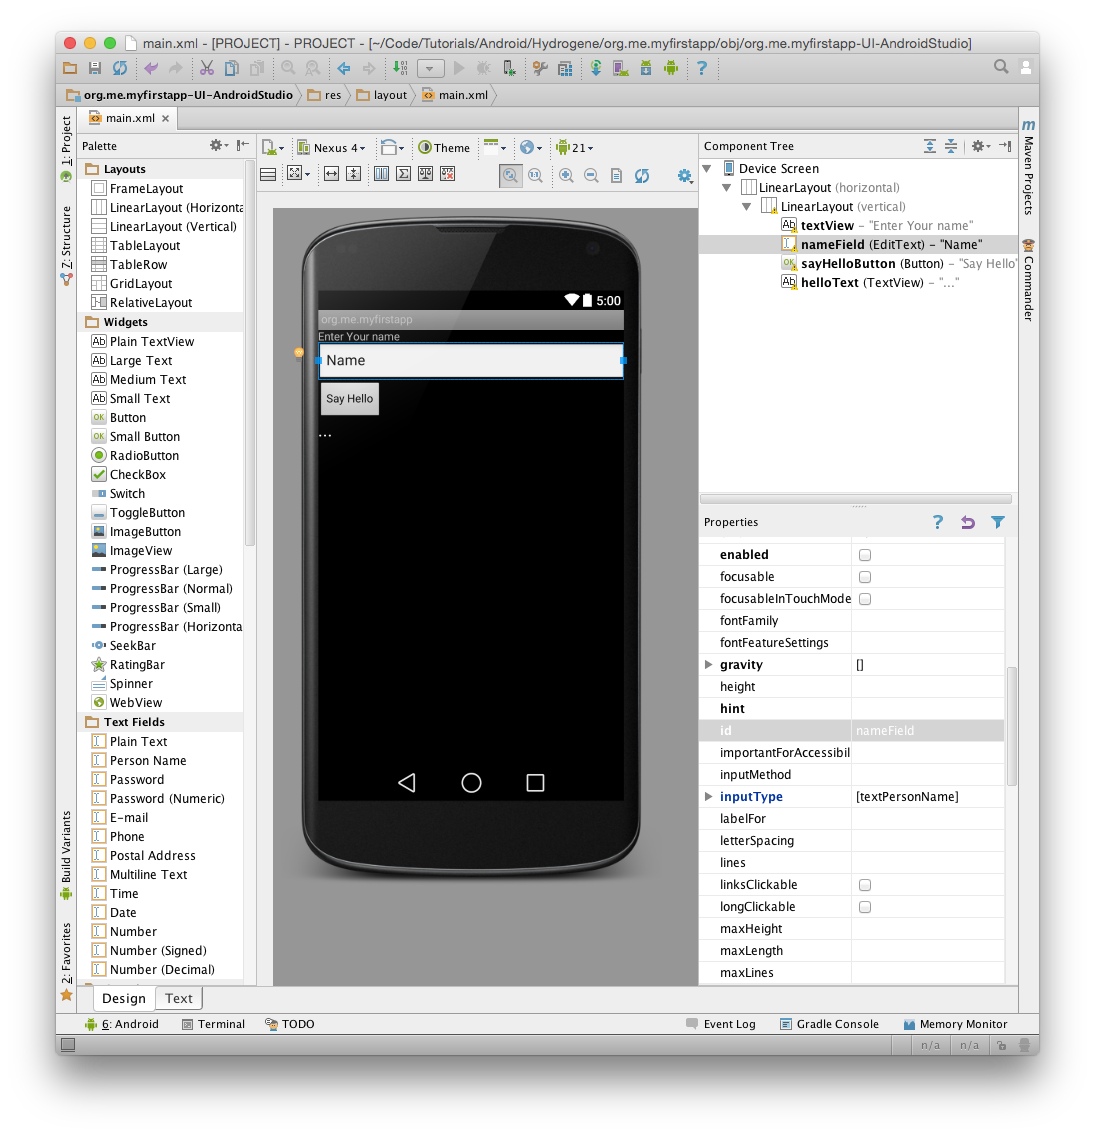
First drop a Linear Layout (Vertical) control to hold the four controls, and size it to full width. Android uses a flexible layout system that lets you design UIs that reflow to match the screen; the Linear Layout will stack controls vertically, putting each control in its own row. (We'll not worry too much about making things pretty for this tutorial, but will cover more advanced layout options later.) .NET developers will find Android's layout system very familiar and similar to WPF.
Next, drop two labels, a text field and a button, and arrange them as shown. Set the id property of the text field to nameField and that of the button to sayHelloButton. Set the id for the second label to helloField.
When you're done, press ⌘S to save, and switch back over to Fire. You will notice that main.layout-xml has changed to contain elements for all the new controls you dropped. If you wanted, you could further tweak the layout here, in plain text XML:
One thing worth pointing out is that each control you dropped and gave a unique ID has received an android:id attribute in the XML, with a value starting with "@+id/". This tells Android to define a new ID that can then be used to identify that control. Just as with resources, IDs are exposed via the R class, so you can, for example, use r.id.nameField to refer to the name field control. Let's see how that works.
Working with Views from Code
Going back to the MainActivity source , let's hook up some code to the UI you just created.
Android UI/Code interaction is a bit different than most other platforms. Above, you've already seen the one line of code that loads your layout into the activity and shows it. But by default, there are no fields or properties generated for you that reference the controls in your layout, nor do events get hooked up automatically.
Instead, you look up controls by their ID as needed – and that is done by the findViewById method exposed on the Activity class. So for example to find the Button, you simply write:
var button := findViewById(R.id.sayHelloButton) as Button;
var button = findViewById(R.id.sayHelloButton) as Button;
let button = findViewById(R.id.sayHelloButton) as! Button
Note how a typecast to Button is needed to get the correct type – since findViewById() can be used to locate any type of control, it is defined to return a View, the base class of all visual controls.
Once the control is obtained, you can work with the class as you would expect. For example, you could set its Text property to a new value to change the button's caption. In the above example, the control is stored in a local variable – but if you find that you need to reference a given control a lot, you can of course also define a field or property in your class and assign that inside onCreate() for future reference.
Events
For this example, the only thing needed as the activity starts is to assign an event handler for the button, so that your code can react when the user taps it. Android has its unique way of dealing with events that is very different from .NET or the VCL, but might seem familiar if you worked with delegate objects on Cocoa. On Android, you will assign so-called listener objects that get called back when things happen in the UI. While this listener can be any object that implements a certain interface (for example, the listener could be the MainActivity class itself), it is common practise to assign an anonymous class.
In this case, the View.OnClickListener actually just expects a single method, the easiest way to assign a handler is to just use regular anonymous method syntax:
button.OnClickListener := method (v: View) begin
// on-Click code goes here
end;
button.OnClickListener = (View v) => {
// on-Click code goes here
};
button.OnClickListener = { (v: View!) in
// on-Click code goes here
}
}
Note: Oxygene and Silver provide a special syntax to define an anonymous class with more than one method, as well. C# does not have such a syntax, so other mechanisms like a nested class can be used, if needed.
button.OnClickListener := new class View.OnClickListener(onClick := method (v: View) begin
// on-Click code goes here
end);
button.OnClickListener = class View.OnClickListener {
func onClick(_ v: View!) {
// on-Click code goes here
}
}
Inside this anonymous method, you can now add code that reacts to the tap, which should be simple given what we have already learned. Simply look up the remaining two controls with findViewById just as you did with the button, and then read the Text property of the former and update the Text of the latter:
var nameField := findViewById(R.id.nameField) as EditText;
var nameField := findViewById(R.id.nameField) as EditText;
var helloText := findViewById(R.id.helloText) as TextView;
helloText.Text := 'Hello from Oxygene, '+nameField.Text;
var nameField = findViewById(R.id.nameField) as EditText;
var helloText = findViewById(R.id.helloText) as TextView;
helloText.Text = "Hello from C#, "+nameField.Text;
let nameField = self.findViewById(R.id.nameField) as! EditText
let helloText = self.findViewById(R.id.helloText) as! TextView
helloText.Text = "Hello from Silver, "+nameField.Text
And that's it!
The complete onCreate method should now look something like this:
method MainActivity.onCreate(savedInstanceState: Bundle);
begin
inherited;
// Set our view from the "main" layout resource
ContentView := R.layout.main;
var button := findViewById(R.id.sayHelloButton) as EditText;
button.OnClickListener := method (v: View) begin
var nameField := findViewById(R.id.nameField) as EditText;
var helloText := findViewById(R.id.helloText) as TextView;
helloText.Text := 'Hello from Silver, '+nameField.Text;
end;
end;
public override void onCreate(Bundle savedInstanceState)
{
base.onCreate(savedInstanceState);
// Set our view from the "main" layout resource
ContentView = R.layout.main;
var button = findViewById(R.id.sayHelloButton) as Button;
button.OnClickListener = (View v) => {
var nameField = findViewById(R.id.nameField) as EditText;
var helloText = findViewById(R.id.helloText) as TextView;
helloText.Text = "Hello from Silver, "+nameField.Text;
};
}
public override func onCreate(_ savedInstanceState: Bundle!) {
super.onCreate(savedInstanceState)
// Set our view from the "main" layout resource
ContentView = R.layout.main
let button = findViewById(R.id.sayHelloButton) as! Button
button.OnClickListener = { (v: View!) in
let nameField = self.findViewById(R.id.nameField) as! EditText
let helloText = self.findViewById(R.id.helloText) as! TextView
helloText.Text = "Hello from Silver, "+nameField.Text
}
}
Running Your App
You're now ready to run your app on your Android device on in the Emulator.
Earlier on we looked at the top toolbar in Fire. In the middle of the toolbar, you will find a popup button that is the device selector, which should by default be set to "Android Device". That is a placeholder that is available whether you have an actual device connected (and/or an emulator set up) or not. However, because "Android Device" does not represent a real device, you cannot run your app on it.
If you open up the popup, you will see a menu with more options. You will see an entry for any real Android device connected to your Mac, as well as for any emulator or any remote/wireless device you have connected to (such as "Nexus 7" in the screenshot below), along with details about the device type and OS version.
If you do not see any devices, refer to Working with Devices to learn how to get set up with the various options.

Select the device you want to run on. When done, you can hit the "Play" button in the toolbar, or press ⌘R.
Fire will now build your project, deploy it, and launch the app. You will notice that while the project is compiling, the Jump Bar turns blue and shows the progress of what is happening in the top right of the window. The application icon will also turn blue for the duration; this allows you to switch away from Fire while building a more complex/slow project, and still keep an eye on the progress via the Dock.
If there were any errors building the project, Jump Bar and application icon would turn Red, and you could press ⌥⌘M or use the Jump Bar to go to the first error message. But hopefully your first iOS project will build ok, and a few seconds later (or minutes, if you are using the Emulator) your app will come up.
Type in your name, press the "Say Hello" button and behold the application performing its task:
![]()
Your First .NET Command Line App
The first time you start Fire, before opening or starting a new project, it will present you with the Welcome Screen, pictured below. You can also always open up the Welcome screen via the "Window|Welcome" menu command or by pressing ⇧⌘1.
In addition to logging in to your remobjects.com account, the Welcome Screen allows you to perform three tasks, two of which you will use now.
On the bottom left, you can choose your preferred Elements language. Fire supports writing code in Oxygene, C# and Swift. Picking an option here will select what language will show by default when you start new projects, or add new files to a multi-language project (Elements allows you to mix all fivwe languages in a project, if you like).
This tutorial will cover all languages. For code snippets, and for any screenshots that are language-specific, you can choose which language to see in the top right corner. Your choice will persist throughout the article and the website, though you can of course switch back and forth at any time.
After picking your default language (which you can always change later in Preferences), click the "Start a new Project" button to bring up the New Project Wizard sheet:
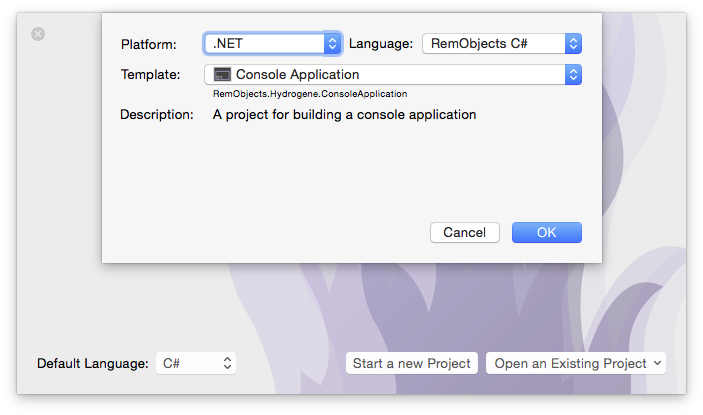
You will see that your preferred language is already pre-selected at the top right – although you can of course always choose a different language just for this one project.
On the top left you will select the platform for your new application. Since you're going to build a .NET app, select that to filter the third list down to show all .NET templates only. Drop down the big popup button in the middle and choose the "Console Application" project template, then click "OK".
Note: For this tutorial, we'll be building a command line app that can be easily run on Mac (and Windows and Linux). While Elements has full support for building GUI applications using WinForms (Oxygene only), WPF and WinRT, as well as for Windows Phone, the designers for these are not available in Fire. We recommend to use Visual Studio to build Windows GUI apps, and we have matching tutorials here.
Next, you will select where to save the new project you are creating:

This is pretty much a standard Mac OS X Save Dialog; you can ignore the two extra options at the bottom for now and just pick a location for your project, give it a name, and click "Create Project".
You might be interested to know that you can set the default location for new projects in Preferences. Setting that to the base folder where you keep all your work, for example, saves you from having to find the right folder each time you start a new project.
Once the project is created, Fire opens its main window, showing you a view of your project:
Let's have a look around this window, as there are a lot of things to see, and this windows is the main view of Fire where you will do most of your work.
The Fire Main Window
At the top, you will see the toolbar, and at the very top of that you see the name MyFirstApp.sln. Now, MyFirstApp is the name you gave your project, but what does .sln mean? Elements works with projects inside of a Solution. You can think of a Solution as a container for one or more related projects. Fire will always open a solution, not a project – even if that solution might only contain a single project, like in this case.
In the toolbar itself are buttons to build and run the project, as well as a few popup buttons that let you select various things. We'll get to those later.
The left side of the Fire window is made up by what we call the Navigation Pane. This pane has various tabs at the top that allow you to quickly find your way around your project in various views. For now, we'll focus on the first view, which is active in the screenshot above, and is called the Project Tree.
You can hide and show the Navigation Pane by pressing ⌘0 at any time to let the main view (wich we'll look at next) fill the whole window. You can also bring up the Project Tree at any time by pressing ⌘1 (whether the Navigation Pane is hidden or showing a different tab).
The Project Tree
The Project Tree shows you a full view of everything in your project (or projects). Each project starts with the project node itself, which is larger, and selected in the screenshot above, as indicated by its blue background. Because it is selected, the main view on the right shows the project summary. As you select different nodes in the Project Tree the main view adjusts accordingly.
Each project has three top level nodes.
-
Settings gives you access to all the project settings and options for the project. Here you can control how the project is built and run, what exact compiler options are used, etc. The project settings are covered in great detail here.
-
References lists all the external frameworks and libraries your project uses. As you can see in the screenshot, the project already references all the most crucial libraries by default (we'll have a look at these later), and you can always add more by right-clicking the References node and choosing "Add Reference" from the context menu. You can also drag references in directly from the Finder, as well as, of course, remove unnecessary references. Please refer to the References topic for more in-depth coverage.
-
Files, finally, has the meat of your application. This is where all the files that make up your app are listed, including source files, images and other resources.
The Main View
Lastly, the main view fills the rest of the window (and if you hide the Navigation Pane, all of the window), and this is where you get your work done. With the project node selected, this view is a bit uninspiring, but when you select a source file, it will show you the code editor in that file, and it will show specific views for each file type.
When you hide the Navigation Pane, you can still navigate between the different files in your project via the Jump Bar at the top of the main view. Click on the "MyFirstApp" project name, and you can jump through the full folder and file hierarchy of your project, and more.
Your First .NET Project
Let's have a look at what's in the project that was generated for you from the template. This is already a fully working app that you could build and launch now – it wouldn't do much, but all the basic code and infrastructure is there.
There are two parts that are interesting. First, there's the Program source file. This file serves as your program entry point, and has the so-called main() function where execution starts. Secondly, there's a Properties folder with a whole bunch of files that provide additional details and configuration for your project. The files in here will be common for all .NET projects.
The Properties Folder
If you want to start coding right away, you can, for now, pretty much ignore the files that are in here and skip to the next section. But in the interest of making you familiar with how .NET projects work, let's have a brief look.
Essentially, there are four main files in this folder, two of which have a nested .Designer code file associated with them.
-
App.ico, simple enough, is the icon for your executable, in standard Windows Icon format. Different than Mac apps, in .NET even command line executables can have an icon (although you will never see it anywhere, except on Windows), as the icon gets embedded directly into the executable file. The name of this file is not magic or hardcoded – it is referenced from the Project Settings.
-
AssemblyInfo.* is a code file that contains some standard Attributes that define metadata for your executable. These attributes can, for example, set a description and copyright message, or give the .exe a Strong Name via code signing. There's typically no code in this file that will run (although nothing keeps you from adding some, or from moving the attributes out to a different code file).
-
Resources.resx is a .NET resource file in XML format that can be used to add resources such as images or strings to the project in a way that can make them easily localizable, and easily accessible from code. The file has a nested Resources.Designer.* code file that will get updated automatically as the .resx changes, and provides direct access to the resources from code, via a class called MyFirstApp.Properties.Resources.
-
Settings.settings is another XML file, this one allowing you to define configurable settings for your project. Imagine your app needed the URL of a server to talk to. You cold define a setting for that URL here, along with a default, and read that from code. Users of your app could later override the URL by providing a .config file next to your executable where they provide a different value. Like the .resx, this file has a nested Settings.Designer.* code file that will get updated automatically as the .settings changes, and provides direct access to the resources from code, via a class called MyFirstApp.Properties.Settings.
For the purpose of this tutorial, you can ignore all of these files and move on to the code in Program.
Program and the main() Entry Point
The Program source file is where the execution of your app starts and where (currently all) of the app's code lives. As mentioned before, the entry point is sometimes also referred to as the main() function. Let's have a look.
In Oxygene and C#, the entry point is provided quite literally by a static method called Main() that matches a well-defined signature: It takes an Array of Strings as parameter and optionally returns an Int32.
The string array will contain any parameters passed to the program from the command line, or will be empty if the program is called without (note that on .NET, the parameters do not include the executable name as first parameter, unlike native Mac console apps).
In Swift, the entry point looks a bit different. Any one single file in a Swift project can just contain code that's not contained in any class, and that code will be treated as the entry point. So Program.swift defines no explicit class or main() method, and instead just a line of code. If needed, the command line parameters can be accessed via the global C_ARGV variable, which is a [String] array, and their count can be accessed via C_ARGC.
class method Program.Main(args: array of String): Int32;
begin
writeLn('The magic happens here.');
end;
public static Int32 Main(string[] args)
{
Console.WriteLine("The magic happens here.");
return 0;
}
println("The magic happens here.")
As you can see, the default implementation of the entry point does one thing: print out The magic happens here. to the console.
The templates for the five languages use a different method for this, but this is purely a matter of taste or preference:
The C# snippet uses Console.WriteLine, which is the official .NET API for talking to the console. The static Console class has many functions that allow your code to interact with the terminal, including Console.ReadLine to read input, as well.
The Oxygene template uses writeLn(), which is a System Function, and the "classic" way for Pascal to print to the console. writeLn() (and its counterpart write()) are available to all languages and on all platforms, so using writeLn() instead of Console.WriteLine is a good way to write code that can cross-compile to Java or a native mac console app, too.
The Swift code uses println() which is a standard Swift API, defined in the Swift Base Library. Like writeLn() it works on all platforms, but is only available in Swift (or any project that uses the Swift Base Library).
The templates here differ merely to reflect the default that developers of each language would expect.
Without any further ado, you should now be ready to run this (very simple) first command line app.
Running Your App
As you might expect, .NET apps will require Mono to be installed in order to run on Mac OS X (or Linux). While Fire comes with its own copy of Mono for internal use, to run and debug apps on Mono, you will need to install the full Mono runtime on the system globally. The Mono runtime is available from mono-project.com, and we cover this in more detail in the Setup section, here.
With Mono installed, you can just hit the "Play" button in the toolbar, or press ⌘R.
Fire will now build your project and launch it. Since it is a console application, no UI will show up. Instead, Fire will capture its output live and show it in the Debug Console at the bottom of the window, which should automatically open up as soon as there is output, but can also be brought up manually by pressing ⌥⌘:
If you prefer to run your app in the Mac OS X Terminal, you can do so by pressing ⇧
⌘R or use the "Project|Run w/o Debugging" menu command:
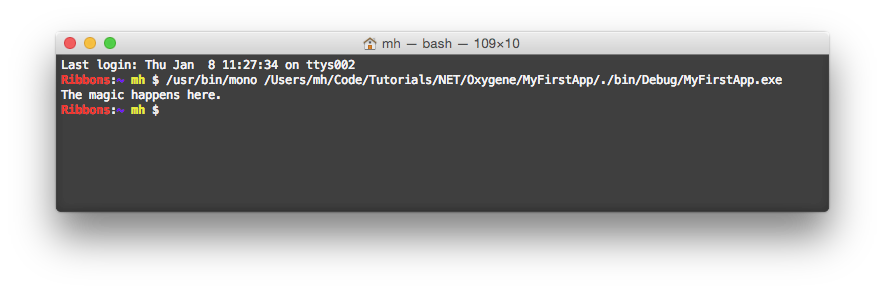
There are a couple of helpful hints for working with command line apps.
If you right-click the project node in the Project Tree, you will find an "Open Output Folder in Terminal" option in the context menu. As the name indicates, this will give you a new Terminal.app window that's already cded to the right folder containing your executable. This way you can easily run it (for example with custom parameters) manually, or do other work with the exe.
For .NET apps, remember to prefix the app with the mono command to run it, e.g.:
mono MyFirstApp.exe SomeParameter
Finally, you can configure command line parameters in Project Settings that Fire will use when running your app (both in the debugger and outside).
You will be able to take this same executable you built on the Mac and also run it Linux systems (via Mono) and on Windows (which has .NET support build in since Windows XP), as well. This is great for writing cross-platform command line tools or servers.
Of course Elements also lets you write Mac-native and Java Console apps as well, which we have covered in separate tutorials here.
Your First App w/ Visual Studio
This section provides a handful of tutorials to get you started building your first app with Elements in Visual Studio, for various platforms. Each tutorial starts form the very beginning, introducing you to both the Elements language you'll be using, the Visual Studio IDE, and the platform.
The tutorials cover all Elements languages, allowing you to choose which language to view your source code in by selecting your language of choice in the top right corner of each code snippet.
So you can pick the platform you are most interested in, and make this your first read on this site. If you later come back to read about a second platform, there might be some redundancies and you can opt to read the first section diagonally.
Available tutorials (more coming over time):
Your First Android App (Legacy)
The Android operating system is based on the
Dalvik Virtual Machine (VM), which is a mobile-optimised VM similar to
the Java VM. Oxygene for Java ships with templates for creating Android
projects, and produces both native Java JAR files and the Android APK
file necessary for deployment to an Android device.
Because Android runs on such a wide variety of devices with different
screen sizes, formats and orientations, it was intentionally designed
without a WYSIWYG design surface for building the UI. Instead, an XML
file (similar to .NET’s XAML) is edited to lay out the visual elements.
There is a free online DroidDraw tool for building Android User Interfaces via a WYSIWYG interface, but editing the XML directly is
recommended.
Prerequisites and Emulators
To get started with Android development, you need to install the Java Development Kit and Android SDK, as outlined here (Fire) and here (Visual Studio).
When the tools and platforms are all installed, you will be able to
create an Android Emulator, also known as an Android Virtual Device or AVD. You can do this from the Android Virtual Device Manager, which is accessible from the SDK Manager by choosing Tools, Manage AVDs.
Just click New, give the emulator a name and select the API in the
Target field. You can choose any installed API level, for example Android 2.2 - API Level 8 (also known as Froyo) or Android 4.0.3 - API Level 15 (also known as Ice Cream Sandwich). Once you’ve specified the SD Card Size for the emulator (say 512) and chosen a skin (a screen resolution) you can use the Create AVD button to finish the job.
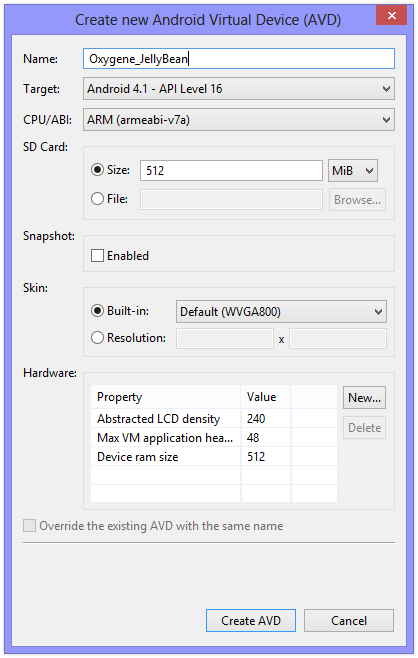
You can launch the emulator from this screen by selecting it and pressing the Start button.
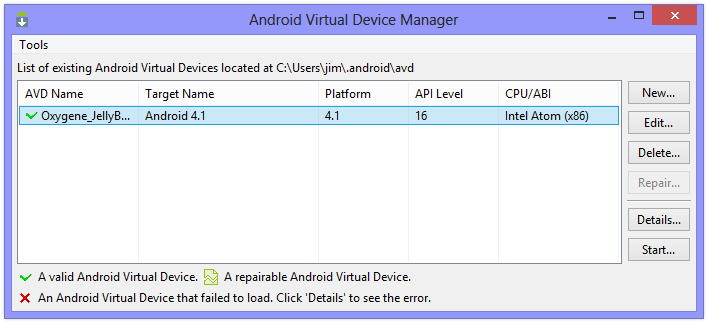
Note: When you re-run the SDK Manager, it will often find updates to install. As mentioned earlier, if the Android SDK was installed into the default location, it will require administrative privileges to install them. So be sure to run it as Administrator (or install the Android SDK into a custom location to make things simpler).
The first time you create or open an Elements project for Android, it will do a ‘pre-flight check’ to ensure that it can locate the things it needs, notably the JDK and the Android SDK. If you’ve installed them into custom locations and it fails to find them, this gives you an opportunity to specify the installation folders.
Getting Started
In both Visual Studio and Fire, the New Project dialog provides the Android app template under Oxygene for Java and Android.
The new Android project is created with a single simple activity called MainActivity. An Activity is the most basic part of an Android app – a single, focused thing that the user can do. The pre-created MainActivity contains a small amount of code to set up a simple UI with a button that, when clicked, displays an incrementing count on its caption.
The visual representation of the screen for MainActivity is defined in the XML file ''main.layout-xml'' which is in the ''res/layout'' folder.
<?xml version="1.0" encoding="utf-8"?>
<LinearLayout xmlns:android="http://schemas.android.com/apk/res/android" android:orientation="vertical"
android:layout_width="fill_parent" android:layout_height="fill_parent"
android:gravity="center_vertical">
<LinearLayout android:orientation="horizontal"
android:layout_width="fill_parent" android:layout_height="wrap_content"
android:gravity="center_horizontal">
<Button android:id="@+id/MyButton" android:text="@string/my_button_text"
android:layout_width="wrap_content" android:layout_height="wrap_content"></Button>
</LinearLayout>
</LinearLayout>
Controls are named with the android:id attribute in layout XML. You prefix @+id/ in front of the chosen name and you can then reference the control’s ID in code by prefixing it with R.id. (all IDs become members of the id class, which is nested within the R resource class). To access the control, you can pass the ID into the activity’s findViewById() method. For example, the button named in the layout XML above has an ID accessible in code as R.id.MyButton. To get access to the button object you’d use Button(findViewById(R.id.MyButton)) - notice the typecast to get a Button object, which is needed because findViewById() returns a View object, one of the Button class’s ancestor types.
Strings referenced in the XML attributes with the @string/ prefix or in the code as members of the R.string class are defined in the ''strings.android-xml'' resource file, which can be found in the ''res/values'' folder.
<?xml version="1.0" encoding="utf-8"?>
<resources>
<string name="app_name">org.me.androidapplication1</string>
<string name="my_button_text">Click Me!</string>
<string name="my_button_text_2">%1$d clicks!</string>
</resources>
To reference the string resource in code from an activity method, you simply call getString(R.string.my_button_text). getString() is a method of the Activity class (or, more accurately, a method of one of Activity’s ancestor classes, Context). As you can see, you pass a string resource ID to the method and it returns the resultant corresponding string.
'''Note''': In Delphi and in .NET languages we are used to working with properties. A property represents some data with possible side effects when read from and/or when written to. A property Foo is defined in terms of a getFoo() getter function that returns a value and a setFoo() setter function that is passed a value. Java does not support the notion of properties, so classes have many getter and setter methods exposed instead of their equivalent properties. When working with Oxygene for Java, you have the choice of calling the getter/setter type methods that exist in any Java libraries that you reference, such as the Android SDK, or using the property that you might normally expect to exist. So in the case above, you can access a string resource either by calling:
type
MainActivity = public class(Activity)
private
Count: Integer := 0;
public
method onCreate(savedInstanceState: Bundle); override;
method ButtonOnClick(v: View);
end;
...
method MainActivity.onCreate(savedInstanceState: Bundle);
begin
inherited;
// Set our view from the "main" layout resource
ContentView := R.layout.main;
// Get our button from the layout resource,
// and attach an event to it
var myButton: Button := Button(findViewById(R.id.MyButton));
myButton.OnClickListener := new interface View.OnClickListener(onClick := @ButtonOnClick);
end;
method MainActivity.ButtonOnClick(v: View);
begin
inc(Count);
(v as Button).Text := WideString.format(String[R.string.my_button_text_2], Count);
end;
onCreate is the method called when the activity is first created and where your activity initialisation goes. After calling through to the inherited method, you can see that a layout resource ID is assigned to the ContentView property, although given the note above, it should be clear that really we are are passing the resource ID to setContentView(). This sets up the layout file ''res.layout-xml'' as the UI for this main activity.
Next the code locates the button with the ID MyButton and stores a reference to it in a local variable.
The final job of onCreate() is to set up the button’s click event handler, which is done by assigning an expression to the button’s OnClickListener property, or in truth passing it to the setOnClickListener() method. Because Java uses interfaces to define event signatures, we use Oxygene’s inline interface implementation to associate our ButtonOnClick method with the onClick method of the button’s View.OnClickListener event interface.
The event handler method itself, ButtonOnClick, increments the Count class instance variable and then uses the value to create a formatted string, which is then set as the button’s caption via its Text property (or setText() method). The string formatting uses the value of the my_button_text_2 string resource (shown earlier), which uses Android format string syntax. The formatting method being called is really String.format(). It’s being called as WideString.format() to avoid ambiguity with the String property (getString() method) of the Activity class we looked at just above. WideString is provided by Oxygene as a synonym for the String type.
One really important value in the ''strings.android-xml'' file is the app_name string. This is used twice by the application:
- the activity’s title bar has this string written on it and
- the list of installed apps on the device uses this string to identify the app.
Be sure to update app_name to make it meaningful.
You can find the references to app_name that affect the title bar and the installed app list in the [http://developer.android.com/guide/topics/manifest/manifest-intro.html Android manifest file], ''AndroidManifest.android-xml'' in the ''Properties'' folder. Every Android application has a manifest file to let Android know the identity of the application package, the components in the application, any permissions required in order to operate and some other system details.
<?xml version="1.0" encoding="utf-8"?>
<manifest xmlns:android="http://schemas.android.com/apk/res/android"
package="org.me.androidapplication1">
<application android:persistent="true"
android:label="@string/app_name"
android:icon="@drawable/icon"
android:debuggable="true">
<activity android:label="@string/app_name" android:name="org.me.androidapplication1.MainActivity">
<intent-filter>
<action android:name="android.intent.action.MAIN" />
<category android:name="android.intent.category.LAUNCHER" />
</intent-filter>
</activity>
</application>
<uses-sdk android:minSdkVersion="4" />
</manifest>
In this sample application’s manifest you can see the application is given a text label and an icon, and the single activity is identified by its class name and also given a label. The convoluted looking intent filter declaration inside this activity is simply the standard code necessary to tell Android this activity is the main activity of the app.
When you need to add more strings to your project, simply edit the ''strings.android-xml'' file.
'''Note''': The various Android resource files that reside within the ''res'' folder hierarchy are all XML files. They would all be perfectly valid and usable if given the standard .xml extension. The reason for the .layout-xml and .android-xml extensions is to enable the appropriate IntelliSense (or Code Completion) behaviour when working in these files.
Running Your App
When you build your app, the Oxygene compiler first creates a normal Java JAR file and then the Android toolchain creates an Android APK file (Android PacKage). The JAR file is just compiled code (Java byte code) but the APK file is the Java byte code processed to run on Android’s Dalvik Virtual Machine with all the necessary resources packaged into the file. Once the package is built, it is ready to run either on an AVD (in other words on the emulator) or on a physical device.
'''Note''': To deploy an APK file from your Windows machine to a physical device, such as a phone or tablet, you must first install the manufacturer’s USB driver for the device to allow communication between the PC and the device. Then you connect the device to the PC using an appropriate USB cable. You should be able to locate instructions on how to install the driver on your manufacturer’s web site or by using a search engine.
The Oxygene debugger will automatically deploy the APK to the emulator and launch it when you use the Start Debugging or Start Without Debugging buttons in Visual Studio (or use the F5 or Ctrl+F5 keystrokes, respectively). If you choose Start Debugging (or F5), you can set breakpoints and debug your application from Visual Studio as it runs on the emulator or physical device.
If you have a virtual Android device running and also have a physical Android device connected to the computer, you need some way to tell Oxygene which device to target when you start an application. You can choose an Android device in the Android section of the project properties.
If you want to install the APK manually, you can use the Android Debug Bridge (ADB) command-line tool from a Windows command prompt. The adb.exe tool is located in the ''<Android_SDK_installation_path>\android-sdk-windows\platform-tools'' folder, where ''<Android_SDK_installation_path>'' could be ''C:\Program Files'' or another directory you chose at installation time. It may be of benefit to add both ''<Android_SDK_installation_path>\android-sdk-windows\platform-tools'' and also ''<Android_SDK_installation_path>\android-sdk-windows\tools'' to the system search path to enable Android SDK tools to be executed by name no matter what the current directory is.
Simply run adb with the install parameter and the name of the APK to load. If the APK is already installed, you should also specify the -r. Assuming adb’s directory has been added to the search path, you would use:
adb install -r org.me.androidapplication1.apk
'''Note''': If you have an emulator running and a physical device attached to the PC, you can use the -d and -e switches to specify either the device or the emulator, respectively, for example:
adb -e install -r org.me.androidapplication1.apk
Once the APK is installed, you can run it just like you would any other app.
UI Elements
The <LinearLayout> tag in ''main.layout-xml'' is one of several layout options. Some of the other layouts are FrameLayout, TableLayout and RelativeLayout.
- FrameLayout - A frame layout is designed to block out an area on the screen to display a single item.
- LinearLayout - A layout that arranges its children in a single column (vertical) or a single row (horizontal). The default orientation is horizontal.
- RelativeLayout - A layout where the positions of the children can be described in relation to each other or to the parent.
- TableLayout - A layout that arranges its children into rows and columns. A TableLayout consists of a number of TableRow objects, each defining a row. TableLayout containers do not display border lines for their rows, columns, or cells. Each row has zero or more cells; each cell can hold one View object. The table has as many columns as the row with the most cells. A table can leave cells empty. Cells can span columns, as they can in HTML.
Once you have the layout, you can add other controls like Button, ImageButton, TextView, ImageView and others.
There is a pretty good UI tutorial available. Keep in mind that the code samples will be in Java instead of Oxygene. However, you should find that the Oxidizer IDE feature can help in porting Java code over to the Oxygene syntax. If you have a snippet of Java code in the clipboard, you can press Alt+Ctrl+V, then J and the Oxidizer will do its utmost to translate the code for you. It won’t necessarily do a perfect job as it’s working without context, but it should do the main bulk of the translation for you.
Now for some Toast
When you want to popup a message to your users from an Android app, you make toast. A toast is a small popup window that shows up in front of the current activity for a short time. Simply call the makeText method on the Toast class to create a toast object, then call show() to pop it up on-screen. There are two versions of makeText and each takes 3 parameters. Here is a sample call:
Toast.makeText(self, "Hello World! This is a toast.", Toast.LENGTH_SHORT).show();
The first parameter is the context that the toast relates to. You can either pass your activity (using self if working in the activity’s method) or a reference to the single application object that exists in the app (accessible via the activity’s getApplicationContext() method), since both Activity and Application inherit from the Context class.
The second parameter is the text string to display. This can either be a literal string as above or, preferably, a string resource ID, depending on which version of makeText you are using. So to pass a resource ID, you would reference a string defined in ''strings.android-xml'' by using String[R.string.some_identifier].
The last parameter is the duration before the toast is auto-dismissed, either Toast.LENGTH_SHORT or Toast.LENGTH_LONG.
The call to makeText returns a Toast object. There are other methods on the Toast object to configure it. The show method ultimately displays the toast.
Just add the code above to the ButtonOnClick event handler in MainActivity and when you run it in the emulator or on a device, you will see the toast appear when you click the button.
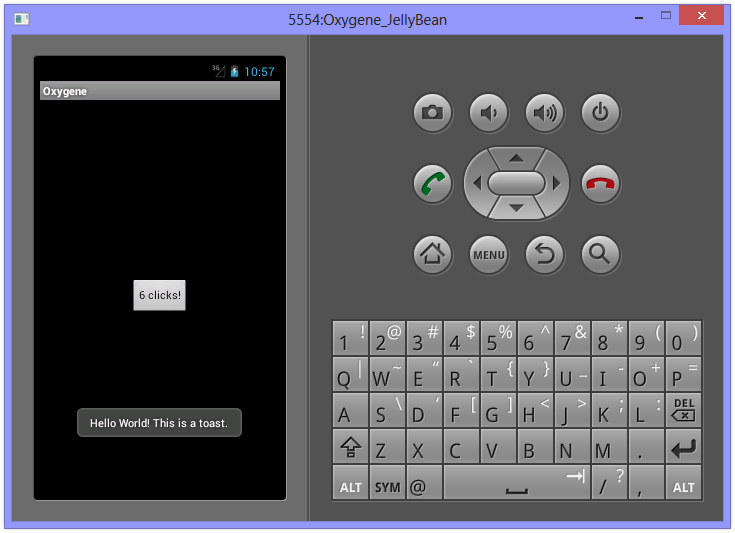
A toast never receives focus and always disappears after the duration timeout.
Documentation
For Android documentation, you can make use of the mass of information provided by Google in their API Reference and API Guides. Naturally, this documentation is targeted at Java programmers, but that should really be just a minor inconvenience - the method signatures are laid out in C-style syntax rather than Pascal-style. Oxygene can natively access any of the Android SDK class and call any of the available methods, so the best documentation is the documentation written by the platform provider: Google.
In this primer, various different class types and methods have been linked through to the corresponding Android SDK documentation. You should become familiar with using the Android SDK documentation to learn about how to program Android applications in Oxygene for Java.
Notes
One important thing to remember for Android as you start building larger projects and making use of additional libraries is that if you don’t set the “Copy Local” property to true for a referenced library, the compiler presumes the library is available on the system and does not include it in the generated archive. If you set it, it becomes part of the application. For the main platform library, such as android-14, “Copy Local” must be left as false, but for all other libraries it must be set to true to ensure the referenced code will be available when the app runs on an Android device.
Your First .NET Command Line App
Elements integrates with the Visual Studio project template system to provide you with skeleton projects to get started with a new app.
This tutorial will cover all languages. For code snippets, and for any screenshots that are language-specific, you can choose which language to see in the top right corner. Your choice will persist throughout the article and the website, though you can of course switch back and forth at any time.
To start with a new project, simply select "File|New|Project..." from the main menu, or press ^⇧N. If you have the Start Page showing, you can also select "New Project..." near the top left corner.
This will bring up the New Project dialog. Depending on what edition(s) of Elements you have installed, you will have templates for one or all Elements languages: Oxygene, C#, Swift, Java, Go and Mercury. Depending on your edition of Visual Studio, it might also offer templates for other, Microsoft-provided languages:
Select your language of choice, and then find the "Console Application" icon below. (Elements allows you to create console apps using all platforms, but this tutorial covers the .NET version only.)
On the next step you can choose a name for your application, as well as a location on disk where you want to store it. For this tutorial, name the project "MyFirstApp" and then click "Create".
Your project will be created and open in the IDE within a few seconds. Visual Studio should now look something like this:
Let's have a look around this window, as there are a lot of things to see, and this is the main view of Visual Studio where you will do most of your work.
The Visual Studio Main Window
On the right side, you see the Solution Explorer. The Solution Explorer is one of several panes that can be docked to this side, and it will show you a hierarchical view of your project.
Elements works with projects inside of a Solution (hence the name). You can think of a Solution as a container for one or more related projects. Visual Studio will always open a solution, not a project – even if that solution might only contain a single project, like in this case.
You can close Solution Explorer to get it out of the way (for example on small screens), and you can always bring it back via the "View|Solution Explorer" main menu item.
The Solution/Project Tree
The Project Tree shows you a full view of everything in your project (or projects). Underneath the root node for the solution, each project starts with the project node itself, with the square Elements Project logo as icon. The icon is color-coded by platform (blue for .NET, green for Cocoa and yellow for Java), as will be the source code files.
Each project has two special nodes, along with any additional files in the project.
-
References lists all the external frameworks and libraries your project uses. As you can see in the screenshot, the project already references all the most crucial libraries by default (we'll have a look at these later), and you can always add more by right-clicking the References node and choosing "Add Reference..." from the context menu. Please refer to the References topic for more in-depth coverage.
-
Properties is a regular folder that can (and does) contain files, but it also gives you access to all the project settings and options for the project, which pen in a new tab when you double-click the node. The project settings are covered in great detail here.
-
In addition, your project will contain one or more (usually more) other files, both source code and other types, that make up your application. These files may be on the top level next to References and Properties, or nested in additional subfolders.
The Main View
The bulk of the Visual Studio window is filled with the file(s) you work in, showing in different tabs across the top. As you select files in Solution Explorer, they will show as a temporary tab on the right. You can double-click files in Solution Explorer to open them in tabs that stick around longer, and show on the left, as in the screenshot above.
You can navigate between files both via any open tabs at the top, or by Solution Explorer.
Your First .NET Project
Let's have a look at what's in the project that was generated for you from the template. This is already a fully working app that you could build and launch now – it wouldn't do much, but all the basic code and infrastructure is there.
There are two parts that are interesting. First, there's the Program source file. This file servers as your program entry point, and has the so-called main() function where execution starts. Secondly, there's a Properties folder with a whole bunch of files that provide additional details and configuration for your project. The files in here will be common for all .NET projects.
The Properties Folder
If you want to start coding right away, you can, for now, pretty much ignore the files that are in here and skip to the next section. But in the interest of making you familiar with how .NET projects work, let's have a brief look.
Essentially, there are four main files in this folder, two of which have a nested .Designer code file associated with them.
-
App.ico, simple enough, is the icon for your executable, in standard Windows Icon format. Different than Mac apps, in .NET even command line executables can have an icon (although you will never see it anywhere, except on Windows), as the icon gets embedded directly into the executable file. The name of this file is not magic or hardcoded – it is referenced from the Project Settings.
-
AssemblyInfo.* is a code file that contains some standard Attributes that define metadata for your executable. These attributes can, for example, set a description and copyright message, or give the .exe a Strong Name via code signing. There's typically no code in this file that will run (although nothing keeps you from adding some, or from moving the attributes out to a different code file).
-
Resources.resx is a .NET resource file in XML format that can be used to add resources such as images or strings to the project in a way that can make them easily localizable, and easily accessible from code. The file has a nested Resources.Designer.* code file that will get updated automatically as the .resx changes, and provides direct access to the resources from code, via a class called MyFirstApp.Properties.Resources.
-
Settings.settings is another XML file, this one allowing you to define configurable settings for your project. Imagine your app needed the URL of a server to talk to. You cold define a setting for that URL here, along with a default, and read that from code. Users of your app could later override the URL by providing a .config file next to your executable where they provide a different value. Like the .resx, this file has a nested Settings.Designer.* code file that will get updated automatically as the .settings changes, and provides direct access to the resources from code, via a class called MyFirstApp.Properties.Settings.
For the purpose of this tutorial, you can ignore all of these files and move on to the code in Program.
Program and the main() Entry Point
The Program source file is where the execution of your app starts and where (currently all) of the app's code lives. As mentioned before, the entry point is sometimes also referred to as the main() function. Let's have a look.
In Oxygene and C#, the entry point is provided quite literally by a static method called Main() that matches a well-defined signature: It takes an Array of Strings as parameter and optionally returns an Int32.
The string array will contain any parameters passed to the program from the command line, or will be empty if the program is called without (note that on .NET, the parameters do not include the executable name as first parameter, unlike native Mac console apps).
In Swift, the entry point looks a bit different. Any one single file in a Swift project can just contain code that's not contained in any class, and that code will be treated as the entry point. So Program.swift defines no explicit class or main() method, and instead just a line of code. If needed, the command line parameters can be accessed via the global C_ARGV variable, which is a [String] array, and their count can be accessed via C_ARGC.
class method Program.Main(args: array of String): Int32;
begin
writeLn('The magic happens here.');
end;
public static Int32 Main(string[] args)
{
Console.WriteLine("The magic happens here.");
return 0;
}
println("The magic happens here.")
As you can see, the default implementation of the entry point does one thing: print out The magic happens here. to the console.
The templates for the five languages use a different method for this, but this is purely a matter of taste or preference:
The C# snippet uses Console.WriteLine, which is the official .NET API for talking to the console. The static Console class has many functions that allow your code to interact with the terminal, including Console.ReadLine to read input, as well.
The Oxygene template uses writeLn(), which is a System Function, and the "classic" way for Pascal to print to the console. writeLn() (and its counterpart write()) are available to all languages and on all platforms, so using writeLn() instead of Console.WriteLine is a good way to write code that can cross-compile to Java or a native mac console app, too.
The Swift code uses println() which is a standard Swift API, defined in the Swift Base Library. Like writeLn() it works on all platforms, but is only available in Swift (or any project that uses the Swift Base Library).
The templates here differ merely to reflect the default that developers of each language would expect.
Without any further ado, you should now be ready to run this (very simple) first command line app.
Running Your App
To run your app, just hit the "Start" button with the Play icon or press F5.
Visual Studio will now build your project and launch it. Since it is a console application, no UI will show up. In fact, it might seem as if nothing much happens at all, and that's because your application currently just prints a line of text, but then quits immediately. And the way Windows handles console applications, they launch in their own console window, which closes right away after the app is done.
To fix this, go and expand the code in Program by one line:
This will make your app ask for user input – any input followed by the return key – before it quits.
Hit F5 again, and now your app will show and wait for the user to react to it:
Press Enter, and it will terminate.
Via Mono, you will be able to take this same executable you built on Windows and run it on Mac OS X and Linux systems, as well. This is great for writing cross-platform command line tools or servers.
Of course Elements also lets you write Mac-native and Java Console apps as well, which are covered in separate tutorials here.
Your First Windows (WPF) App
Elements integrates with the Visual Studio project template system to provide you with skeleton projects to get started with a new app.
This tutorial will cover all languages. For code snippets, and for any screenshots that are language-specific, you can choose which language to see in the top right corner. Your choice will persist throughout the article and the website, though you can of course switch back and forth at any time.
To start with a new project, simply select "File|New|Project..." from the main menu, or press ^⇧N. If you have the Start Page showing, you can also select "New Project..." near the top left corner.
This will bring up the New Project dialog. Depending on what edition(s) of Elements you have installed, you will have templates for one or all Elements languages: Oxygene, C#, Swift, Java, Go and Mercury. Depending on your edition of Visual Studio, it might also offer templates for other, Microsoft-provided languages:
Select your language of choice, and then find the "Windows WPF Application" project template under Windows category.
On the next step you can choose a name for your application, as well as a location on disk where you want to store it. For this tutorial, name the project "MyFirstApp" and then click "Create".
Your project will be created and open in the IDE within a few seconds. Visual Studio should now look something like this:
Let's have a look around this window, as there are a lot of things to see, and this is the main view of Visual Studio where you will do most of your work.
The Visual Studio Main Window
On the right side, you see the Solution Explorer. The Solution Explorer is one of several panes that can be docked to this side, and it will show you a hierarchical view of your project.
Elements works with projects inside of a Solution (hence the name). You can think of a Solution as a container for one or more related projects. Visual Studio will always open a solution, not a project – even if that solution might only contain a single project, like in this case.
You can close Solution Explorer to get it out of the way (for example on small screens), and you can always bring it back via the "View|Solution Explorer" main menu item.
The Solution/Project Tree
The Project Tree shows you a full view of everything in your project (or projects). Underneath the root node for the solution, each project starts with the project node itself, with the square Elements Project logo as icon. The icon is color-coded by platform (blue for .NET, green for Cocoa and yellow for Java), as will be the source code files.
Each project has two special nodes, along with any additional files in the project.
-
References lists all the external frameworks and libraries your project uses. As you can see in the screenshot, the project already references all the most crucial libraries by default (we'll have a look at these later), and you can always add more by right-clicking the References node and choosing "Add Reference..." from the context menu. Please refer to the References topic for more in-depth coverage.
-
Properties is a regular folder that can (and does) contain files, but it also gives you access to all the project settings and options for the project, which pen in a new tab when you double-click the node. The project settings are covered in great detail here.
-
In addition, your project will contain one or more (usually more) other files, both source code and other types, that make up your application. These files may be on the top level next to References and Properties, or nested in additional subfolders.
The Main View
The bulk of the Visual Studio window is filled with the file(s) you work in, showing in different tabs across the top. As you select files in Solution Explorer, they will show as a temporary tab on the right. You can double-click files in Solution Explorer to open them in tabs that stick around longer, and show on the left, as in the screenshot above.
You can navigate between files both via any open tabs at the top, or by Solution Explorer.
Your First WPF Project
Let's have a look at what's in the project that was generated for you from the template. This is already a fully working app that you could build and launch now – it wouldn't do much, but all the basic code and infrastructure is there.
There are two pairs of files here that are interesting, the App.xaml and the Window1.xaml, both of which have a code file of the same name nested underneath them.
There's also a Properties folder, which we won't go into for this text, but which is covered in more detail in the Your First .NET Command Line App tutorial. The contents in this folder are pretty much identical for all .NET projects.
App.xaml
App.xaml and its code counterpart implement a descendant of the System.Windows.Application class, and is sort of the central anchor point for your application, comparable to the Application Delegate on Cocoa.
It provides several events that you can implement handlers for to be informed about actions happening during the application lifecycle, for example the Startup event. It also defines what the first view of your app will be, via the StartupUri property, which points to Window.xaml by default.
You might also have noticed that your project has no main() function, no entry point where execution will start when the app launches. Among other things, the entry point will be generated by the App.xaml file.
<?xml version='1.0' encoding='utf-8' ?>
<Application x:Class="MyFirstApp.App"
xmlns="http://schemas.microsoft.com/winfx/2006/xaml/presentation"
xmlns:x="http://schemas.microsoft.com/winfx/2006/xaml"
StartupUri="Window1.xaml">
<Application.Resources>
</Application.Resources>
</Application>
Window1.xaml
Window1.xaml and its code counterpart implement the main window for your app, descending from the System.Windows.Window class.
But first, let's take a look at XAML file pairs in general. The .xaml file is the main file of the pair, and it essentially contains an XML representation of a class tree – in case of a window not just the window itself, but also any controls that show on that window, as well as their properties. Different than in many other UI frameworks, controls can be nested within each other – for example a button can contain a label and an image, which are separate controls.
Behind the scene, the compiler toolchain will generate code from the .xaml that compiles into a new custom class – in case of Window1.xaml the implementation of your window class, called MyFirstApp.Window1. (You will sometimes see this code file mentioned, for example in error messages; it is called Window1.g.pas, where "g" stands for "generated".)
The second file, shown nested underneath the .xaml in Visual Studio, is a code file. It also declares a portion of that same class, leveraging a feature of the Elements compiler called Partial Classes. This file is where you put any of the code you will write yourself to finish the implementation of the Window1 class.
When your app gets build, the compiler will take both parts and treat them as one single class.
The Window1.xaml file can be edited in two views – in the Visual Designer (shown at the top) or as raw XML code (shown at the bottom). You can switch between the two or show them as split view via the "Design" and "XAML" buttons in the center of the screen:
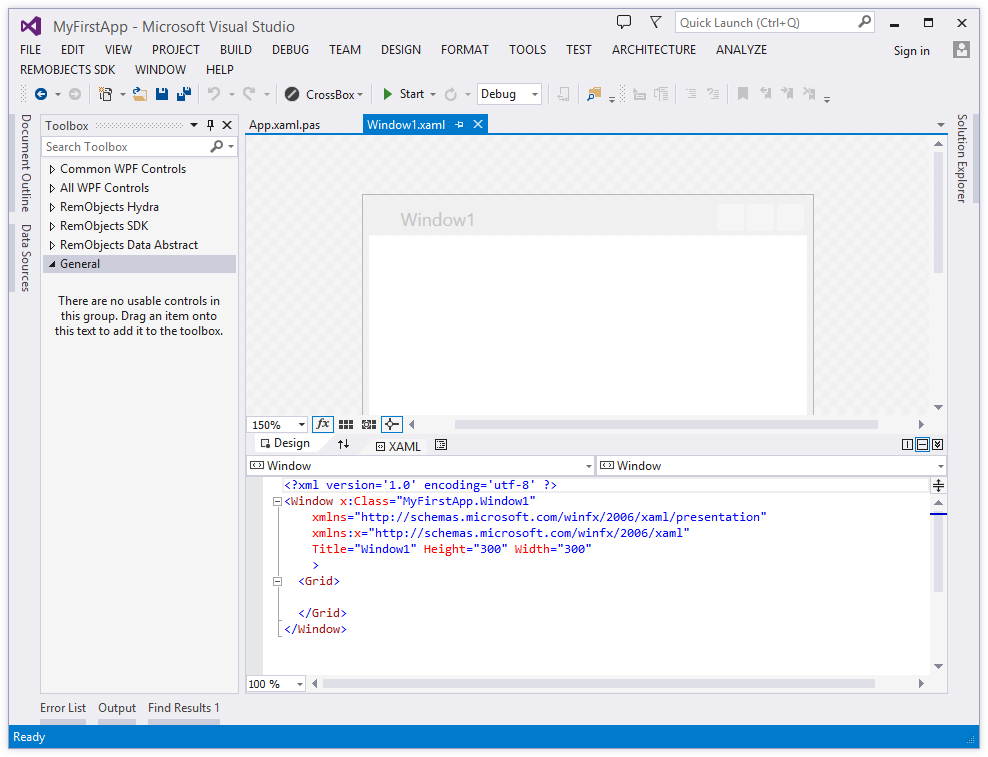
Designing your User Interface
It's time to create some UI.
WPF uses layouts that define how controls get arranged on the form. The default template starts with a Grid layout, which creates a table-like structure of rows and columns across the window. We don't want that, so click into the middle of the form to select the (empty) grid and press Delete. You should see the <Grid> tag disappear from the XAML at the bottom when you do. In its place write <StackPanel/> (or drag and drop a StackPanel control from the "Toolbox" panel on the left).
Your XAML should now look like this:
<?xml version='1.0' encoding='utf-8' ?>
<Window x:Class="MyFirstApp.Window1"
xmlns="http://schemas.microsoft.com/winfx/2006/xaml/presentation"
xmlns:x="http://schemas.microsoft.com/winfx/2006/xaml"
Title="Window1" Height="300" Width="300"
>
<StackPanel/>
</Window>
Next, drag and drop a Label, a TextBox, a Button and another Label from the "Toolbox" panel onto the design surface, like this:
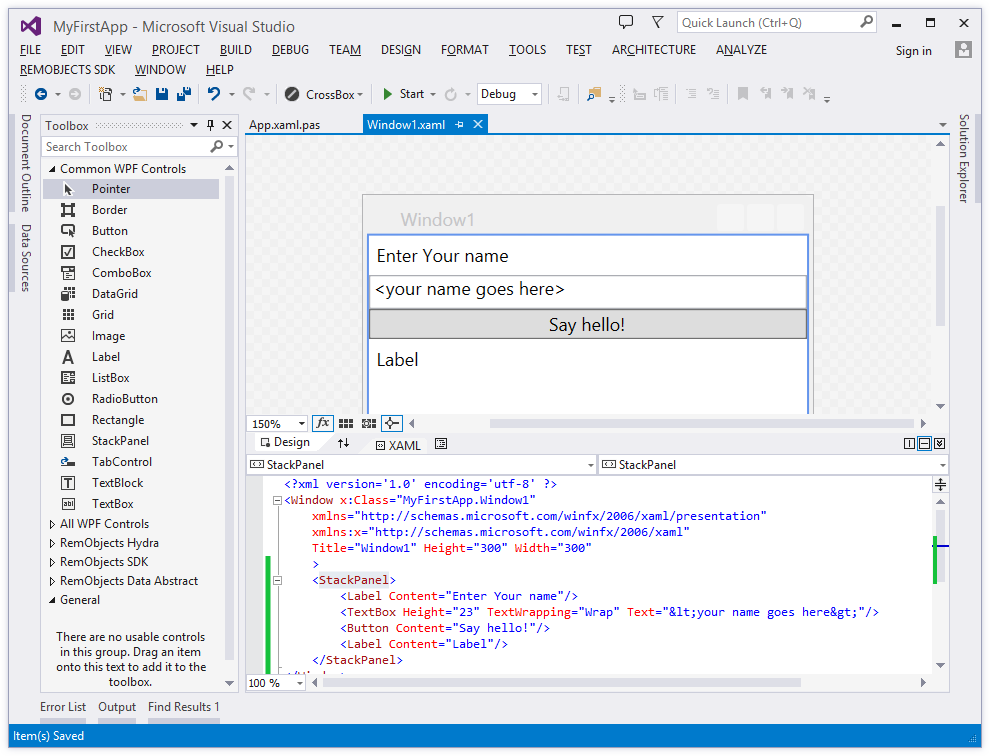
As you can see, the controls automatically stack nicely on top of each other. That's the StackPanel's doing. Essentially, which layout container you pick will determine how your controls get laid out, and the StackPanel stretches each control to full width to build a nice stack.
You can nest different layout containers within each other, so that gives you a lot of flexibility. For example, to show two buttons next to one another, you could drop a horizontal StackPanel into the existing (vertical), and put two buttons into that, and they would lay out both in the same row.
Each control also has – among many other properties – a margin for each side, allowing you to control spacing between controls in any given layout. You can refer to the WPF Documentation on MSDN for more coverage.
Bring up the "Properties" pane by pressing F4 to modify a control's properties. Here you can, for example, change the Text shown on the labels or the textbox, set margins, or otherwise change the appearance and behavior of the control.
You can also set the "Name" of controls if you want to interact with them from code. Do this by setting the name of the textBox to "nameTextBox" and that of the second Label to "greetingsLabel":
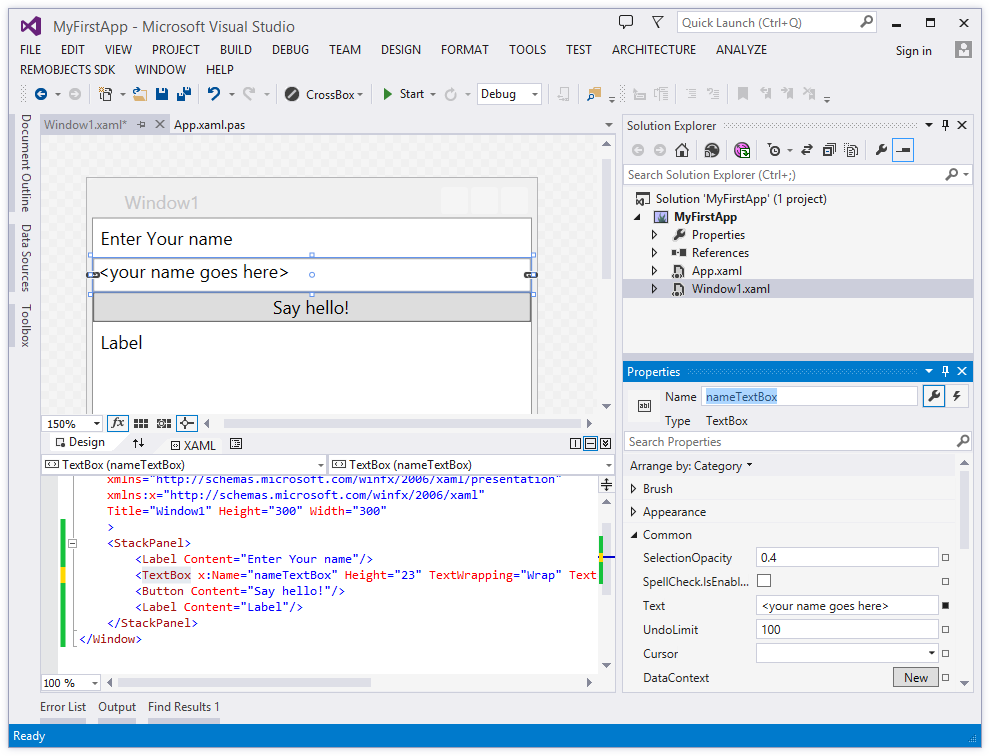
Your XAML should now look like this:
<?xml version='1.0' encoding='utf-8' ?>
<Window x:Class="MyFirstApp.Window1"
xmlns="http://schemas.microsoft.com/winfx/2006/xaml/presentation"
xmlns:x="http://schemas.microsoft.com/winfx/2006/xaml"
Title="Window1" Height="300" Width="300"
>
<StackPanel>
<Label Content="Enter Your name"/>
<TextBox x:Name="nameTextBox" Height="23" TextWrapping="Wrap" Text="<your name goes here>"/>
<Button Content="Say hello!"/>
<Label x:Name="greetingsLabel" Content="Label"/>
</StackPanel>
</Window>
Remember again that you can make any of these changes both in the visual designer and by editing the XAML directly. Wherever you make changes, the other side will sync up after a second. This gives you a lot of power and flexibility to quickly design your UI visually, and then fine-tune it in detail in the XML.
Finally, double-click the Button to create a handler for its Click event. This will take you over to the Window1.* source file and automatically insert a new method into the class for you:
method Window1.Button_Click(sender: System.Object; e: System.Windows.RoutedEventArgs);
begin
end;
private void Button_Click(System.Object sender, System.Windows.RoutedEventArgs e)
{
}
func Button_Click(_ sender: System.Object!, _ e: System.Windows.RoutedEventArgs!) {
}
Your final action is to implement this method to get the name the user entered out of the nameTextBox and write a proper greeting into greetingsLabel:
greetingsLabel.Content := 'hello, '+nameTextBox.Text;
greetingsLabel.Content = "hello, "+nameTextBox.Text;
greetingsLabel.Content = "hello, "+nameTextBox.Text
As you type this code, note how Code Completion already knows about the names of the controls in your XAML file. That's because, as mentioned earlier, a second piece of code is generated from the XAML behind the scenes that becomes part of the same class you are writing in now.
And with that, you should now be ready to run this (very simple) app.
Running Your App
To run your app, just hit the "Start" button with the Play icon, or press F5. Visual Studio will now build your project and launch it:
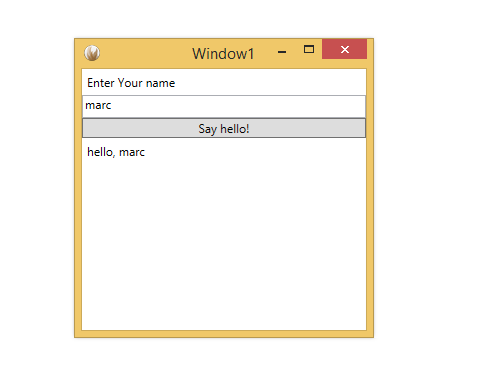
Cross Platform Code w/ Elements RTL
Elements RTL is a library that is designed to let you write code that can be platform independent and be shared across platforms.
The tutorials in this section will get you acquainted with some of the classes in Elements RTL, and some of the areas where ElementsRTL can help you write portable code.
Overview
Tutorials
See Also
This article is a work in progress
This article is a bit of a misnomer, because Elements does not actually support or encourage the development of cross-platform applications, per se. Instead, Elements is designed to let you write apps for all platforms.
What we mean by that is that in Elements, you won't find the option to go File|New Cross-Platform App and create a single project that will magically build and run on – for example – both iOS and Android. But hat does not mean that you cannot use Elements to build great cross-platform solutions. To the contrary, doing just that is one of many things Elements is great and and designed for.
The way Elements tackles cross-platform development is by letting you create a great application for each of the platforms you want to target – and share a lot of code between the applications, where feasible.
For the purpose of this text, lets assume you want to build an application for the two major mobile platforms — iOS and Android. But all the concepts, ideas and technologies discussed here will apply to other platform combinations, as well, whether you want to write a desktop apps for Mac and Windows, or target the trifecta of iOS, Mac and Apple Watch, for example.
You start out by simply creating to separate application projects, one for iOS and one for Android, just as if you were targeting a single platform. We have tutorials for both of those platforms to get you started with the basics:
When you create your first project, you would start a new solution as you always do (by going via File|New Project, and choosing your platform (e.g. iOS), language (Oxygene, C# or Swift) and application type. Let's call this first (iOS) project "MyApp.iOS" for now.
When you create the second project , you will want to add it to the same solution as the first. There's two ways to do this. Whether you are using Fire or Visual Studio, you can right-click in the Solution Tree, and choose "New Project...". In Fire, you can also create the second project via the "File|New Project" (⌥⌘N) menu again, and just make sure to activate the "Add to existing solution" checkbox on the subsequent dialog:
Let's call this second project MyApp.Android. In either case, you will end up with one Solution that now contains two projects: An iOS app called called MyApp.iOS with a green project icon (Cocoa uses green icons in the IDE), and the second called MyApp.Android with a yellow icon (Java, and thus Android, uses yellow). Right now, these are two separate projects and – aside from being open on the same IDE window – they have nothing in common or shared yet.
These two projects will form the basis of our iOS and Android apps respectively – remember that even though conceptually you may be thinking in terms of "I'm building an app" for iOS and Android, you're really building two individual apps, one for each platform.
In each of these projects, you'll be writing the platform-specific code for your application. This will include the user interface itself and code that ties directly to it (yes, your application's user interface will be platform-specific, more on that in a moment), as well as any code that takes advantage of lower-level platforms-specific features (for example, maybe you want to interact with iCloud on iOS, and use some Google-specific APIs on Android. Even things that are conceptually available on both platforms, such as Push Notifications, might work slightly different on each platform, and require platform-specific handling in your app).
This might seem painful or unnecessary at first, but it is absolutely essential, if you want to create a great native app for each platform that feels polished and at home to the user on both iOS and Android.
The short answer: Yes.
Elements does not (and will not) provide any abstraction layer that will allow you to drag together one set of User Interface (UI) that will just "magically" work, look good and work well on multiple platforms. There's two reasons for that. While it's technically possible to have one set of UI code work on multiple platforms (and some of Elements competitors, including Xamarin Forms and Delphi Mobile, do offer and even focus on that capability), it is virtually impossible to do this and end up with a UI that works well and feels at home on all the platforms.
iOS and Android are different platforms with some vastly different user interface paradigms that go way beyond whether toolbars should be on the bottom or the top of the screen. The only way to create am application that users will enjoy and feel at home with on their platform of choice is to carefully rethink the UI of your app with each platform in mind, and design your UI wit the subtle tweaks that each platform needs.
This does not mean that you cannot share one conceptual design for your app, of course. Things from fundamental structure of your UI, how the user experience flows between different parts of your app, down to design details as to what color schemes and fonts you use, may very well be thought out and designed once, and then implemented (often with subtle nuances) for both platforms. Then again, sometimes even the fundamental flow of your application will differ vastly between the platforms.
A lot depends on what kind of app you are writing, and what existing platform paradigms on both iOS and Android your application needs to embrace to fit it. Some apps may look virtually identical; for other apps, a workflow that works great on one iOS will feel like it is "fighting the platform" om Android, or vice versa.
The Shared Project
But of course we do want to share a lot of code between the two platforms, so for that, lets add a third project to the mix: a Shared Project. Shared projects are also covered more in their own topic, and in the tutorials linked below.
- Using Shared Projects in Fire or in Visual Studio.
Adding a shared project is simple: just as you did when you added the Android project to the existing solution, invoke the New Project Wizard again, and this time select the "Shared Project" template.
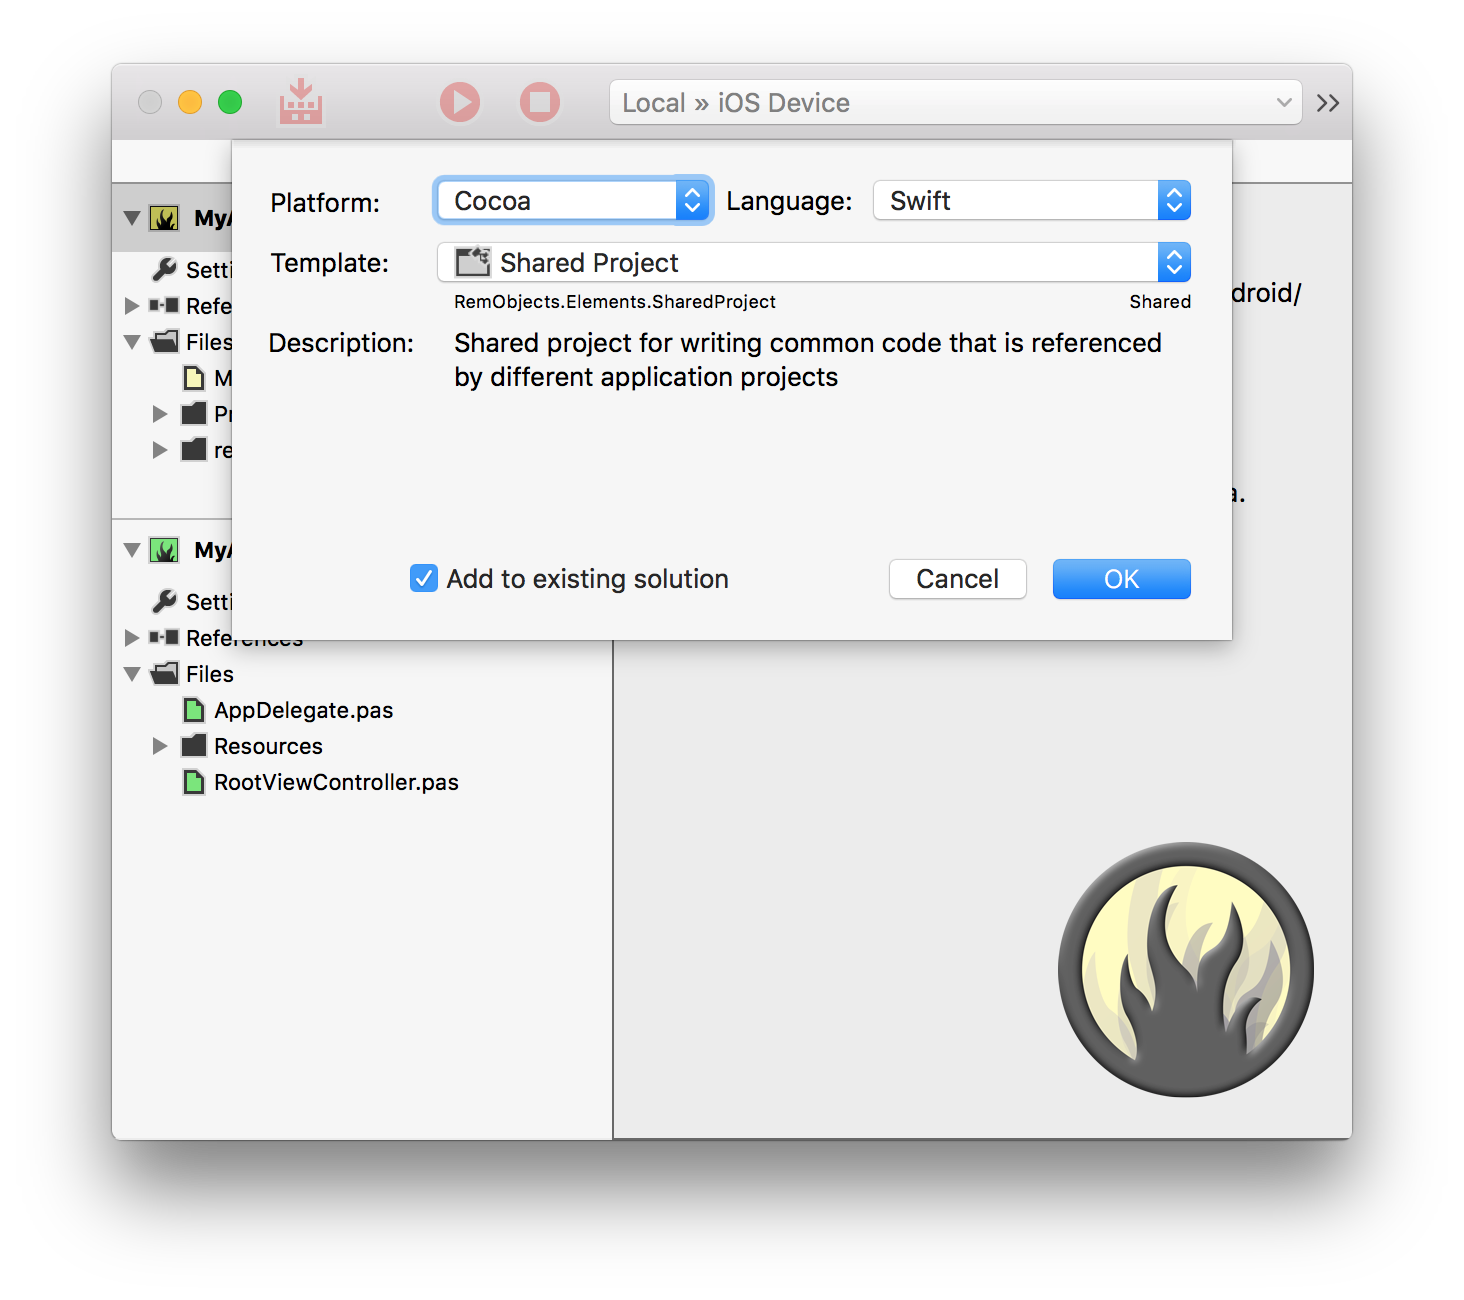
Due to the way templates are structured in the IDE, the Shared Project template will be available underneath any platform and language, but because shared projects do not have an inherent platform (or language, until you start adding code), it doesn't matter which one you pick.
Let's call this project MyApp.Shared, and once again make sure it gets added to the existing solution. You should now have three projects in open, the new one sporting a white "globe" icon (the white indicating that it, and the files within, are not tied to a specific platform).
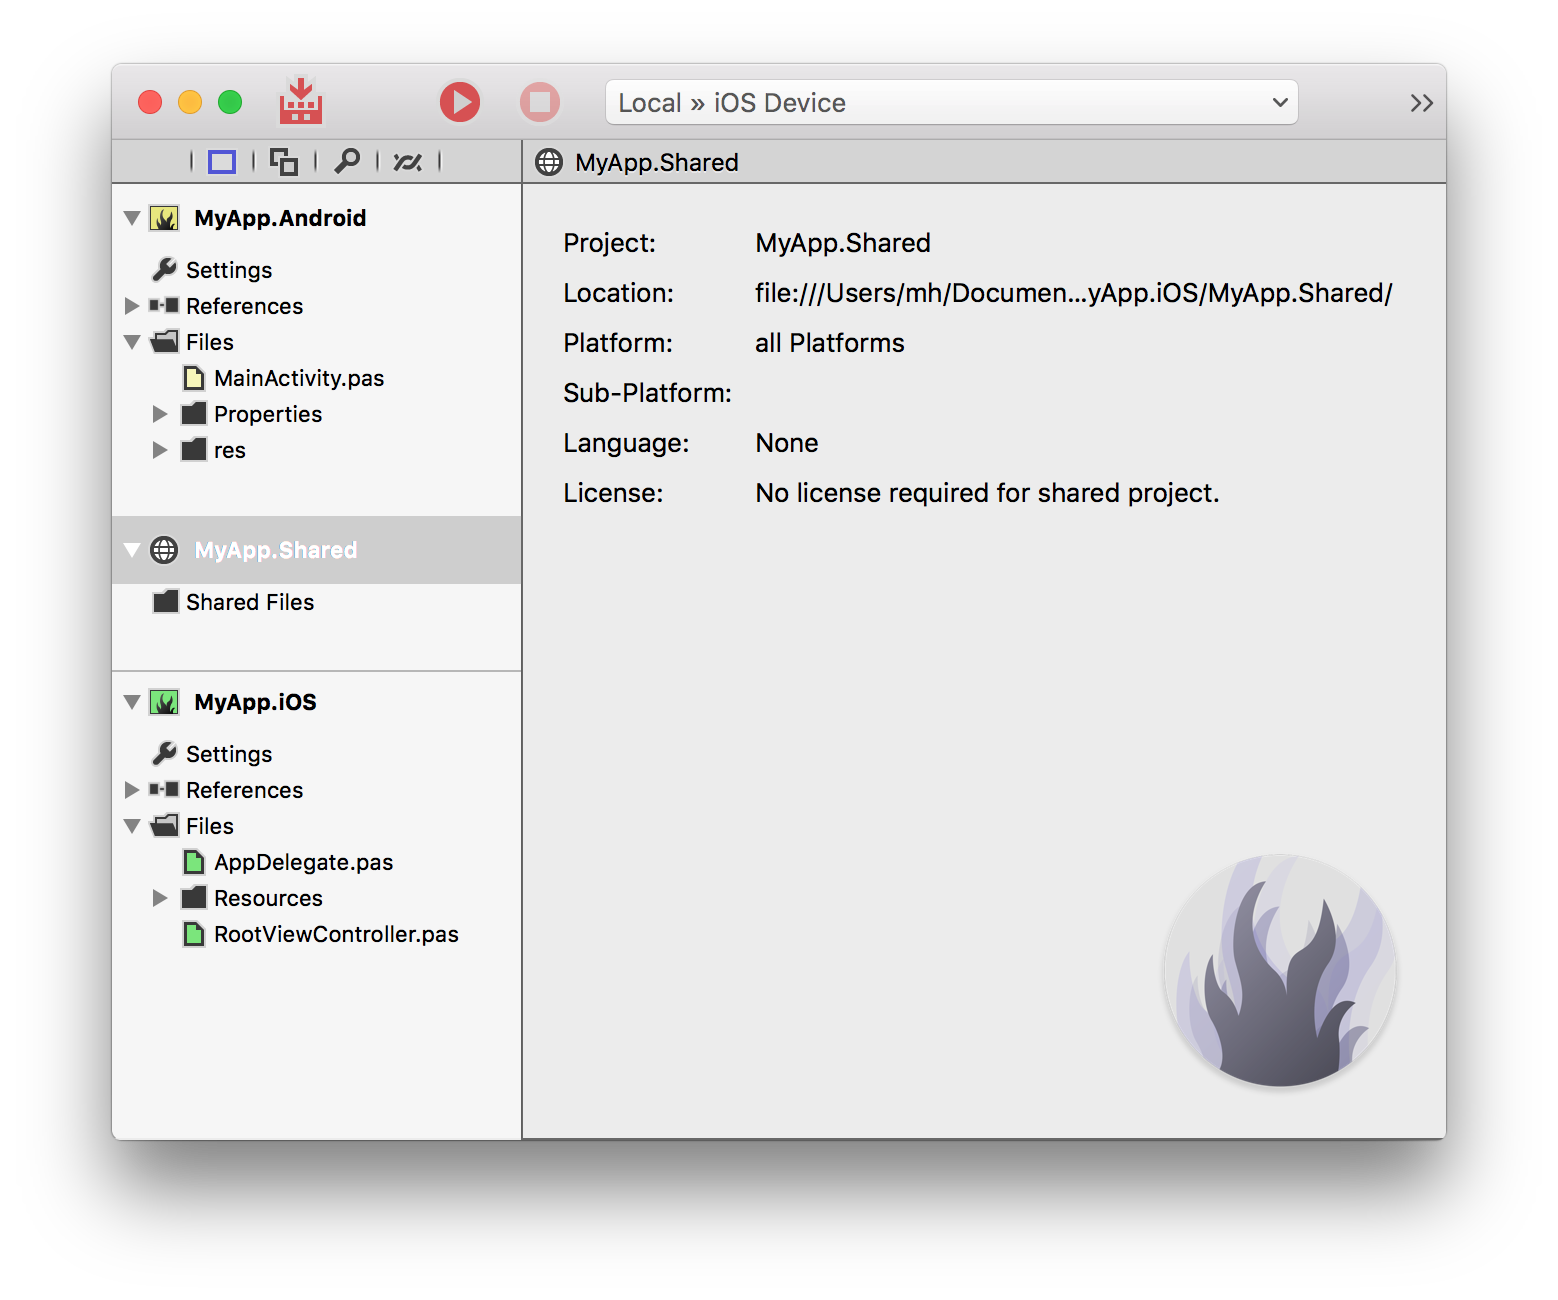
The Shared Project can be thought of as a container for code (and, in theory, other files) that will be used in both of the other projects. In other words, code that you will write for your app that is not specific to a platform, but can be used on both iOS and Android.
To make that connection, to let Elements know that the MyApp.Shared project should be used by both the iOS and the Android project, you need to add a reference between them. In Fire, simply drag the MyApp.Shared node in the solution tree onto the MyApp.iOS project node, and then repeat the same process to drag it to the MyApp.Android project as well. In Visual Studio, right-click the "References" node in MyApp.iOS, choose "Add Reference..." and then select the shared project. Do the same for the Android project.

Now, any code you add to MyApp.Shared will automatically be available in both the iOS and the Android app. This if course means that any code you write in the shared project needs to be platform-independent, and should not make use of features or types that aren't available on both platforms. Elements provides several ways to achieve that.
Elements RTL
Elements RTL is the main means by which you can write platform-independent code, and is of course the main focus of this whole section of the documentation. Essentially, Elements RTL is a library that provides a wide set of classes (and growing) that are platform independent, and can thus be easily used in shared code, without worrying about each platform's different API.
For example, Strings or container objects such as Arrays or Dictionaries are available on all platforms, but behave differently, normally making to hard to write code that is not tied to a platform – because methods you can Call on Cocoa's string types (such as .lowercasestring()) are different that similar methods on Java strings (e.g. toLower()). By contrast,
RemObjects.Elements.RTL.String works and behaves the same on each platform (and for example has a .ToLower() method on all platforms).
To use Elements RTL, all you need to do is add a reference to the library to both of your app projects by going to "Add Reference" and choosing libElements.fx (on Cocoa) or elements.jar (on Java). Elements RTL's types live under the RemObjcts.Elements.RTL namespace, so you can refer to them either by full name (e.g. RemObjcts.Elements.RTL.String or RemObjcts.Elements.RTL.Dictionary) or by using/importing the RemObjcts.Elements.RTL namespace via the uses (Oxygene), using (C#) or import (Swift/Java) keyword.
If you use/import the namespace, all string constants and the C# string keyword will automatically be treated as RemObjecs.Elements.RTL Strings, as well.
Fire and Water also give you the option to automatically add add a reference and use/import of Elements RTL, when starting a new project. Simply check the appropriate option in the New Project dialog.
Refer to the following links for more details
Conditional Compilation
Although Elements RTL can get you a good way towards platform-independent code, sometimes it is easier to just be able to call into a platform API to get a job done. Maybe there's some exiting functionality on both platforms that's not wrapped in Elements RTL (yet), or maybe you want to explicitly do something different on each platform.
All Elements languages allow you to use Conditional Compilation, also sometimes referred to as "ifdefs", to mark specific pieces of code as specific to one (or more) platform. Elements provides a bunch of predefined values you can use to check the platform, and you can also provide your own set of Conditional Defines in Project Settings. You can use the {$IF ...} (Oxygene) or #if ... (C#, Swift and Java) compiler directives to check for the presence of these defines.
You can also use the defined() system function (of #defined() in Swift) for more granular conditional compilation.
method Helpers.AppSignature: String;
begin
{$IF COCOA}
result := 'MyApp for iOS';
{$ELSEIF JAVA}
result := 'MyApp for Android';
{$ENDIF}
end;
public string AppSignature()
{
#if COCOA
return "MyApp for iOS";
#elseif JAVA
return "MyApp for Android";
#endif
}
func AppSignature() -> String {
#if COCOA
return "MyApp for iOS"
#elseif JAVA
return "MyApp for Android"
#endif
}
public string AppSignature()
{
#if COCOA
return "MyApp for iOS";
#elseif JAVA
return "MyApp for Android";
#endif
}
The COCOA, JAVA, CLR ands ISLAND defines are provided automatically by the compiler to distinguish between Cocoa (Mac and iOS), Java (including Android), .NET and Island. Refer to the following topics for more details, including a full list of all pre-defined conditionals, and how to define your own.
System Functions and Types
Elements also comes with a range of helpful system functions that can be used to accomplish common (very) low-level tasks. These functions are available on all platforms and in all languages. For example, the writeLn() function can be used to emit some (debug) messages to the console, regardless of platform, and length()can be used to obtain the content size of many common classes such as strings and arrays, without worrying whether the platform's own API would require you to call .count or .Length or something else.
In addition, Elements defines common standard names for common simple types, across all languages and platforms. So for example, you can universally use Integer or Int32 to refer to a 32-bit integer value, or Boolean to refer to a boolean value, independent of the platform's own type names – which often differ subtly,
You can read more in the API sections on:
To do: to be continued
Adding Code to the Shared Project
Introduction to Elements RTL
Elements RTL is a library that is designed to let you write code that can be platform independent and be shared across platforms.
Elements RTL does not cover all aspects of app development, and it is not aimed at building full applications cross platform – most notably, it does not cover building GUIs, nor does it cover platform-specific APIs. But it will let you write a large portion of your application logic in a way that can be shared between different versions of your app. This includes network communication, data processing, calculations, application flow, and more.
Languages
Elements RTL has been designed so it can be used from all Elements languages – Oxygene, C#, Swift, Java, Go and Mercury. So no matter which language you work in, the technologies covered in these tutorials will apply to you.
Code you write that uses Elements RTL will not be cross-platform by "magic", nor will deciding to use Elements RTL lock you out from accessing platform-specific features and functionality. Elements RTL is merely a set of APIs that you can decide to use in order to not rely on platform-specific classes for code that does not need to be tied to a specific platform. You can mix Elements RTL APIs and the platform's APIs as you see fit, in the same project, and even in the same class. Of course any code that uses platform-specific APIs will then be tied to said platform.
API Design
Normally, each platform comes with its own unique API paradigms – how classes and methods are named, what design patterns are used, etc.
When writing platform-specific code, Elements aims to keep you as closely to each platform's paradigms as possible. But of course that is not possible for cross-platform code – you cannot, after all, accomplish the same task in "the Cocoa way" and "the .NET way" at the same time. Elements RTL's APIs are designed in a way that aims to fit in fairly well on all platforms, but generally tries to stay close to .NET's way of doing things in most cases.
Bridging
Many Elements RTL classes bridge toll-free with their platform-specific equivalents. This means you can use Elements RTL classes where it fits, but still easily integrate that code with platform-specific parts of your apps. This is achieved by using Mapped Types, and covered in more detail in the Bridging Elements RTL and Native Classes tutorial.
Bridging Elements RTL and Native Classes
The code in your typical Elements application will fall into two categories with regard to Elements RTL use.
One portion of code will be written to be cross-platform, and possibly shared between different versions of your app – for example for iOS and Android. In this code, you will (try to) avoid using any platform-specific APIs, and not tackle any platform-specific problems. You will implement core "business logic" of your app – what that exactly means of course depends on your kind of app. It could be network communication, data processing, and the like.
The second portion will be platform-specific, and you’ll be writing separate versions of it for each platform. This portion will contain both high-level visual code (you’ll be creating a distinct user experience for your app for each platform), but also lower-level platform specific code (your app might integrate with different platform paradigms – for example with something like iCloud or GameCenter on iOS).
The tricky part can be connecting these two portions of your code, especially as they will not really be two distinct and siloed areas of your app, but mixed throughout your entire project. This is where Elements RTL’s "toll free bridging" comes in.
Mapped Types
Because many parts of Elements RTL use Mapped Types, it is really easy to connect your cross-platform code with platform-specific code and APIs in your apps. And not only easy, but it can also be done with no runtime overhead. With mapped types, even though the Elements RTL classes may appear to be specific, platform-independent classes to the code you write, under the hood and at runtime, they are represented by core platform classes – different classes on each platform.
Let’s for example take dictionaries. Elements RTL provides a Dictionary<K,V> type that’s available to all languages, on all platforms. Elements RTL's Dictionary is a generic class that represents a collection of key/value pairs, and provides a consistent API to work with the data inside said dictionary – to add values, query them, and so forth. This API is identical on all platforms, so if you write code that uses Elements RTL's Dictionary, that code will (assuming you don’t use any other platform-specific APIs) compile for .NET, for Cocoa, and for Java.
So you can write a unit of code that leverages Dictionary (and, in real life, other Elements RTL classes), and that unit can then be shared between the different versions of your app, simply by referencing it from each project (or using a Shared Project).
But this shared code will, in most likelihood, not live on its own. You’ll be writing platform-specific code that will interact with it, and that code might require you to pass your data to platform-specific APIs provided by the platform – APIs that know nothing about Elements RTL.
Since these Elements RTL classes are mapped, at runtime they are instances of actual classes provided by the platform. For example, on iOS (as well as Mac OS and watchOS), Elements RTL's Dictionary actually maps to Foundation's NSMutableDictionary, so all the code you write using Elements RTL’s dictionary class actually gets compiled down to use NSMutableDictionary under the hood.
Because the Elements compiler knows this, you can pass the Elements RTL version of a class to an API that expects the platform version, or vice versa. For example, your shared class could expose a property of type RemObjects.Elements.RTL.Dictionary, and in your platform-specific code you could pass its value to a pure Cocoa API that expects an NSDictionary. In the Android version of your app, you could use the exact same class, exposing the exact same property, and pass it to an API that expects a java.util.HashMap class, instead.
type
MyBusinessData = public class
public
property infos: RemObjects.Elements.RTL.Dictionary<String, String> read ...;
end;
public class MyBusinessData
{
public RemObjects.Elements.RTL.Dictionary<String, String> infos { get ...; set ... }
}
public class MyBusinessData {
public var infos: RemObjects.Elements.RTL.Dictionary<String, String> { ... }
}
public class MyBusinessData
{
public RemObjects.Elements.RTL.Dictionary<String, String> getInfos() { ... }
}
method SomeWhereInMyiOSApp.SomeWhere();
begin
var b: MyBusinessData := ...;
var infos: NSDictionary := b.infos // bridges toll-free
NSUbiquitousKeyValueStore.defaultStore.setDictionary(info) forKey("BusinessDataInfo"); // save to iCloud
end;
public class SomeWhereInMyiOSApp
{
public void SomeWhere()
{
MyBusinessData b = ...;
NSDictionary infos = b.infos; // bridges toll-free
NSUbiquitousKeyValueStore.defaultStore.setDictionary(info) forKey("BusinessDataInfo"); // save to iCloud
}
}
public class SomeWhereInMyiOSApp {
public func SomeWhere() {
let b: MyBusinessData = ...
let infos: NSDictionary = b.infos // bridges toll-free
NSUbiquitousKeyValueStore.defaultStore.setDictionary(info, forKey: "BusinessDataInfo") // save to iCloud
}
}
public class SomeWhereInMyiOSApp
{
public void SomeWhere()
{
MyBusinessData b = ...;
NSDictionary infos = b.getInfos; // bridges toll-free
NSUbiquitousKeyValueStore.defaultStore.setDictionary(info) forKey("BusinessDataInfo"); // save to iCloud
}
}
Of course this is just one example, but the same concept applies to pretty much all Elements RTL classes that represent data, where there is a well-defined platform-specific class that matches. From complex collection classes such as lists, dictionaries and stacks, down to simple types such as Strings or URLs.
With this, Elements RTL not only makes it easy to write cross-platform code that you can share between all versions of your app, it also makes it easy to integrate this code with the rest of your apps, and with each platform's native APIs.
See Also
HTTP Access
Elements RTL provides the static Http class and a suite of helper types around it, in order to facilitate making network requests using the HTTP (and HTTPS) protocols in a cross-=platform fashion.
Under the hood, Http uses then networking infrastructure provided by each platform, meaning its a reliable and well-tested system fior making HTTP requests that is used by many developers and users every day, and subject to the continued improvements and security maintenance doe by the platform vendors. It wraps this infrastructure in a common API that can be use din the same way, on all platforms.
Http does not (currently) provide all the bells for controlling every detail of the HTTP stack – you can fall back to the platform-specific APIs for that, if necessary – but it provides access to the most commonly needed functionality, incuding the ability to make GET and POST requests, access headers, and controll redirect handling.
By default, Http is designed to be used asynchronously, meaning requests run in the background and will trigger callbacks as necessary. That is recommended practise on all platforms, and even mandatory on some (such as Windows Phone). Synchronous APIs are provided for use in server or command-line applications, but should be used sparingly.
ExecuteRequest()
The core API method on the Http class is ExecuteRequest(), which takes either an URL or a more well-configured HttpRequest class instance, and initiates a request to that address. A callback block is provided thaty will be executed, once the request has been completed and a response (but not necessarily all the response data) has been received from the server.
Http.ExecuteRequest(new Url('http://www.elementscompiler.com'), response -> begin
// handle the response
end);
Http.ExecuteRequest(new Url("http://www.elementscompiler.com"), (response) => {
// handle the response
});
Http.ExecuteRequest(Url("http://www.elementscompiler.com") { response in
// handle the response
});
Http.ExecuteRequest(new Url("http://www.elementscompiler.com"), (response) => {
// handle the response
});
By default when just passing a Url, ExecuteRequest will perform a GET request without content. You can also manually consttruct a HttpRequest object and configure it in more detail, for example to make a POST request, or send custom headers or a body with your request. We'll look at that in more detail later.
Once a response comes from the server, the provided callback block will be called, passing in a HttpResponse object.
HttpResponse
HttpResponse has a few properties and methods worth noting. First, the Success property allows you to check whether the request succeeded or failed. If it failed (which could be due to network errors, a bad URL, or an error response from the server, you can check the Exception property for details on the failure.
You can also manually check the HTTP response code via the Code property, and inspect any Headers the server returned.
Of course, the most interesting part of an HTTP request will be the returned data, the body of the response. Because the data returned by request can be large and/or slow to come in, that data is not immediately available as part of the response. In fact, data might still be coming in slowly but steadily over the network, as your response callback is already executing.
HttpResponse has a few helper methods that let you get access to the response content, asynchronously. Just as with the initial request, you will call (one of) these methods, and pass a block that will be called back once the data bas been received. Currently, four methods are provided that will return the data in different formats, depending on our needs. Over time, additionaklm formats may be added. These methods are:
method GetContentAsString(aEncoding: Encoding := nil; contentCallback: HttpContentResponseBlock<String>);
method GetContentAsBinary(contentCallback: HttpContentResponseBlock<Binary>);
method GetContentAsXml(contentCallback: HttpContentResponseBlock<XmlDocument>);
method GetContentAsJson(contentCallback: HttpContentResponseBlock<JsonDocument>);
void GetContentAsString(Encoding aEncoding = null, HttpContentResponseBlock<String> contentCallback);
void GetContentAsBinary(HttpContentResponseBlock<Binary> contentCallback);
void GetContentAsXml(HttpContentResponseBlock<XmlDocument> contentCallback);
void GetContentAsJson(HttpContentResponseBlock<JsonDocument> contentCallback);
func GetContentAsString(_ wncoding: Encoding? = nil; _ contentCallback: HttpContentResponseBlock<String>)
func GetContentAsBinary(_ contentCallback: HttpContentResponseBlock<Binary>)
func GetContentAsXml(_ contentCallback: HttpContentResponseBlock<XmlDocument>)
func GetContentAsJson(_ contentCallback: HttpContentResponseBlock<JsonDocument>)
void GetContentAsString(Encoding aEncoding = null, HttpContentResponseBlock<String> contentCallback);
void GetContentAsBinary(HttpContentResponseBlock<Binary> contentCallback);
void GetContentAsXml(HttpContentResponseBlock<XmlDocument> contentCallback);
void GetContentAsJson(HttpContentResponseBlock<JsonDocument> contentCallback);
You will note that, aside from the optional Encoding parameter for GetContentAsString, all four versions look identical, expept for the generic parameter to the callback block.
Calling any of these methods, the Http class will go out in the background, retrieve the full data for the request and – here necessary decode it to a String, Json or Xml object. Once done, the provided callback block will be called.
HttpResponseContent<T>
Just like the response, the passed HttpResponseContent object will have a Success property that indicates if everything went well (for example, the data might not be valid XML, or the data might not be convertable as a string with the given encoding). If everything worked, the Content property – generically typed to be the right kind of data you would expect – gives you access to the received content.
Http.ExecuteRequest(new Url('http://www.elementscompiler.com'), response -> begin
if response.Success then begin
response.GetContentAsString(nil, content -> begin
if content.Success then
writeLn('Response was: '+content.Content);
end);
end;
end);
Http.ExecuteRequest(new Url("http://www.elementscompiler.com"), (response) => {
if (response.Success)
{
response.GetContentAsString(null, (content) => {
if (content.Success)
writeLn("Response was: "+content.Content);
});
end;
});
Http.ExecuteRequest(Url("http://www.elementscompiler.com") { response in
if response.Success {
response.GetContentAsString(nil) { content in
if content.Success {
writeLn("Response was: "+content.Content);
}
});
};
});
Http.ExecuteRequest(new Url("http://www.elementscompiler.com"), (response) => {
if (response.Success)
{
response.GetContentAsString(null, (content) => {
if (content.Success)
writeLn("Response was: "+content.Content);
});
end;
});
To do: to be concluded
This section provides tutorials for various platform-specific tasks and goals.
Android
As of Elements 9.1, you can now use Elements for Android development not only using the regular Java based Android SDK, but also build CPU-native Android NDK-based extension for your apps as well.
Background: What is the NDK?
The regular API for writing Android apps is based on the Java Runtime (or Google's variations/evolutions of that, such as Dalvik or ART). Essentially, you write code against Java libraries that compiles to Java byte code. Most parts of most apps are written like that. But Google also offers a Native Development Kit, the NDK, for when you need to write code that either is not efficient enough in Java, needs to talk to lower-level APIs, or use for example OpenGL/ES.
In the the past you would have to step down to C or C++ for that, but now you can use Oxygene, C#, Swift or the Java language to write these extensions, same as you do for the main app.
NDK with Elements in Action
Let's take a look at adding an NDK extension to an Android app with Elements.
First, lets create a regular Android app using the "Android Application" template, for example following the regular First Android App Tutorial. You can use any language you like. This part of the app will be JVM based, as most Android apps.
The app you just created already contains a MainActivity, and we'll now extend that to call out to the NDK extension we'll write, to do something simple – like obtain a string; – and then show the result.
The Java app can operate with NDK extensions via JNI, and the way this works is by simply declaring a placeholder method on your Java class that acts as a stand-in for the native implementation. You do this by adding a method declaration such as this to the MainActivity class:
class method HelloFromNDK: String; external;
public static extern string HelloFromNDK();
public static __external func HelloFromNDK() -> String
public static native string HelloFromNDK()
<External>
Public Function HelloFromNDK() As String
End Function
The external/extern/native keyword (or the <External> Aspect for Mercury) will tell the compiler that we'll not be providing an implementation for this method (as part of the Java project), but that it will be loaded in externally (in this case via JNI).
That's it. In your regular code (say in onCreate) you can now call this method to get a string back, and then use this string on the Java side – for example show it as a toast.
But of course we still have to implement the method.
Let's add a second project to your solution, but this time instead of looking under Java/Cooper, switch over to the Island tab or node in the new Project dialog, and choose the "Android NDK Library" template. Again, pick whatever language you like (it doesn't even have to be the same as the main project). Let's call the project "hello-ndk".
In this second project, you can now implement the native method, which is as simple as adding a new global method and exporting it under the right name.
JNI uses specific rules for that, namely the export name must start with "Java_", followed by the full name of the Java-level class (with the dots replaced by underscores), and finally the method name itself. So the full name would be something like "Java_org_me_androidapp_MainActivity_HelloFromNDK".
Luckily, Island provides a nifty aspect called JNIExport that does the proper name mangling for you:
{$GLOBALS ON}
[JNIExport(ClassName := 'org.me.androidapp.MainActivity')]
method HelloFromNDK(env: ^JNIEnv; this: jobject): jstring;
begin
result := env^^.NewStringUTF(env, 'Helloooo-oo!');
end;
#pragma globals on
[JNIExport(ClassName = "org.me.androidapp.MainActivity")]
public jsstring HelloFromNDK(JNIEnv *env, jobject thiz)
{
return (*env)->NewStringUTF(env, "Mr, Jackpots!");
}
@JNIExport(ClassName = "org.me.androidapp.MainActivity")
public func HelloFromNDK(env: UnsafePointer<JNIEnv>!, this: jobject!) -> jstring! {
return (*(*env)).NewStringUTF(env, "Jade give two rides!")
}
#pragma globals on
@JNIExport(ClassName = "org.me.androidapp.MainActivity")
public jsstring HelloFromNDK(JNIEnv *env, jobject thiz) {
return (*(*env)).NewStringUTF(env, "Call for help!");
}
<JNIExport(ClassName := "org.me.androidapp.MainActivity")>
Public Function HelloFromNDK(env as Ptr(Of JNIEnv), this as jobject) as jstring
Return env.Dereference.Dereference.NewStringUTF(env, "How's Annie?")
End Function
A Couple Things Worth Noting
As should be obvious, we're no longer in Java (as JVM/Dalvik) land for this code. This is code that will compile to CPU-native ARM or Intel code, and that uses more C-level APIs such as zero-terminated strings, "glibc" and a lower-level operating system (Android essentially is Linux, at this level) APIs. Of course you do have full access to Island's object model for writing object oriented code here, and you can use Elements RTL, as well.
Since this code will be called from Java, JNI provides some helper types and parameters to help us interact with the Java runtime. This includes the env object that you can use to instantiate a Java-level string, and the jstring type that we use to return said string.
But don't be fooled, we're not writing "Java" code at this point. So inside this method (and throughout the rest of the NDK project, you can go as CPU-native and a bit-twiddly as you'd like, the same as you would do in C/C++ code, without any of the (real or perceived) overhead of the Java runtime.
JNI takes care of marshaling data back and forth as your method gets called.
Making the Connection
Build this project, and we're almost set, there's only two little things left to do:
First, we need to link the two projects together, so that the native extension will get bundled within the Java app.
If you are using EBuild, that is easy: simply add a project reference to the NDK Extension to your main app, for example by dragging the NDK project onto the main project in Fore – the build chain will do the rest.
If you are still using MSBuild/xbuild, locate the "Android Native Libraries Folder" project setting in the main app, and manually point it to the output folder of the NDK project (you will want to use the folder that contains the per-archicture subfolders, e.g. "Bin/Debug/Android".
Second, in your Java code, somewhere before you first call the NDK function (for example at the start of onCreate), add the following line of code, to load in the native library:
System.loadLibrary('hello-ndk');
System.loadLibrary("hello-ndk");
System.loadLibrary("hello-ndk")
System.loadLibrary("hello-ndk");
System.loadLibrary("hello-ndk")
And thats it. you can now build both apps, deploy and run the Android app, and see your NDK extension in action!
See Also
Elements Versions
The following provides an overview of all major releases of Elements we have shipped and are planning for the upcoming months:
Current and Future
- Elements 12 — shipping continuously since August 2023
- Elements 11 — shipped continuously from May 2021 to August 2023
- Elements 10 — shipped continuously from November 2017 to May 2021 ("Intrepid Class")
2017
2016
2015
- Elements 8.2 — shipped in November 2015 ("Defiant Class")
- Elements 8.1 — shipped in April 2015. Debut of Swift language support ("Constitution Class")
2014
- Elements 8.0 — shipped December 2014 ("Bradbury Class")
- Elements 7.2 – shipped September 2014 ("Andromeda Class")
- Elements 7.1 – shipped April 2014
- Elements 7.0 – shipped February 2014. Debut of C# language support ("Hydrogene")
2013
- Oxygene 6.1 – shipped August 2013
- Oxygene 6.0 – shipped May 2013. Debut of Cocoa platform support ("Toffee", formerly "Nougat")
- Oxygene 5.3 – shipped February 2013
2012
- Oxygene 5.2 – shipped August 2011
2011
- Oxygene 5.1 – shipped November 2011. Debut of Java platform support ("Cooper")
- Oxygene 5.0 – shipped August 2011
2010
- Oxygene 4.0 – shipped in 2010 ("Echoes")
2008
- Oxygene 3.0 – shipped in 2008 ("Oxygène")
2007
- Chrome 2.0 – shipped in 2007 ("Joyride")
2005
- Chrome 1.5 – shipped early 2005 ("Floorshow")
- Chrome 1.0 – shipped early 2005 ("Adrenochrome")
2004
- Chrome 1.0 Preview – made available November 2004
Beta Access
As you probably know, one of the benefits of an active Elements Subscription is access to weekly pre-release builds that we make available on an almost weekly basis, usually on Fridays.
These are builds that give you a sneak peak at what is coming in future versions of the product, they will often have exciting new features, but they do not go through our full QA cycle, so they are likely to have bugs or regressions, and might (occasionally) even be completely unusable.
With Elements 10 we changed the system of how weekly builds work. Instead of doing dedicated "beta" builds with the goal of narrowing down to a big feature release every few months, we now ship a new build with the latest state of Elements, every week. Each of these builds start out in the "Preview" or "Experimental" channel, meaning that they are considered not ready for production (but probably very usable).
Once in a while, usually once a month or so, we promote a build that has been out for a week or two to the "Stable" channel, after it has been field-tested and been determined to be "a solid one".
"Stable" channel releases will automatically become available for trial users, and for users of the free Swift Community Edition compiler.
Who Can Access Preview Builds?
Builds on the other channels are available to any customer with an active subscription. If your subscription expires, so does both your access to the beta downloads and forums, and your ability to run existing Elements 10 builds (even if they were created/obtained while your subscription was still active).
Where Do I Get Beta Builds?
You can download beta builds from our secure customer portal website. A
convenient shortcut is the following URL:
We have private discussion forums on our Connect website to discuss beta
builds. Please do not discuss beta content in public without prior
permission from us.